

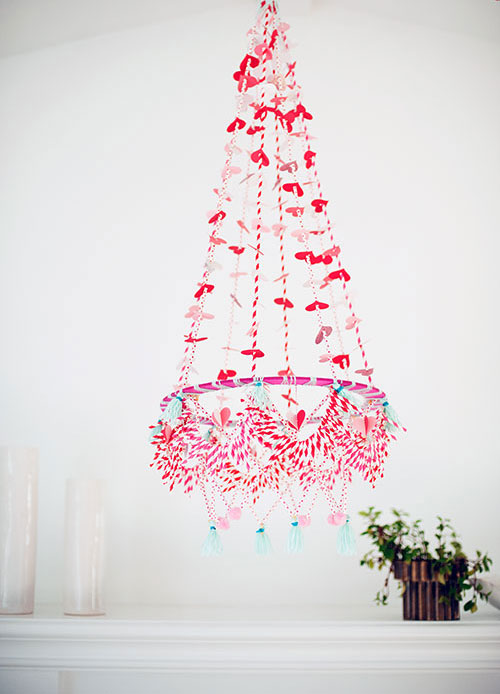
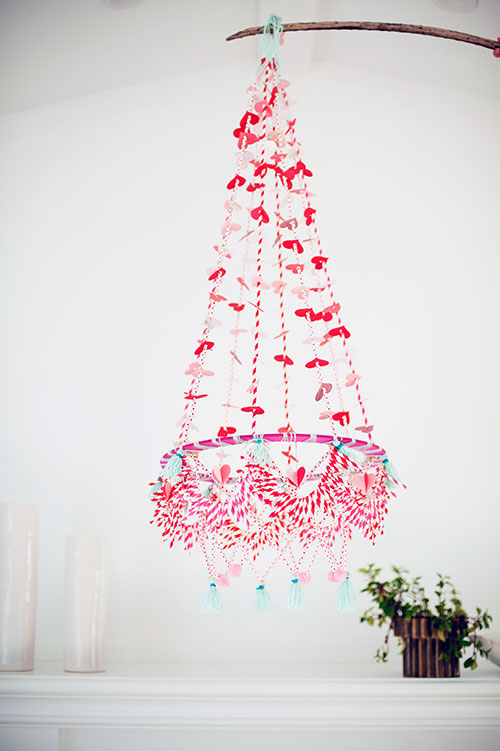
I’ve been wanting to create a pajaki, or traditional Polish chandelier, for quite some time now. They are bright, colorful, happy, folky–all things I love! I decided to turn it into a Valentine’s Day decor piece complete with globs of hearts and straws. You know, the normal! I collaborated with interior designers, Owens and Davis, to stage it in one of their beautiful spaces. See how to make it below complete with a shopping list!

photography by Elise Lauren | Crafting by Brittany Jepsen | Interior Design by Owens and Davis | Assisting by Caitlin Watson Boyes
Check out the full tutorial & shopping list below
Valentine’s Day Polish Chandelier

Materials:
- scrapbook paper in shades of pinks and reds
- baker’s twine in pink and white
- paper straws in pinks and reds
- wreath form 18″
- yarn in ice blue and turquoise
- scissors
- glue gun
- hold punch
- Heart punch
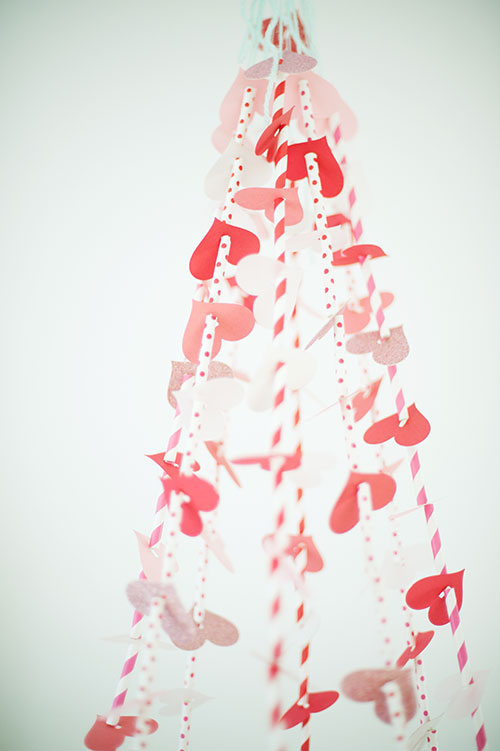
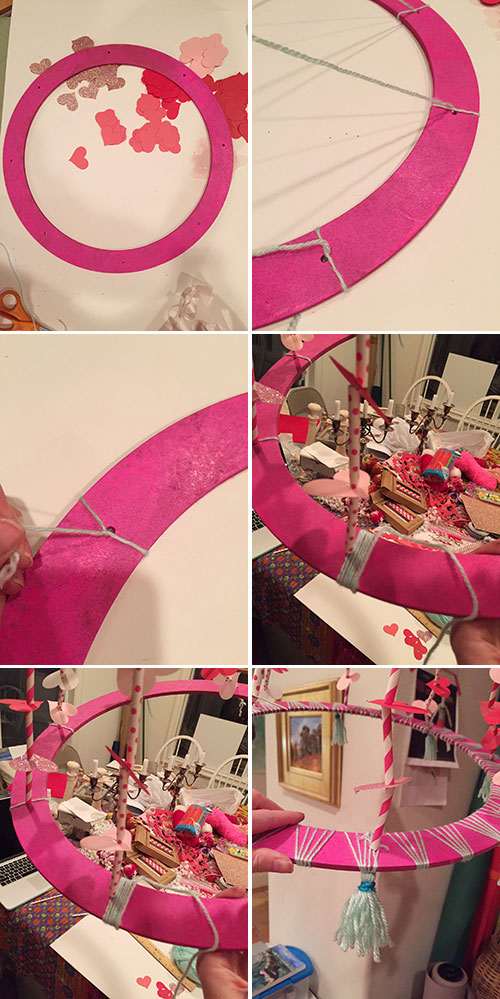
To make the top part of the chandelier:
- Take the wreath form and string a 4′ yarn through each hole and tie securely.
- Cut the straws into 3″ parts. I used 16 pieces per strand and 8 strands for a total of 128.
- Cut the same amount of hearts with your heart punch.
- Hole punch the center of each heart.
- String each yearn starting with a straw and alternating with a straw then a heart all the way up.
- Repeat to each string of yarn.
- Tie all the strings together at the tip and form a loop. This should be secure enough to hang it from.

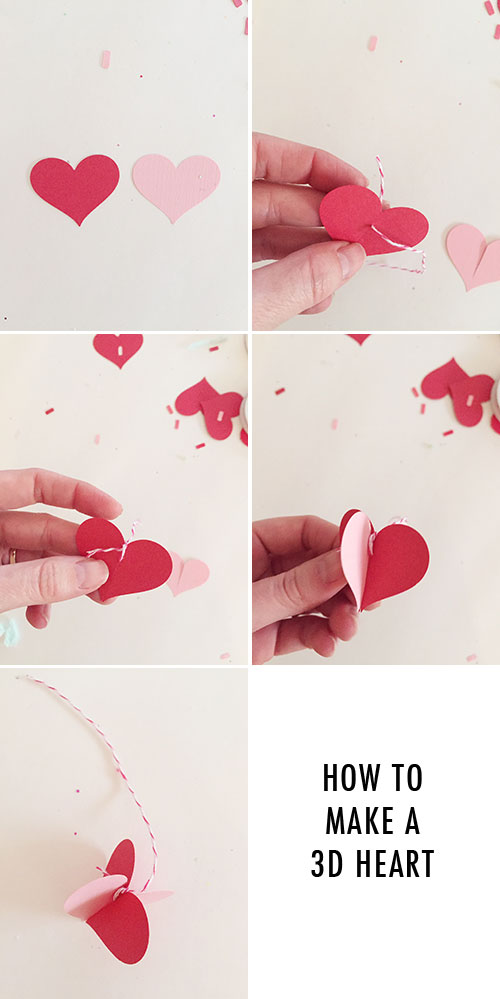
To make the 3D hearts
- Start by cutting more hearts with your punch or you can find the template HERE.
- With your scissors, cut about 1/2″ down from the top of the center of the year. With another heart, cut the bottom center 1/2″ up.
- With the heart that is cut from the bottom, string a piece of 5″ twine from the bottom and to the top of the heart. Tie it at the top. Leave one section so that it is much longer than the other.
- Put the two hearts together perpendicularly like a puzzle piece.
- You will make 8 of these hearts and hang them from the wreath form.
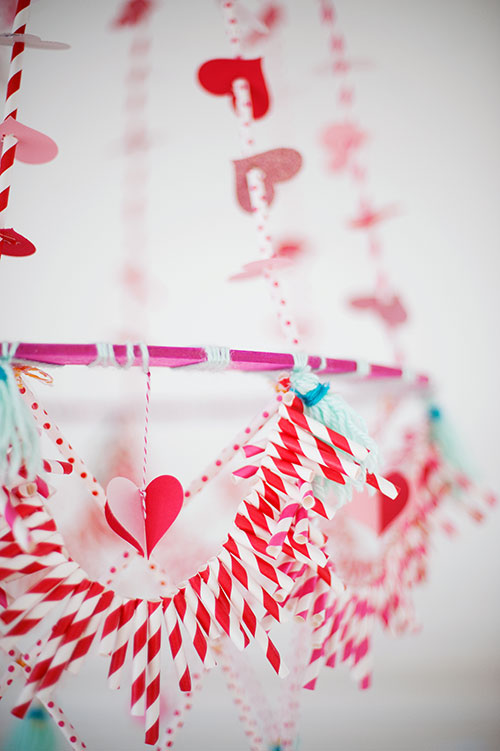
To make the yarn wrapping around the wreath form:
- Use your ice blue yarn and start wrapping it around the wreath form. Tie it first to one of the holes to secure it. I wrapped it around 5 times in the shape of a fan to get the shape I wanted.
- At each hole I made a tassel and hung it with a piece of yarn. Learn to make the tassels here.
- Secure the tassel with the turquoise yarn.
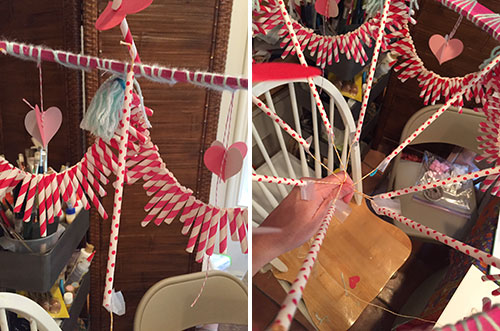
To make the wavy dangle straw swags at the bottom:
Materials:
- Red Striped Straws
- Pink Striped Straws
- Scissors
- Ruler
- Needle
- White Thread
- Cut straws into 4 different sizes for each grouping (4 red striped groupings, 4 pink striped groupings):
-
- XS: 8 at 1″
- S: 14 at 1.5″
- M: 14 at 2″
- L: 7 at 2.5″
- Within 1 grouping of the wavy dangle straws layout on your workspace 7 of the following sequence: XS S M L M S
- End your last sequence with an XS
- So here is what it will look like:
- XS S M L M S XS S M L M S XS S M L M S XS S M L M S XS S M L M S XS S M L M S XS S M L M S XS
- End your last sequence with an XS
- XS S M L M S XS S M L M S XS S M L M S XS S M L M S XS S M L M S XS S M L M S XS S M L M S XS
- There will be 4 red striped groupings and 4 pink striped groupings
-
- Thread your needle and bring the end of the threads together. Double knot
- With the first grouping laid out, start threading the top of the straws
- Continue till there are 7 sequence, starting with the XS and ending with the XS
- Double knot your grouping
- Knot of the ends of a grouping to one of the tassels that is around the large structural ring of your chandelier
-
- Cut the excess thread
- Alternate the red striped groupings and pink striped groupings
-
Basketball Straw Hoop in the middle of the chandelier
Materials:
- Pink Polka Dot Stripes
- Twine
- Scissors
- Tape
- Thin Bamboo Skewer
- Hot Glue
- Cut 16 pieces of twine at 30” length
- Tie two pieces of twine where each tassel meets on the large structural ring
- Thread a straw on each pieces of twine and bring it all the way to the top (you may need the bamboo skewer to thread your twine through the straw)
- To temporarily secure the straw so it won’t slide off, place a tape on the twine where your straws ends
- Take one of your straws and keep it in one hand, now skip a straw and pick up the next straw.
- Remove the temporary tape and double knot the two straws together
- Connect every other straw to each other
- This will make a cross straw design
- Cut 8 straws in half to get 16 pieces
- Below your cross straw design, thread 1 straw to each twine (temporarily secure the ends with tape)
- Connect 1 straw to the next one making a “V” shape
- Cut the excess twine
- Hot glue a pink pom pom to the front and back on the end of every other
- Tie a tassel to the remaining “V’”
I know there’s a lot of directions to read. If something doesn’t make sense, please let me know and I’ll do my best to answer!
Comments