


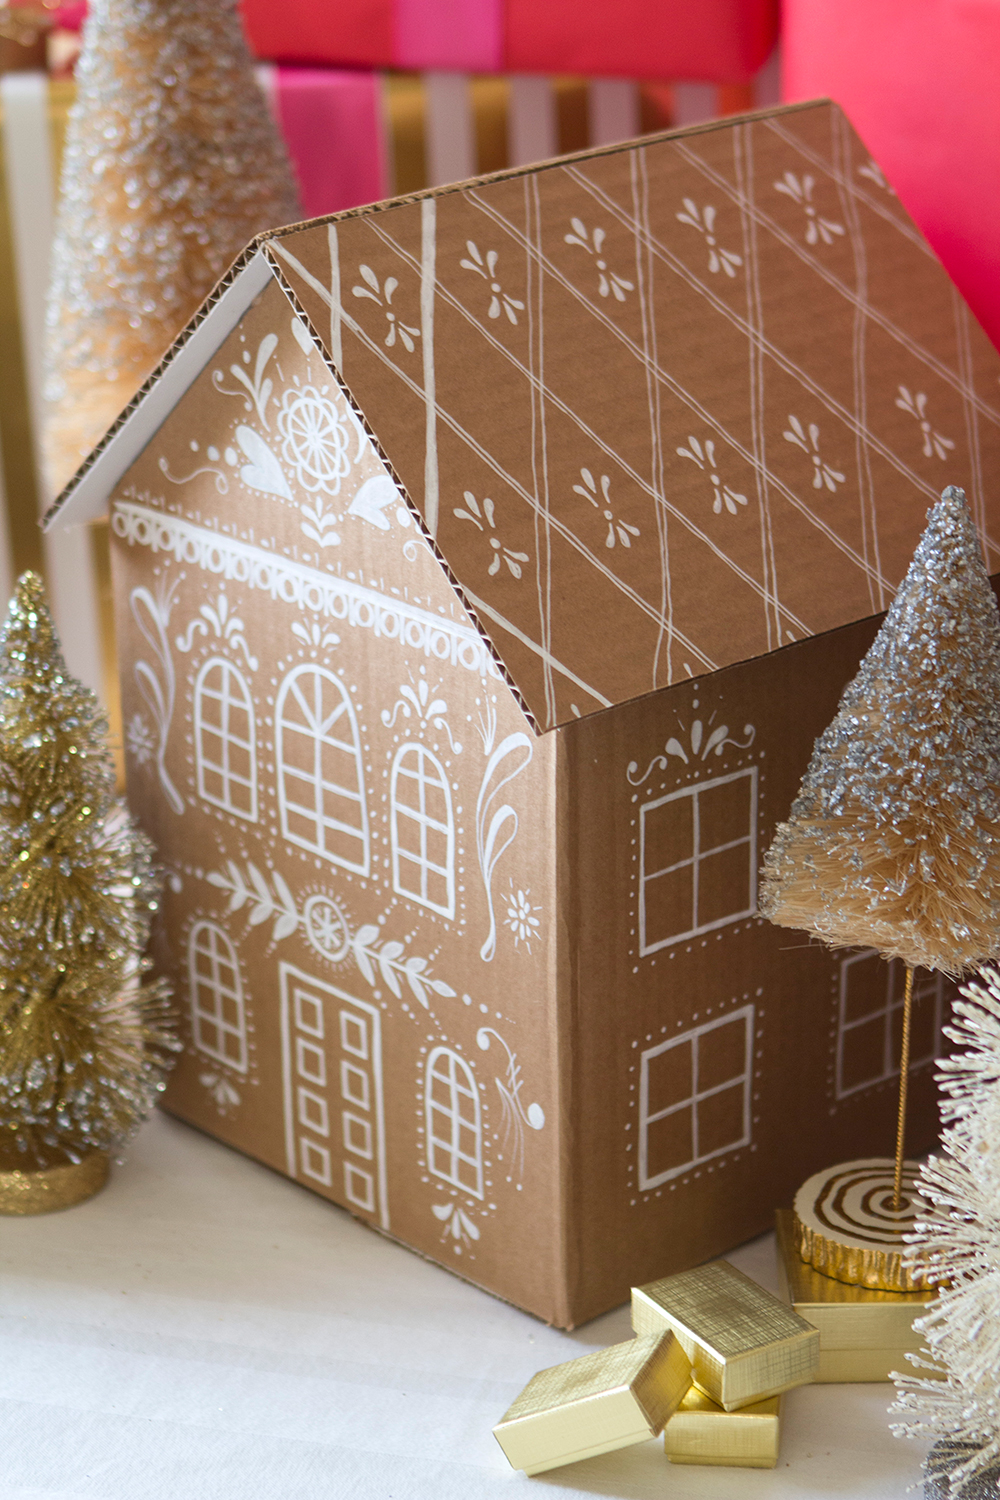
Gingerbread houses are a holiday classic, but we wanted to change them up a bit for this DIY craft. Today we’ve got a tutorial that combines the fun of decorating a gingerbread house with the joy of giving gifts (and it will last much longer than a real gingerbread house)!
Read below for the tutorial on how to create these DIY gingerbread house gift boxes.

You know I love getting creative with my wrapping paper–it’s part of the fun of gift-giving! We were challenged by Painters to use our imagination with their markers and so we came up with these adorable DIY gingerbread house gift boxes, which just might induce more squeals than the actual gift box itself. And no need to fear, they require just three materials. Easy squeezy!
Painters is hosting the Style by Aisle Painters Contest for all you looking to get creative this month. Through December, they are giving a winner a prize valued at $500 to someone creating something in the Party and Seasonal Decor category. You and your other talented DIY friends/family can submit your homemade creations to elmers.com/painters. On the website, you can even download a coupon for Painters products so you can add more colors or tips to your DIY/crafting collection. You can take advantage of the coupon even if you don’t enter the contest. Go to the website to learn more!
Edit: The Style by Aisle Painters Contest has closed.
See below for the full Gingerbread house gift box tutorial!
DIY gingerbread house gift boxes
Materials:
- Painters marker (we used white)
- Cardboard boxes (we used three different sizes: Large, Medium, Small)
- Glue gun
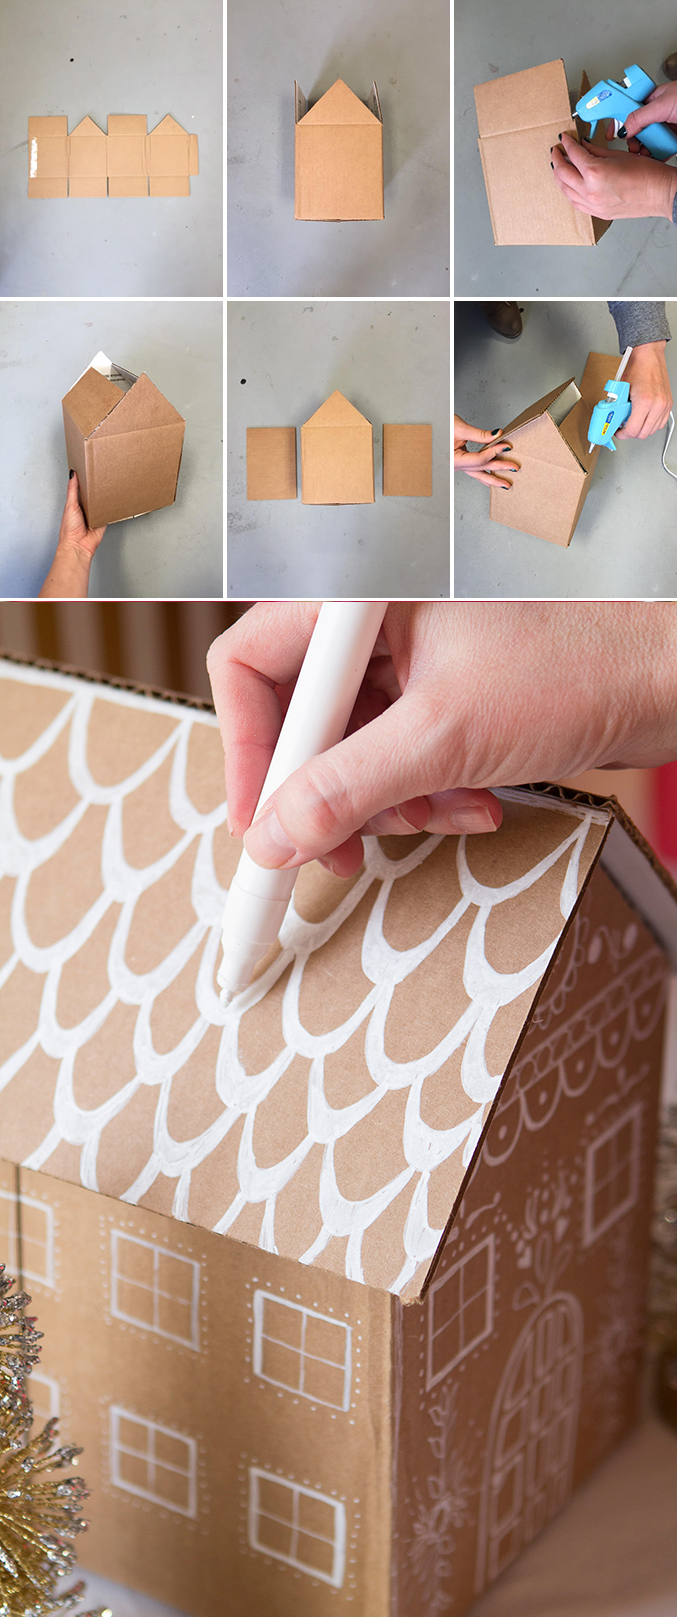
Instructions:
- If necessary, table your box together with strong tape at the bottom of the box.
- Leave the opposite side of the box open and cut a triangle on two ends and cut off the flaps on the other ends.
- Use two pieces of cardboard in a rectangular shape to create the roof of the house. Hot glue the two pieces together on the long end at a 90 degree angle.
- Rest the roof on the house. If needed, glue a small piece of cardboard, about 3” wide and 1” tall to the top of the roof just within the pitch of the house. Repeat to the opposite end. This will help the roof from sliding around and will allow the recipient to easily access the gift.
- Now’s the fun part. Start drawing! With our Painters marker, we went to town drawing windows, doors, and fun Christmas decor on the boxes. Use your imagination!
- Add tissue paper and give to your friends and family!

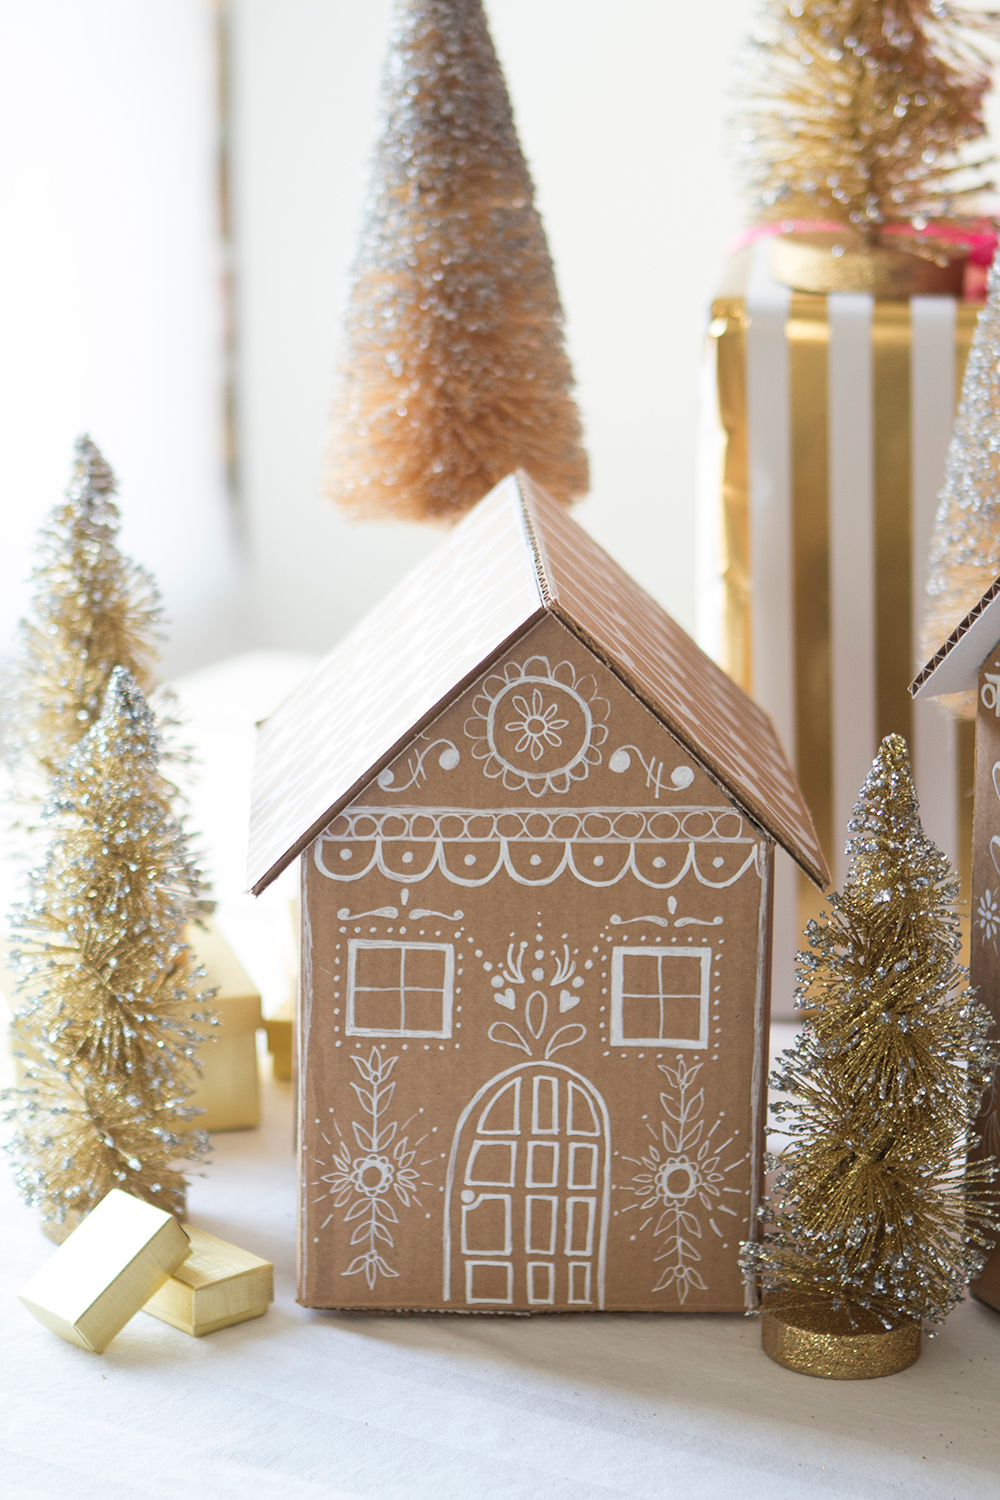

We love how this project turned out and can’t wait to gift it!
Photography by Alizabeth Rinner
This post is brought to you in collaboration with Painters. All content, ideas, and words are my own. Thanks for supporting the sponsors that keep Lars thriving!
Comments