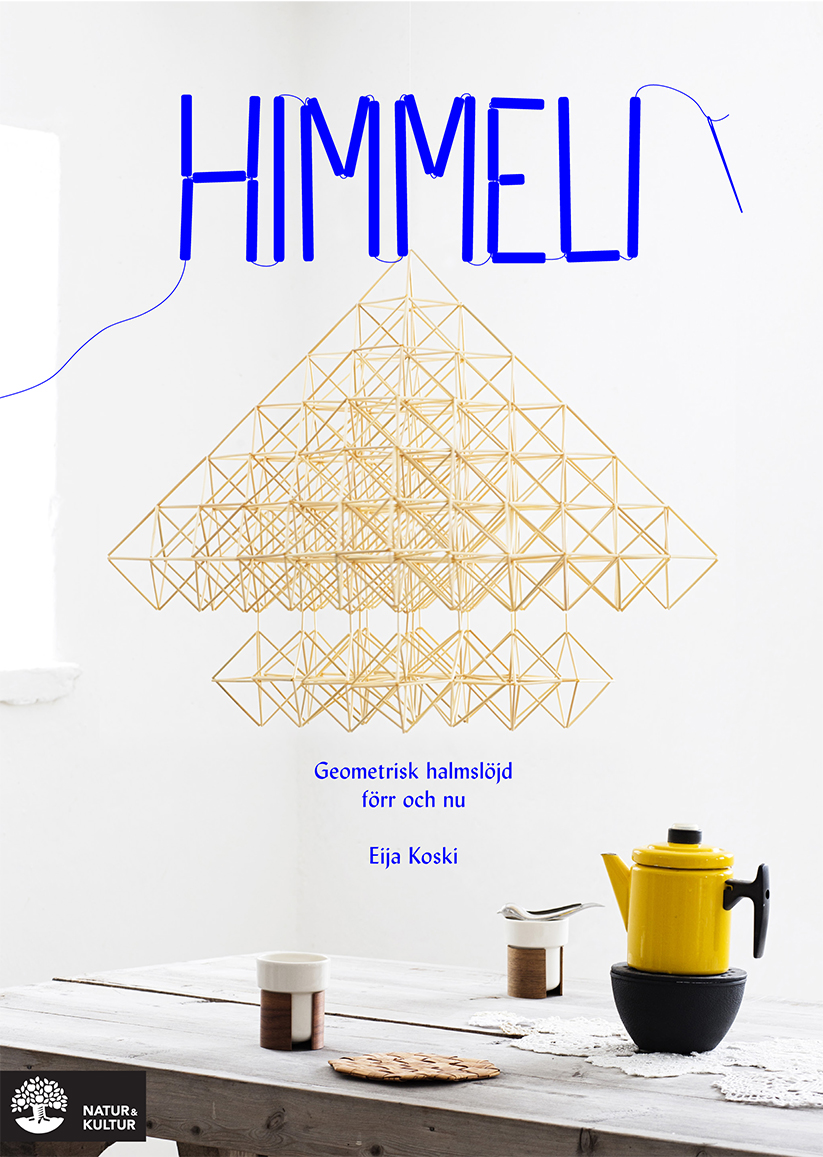
We’ve been long time lovers of the himmeli for a while now, evident here and here. Himmeli is considered the quintessential Christmas decoration of Finland, but is popular in all Nordic countries. It is a geometric straw mobile or chandelier and can be transformed into a variety of interpretations. The Swedish word for chandelier is takkrona, which means ceiling crown. I love the idea of having homemade ceiling crowns all over your home. I feel like it captures Scandinavian design perfectly: clean and simple but stunning and interesting. This book, Himmeli: Geometric Home Decor Past and Present by Swedish author Eija Koski is a beautiful compilation of Himmeli projects and the ultimate go-to book for all things himmeli.
Eija Koski is considered the only professional himmeli artist in the world, so you know these projects are going to be good! The book is in Swedish, but there are step-by-step pictures to easily guide you through. There are 24 different himmelis for every corner of your home, in addition to the basics to help you create your own designs! I love the concept that you can create beauty out of anything, and for Himmelis all you need is string and straw to create a unique art piece! Though traditionally a Christmas decoration, the himmeli is a beautiful design element all year round. Eija has one in every room of her home! Buy Himmeli: Geometric Home Decor Past and Present here!
Reed Himmeli Himmeli
Nature is filled with different resources for Himmeli projects and you can collect them all year long – even during the winter. For example, reeds become even more unique if you pick them once they’ve gotten their gray-antique tint, which comes about during winter. You can use any type of straw plant that you can thread a string through – so keep your eyes open when you walk around in the forest or gardens!
How To
Build Himmeli according to the instructions for “Light” (see below), but with the following modifications: Instead of starting a new Himmeli when you get two the second to last row, finish the bottom part of the Himmeli with a point.
Materials:
- Reeds (alternatively straw)
- 360 pieces, 8 inches
- a fine toothed, iron saw to cut the reeds with
- thick cotton string
- a thick needle
Light
How To
Build a Himmeli according to the instructions for “Present” (see below), but instead of 2 x 2 rows, make 4 x 4 rows. When you get to the second row in the bottom part of the Himmili, start to build another Himmeli. Build out 2 rows until the new Himmeli has the same width as the first one, then build in 2 rows on the bottom part of the Himmeli. Again start building out like you did before. Finish the third Himmeli with a point.
Present
How To
- Build the top part of this Himmeli in the same way as “Prayer” (below), but with two important differences. “Prayer” is made up of 2 pyramids, a bottom one and a top on; “Present” only needs 1 pyramid. The other different is that “Present’s” base is one big square with 36 smaller squares inside of it, that is 6 x 6 rows.
- Build a pyramid for each smaller square: Start with your thread in one of the corners, then take 2 reeds and thread your string through, attaching them in the corner in triangle shape.
- Thread the needle and string through the closest reed. Then add a reed onto the string. Take the needle and pick up the point of your triangle; wrap the thread around the point twice before threading it through 1 more reed and knotting it in the fourth corner. Continue doing this until you have a pyramid with all 36 squares. Work row upon row.
- When you’ve made your last pyramid, continue up through the final reed to the middle of the pyramid. Thread 1 reed on the string and wrap the string twice around the pyramid’s top. Continue till you have a new square pattern with 25 pyramids. Then build another level of pyramids. Continue till you have 6 levels on your big pyramid – that is when you’re done.
- On each square of the big pyramids base, use four reeds to build a pyramid; in total 36.
- Make 16 octahedrons according to the instructions.
- Attach the octahedrons to the 16 middle pyramids on the base of the big pyramid. Use 2 cm long reeds to hide the string.
Prayer
How To
- Thread 4 paper straws on the string and double knot them together to make a square.
- Thread 3 paper straws onto the string and wind it around the previously-made-square’s closest corner, so that it makes 2 squares. Then thread the needle and string through the closest straw to make the next square.
- Thread 3 straws and continue to build the third square under your other. Like always, attach by winding the string around the corner twice and tying a knot. Continue by threading the needle and string through the closest straw.
- Thread 2 straws and wind as before, going around the first squares bottom corner. Now you’ll have a big square with 4 smaller squares inside.
- Thread 2 more straws on and wrap your string around A’s corner twice. This should make a triangle. Continue in this manner all the way around. You should have 8 triangles.
- Thread your string through a paper straw so the needle and thread are in the middle of the big square. Thread 1 straw and bend one of the triangles up to the middle of the figure. Catch the triangle by winding string around the top corner twice. Continue by adding one straw to the thread and attach it in the empty corner in your little square. You should now have a pyramid made of 4 straws in your first square. The dotted lines in the picture show how the straws should be placed. Continue doing this until all 4 squares are 4 triangles. At this point, 2 opposing, triangle sides should still be laying on the table.
- Thread your string through the last piece of straw so that it comes out of a pyramid top. Thread on a paper straw and attach it to another top. You should then have a new square on top of the pyramids.
- You make your Himmeli’s top point by starting from one of the corners of your recently-made square. Thread on 2 more straw pieces and attach them to the next corner. Now thread the string and needle through an adjacent straw to get to the next corner. Thread 1 more piece of straw onto the string and lift up the corner of your triangle. Wind the string around the top twice and finish it with a knot. Add 1 additional straw piece and attach it in the last empty corner so that you’ve made a pyramid. You’ve now completed one side!
- Flip your Himmeli over and repeat from step 6, so that it becomes symmetric.
Luck
How To
Octagons/basic unit
- Thread the string through 3 reeds and tie it at point A with a double knot.
- Thread the string through 2 reeds and wind it around the string that connects the straw at point B.
- Thread the string through yet another 2 reeds. Wind it again around the string that connects the top right corner.
- Repeat steps 2-3 so that you have 5 triangles in a row.
- Thread the string through 1 reed and wind it around the thread that creates corner A in the very first triangle. Tie the thread a few centimeters from the corner.
- Thread the string through a reed in one of triangles that isn’t attached to the rest of the figure. Finish it by winding the string around the last corner, which makes the top. Let the thread hang to continue building.
This tutorial is from the brand new book Himmeli by Eija Koski put out by Natur & Kultur


