

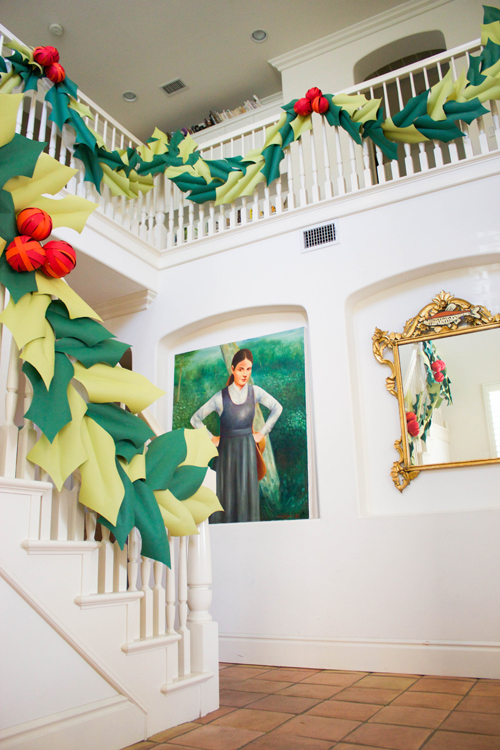
Last year I made these holly and berry garlands for my parents’ house when I went home to visit. My mom was totally over decorating the house for the holidays so she let me do whatever I wanted–my favorite words to hear. I chose to do paper so that she could just trash it afterward (recycle please!).
Materials:
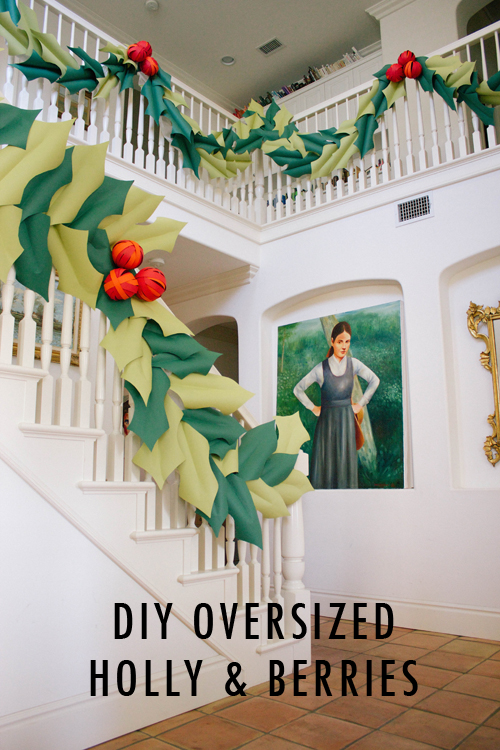
DIY holly and berry garland
The success of the holly shape is based on the seamless backdrop paper used by photographers. It comes in a roll so that when it’s bent it makes a lovely curl. You can find this in various sizes. You can find them anywhere from 26″ wide to 53″ wide. I bought the 53″ wide so I could get more out of my paper.
Materials:
Full supplies list linked here
- seamless backdrop paper in shades of greens (here are some paper suggestions: green, smaller green
- cardstock in shades of reds
- scissors
- butcher paper
- wire or chenille stems (pipe cleaners)
- glue gun
- Template

The trick to making a holly and berry garland is in the paper choice. I used seamless paper roll backdrops, which photographers use on sets. You can order yours from here. There are a ton of colors to choose from and it’s MUCH cheaper and efficient than buying other types of paper.
To make the holly in the DIY garland:
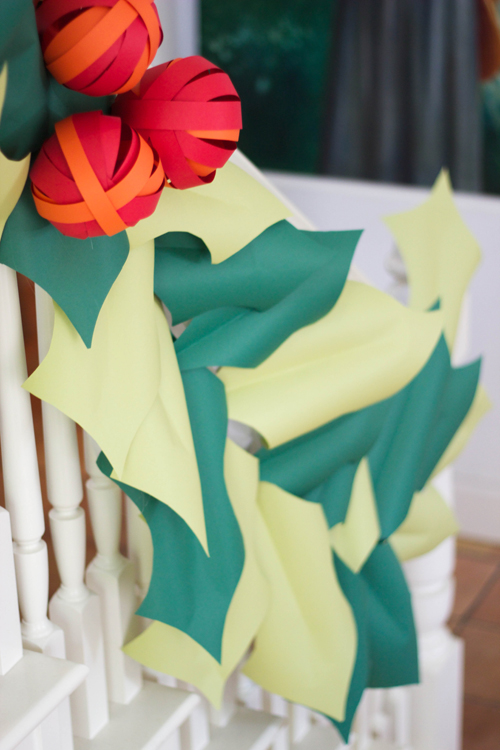
- I chose to use a light green and a dark green paper for my holly. Trace and cut out your holly (here’s a template). Mine was about 15″ long.
- Fold the piece of holly lengthwise so it gets creased in the middle. Because the paper comes on a roll it should automatically create that 3D effect.
- Cut out all the holly to fit the length of the garland you want to create.
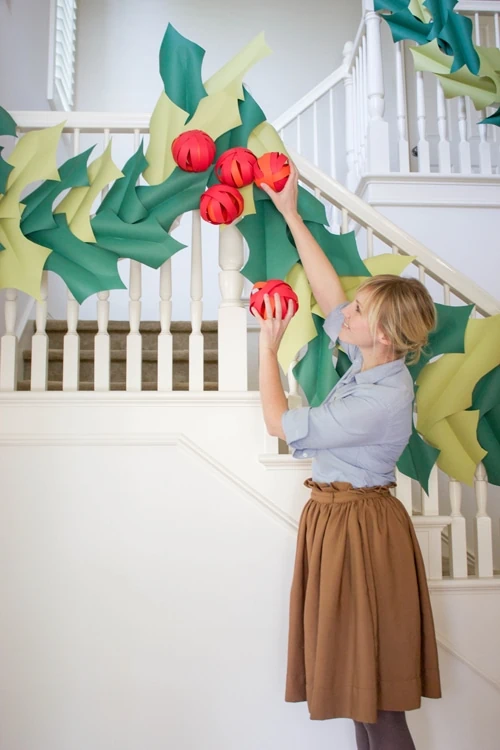
- To create the form of the garland I used butcher paper and twisted it to form the swag. I attached it to my staircase with chenille wire stems.
- Start at one end and glue the tip of the holly onto the butcher paper angled one way.
- Layer the next piece of holly going the other way and glue in place to the butcher paper. Continue alternating angles and colors of the holly.
To make the berries in the DIY garland:
I used two shades of red seamless paper in the same way.
- Cut strips of paper about 1″ wide and 1′ long.
- As if you’re making a paper chain, glue one strip of paper together.
- Glue another strip around the first strip. Glue the two papers to each other so they stick together.
- Continue gluing more strips to each other forming a globe. Make sure they all stick to at least one other strip so they are secure.
- Cover all the holes that may form.
- Glue these “berries” onto the garlands in groups of 2s or 3s where the swag peaks.
That’s it!
Happy holly making! Let me know if you have any questions or if I can clarify anything!
Comments