I think about what I’m going to wear for Halloween nearly every single day of the year. Sadly, I’m not joking. BUT, when it comes down to actually carrying out my plans, I’m usually so burned out that I end up doing something quick and easy if I do anything at all. Well, this Halloween season, we’ve teamed up with Bath and Body Works over the next three weeks to create 7 costumes inspired by their large variety of sweet smelling fragrance mists. Today we’re sharing 3 last minute costumes you can make from your craft closets, which is good for all of you who don’t want to put that much time or money into your costumes. Think tissue paper, paper plates, and drinking straws, cardboard, balloons, paint, batting. All cheap and easy yet have so much impact. In fact, I wore the unicorn costume to my first costume of the season and the kids loved it! Also on the list: hippies…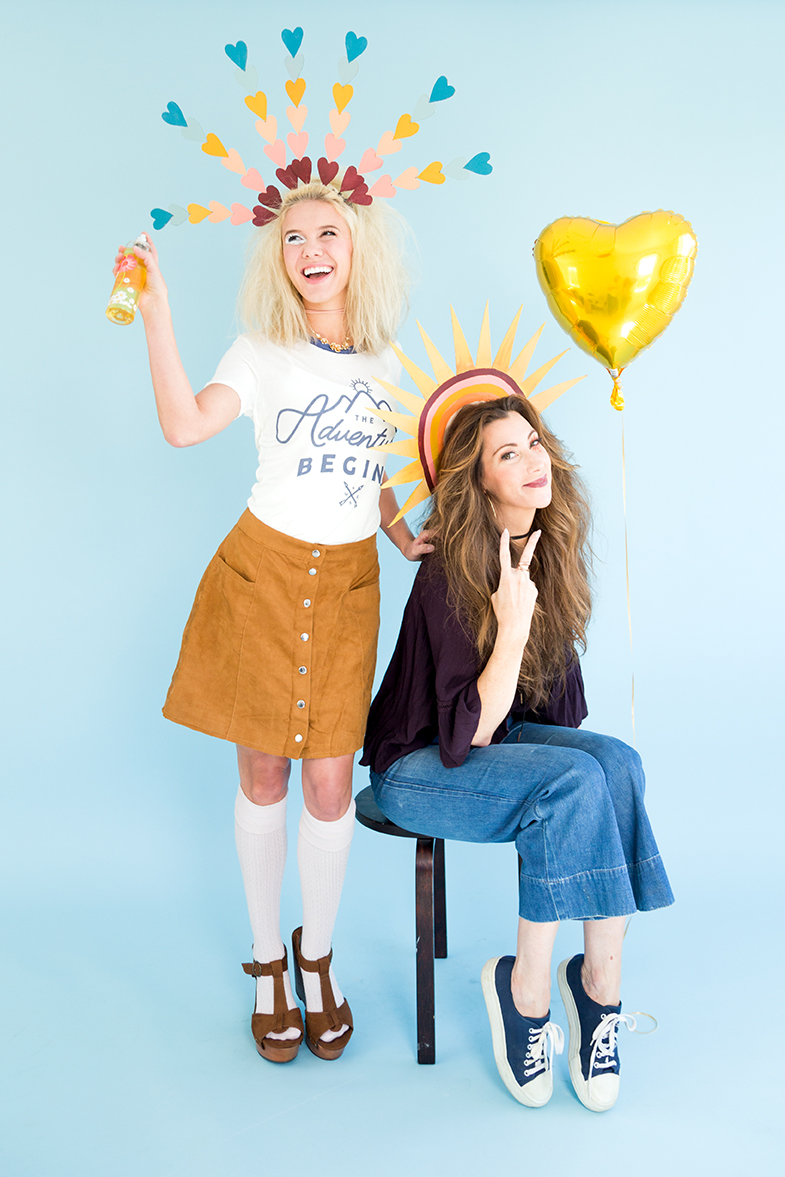
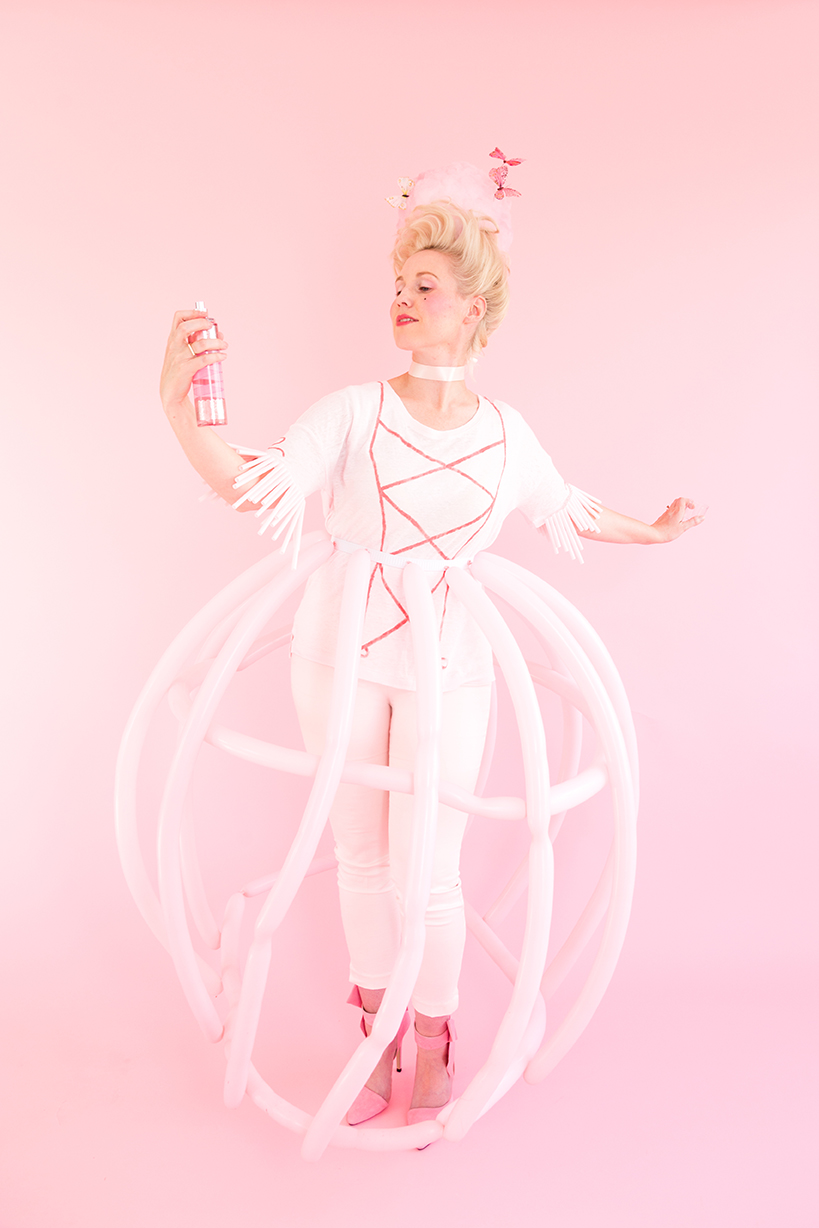
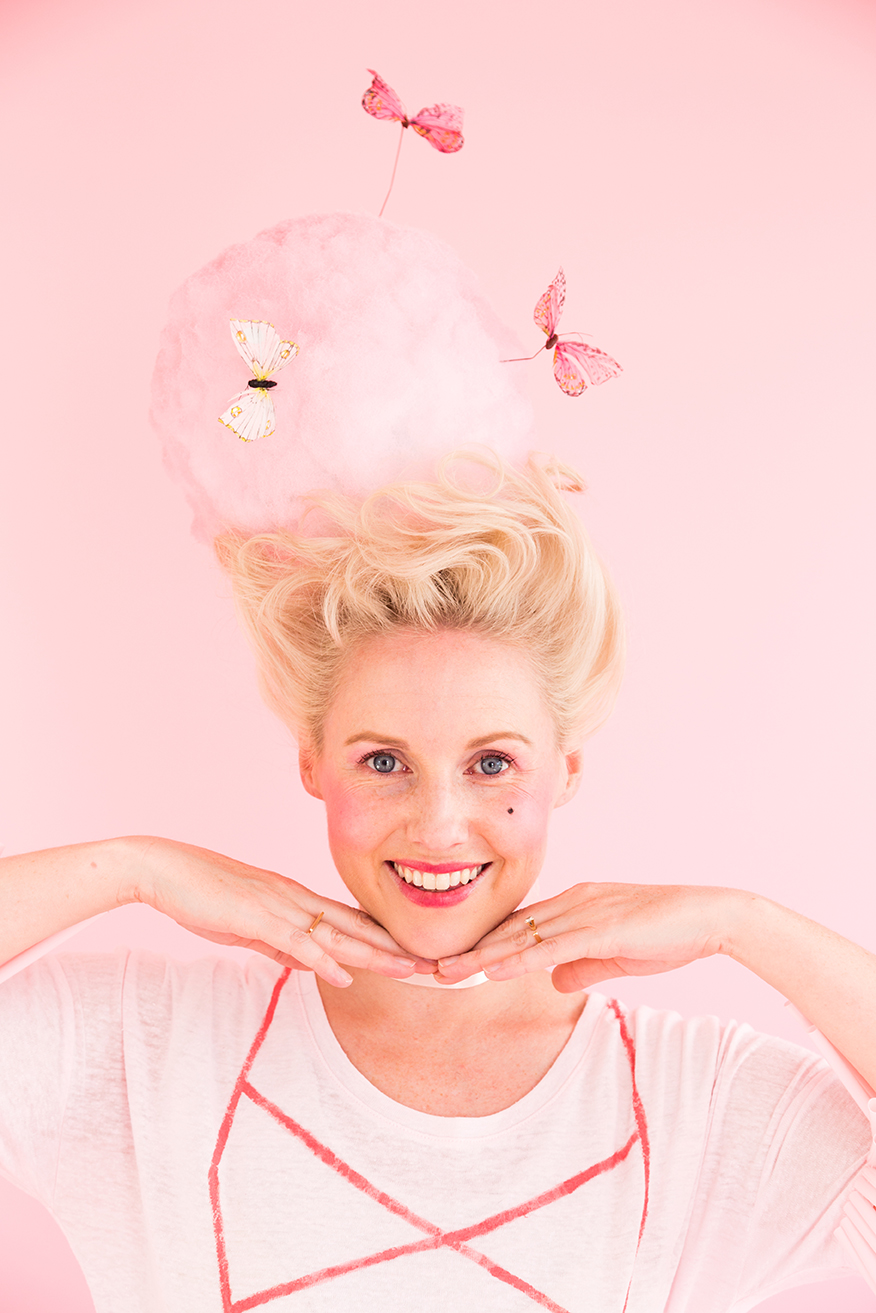
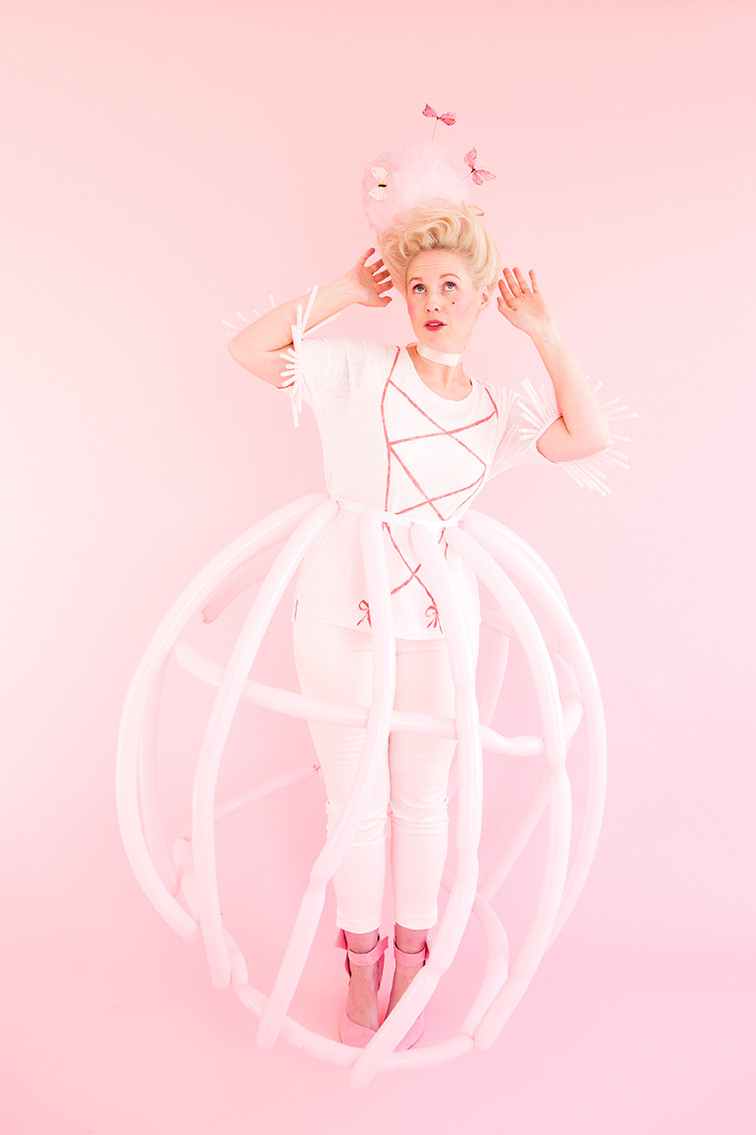
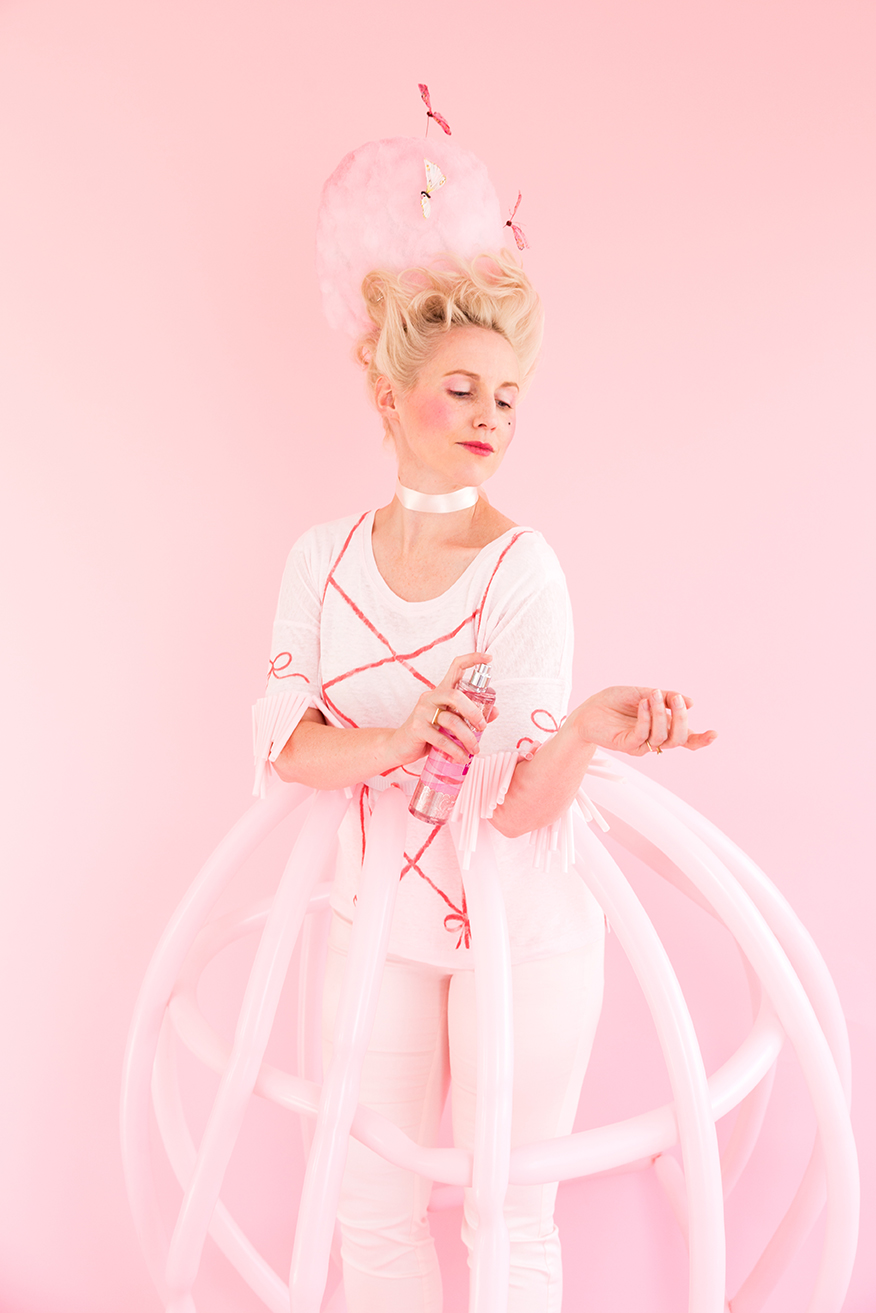
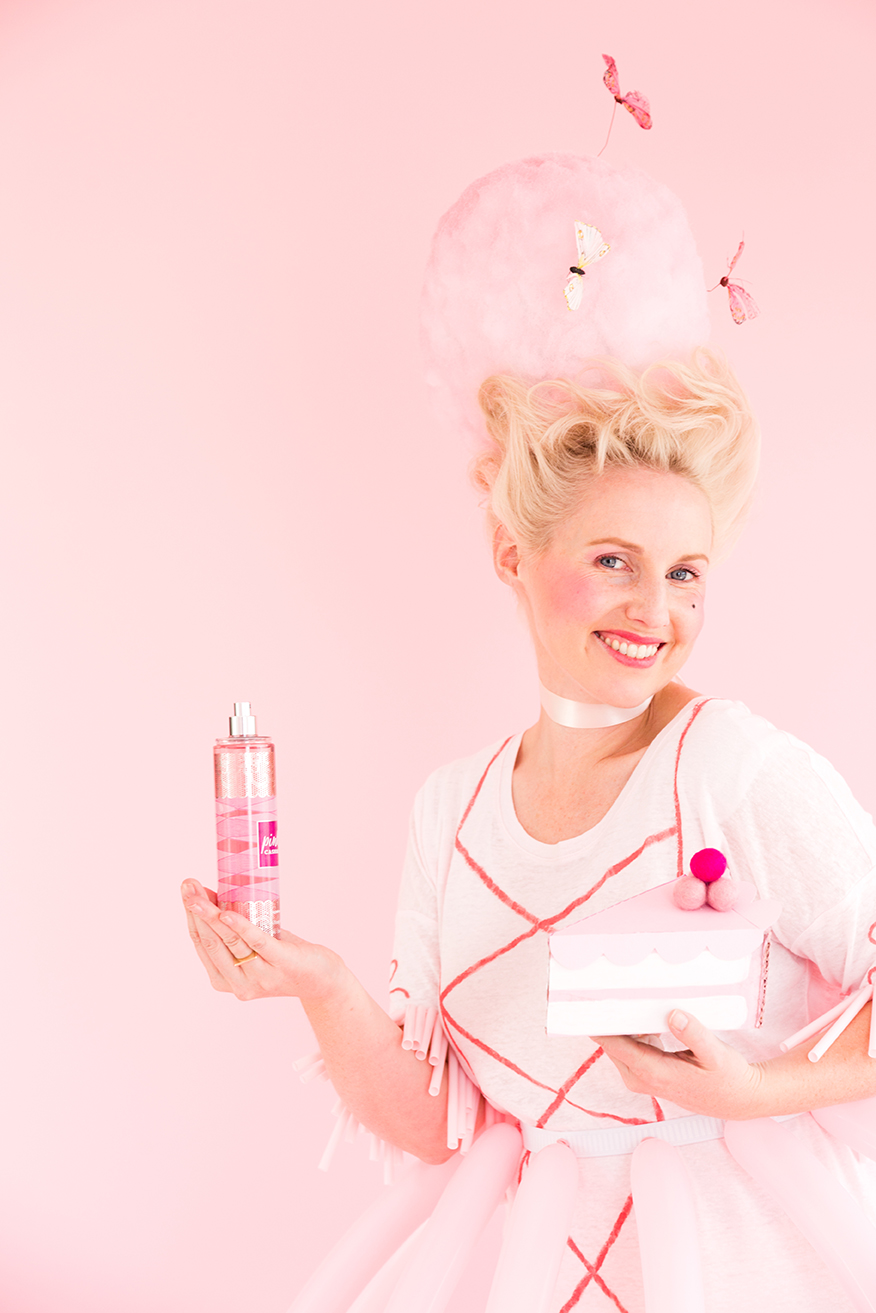
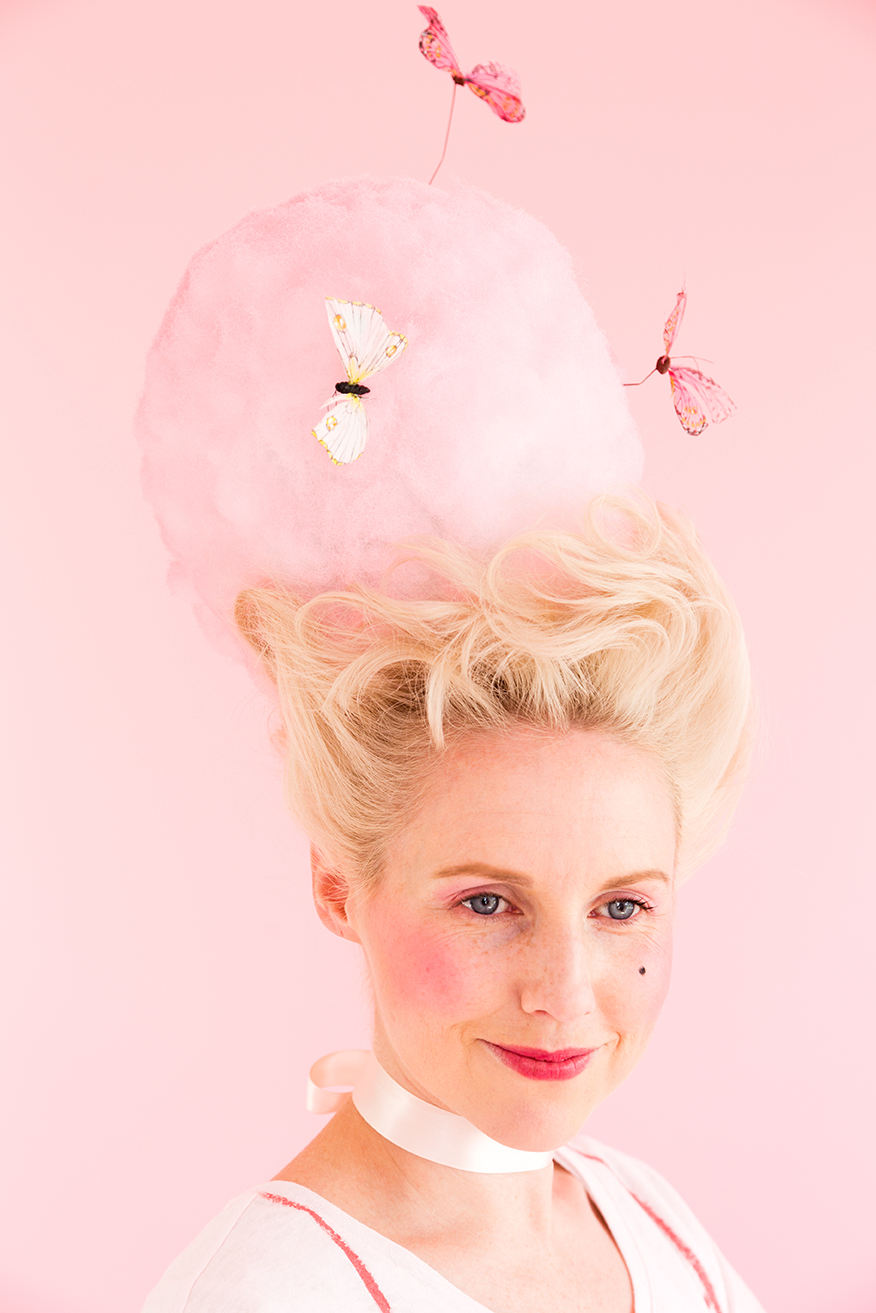
DIY Marie Antoinette headpiece
- batting
- wire
- glue gun
- faux butterflies on wires
- pink spray paint
- wire cutters
- Form a circle with your wire to the shape that you want the base of your headpiece. We made ours smaller than a head so that it would fit on top.
- Add a wire from the base of the circle to the height that you’d like it to be and then back to the other side of the circle, like an upside down U.
- Repeat this process around the circle until you’ve built up a cage-like structure.
- Add batting into the wire structure so it’s dense. Keep on adding batting until it puffs out through the wire so you can pull it out to cover the wire.
- Spray paint the batting pink and let dry.
- Add butterflies into the batting. Glue in.
- To add onto the head, secure with bobbi pins. Add hair around it to cover the base.
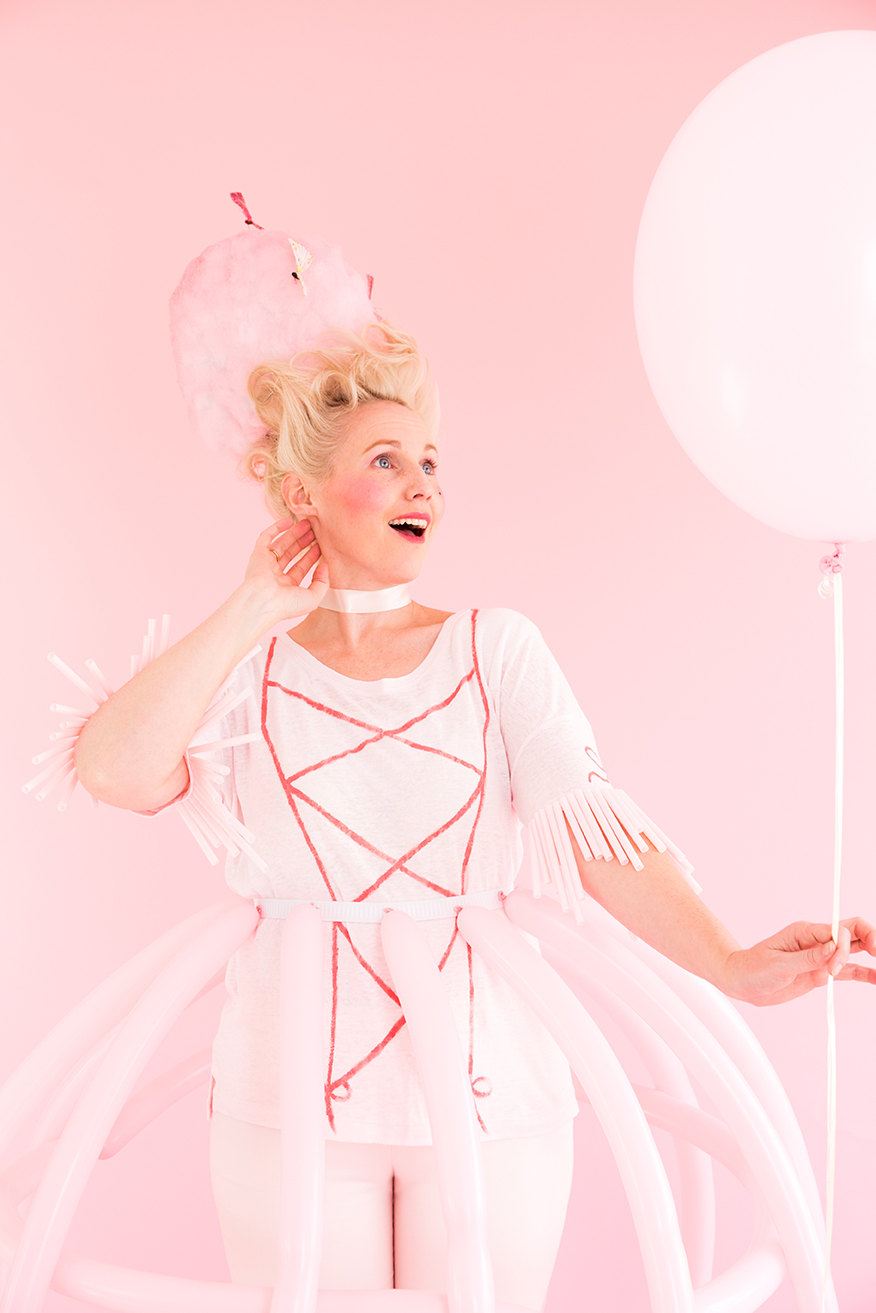
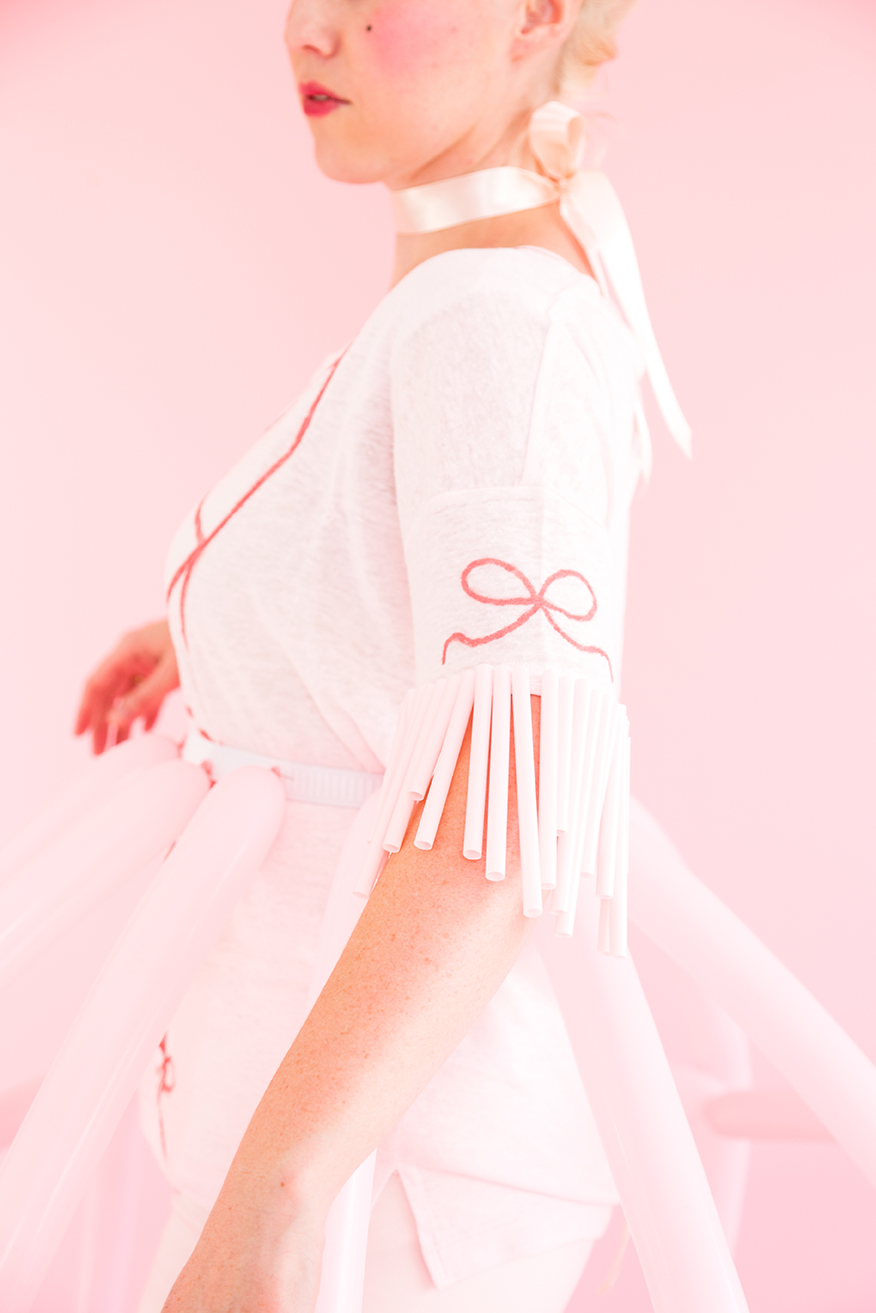
DIY corset shirt
- pink t-shirt (we got ours here)
- pink house paint (or acrylic or textile) in a darker color than the shirt
- paint brush
- pink drinking straws (we got ours from Ikea)
- Fishing line and craft needle
- glue gun
- scissors
- Cut straws in a variety of lengths
- With the fishing line and needle, string the straws together at the top, enough to wrap around the shirt and tie with knots.
- Glue the straws to the edges of the sleeves.
- Add a piece of cardboard into the shirt and paint your corset design. Add in bows and such for extra adornment.
DIY balloon skirt
- 16 long pink balloons (I’d get extras just in case some pop)
- lo temperature glue gun
- balloon pump
- elastic for the waistband
- stapler
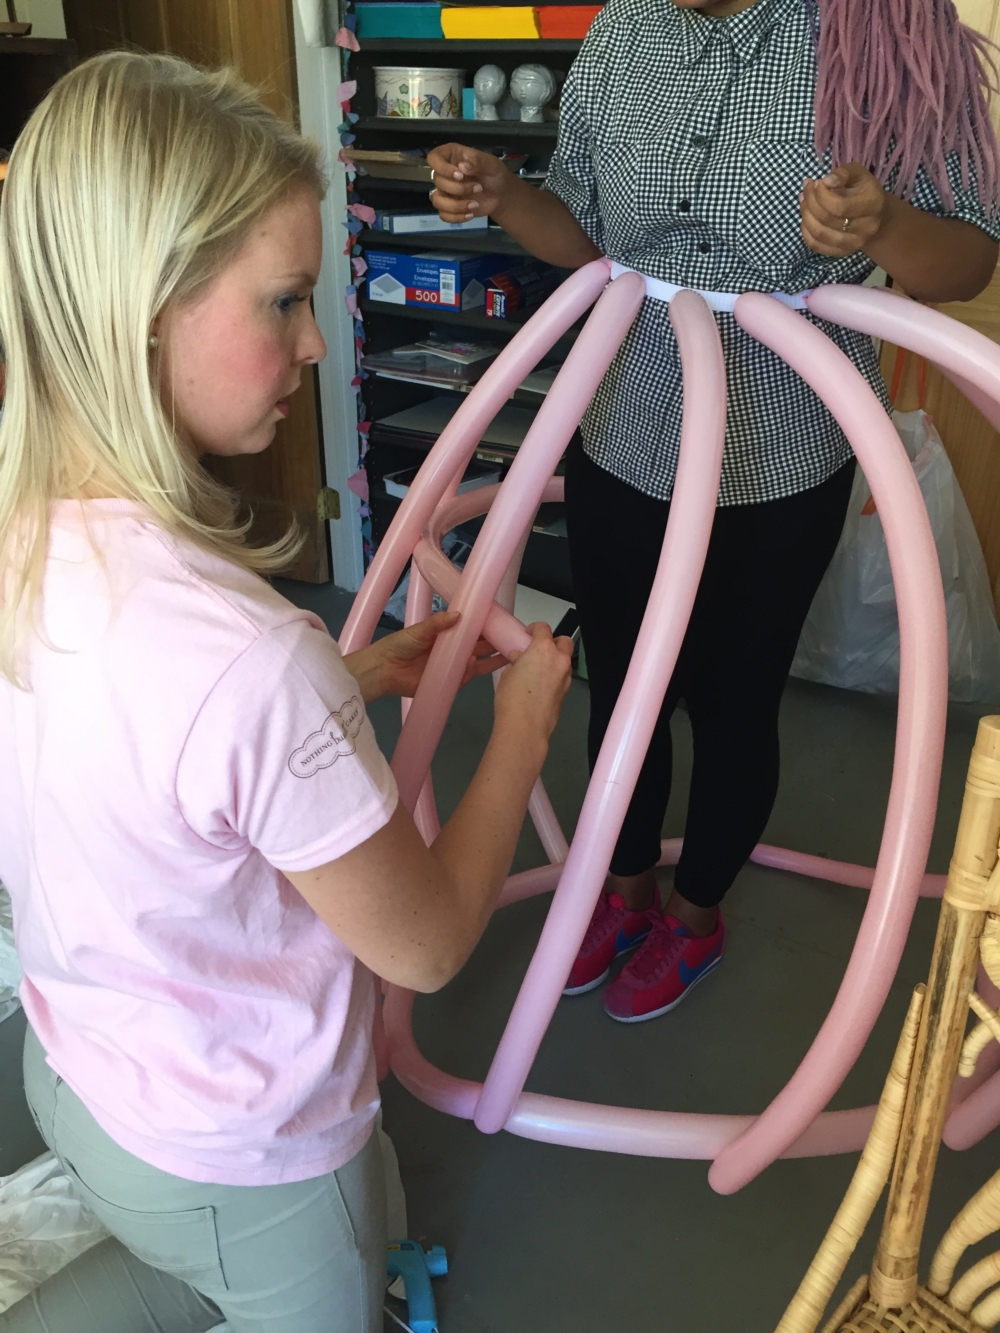
- Blow up your balloons really full and make sure they are tied tightly so you can make your skirt in advance and it will last.
- Staple the knots of the balloons evenly around the waistband in a vertical direction.
- Glue a balloon to the bottom of the balloons with your glue gun in a horizontal direction. Add additional balloons to each other to go all the way around.
- Add in another set of balloons around closer to the top, creating a hoop-like skirt form.
- your usual foundation OR a foundation several shades lighter than your skin tone
- light pink blush
- other shades of pink blush or eyeshadows
- mascara
- black eyeliner
- makeup brushes
- Apply your usual foundation. You can also use a foundation or powder several shades lighter than your skin tone if you want a more “historically accurate” version of the look.
- Using a fluffy brush, place light pink powder blush right on the apples of your cheeks. Apply several layers to get the strong pink tone Marie Antoinette was famous for.
- Sweep a light pinky-white shadow across your eyelids and nearly up to your brow.
- Using a smaller rounded brush, sweep a darker pink shadow into your eye crease.
- With an angled brush take another darker pink tone shadow and lightly line the upper lashline.
- Using a black eyeliner pencil, place a small dot on your cheek (to mimic the small black patches that Marie wore).
- Finish with mascara.
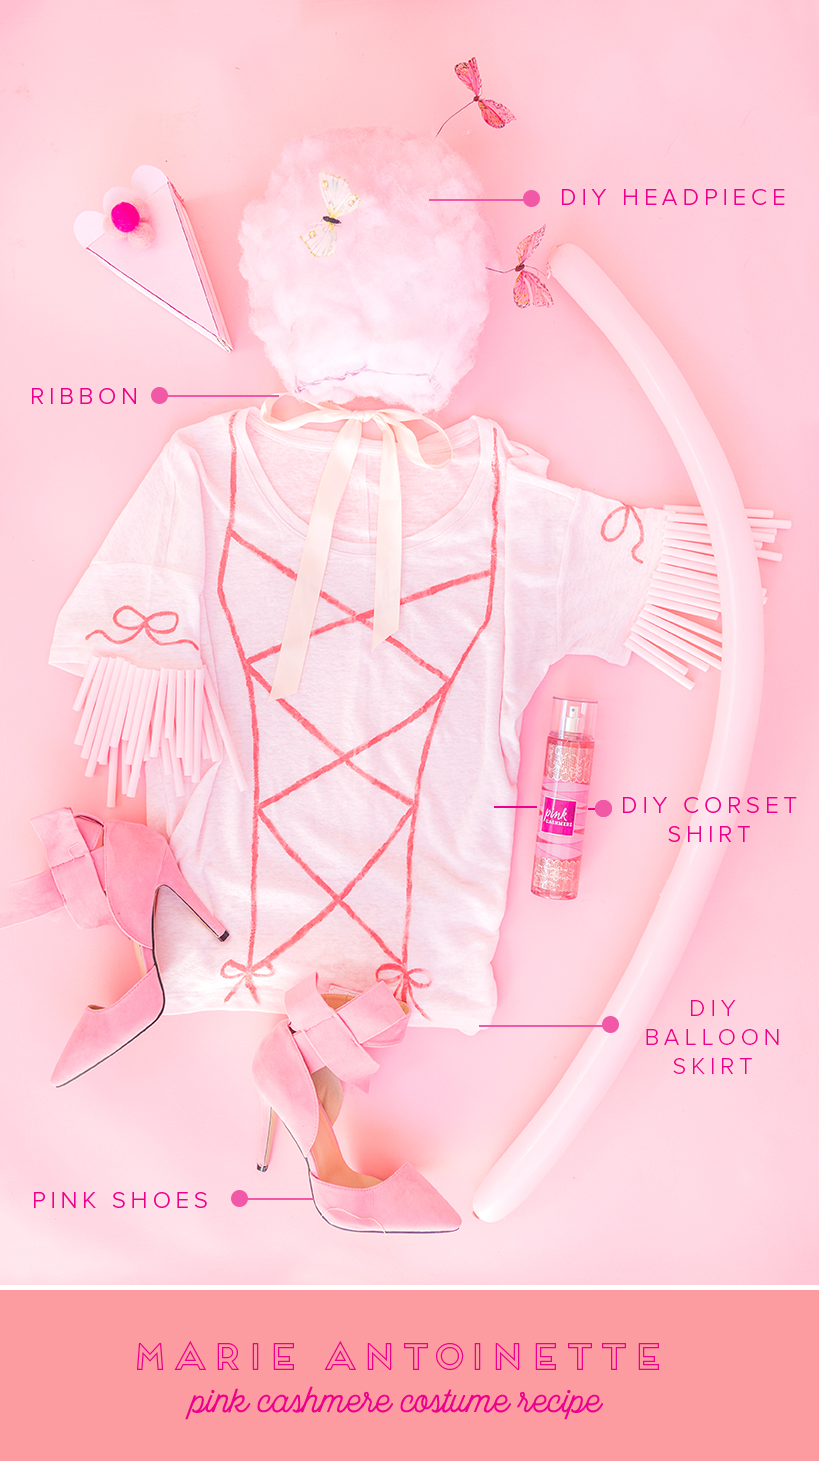
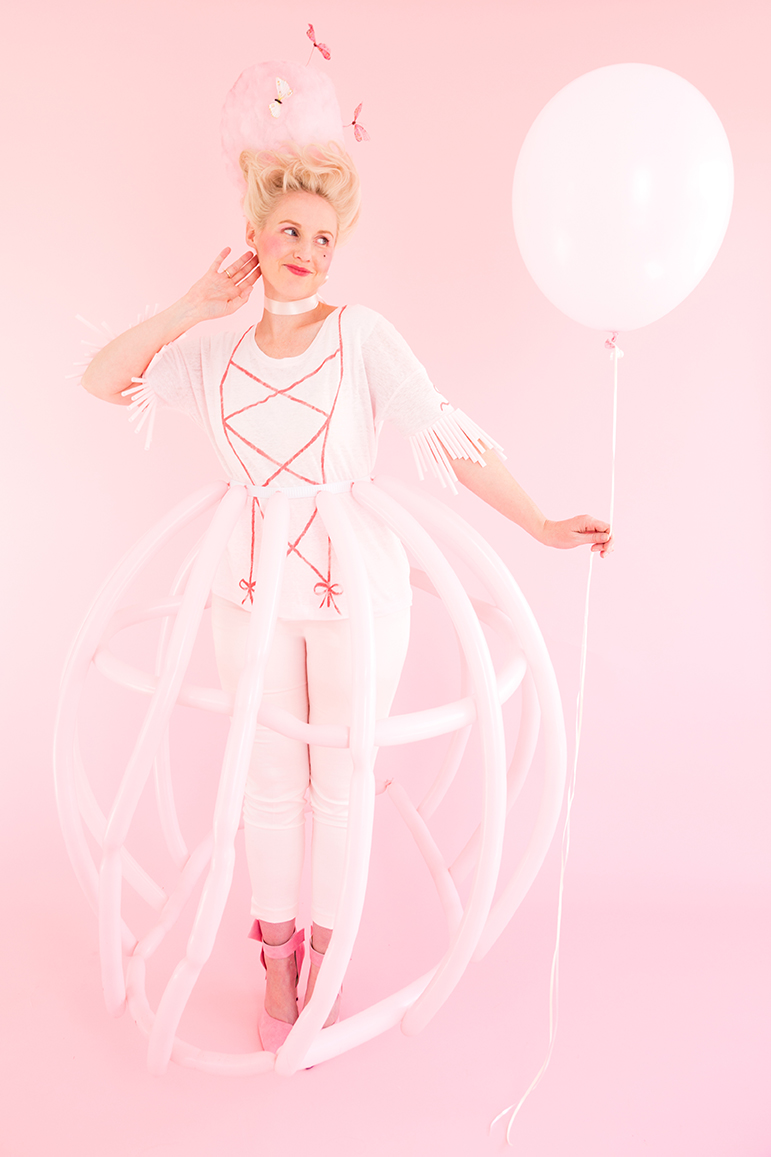
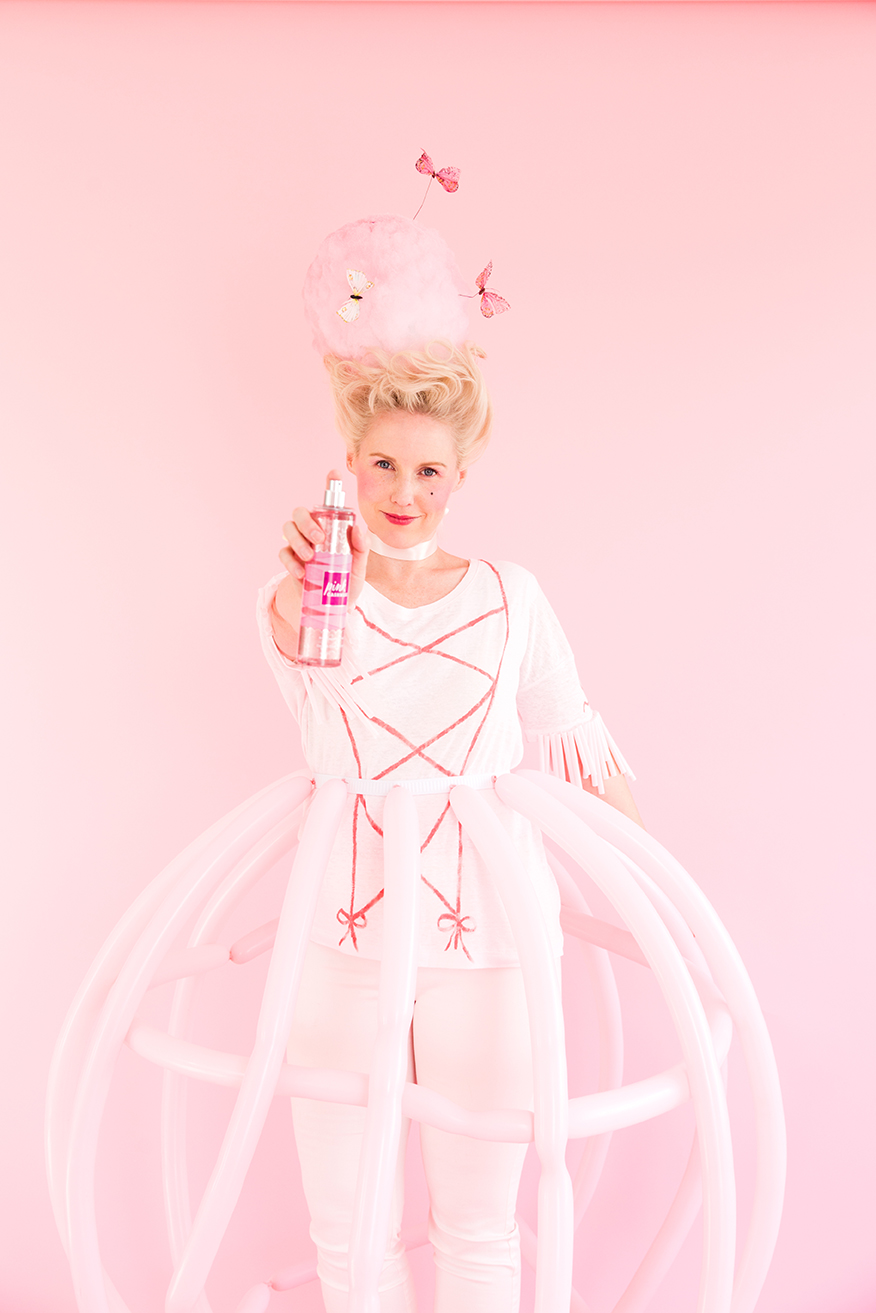
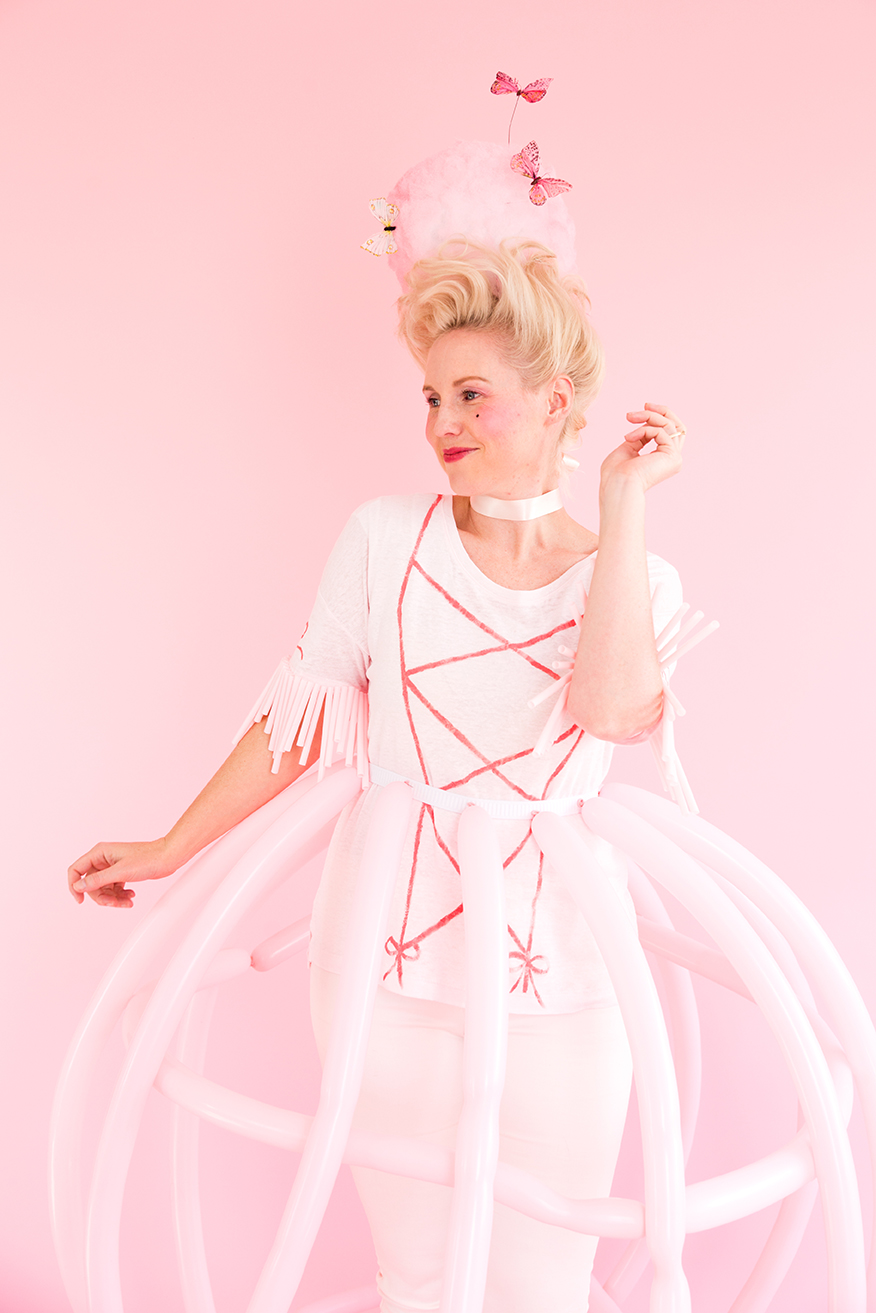
- DIY headpiece
- ribbon around the neck as a choker
- DIY corset shirt
- DIY balloon skirt
- pink shoes
Check out below for the hippie costume
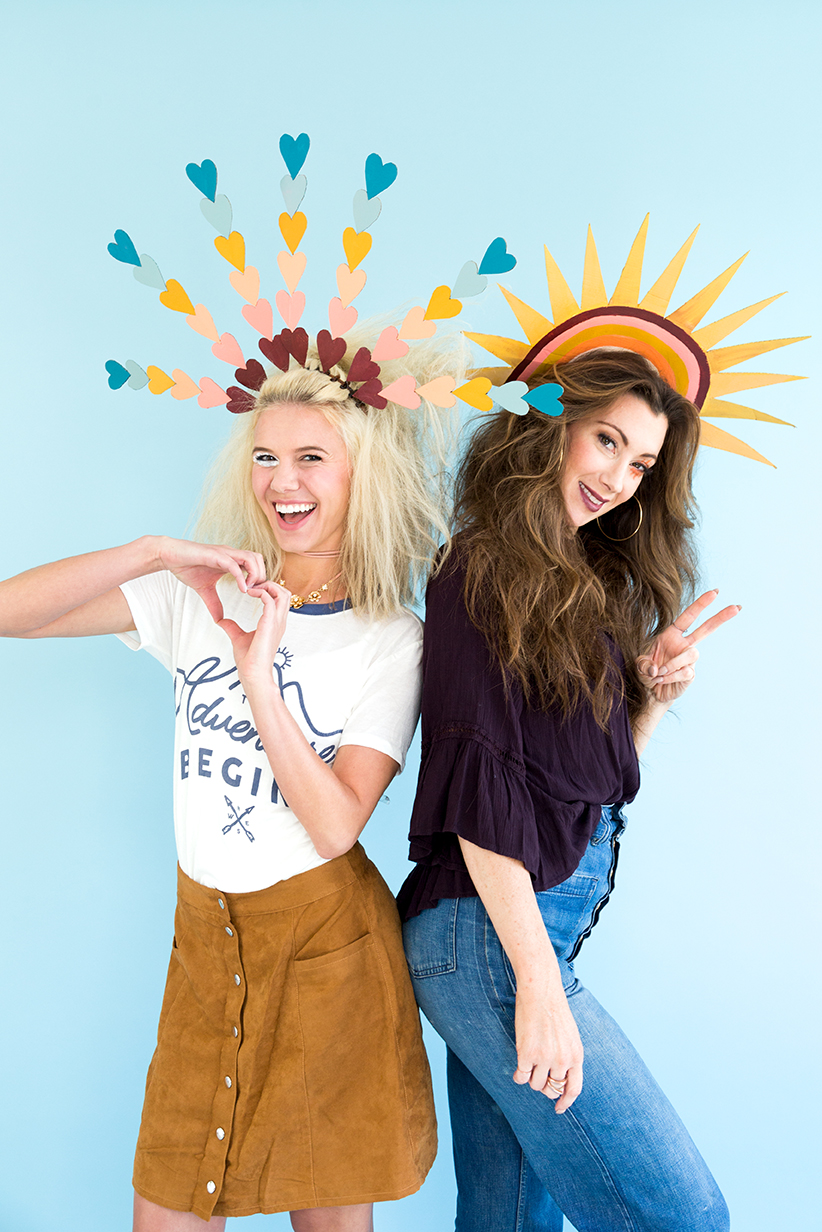
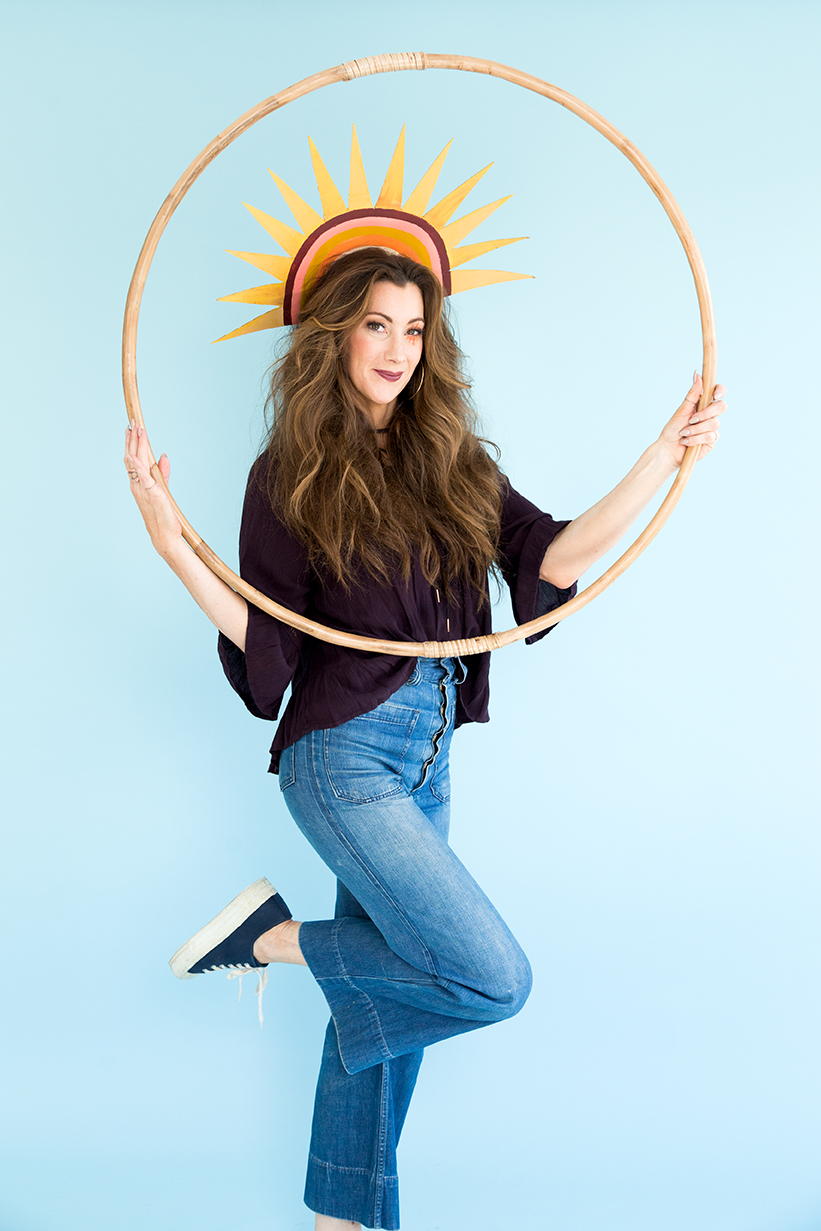
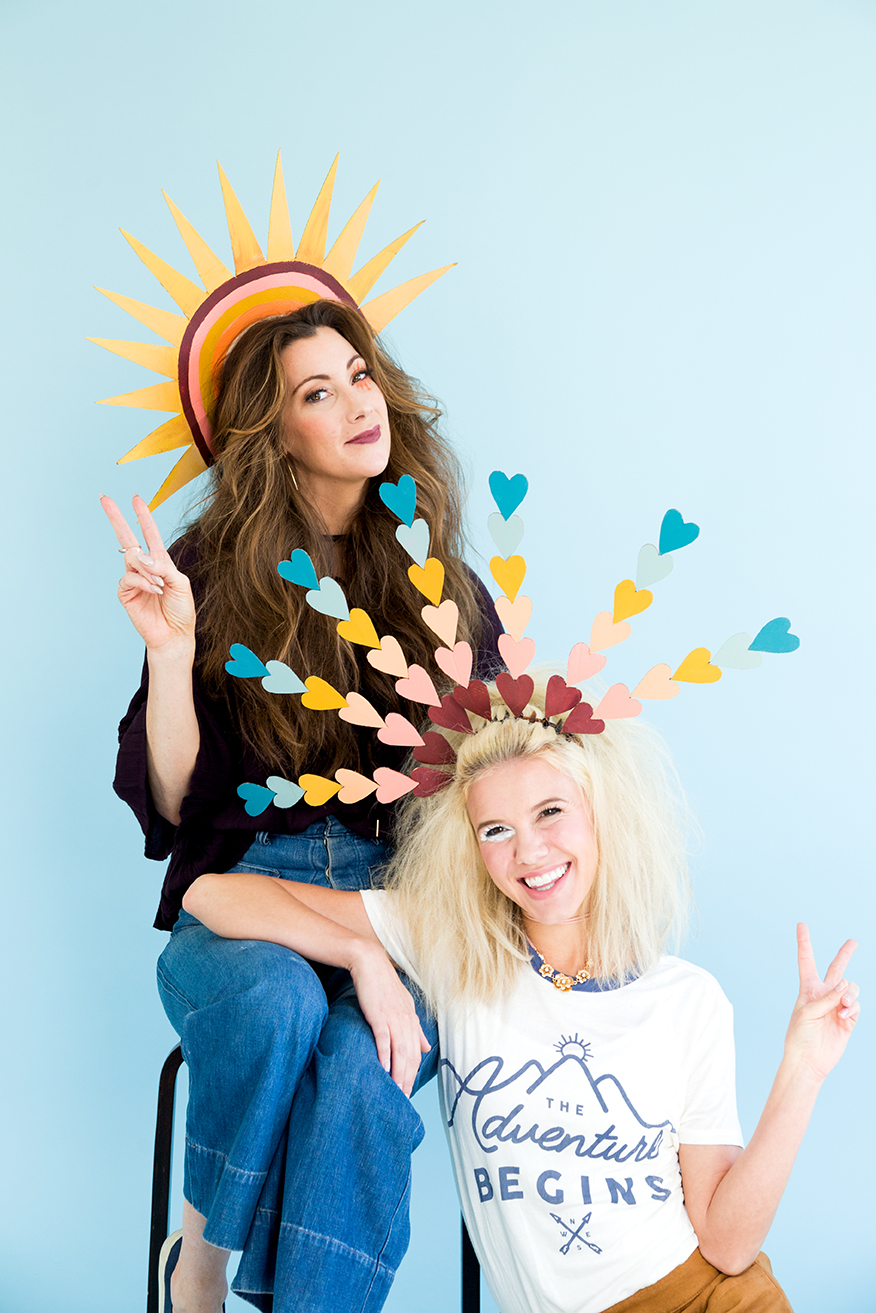
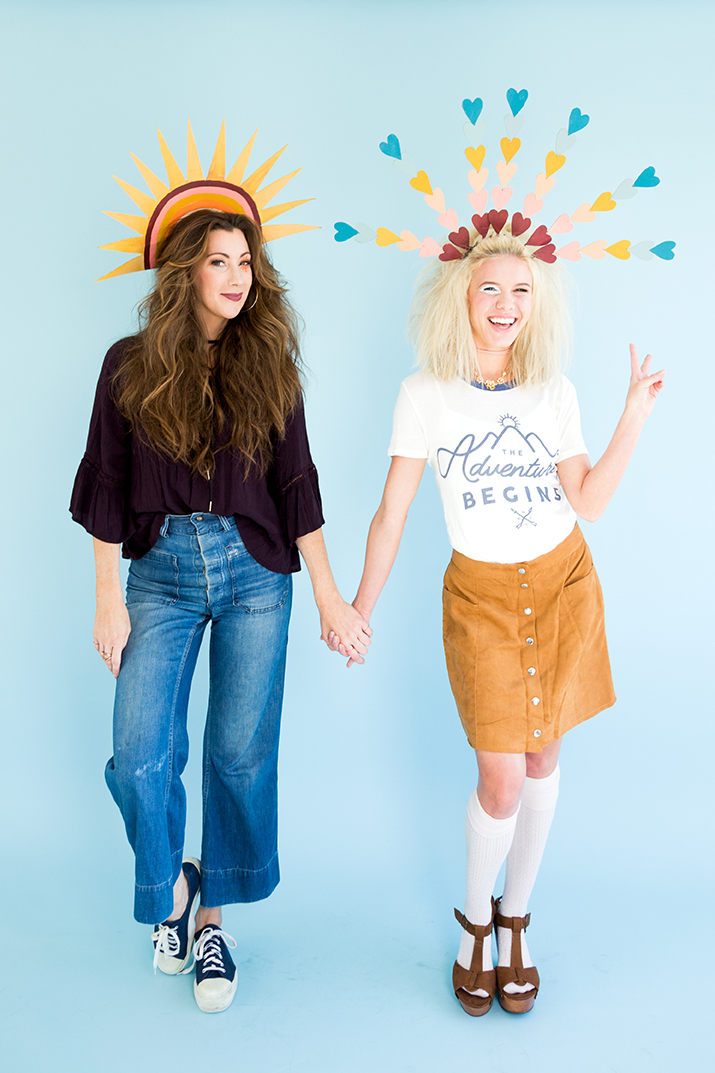
I immediately envisioned an early 70s hippie for our Love and Sunshine costume . I find that hippie costumes tend to be a little corny and I wanted something that you might actually find in your closet with a rad headpieces as the topper. I turned to cardboard extraordinaire, Merrilee Liddiard, to create some groovy headpieces. She nailed it! I love how they turned out. Plus, they’re just cardboard.
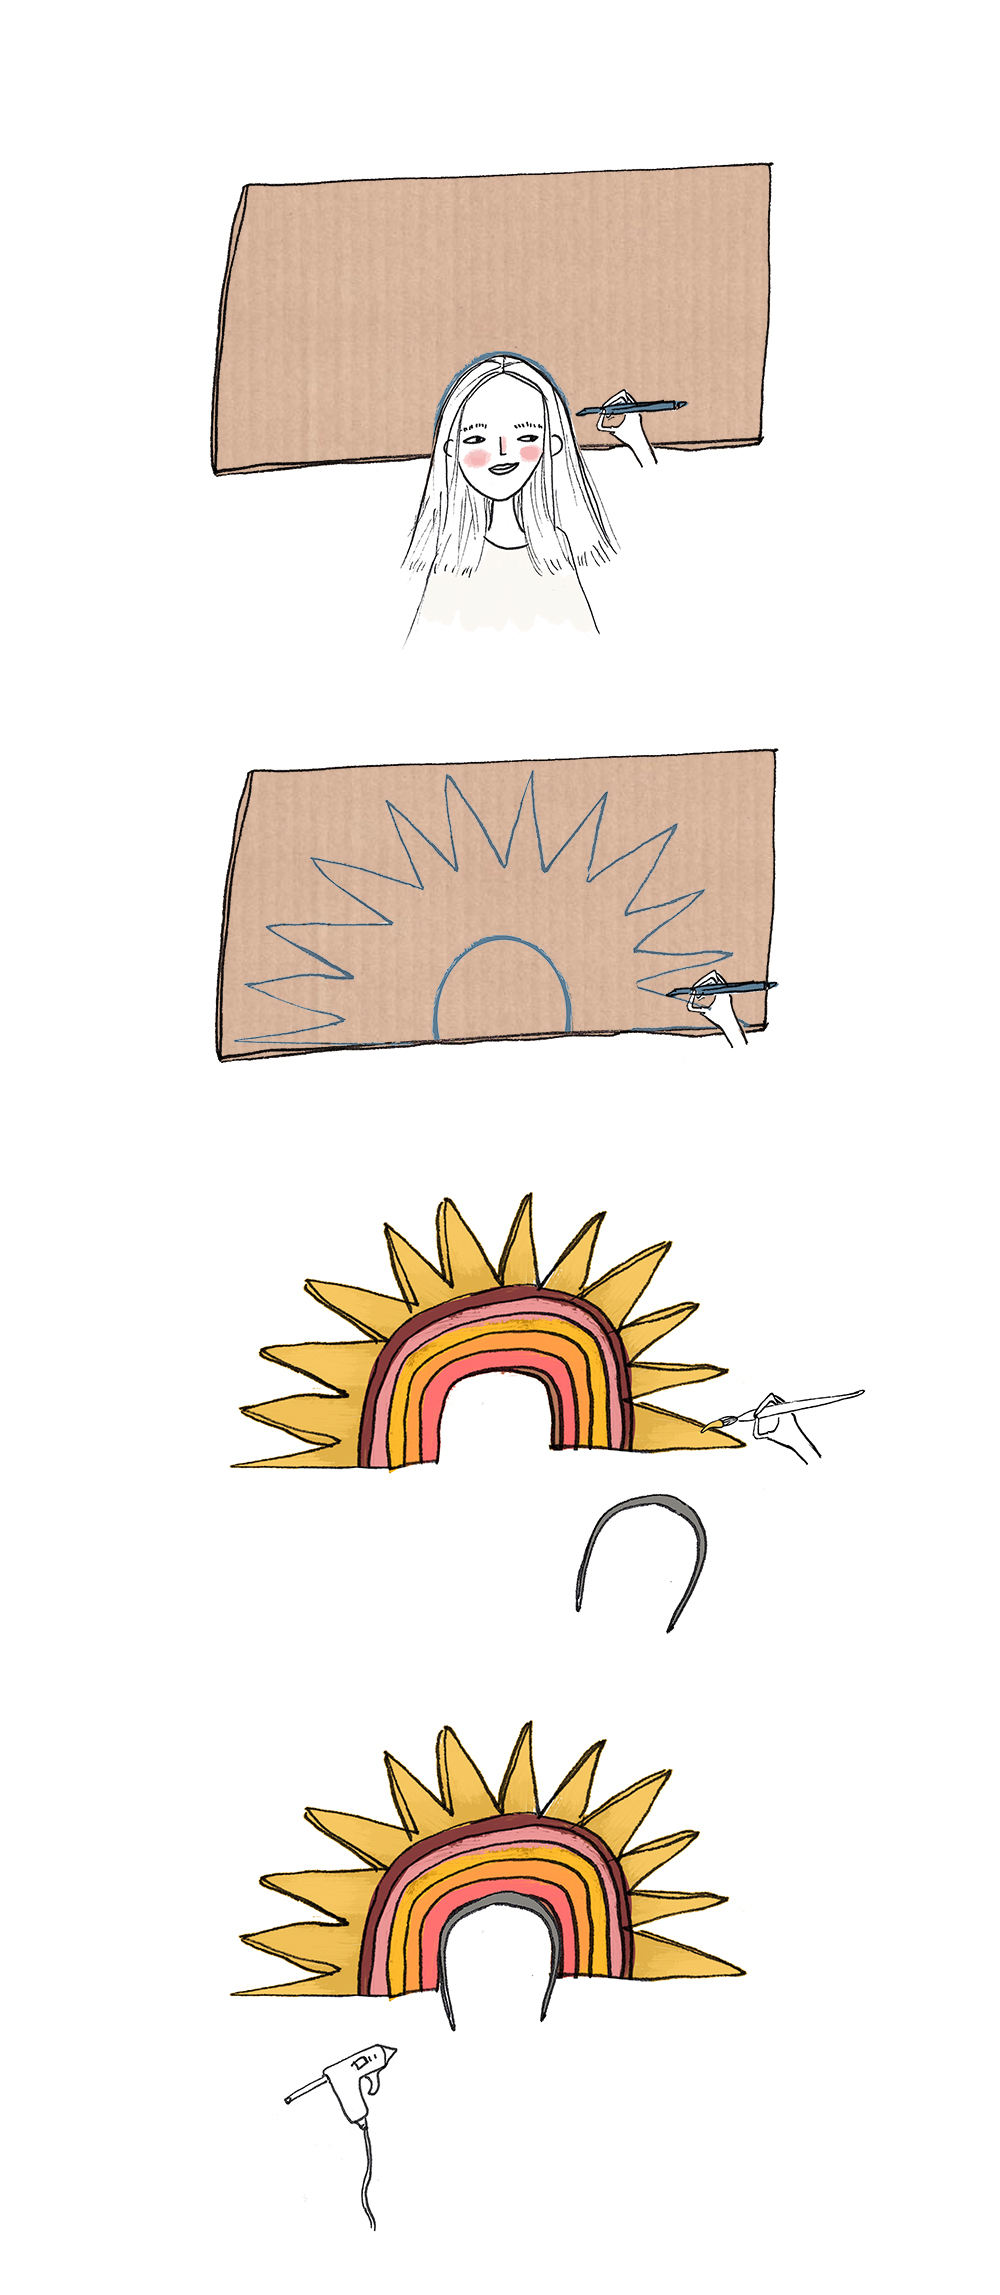
- begin by finding a large and long piece of cardboard. Have someone trace around your head in the lower center portion of the cardboard to ensure proper fitting of headdress. This will be the center of the sun.
- Continue by tracing the sunshine template. cut out.
- paint your sun in fun colors, including a sun colored rainbow on the inside.
- glue in a headband. (We recommend a bendable headband so that it will bend into place properly.). You are now ready to wear SUNSHINE!
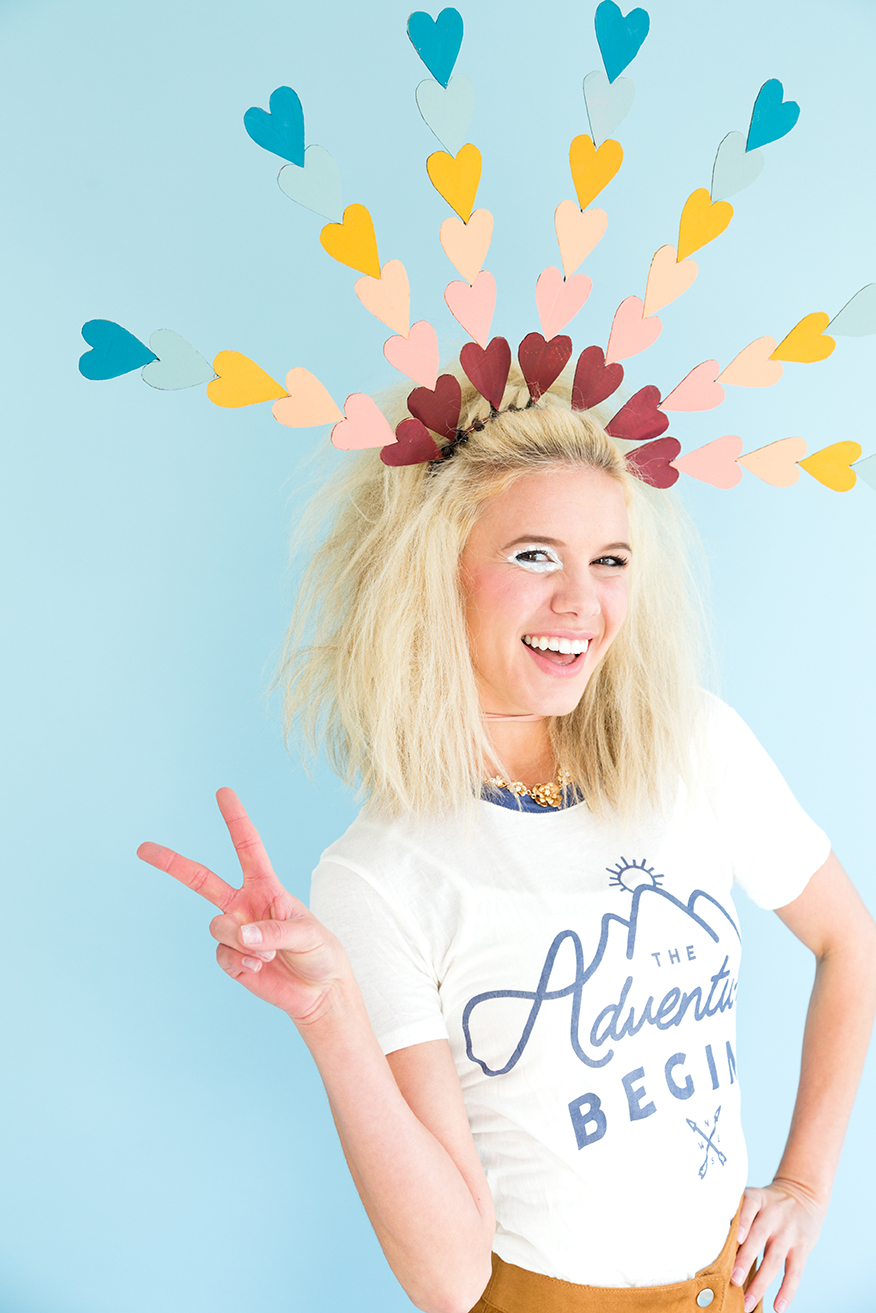
Love headpiece:
- cut out 42 hearts from cardboard. paint 6 groups of seven hearts in different rainbow colors. So seven burgandy, 7 pink, 7 peach, and so on.
- you’ll need a headband (we recommend a comb headband to help secure the hearts in place) and seven 14″ pieces of thick wire (we used baling wire but any strong jewelry wire or coat hanger, etc. will work)
- begin by placing a wire in the middle of the headband and securing it by twisting the wire up and over the headband and back onto itself.
- repeat this for the remaining 6 wires, spacing apart evenly
- glue on your cardboard hearts starting from bottom up.
- finish by glue on all remaining hearts. let dry and then you are ready to wear LOVE!

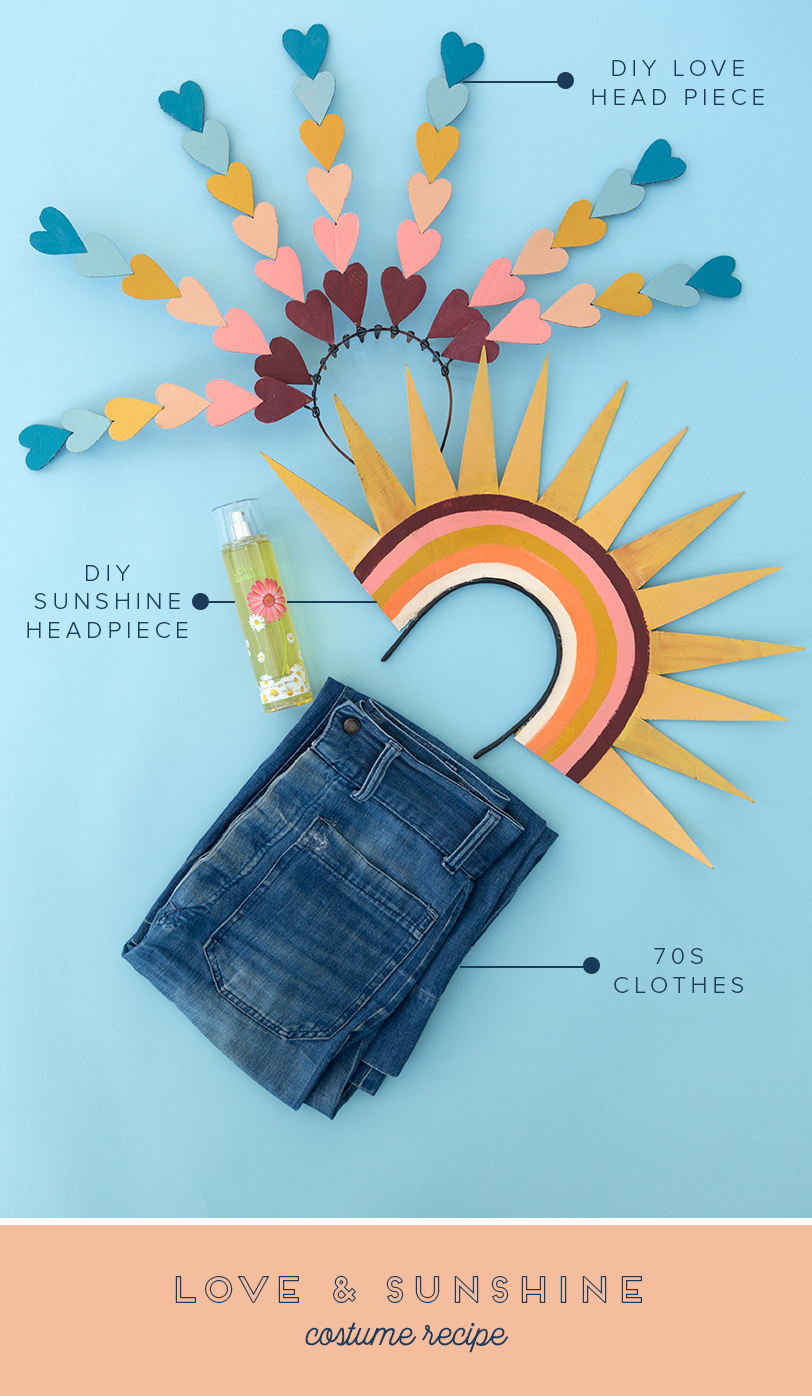
To complete the costume:
- headpiece for love or sunshine
- shirt and jeans
- authentic shoes
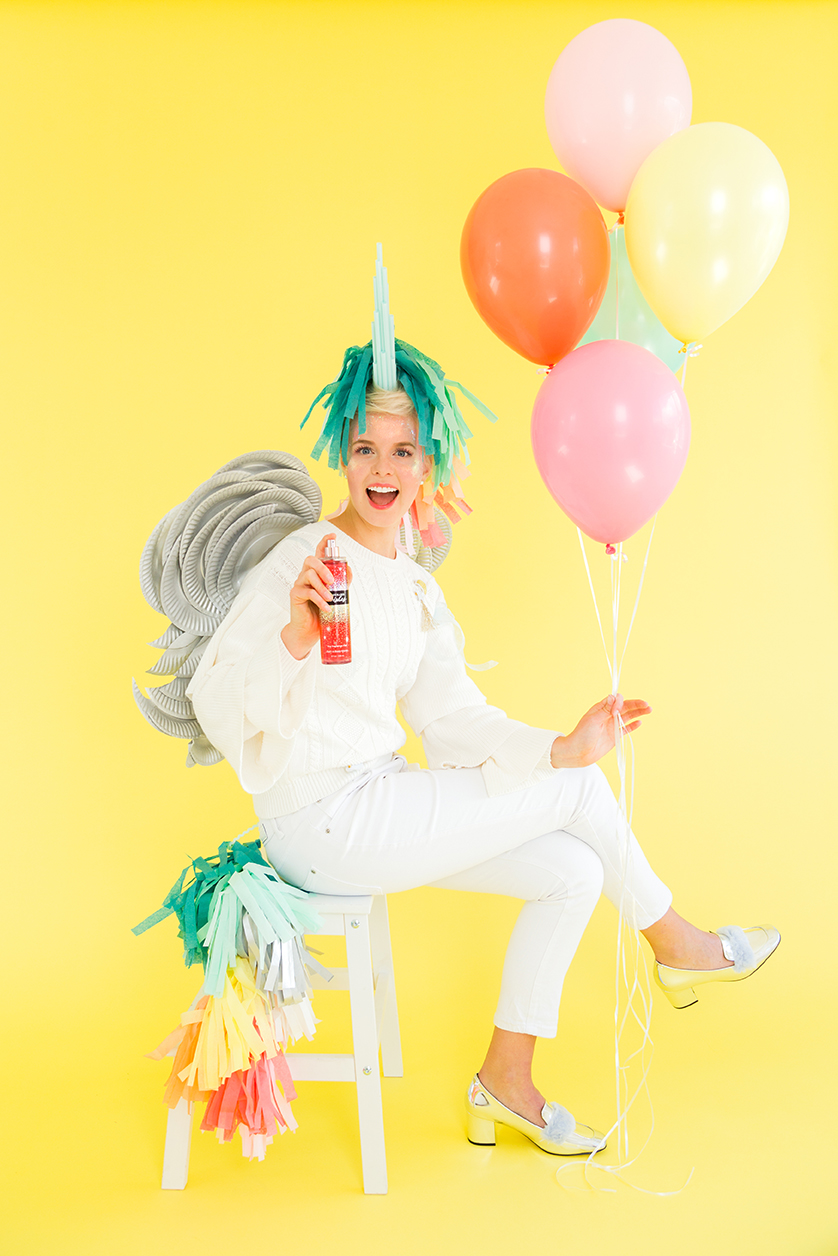
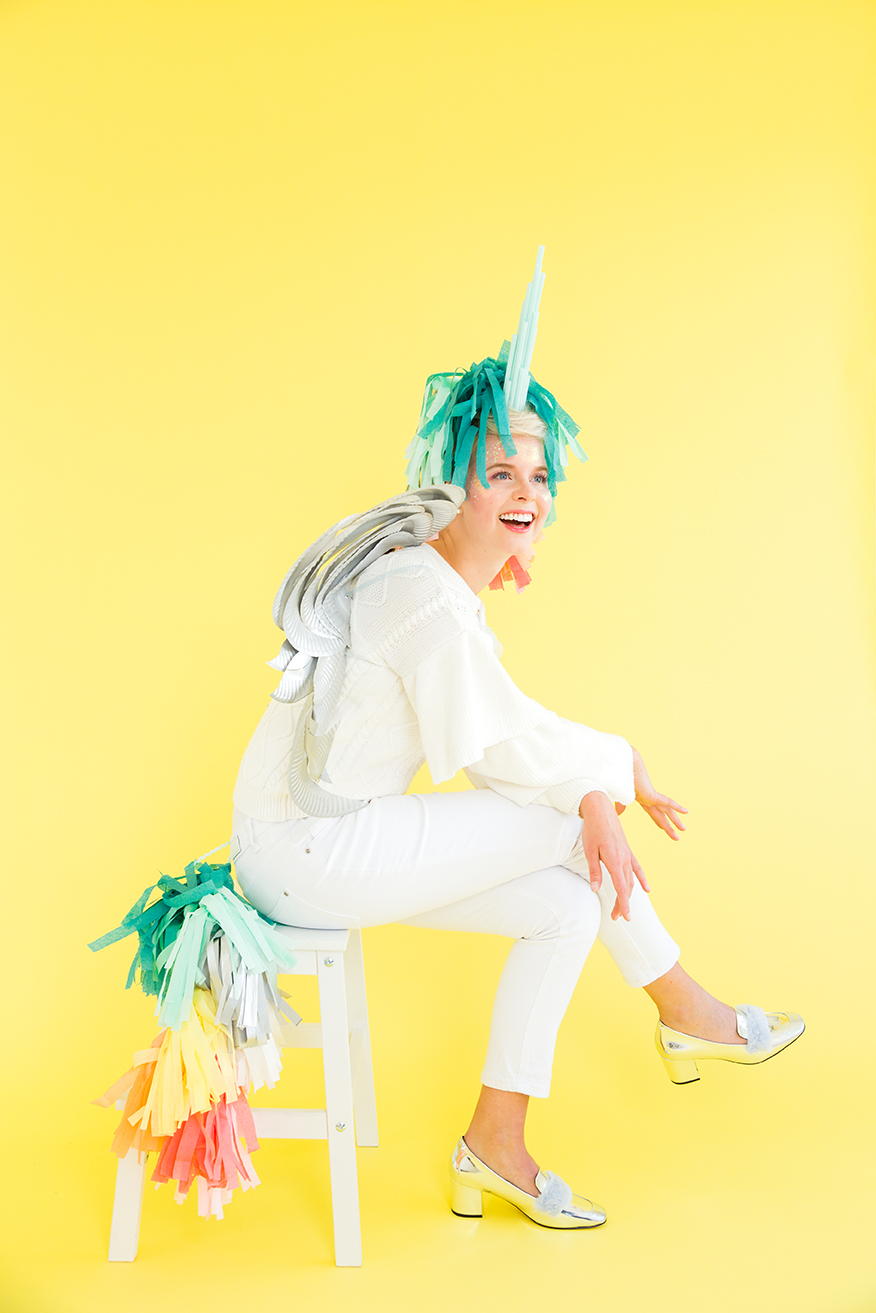
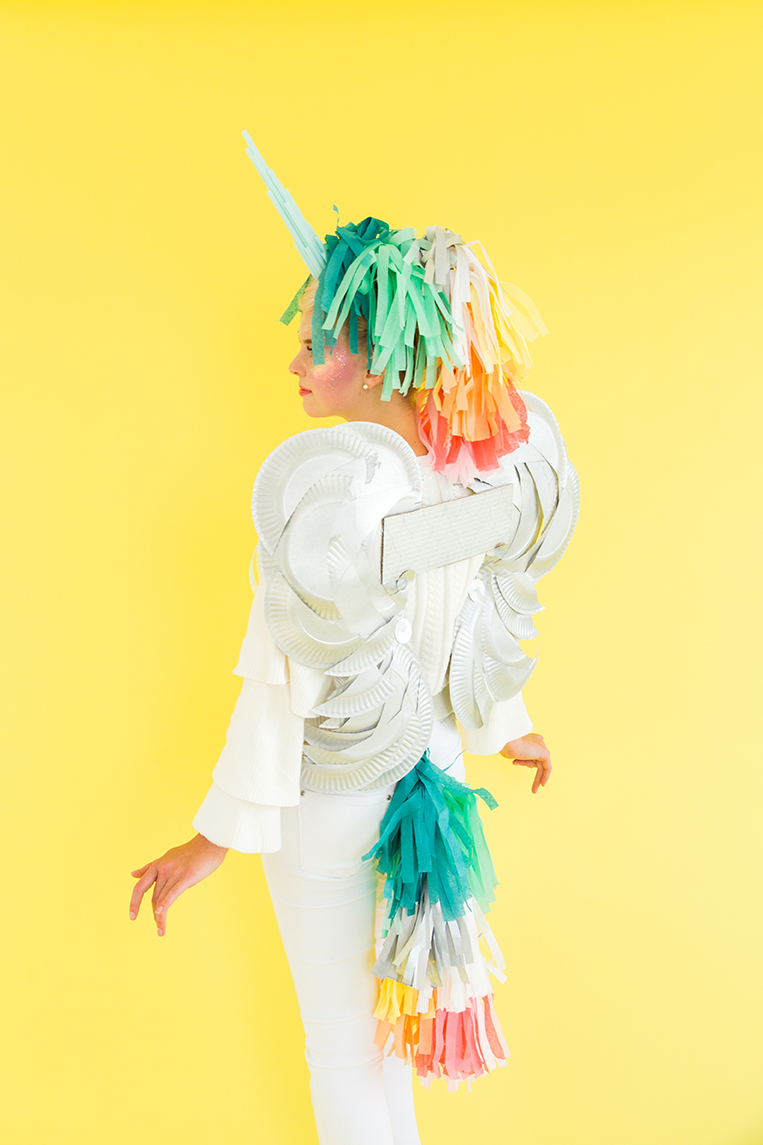
I know, I know…it’s not technically a unicorn. The kids last night were quick to correct me that it’s a pegacorn, a cross between a unicorn and a Pegasus. A unicorn has the horn and a pegasus has the wings. Go figure! This one was my favorite! It takes only a few materials but they make such an impact. I LOVE how it turned out!
To make the wings:
- paper plates
- glue gun
- ribbon
- silver spray paint
- piece of cardboard about 1′ wide and 4″ tall
- hole punch
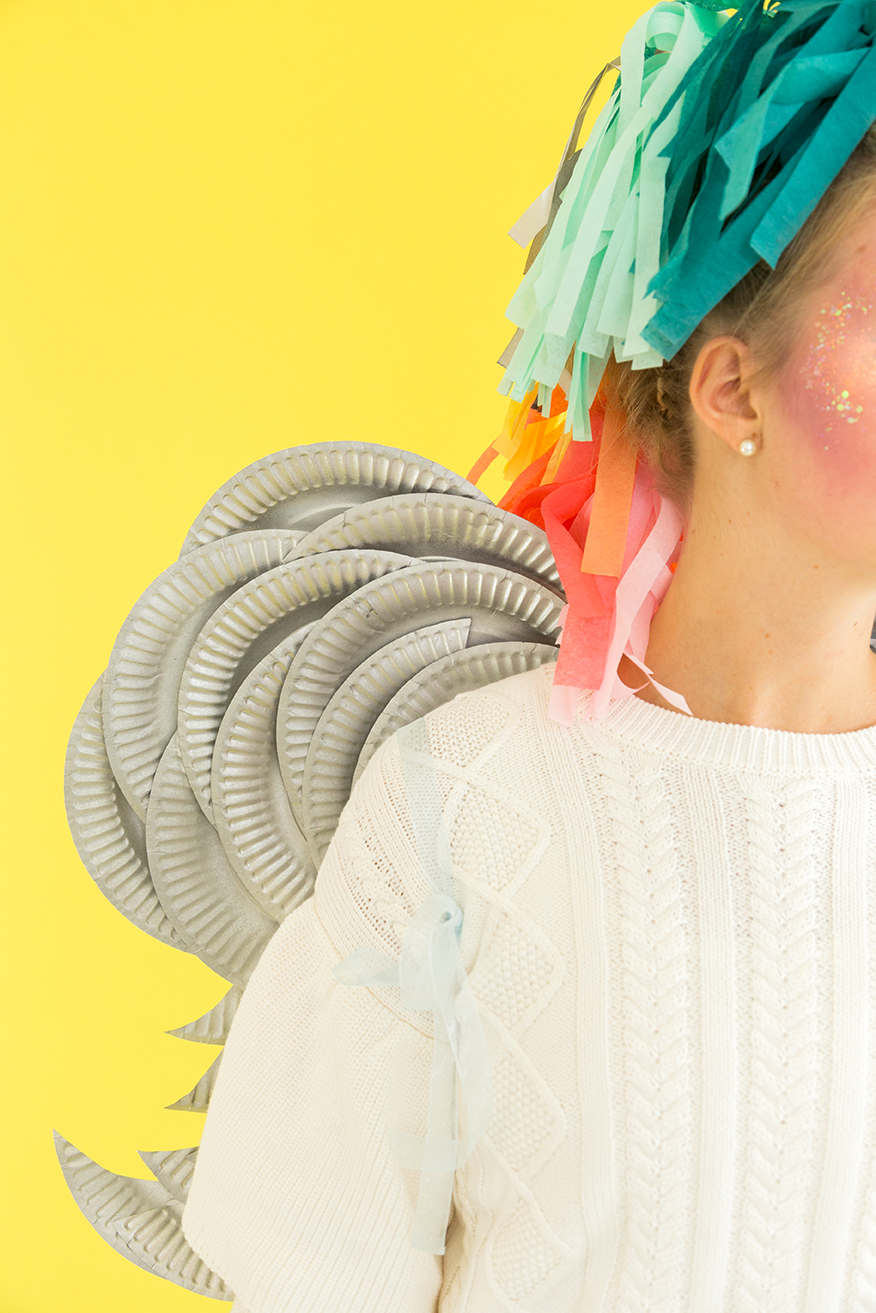
- Cut the paper plates in the shape of moons, varying from half moon shapes, crescent shapes, and smaller pieces for the lower wings.
- Layer the pieces together creating a rounded shape for the upper wings and a fringed shape for the lower wings. Glue the plates together.
- Using the cardboard piece, glue the two wings together so the wing span fits your back comfortably.
- Spray paint the whole thing silver.
- Punch two holes in each wing and thread the ribbon through the holes, tying knots at the back and leaving long tails at the front so you can wrap the ribbon around your shoulders and tie bows to secure.
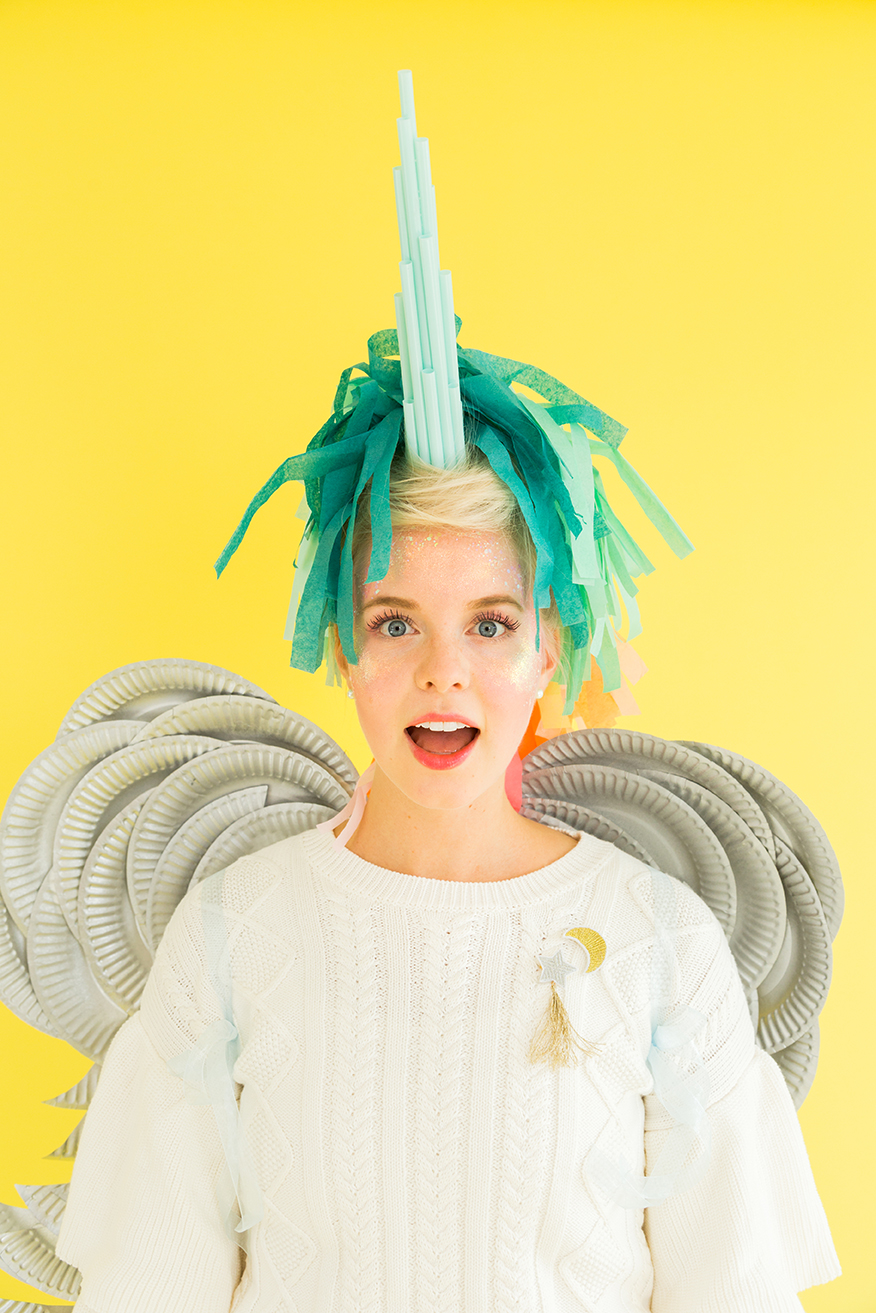
To make the horn:
- drinking straws (we got ours from Ikea)
- scissors
- glue gun
- cardboard
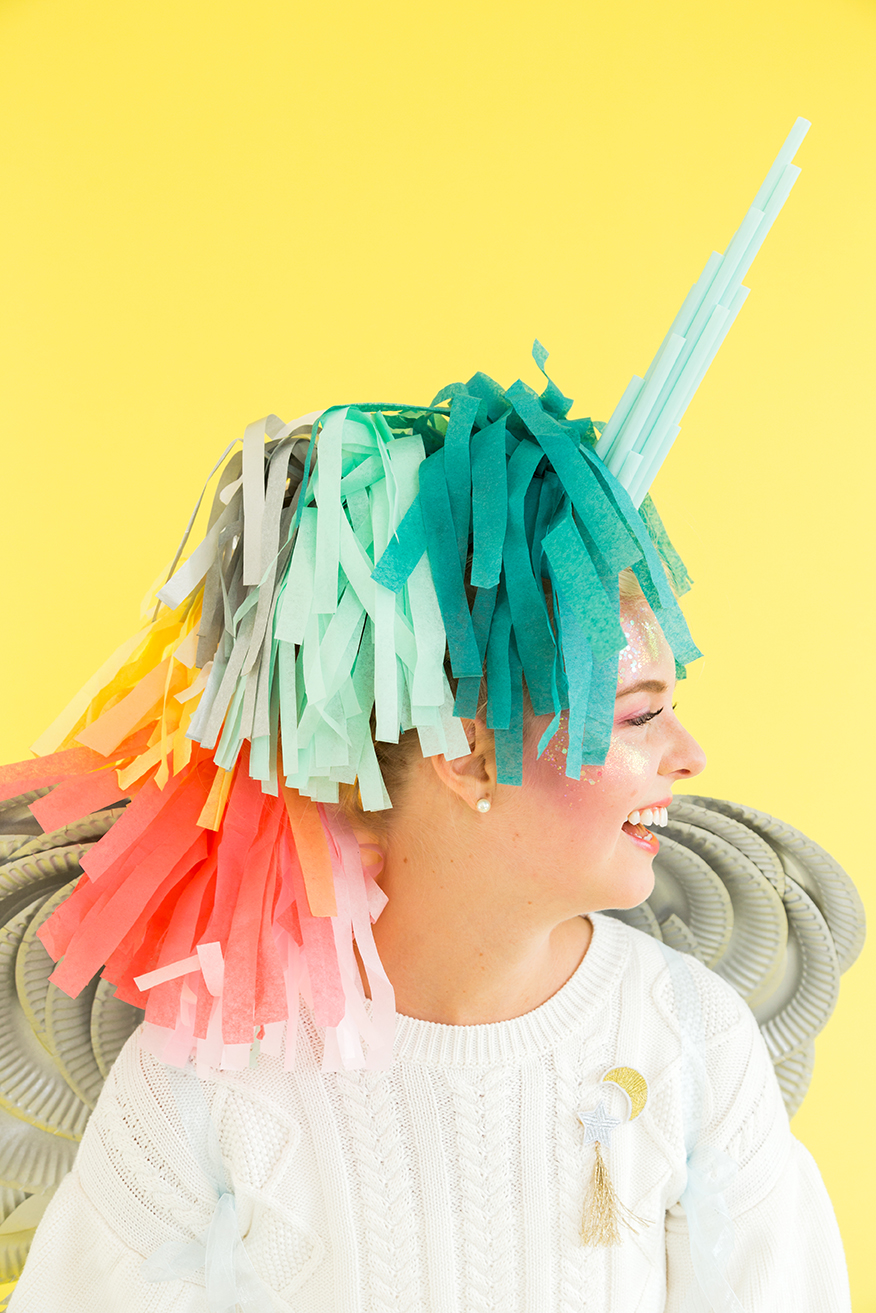
- Cut the straws in various lengths, leaving some uncut
- Glue about 15 pieces of straws together, creating a jagged, cone-like shape.
- Cut the straws evenly on the bottom.
- Glue the straws to a small circle of cardboard.
- Position the cardboard where you want it and wrap the hair around the cardboard and secure with bobbi pins.
To make the mane and tail
- tissue paper in rainbow colors
- scissors
- glue gun
- ric rac or ribbon
- safety pin
- rotary cutter
- cutting mat
- Take a piece of tissue paper, folding in lengthwise and then widthwise.
- Using a rotary cutter or a pair of scissors, cut 1/2″ wide strips up the tissue paper, stopping about an inch from the top. Continue cutting the strips until you’ve gone all the way across
- Unfold once and cut in half, so you have two fringed pieces
- Take one piece and unfold again, so there is fringe on both sides of the paper.
- Begin twisting the tissue paper up from the center, creating tassels on each end.
- Twist until the top and then fold over and glue so there is a loop at the top. Repeat for all colors of tissue paper
- Lay out the tassels in a rainbow color (you only need one tassel for each color), thread onto the ric rac, and glue in place.
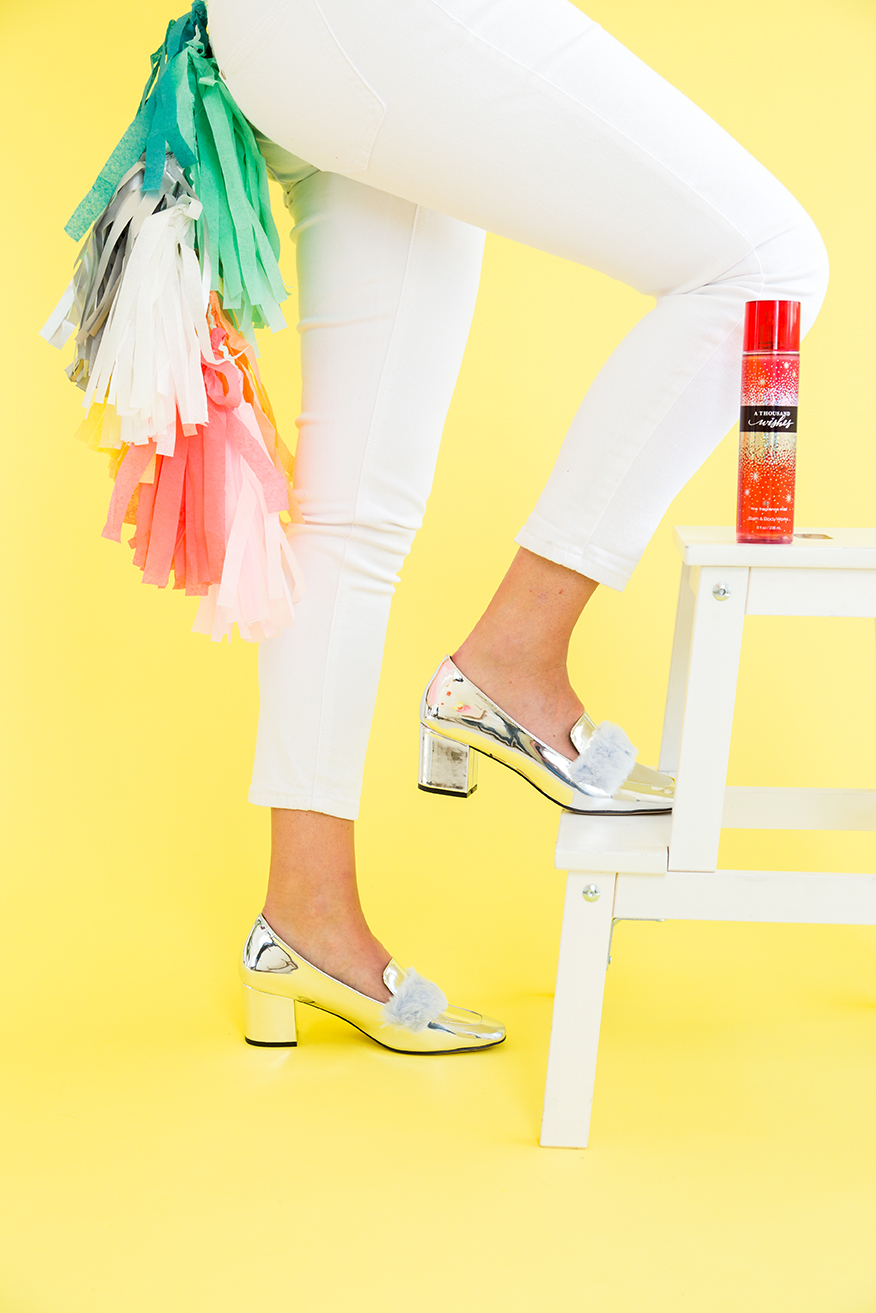
- Use the remaining tassels for the tail and repeat the threading and gluing process.
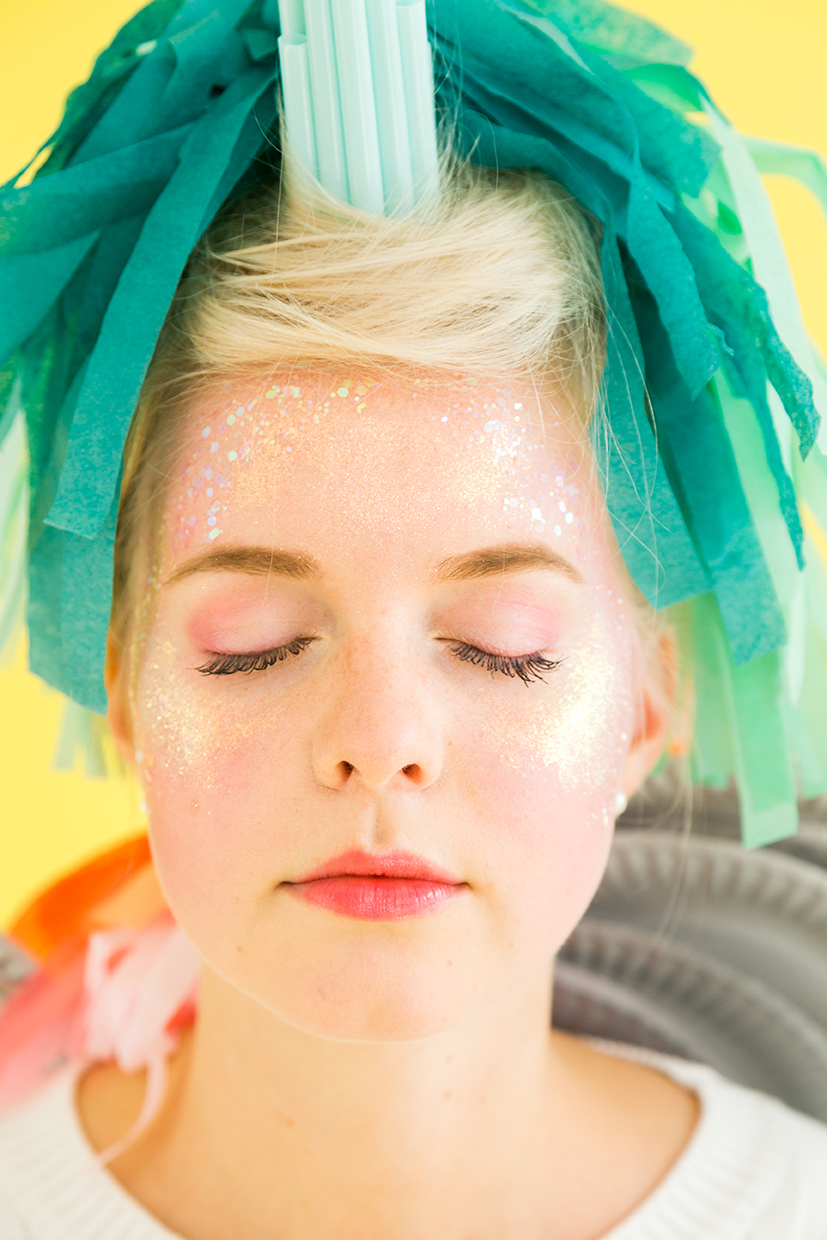
- your usual foundation
- pink powder blushes and/or eyeshadows
- (optional) purple eyeshadows
- iridescent cosmetic glitter (easy to find in the Halloween section at Walmart or online)
- **IMPORTANT SAFETY NOTE** NEVER use craft glitter on or near your eyes. Craft glitter is not manufactured to be safe for the eyes, so the blades that cut the glitter are not sanitary (can be rusty) and the individual pieces of glitter have much sharper edges than cosmetic glitter. Putting craft glitter on your eyelids or near your eyes puts you at risk for serious eye infection and potentially even loss of eyesight if a piece of glitter gets into your eye and causes lesions or irritation. Cosmetic glitter, on the other hand, is intentionally manufactured to be cleaner and safer near the eyes.
- aloe vera
- (optional) larger particle size craft glitter/sequins
- mascara
- pink tinted lip balm or gloss
- makeup brushes
- Apply your foundation as usual.
- Use a fluffy powder brush to sweep a pink blush along your cheeks, up to your temples and slightly onto your forehead.
- Layer a lighter, more shimmery pink (could be eyeshadow or blush) on top of your cheekbones as a highlight and up onto your temples and in the center of your forehead.
- Use a combination of those same pinks and more (if you have them) on your eyes, starting with the lightest color all over your eye and moving to a deeper pink tone for your eye crease and lash line. You can also add some purple to the crease or lashline as well. Just have fun with it!
- (optional) Brush a purple shadow into the hollow of your cheeks as a stylized “contour.”
- Using your finger, tap a light layer of aloe vera onto your cheeks and temples. Then use a clean finger to pat the iridescent cosmetic glitter onto the areas you’ve treated with aloe vera (this method will help the glitter stick).
- (optional) Continue to work out from where you started the glitter, layering aloe vera and then different types of glitter/sequins to achieve the look you want. Again, it is not safe or sanitary to put craft glitter on your eyelids or near your eyes. We used cosmetic glitter in all the areas closest to the eyes and then different types of larger particle craft glitter lower on the cheeks and higher on the forehead as we worked away from the eyes.
- Finish with mascara and your favorite pink-tinted lip balm
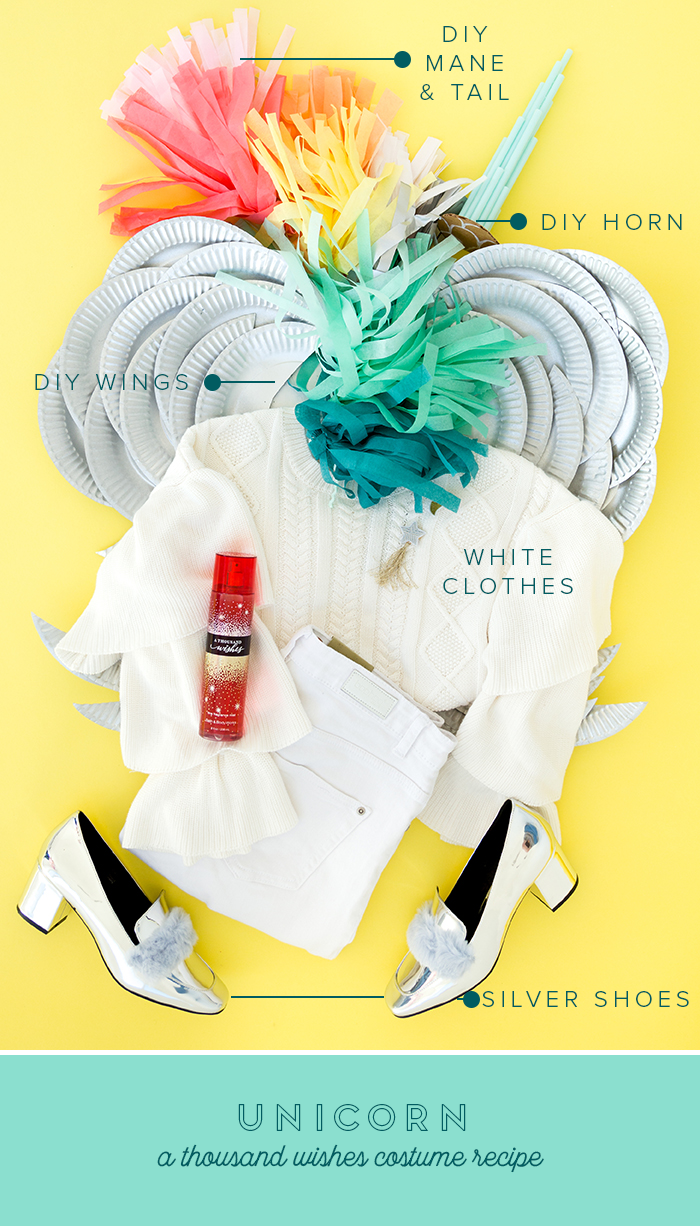
To complete the costume:
- DIY mane and tail
- DIY horn
- DIY wings
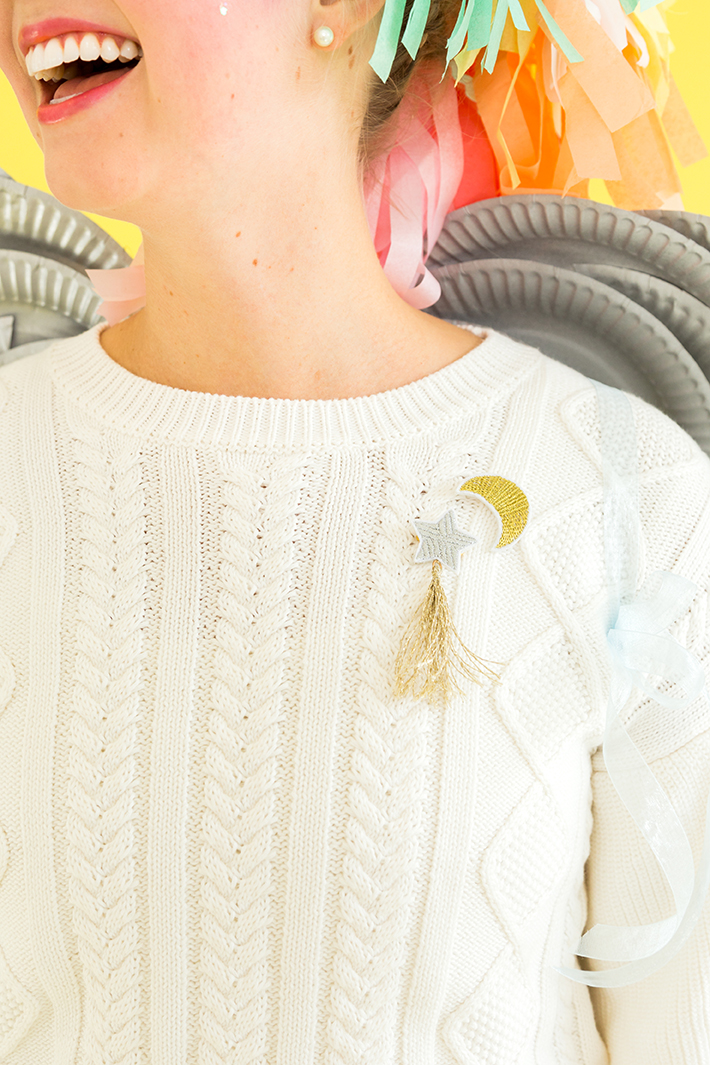
- white sweater
- white jeans
- silver shoes
SO! What are YOU going to be for Halloween? I’d love to see what you’ve got up your sleeve. If you make any Lars costumes, please post and tag them with #LarsHalloween.
Photography by Anna Killian | Hair by Kathy Lynch | Styling for Love and Sunshine by Aliza Wride | Make up by Natalie Krall | Love & Sunshine crafting by Merrilee Liddiard | Unicorn and Marie Antoinette crafting and unicorn modeling by Rebecca Young | Models for Love & Sunshine: Kim Kienow and Melissa Hendershot | Art directed by Brittany Jepsen
This post is sponsored by Bath and Body Works. Thank you for supporting the brands that help us create original content.


Comments