Part 2 of my collab with Jessica Peterson and Rubi Jones. Again, I didn’t have much time to prepare for this one, so most of our selection was from going through Caitlin (our model and my sister)’s closet. For her BFA final last year her theme was patterns and she made her own patterns and turned it into clothing and then made outfits for everyone in attendance. (I wrote about her show, She Comes In Color here). I thought it would be fun to use them for the shoot. She had also made a number of belts (see below for DIY) which Rubi styled into her hair as a turban. I love how it turned out! Caitlin made the geometric background on Jessica’s great blackboard backdrop. Rubi made an awesome tutorial on how to get her curls (she didn’t use a curling iron!), which you can find on her blog, She Lets Her Hair Down.
Caitlin was kind enough to show us how to make these belts. And you’ll never guess what they were made of. Go ahead, scroll down to the materials.
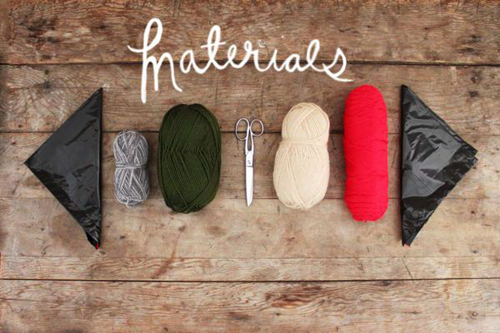
Materials: two large plastic trash bags (are you kidding?!), yarns in the colors of your choice, scissors
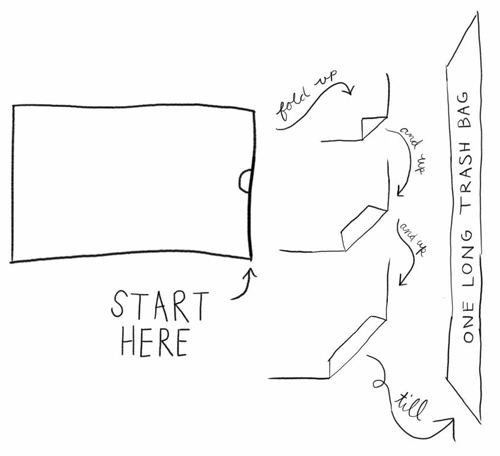
Step 1: Lay flat one of your plastic bags on your workspace.
Step 2: From the bottom right corner, fold the corner like you would a bandana until you reach the other top left corner. This makes it so you have one large trash bag to work with.
Step 3: Twist your trash bag. You will repeat the same process to the other one later.
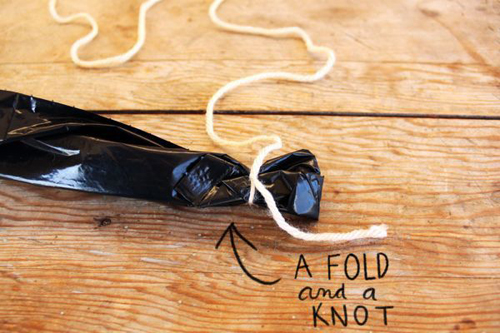
Step 4: Grab the end of your trash bag and fold the end in about an inch or so.
Step 5: Now grab one of your yarns and tie a knot.
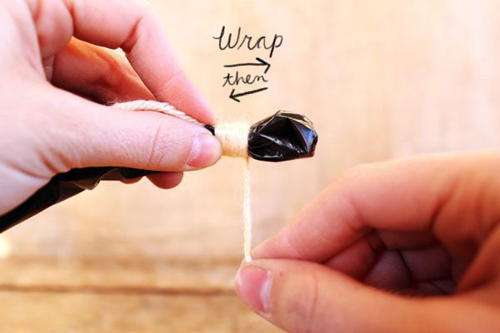
Step 6: Wrap the yarn so you go up close to the end of your folded trash bag and then come back down so you cover your fold. Make sure your wrap is good and tight here so your end won’t fall apart.
Step 7: Keep wrapping your yarn, giving a good 6 inches of length.
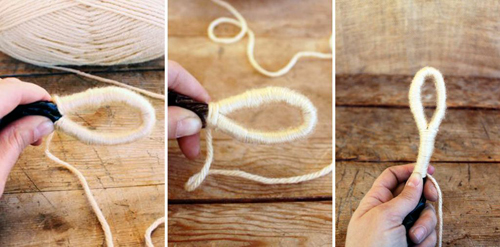
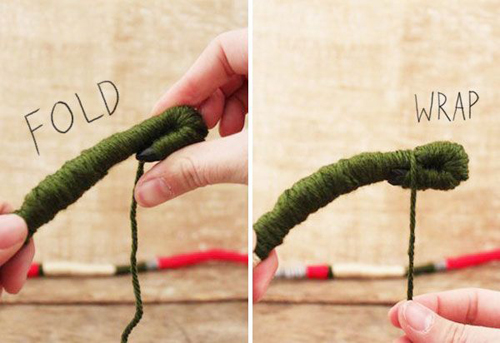
Step 8: Making the loop: Fold the end of the already wrapped trash bag. Make sure you have a good sized loop about 2-3″ hole.
Step 9: Pinch it tight.
Step 10: Wrap yarn tightly around your pinched bag. Wrap up towards the loop and then back down. This will make it secure.
Step 11: Keep wrapping your yarn another 2-3 inches. You can keep going longer but you can also change the color.
Changing the color of your yarn
Step 1: Cut your yarn, allowing it to have a good length of tail.
Step 2: Grab another color of yarn and tie it around the bag where you ended the last color. Give it about 1/2″ space.
Step 3: Make sure you knot the new color so the tail of the last one is under it.
Step 4: Wrap up the yarn close to where you last ended your previous color and then come back down and keep wrapping for as long as you would like.
TIP: The pressure of your wrapping can vary. This helps make it different widths throughout the whole belt.
Step 5: Change up the color whenever you wish to follow step 4.
Joining together
Step 1: Stop your wrapping until you are about 3-4″ from the end of your first trash bag.
Step 2: Grab your other trash bag. Repeat step one.
Step 3: Fold the end of the second trash bag so you have a good clean end.
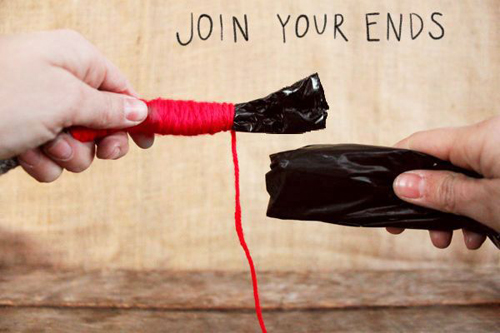
Step 4: Take your first wrapped trash bag and your new one and overlap the ends.
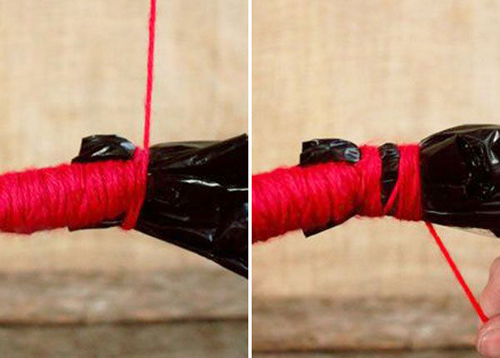
Step 5: Start wrapping around both of them.
Step 6: Tightly wrap your yarn in multiple places on both of the ends.
Step 7: Now you can go backwards to cover the first bag and keep wrapping until you come bac to the second bag. Keep on wrapping.
Step 8: Keep going until you have a strong joint.
Step 9: Repeat with all the colors you would like.
Folding the end
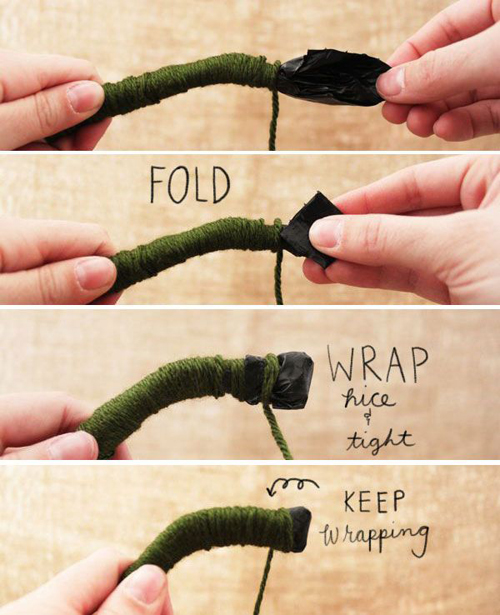
Step 1: Steop when you are about 2″ away from the end.
Step 2: Fold the end and wrap around the yarn to secure it down.
Step 3: Wrap until you reach the end.
Finishing up
Step 1: Fold the end about an inch against the bag.
Step 2: Pinch it tight and wrap it tightly so you cover it all.
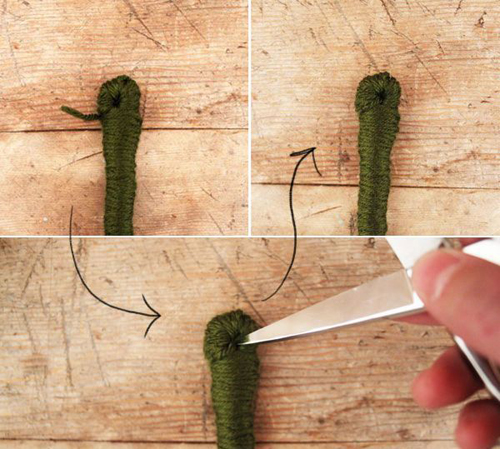
Step 3: Once you feel like you covered everything up, tie a knot through the hole of the pinched end.
Step 4: Cut your yarn so you have about an inch of tail.
Step 5: Grab your scissors and use it to tuck your tail in the little hole of the pinched end.
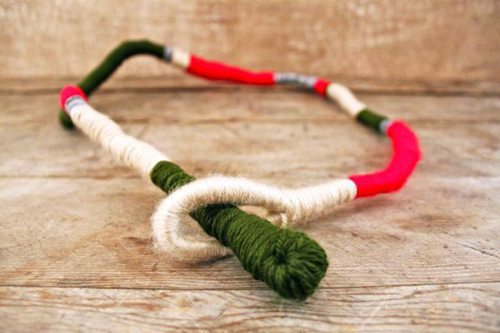
There you go! Use it as a belt, headpiece, necklace. The sky’s the limit!
Photography by Jessica Peterson
Hair (and tutorial on how to get her non-curling iron curls) by Rubi Jones of She Lets Her Hair Down
DIY by Caitlin Watson
Concept and styling by me


