

You know how terrariums are super in right now? Yes, they’re everywhere. I love the look and wish I could have them, but to be completely honest, they totally frighten me. As much as I love flowers, I have the biggest black thumb. I cannot keep a cactus alive. And then to have the responsibility of a mini eco-world in the form of a terrarium? That’s just way too much pressure.
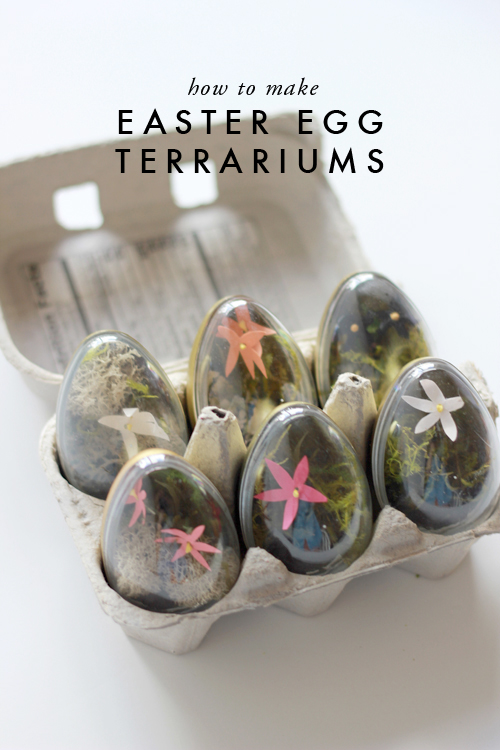
If you’re anything like me and wish you had a terrarium of your own (but can’t seem to keep any plant alive), this paper flower Easter egg terrarium is perfect for you! Read below for the full tutorial!
Materials:
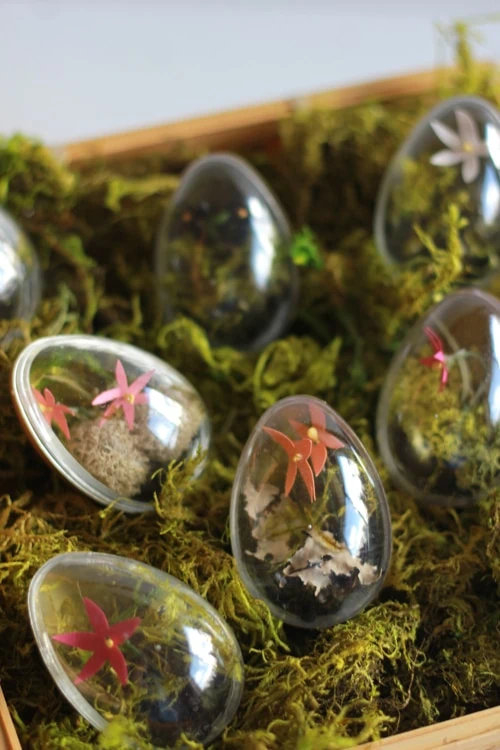
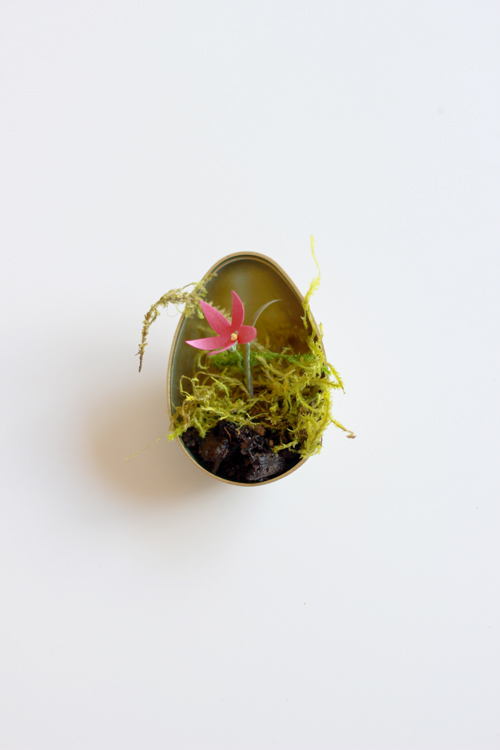
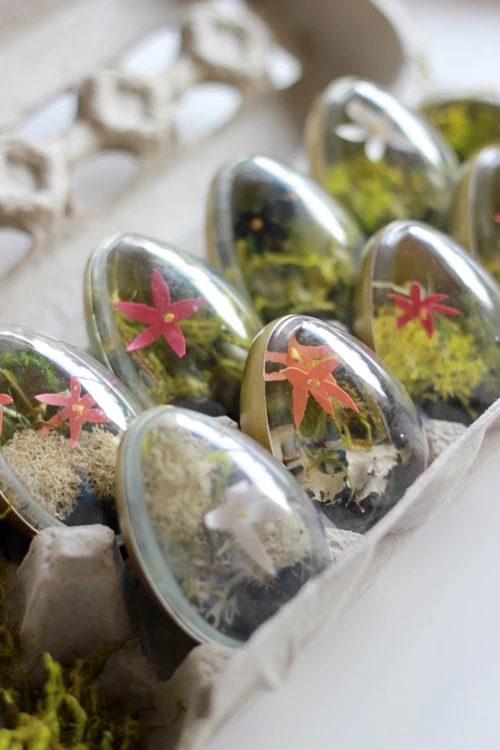
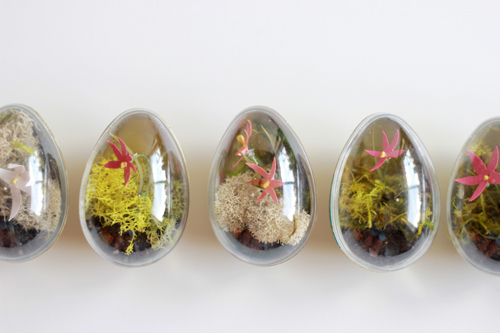
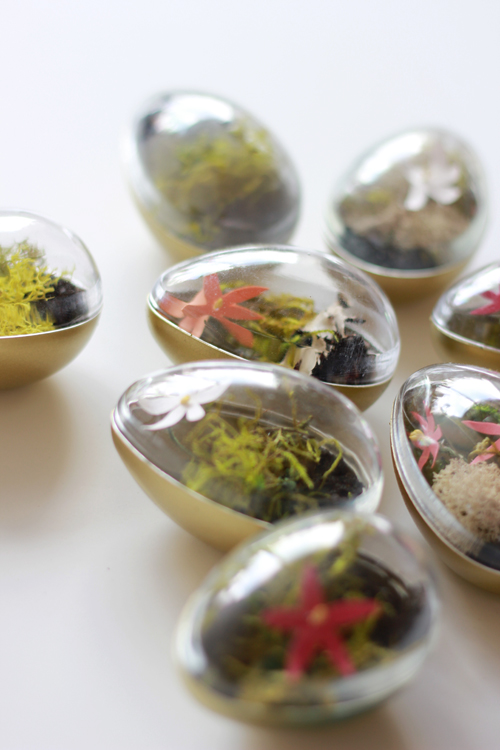
These Easter egg terrariums are the perfect craft for the holiday. When I came across these clear Easter eggs at Smith’s, my first reaction was “terrariums!” and then reality started to set in. I did what every adult evading responsibility does: I faked it. Yes, this is a fake terrarium. The dirt? Real. The moss? Real. The flower? Well, shouldn’t you know by now that it’s paper?! So, if you’re anything like me, you’ll be all for a fake terrarium. Much less pressure. But to give myself a little bit of credit, the egg is too small to have a living thing grow inside without bursting out of the seams. ALSO, there is no oxygen hole and any type of drilling would have shattered the plastic.
Am I forgiven?
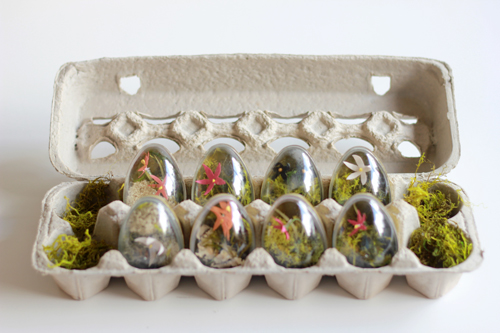
These terrariums are also great for kids to make. Plus, they’re small enough to fit in the palm of your hand and can easily be displayed in an egg carton! Learn how to make the Easter egg terrarium below!

DIY Easter egg terrarium
Instructions:
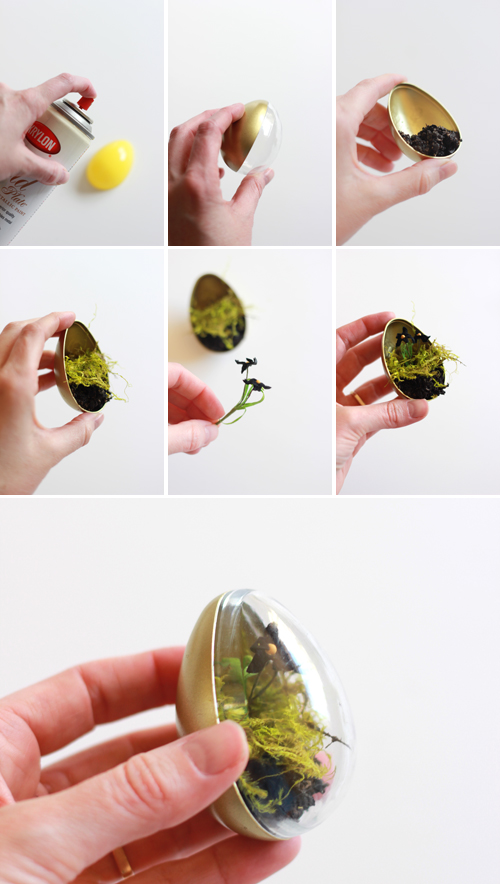
- Spray the colored egg part gold. Wait 24 hours to dry properly.
- Insert a bit of wet dirt into the bottom of the egg filling about 1/3.
- Add a bit of moss on top.
- Dig your wire flower into the dirt.
Done!
Materials for the paper flower:
- paper color of your choice
- green paper
- stamen (center of the flower–you can choose a color here)
- scissors
- floral wire wrapped in cloth (here’s my suggestion on Amazon)
- hole punch (mine is Martha Stewart 1/16″ from Amazon)
- glue gun

Instructions:
- Cut a circle, about 1/2″ diameter
- Make a rounded start
- Curl the edges up
- Make a punch in the center of the flower
- Add a stamen through the hole.
- Glue on the back side of the flower and hold.
- Cut a thin leaf in the green paper and curl with your fingers to give it shape.
- Take some wire and cut a piece smaller than the size of the egg.
- Cut the stamen down to a nub on the back side.
- Glue the wire to the nub of the stamen.
- Put a small amount of glue on the leaf and attach to the wire.


Comments