

It was so wonderful to meet so many of you at the West Elm Etsy Pop-up shop on Saturday. Thank you for coming!
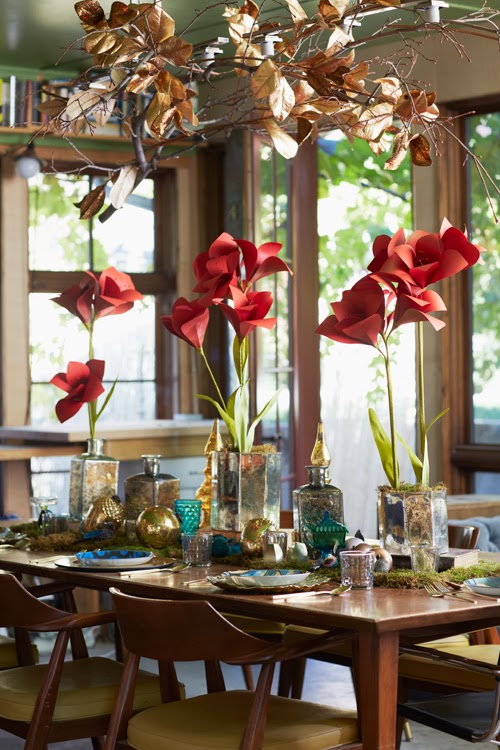
Speaking of West Elm, they approached me awhile back to style a shoot around a brand new DIY project that I could teach at an upcoming in-store event on November 14th. I chose to create a paper flower amaryllis that could be styled on a table spread for the holidays. And tell you what, I had a ball making them and styling them. They sent over a smorgasbord of products that I could use to make it all look pretty including their new plate set, flatware, mercury hurricanes, birds, butterflies, drinking glasses (and secretly I was hoping for a sofa and love seat–gah! they’ve got awesome stuff!).
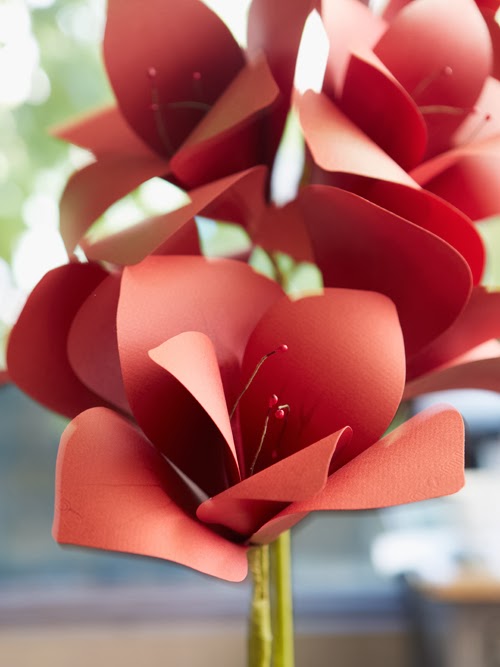
See the full paper flower amaryllis tutorial below!
I thought it would be fun to share a few tips on how to create the look for your own holiday table scene. Let’s go:
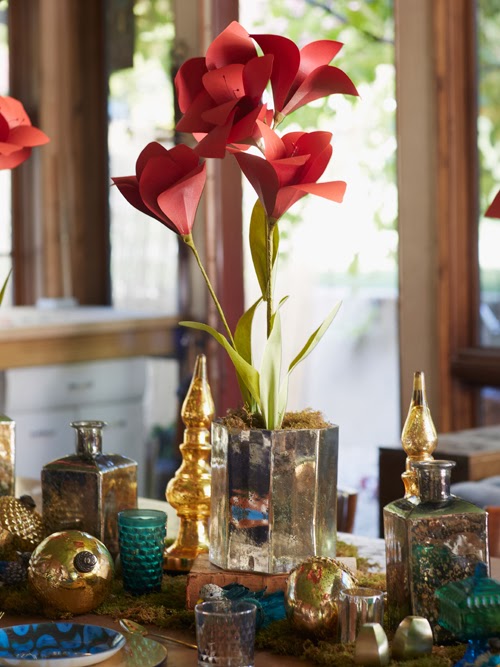
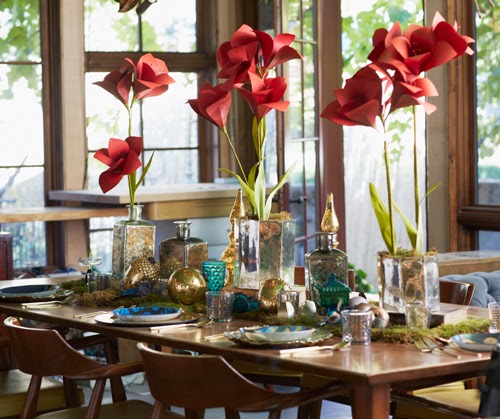
- Location. Ok, you’re probably limited to your own home, which I’m sure is lovely. If not, choose a location with room for a long table. I shot the scene at my friend Mary’s house. This is her studio space. Isn’t it divine?! She has grapes dangling outside the windows and this huge table to work on. It’s really dreamy. I thought it was the perfect place to hold a holiday dinner. I created the amaryllis and set them into their Cityscape mercury hurricanes. They acted as the perfect vases, doncha think? And they’re on sale for less than $15! Go get em! I also used these octagonal ones too, which are so lovely.
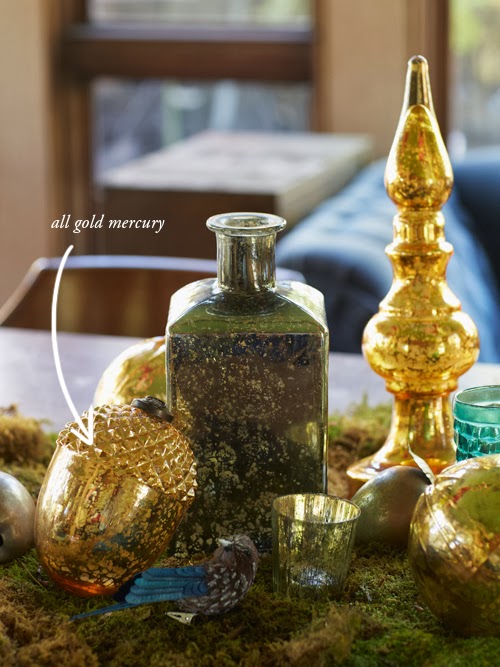
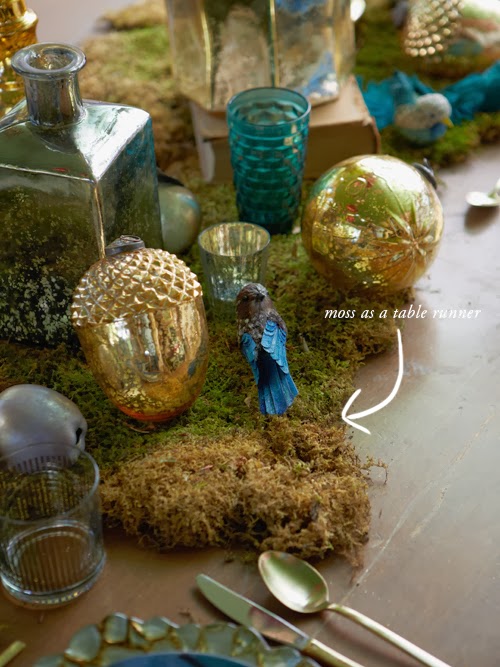
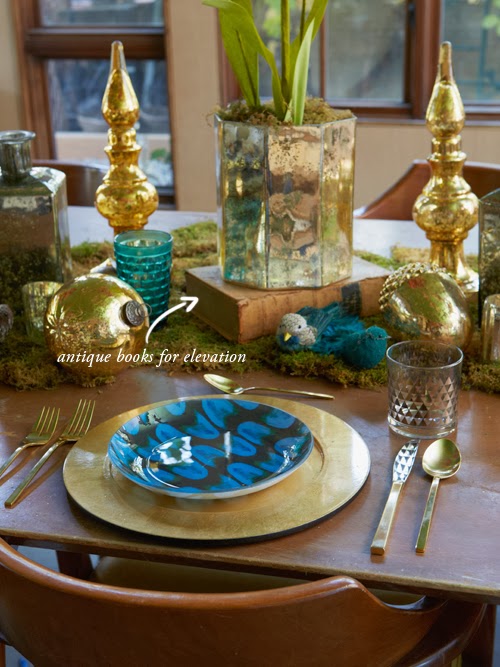
- Centerpieces. Paper flower amaryllis. I used these as the focal point of the scene by making them a tad oversized and tall. Tall enough–just above eye level–so that they aren’t a bother when you’re trying to speak to someone across the table. I added in these mercury glass bottles and votive candle holders and then some of Mary’s own Christmas collection with the acorns and tall, gold urns.
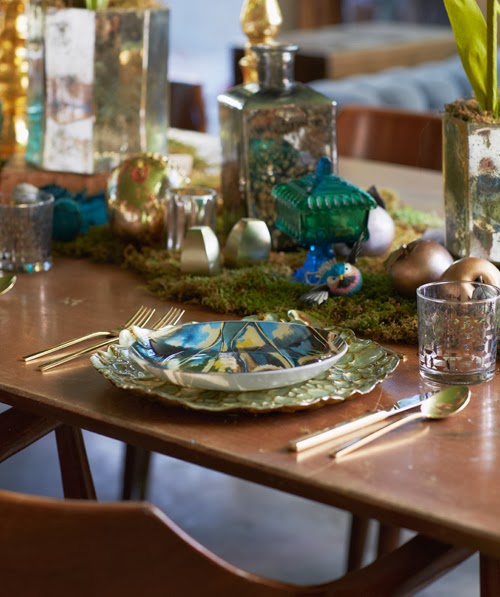
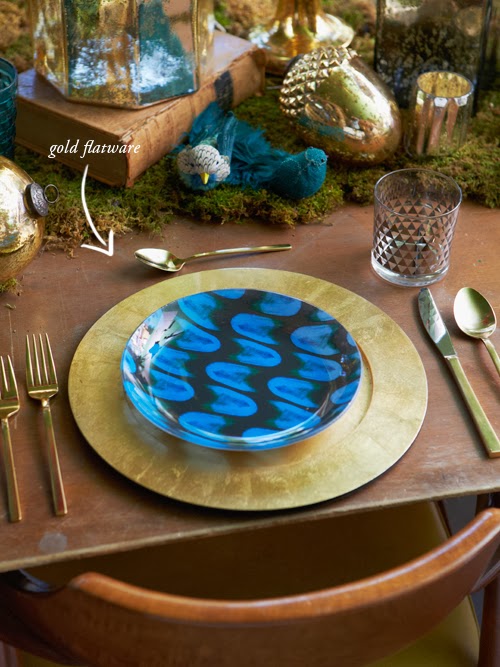
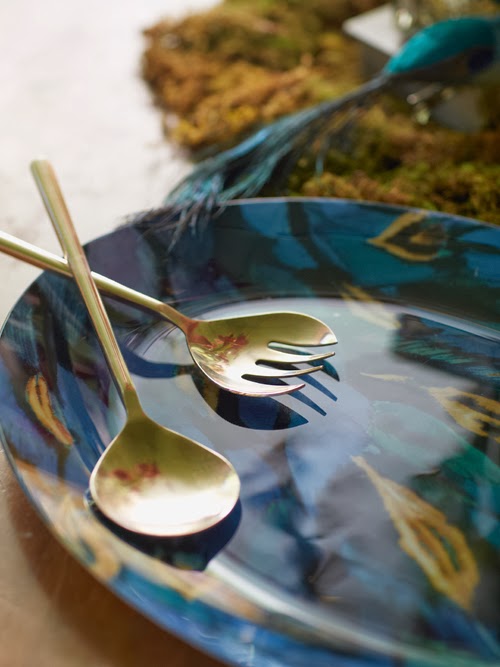
- Gold flatware. I’ve been wanting some gold flatware ever since I first saw them popping up a couple of years ago around the web. They are gorgeous. And such a scene stealer. I’ve been using them ever since and though they can only be washed by hand, I’m still a huge fan. Take a look at them here.
4. Moss as a table runner. I used patches of moss to create the length of a table runner for the scene. I wanted something that would add a bit of volume to the table and some depth and this was perfect. Plus, it’s so easy to store. All you have to do is pile it up in a bucket and leave it outside.
5. Salad set and dinner plates. I used West Elm’s rose gold salad set against the beautiful platter and dinner plates. I love the colors with the peacock blue and teal. So moody! I added in some of Mary’s vintage glass collection too.
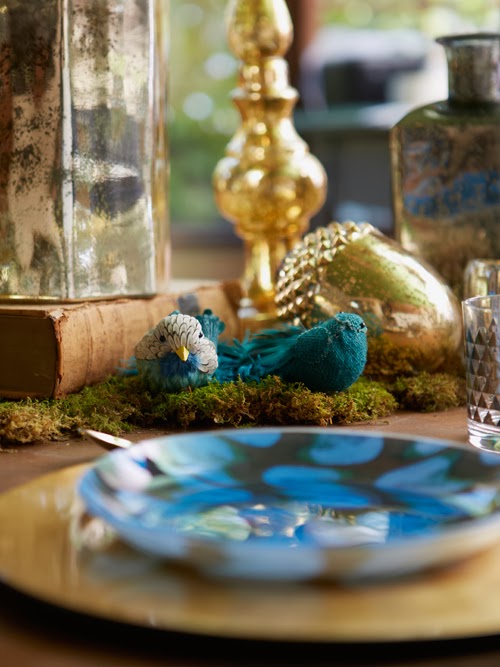
6. BIRDS! I love their new collection of bird ornaments. They come with a clip to put them on a Christmas tree or what not, but I added them into the table scene. Here’s the peacock. I was really wanting to style them in their brand new cloches, but they weren’t available yet. Dommage!
7. Set the arrangements on some antique books. This provided such a lovely elevation to the scene. You’ll want to create a pattern of objects where some are higher and some are lower. I found them to be the perfect way to create the height.
8. Gold metallic glassware. I loved the geometric, mid-century vibe, these gave off. Find them here.


With that, I’ll be teaching how to make the paper flower amaryllis on Thursday, November 14th at the SLC West Elm. RSVP here.
AND, I’ll be teaching how to make them THIS SATURDAY at the San Clemente Art Supply in South Orange County as well as some other gift wrap ideas. I’d love to see you there!
Well, with that, I’m off to SoCal for the week for a project and this workshop. I better go catch my flight!
photography by Nicole Gerulat
This project was done in collaboration with West Elm.
Comments