

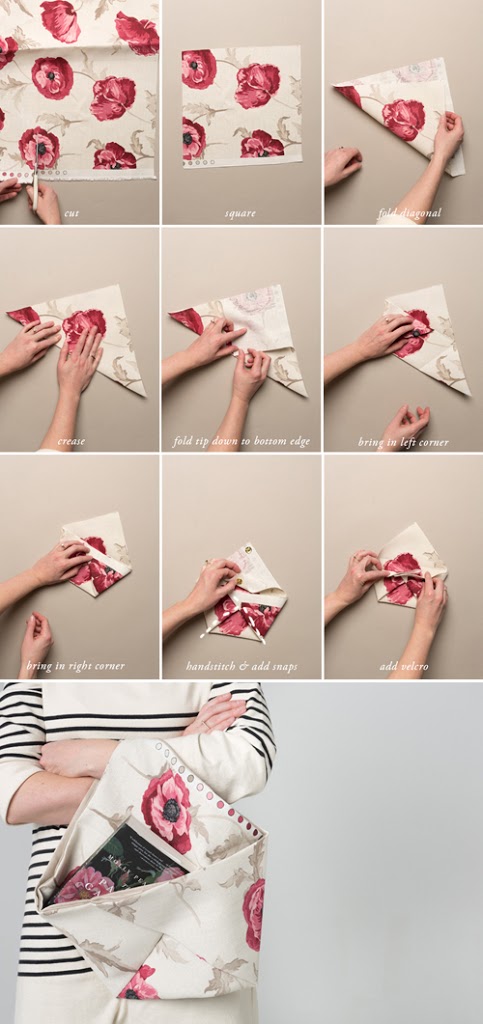
How to create the No Sew Origami Tote Bag:
- Cut out a piece of fabric in a square (I left the selvage on mine to be cheeky). The top image was made out of a square 24×24″ and the bag in these step by step photos was made with a 12x 12″ square. If you want to add a liner, which I did, cut out two pieces of fabric in the same size squares.
- Optional: If you’re doing one with a liner, put the squares faced together and sew around the edges leaving a 4″ gap. Turn it inside out and iron flat. Hand sew the edges closed.
- Fold the diagonal points together and crease the edge (use an iron to press the lines)
- Fold the top point down to the bottom edge and crease. You will use this creased line as a guide.
- Bring the left tip to the new guide line and crease.
- Bring the right tip over to the guide line and crease.
- Hand sew the two folds to the bag.*
- Add a snap to the top of the corners.
*No-sew option. Apply velcro to keep the folds affixed to the bag.
Voila!

Comments