

Materials:
- cardstock and normal weight colored paper (scrapbook paper works well! or buy the custom color packet I made for this project here)
- bone folder
- pencil
- cutting machine or craft knife or scissors
- craft glue or glue gun
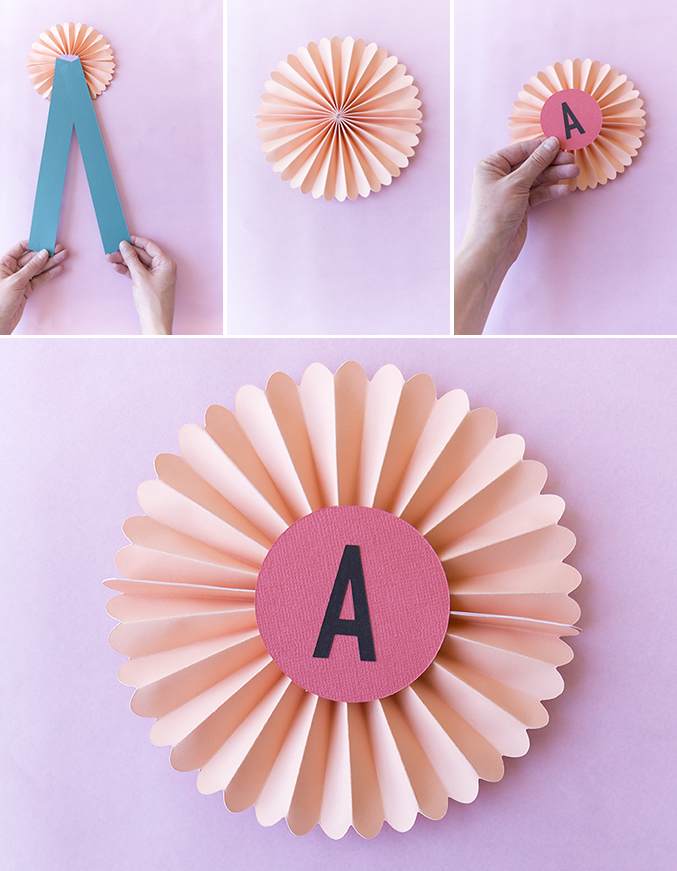
Step 1: I used a cutting machine (this is the one I use), to cut out the shape for my paper rosette. I found this pattern and cut out two for each ribbon. 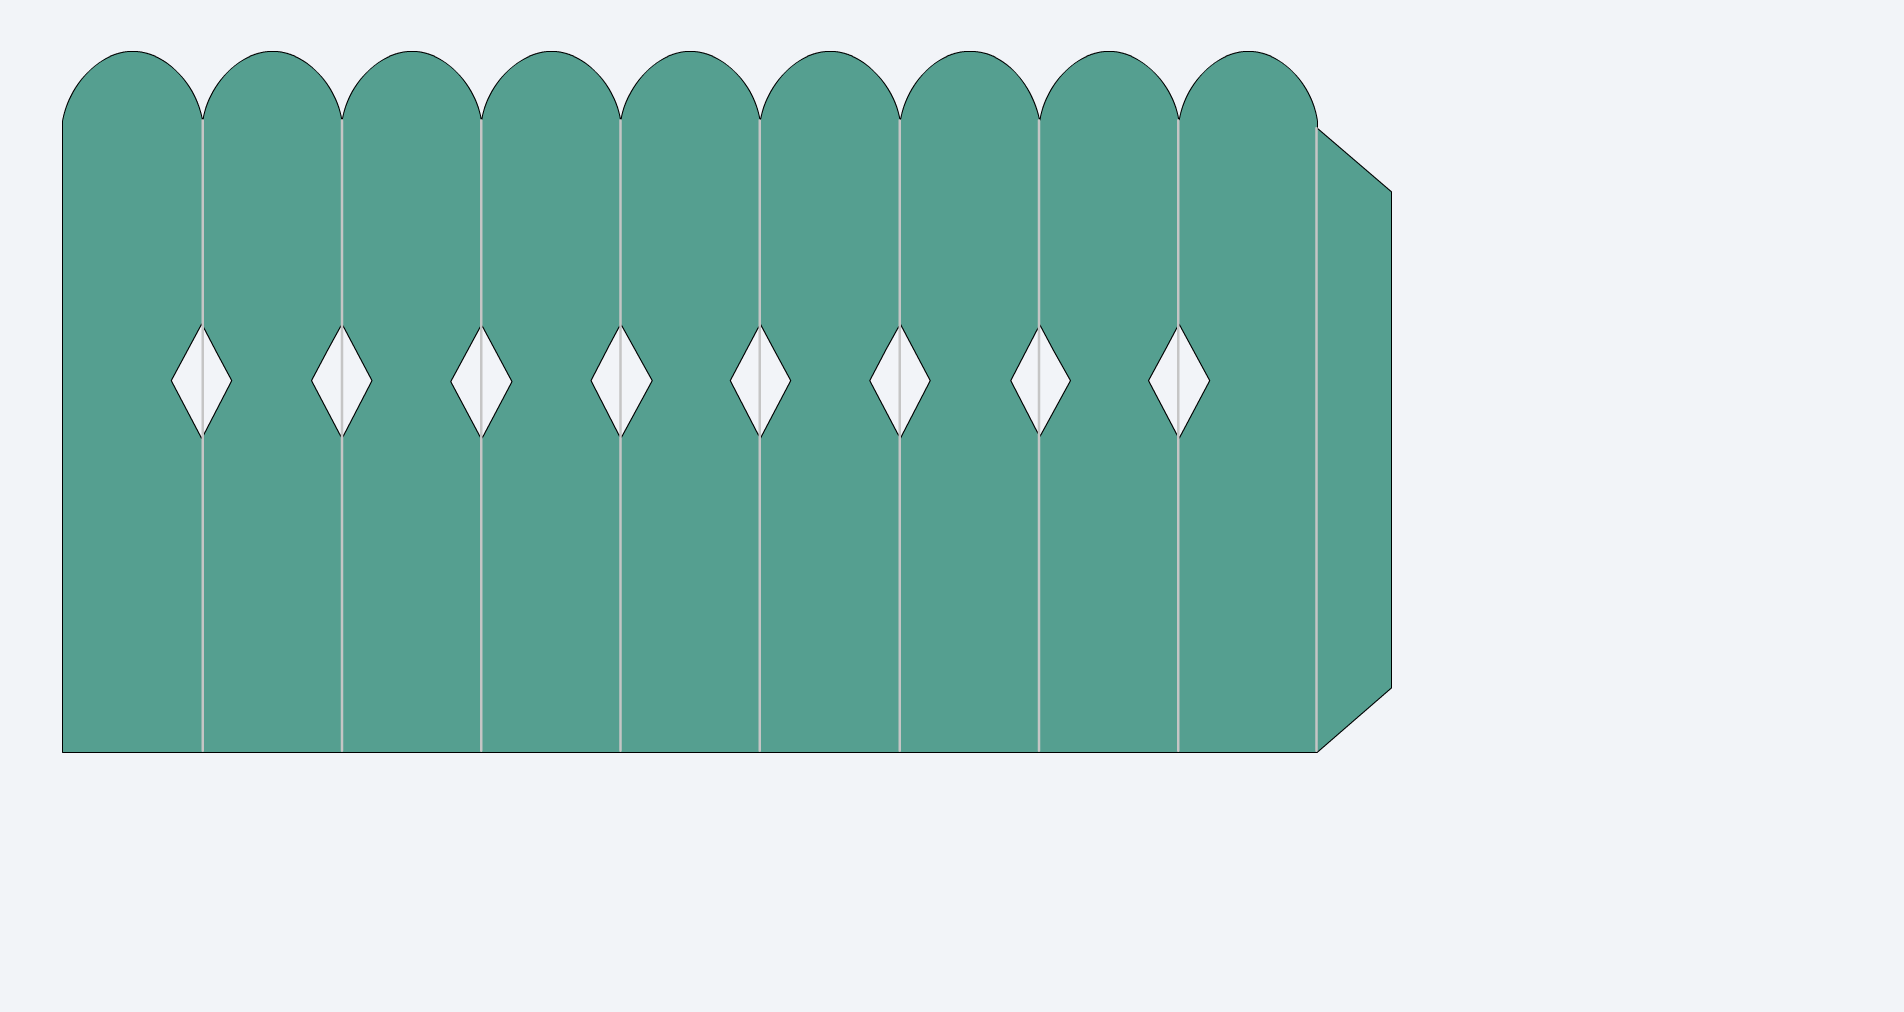
Step 2: If you don’t have a cutting machine, cut out a strip of paper 3″ wide and 7″ long and do an accordion fold about 1/2″ wide. Cut a fun pattern on one side to give it a shape (like a scallop or point). I show how to make a rosette here, but you’ll glue two of them together so that they form a round circle. Glue.
Step 3: Cut out a circle. Again, I used my cutting machine, but you can use a punch or trace a circle and cut around it.
Step 4: A cutting machine is handiest for making letters so once again, I cut out letters using my machine that were slightly smaller than the circle. If you don’t have one, print off a letter from a word processors and trace the letter onto a piece of paper and cut out.
Step 5: Cut two strips of paper about 1.5″ wide and as long as you can (mine was a 12″ paper) and glue to the back of the rosette.
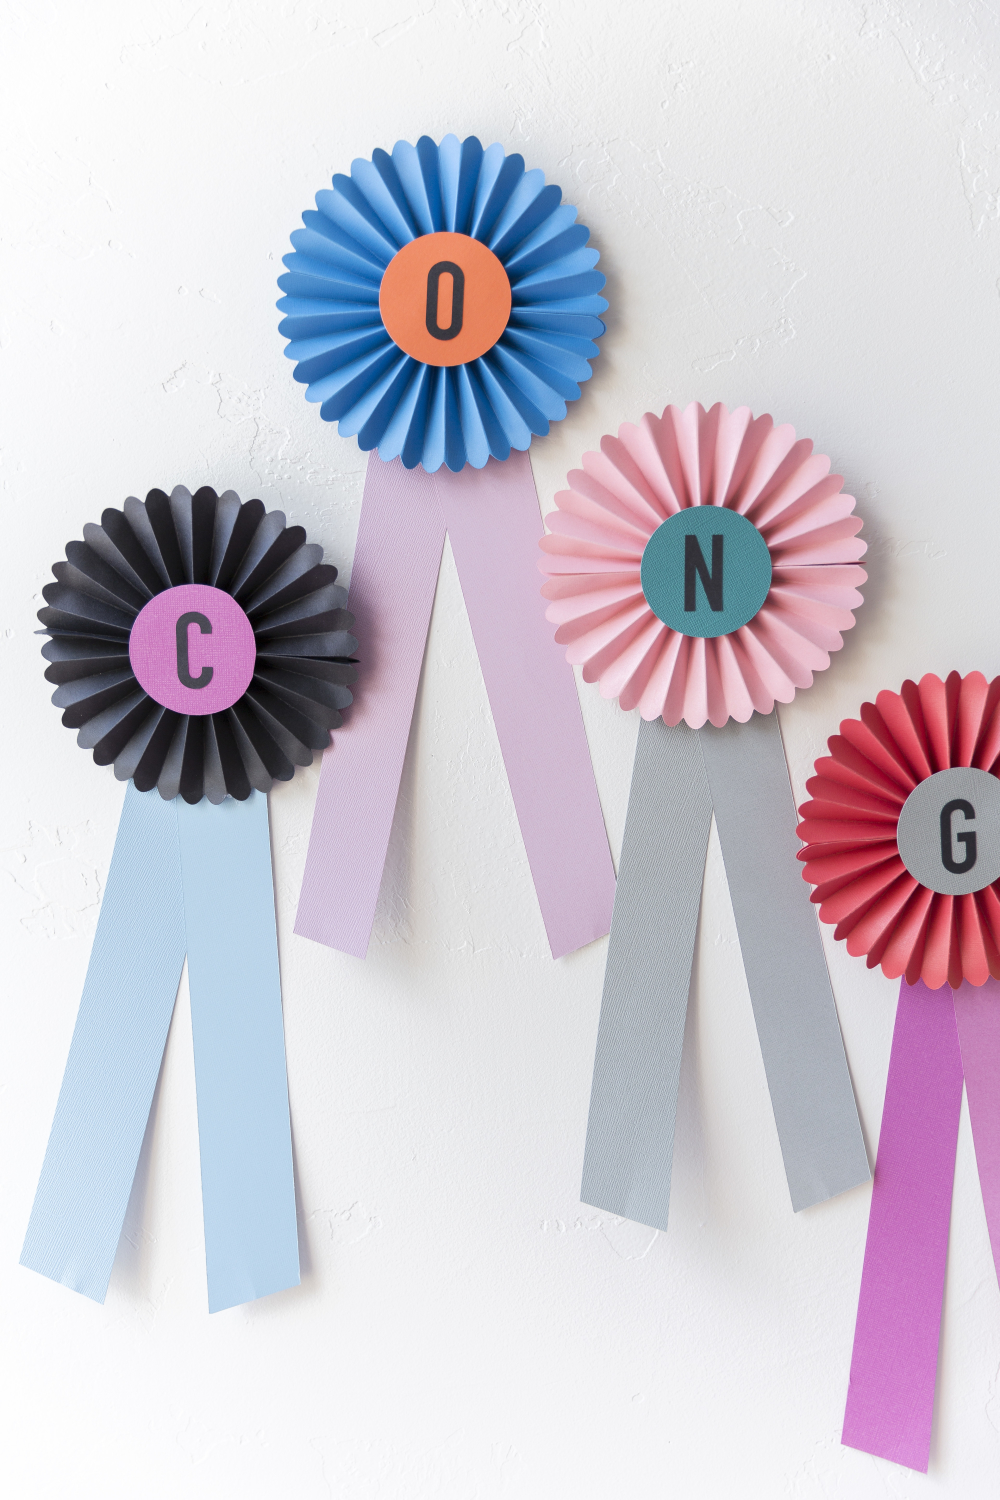
Donzo! These are great for parties or congrats or anything really. I keep mine in a storage box so I can pull it out whenever I need it!

Comments