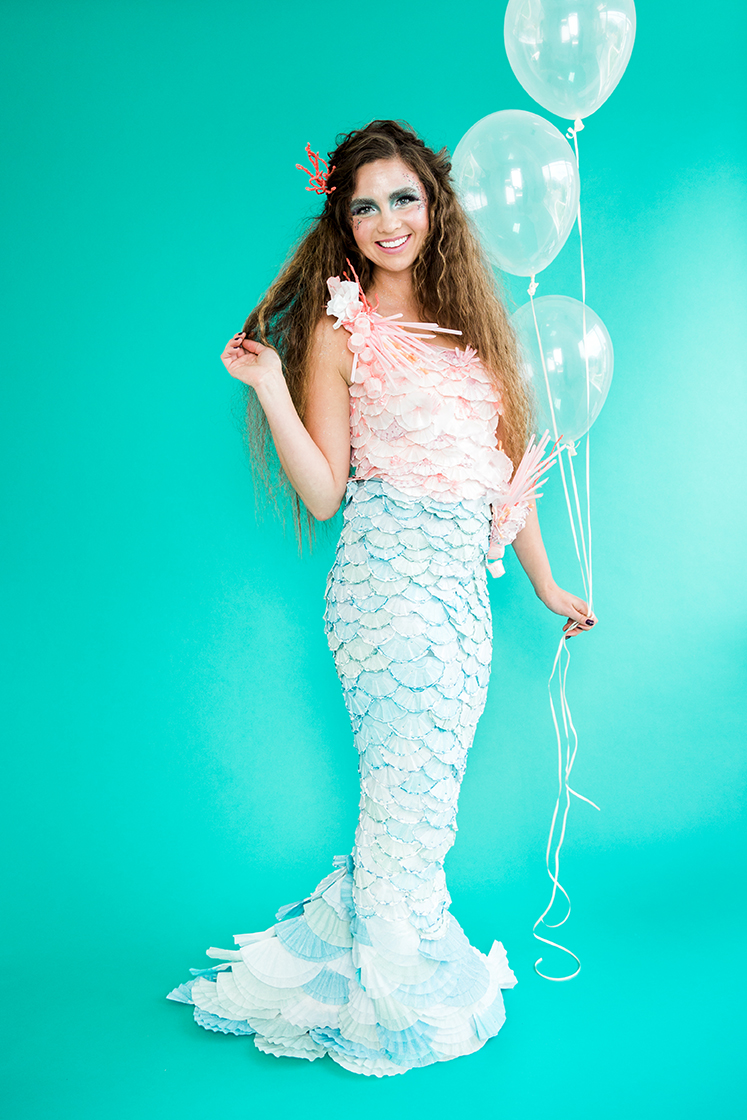
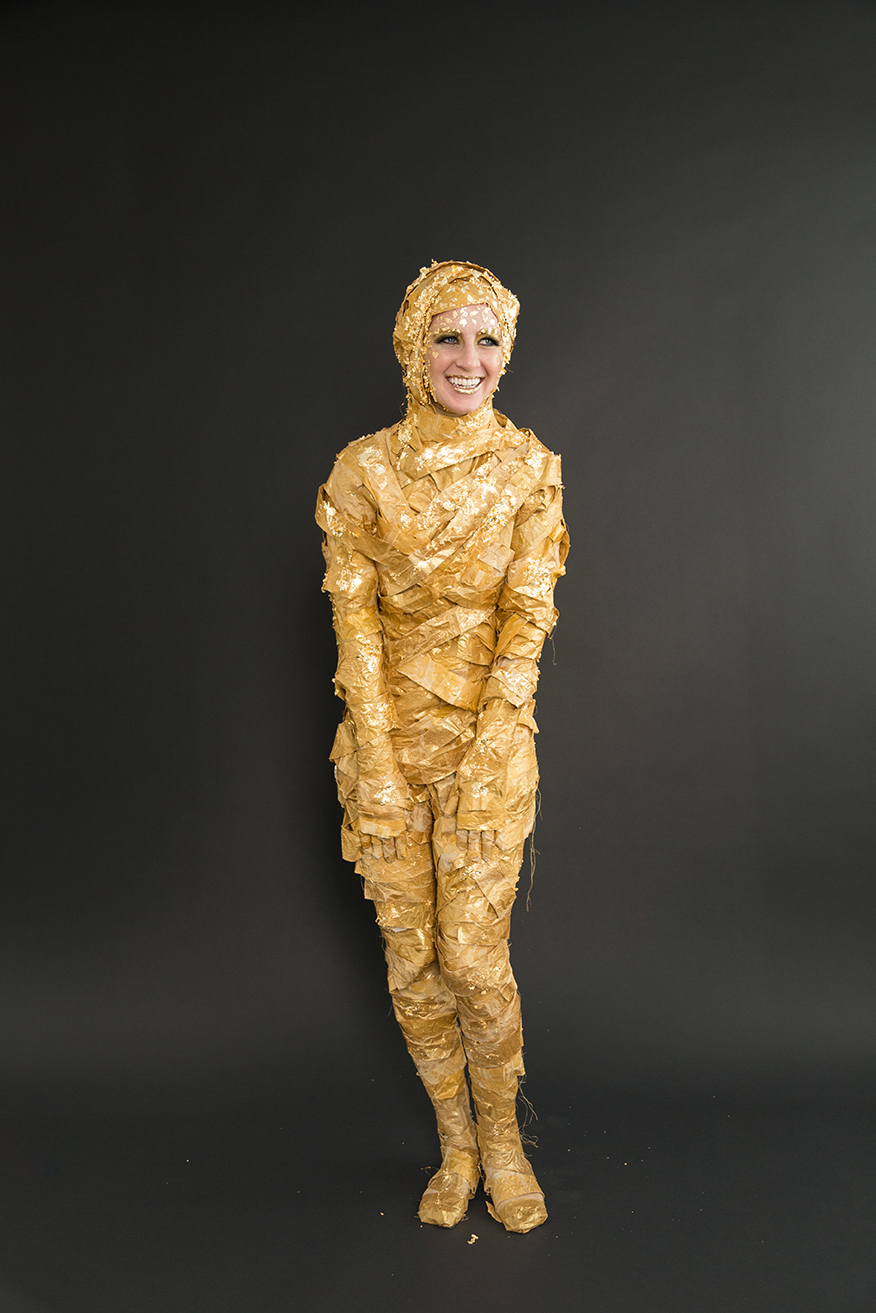
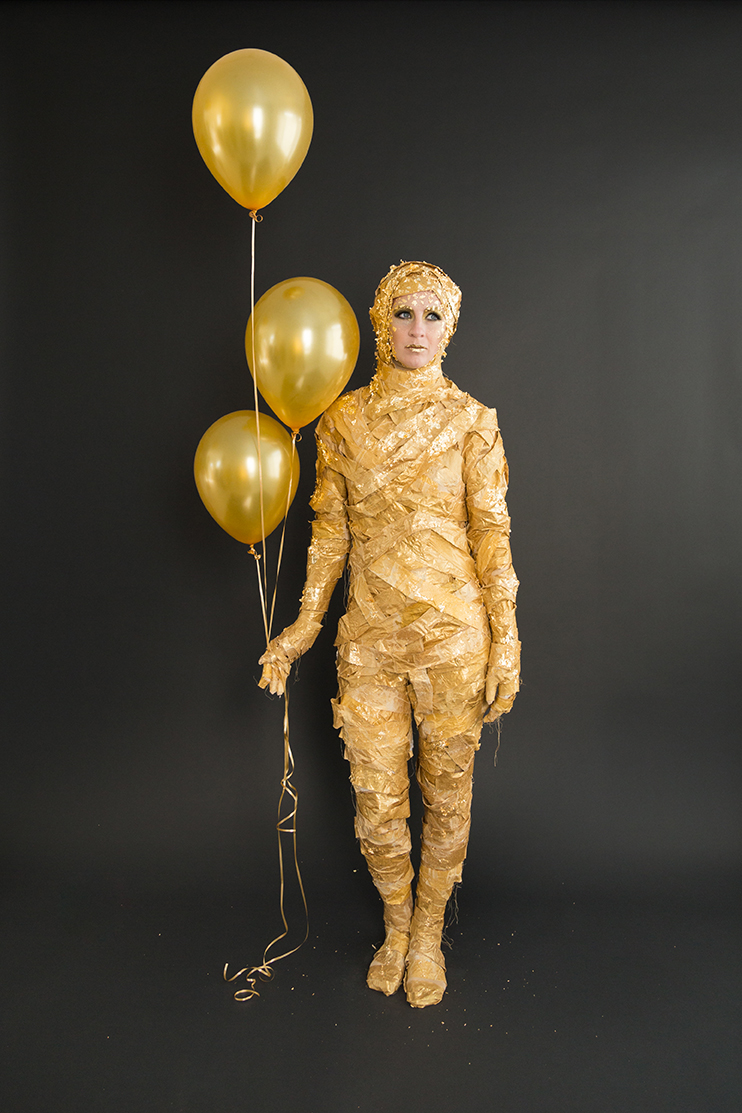
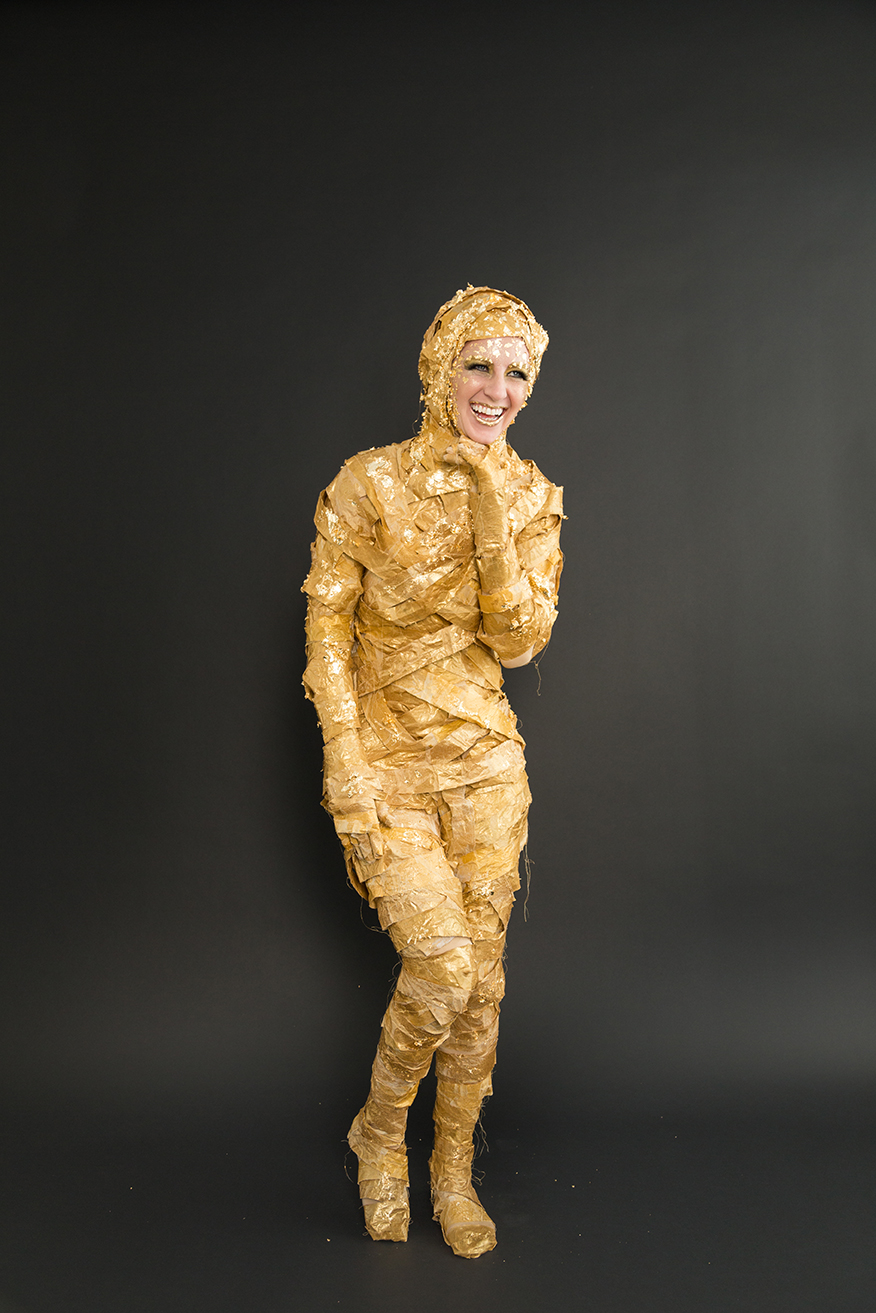
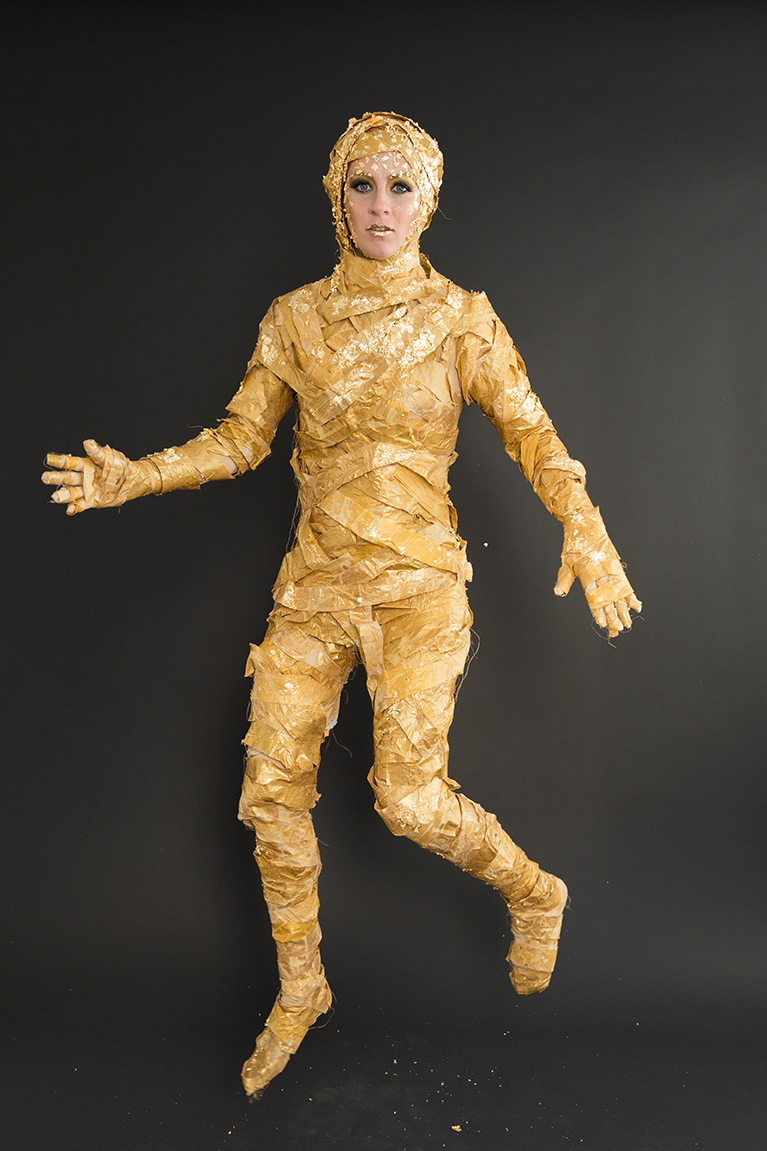
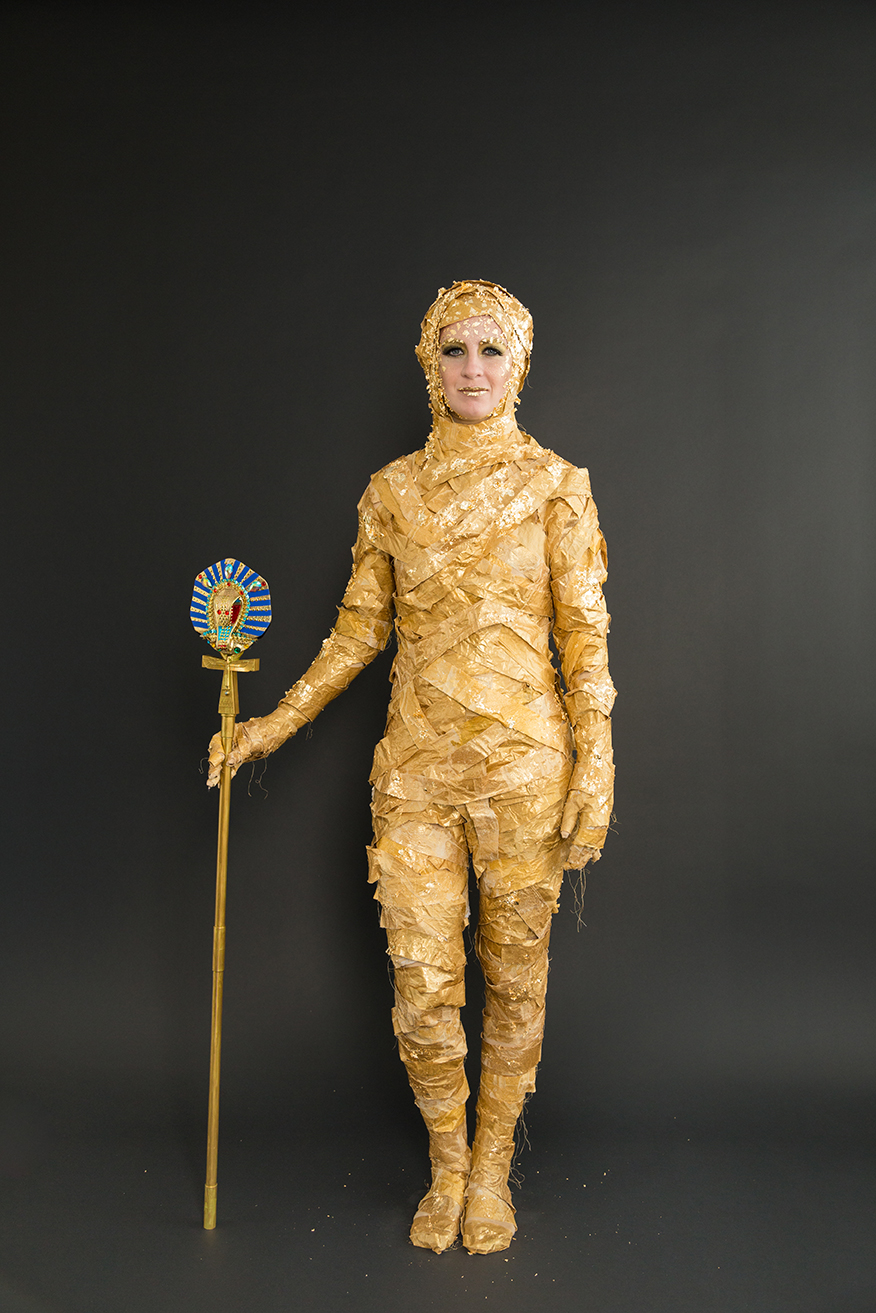
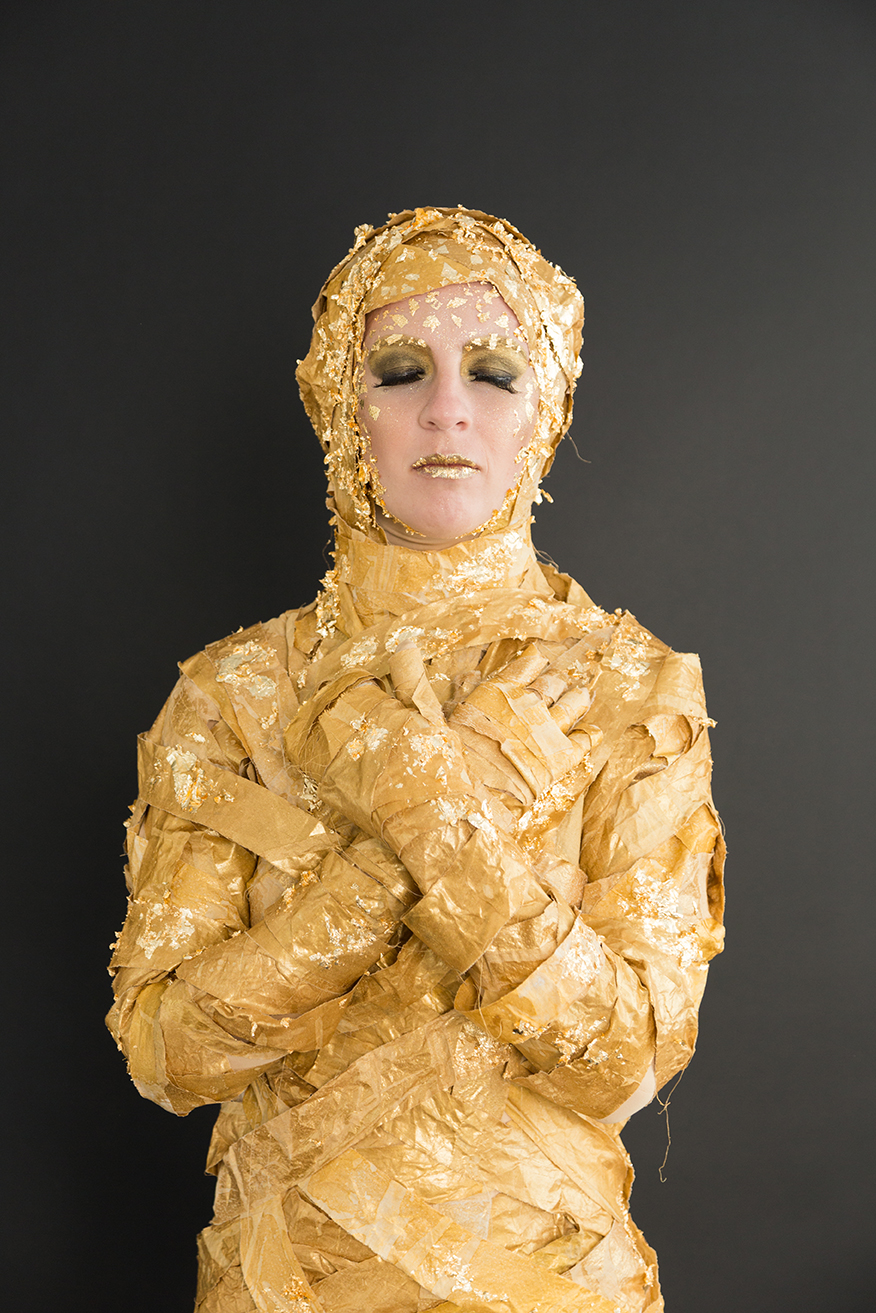
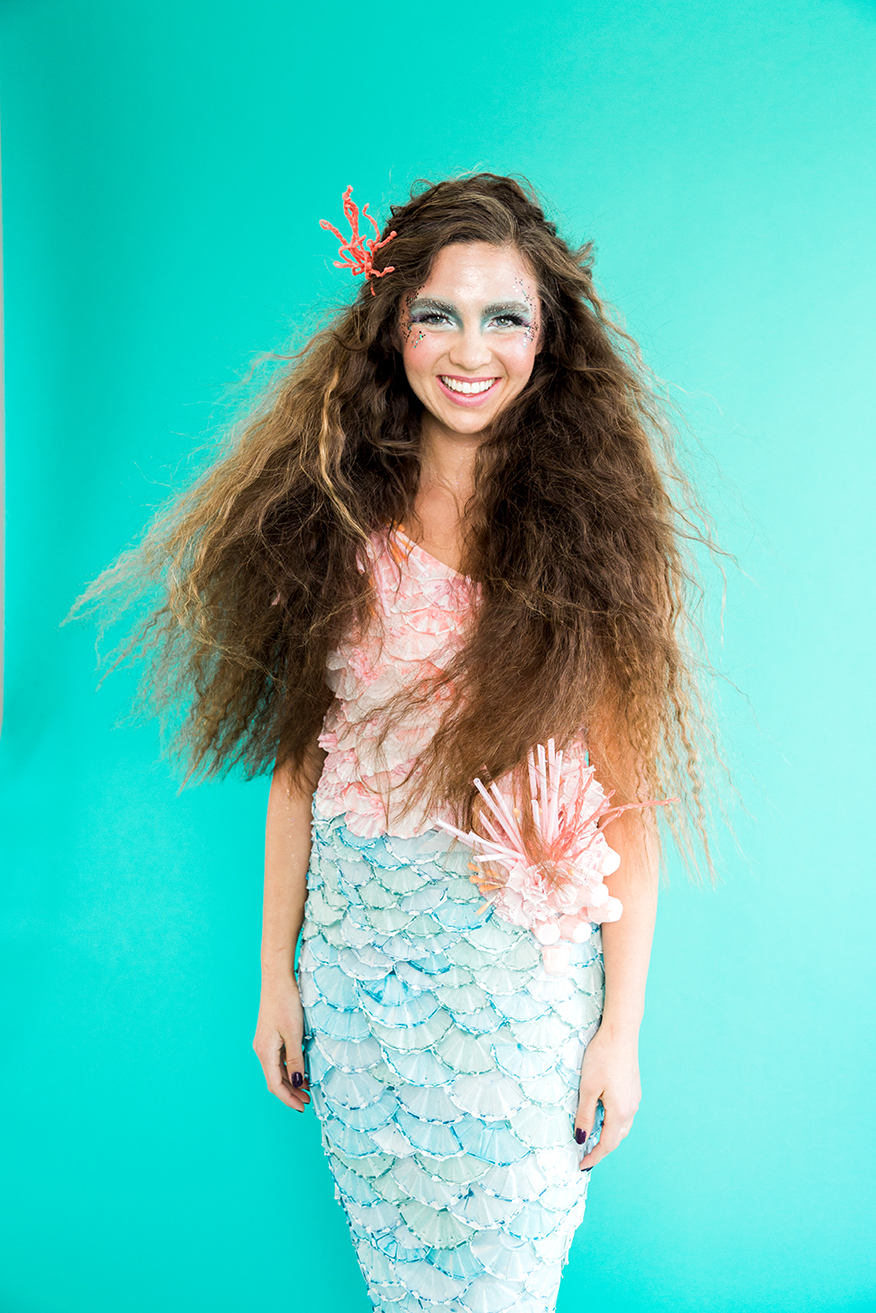
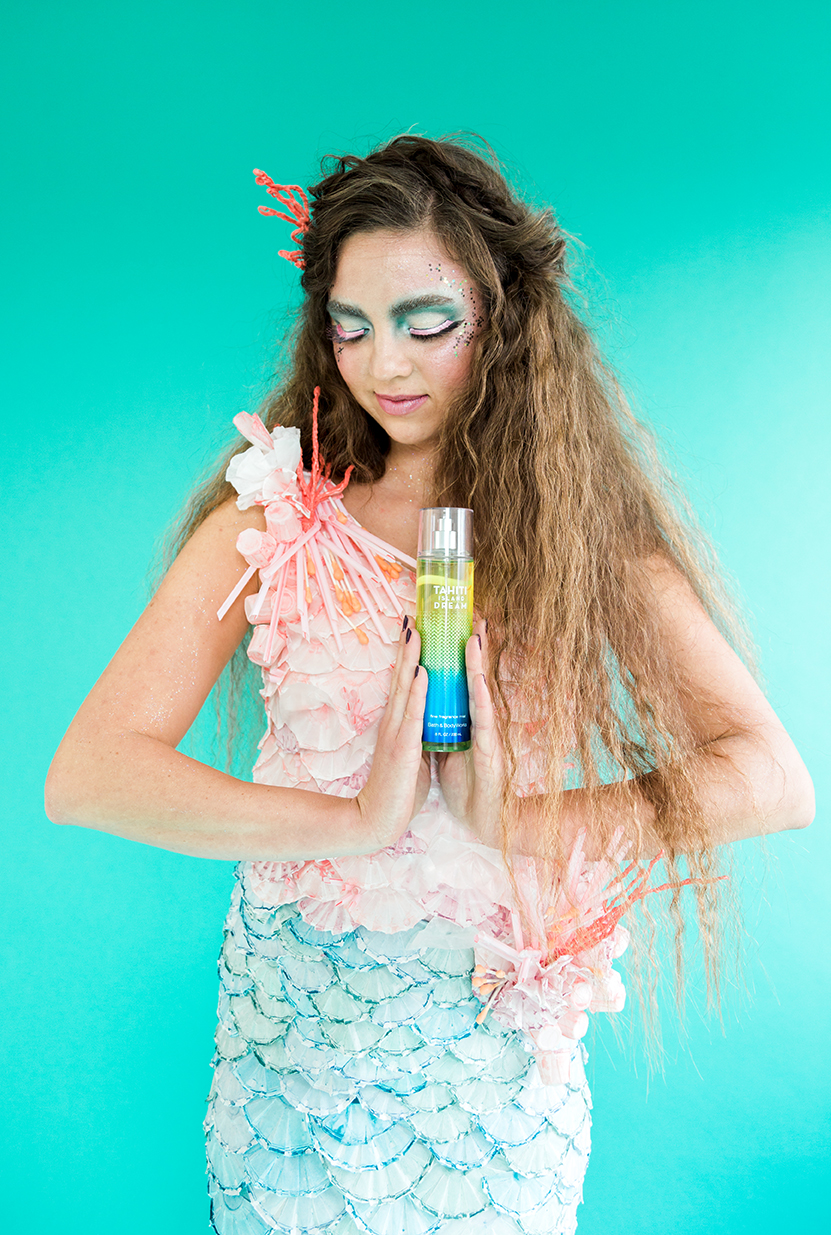
We’re finishing up our Halloween series with Bath and Body Works (you can see the first one here and the second one here) with 2 showstopper costumes made from everyday materials. We were inspired by Tahitian Island Dream to create a mermaid and Warm Vanilla Sugar to create a gilded mummy. By “showstopper” we mean that these ones will take a bit more time, but the results are so so worth it, no?! We had every intention of going the traditional fabric/sea shell route, but after seeing how much fun it was to create the unicorn, hippies, and Marie Antoinette costumes, I wanted to get my hands on some non-traditional items again. Can you guess what we made the mermaid costume out of?
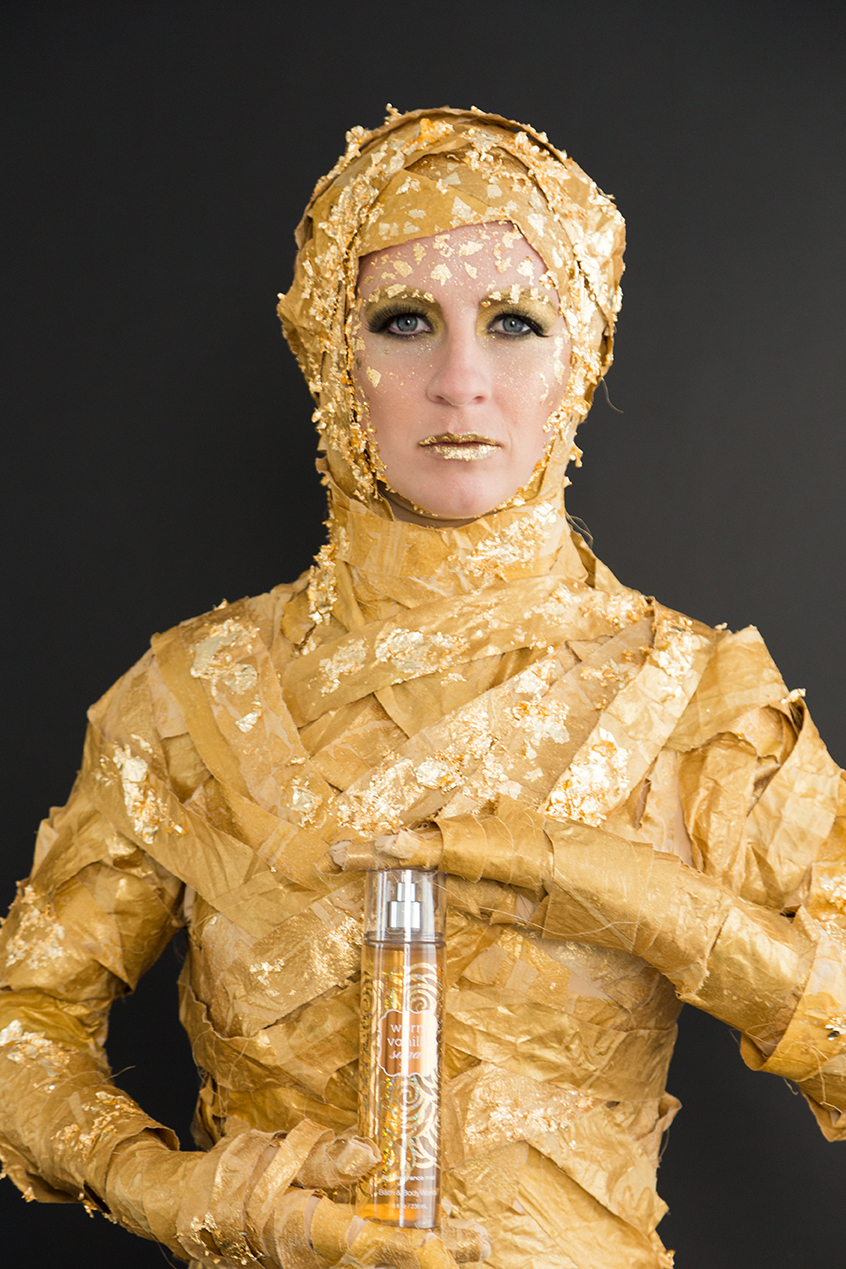
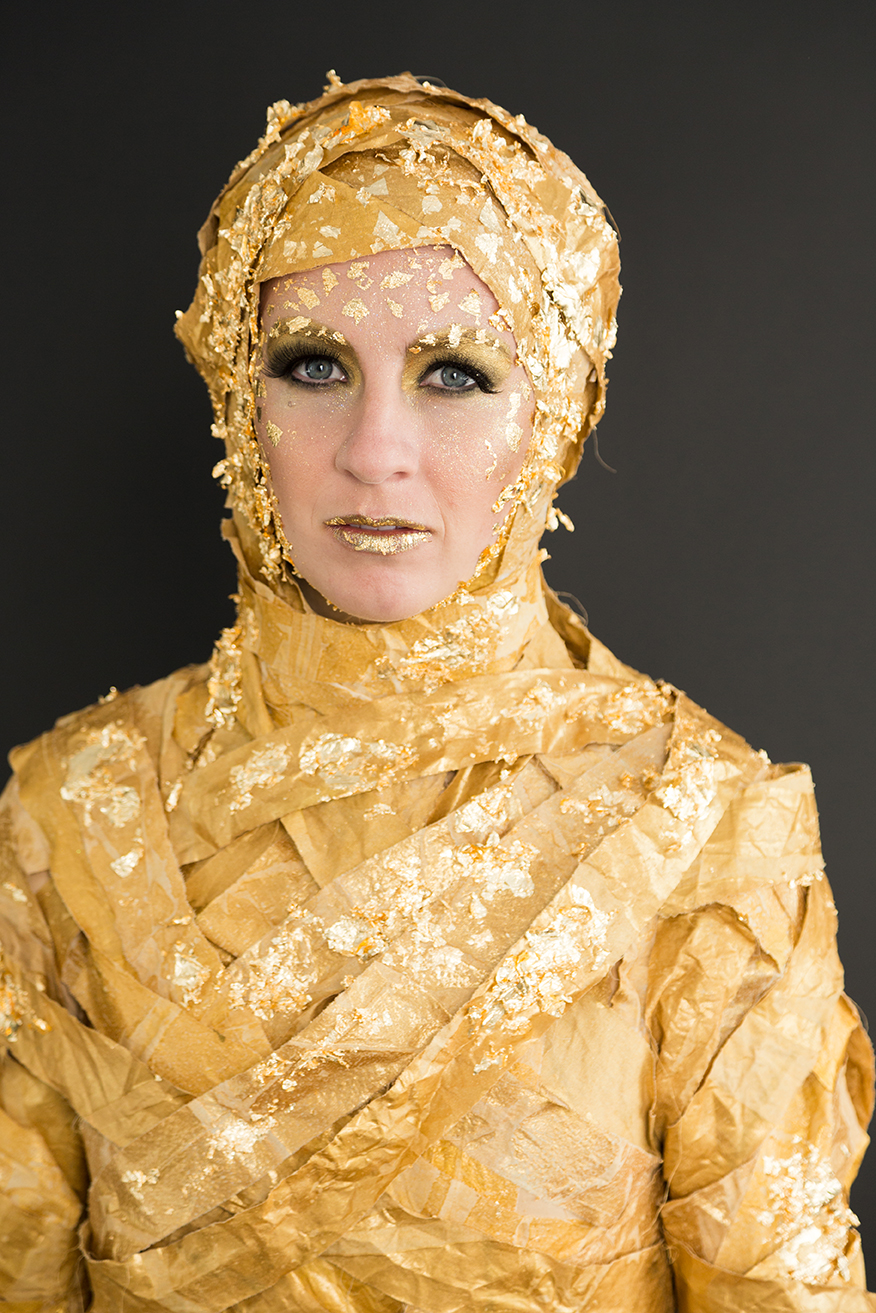
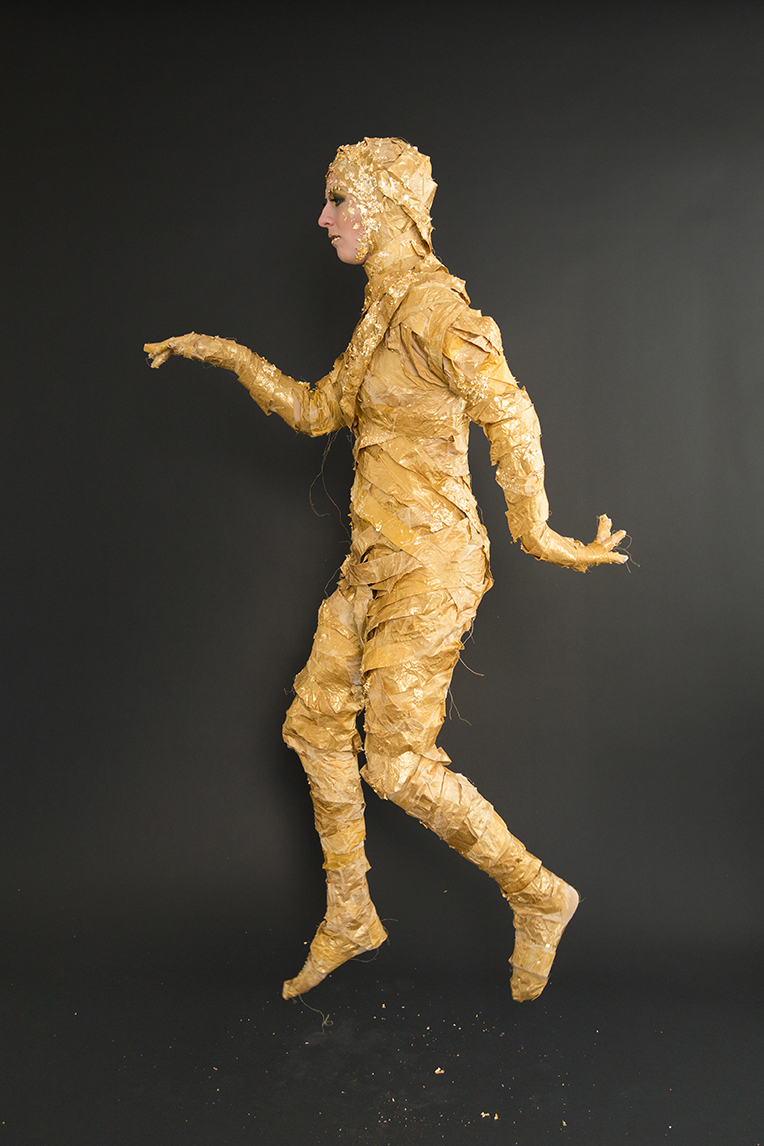
How to make a gilded mummy by Danielle Wilson
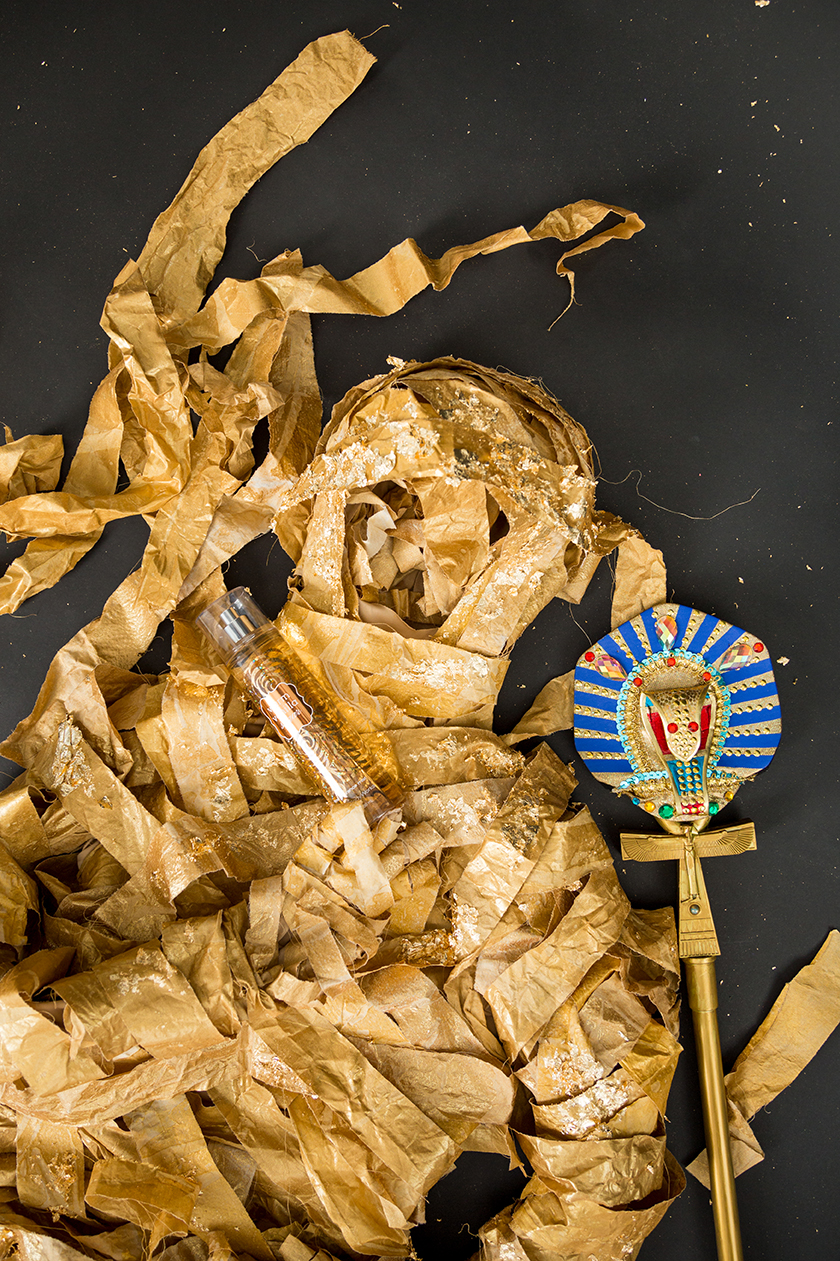
Lightweight cotton muslin or gauze, in white or gold (we used about 6 yards)
Acrylic metallic gold paint in various shades
Wide foam paint brush
Gold leaf
Fabric glue
Plastic sheetingDirections:1. Cover a firm work surface with enough plastic sheeting to fully contain your fabric when it is laid flat. (Note: you may want to split this fabric painting step into smaller batches)
2. Dampen fabric and wring out excess water gently. Lay fabric flat on plastic sheeting. A few wrinkles are OK!
3. Mix metallic gold paint with a little bit of water. I used about 1/4 water to 3/4 paint. Your ratio might differ depending on the openness of the weave of your fabric. (Note: The goal is that once the fabric has been painted, it will seep through and coat the other side as well. If it’s not pooling slightly on the plastic beneath the fabric, add more water. If it’s too watery and not coating the fabric well, add more paint.) Paint the entire surface of your fabric, ensuring it seeps through to coat the other side as well. Feel free to experiment mixing different tones of gold to give a more dimensional look. Let the fabric remain slightly raised away from plastic and wrinkled in some spots. This will add to the overall texture when it’s dried. Leave fabric on plastic until it dries completely.
4. Once fabric has dried completely, carefully peel it from the plastic sheeting. The side in contact with the sheeting should have a beautiful faux gold-leaf sheen now, and the reverse should look rich and lux.
5. Snip a small cut every 2″ or so along the length of your fabric. This does not need to be precise- in fact variation is welcome! Tear the fabric into strips at each cut.
6. Put on your full body suit and if necessary, mark and remove a circular section covering the face, leaving the head and neck portions in place. You may want to wear a protective layer of old clothing under your suit while fabric is being glued on. Occasionally the fabric glue might seep through the body suit while strips are being applied.
7. With a helper (or 2!) begin gluing strips of fabric to your body suit, in a mummy-wrapped fashion. Let the fabric overlap, making sure to cover all bare spots. Alternate lux and shiny sides of the fabric as you wrap. The strips only need to be attached at a couple of points (not their whole length) and with a very small amount of glue. Take care not to wrap too tightly, and be sure to leave a few loose draped bits. (Note: once the ankles, wrists, hands and feet have been wrapped it’s difficult to get out of the costume. Save these bits until right before you plan on wearing it, OR detach them at the wrist and ankle like socks and gloves, to get the costume off and on more easily). Once all the fabric wrapping has been applied, make a cut to the fabric strips along the length of the body suit zipper, being careful not to cut into the bodysuit or zipper itself. Secure the now loose cut edges with glue to the body suit along the length of the zipper, making sure not to get any glue in the zipper. You should be able to unzip and get in and out of your costume now.
8. For added luster, apply bits of gold leaf at random to your mummy, following manufacture directions.
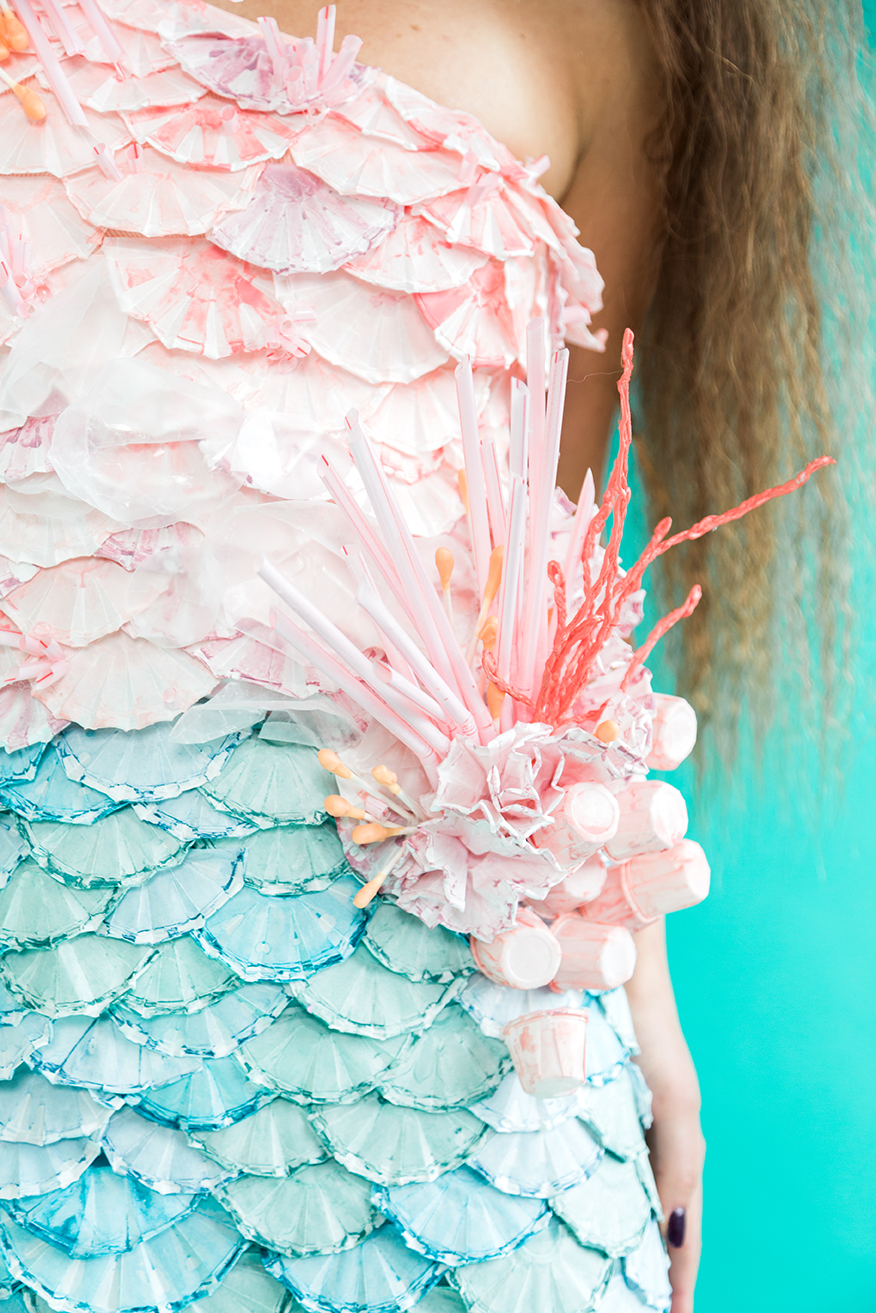
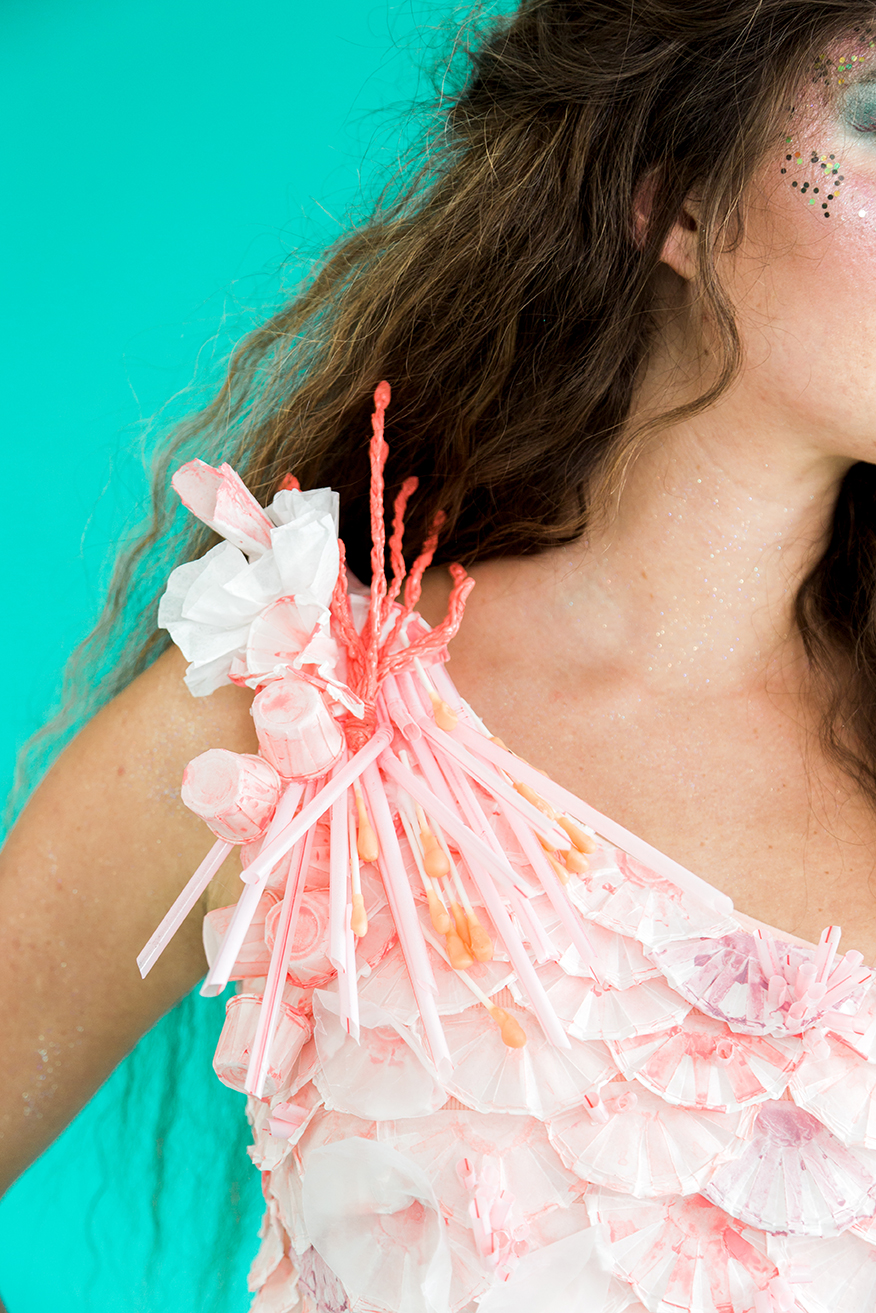
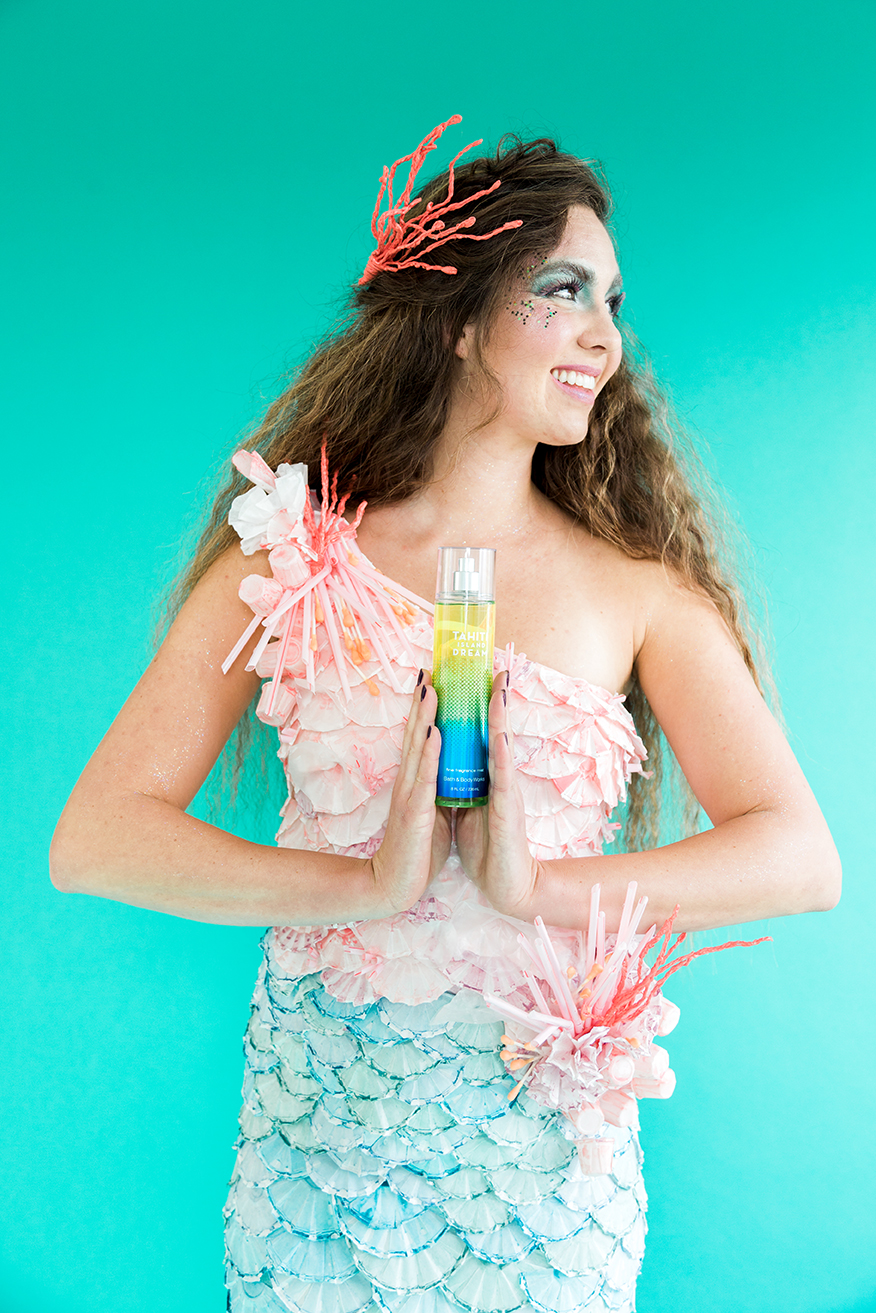
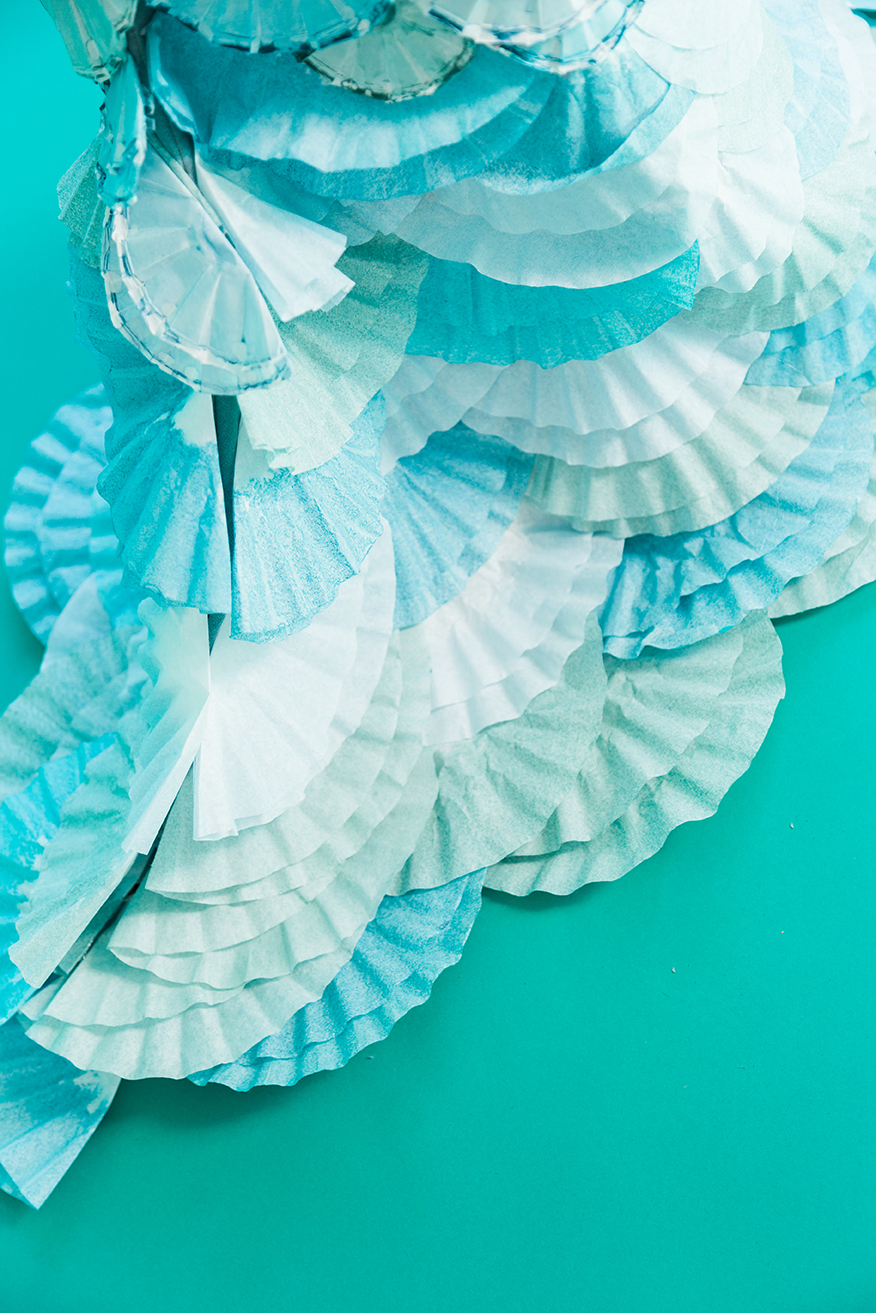
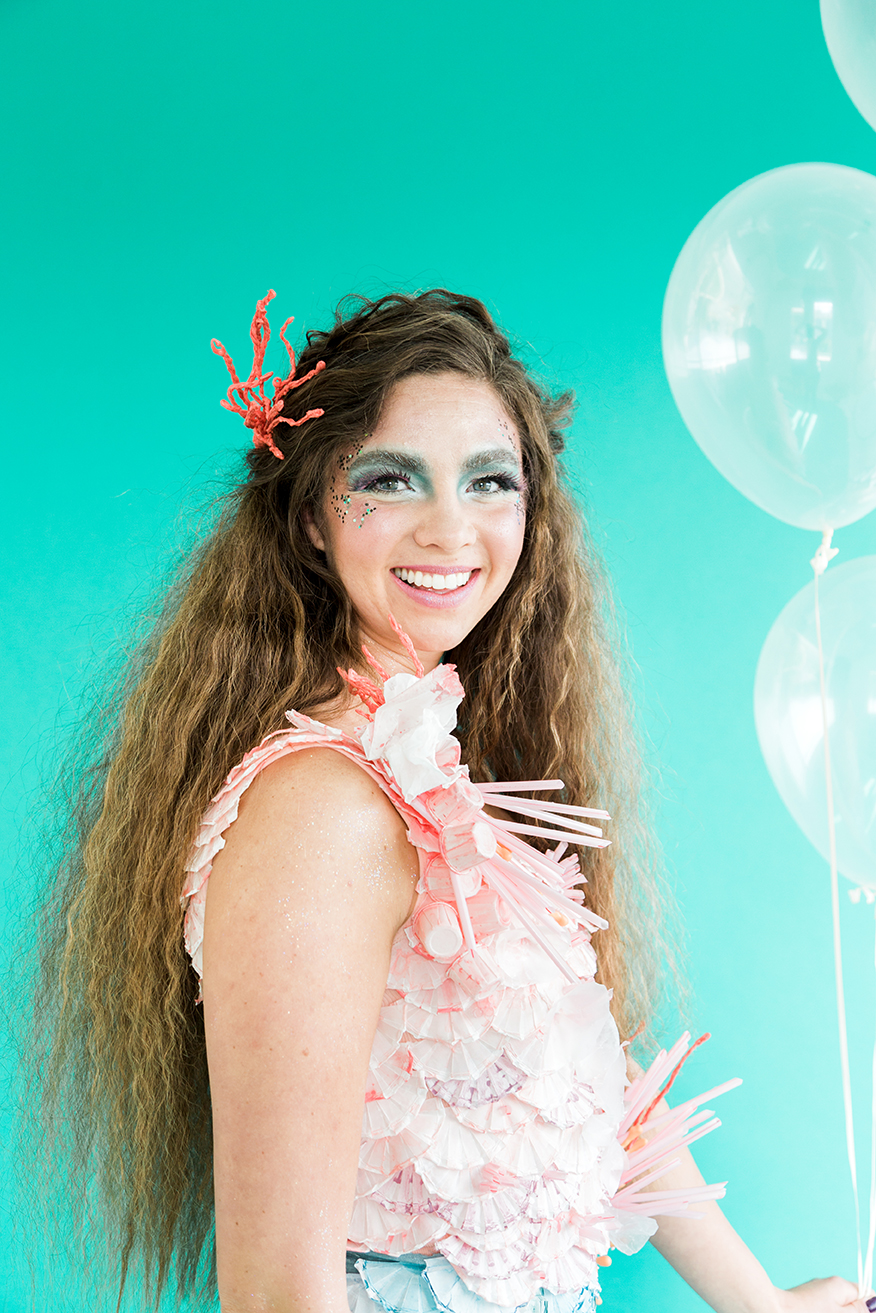
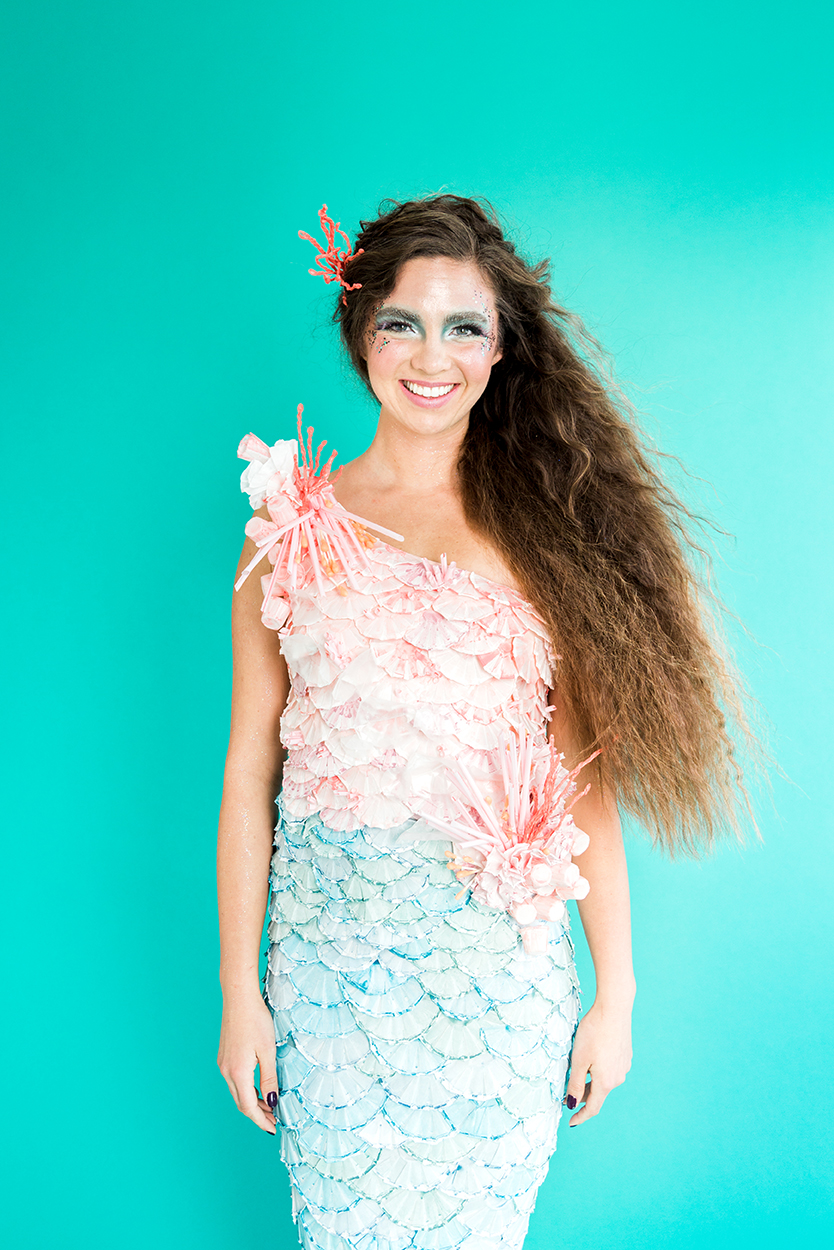
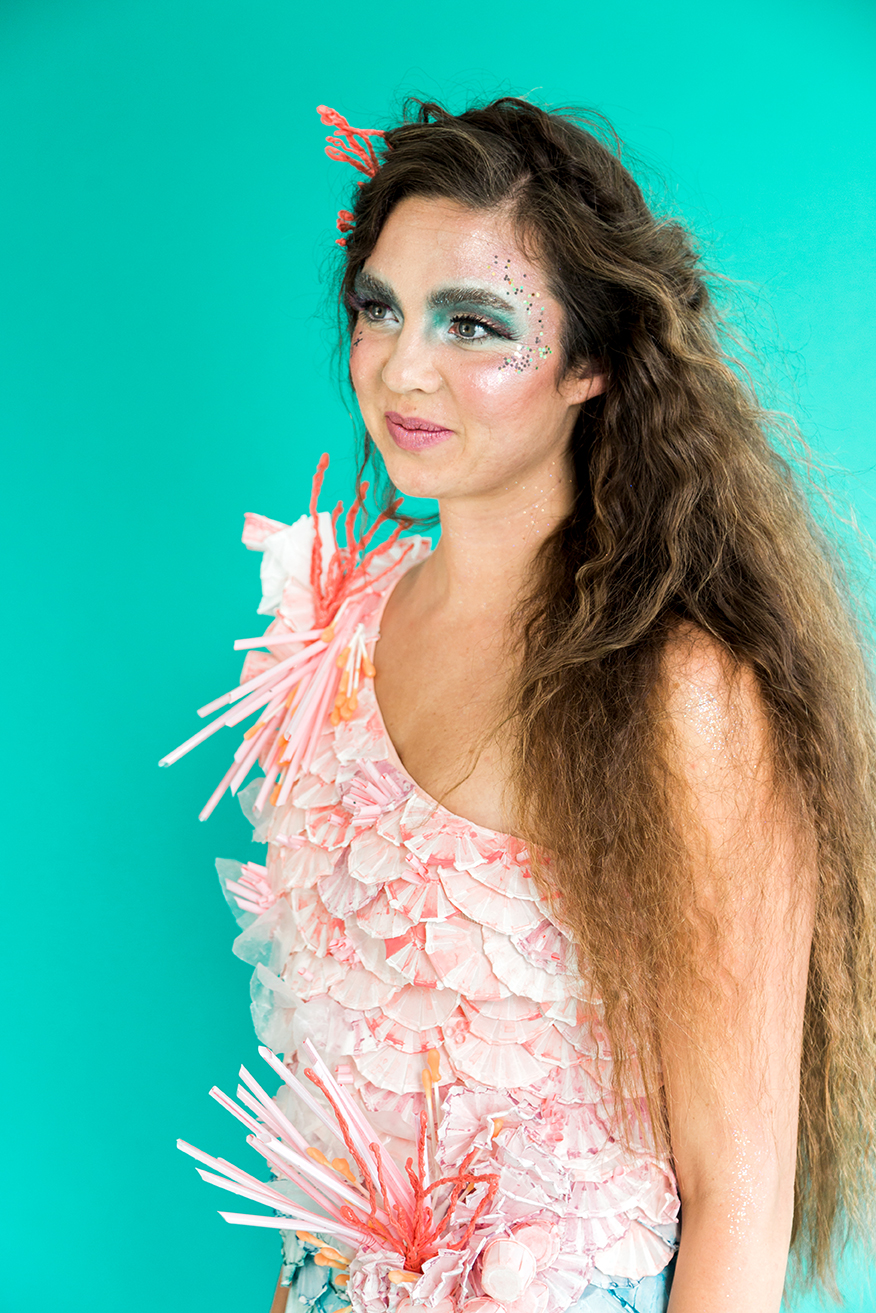
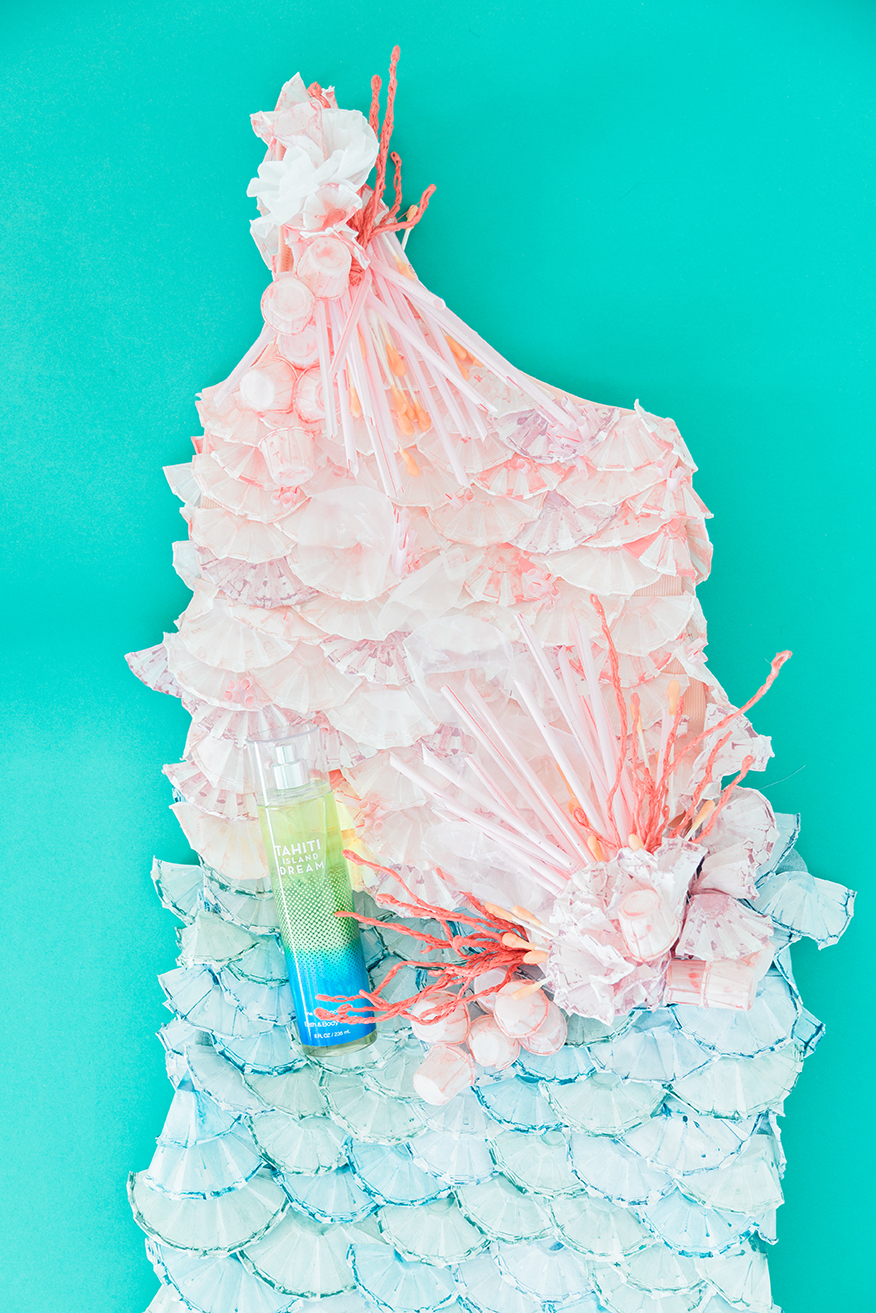
We had a lot of different directions we could take with the mermaid, but ultimately, I knew I didn’t want to go in a children’s cartoon direction. I wanted more depth and less sea shell bra. I came across this Anthropologie window display from a few years ago and I thought it was amazing inspiration for our costume. Those are made from paper plates, coffee filters, straws and cups. Together with my assistant Rebecca, we decided on a one-should strap number that would be a bit more comfortable and interesting. We gathered paper medicine and souffle cups in various sizes, dipped them in paint, and added cotton swabs, and wire coral.
Mermaid Instructions as inspired by Tahitian Island Dream
Skirt:
Materials:
- Coffee filters, make sure they have the ruffled edges like these!
- Paper soufflé cups in various sizes (we used these, these, and these)
- Paint colors in cool colors. We used jade, teal, and a steely blue.
- Buckets to dilute paint in
- Blue stretch material (1-2 yards depending on your size)
Instructions:
- Take body measurements of hip, waist, and the lengths of waist to hip, hip to knee, and knee to floor. These will provide the guidelines for the pattern of the base skirt.
- Fold the fabric in half, so the fold marks center-front. Halve your measurements and mark them on the material. Connect the dots with a fabric marker, creating a mermaid shaped silhouette, which hugs the waist down to the knees and then flairs out at the bottom. Cut out and sew right sides together. The seam will be center-back.
- Fill small buckets with water and add a bit of paint to each bucket. Stir. The amount of paint will determine the color potency.
- Dip ruffled edges of coffee filters into color buckets, about 1-2″ up. The color will bleed up about an inch. Let dry for 15-24 hours.
- Submerge soufflé cups into same color buckets, letting them soak for a few minutes. Remove and let dry for 5-10 hours.
- Once dry, fold coffee filters in half, with one side slightly longer than the next.
- Flatten soufflé cups and cut in half.
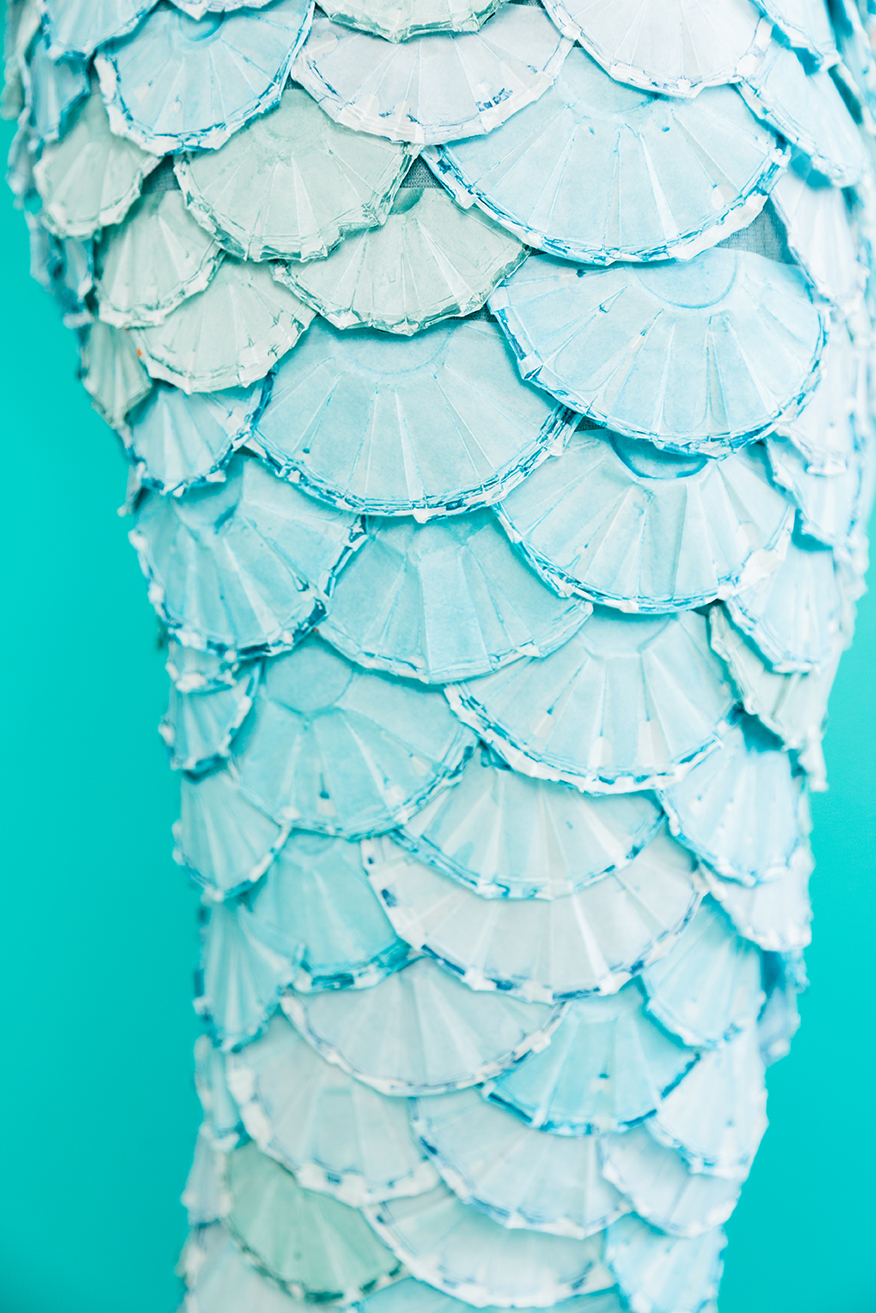
- Beginning at the base of the skirt, hot glue the coffee filters to the fabric in a row. Overlap the filters as you glue on additional rows.
- About 1-2 feet up the skirt, transition into the largest size of souffle cups and continue the overlapping pattern with the different colors.
- The top of the skirt should end with the smallest size of souffle cups.
**We completely covered one side of the skirt first and then flipped it over and did the other side.
Top:
Materials:
- Pink one-shoulder top, we used this one
- Paper soufflé cups in various sizes, we used these, these, and these!
- Paint colors in warm colors (We used pink, lavender, and coral)
- Plastic straws. We liked the bendable ones so had more control.
- Spray paint in pink and coral
- Wax paper
- Wire, we liked this coated wire
- Q-tips (you can always use more right?!)
- Pink candle wax. This one from Bath and Body works is the perfect color and smells amazing!
- Hot glue gun
Instructions:
- Follow the same instructions for the skirt and mix paint colors into water buckets.
- submerge the paper soufflé cups into paint, remove, and let dry for 5-10 hours.
- Flatten cups and cut in half.
- Hot glue cups onto shirt beginning from the bottom and working your way up. Overlap the cups slightly.
Coral pieces:
- Take wire and cut into various lengths.
- Fold wire pieces in half and twist together.
- Coat the wire pieces with hot glue to give them a more organic shape and texture.
- Wrap all the wire pieces together with a small piece of wire at the base and form into a coral shape
- Spray paint coral
Sea Anemone:
- Spray paint plastic straws light pink
- Cluster the straws together and glue onto a paper soufflé cup to secure.
- Trim the edges of the straws to make points.
- Keep straw trimmings to glue onto blouse for additional detail.
Q-tip Pieces:
- Dip the ends of Q-tips into pink candle wax.
- Dip 2-3 times depending on the color and thickness of the wax.
Wax Paper sea flowers:
- Cut out small circles of wax paper.
- Cut a slit into the center of the circle, overlap paper and hot glue to form small cone shapes.
Using all the pieces in addition to extra paper soufflé cups, hot glue on the pieces to the should and waist. We created a trail of the wax paper cones across the bodice, placing the most emphasis on the right shoulder and left waist.
We hope you’ve enjoyed our costume series this year. I’d love to know which one is your favorite! Dish below! And check out more costumes on our tag #LarsInCostume
Photography by Anna Killian | Mummy costume by Danielle Wilson | Costume makeup by Kathy Lynch | Crafting by Rebecca Young | Art directed by Brittany Jepsen | Mermaid model: Alexis McKinnon | Mummy model: Melissa Leavitt


Comments