Check out all the looks and start planning your costume! I’d love to know which one is your favorite?
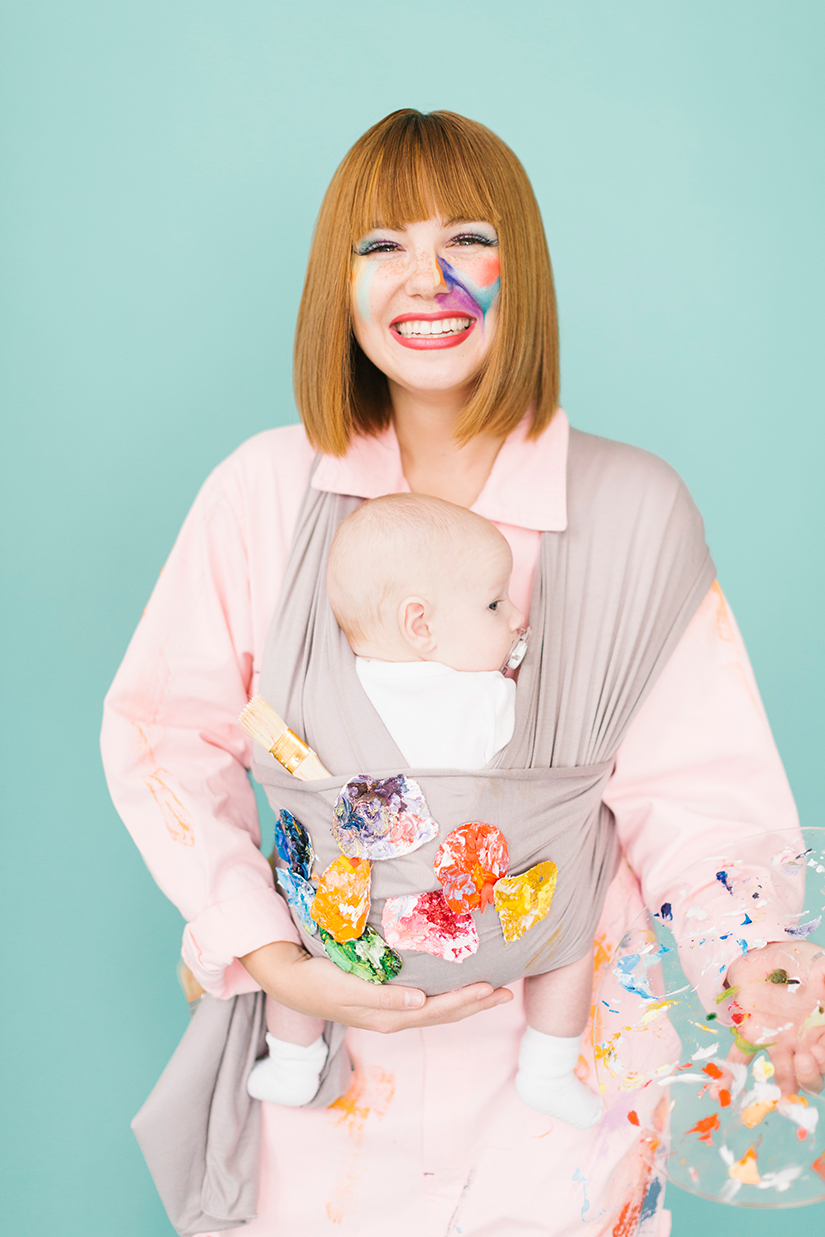
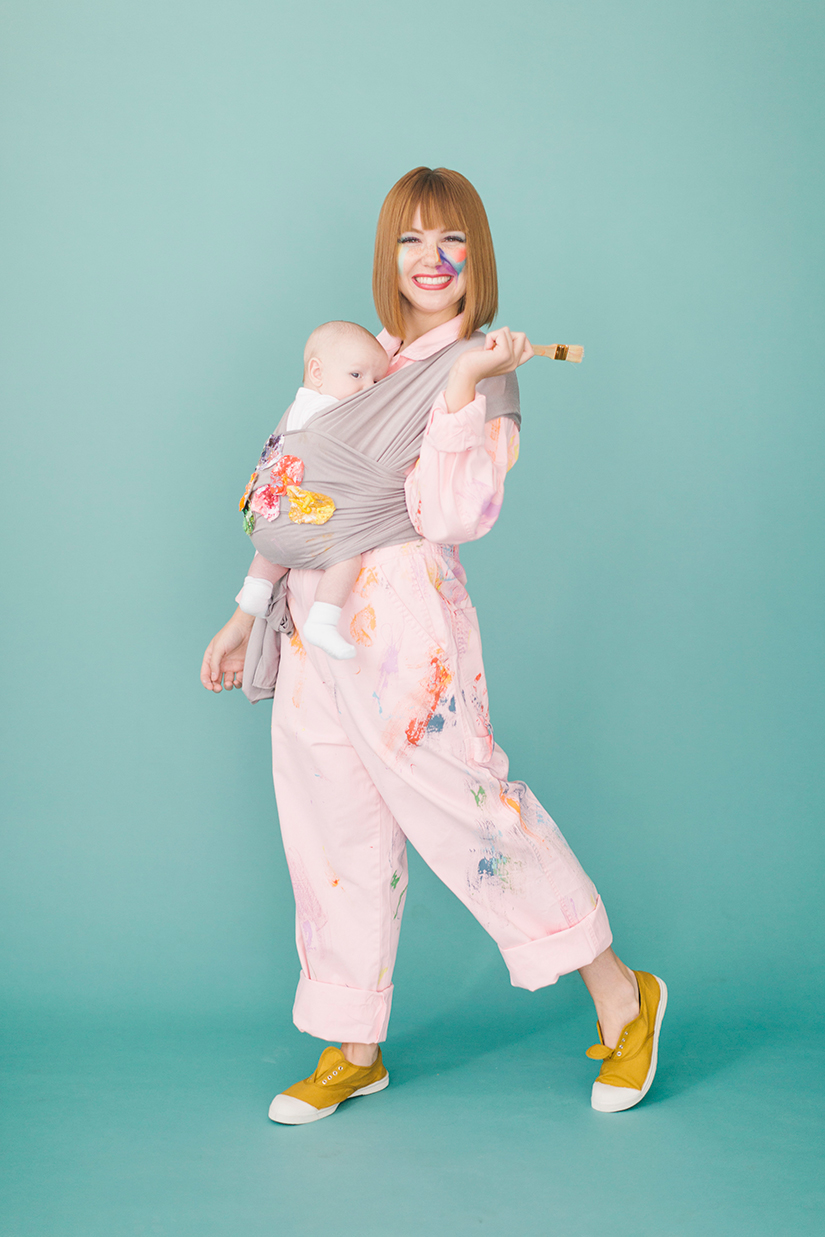
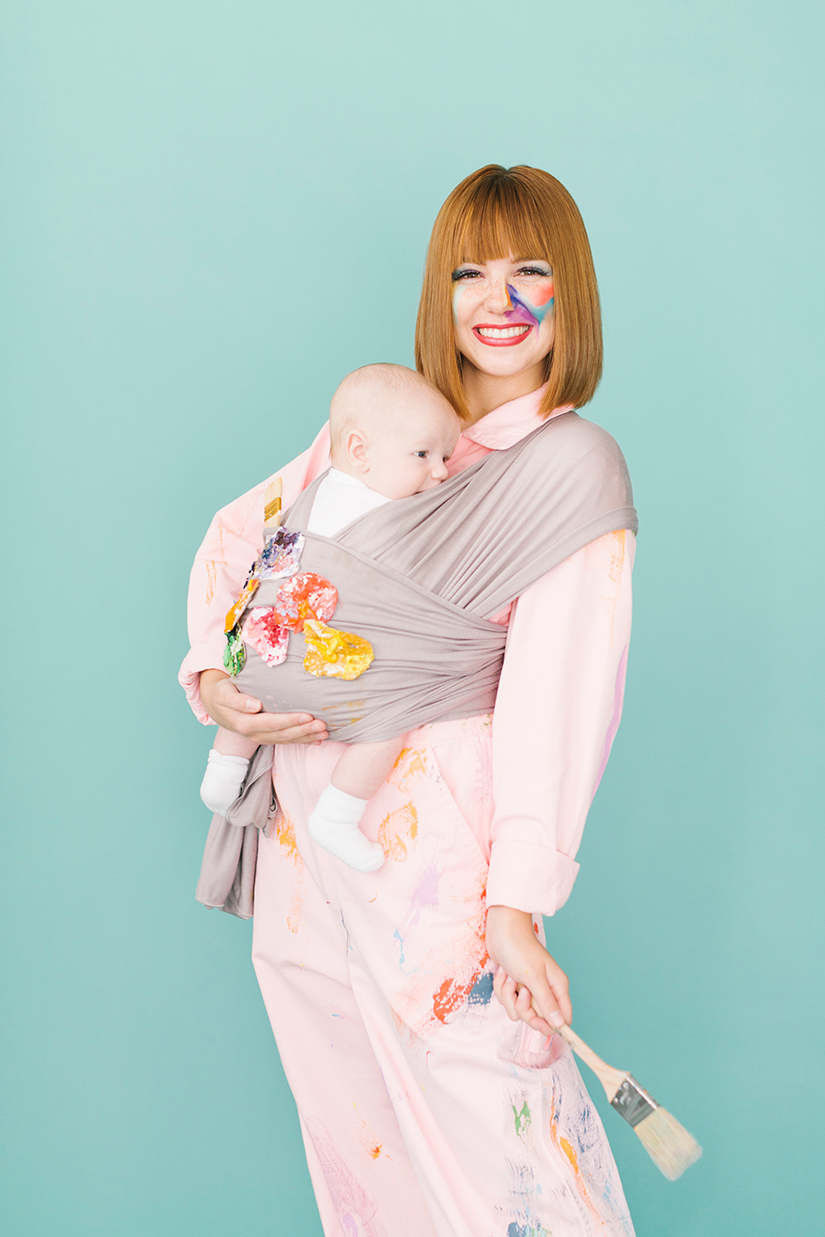
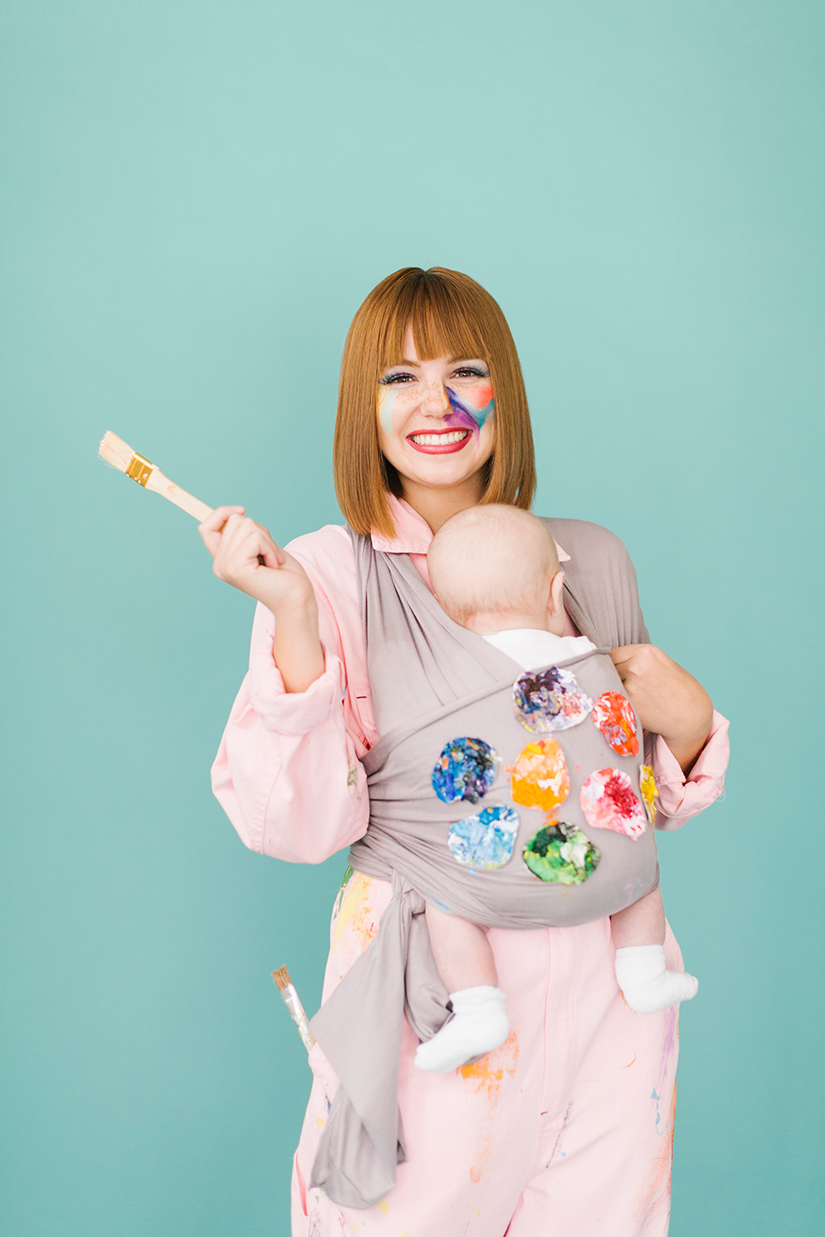
Painter Costume
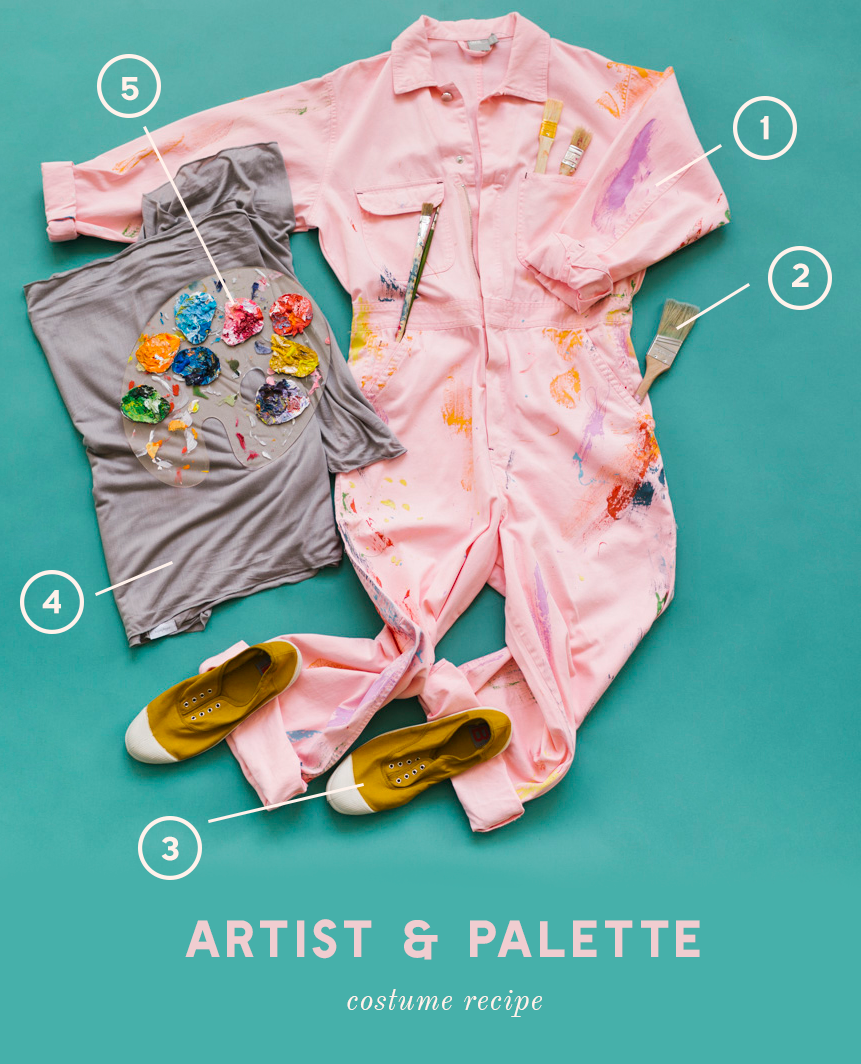
Painter Costume Recipe:
- Pink Boiler Suit
- Paintbrushes
- Yellow sneakers
- Gray Solly Wrap
- Paint palette and Paint swatches for baby (see below for tutorial)
Paint Swatch Materials
- Light canvas
- Scissors
- Acrylic paints
- Paintbrush
- Safety pins
Instructions:
- Cover your jumpsuit with a variety of paint splatters and brush strokes. Have fun with it!
- Cut out small “paint blob” shapes from the canvas and cover with acrylic paints to appear like real paint palette blobs.
- Pin paint blobs onto a gray Solly Wrap.
- Grab some brushes and a palette and you’re ready to hit the town!
Makeup Tips from professional Alyssa Hall:
The trick? Don’t think! Just place the product! Use actual paint brushes instead of makeup brushes to achieve brush strokes! I use Mehron brand cosmetic paint. But, you can use regular ol’ lipstick too! It just won’t be transfer proof!
See the Russian doll, Chiquita banana, Mushroom, and Stork costumes on the next pages!
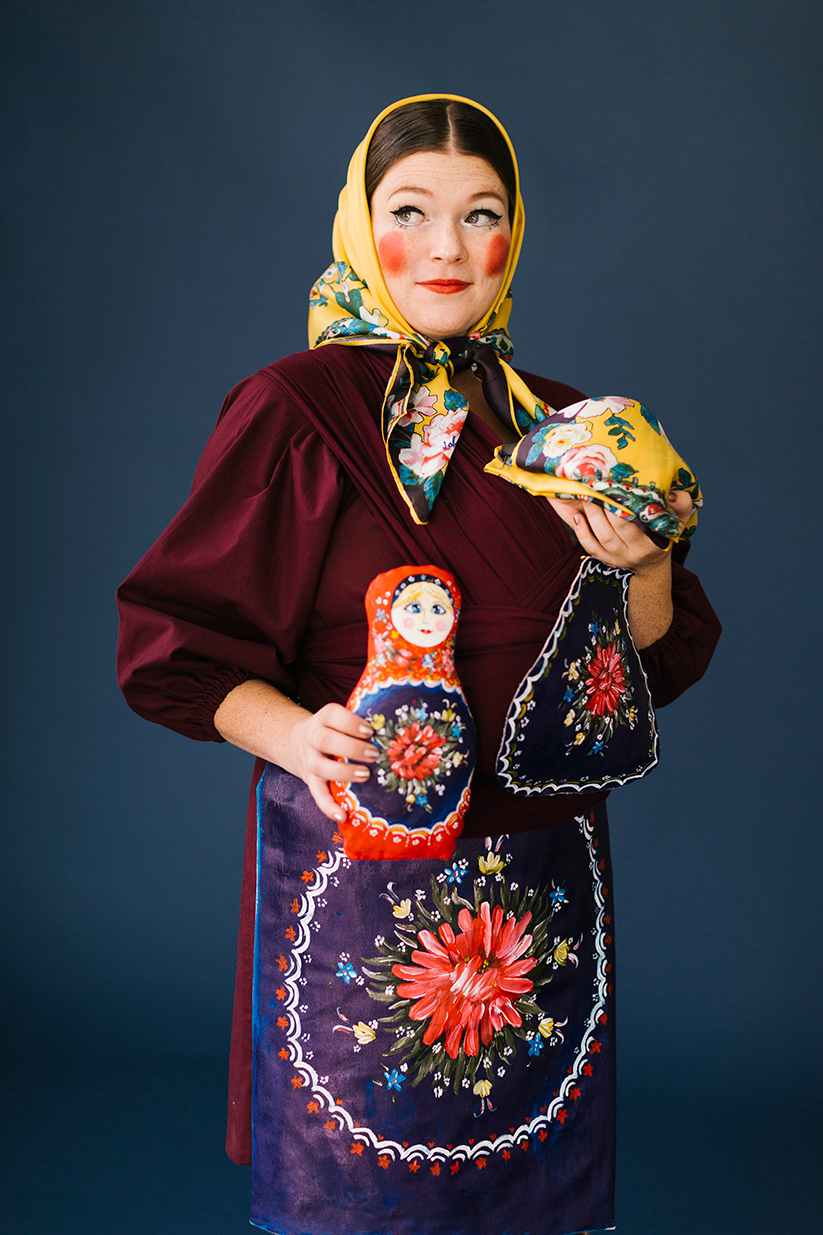
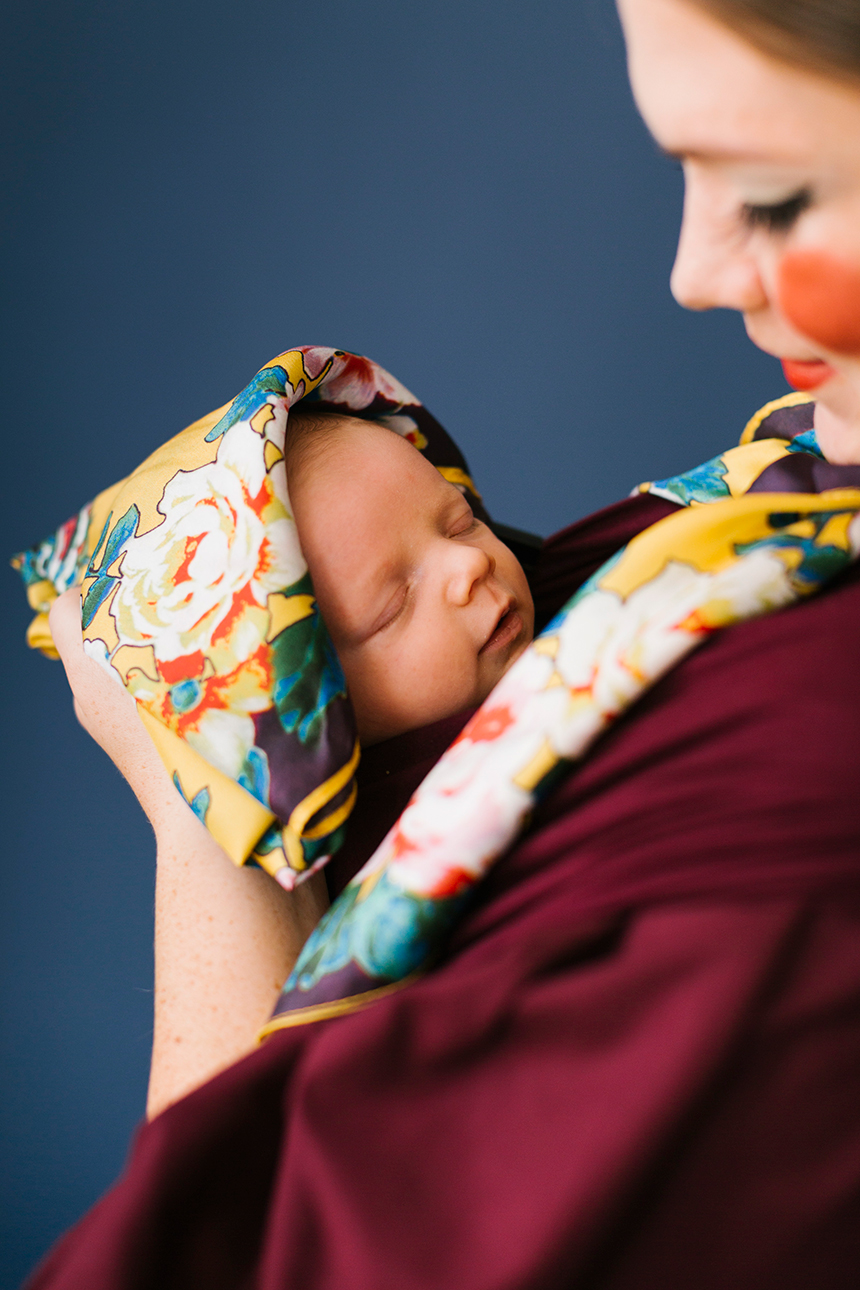
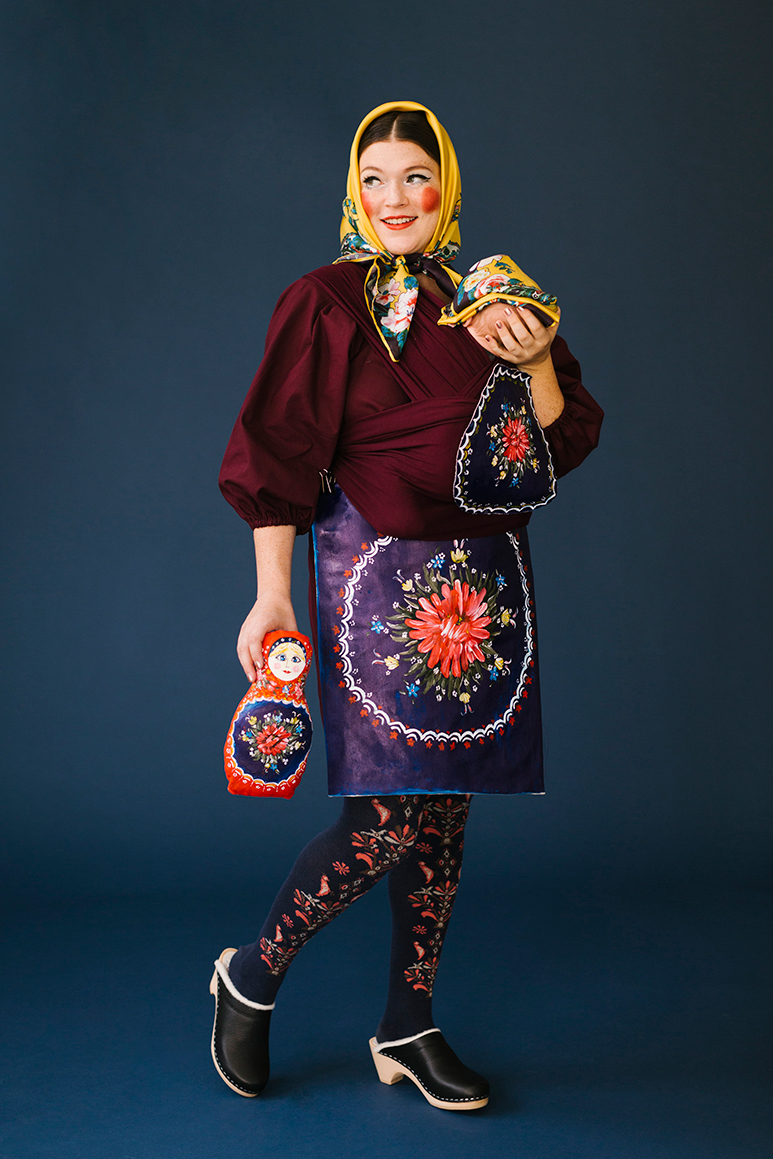
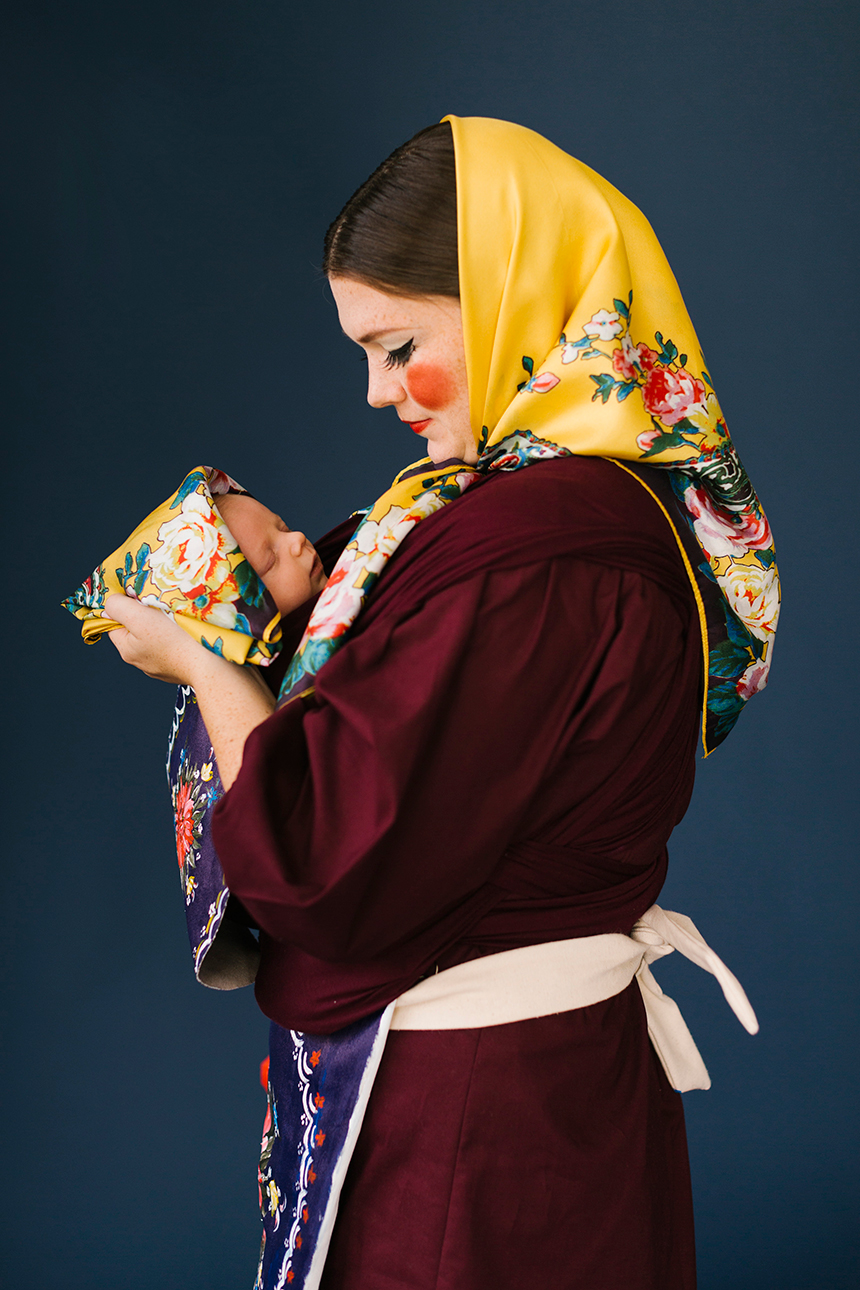
Russian Nesting Doll Costume
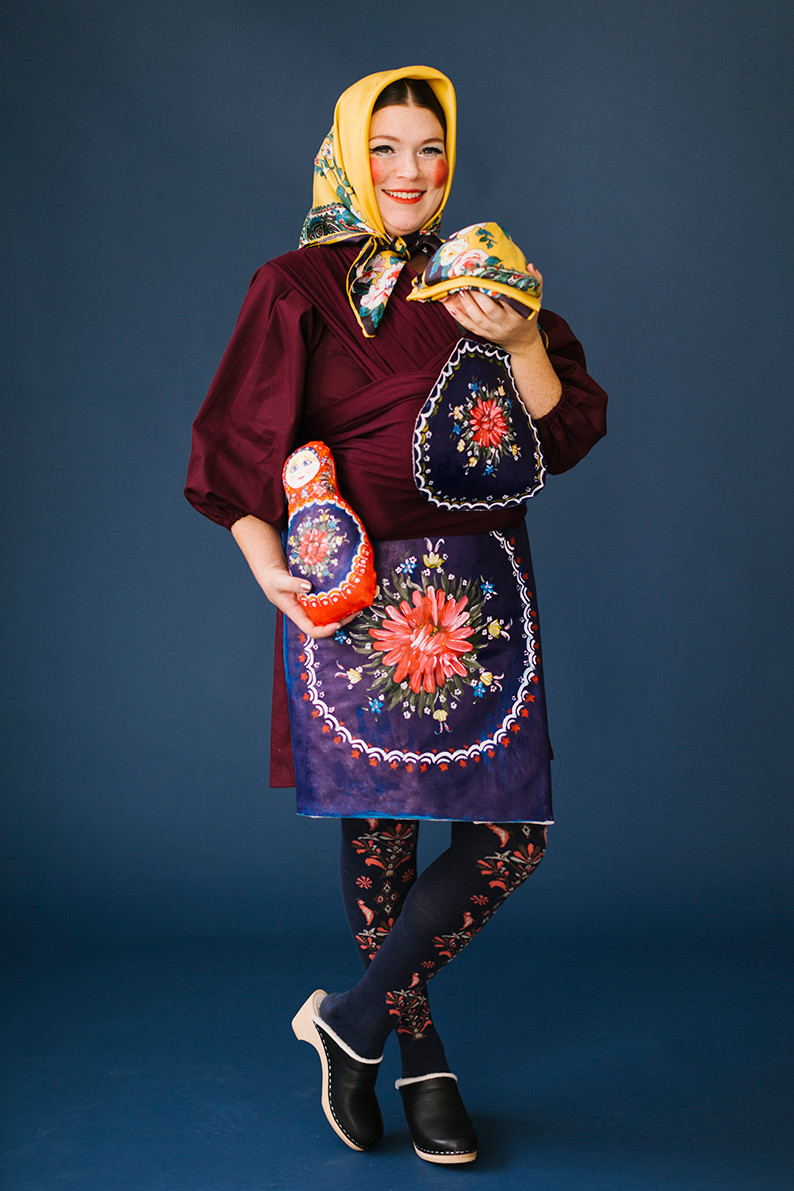
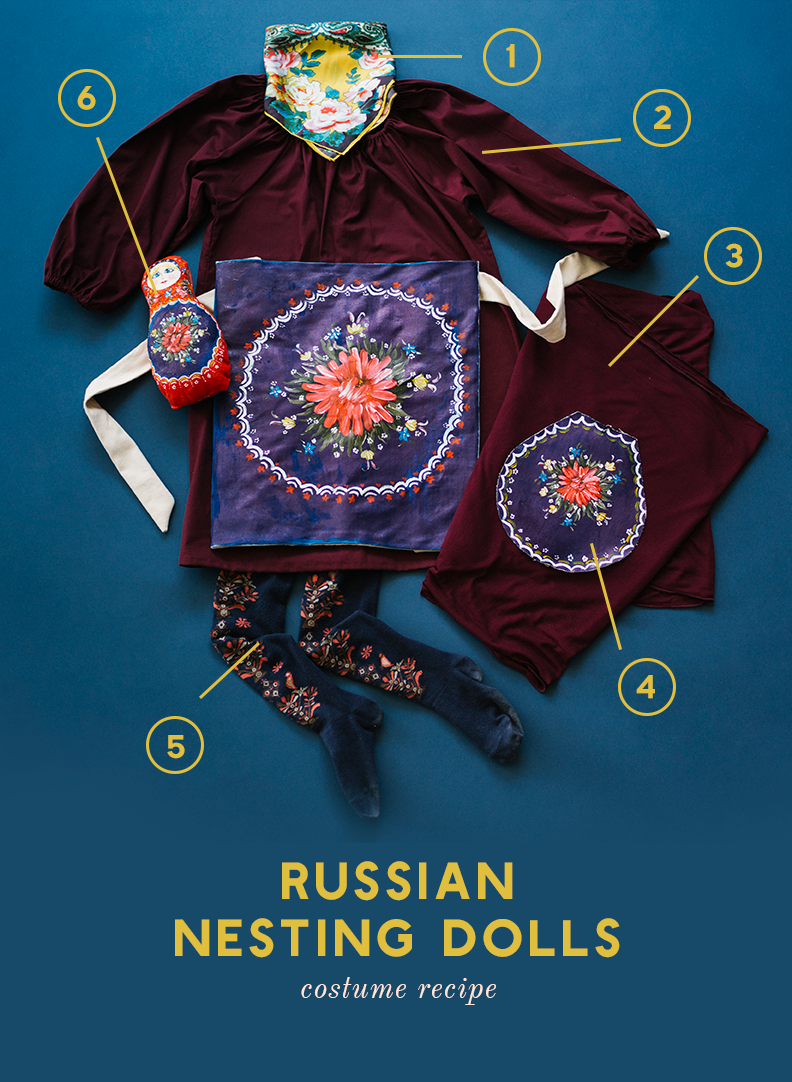
Russian nesting doll Costume recipe:
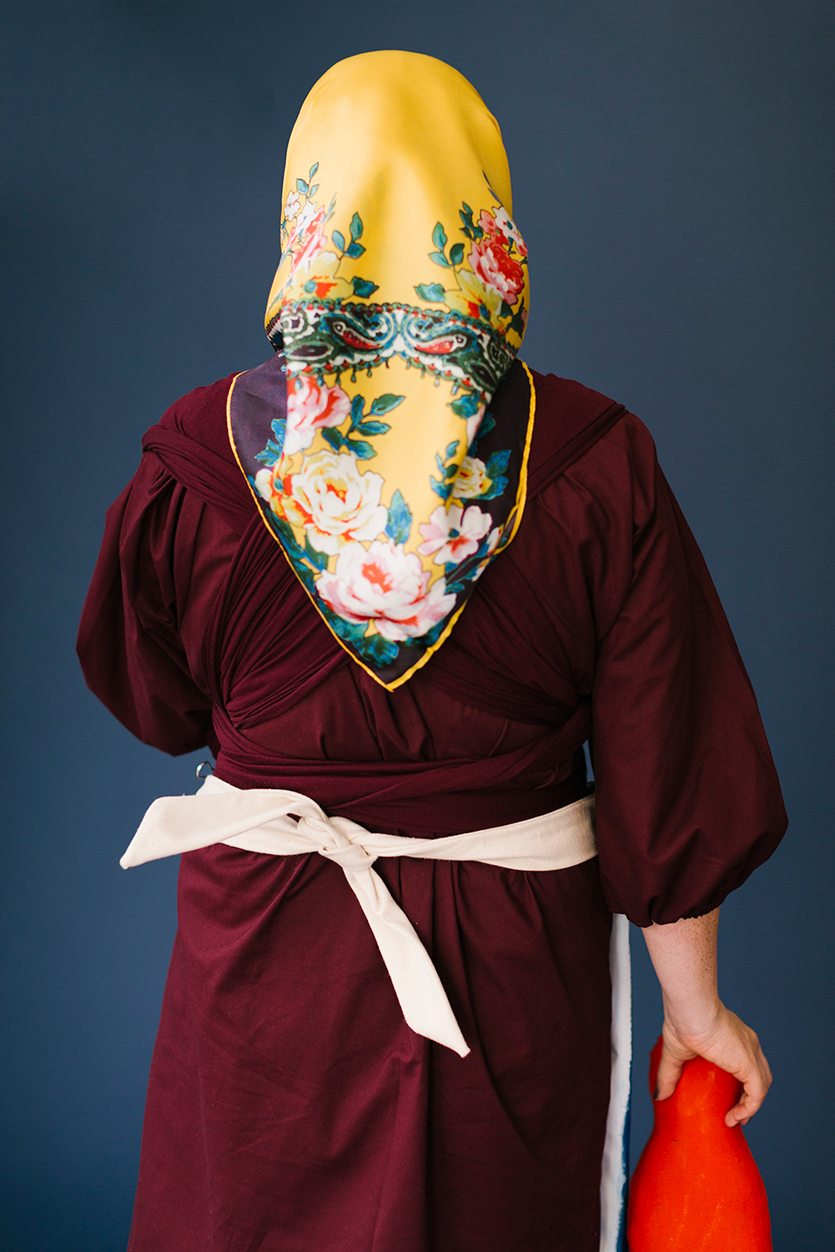
- Silk head scarves
- Burgundy peasant dress (we made ours)
- Mulberry Solly Wrap
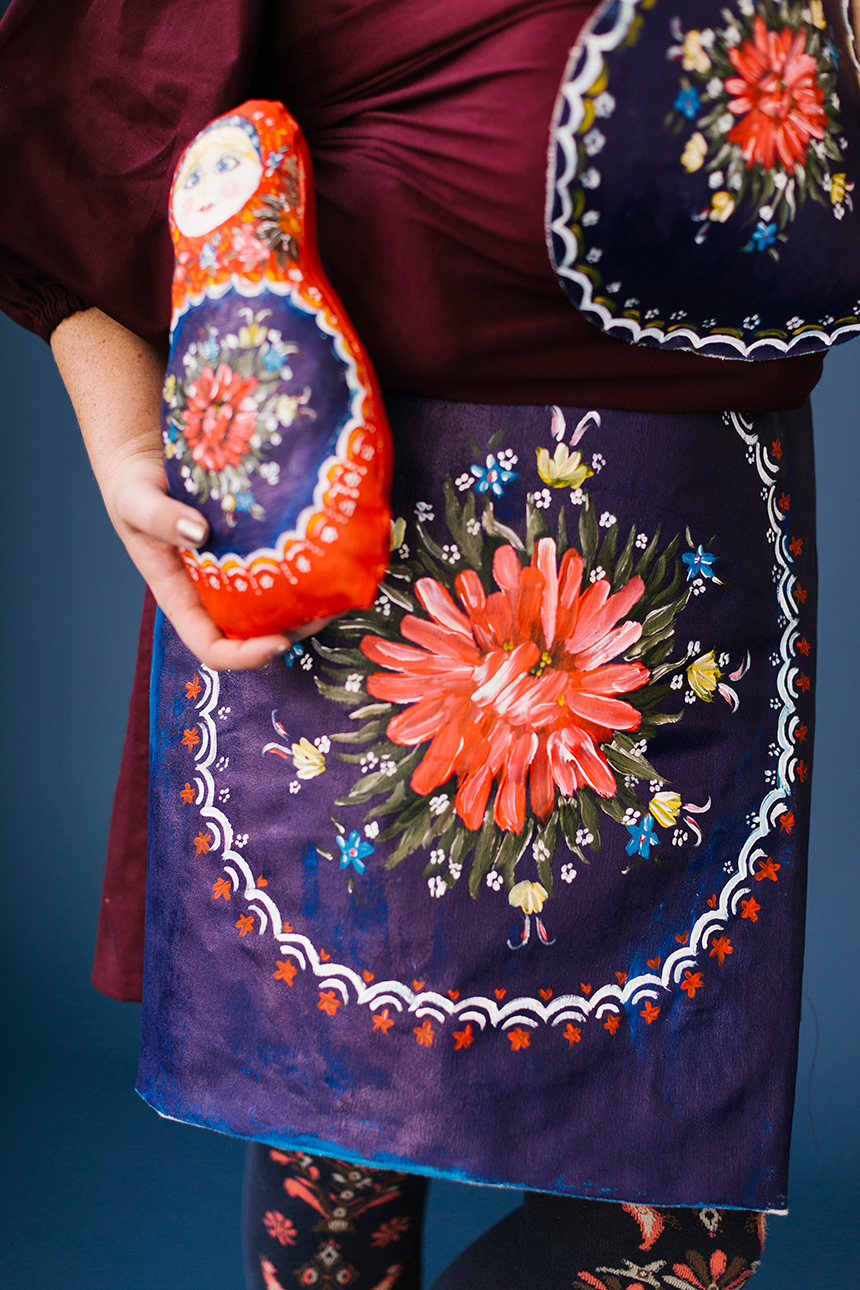
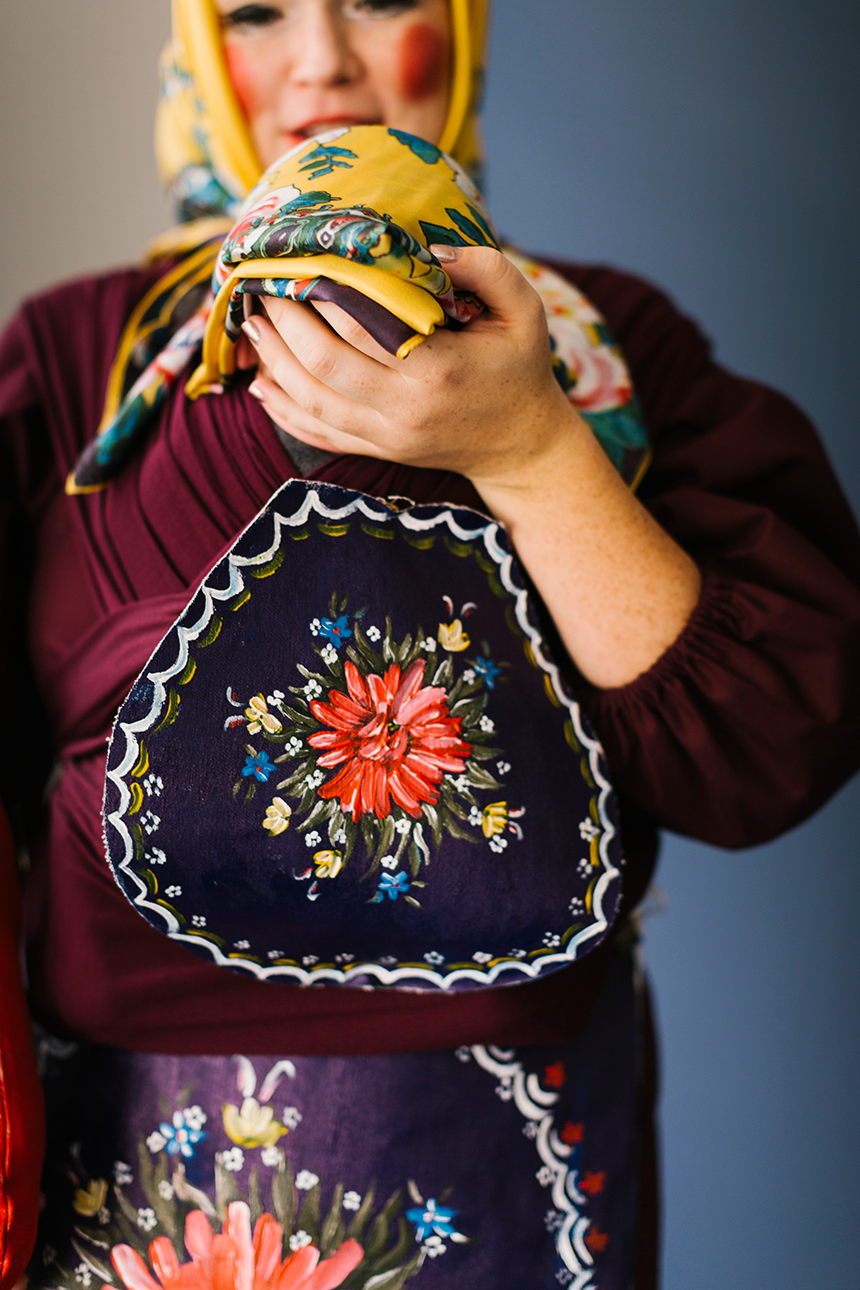
- Painted aprons (See below)
- Stuffed Russian Nesting Doll (see below)
- Tights
- Black Clogs
Paint by Number Key for apron:
- 1: Red
- 2: Yellow
- 3: Olive Green
- 4: Sky Blue
- 5: White
- 6: Dark Blue
Painted Apron and Stuffed Doll Materials:
- Canvas half apron
- ½ yard canvas fabric for Russian nesting doll patch and plushy
- Acrylic paints
- Paint brush
- Badding to stuff the plushy
Russian Nesting Doll Instructions:
- Cut 2 Russian nesting doll plushies using the pattern provided.
- Sew the Russian Nesting doll plushy with a 1/4-inch seam allowance, leaving a 3-inch hole at the bottom.
- Stuff with batting and sew up.
- Paint the apron, baby apron, and plushy using the “paint by numbers” template provided, referencing the key above. Size as necessary.
- Get all dressed up and head out the door!
Makeup Tips:
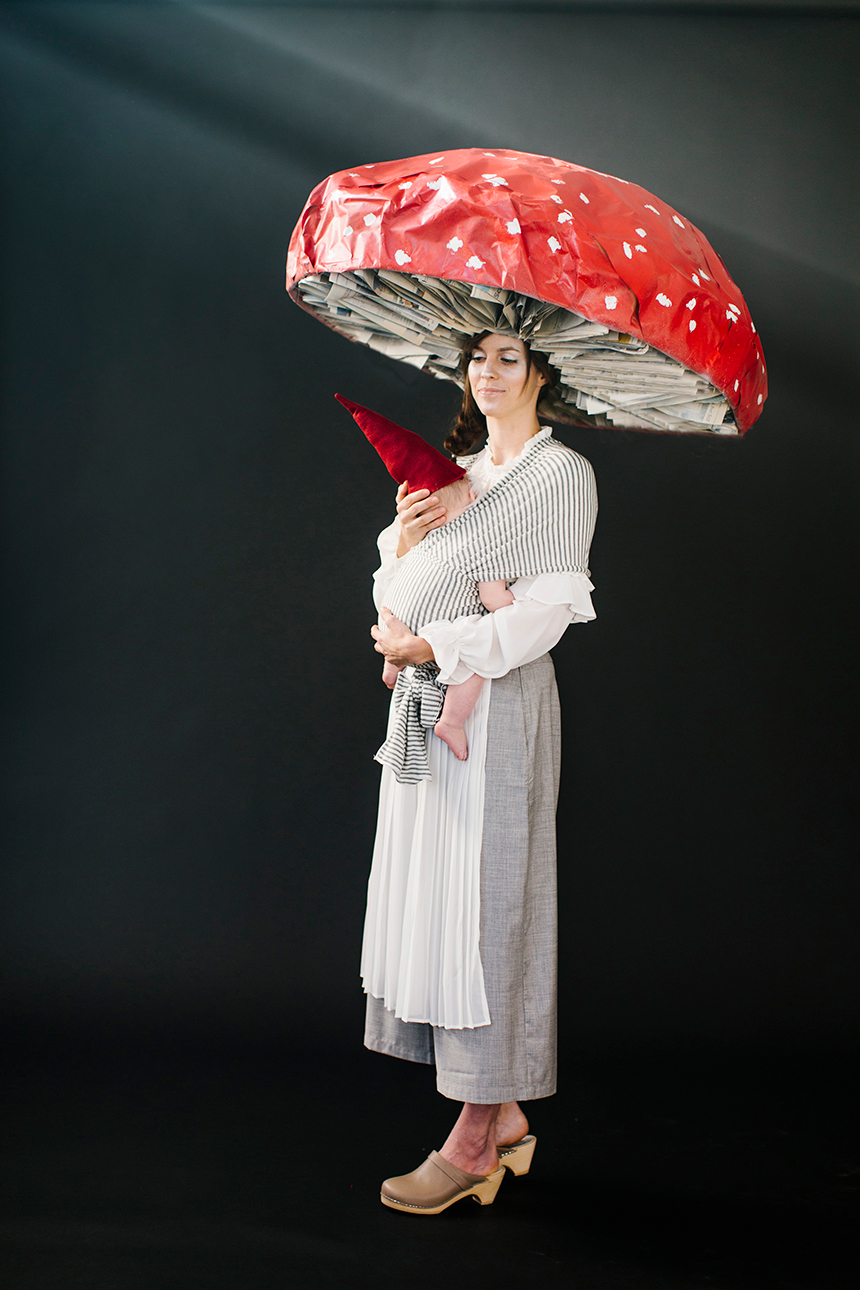
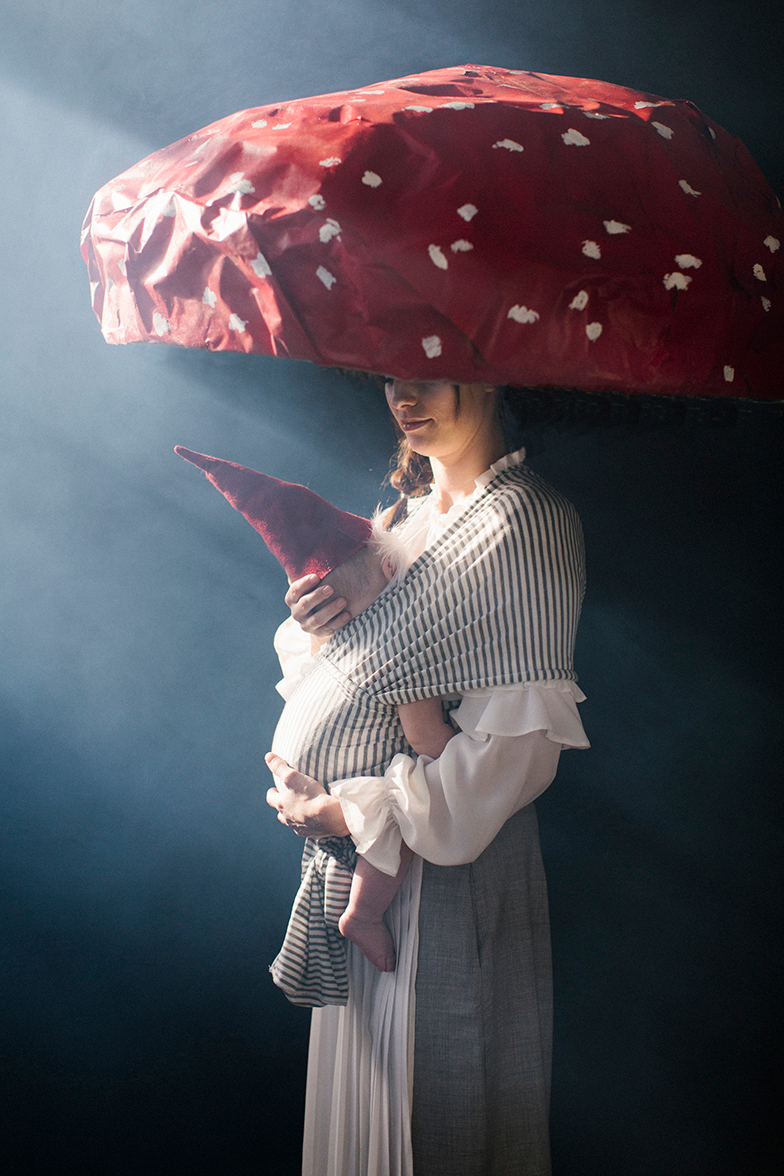
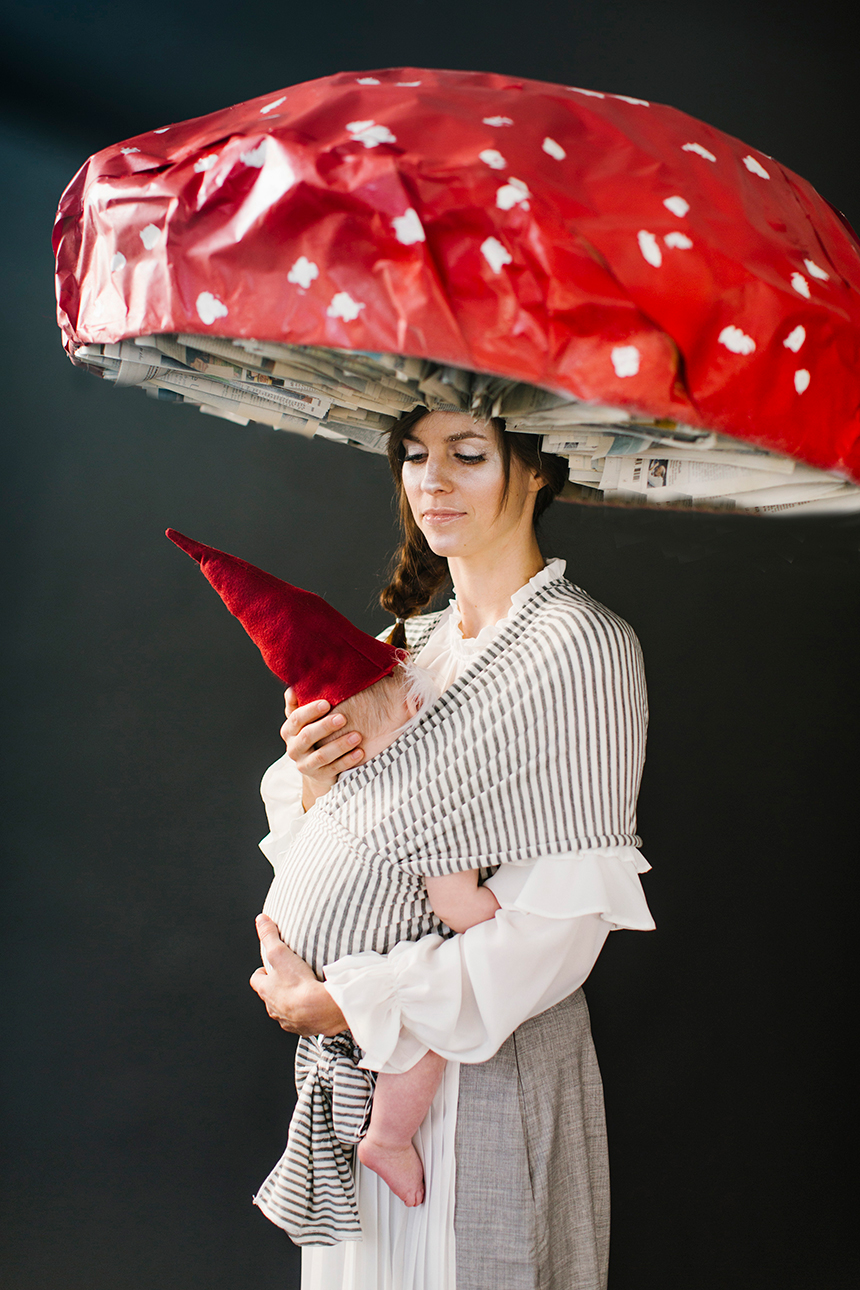
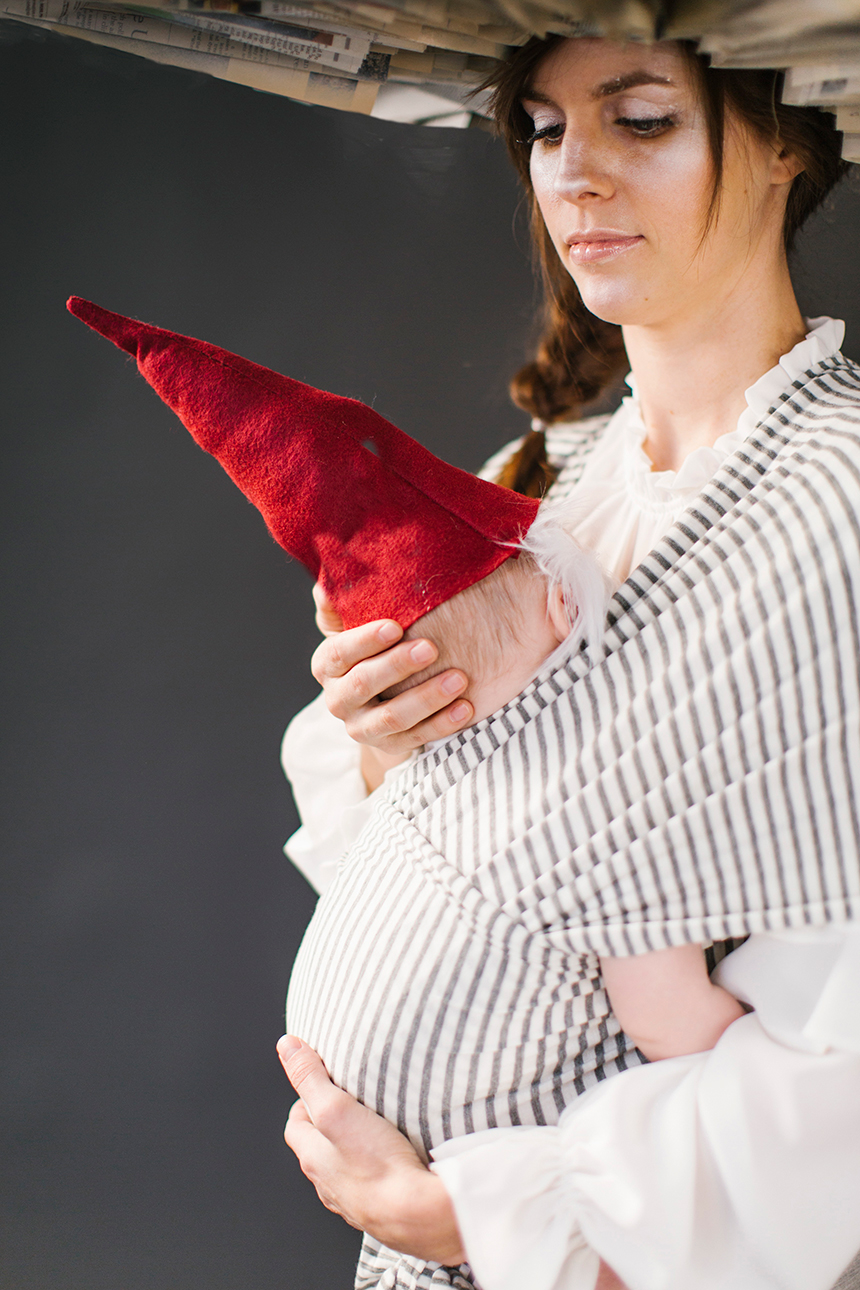
Mushroom and Gnome Mom and Baby Costume
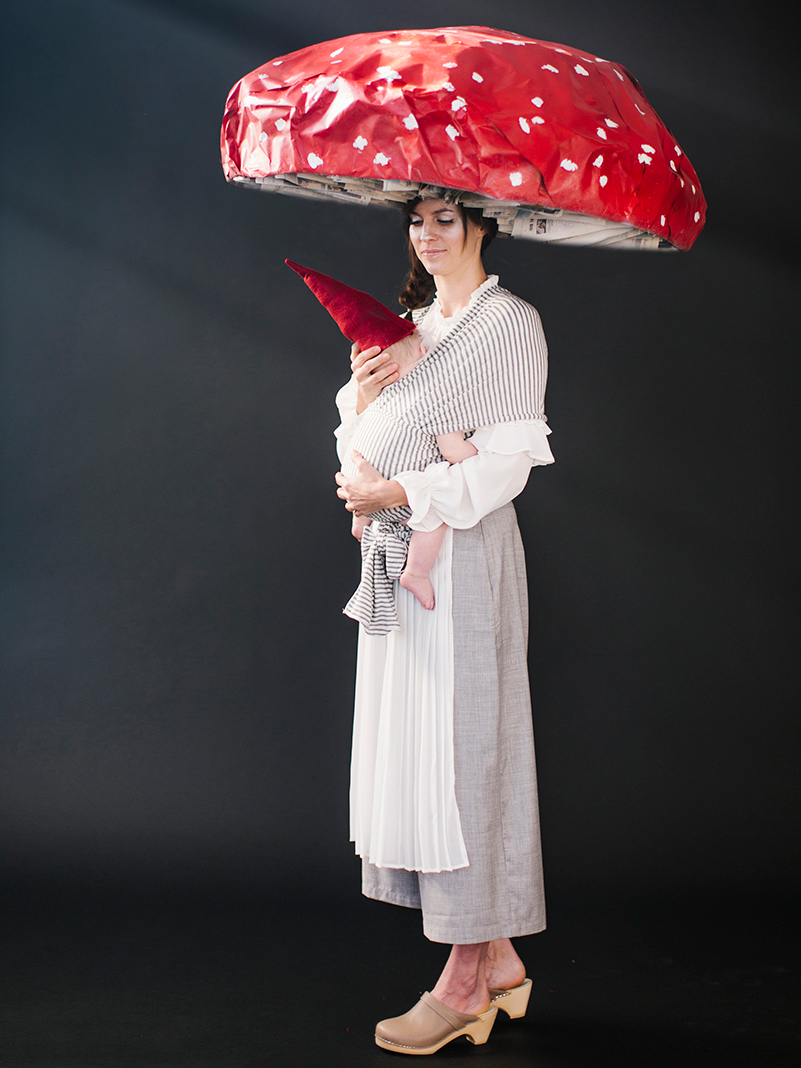
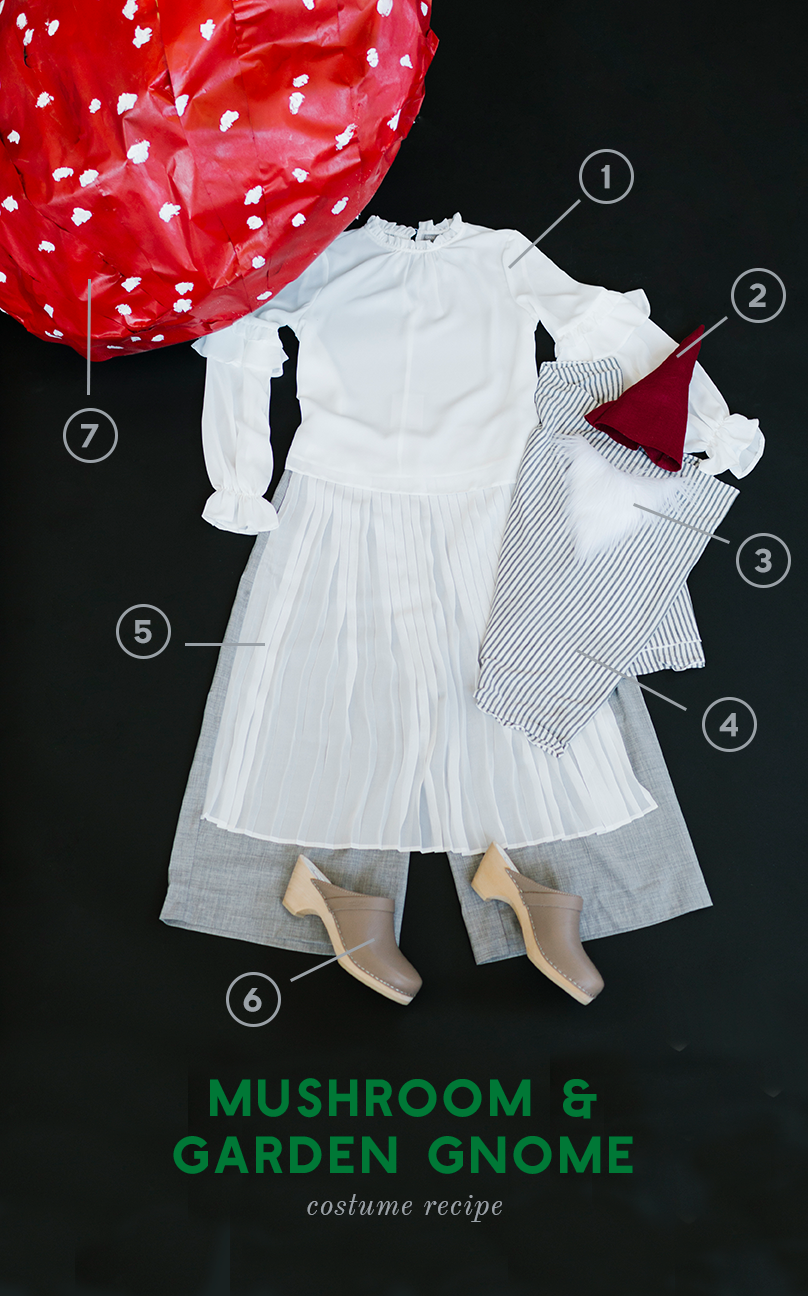
Mushroom and Garden Gnome Costume Recipe:
- White peasant blouse
- Red Gnome Hat (See below)
- White baby beard (see below)
- Gray and white striped Solly Wrap
- Gray or white pleated skirt or culottes
- Taupe Clogs
- Cardboard mushroom hat (see below)
 Gnome Hat materials:
- Deep red felt
- Sewing machine or needle and thread
- Badding to stuff the hat
Gnome Hat Instructions:
- Measure the circumference of your baby’s head. Divide this number by 2 and add 1 inch. Write down this measurement
- Take two pieces of deep red felt and lay them on top of each other.
- Cut out an isosceles triangle with the base measurement being the one found above and the two other sides measuring about 13 inches.
- Sew the two triangles together along the tall sides with a ½-inch seam allowance
Gnome Beard materials:
- White faux fur
- 1/4″-inch Elastic
Gnome Beard Instructions:
- Using the template provided, cut out a beard from the fake fur.
- Measure a length of elastic appropriate for your baby, and sew the ends of the elastic onto the corners of the beard. This should fit snugly but comfortably around your baby’s bead.
Mushroom Hat Materials:
- Cardboard
- Hot Glue gun
- Duct Tape
- Newspaper
- Red and white spray paint
- Sepia Tint It Spray paint
- White acrylic paint
- Paintbrush
- Kraft wrapping paper
- Plastic bags
Mushroom Hat Instructions:
- Cut a circle of cardboard that measures 4 to 5 feet in diameter. Ours is quite large, but feel free to shrink the size down so you can easily fit through a doorway. Ha!
- Cut enough 4-inch wide strips of cardboard to get around the circumference of the circle. Secure along the edge of the circle with duct tape.
- Measure the circumference of your head and make a smaller circle inside the large circle with 4-inch strips of cardboard. Secure with duct tape.
- To create the rounded dome shape on the mushroom, take long, 2-inch strips of cardboard and roll them out to make them bendy. Create a dome-shaped grid for the mushroom cap by attaching the ends of the strip to opposite ends of the mushroom cap, creating a “rainbow” shape across the cap.
- Repeat with 3 to 4 other strips of intersecting cardboard.
- Now fill the mushroom dome with plastic bags to give the mushroom cap some shape.
- Cover the cap with strips of kraft wrapping paper and glue in place.
- Spray paint with red spray paint and then with Sepia Tint It.
- Paint white dots on the mushroom cap
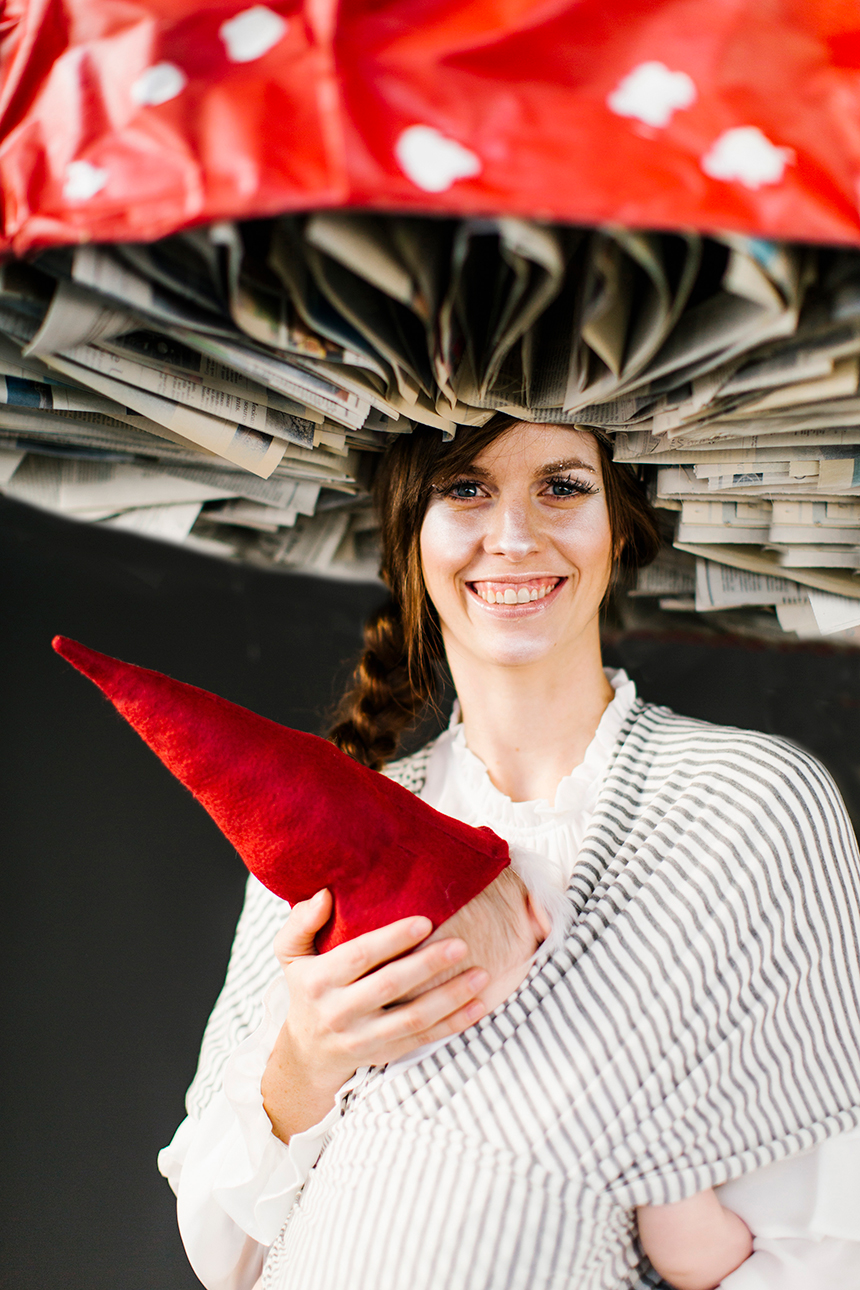
- To create the gills on the underside of the mushroom, flip the hat upside down.
- Cut your newspaper into 4-inch thick strips.
- Line the underside of the mushroom with the newspaper strips by hot gluing them to the base of the mushroom and the sides and center. Make sure to secure them properly of they will fall out.
- Spray paint all the newspapers white. It’s fine if you can still see some type.
Makeup Tips:
With a look like this, apply a silver highlight over the top of a whitewashed face paint while it’s still wet. That way the powder highlight melds right into the white color and it becomes skin-like. As skin-like as silver glitter can look, that is! You can also dip a disposable mascara wand in white and comb it through false lashes for an ethereal, woodland look.
See the Chiquita Banana and Stork Costumes on the next page
Go back for Mushroom, Russian nesting dolls and artist costumes
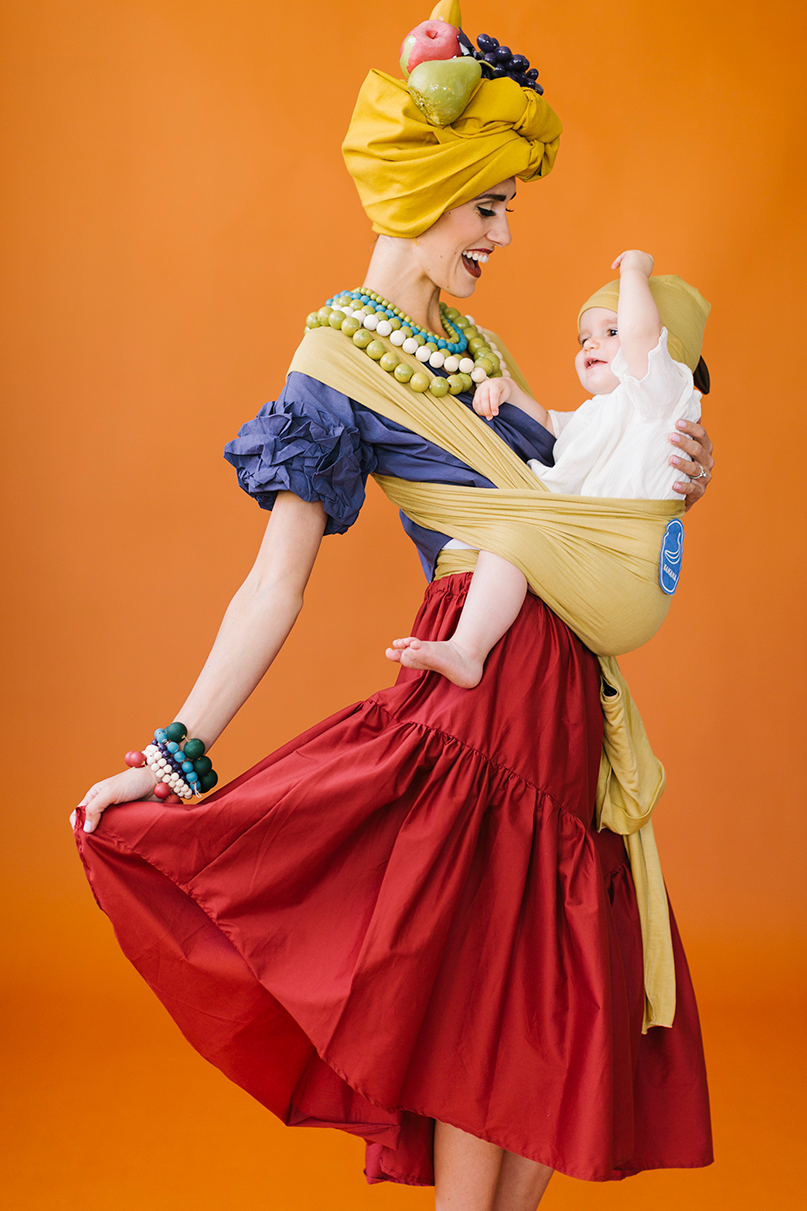
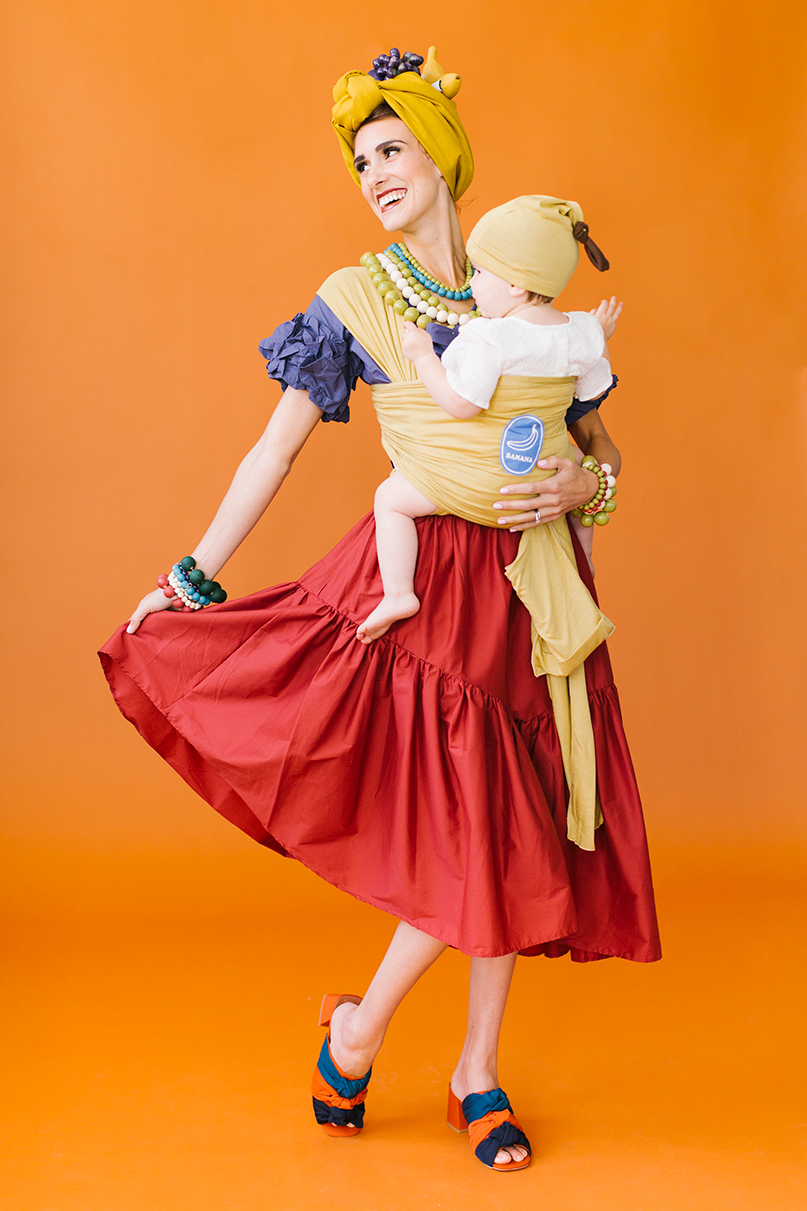
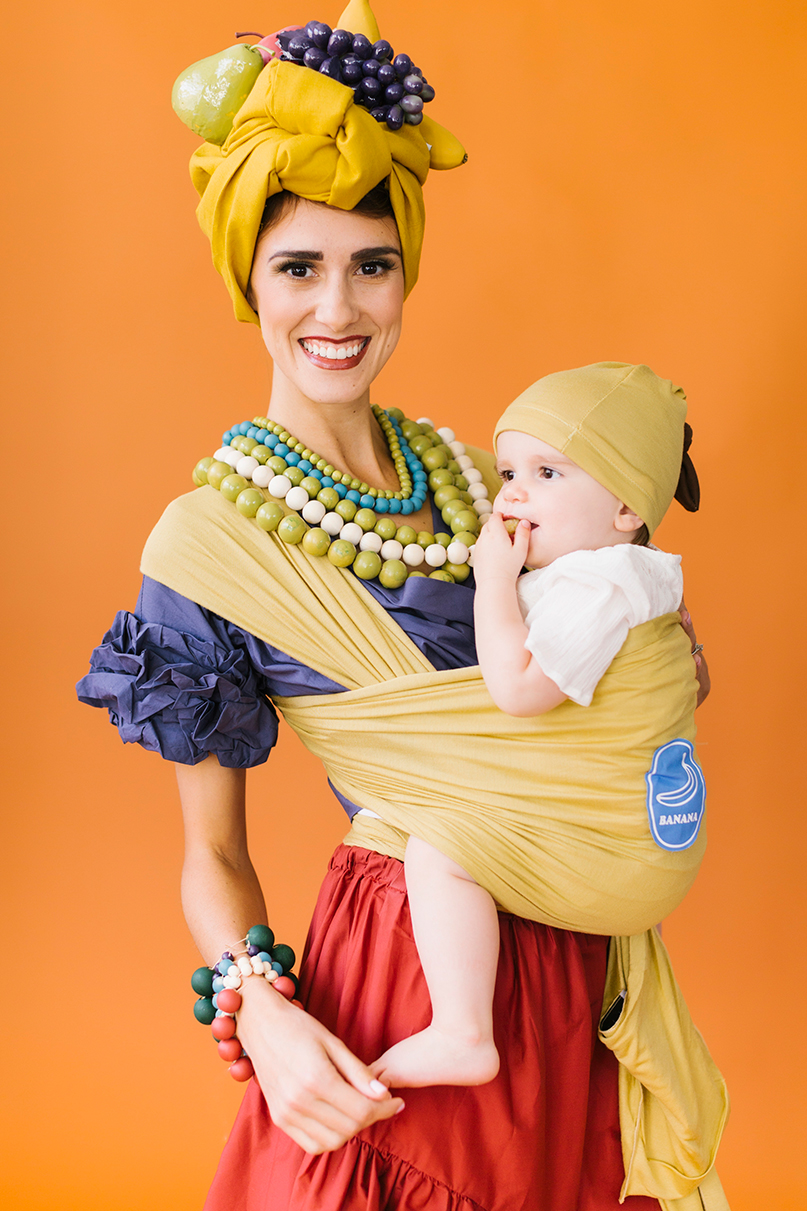
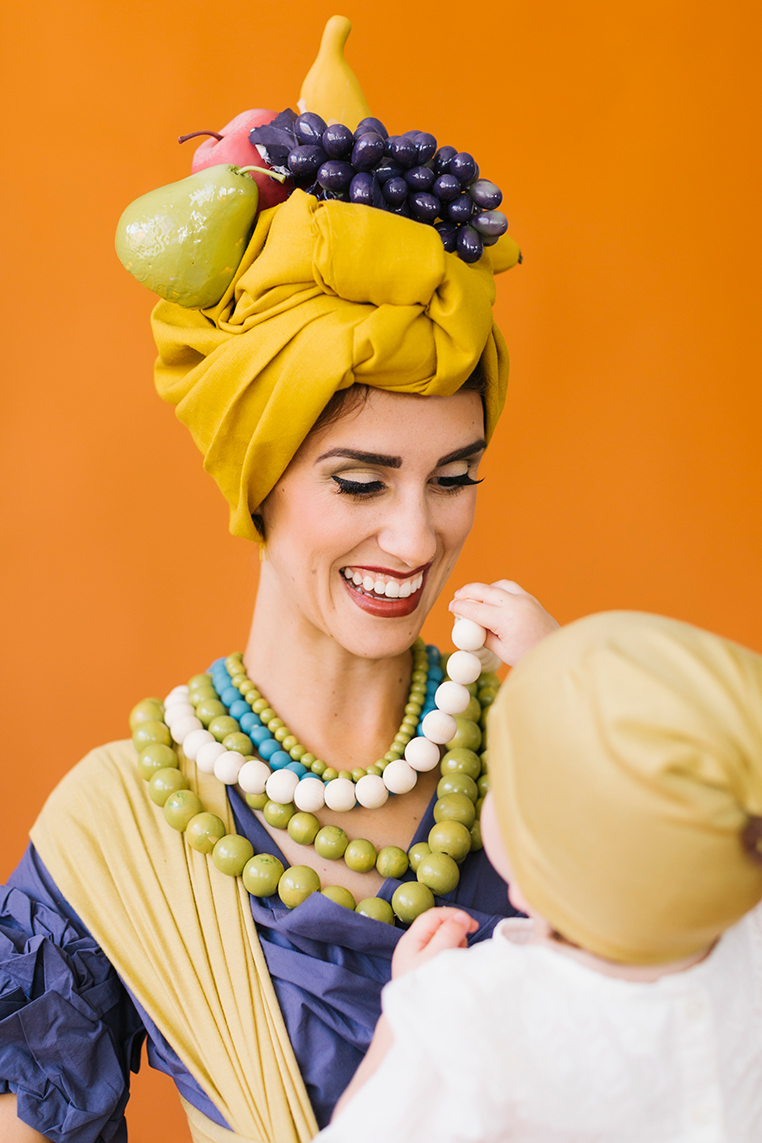
Chiquita Banana Lady and Banana Mom and Baby Costume
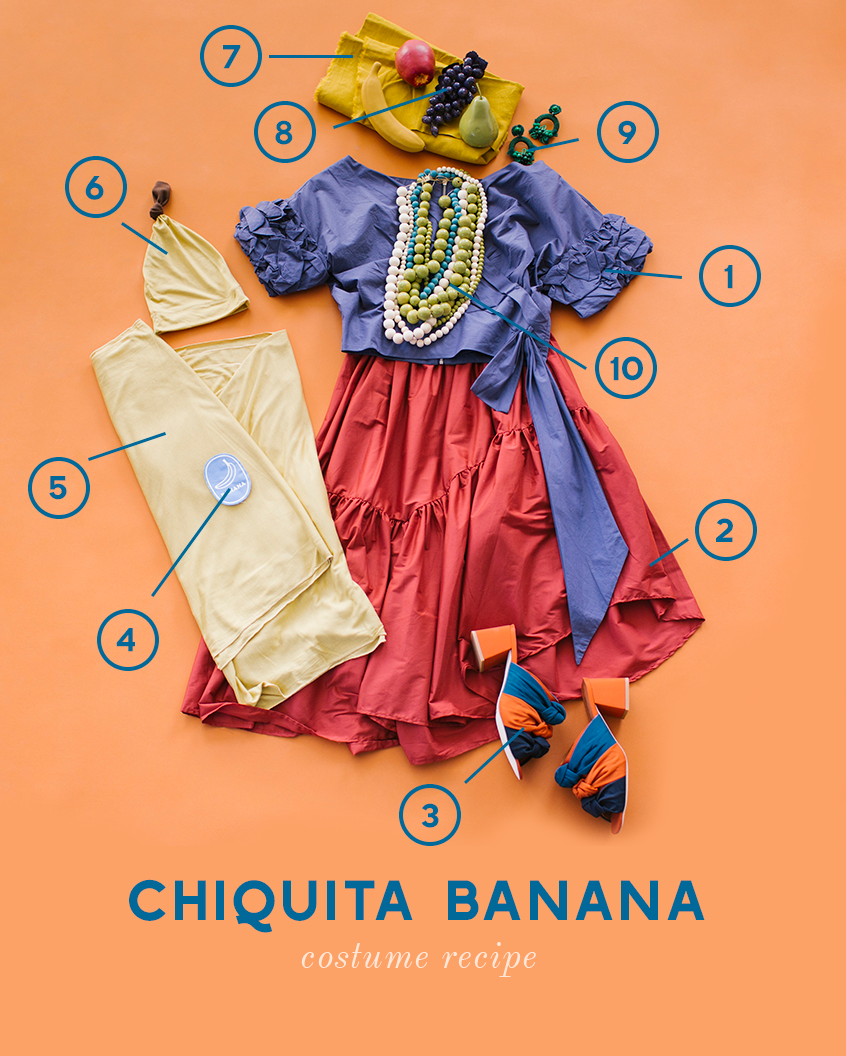
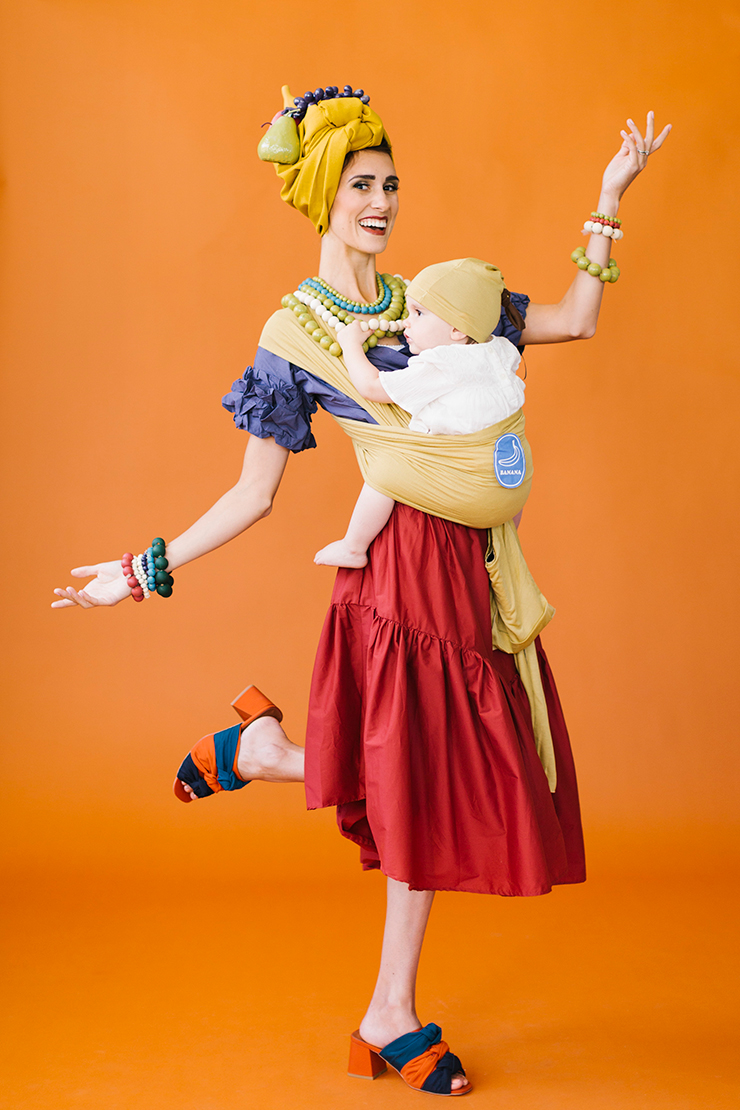
Chiquita Banana Costume Recipe:
- Ruffle sleeve blouse
- Ruffled skirt
- High heels
- Banana sticker template
- Ochre Solly Wrap
- Yellow baby hat
- Head Piece (Instructions below)
- plastic fruit
- earrings (doh! We forgot to put them on the model)
- Necklaces and bracelets (Instructions below)
Head Piece Supplies:
- Length of fabric
- Hot glue gun
- Plastic fruit
- Spray paint in pretty colors
Head Piece Instructions:
- Spray paint each fruit (we used four pieces) in different colors. Allow to dry completely.
- Use the “Big Bow” tutorial here to tie your headwrap:
- Nestle fruit into the fabric of the head wrap and hot glue in place.
Necklace and bracelet supplies:
- Spray paint in pretty colors
- Old shoe boxes
- Bamboo skewers and/or floral wire and wire cutters
- Twine
- Wooden beads in various colors
- Scissors
- Elastic thread
Necklace and bracelet instructions:
- Thread wooden beads onto bamboo skewers or floral wire. Lay the skewers or wire across the top of an open shoe box. Spray beads. Turn and spray paint the undersides. Allow to dry.
- Thread beads onto elastic thread for bracelets and twine for necklaces. Vary the lengths of the necklaces.
Chiquita banana label:
- Download the Chiquita banana label
- Cut it out with your craft cutter onto adhesive vinyl
- Attach vinyl to blue fabric
- Attach to the solly wrap with velcro or safety pins
Makeup Tips:
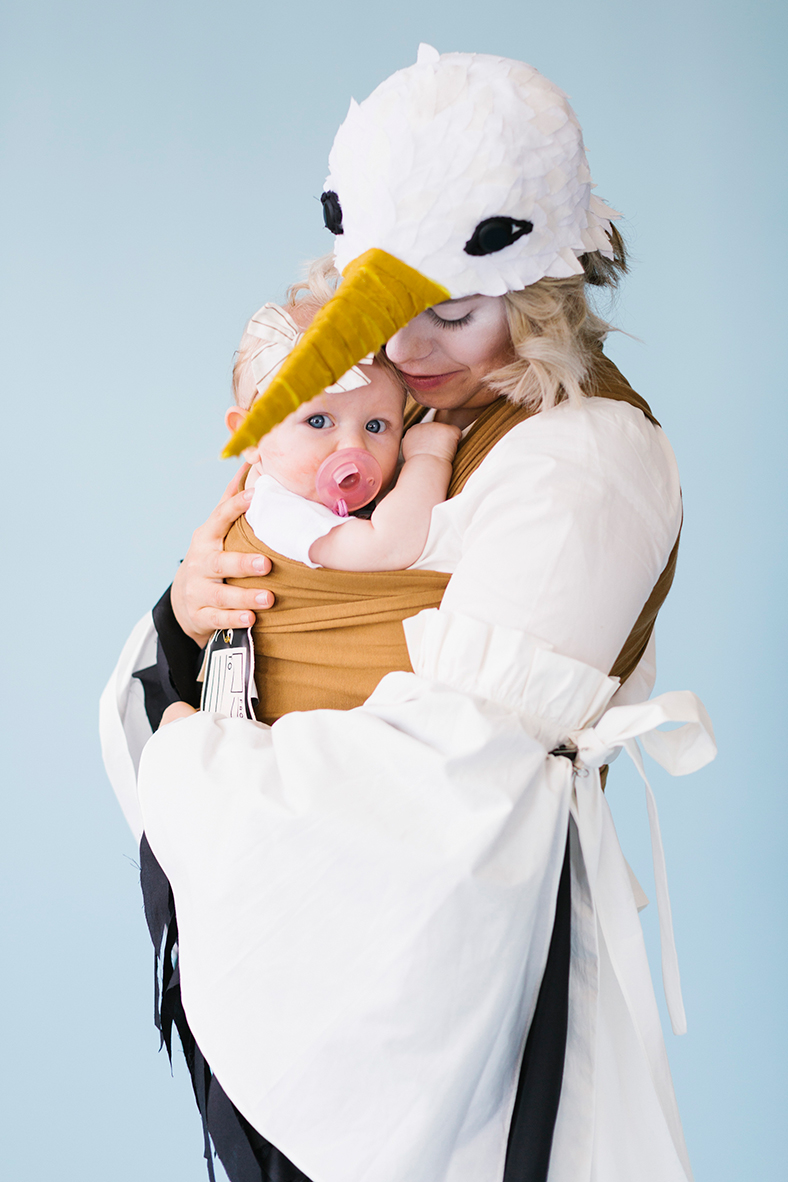
Stork and Baby Package Mom and Baby Costume
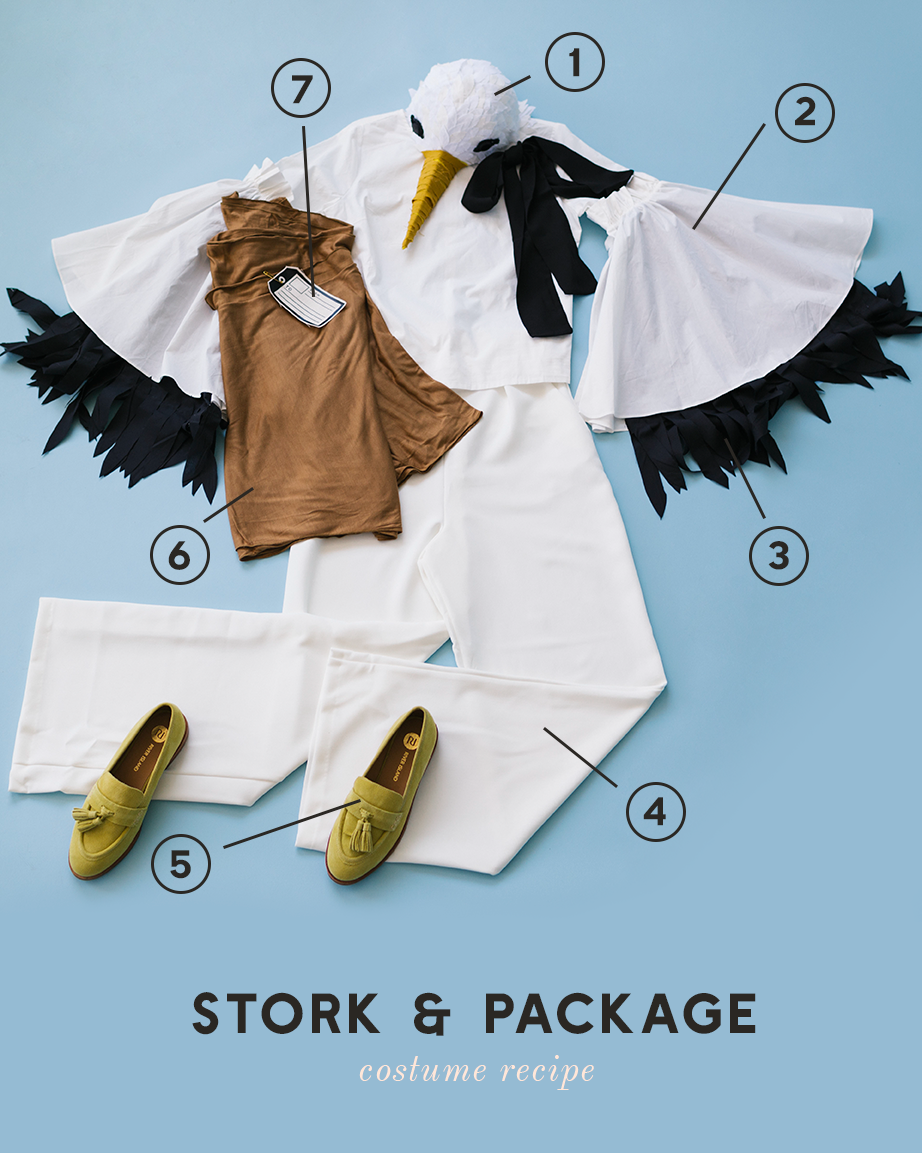
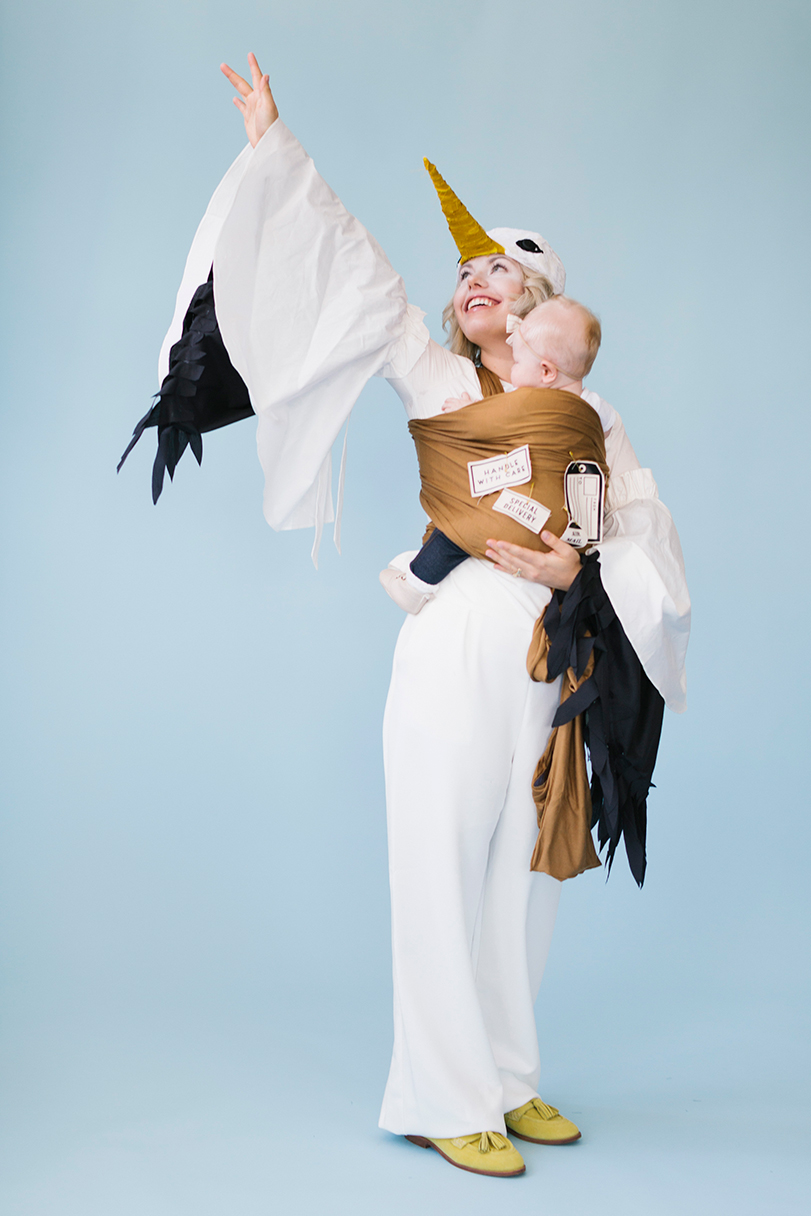
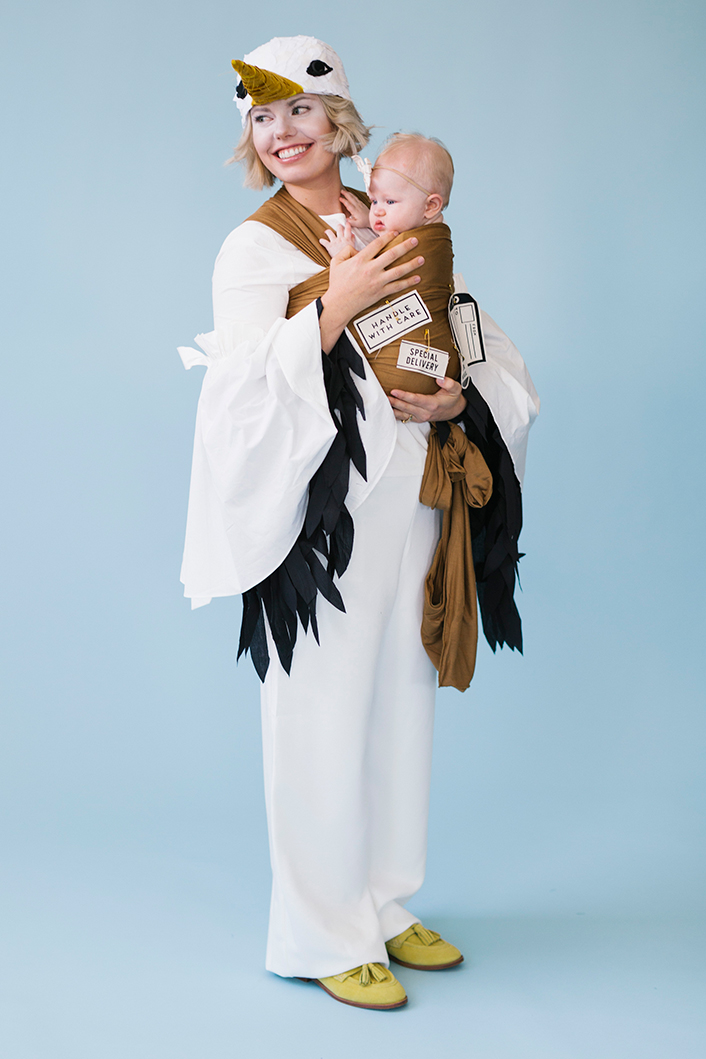
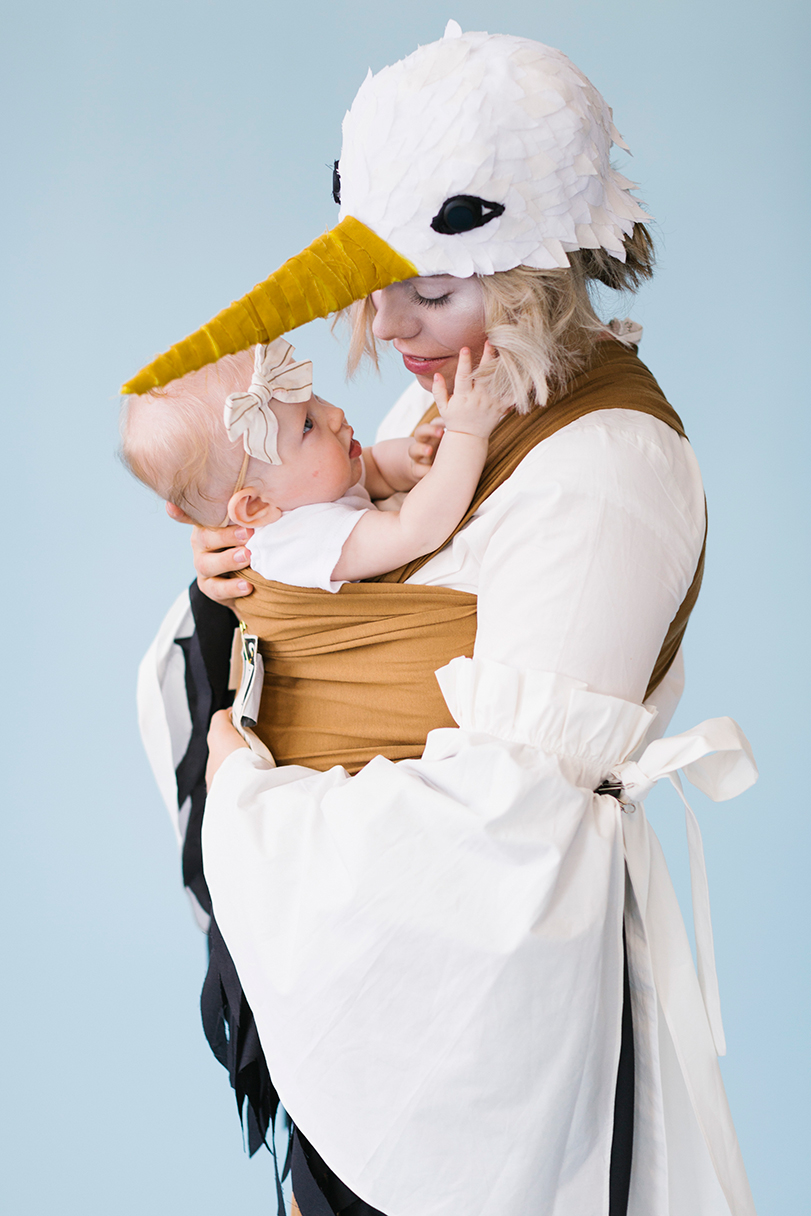
Stork and package Costume Recipe:
- Stork hat (Instructions below)
- White blouse with flare sleeves
- Stork Sleeve cuffs (Instructions below)
- White pants
- Yellow loafers
- Camel Solly wrap
- Canvas packing tags/stickers templates (here)
Shop the look:
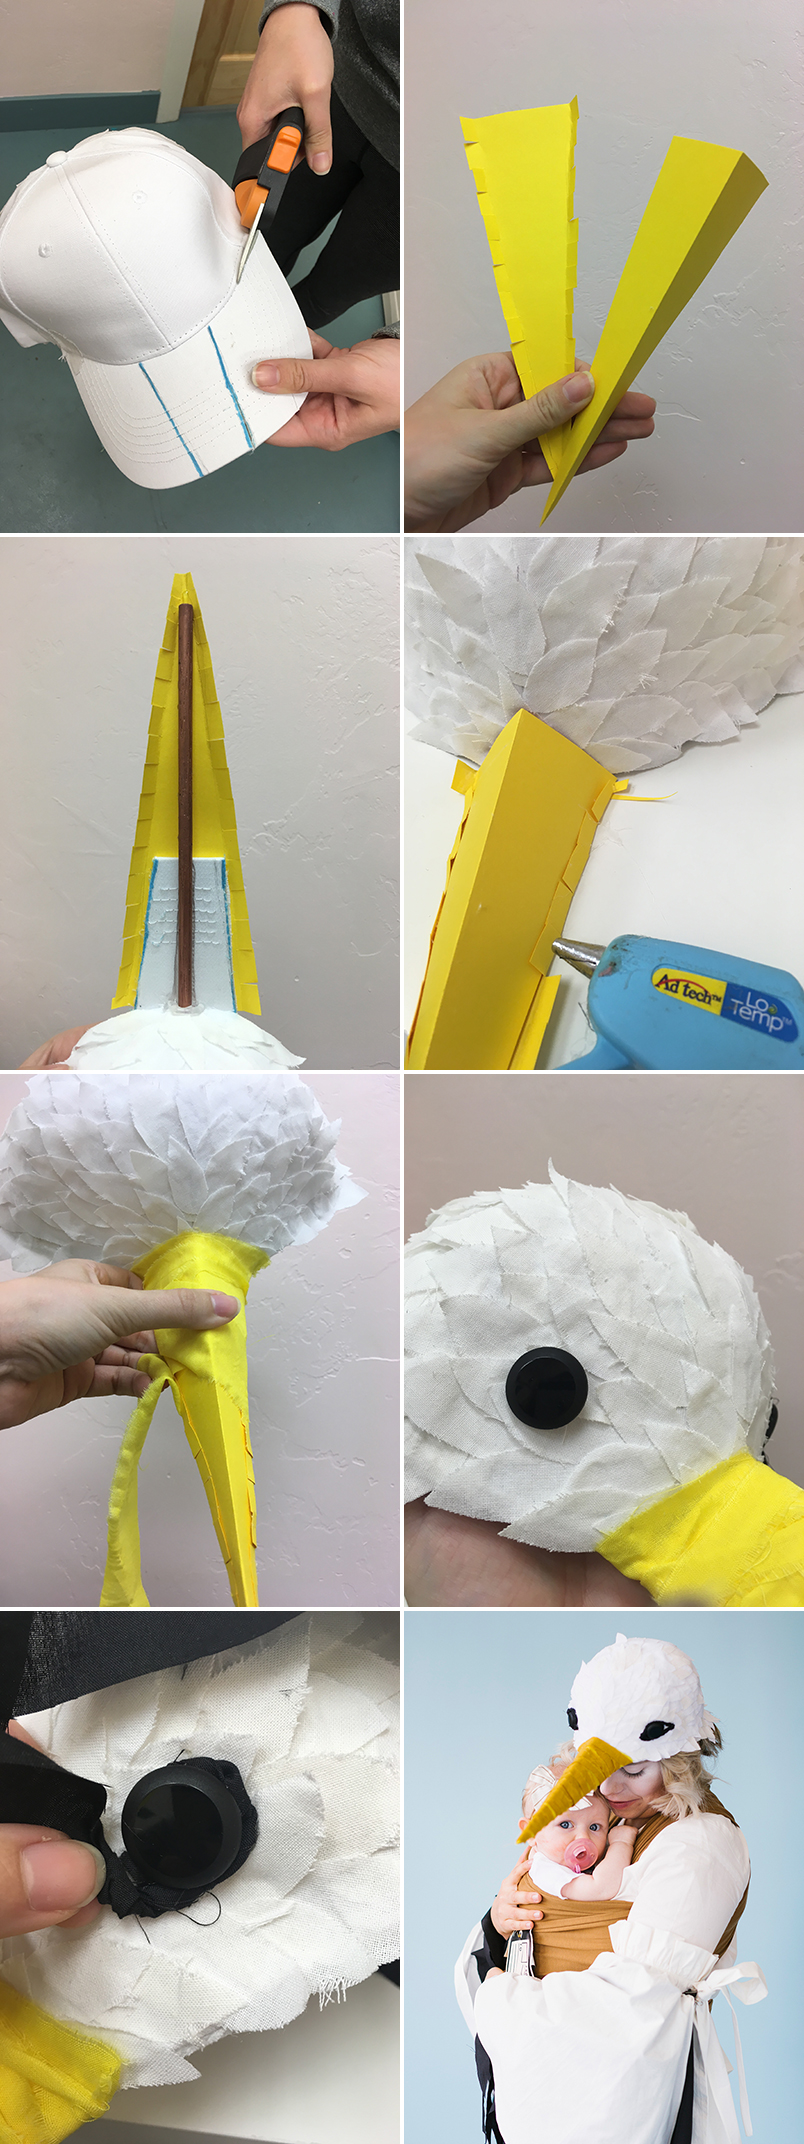
Stork Hat:
Supplies:
- White baseball hat
- Gardening shears or other heavy duty scissors
- Marker
- White cotton fabric
- Scissors
- Hot glue gun
- Wooden dowel (1/4 inch diameter)
- Yellow cardstock
- Yellow fabric
- Strip of black fabric
- 2 large black shank buttons
- Needle and thread
Instructions:
- Use your marker to mark off a 2-inch section at the center of the bill of the hat. The lines should angle in slightly as they reach the edge of the bill. Use shears to cut along the lines and the seam where the bill meets the rest of the hat. You should be left with a narrow, slightly triangular section in the middle of the bill.
- Cut a bunch of white fabric feather shapes ranging from about 1 inch to 3 inches. Use the 3-inch feathers and hot glue the tips of the feathers around the back base of the hat (they should hang off of the edge of the hat). Continue to glue feathers on the hat, overlapping each new row over the last and working from back to front, using smaller feathers as you get to the front.
- Use the shears to cut your dowel to 8 inches. Hot glue the dowel to the top of the bill of the hat.
- Cut two yellow cardstock triangles; one with a 4.5-inch base and 8 inches long. The other should have a 3-inch base and also measure 8 inches long. Fold a vertical (hot dog) fold down the middle of the 4.5-inch base triangle. Score and fold in each long side of the 3-inch base triangle about .25 inches from each of the long edges. Use scissors to fringe these folded edges about every .25-inch.
- Hot glue the fringed triangle to the bottom of the bill and wooden dowel. Place the folded yellow triangle in place on top of the fringed triangle. Hot glue the fringed tabs onto the folded triangle (see photo).
- Cut narrow fabric strips and wrap them around the cardstock beak and glue them into place.
- Sew black buttons into place for eyes. Twist black fabric strip to make two little fabric ropes and shape and glue them into place around the buttons.
Stork Sleeves
Supplies:
- Black cotton fabric
- Sewing machine
- Black thread
- Needle
- Scissors
- Hot glue gun
- Elastic
Instructions:
- Make a really wide tube of black fabric and hem the top and bottom and run a seam up the side. The height of the tube should be the length from your elbow to your wrist.
- Cut long black feathers (about 7 inches) and hot glue the tips of 2-3 layers of them around the bottoms of the tubes. The first (bottom) layer of feathers should hang over the hem about 3 or 4 inches.
- Run some elastic through the hem at the top of the cuffs and gather them. Make sure the elastic is a length that will fit around your elbow securely but comfortably. Cut the elastic and tack in place with needle and thread.
Mailing Tags for to go on Solly Wrap
Use these templates to cut out vinyl adhesive and apply on canvas. Attach with safety pins
Makeup Tips:
Whether you’re using a disposable wedge sponge or reusable beauty sponge, one of the ways that you can make white face paint look more “whitewashed” and less like a clown, is to make sure your sponge is WET! This way, you can gradually blend back to your skin color easier as well!
Go back for Mushroom Costume, Artist Costume, Chiquita Banana Costume, Russian Nesting Doll Costume
Photography by Jessica Peterson | Make up and hair and tips by Alyssa Hall Make up Artistry
This post is sponsored by Solly Baby. Thanks for supporting the brands that we choose to work with!





Comments