

Am I the only one that tends to get burnt out from all the Halloween hullabaloo before Halloween even arrives? This isn’t to say that I don’t enjoy every minute of Halloween prep because believe me, I think about Halloween nearly every single day of the year (sadly, this is true!) But when the end of the month finally rolls around, I realize I haven’t even planned out my own costume! Decorations, parties, festivals, and plenty of other things seem to fill up my schedule (and brain), leaving me frantically throwing a costume together last minute. Well, we’ve come up with the solution.

Easy Iron-On Cricut Costumes
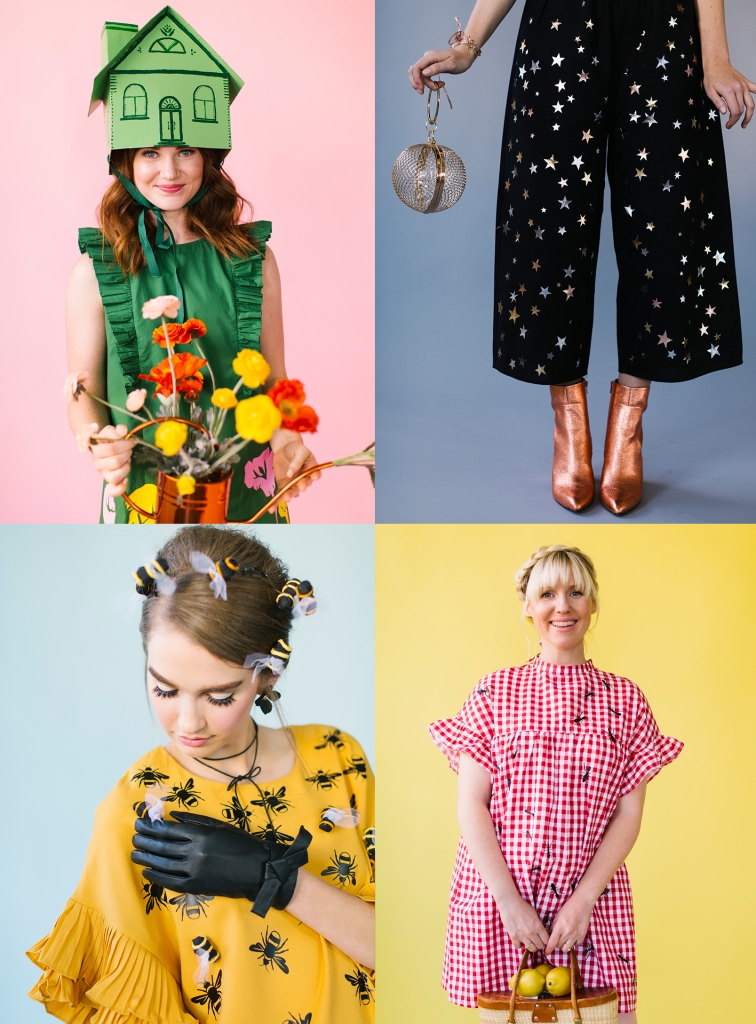
Hallelujah! We’ve joined forces with Cricut to create four easy iron-on costumes: beehive, green house, constellation, and picnic inspired ! Each adorable Halloween Cricut costume can be thrown together in less than an hour! The iron-on vinyl decals can be easily cut out with the new Cricut Maker and ironed on with the Easy Press! Bonus? You probably already have something in your closet that you can easily transform into one of these costumes!
Check out all of the iron-on costumes!
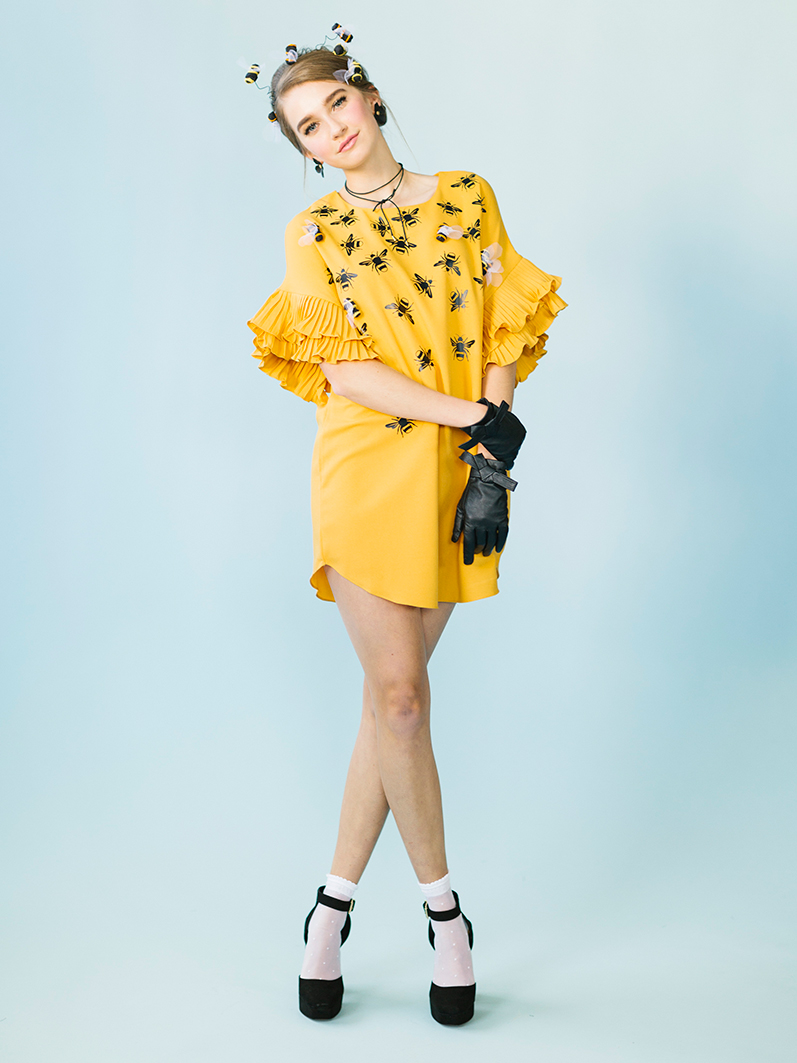
Beehive Costume


Costume Recipe:
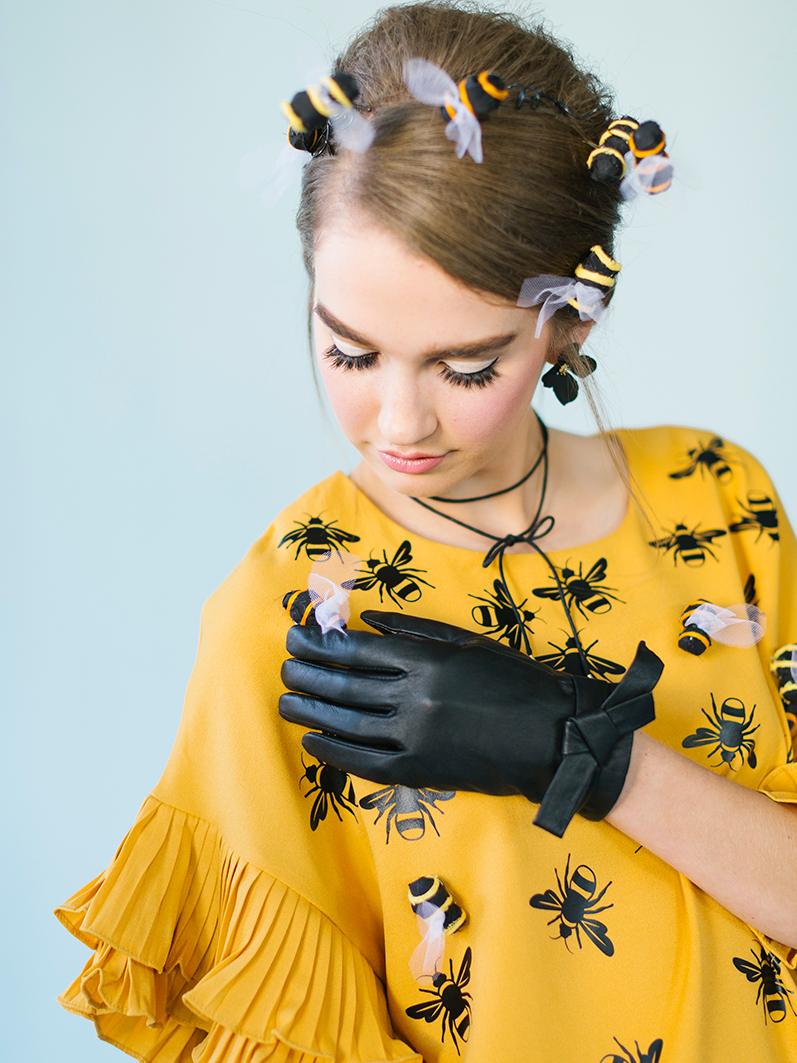
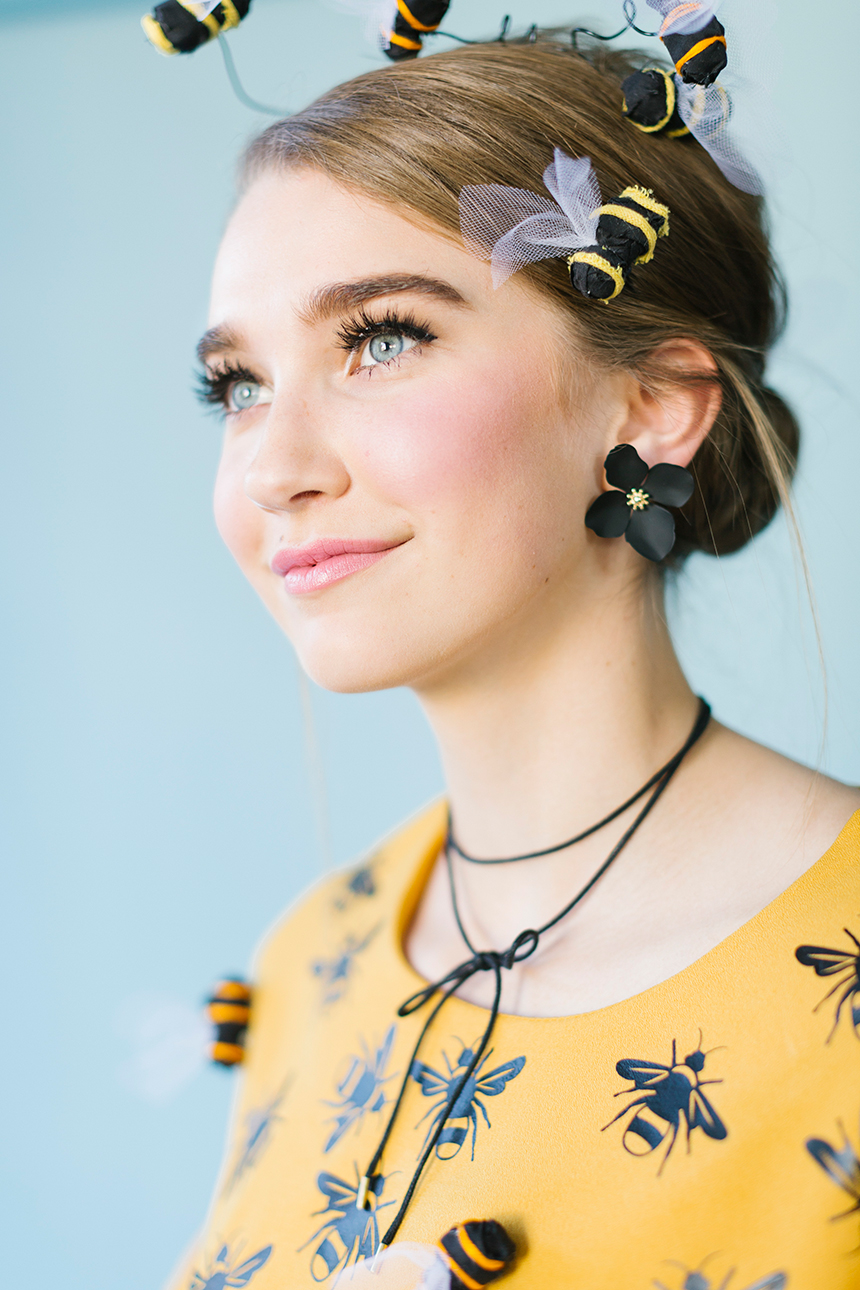
Our first Cricut costume is a beehive! With a yellow dress and beehive hair to match, we think you’re gonna love this one.
- yellow dress
- black heels
- white socks
- black flower earrings
- bee decals
- Black iron-on vinyl
- Cricut Maker
- Cricut Easy Press
- 3D bee tutorial (see below)
Shop the Look!

Instructions:
- Cut out the bee decals on black iron-on vinyl with the Cricut Maker
- Iron on the bees to the yellow dress with the Easy Press.
- Pin with additional 3D bees
3D Bees
Materials:
Instructions:
- Start by cutting two strips of black fabric. They need to be about a foot and a half long and about half an inch wide. It doesn’t have to be perfect, this is just what you are using to cover the beads to make them black
- Take the smaller of the 2 beads, one strip of the black fabric you just cut and your hot glue gun. Start by putting a dot of glue on the bead and sticking the end of the strip of fabric onto it.
- Now just wrap the rest of the strip of fabric around the bead till it’s all covered with the fabric. You will want to add a dot of glue every time you turn the bead so the fabric stays in place.
- Wrap the bead till it is fully covered… you will most likely not need to use the whole strip of fabric to cover the bead … that’s okay, just cut off the excess little bit, you will use it later!
- Glue the bead you just covered (the bee’s head) and the larger uncovered bead (the body) together. Take the larger bead and put a dollop of glue over the bead hole and stick it anywhere on the black bead. Hold them together for a couple seconds so they are glued securely together.
- Cut a piece of wire about 7-8 inches long. Take one end of the wire and wrap it around the place where the 2 beads are glued together. Wrap it once and then twist it around itself so the wire stays in place.
- Take the little strip of excess fabric you cut off in step 4. Roll it up into a little ball and hot glue it to the end of the uncovered (body) bead. This will give your bee a more oval/realistic shape!
- Use the second strip of fabric to cover the body bead and the little ball of fabric glued to the end. Repeat the process in steps 2 and 3. As you are wrapping and gluing feel free to twist the fabric every so often to give your bee some bulk! You should use the whole strip of black fabric to cover this section.
- Start by hot gluing the end of the embroidery floss to the underside of the bees head. Wrap the floss twice around the head, cut, and glue the end down.
- Repeat step 8 two more times on the body so you have 3 stripes.
- The last part is the wings! Take the piece of tulle and fold it in half. Cut a long oval shape a couple inches long. Once you are done cutting you should have 2 oval shapes, just leave them stacked on top of each other!
- Take your net fabric ovals and you are going to find the middle and twist them together.
- Fold the wings in half at the twist and put a drop of hot glue on the twist.
- Glue the wings onto the spot where the 2 beads meet. Push the fabric down a bit so it’s securely glued on the bee’s body!
Makeup Tips:
This one had a very 1960’s feel, so a bold winged liner and thick, fluttery false lashes are key! You can even add falsies to your bottom lashes, a la Twiggy, but if you’d rather not, run a dense makeup brush along your mascara wand and then paint on your lower lashes with that dense brush, allowing clumps. This will give you that doe-eyed, heavy lower lash line. Youthful skin and lips and you’re there! When it comes to a beehive hair-do, backcomb, backcomb, backcomb. And then backcomb a little more!
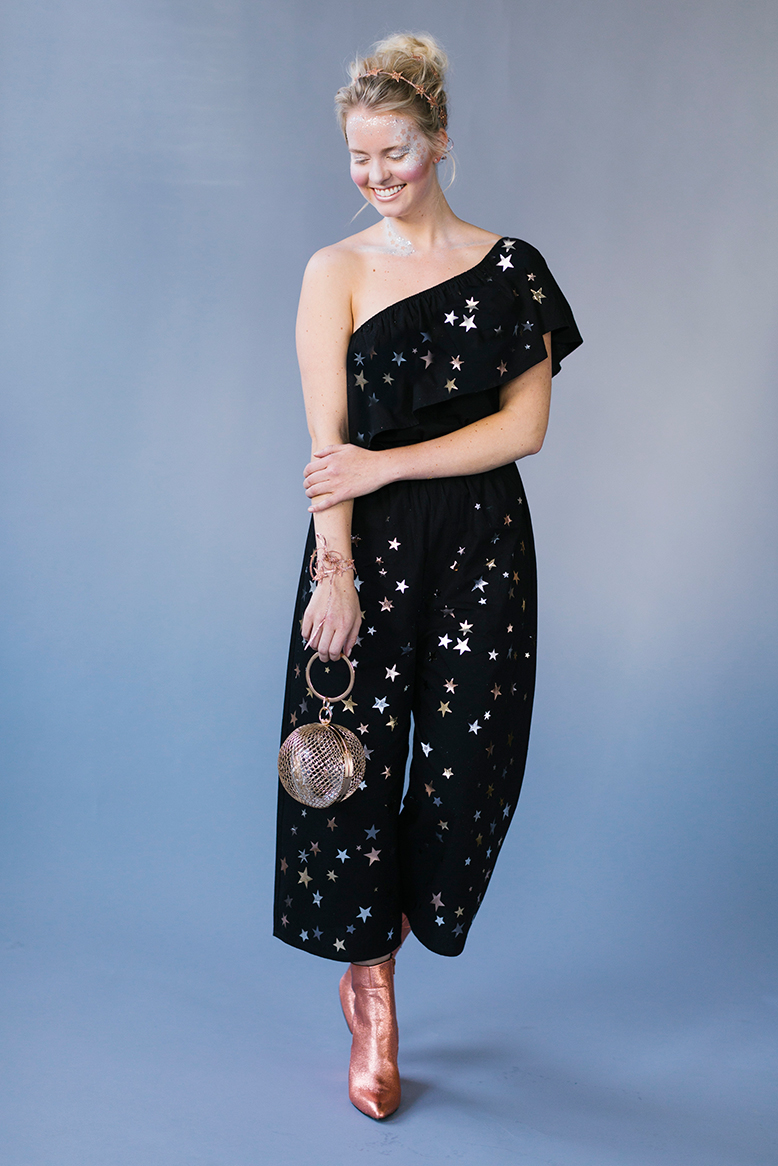
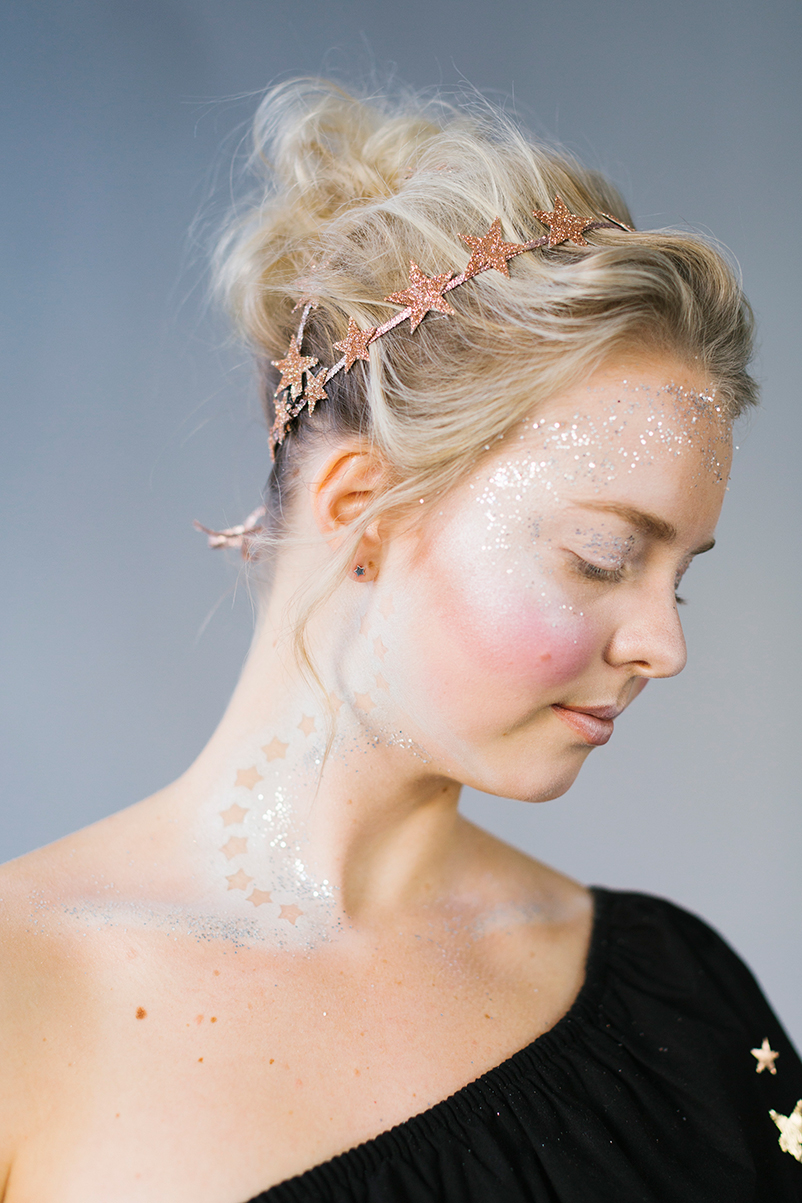
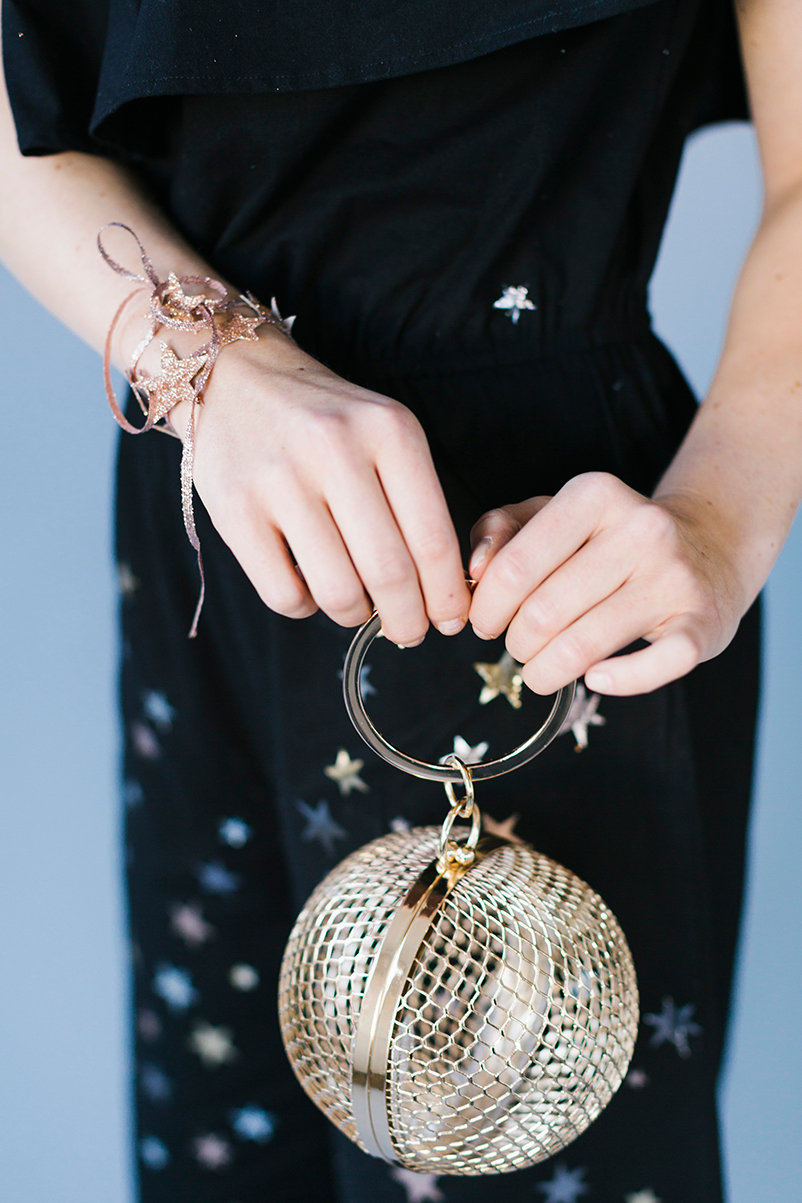
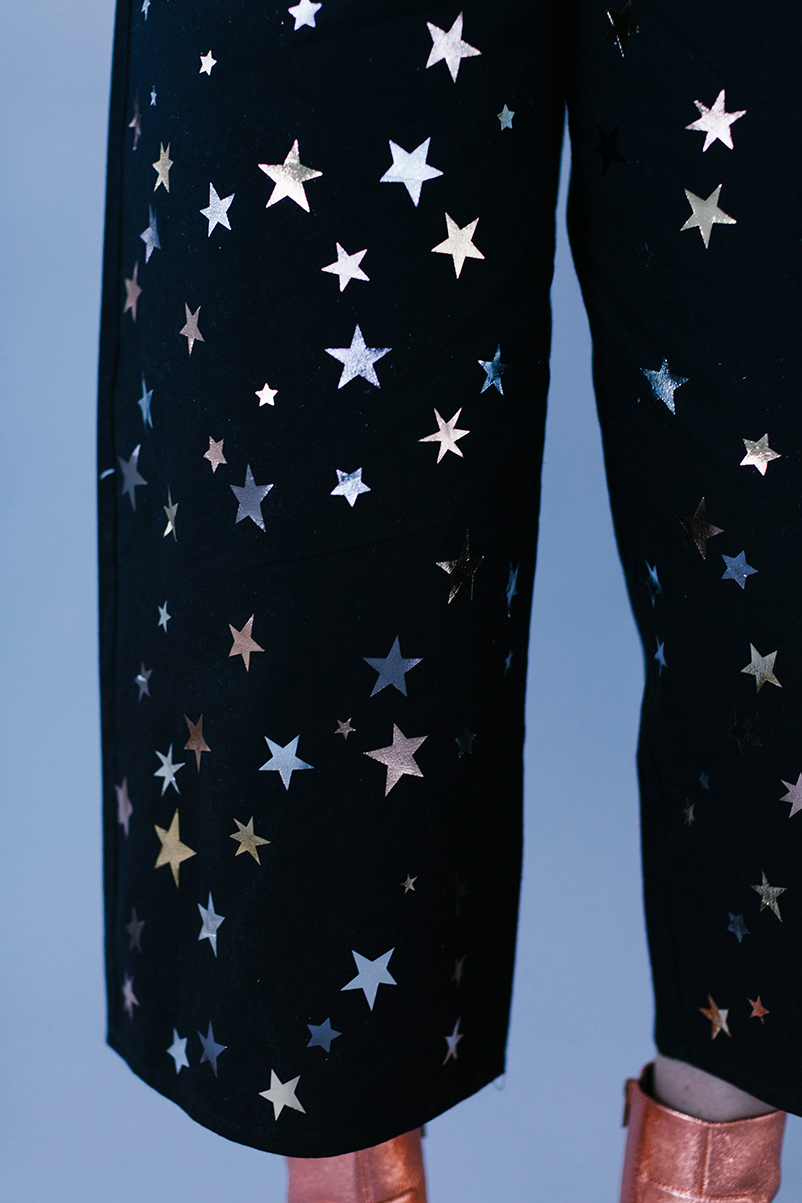
Constellation Costume
Costume Recipe:
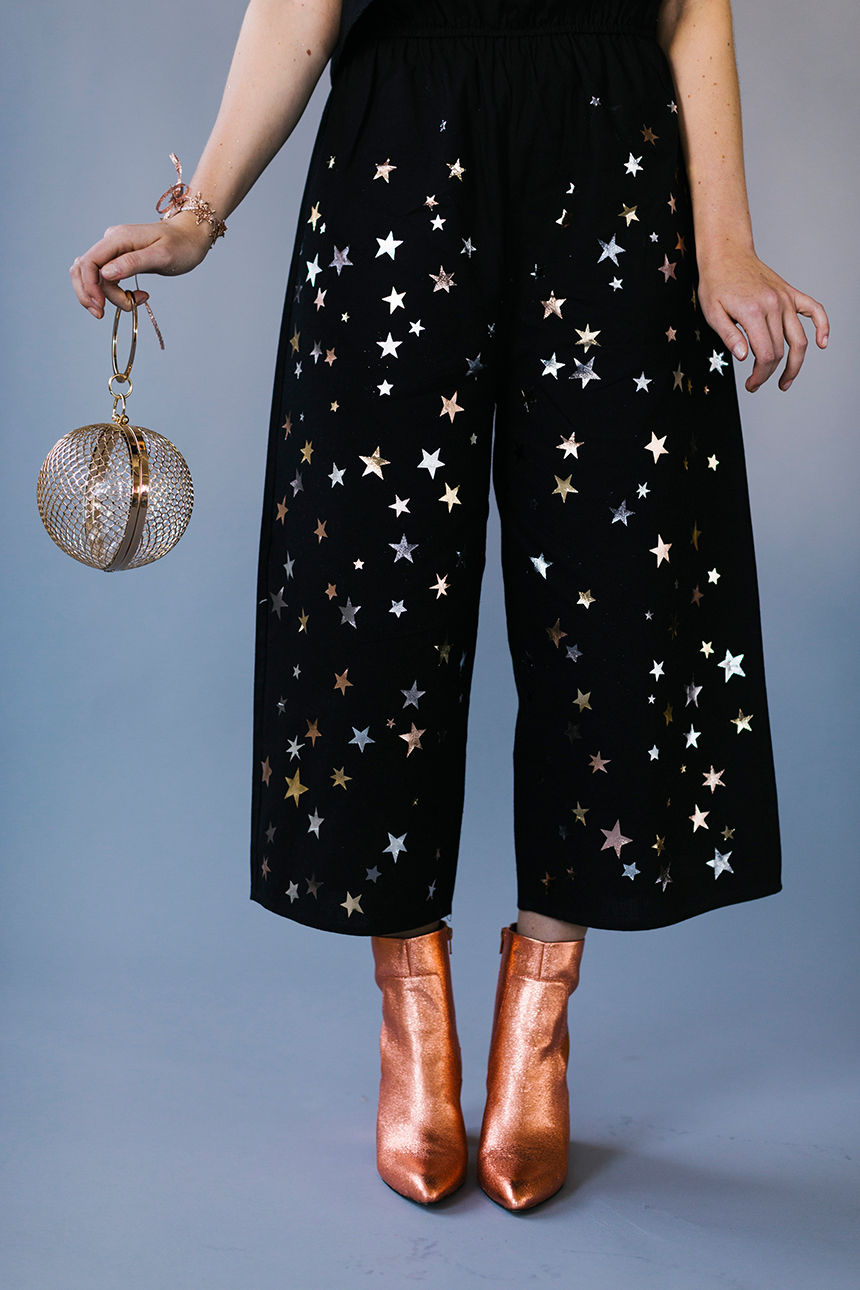
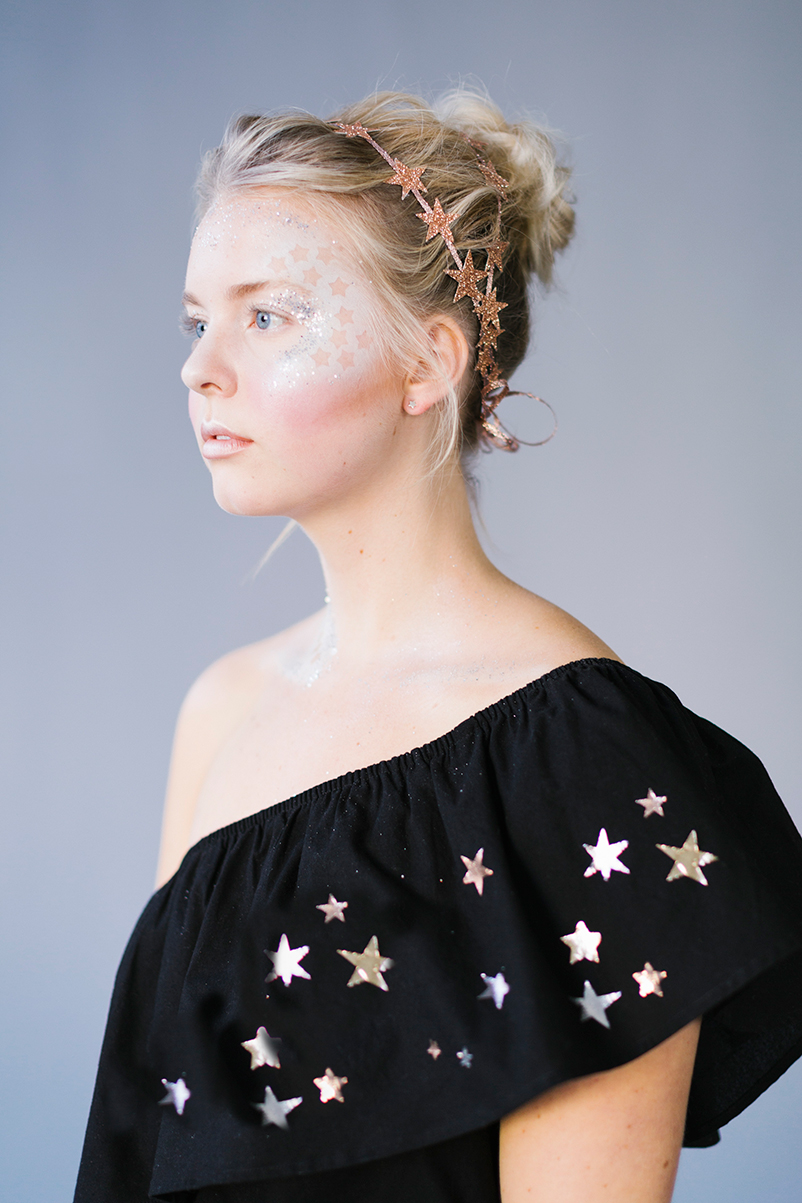
Our next Cricut costume is inspired by the cosmos. No need to stay up late to catch a glimpse of this celestial wonder!
- Black jumpsuit or long maxi dress
- metallic boots
- sphere clutch
- star decals
- Metallic iron-on vinyl
- star headpiece (instructions below)
- Cricut machine
- Cricut Easy Press
Shop the Look:
Cut out the stars in the variety of metallic iron-on vinyl and iron them onto the black jumpsuit.
Star Headpiece
Supplies:
- Chipboard
- Cricut Maker machine
- Rose gold extra fine glitter
- Mod Podge
- Old paint brush
- Narrow rose gold metallic ribbon
- Hot glue gun
Instructions:
- Use star file and Cricut Maker to cut star shapes out of chipboard.
- Select most of the large and medium-sized stars and paint them with Mod Podge. Cover with rose gold glitter. Allow to dry.
- Cut 3 pieces of narrow metallic ribbon to about 36 inches each. Use a dab of hot glue to attach about 14 stars to the center 18 inches of the ribbon.
Makeup Tips:

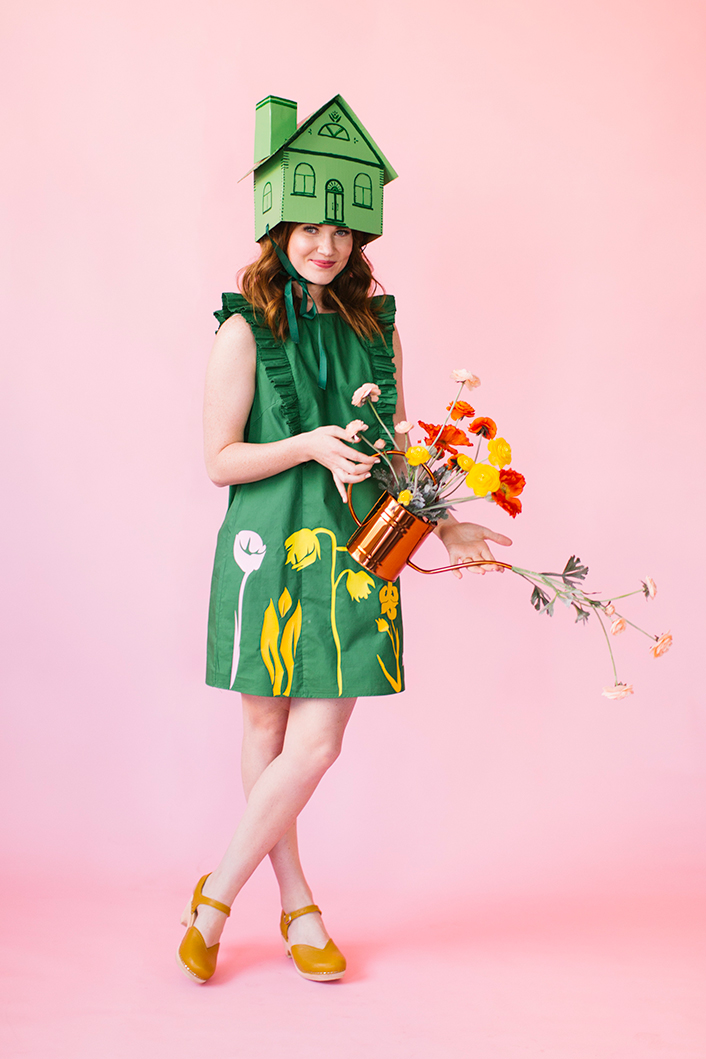
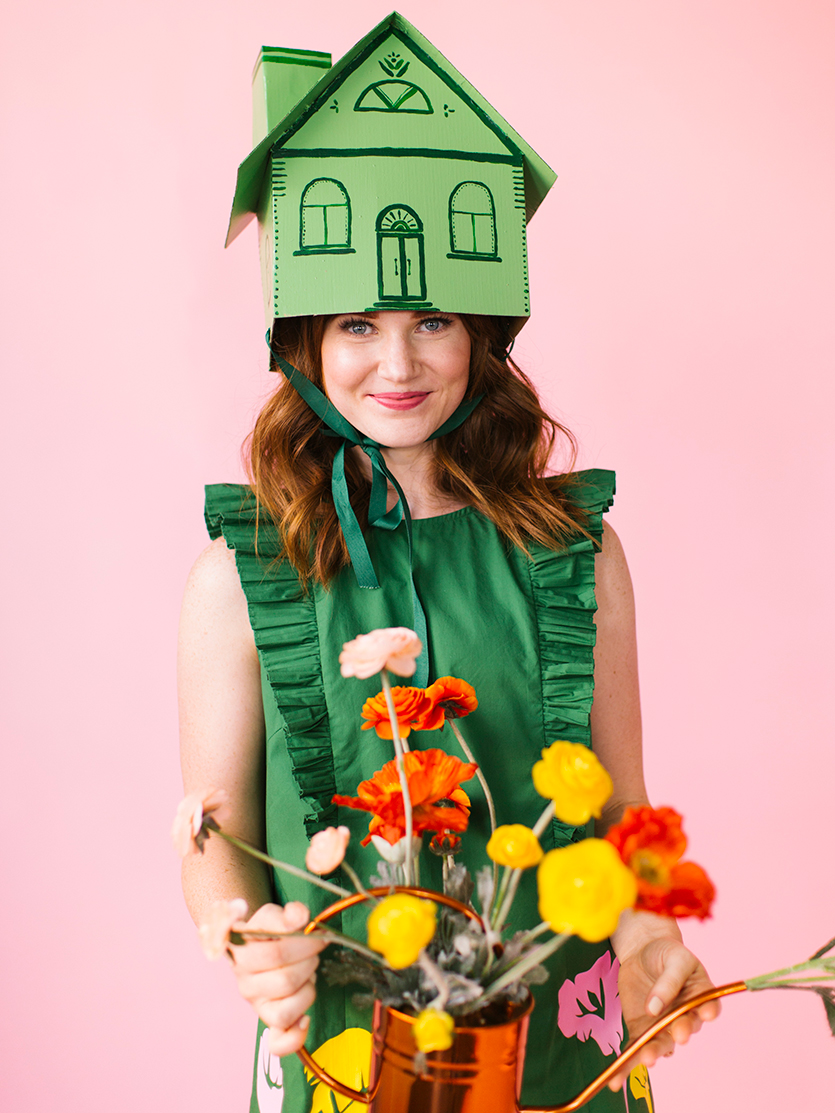
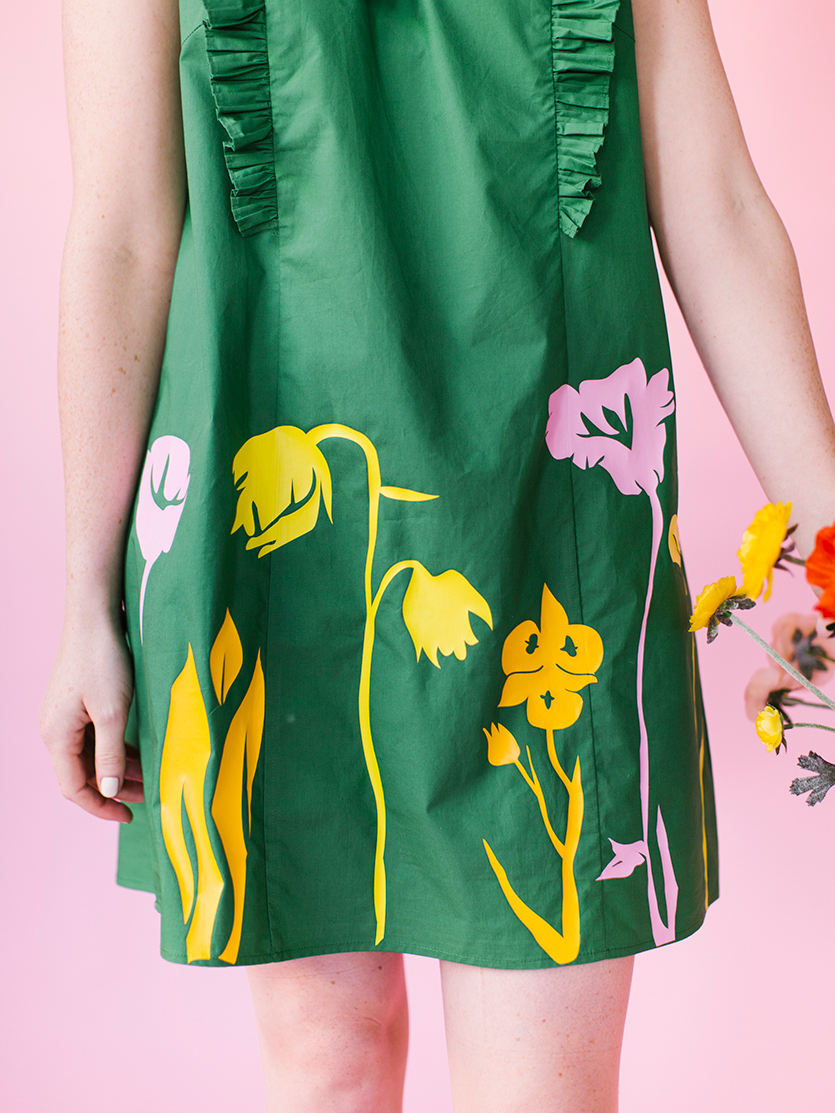
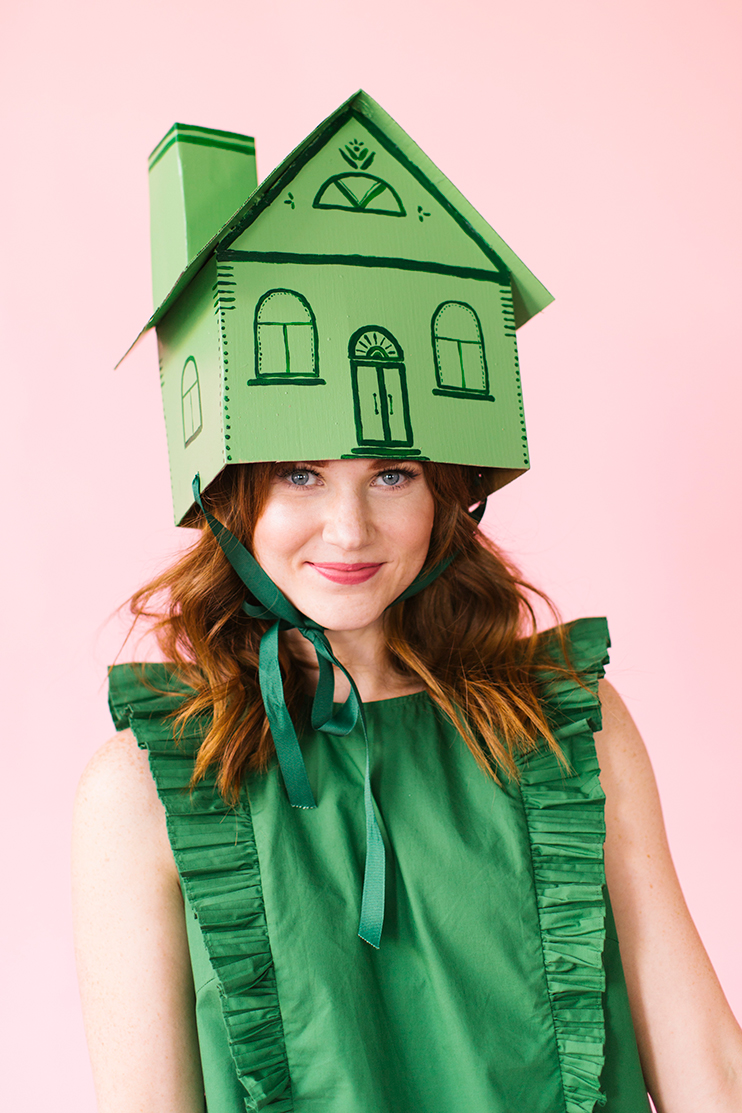
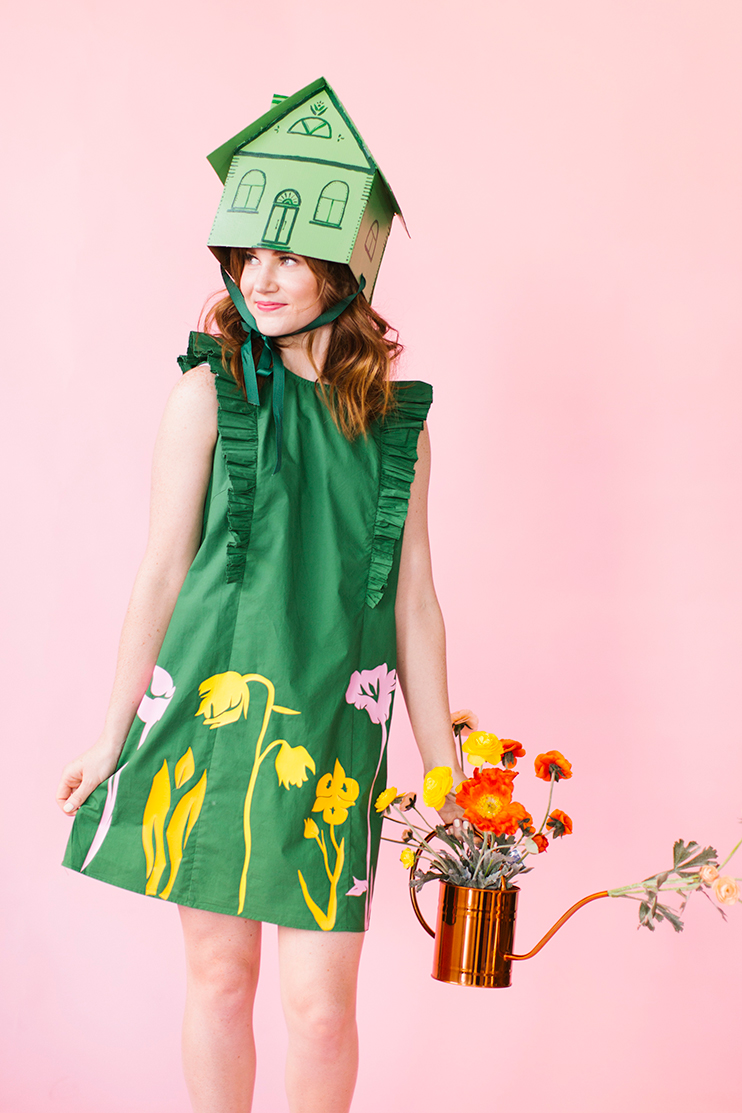
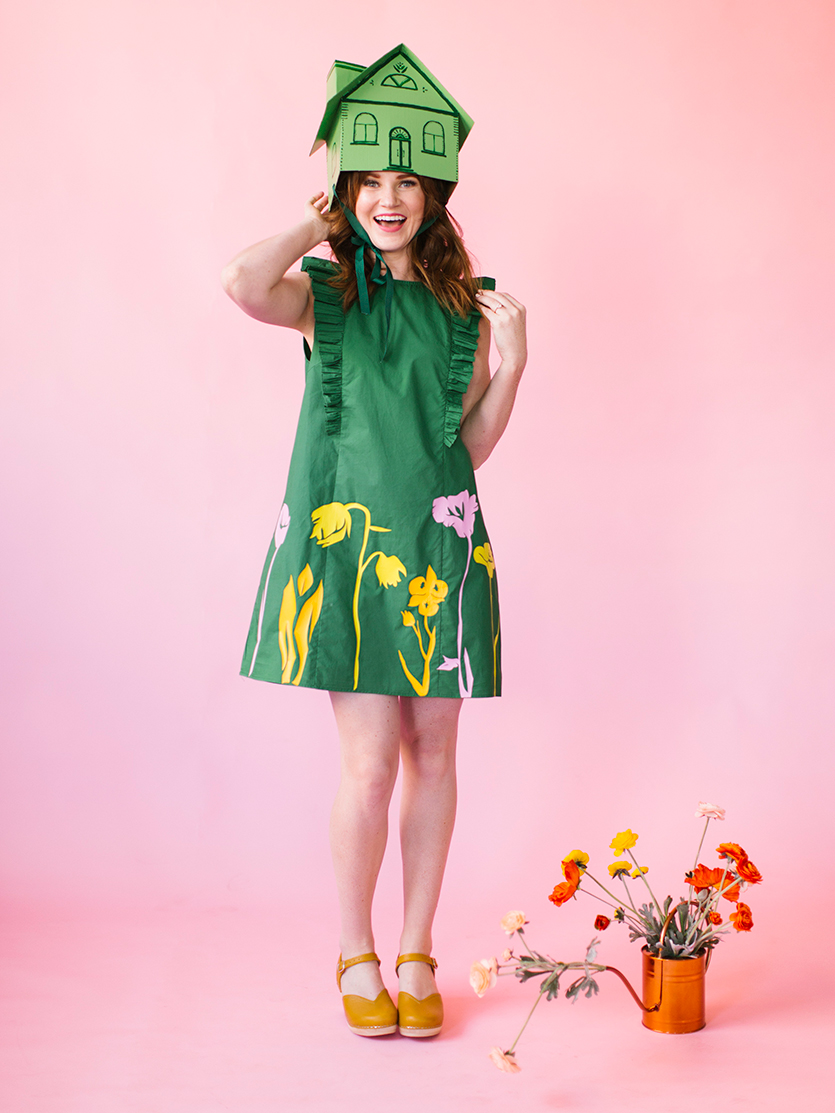
Greenhouse Costume

Costume Recipe:
What’s a Lars costume without some flowers! This next Cricut costume will have you excited for Spring in the dead of Fall.
- Green dress
- Pink, orange, and yellow iron-on vinyl sheets
- Wildflower templates
- Cricut Maker
- Cricut Easy Press
- Yellow clogs
- Copper watering can
- Silk flowers
- Cardboard house hat (template here, tutorial below)
Shop the look!
Instructions:
- Cut out the wildflowers on the vinyl using the Cricut Maker
- Using the Easy Press, iron on the flowers to the dress, starting at the hem of the dress.
- Fill a watering can with silk flowers

Cardboard House Hat
- Using the dimensions and sketch provided or these templates, cut out the house from cardboard and put together with hot glue or duct tape.
- Paint a light grass green. Let dry.
- Apply house details with dark green paint. Let dry
- Punch a hole on each side of the base of the house and tie a piece of 15-inch ribbon on each side, knotting the end of the ribbon on the inside of the house

Makeup Tips:
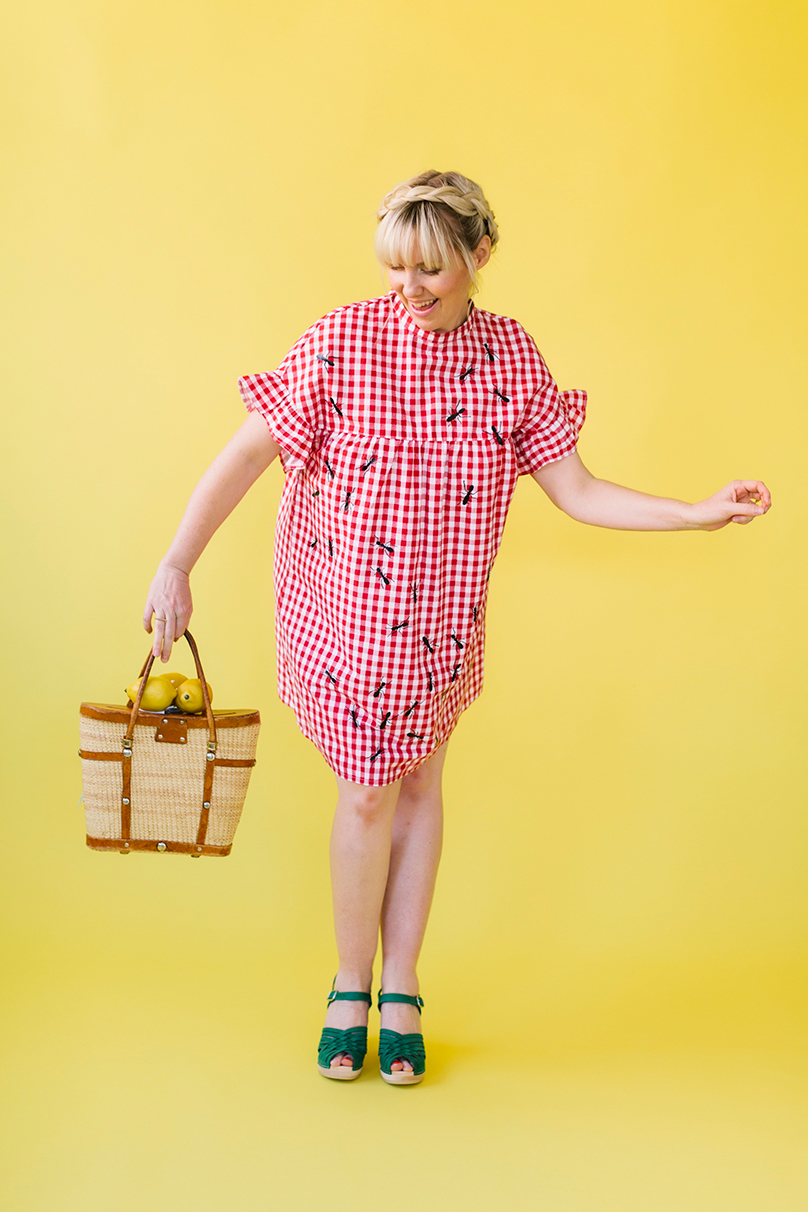
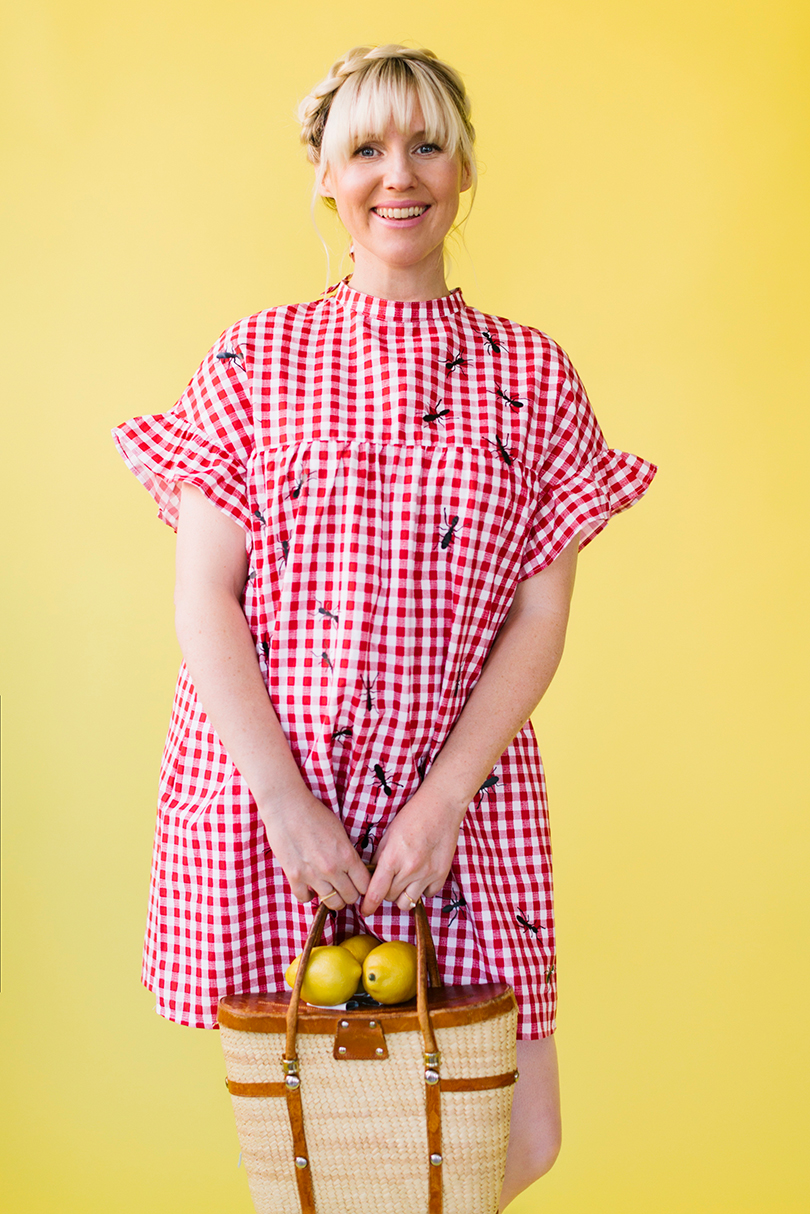
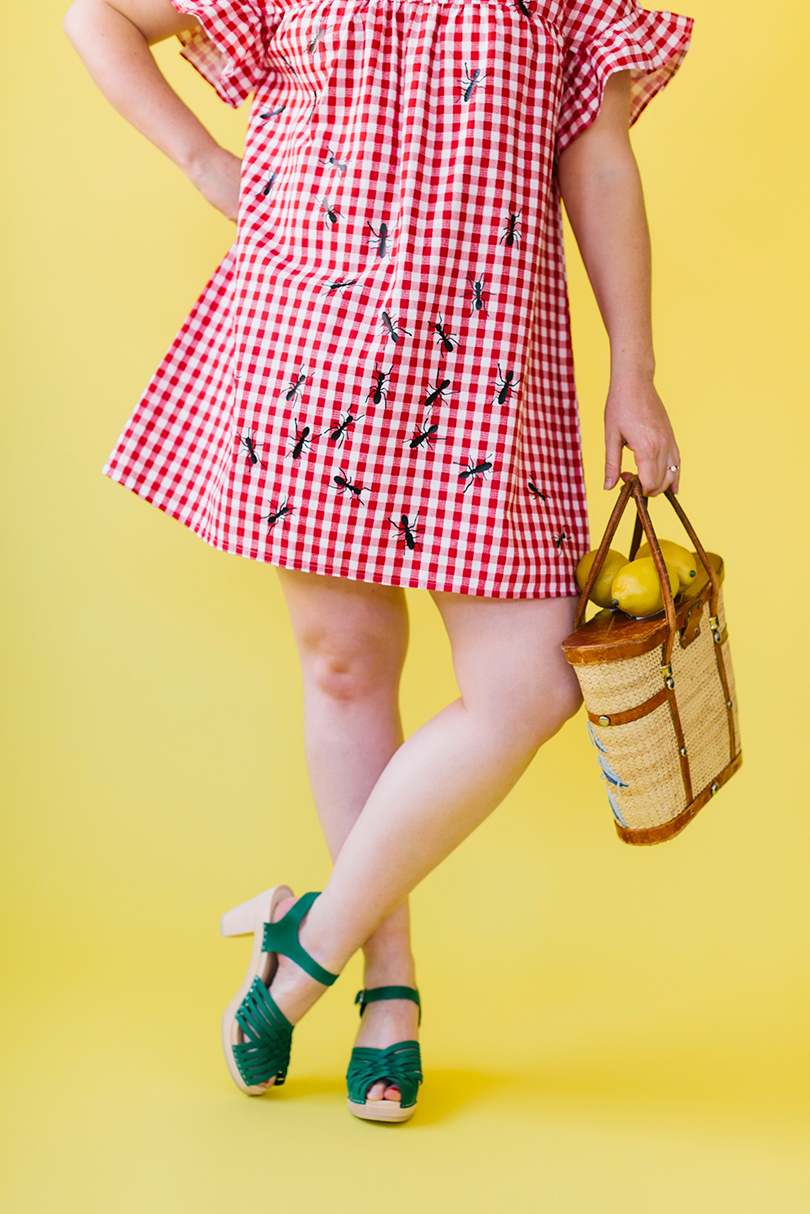
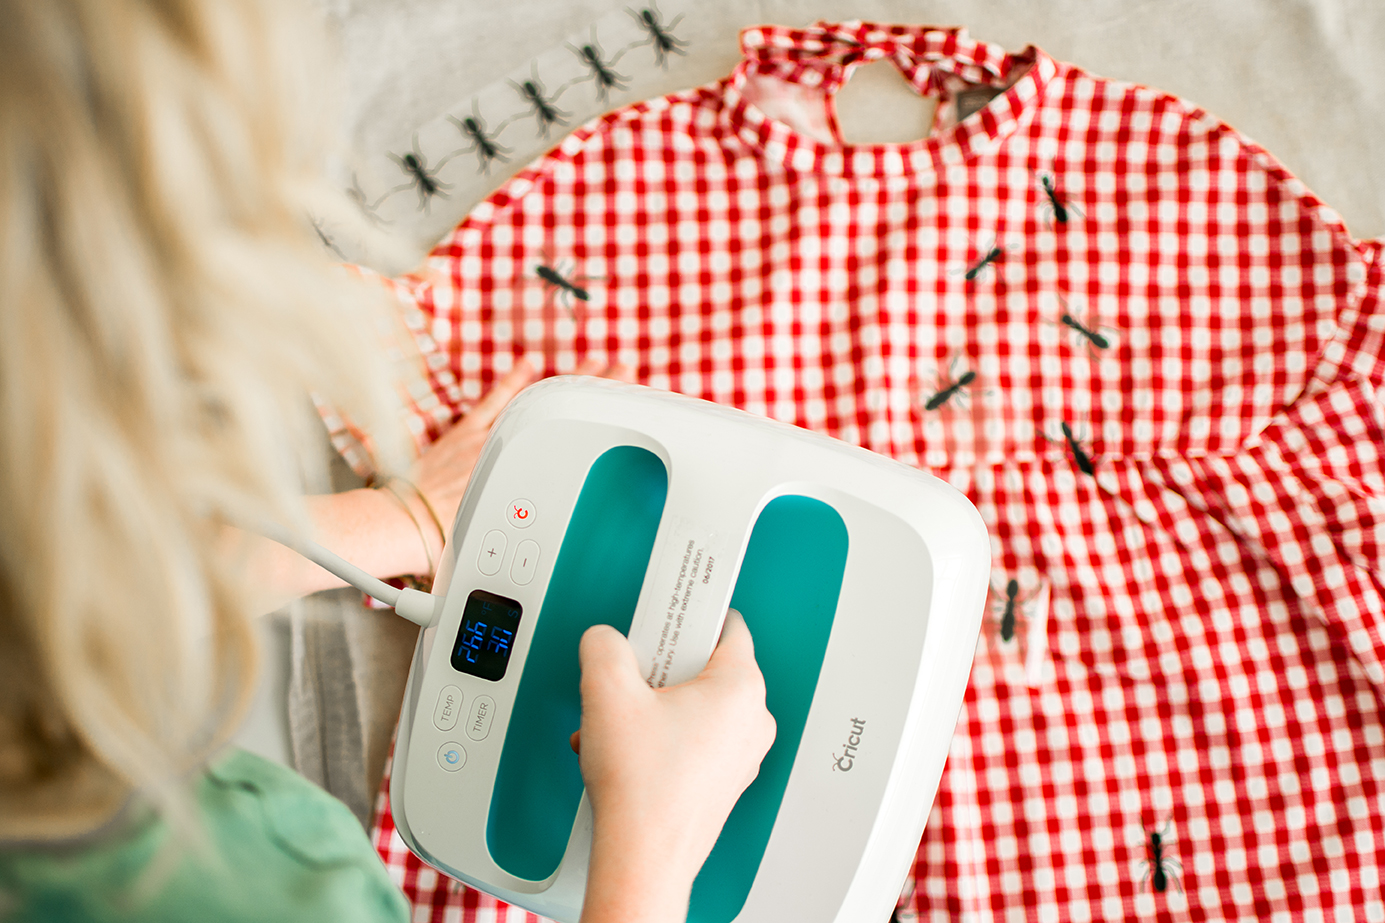
Picnic Costume
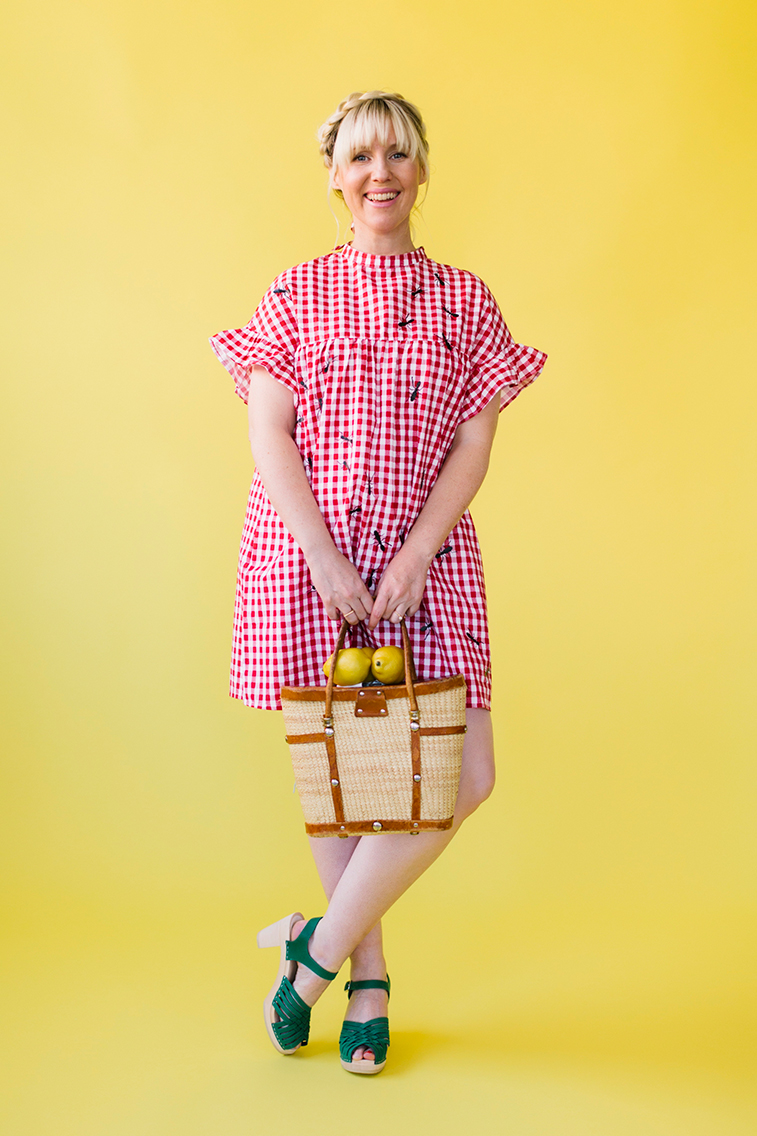
Costume Recipe:
This last Cricut costume gives you all the perks of being in nature without worrying about actual bugs.
- Red and white gingham dress
- Green clogs
- Ant decals
- straw purse
- lemons
- Black iron-on vinyl
- Cricut Maker
- Cricut Easy Press
Shop the look:
Instructions:
- Cut out the ants on the black iron-on vinyl using the Cricut maker
- Using the Easy Press, iron on the ants to the dress in small clusters
- Fill your picnic basket with fake lemons and any other picnic supplies.
Makeup Tips:
A crown braid is easier to achieve than you’d think! Part your hair down the middle all the way to the nape of your neck. Start your braid on one side, at the nape of your neck. Dutch braid it all the way up the temple, and add in the hair on the other side once you get to it! Then pin in the end of your braid when you get back to where you began.
For youthful skin, moisturize like its goin’ out of style and let your moisturizer sink in for a while before adding foundation! Nothing heavy and skip powder if you can get away with it!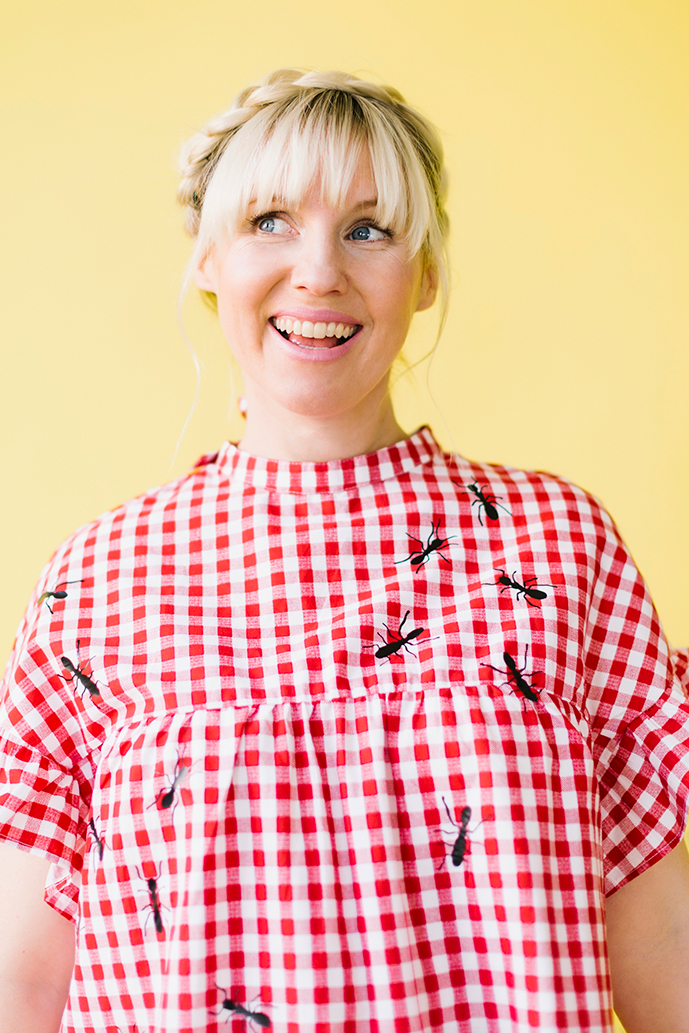
Lastly I want to highlight the machine that made all of this possible. The great thing about the new Easy Press is that it distributes the heat evenly and takes out the guessing of knowing how long each piece should be pressed for unlike a normal iron. We loved using ours to create our costumes. It was such an easy way to customize a costume without having to pull out all the stops. 
Photography by Jessica Peterson | Hair and make up by Alyssa Hall
This is a sponsored conversation written by me on behalf of Cricut. The opinions and text are all mine.
Comments