Ever since having Baby J, life has gotten a bit more complicated. Juggling normal life, running a business, and taking care of a newborn baby is no joke. How do you all do it?! I’ve learned that it takes a village and there is no shame in asking for help and using resources available to you. One such resource that I’ve fallen in love with? Nest! Have you heard of it? It combines the familiarity of a doorbell with an HD security camera. Genius! Between packages being delivered, visitors to see Jasper, and everything in between, we get a lot of traffic at our front door. I love the convenience of being able to see who’s here, and even speak to them through a microphone without moving an inch! This comes in very handy when Jasper is eating or just being particularly adorable.
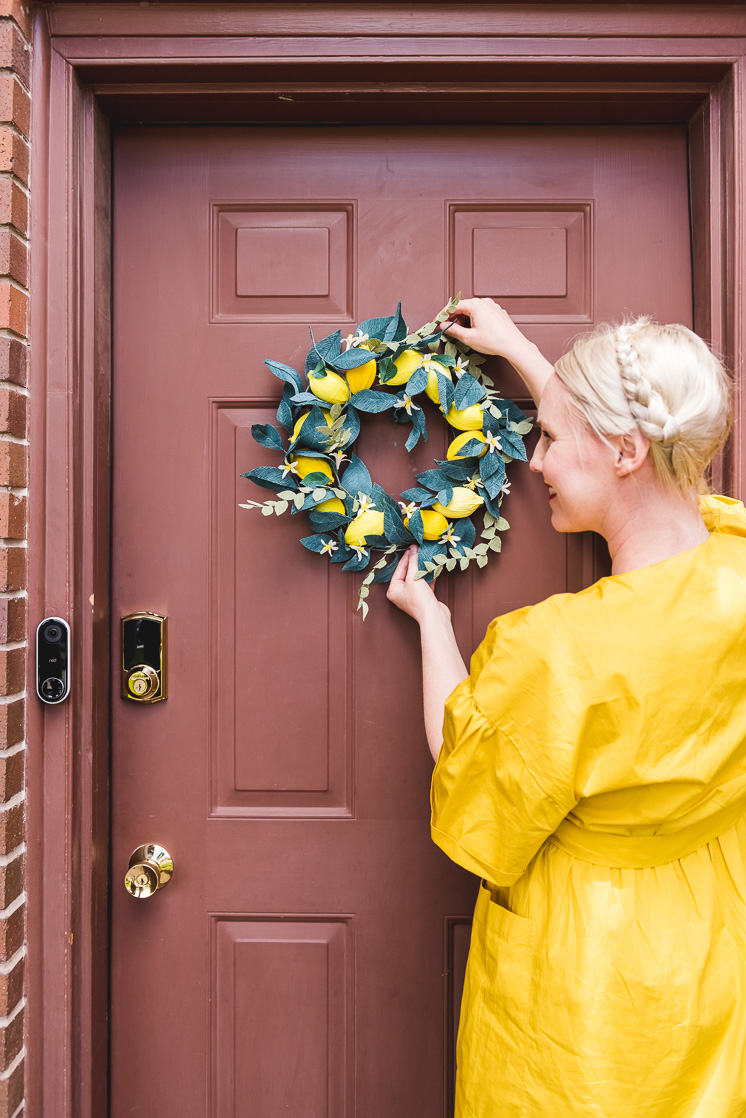
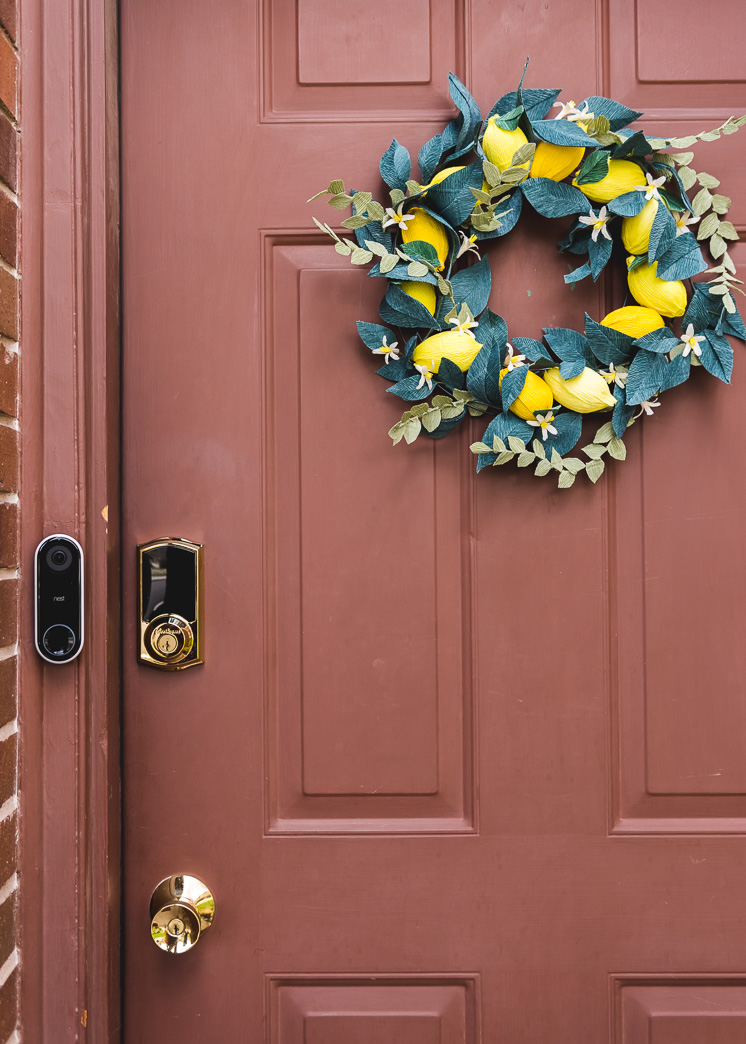
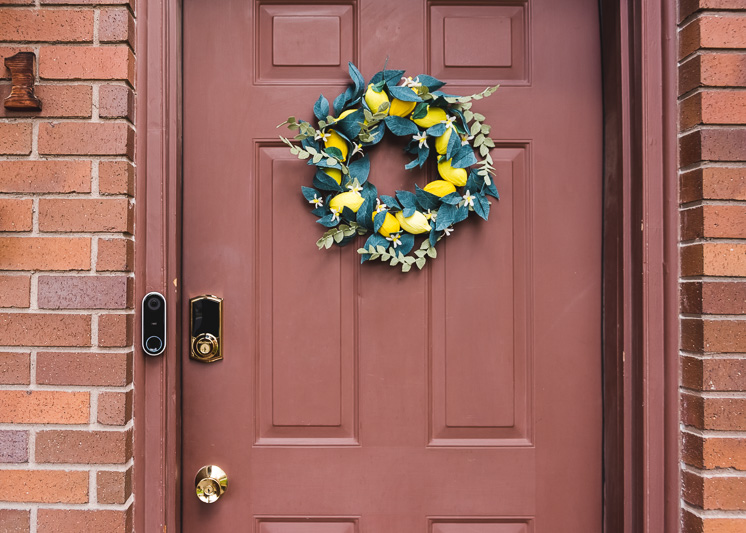
Basically, I’m nesting with Nest! Since we were upgrading our doorbell in a major way, I decided it was high time to update our wreath as well. This Crepe Paper Lemon Wreath is the perfect way to welcome in spring!
Hear more about Nest and see step-by-step photos to make your own Lemon Wreath!
Nest also connects to your mobile device and gives you 24/7 video streaming and alerts you whenever someone is at your front door. Because we receive so many packages for Lars, this is super handy when I’m in the studio or out running errands, because I know when something has been delivered. Honestly, the comfort and security the Nest offers have been so beneficial for my mental health, especially with a newborn baby. A mother worries, okay!? Nest has talk and listen capabilities so I can thank a delivery man or welcome a friend inside no problem. So if you want some peace of mind, make sure to check Nest out!
Crepe Paper Lemon Wreath
Materials:
- Crepe paper in yellow, white, and three shades of green. Buy crepe paper HERE.
- 12-inch wire wreath frame
- 12 Plastic Easter eggs (hopefully you have some still lying around or you can find them on clearance at most stores!)
- Hot glue gun
- Scissors
- 18-inch cloth-covered floral wire stems
Instructions:
Lemons
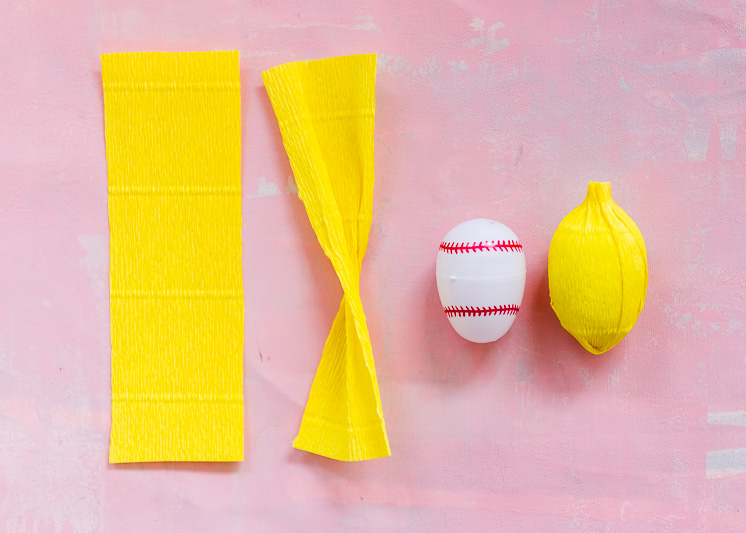
- Cut a 2.5″ by 7″ piece of yellow crepe paper.
- Twist the center of the piece. Wrap it around the easter egg and stretch the crepe paper to make sure the whole egg is covered. There should be a bit of excess on the end of the egg to imitate the shape of a lemon.
- Secure with glue. Make 12 eggs
Lemon Leaves
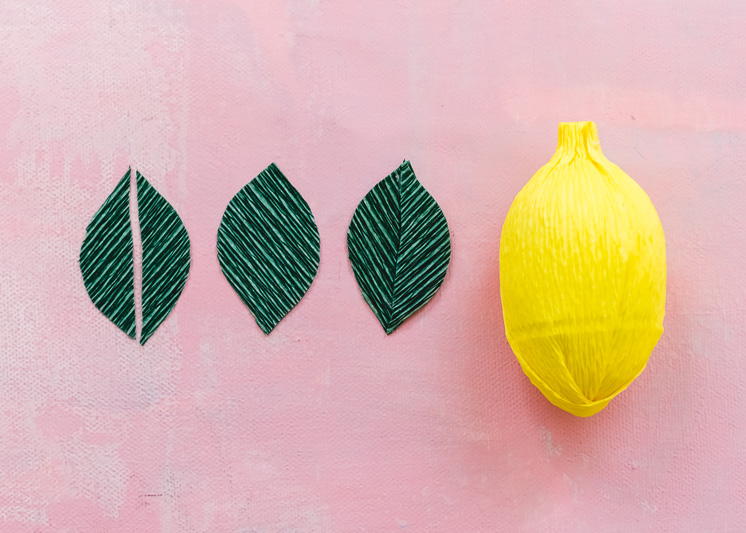
- Using the pictures provided as a guide, cut out 2 leaves approximately 2-inches tall by 1-inch wide, and cut one in half.
- Glue the half leaf on top of the full leaf, making sure the grain of the crepe is going up and out.
- Glue onto the top of the lemon
Lemon Blossoms
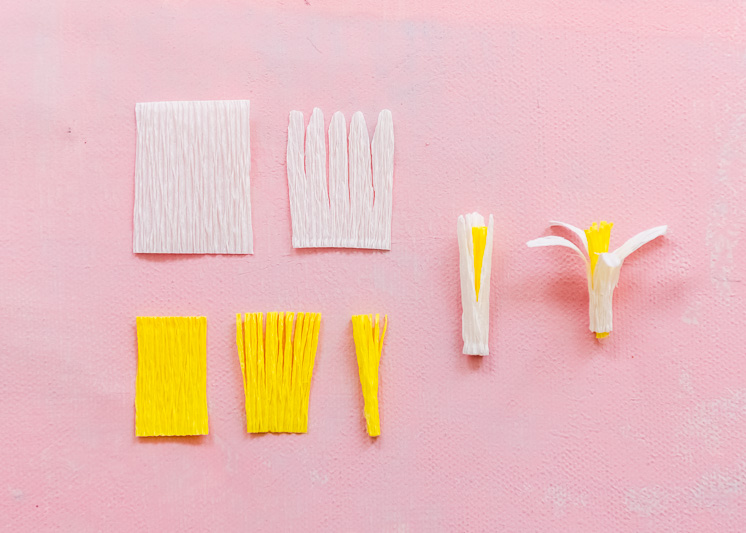
- Using the photos as a guide, cut out a 1-inch wide by 1.25-inch tall piece of yellow crepe paper and the petals in white
- Roll a .5-inch wide by 1-inch tall piece of fringed yellow piece up tightly and secure with glue
- Then wrap the white petals around the yellow center and glue.
- With scissors, curl the white petals so they curl outwards.
- Make 12-15 flowers
Large Lemon leaf boughs
- Using the pictures provided, cut out the lemon leaf shapes, varying in size from 2 to 3.5 inches.
- Cut one leaf in half and glue half onto a full leaf, making sure the grains go up and out from the center.
- Glue a leaf onto a piece of floral wire. Repeat for multiple leaves of various sizes
- Cluster the leaves together and wrap together with floral tape to create boughs
- Make 8 large leaf boughs
Small leaf boughs
- Cut a bunch of small leaves from light green paper using the picture provided, approximately 1-inch wide by 1-inch tall,
- Glue the leaves onto a piece of wire by dabbing a small dot of glue onto the wire, placing the edge of the leaf on the wire, and wrapping the edge of the leaf to the back of the wire.
- Alternate the side you glue the leaves on as you go down the wire.
- Make 6 long leaf boughs
Assembling the Wreath
- Once you have all the components made, arrange the 12 eggs along the inner, concave side of the wire wreath frame and secure with hot glue.
- Then take the two kinds of leaf boughs and weave them throughout the eggs and the wreath frame.
- Start with the larger leaves and finish with the smaller ones. We wanted the smaller ones to have a wild look, so we had them extend beyond the wreath frame.
- To finish, hot glue the flowers sporadically throughout the wreath.
This post was sponsored by Nest. All opinions are our own. Thank you for supporting the brands that keep Lars thriving!
Photography by Jane Merritt | Crafting by Rebecca Hansen









Comments