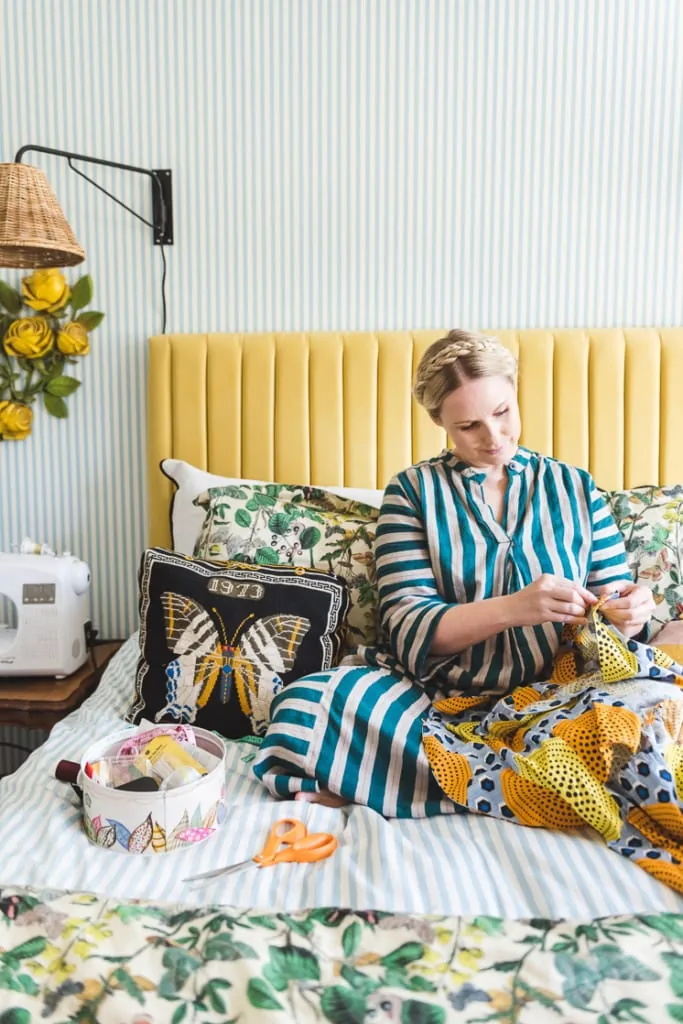
Welcome to the first week of our Sewing Basics series!
We know that many of you are already familiar with the sewing basics, but we also know that many of you have a lot you would like to learn. In order to bring everyone up to speed, we’ve decided to help you out with some essential sewing skills that will help you succeed at a wide variety of basic sewing projects.
This Sewing Basics series is designed to give you the basic skills you need to get sewing! It’s for sewing projects you’ve wanted to make but have been a bit intimidated by until now. For those who’ve already learned the basics at some point, it’s a great refresher. For those who are completely new to sewing, it’s the perfect place to start.
This week we’ll be learning how to thread a sewing machine. Let’s go!
Materials:
Our Sewing Basics Series
As you may have noticed, we’ve been doing a lot of sewing here at The House that Lars Built. Well, we don’t want to be the only ones doing the sewing! Our sewing basics series is designed to give you the simple skills necessary to make the sewing projects we offer on our blog. We’ll be releasing a different lesson every other Tuesday for the next three months. Once you’ve learned the basics in the lessons we’ll be releasing, you will have all the skills required to successfully complete any of our simple sewing projects. Take these, just to name a few: shaped throw pillows, this apron, or these adorable outfits we made for Easter.
How to Thread a Sewing Machine
Knowing how to thread a sewing machine is arguably the most basic and necessary of all sewing skills. The great thing is, it’s as quick as it is easy, and will soon become second nature with a bit of practice.
It’s important to note that every sewing machine is slightly different, which means threading the machine won’t look exactly the same on all machines. But don’t fret! Threading a sewing machine is fairly similar from sewing machine to sewing machine. Most sewing machines also have basic guides on the machine itself that direct you from one step to another, which helps as well.
All that being said, this tutorial will give you the guidance necessary to successfully thread most standard sewing machines.
Threading a Singer Sewing Machine
As we mentioned above, don’t fret if you don’t own a Singer sewing machine! Just apply these tips to your brand of sewing machine and you should be all set. Note: all directions are written as if you’re facing the sewing machine (ie: right=your right as you face the sewing machine).
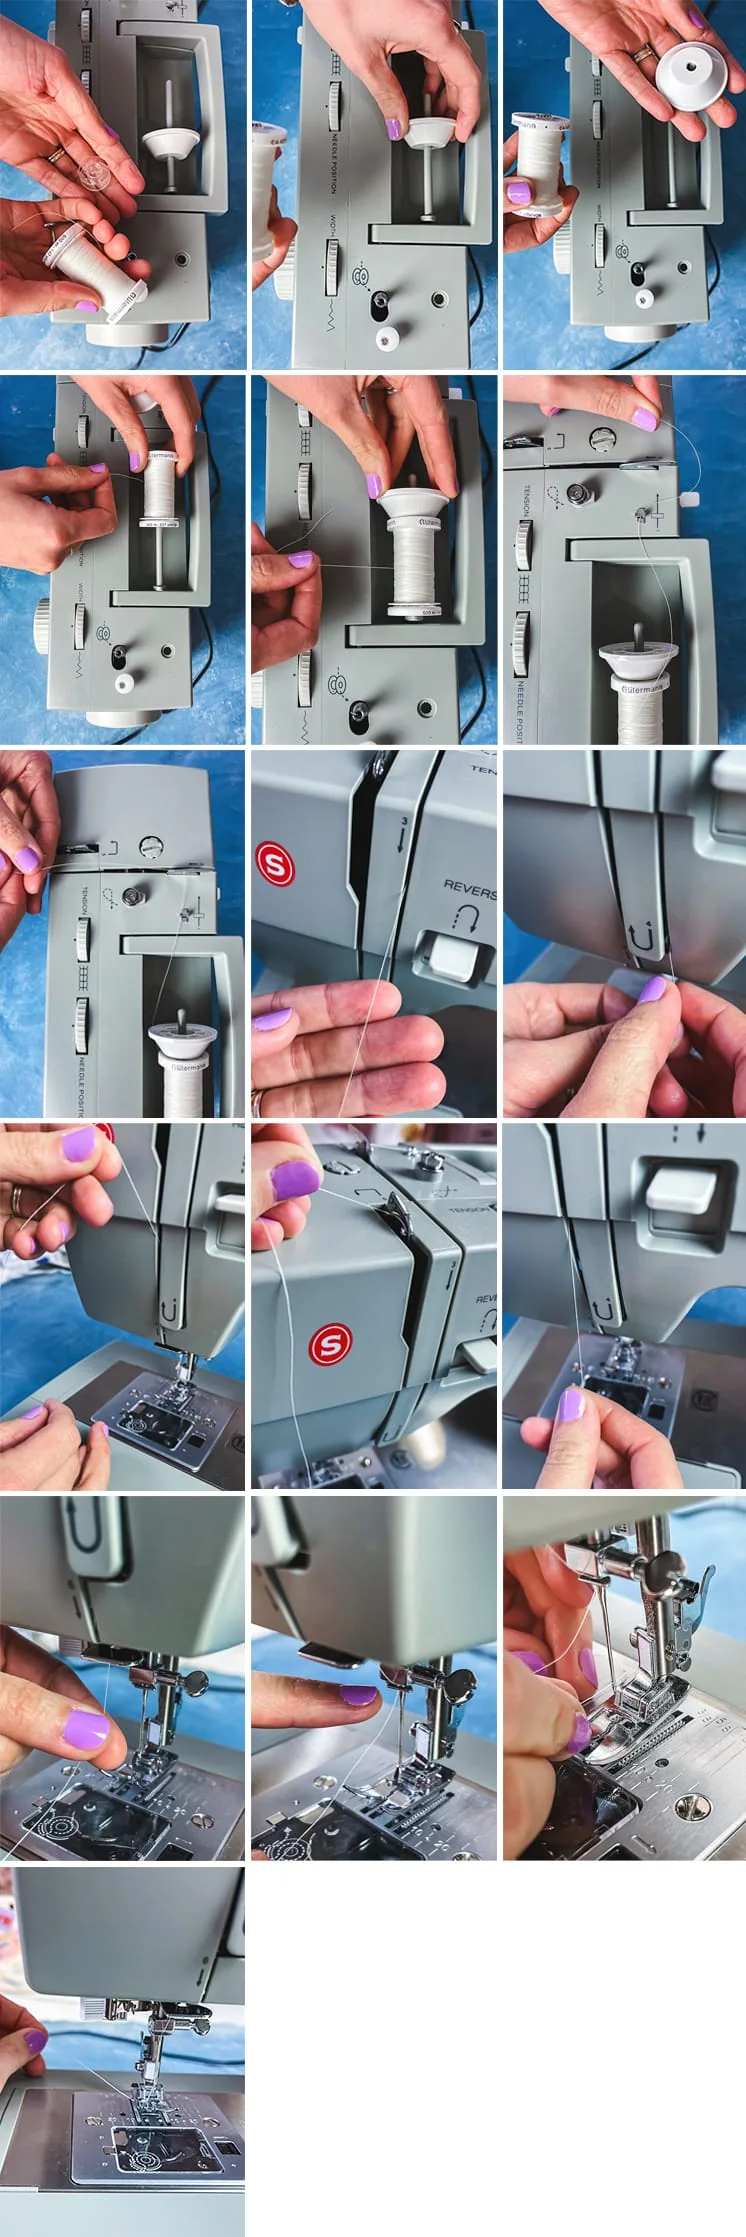
- First, slide your spool of thread onto the spool pin (usually located on the top of the machine on the right side). On some machines the spool pin points upwards, while on others, like ours, it points sideways. If yours points sideways, slide the spool cap onto the end of the spool pin to secure the the thread in place.
- Next, slip the thread through the thread guide (a thin, metal piece that helps hold the thread in place).
- Now, follow the numbers on your sewing machine and guide the thread down through the right side of the narrow slot directly below the thread guide. Pull the thread down, under the lip at the bottom, and then up the narrow slot on the other side.
- Next, turn the hand wheel (usually located on the right side of the machine) to make sure the take up lever is at the top, then, from right to left, slip the thread through the slot at the top of the take up lever.
- Pull the thread down the left side of the take up lever, through the front thread guides, and thread the needle so the thread pokes out the back.
- Done!
You’ve now done the top half. Now let’s learn how to thread a bobbin!
How to Wind a Bobbin
Before you can thread a bobbin into the machine, you’ll need to wind it up with thread first. Here’s how to wind a bobbin:
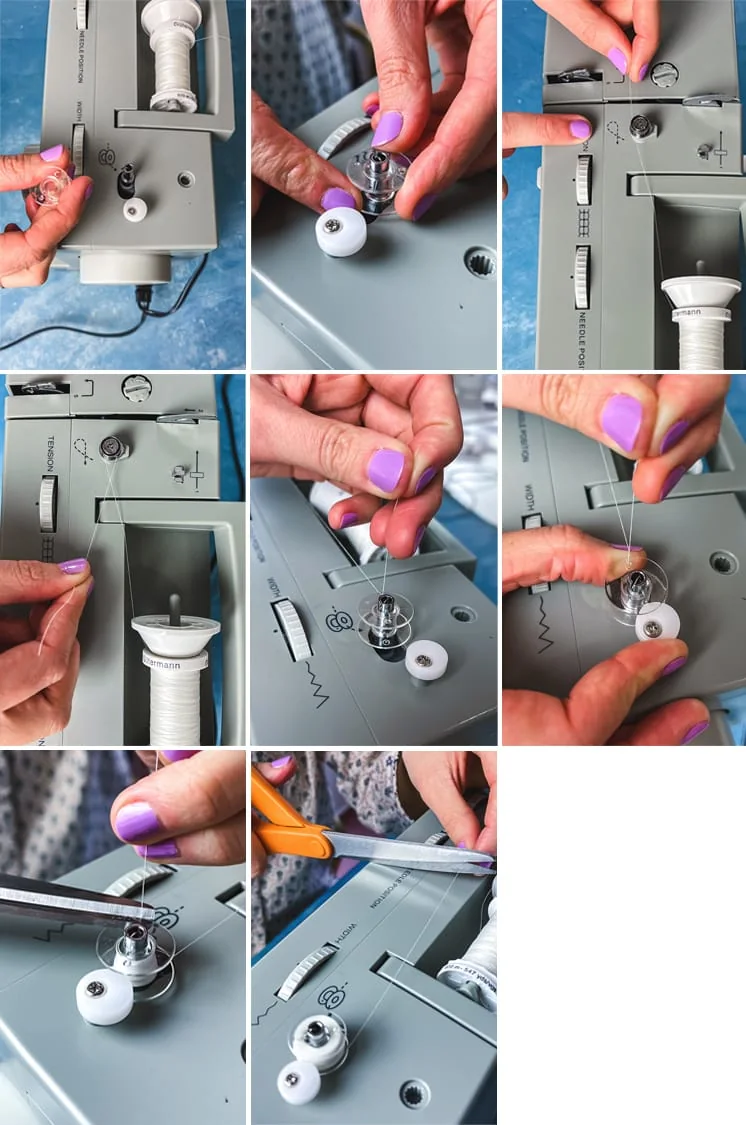
- First, slide the bobbin onto the bobbin winder (usually located near the spool pin on the top right corner of the machine). Then slide the bobbin winder to the right. You should hear a click that it’s in place.
- Now thread the bobbin. To do this, slide the thread onto the spool pin like you would to thread a sewing machine. Instead of pulling it through the thread guides and down, you’ll simply wrap it a single time around the bobbin winder tension disc, then over to the bobbin.
- Feed the thread up through the hole in the bobbin so it sticks out the top. Pull so there’s a little extra you can hold onto.
- Next, make sure you’re holding securely onto the end of the thread that sticks out of the bobbin’s hole. Press the foot controller down until the thread is wrapped around at least a few times. Now you can clip the excess thread sticking out of the bobbin’s hole. Continue winding the bobbin.
- Hold the foot controller down until the bobbin is fully wound. It should stop on its own.
- When it’s done, let up on the foot controller. Now you can clip the thread.
How to Thread a Bobbin
Now you’re ready for the last step: threading the bobbin into the machine!
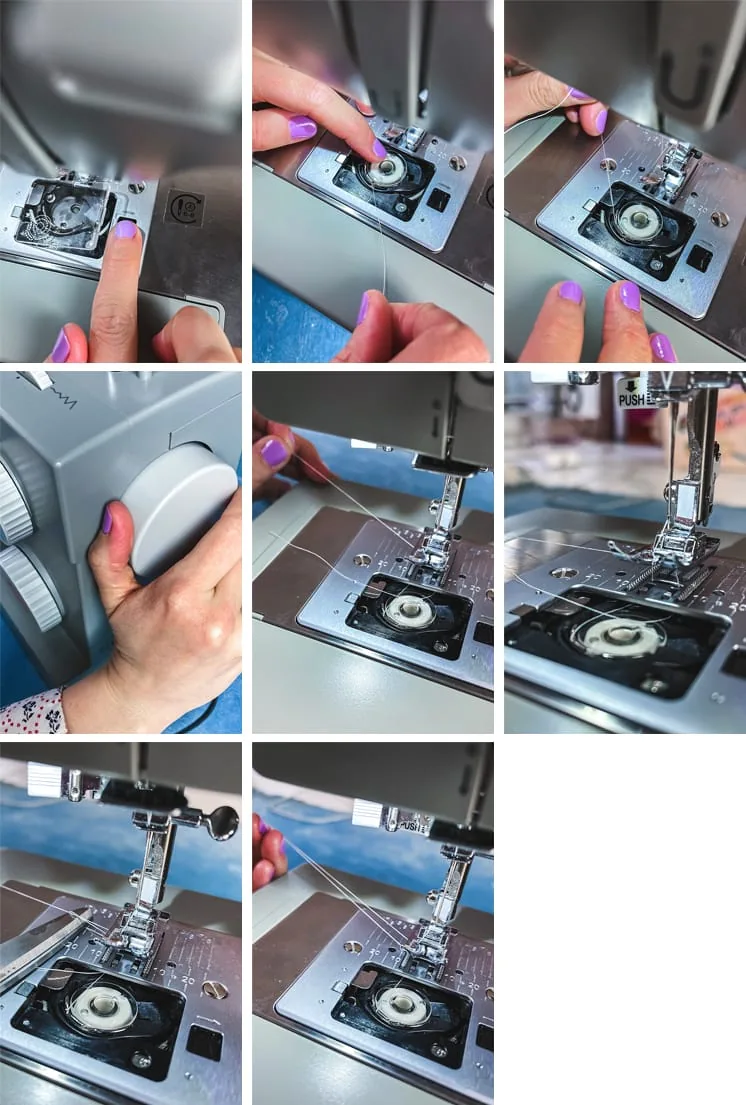
- Pop the bobbin into the bobbin case so the bobbin turns counter-clockwise when you pull on the thread. Leave at least 4-5 inches excess thread to work with.
- Snake the thread to the left side, then to the right of the metal piece below/in front of the bobbin.
- On some machines the bobbin case isn’t already in the machine. If that’s the case for you, pop it into the machine with the little metal arm pointing down. Make sure the open side faces into the machine.
- Now, with the top of the machine threaded as well, give the hand wheel one full 360 degree turn towards you and pull the upper thread taut. A loop of thread should appear.
- The last step is to use scissors or simply your fingers to pull the end of the thread loop up so it’s on top of the needle plate.
- All done!
You’ve just successfully learned how to thread a sewing machine and bobbin. Stay tuned for the next lesson in our sewing basics series! We’ll discuss the ins and outs of choosing the right fabric for your sewing projects.


