


We’ve always believed that good design should spark a sense of play, wonder, and imagination. Whether it’s a parade of tiny paper buildings marching down your Thanksgiving table or a flowering centerpiece that almost feels alive, our projects are meant to make everyday moments feel just a little bit magical. So when the opportunity came to create a brand-new tabletop design inspired by Wicked and the iconic Emerald City, we knew we wanted to bring the full force of that Lars-style magic to the table—literally.
If you’ve followed our work over the years, you might remember our Macy’s Thanksgiving Day Parade cityscape: a bustling world in miniature, where charming buildings, whimsical floats, and darling details created an entire festive scene right down the center of the table. It has remained one of our most beloved projects, and for good reason—there’s nothing quite like shrinking a world down to table size and letting the details speak for themselves.
With the Emerald City tabletop, we decided to tap into that same energy—big imagination in a small space—but reimagine it through the lens of Oz. The world of Wicked is rich with symbolism: the striking contrasts between good and wicked, the shimmering green glow of the city, the soaring architecture, and of course, the story of two girls whose lives intertwine and transform each other. We asked ourselves: How do we turn that into a physical, tangible, celebratory tabletop experience?
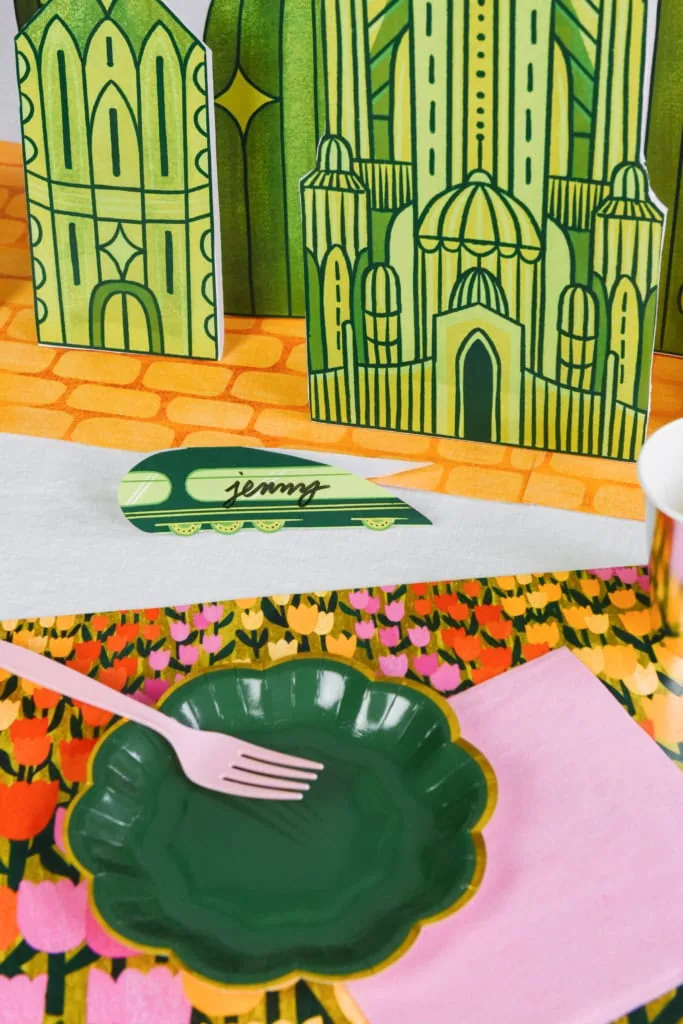
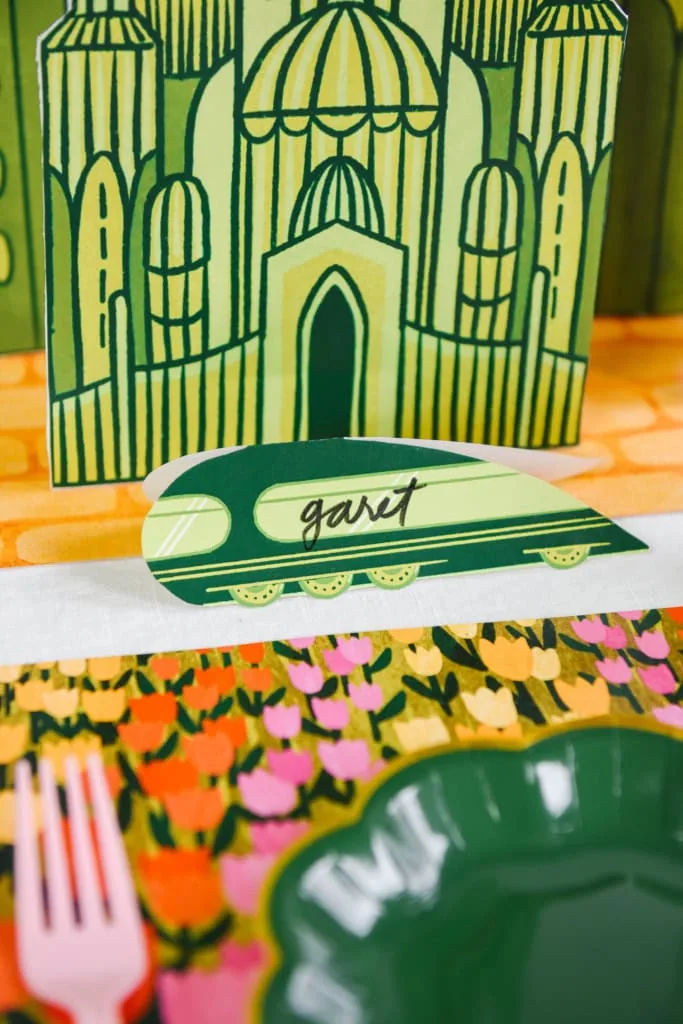
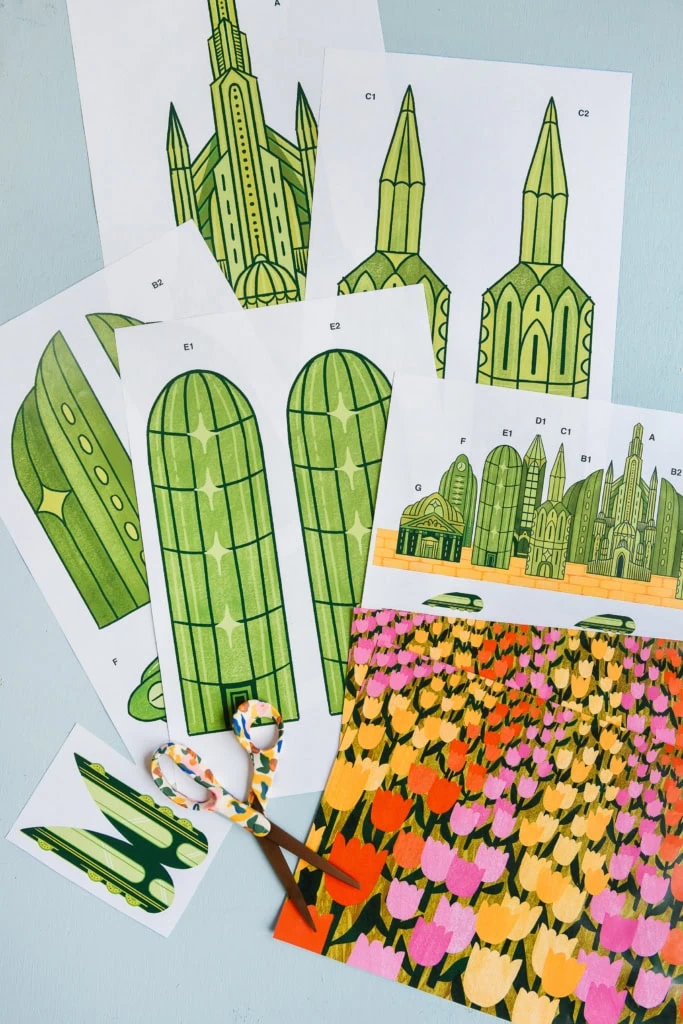
This is a digital printable, so you can purchase, download, and print it super easily! It all fits on an 11″ x 17″ page, so the printing costs are low as well. Included are all of the Emerald City buildings, the tulip placemats, and the train car name tags. Then add in some supplementary paper goods and you’re set! Here is the full list of supplies. Follow the tutorial below to create your own!
Emerald City Tablescape
Difficulty:
BeginnerTime:
2 hoursMaterials
Instructions
Printing
- Purchase the Emerald City tablescape, PDF Printable linked above.
- Download the PDF and send it off to be printed. We recommend printing it on 11″ x 17″ paper. We have had success printing at Fed Ex, Staples, or local print shops. You can print it on regular printer paper or cardstock — regular printer paper will be cheaper and since you will be backing it on foam core that works just fine! But, if you would like to do cardstock for the placemats and train car name tags so they are more durable, you can do that!
- Be sure to specify how many copies of each page of the pdf you would like. For the yellow brick road, print as many as it will take to create a runner on your table. You just need to print one of each page of buildings unless you would like to make the tablescape larger than it is when pictured! The placemats and name cards can be printed as many times as you need for your guests.
- If print shops have any issues printing the files or request “permission”, show them the copyright info at the bottom of the PDF labeled “START HERE”.
Assembling the buildings
- Once everything is printed, cut all of the buildings out with scissors.
- Use spray adhesive to adhere the buildings to the foam core. I recommend doing this in a well ventilated area or outside to prevent overspray from getting anywhere. It’s easiest to spray the adhesive directly on the back of the building and then press it onto the foam core.
- Let the buildings fully dry on the foam core. Within 30 minutes it should be dry enough to cut into.
- Using a craft knife on top of a cutting mat, cut out each building so that the foam core lines up exactly with the building outline.
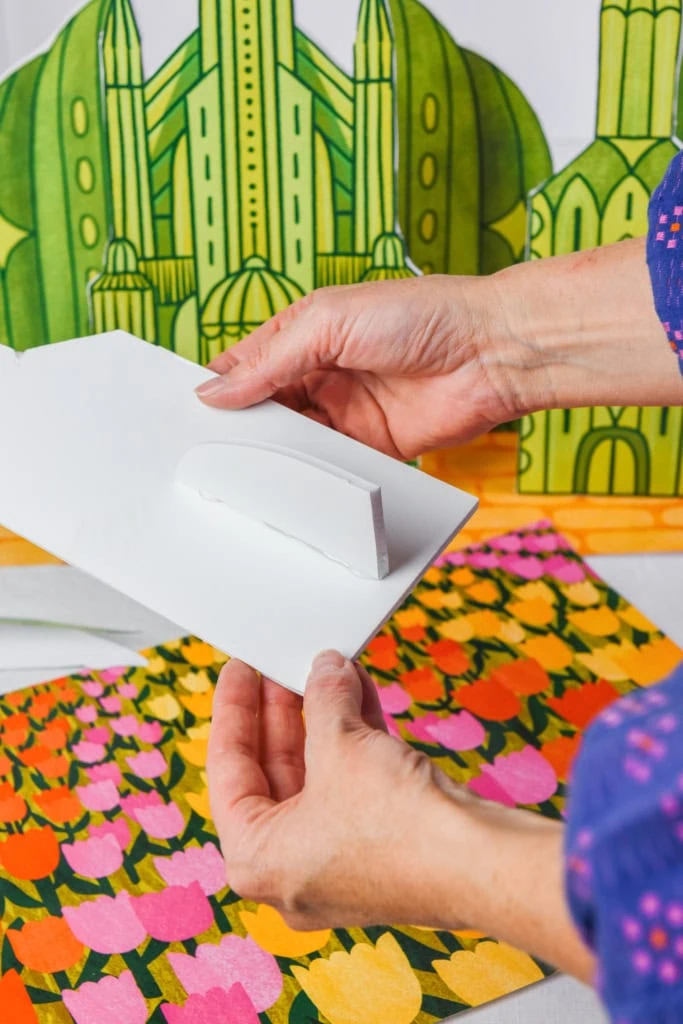
- Once you have all of the buildings cut out, cut wedges out of the foam core with a craft knife to create stands for the back of the buildings.
-
Hot glue a wedge to the back of each building, like so.

Setting the table
- Lay down your tablecloth.
- Cut the white borders off of each yellow brick road and tulip placemat prints. Cut the name tag train cars out as well.
- Using clear scotch tape tape the yellow brick road pieces together on the short end to create the table runner. Using a few loops of tape throughout, tape the yellow brick road runner to the tablecloth.
- Set a placemats and name cards at each place setting. Add plates, napkins, silverware, and cups.
- Enjoy!
Designing a City of Green
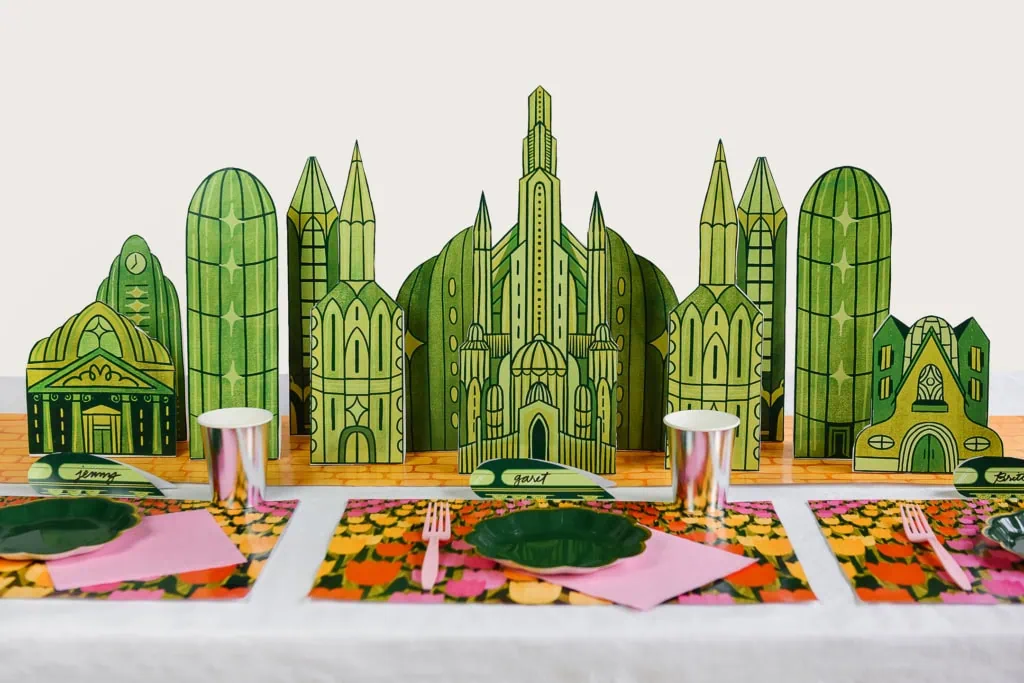
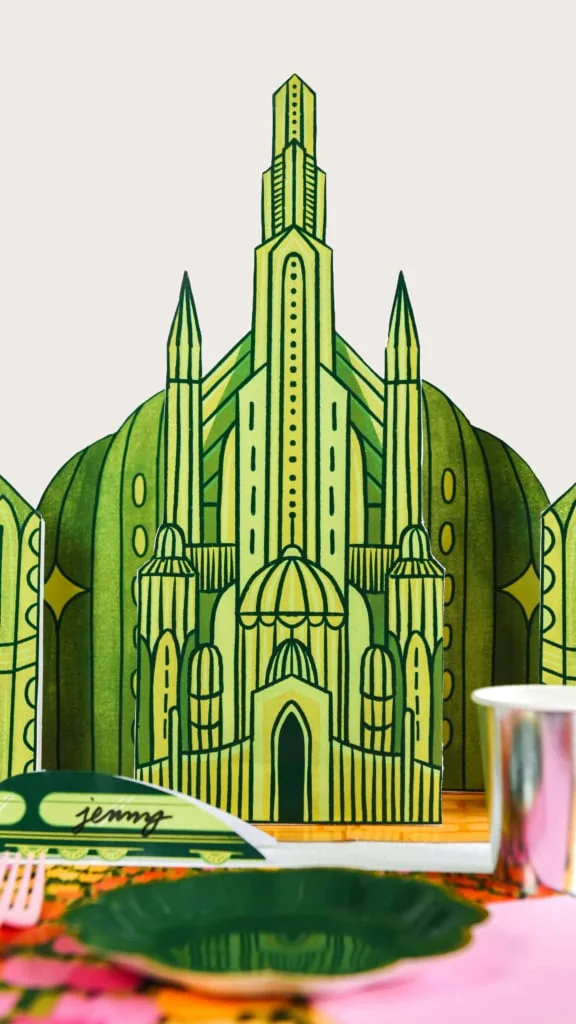
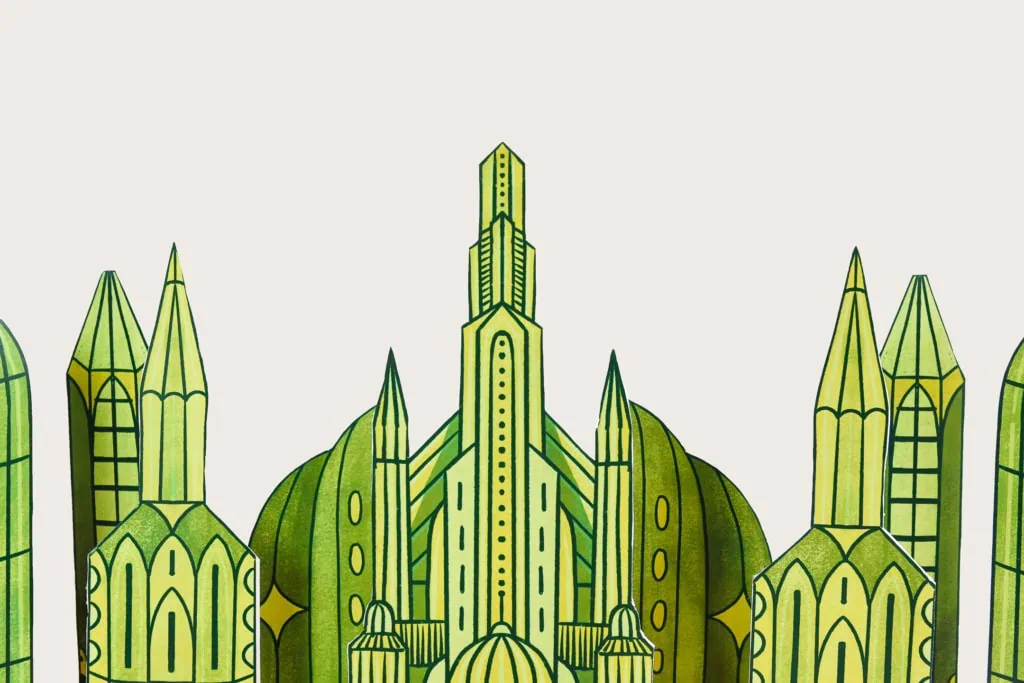
We started with shape. The Emerald City has always felt like a character in its own right—sleek, futuristic, almost Deco in its symmetry and shine. We sketched out tall, slender towers, art-deco domes, and layering structures that could be cut from paper yet still evoke grandeur. Much like the Thanksgiving parade cityscape, these mini buildings create a skyline that rises dramatically from the center of the table. But this time, it’s all bathed in emerald hues.
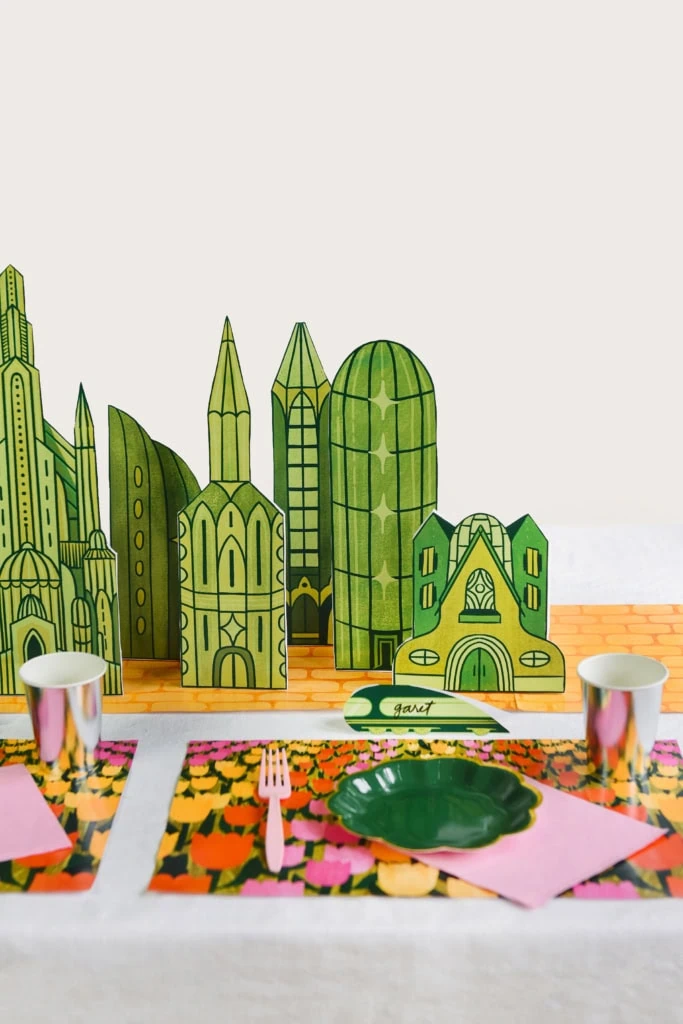
We played with a monochrome palette—every shade of green you can imagine—as a kind of visual wink to the show. From soft mint to deep forest, the layered greens add depth and richness without overwhelming the eye. And of course, for that signature Emerald glow, we added touches of metallic green cardstock that catch the light beautifully. When candles or twinkle lights shine across it, the whole scene feels alive—glittering and theatrical, just like the musical itself.
A Table With a Story
If you know us, you know we never design anything without storytelling at its core. The Wicked tabletop isn’t just a pretty centerpiece; it’s a narrative in miniature.
At one end of the table, we placed a small, symbolic representation of Shiz University—the place where Elphaba and Glinda first meet. It’s simple and understated, intentionally so, because it only hints at the beginning of the story. From there, the Emerald City buildings rise taller and more dazzling as they travel down the table runner, leading toward a final dramatic cluster of the tallest, shiniest towers. The whole table becomes a journey: a visual stroll down the yellow brick road toward the glittering heart of Oz.
And tucked throughout the city are small nods to the show: a tiny silhouette of a broom, a floating hat, a single pop of pink (because Glinda would never forgive us otherwise), even subtle shadows that suggest movement and magic. We wanted fans of the musical to find little “Easter eggs” while still creating something beautiful enough for those who simply love a themed table.
An Invitation to Be a Little Wicked
More than anything, this tabletop design is an invitation—to gather, to play, to create moments that feel special. And in true Lars fashion, it’s also an invitation to DIY. Whether you want to recreate the full Emerald City or simply add a few paper towers to your own tablescape, the beauty of this project lies in its adaptability. You can go full Broadway or keep it subtle. You can build a sprawling skyline or tuck a little corner of Oz into a cozy brunch.
Wicked has always been a story about rethinking what you know, finding beauty in unexpected places, and embracing your own kind of magic. We hope this tabletop design does exactly that—brings a little enchantment, a little drama, and a whole lot of emerald joy to your next gathering.
After all…there’s no place like home. Especially when your table is dressed like Oz.
We can’t wait to see what you create with it. And when you do, tag us with #LarsMakes!
Comments