


Are we all obsessed with tin embossing by now?! I know we shared a tin embossing tutorial over the summer that we did at Lars Craft Camp, but it truly is the perfect craft for every holiday. We wanted to create some special tin embossed Christmas ornaments, so we made our very own template that you can easily make at home! It’s seriously as easy as printing off the template, taping it to metal, and tracing! You can see the full tutorial below with all of the supplies linked!
I did this with my Art Club this week and it was the perfect group craft! Having the template really does take the pressure off because you don’t have to try to think of your own design! You can just enjoy the crafting while you watch a Christmas movie, chat, or cuddle up next to the tree.


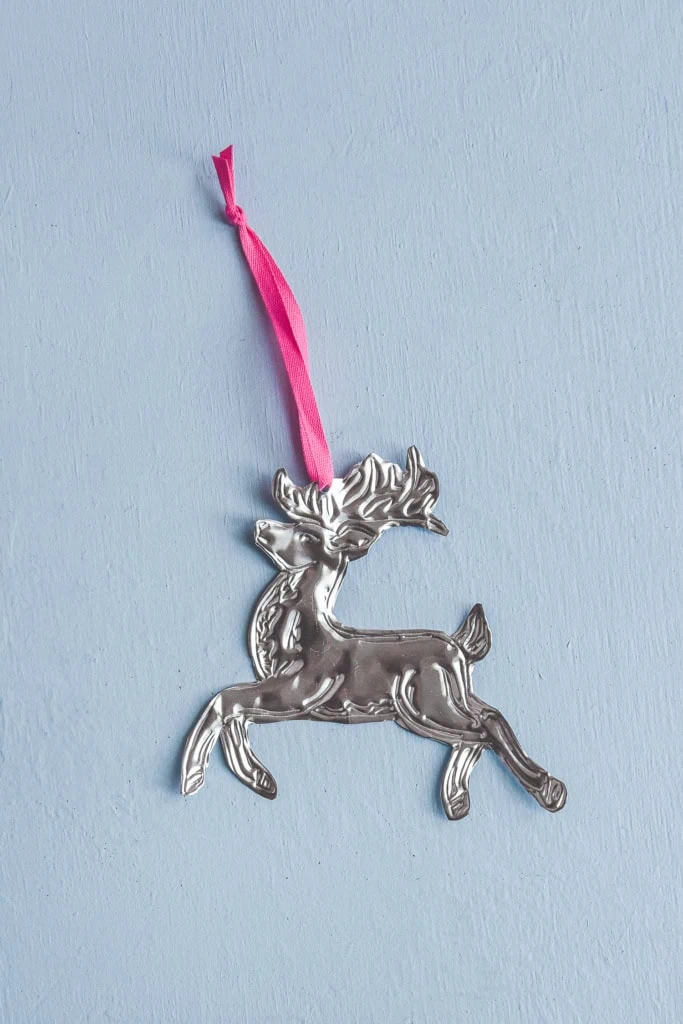

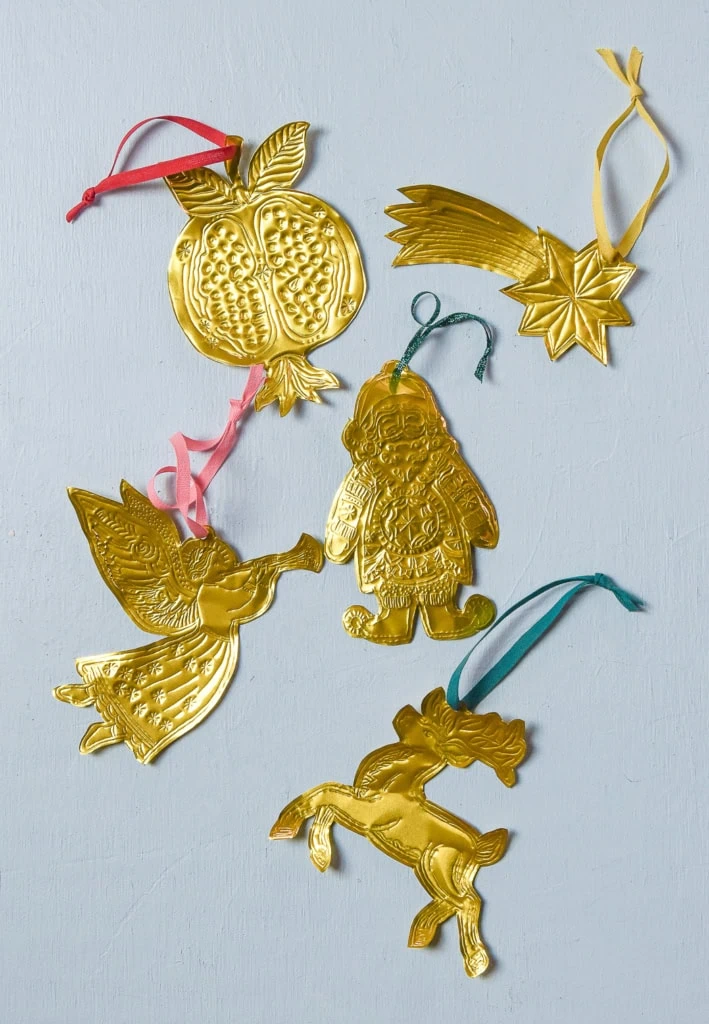
Before we get into the tutorial, I have a few notes. After trying every single tin embossing metal we could get our hands on, here are our key takeaways! For silver, this one is the holy grail. We found that it was way easier to make these in silver than in gold. The gold often was too flimsy and didn’t emboss well. That being said, we did test a bunch of gold options. This one or this one are the two best options! We tried this one, this one, and this one and none of them worked – I would not recommend buying those.
Also, I truly think that using a ballpoint pen is the easiest way to do it. You can purchase a dotting tool if you would like (it was helpful on the pomegranate to have one), but a ballpoint pen can absolutely do the trick!

Tin Christmas Ornaments
Difficulty:
BeginnerTime:
20 minutesMaterials
Instructions
Prepping the template
- Print off the Tin Christmas Ornaments pdf template. You can print it on regular 8.5″ x 11″ printer paper.
- Cut out each ornament leaving about a 1/2″ buffer so that you can tape it to the metal for embossing.
Tin embossing
- Cut out 6″ x 6″ squares of aluminum.
- Fold a piece of fabric over a few times or use felt to emboss on. This will allow you to put pressure on the metal and engrave into it without damaging the table/surface you are working on.
- Place the aluminum square sheet on top of the fabric or felt and then tape the template onto it with scotch tape. Make sure that the entire ornament fits on the aluminum sheet with room to cut around it.
- Start embossing! You do this by tracing every single line on the paper template, so that it engraves into the aluminum sheet. Be sure to apply medium pressure. If you don’t apply enough pressure, you will not be able to see the design clearly. If you apply too much pressure, you will potentially rip the template and not be able to capture the finer details.
- Once you are finished tracing the entire ornament, you can remove the paper template by peeling it off of the aluminum sheet. Be sure not to prematurely check the ornament as this can cause the template to shift.
- Cut along the outside line of each ornament, being sure to include the portion at the top where the hole punch will go.
- Use the hole punch to make a hole for the ribbon in the designated spot.
- String the ribbon through the hole and tie it off to create your ornament!


Comments