I’ve always wanted to host a “come dressed as your favorite artist” party and I found Halloween the perfect opportunity to do so. We invited everyone to come dressed as their favorite tortured artist for our Halloween party. Some of the costumes we’ll show you are a bit more “tortured” than others, but all are easy to make from your existing closets with a little help from the fabric and craft stores.
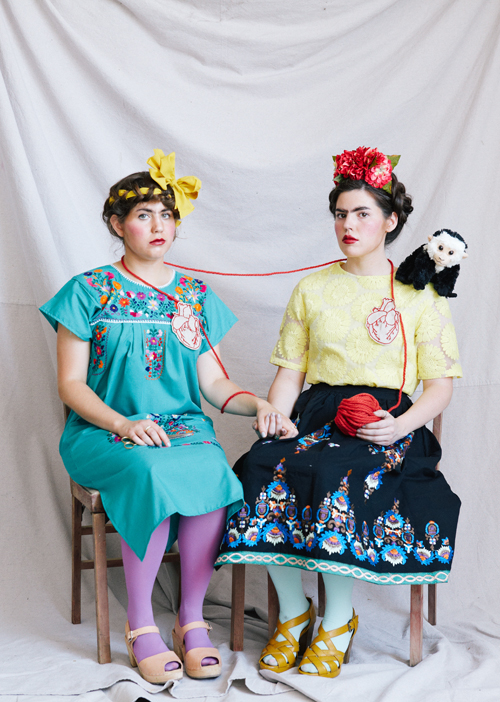
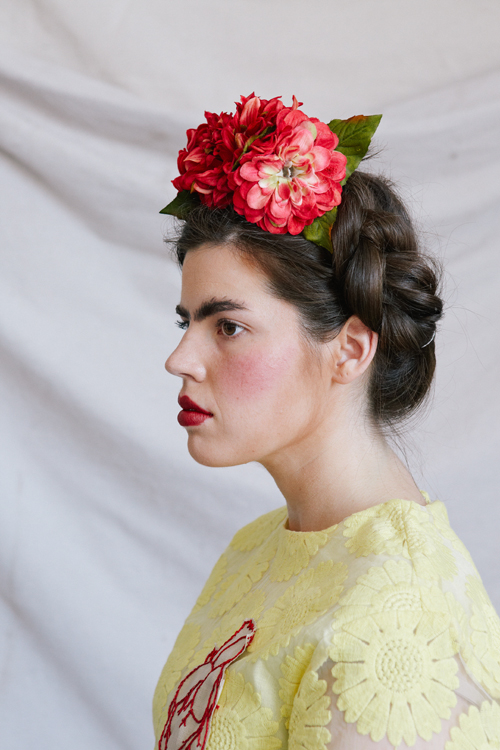
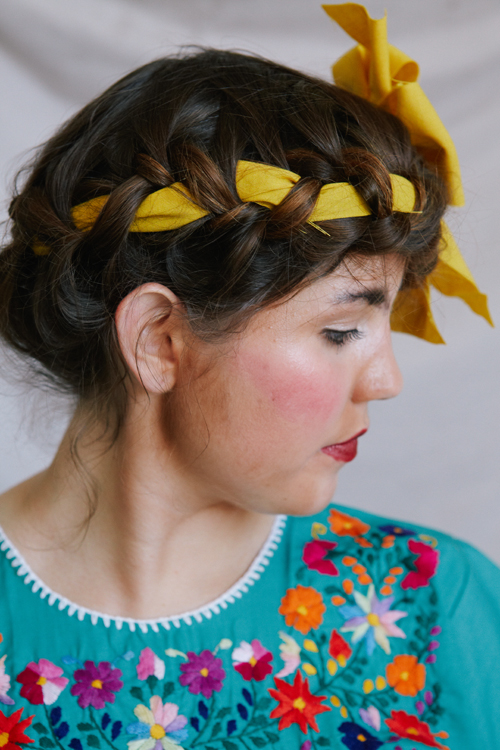
A must for any Tortured Artist party is Frida Kahlo, who, as a person, was quite a tortured soul. We decided to go with her double self-portrait, The 2 Fridas, which is a great choice if you’re wanting a costume for two people. A lot of the costume came from my own closet, but you know me, I like my clothes bright and waistband-less.
To give you a bit of background, this particular painting depicts Frida in the midst of her divorce from Diego Rivera. She left the two hearts exposed showing one broken and the other hole, the one that Diego loved. She depicted surgical pincers to show that she was cutting off the emotional ties.
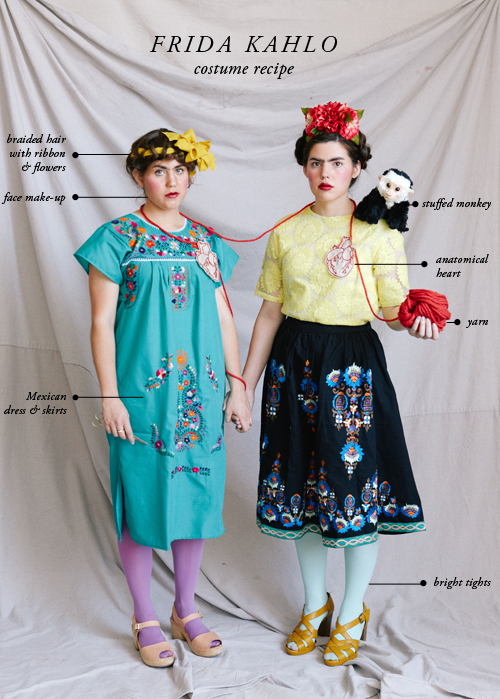
Here’s how to get the look:
- Mexican dress (I got ours from Flor de Luz)
- Embroidered skirt (this one is from Asos)
- Yellow floral top (from Asos)
- Bright tights (here are some similar tights and a ton of color options here)
- We used clogs and shoes from our house (like the pair from Lotta from Stockholm)
- Monkey (ours is from here)
- Yarn
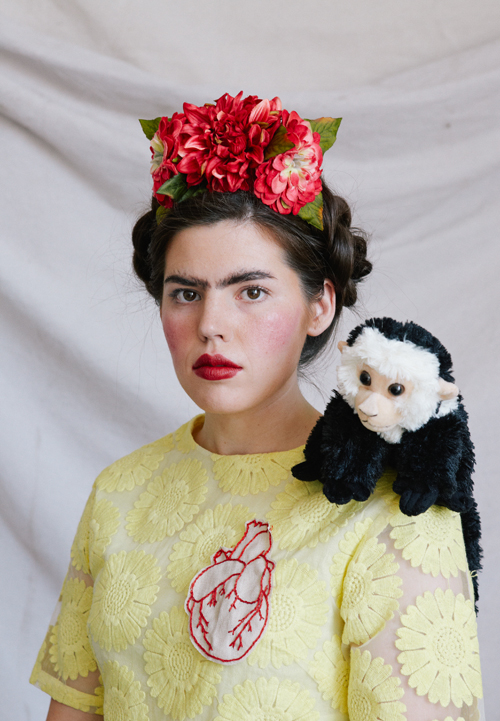
- Floral head piece (see tutorial below)
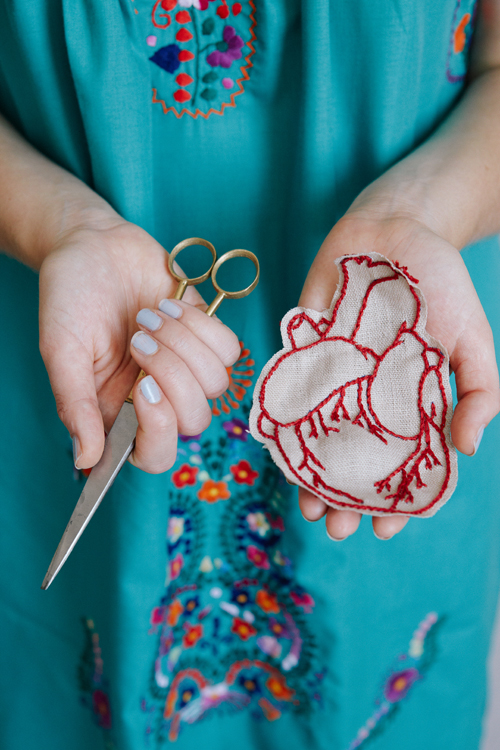
- Embroidered anatomical heart (see tutorial below)
Photography by Alpha Smoot
Hair by Aubrey Nelson
Make up by Rubie Huber
Crafting by Ashley Isenhour
Art directed by Brittany Jepsen
See the full tutorial below
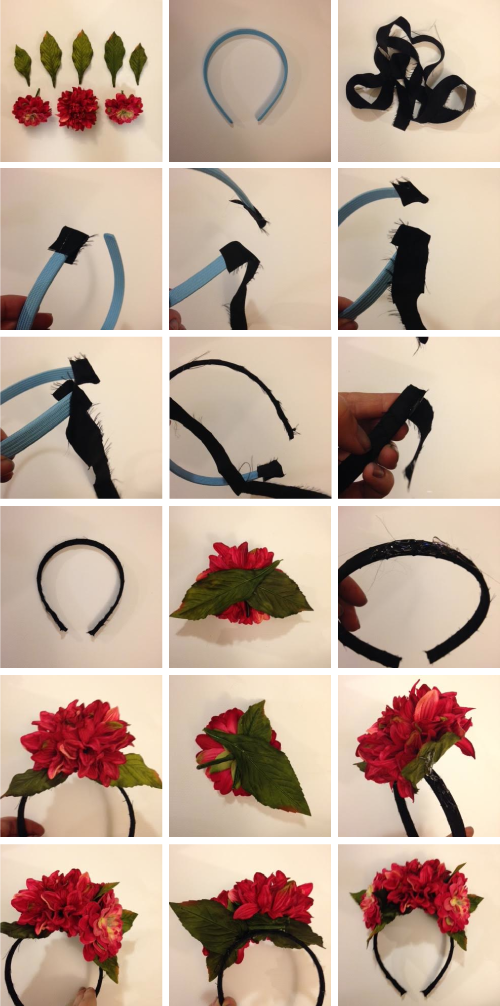
Materials: 3 silk flowers (1 large and 2 medium), 6 silk leaves, headband, black ribbon or fabric strip, scissors, hot glue gun, pliers with wire cutting section (depending on your flowers)
Step 1: Cut 3 silk flowers and 6 silk leaves from flower stems. If your flowers have wire in the stems you’ll want to use wire cutters for this. Leave about 2 inches of stem on the flowers to make gluing the flowers to the headband easier.
Step 2: Cut about 1.5″ of ribbon or fabric strip. Fold piece over one end of the headband and hot glue it into place. Glue end of ribbon to other end of headband. Start wrapping ribbon tightly around headband and add a bit of hot glue to secure ribbon to headband. Continue wrapping until headband is completely covered. Cut end of ribbon and hot glue end to headband.
Step 3: Hot glue 2 leaves (one on either side) to back of large flower. Squirt hot glue on middle of headband. Attach large flower (angling flower forward) and hold in place until hot glue dries.
Step 4: Turn medium flower over. Bend stem to one side of flower. Hot glue 2 leaves on opposite side. Repeat with other medium flower.
Step 5: Lift right leaf of large flower up and squirt hot glue on underside of leaf and along headband. Place one of the medium flowers in this space, making sure that leaves on medium flower are pointing away from center large flower. Angle flower forward slightly while glue dries. On back side of headband hot glue stem of medium flower to back of large flower to secure. Repeat (in opposite direction) with other medium flower.
ANATOMICAL HEART by Ashley Isenhour
Materials: 1/4 yard cream or muslin fabric, embroidery needle, red embroidery thread, embroidery hoop, scissors, white glue, scotch tape, water soluble fabric marker (like this), template (get it here)
Step 1: Print out embroidery pattern. Cut piece of fabric large enough to fit your embroidery hoop. Tape pattern to a sun-lit window. Tape fabric over pattern and trace heart onto fabric with a water soluble fabric marker.
Step 2: Stretch fabric in embroidery hoop. Stitch over heart pattern using a chain stitch (see a great tutorial here) or backstitch. (Good tutorials here.
Step 3: Rinse fabric with water to erase fabric marker. Allow to dry.
Step 4: Trim fabric about 1/4″ all the way around outline of heart. Dab a tiny bit of white glue around edge of fabric and let dry. This will prevent fraying.
Note: If you don’t want to embroider, you can paint or draw it with a marker.
MAKE UP TUTORIAL by Rubie Huber
These two girlies were fun to work with, and I was able to express my love for one of the most beautiful female artists with their make up.
Of course the main job with Frida was the eyebrows. Don’t be afraid to go crazy here! You gotta go even bolder than your boldest brow to really get that Frida look.
First brush your brows up and out and every which way you can to make them fuller and more prominant. I used some eyebrow gel (get it here) to set them at all sorts of angles. Darken them out with dark brown matte eyeshadow. To make them more intense. Spread the same dark eyeshadow between the brows. Using a super thin tiny brush (this one worked great) get the same eyeshadow wet with water and draw a few lines in between the brows and all over the edges.
Keep the rest of the face really clean, only adding nude cream eyeshadow and black mascara.
For the cheeks I used a deep liquid blush more on the red or purple side than the pink; Frida was all about the rich reds. Blend it out on the apples of the cheeks.
You need a deep oxblood red to get the Frida drama. I love the Kate Moss line by Rimmel London #11 (from here). It’s intense.
Finish off the look with a little bronzing around the edges of the face with a non shimmery bronzer.


6 Comments