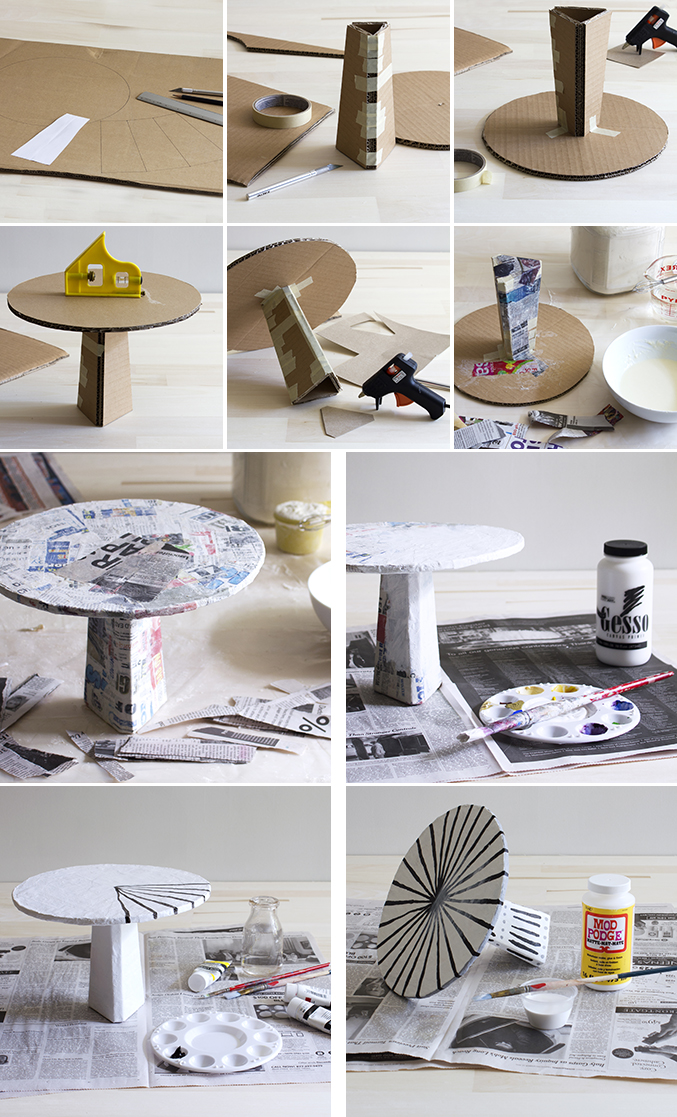
- Prep your cardboard (I used 2 ply). I traced the circle for the top of the cake stand using a 10” dinner plate – but you can use a compass or whatever you have around. Then, using a scrap of paper, I cut and tweaked the shape for the “stand” part until I was happy with the scale. It is 7” tall, 3” wide at the bottom, and 1 3/4” wide at the top. Trace the pattern three times with the long sides connecting. Cut out the circle and the stand piece along the outside lines.
- Once your cardboard pieces are cut out, score the other 2 vertical lines (don’t cut all the way through) of the stand piece. Fold along those lines, meet the 2 ends together and secure in place with masking tape.
- Secure the stand piece to the center of the circle first with hot glue, then with masking tape.
- Optional. But, I recommend checking the level of your cake stand at this point and making adjustments if needed. I’d hate for you to get all the way to the end of the project and realize you went wonky somewhere and all your cupcakes roll off your stand.
- This part is also optional, but I opted to do it myself to help keep everything level – I had to add a tiny shim of cardboard to even-up my stand. For the bottom piece (and my little shim) I used the cardboard from a cereal box, glued, and taped into place.
- Add the first layer of paper mâché. Tear (don’t cut) the newspaper into about 1”x 6” strips. Mix the flour and water. I like a consistency similar to that of pancake batter – about a ratio of 1:1.25 flour to water. Dip the paper into the mixture, saturate, and wipe off the excess before applying to your project. Avoid the temptation to do multiple layers at once, you must wait! Allow the first layer to dry – overnight is best.
- Once that first layer is dry, add a second and third layer (with drying time in between). I recommend 3 layers for this project. Once the paper mâché is dry – squeeze the edge of your cake stand. If you feel it give, add another layer. It should feel as hard as a rock before moving on to the next step. (Note: I’ve made a few of these stands, and in one case the cardboard of the top started to warp. If you encounter this problem, don’t panic! Spritz the top piece on both sides with water and place face down on a flat surface on top of a sheet of newspaper. Weight it down overnight – I used cans of beans and jars of quarters. Everything was level again by morning.)
- Paint the entire stand with 2 layers of gesso. Don’t forget the bottom. Allow to dry thoroughly.
- Paint your cake stand in the pattern of your choice. You can go simple and painterly like me, or full on Russian lacquer style detailed magicness, or just a solid color. I used acrylic art paints, but house paint or whatever you have around will also work. Have fun with this part!
- After you are happy with your decorative painting and everything is dry, add 2 layers of mod podge. Sealer is very important to keep away curious mice (who smell the flour)! A step you definitely do not want to skip. Mod podge is one I always have in my studio and trust for almost everything. But, if you know for a fact that you want to put food directly on your stand – use a food safe sealer.
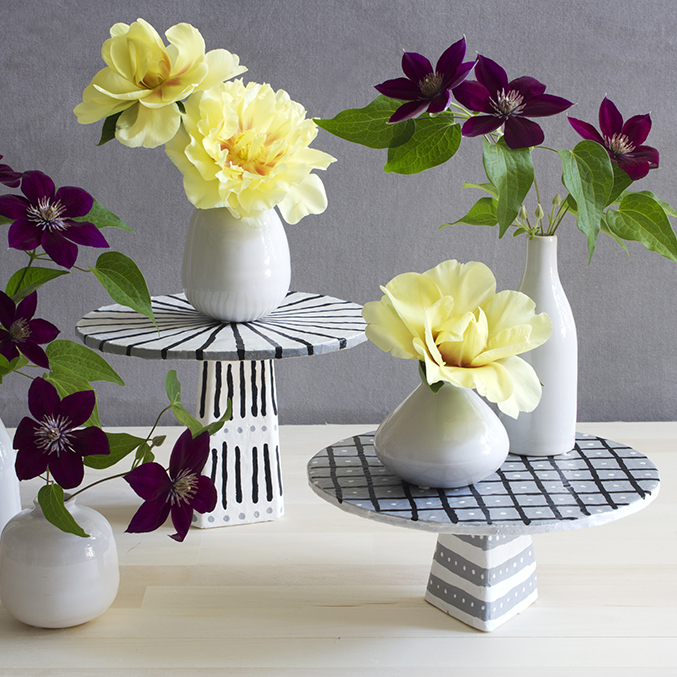
- Finally, place your cake stands in a prominent (hello! you have to show off your work!) place in your home and stand back and admire your cleverness. I used mine for a multi-level floral display, but they can be great anywhere: on a side board to lift up potted plants, as a centerpiece, or to display your cutest cakes and cupcakes. Have fun and show us your cake stands with the tag #MakingWithLars! We would love to see!
- (Side note: in one iteration of this project, I added sand to fill the inside of the “stand” part of my cake stand. Because these are cardboard, they are lightweight and can tip over if you attempt to place something on the very edge of the top. To combat this, add something heavy to the base – totally optional.)

Close
-
why I only wear dresses
and where I buy them


