

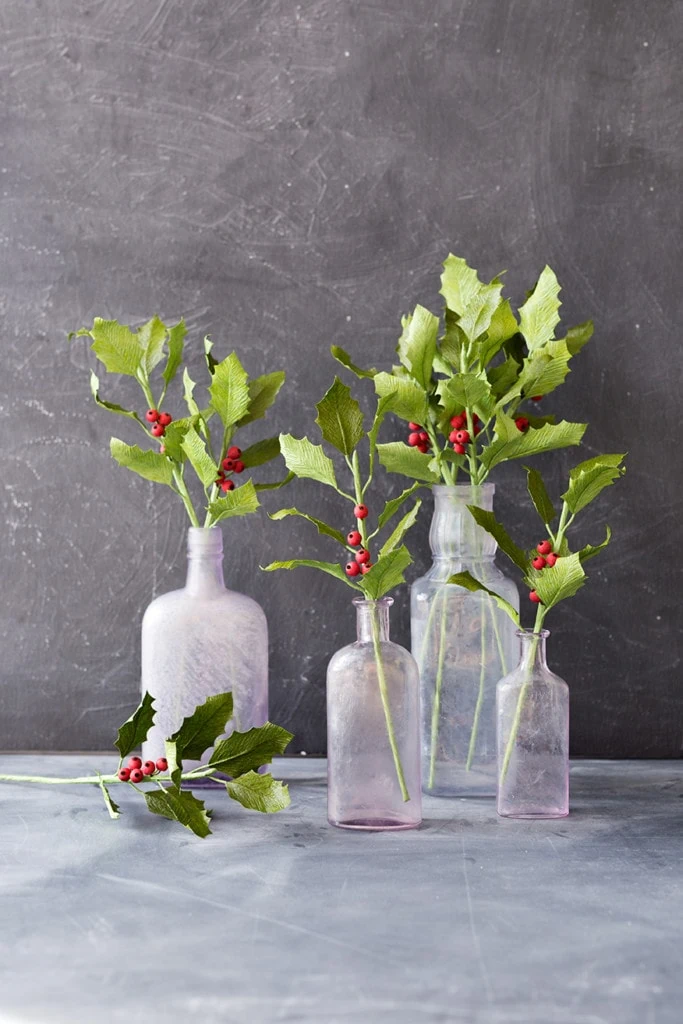
Just because we love oversized everything does not mean that we don’t appreciate the smaller things in life! These delicate DIY paper holly boughs by paper flower artist Tiffany Holloway of Nectar Hollow are so realistic I had to make sure I wasn’t still dreaming of sugar plums and snowflakes.
Keep reading for instructions on how to make your own crepe paper holly!
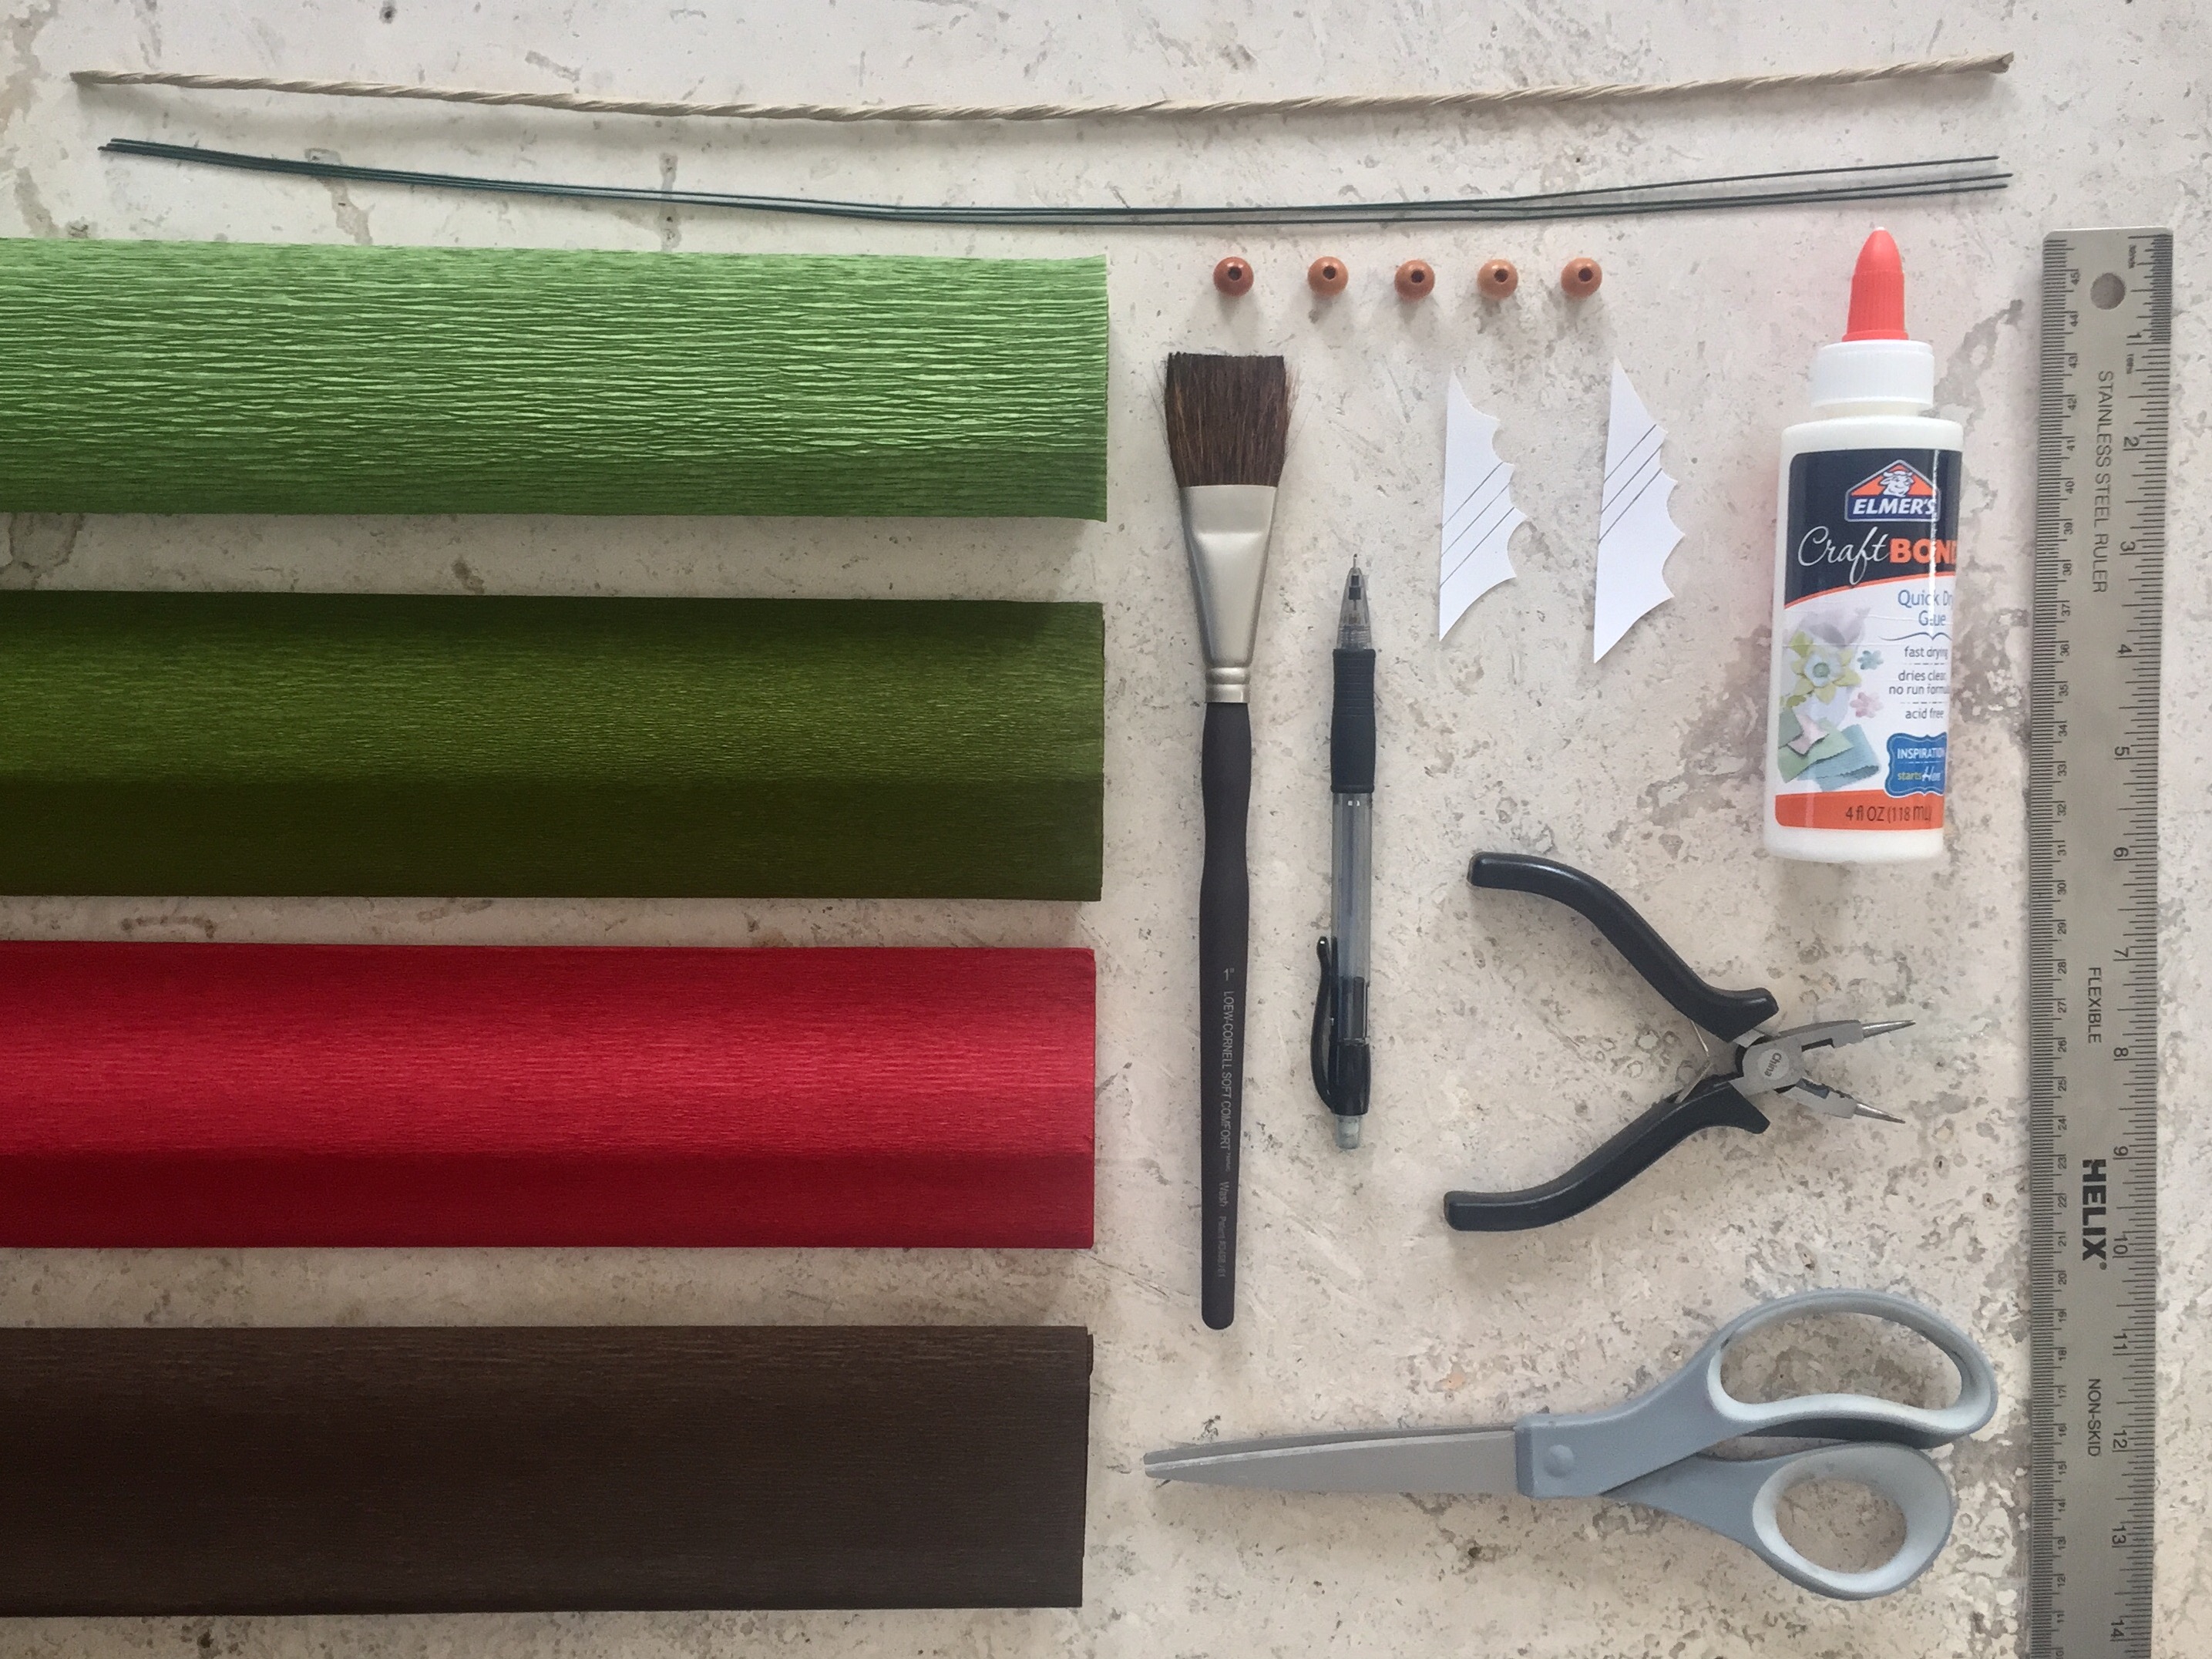
Materials:
- Crepe Paper in red, brown, and 2 shades of green
- Three 20 gauge floral wire stems
- One 18 gauge paper floral wire stem
- Five wooden beads, 3/8" in diameter
- Holly leaf templates, 1 small 1 large
- Clear drying craft glue
- Paintbrush
- Pencil
- Wire cutters
- Scissors
- Ruler
- Damp cloth
- Protective surface to work on
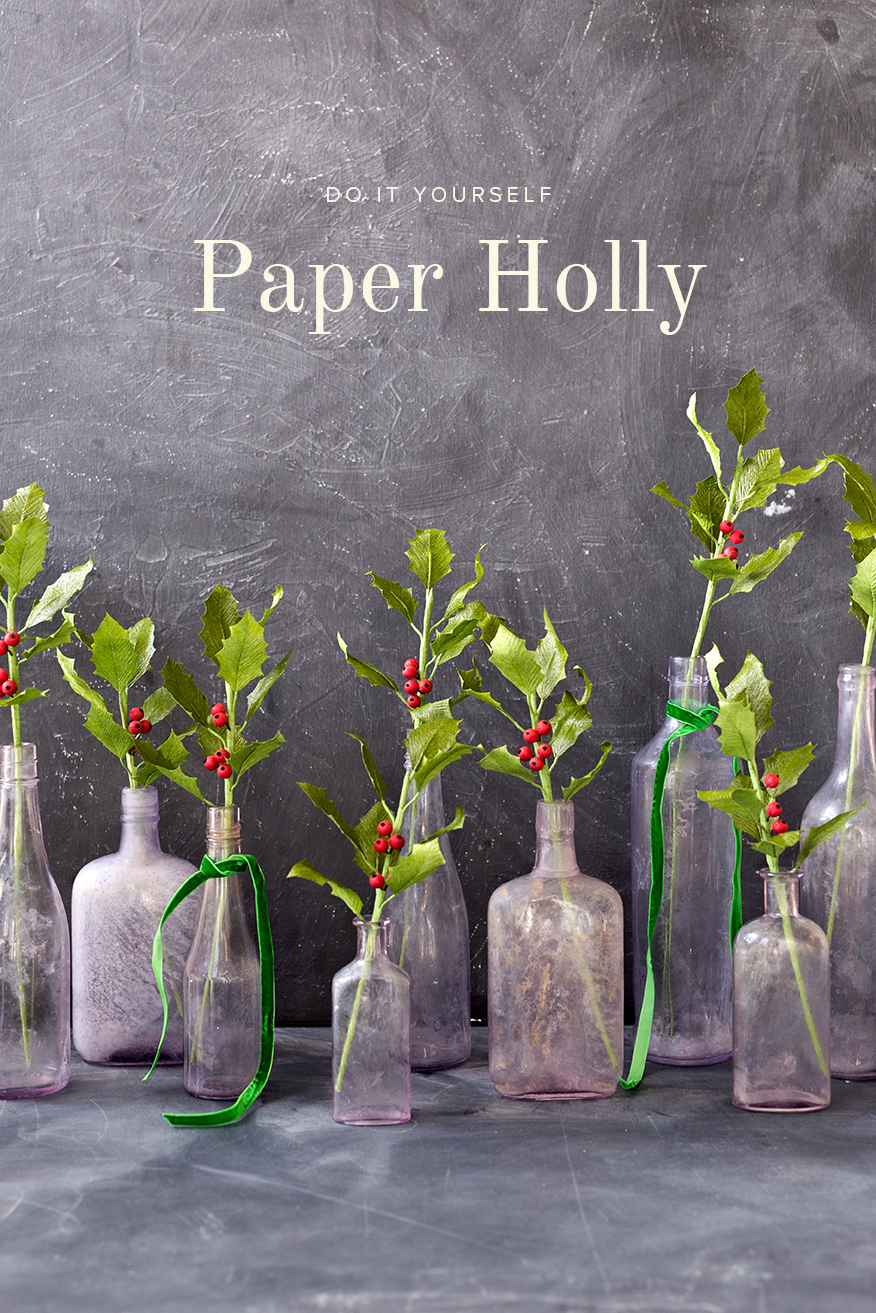
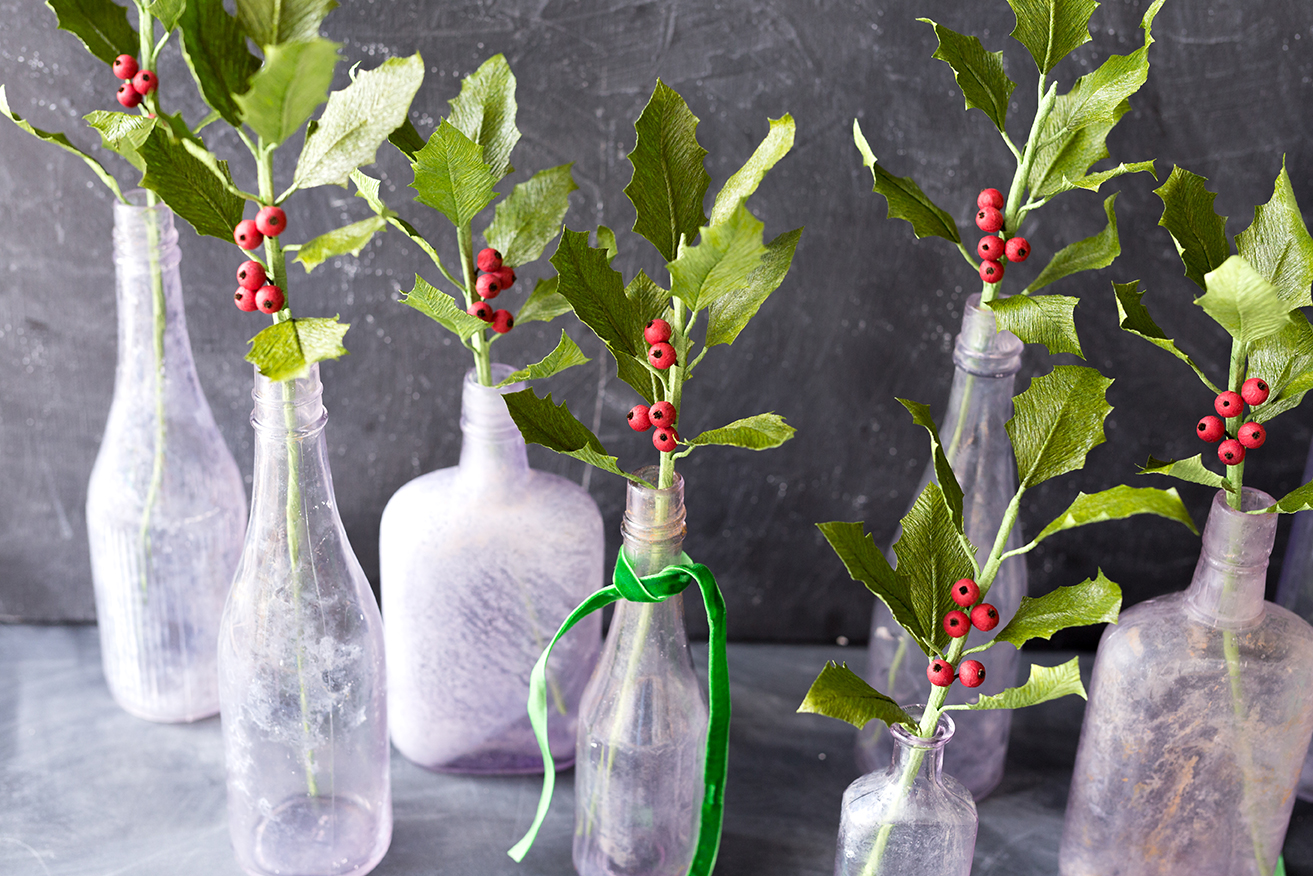
These DIY crepe paper holly boughs are the perfect holiday decoration. They are super versatile as well. You could make an arrangement, incorporate them into a garland, stick them in a tree, or just dance around with one in each hand spreading Christmas cheer. I placed individual boughs in vintage glass bottles I found at a vintage store (for about $1 apiece!) and placed them on my mantel at home. It’s my one Christmas decoration of the year and I love, love, love them! This DIY paper holly tutorial will take you step by step through the process and soon you’ll be up to your knees in this festive greenery.

DIY Crepe Paper Holly and Berry Tutorial
Materials:
- Crepe paper: 2 shades of green (one slightly lighter than the other), red, and dark brown. I used Moss Green from here and Cypress, Cranberry, and Caffe from Lia Griffith (or the assorted from here)
- 3 20 gauge floral wire stems, found here
- 1 18 gauge paper floral wire stem, found here
- 5 wooden beads 3/8″ in diameter, like these
- Holly leaf templates: 1 small, 1 large
- Clear drying craft glue, we love this kind
- Paintbrush
- Pencil
- Wire cutters
- Scissors
- Ruler
- Damp cloth to wipe glue from fingers
- Protective surface to work on
Instructions:
Leaves:
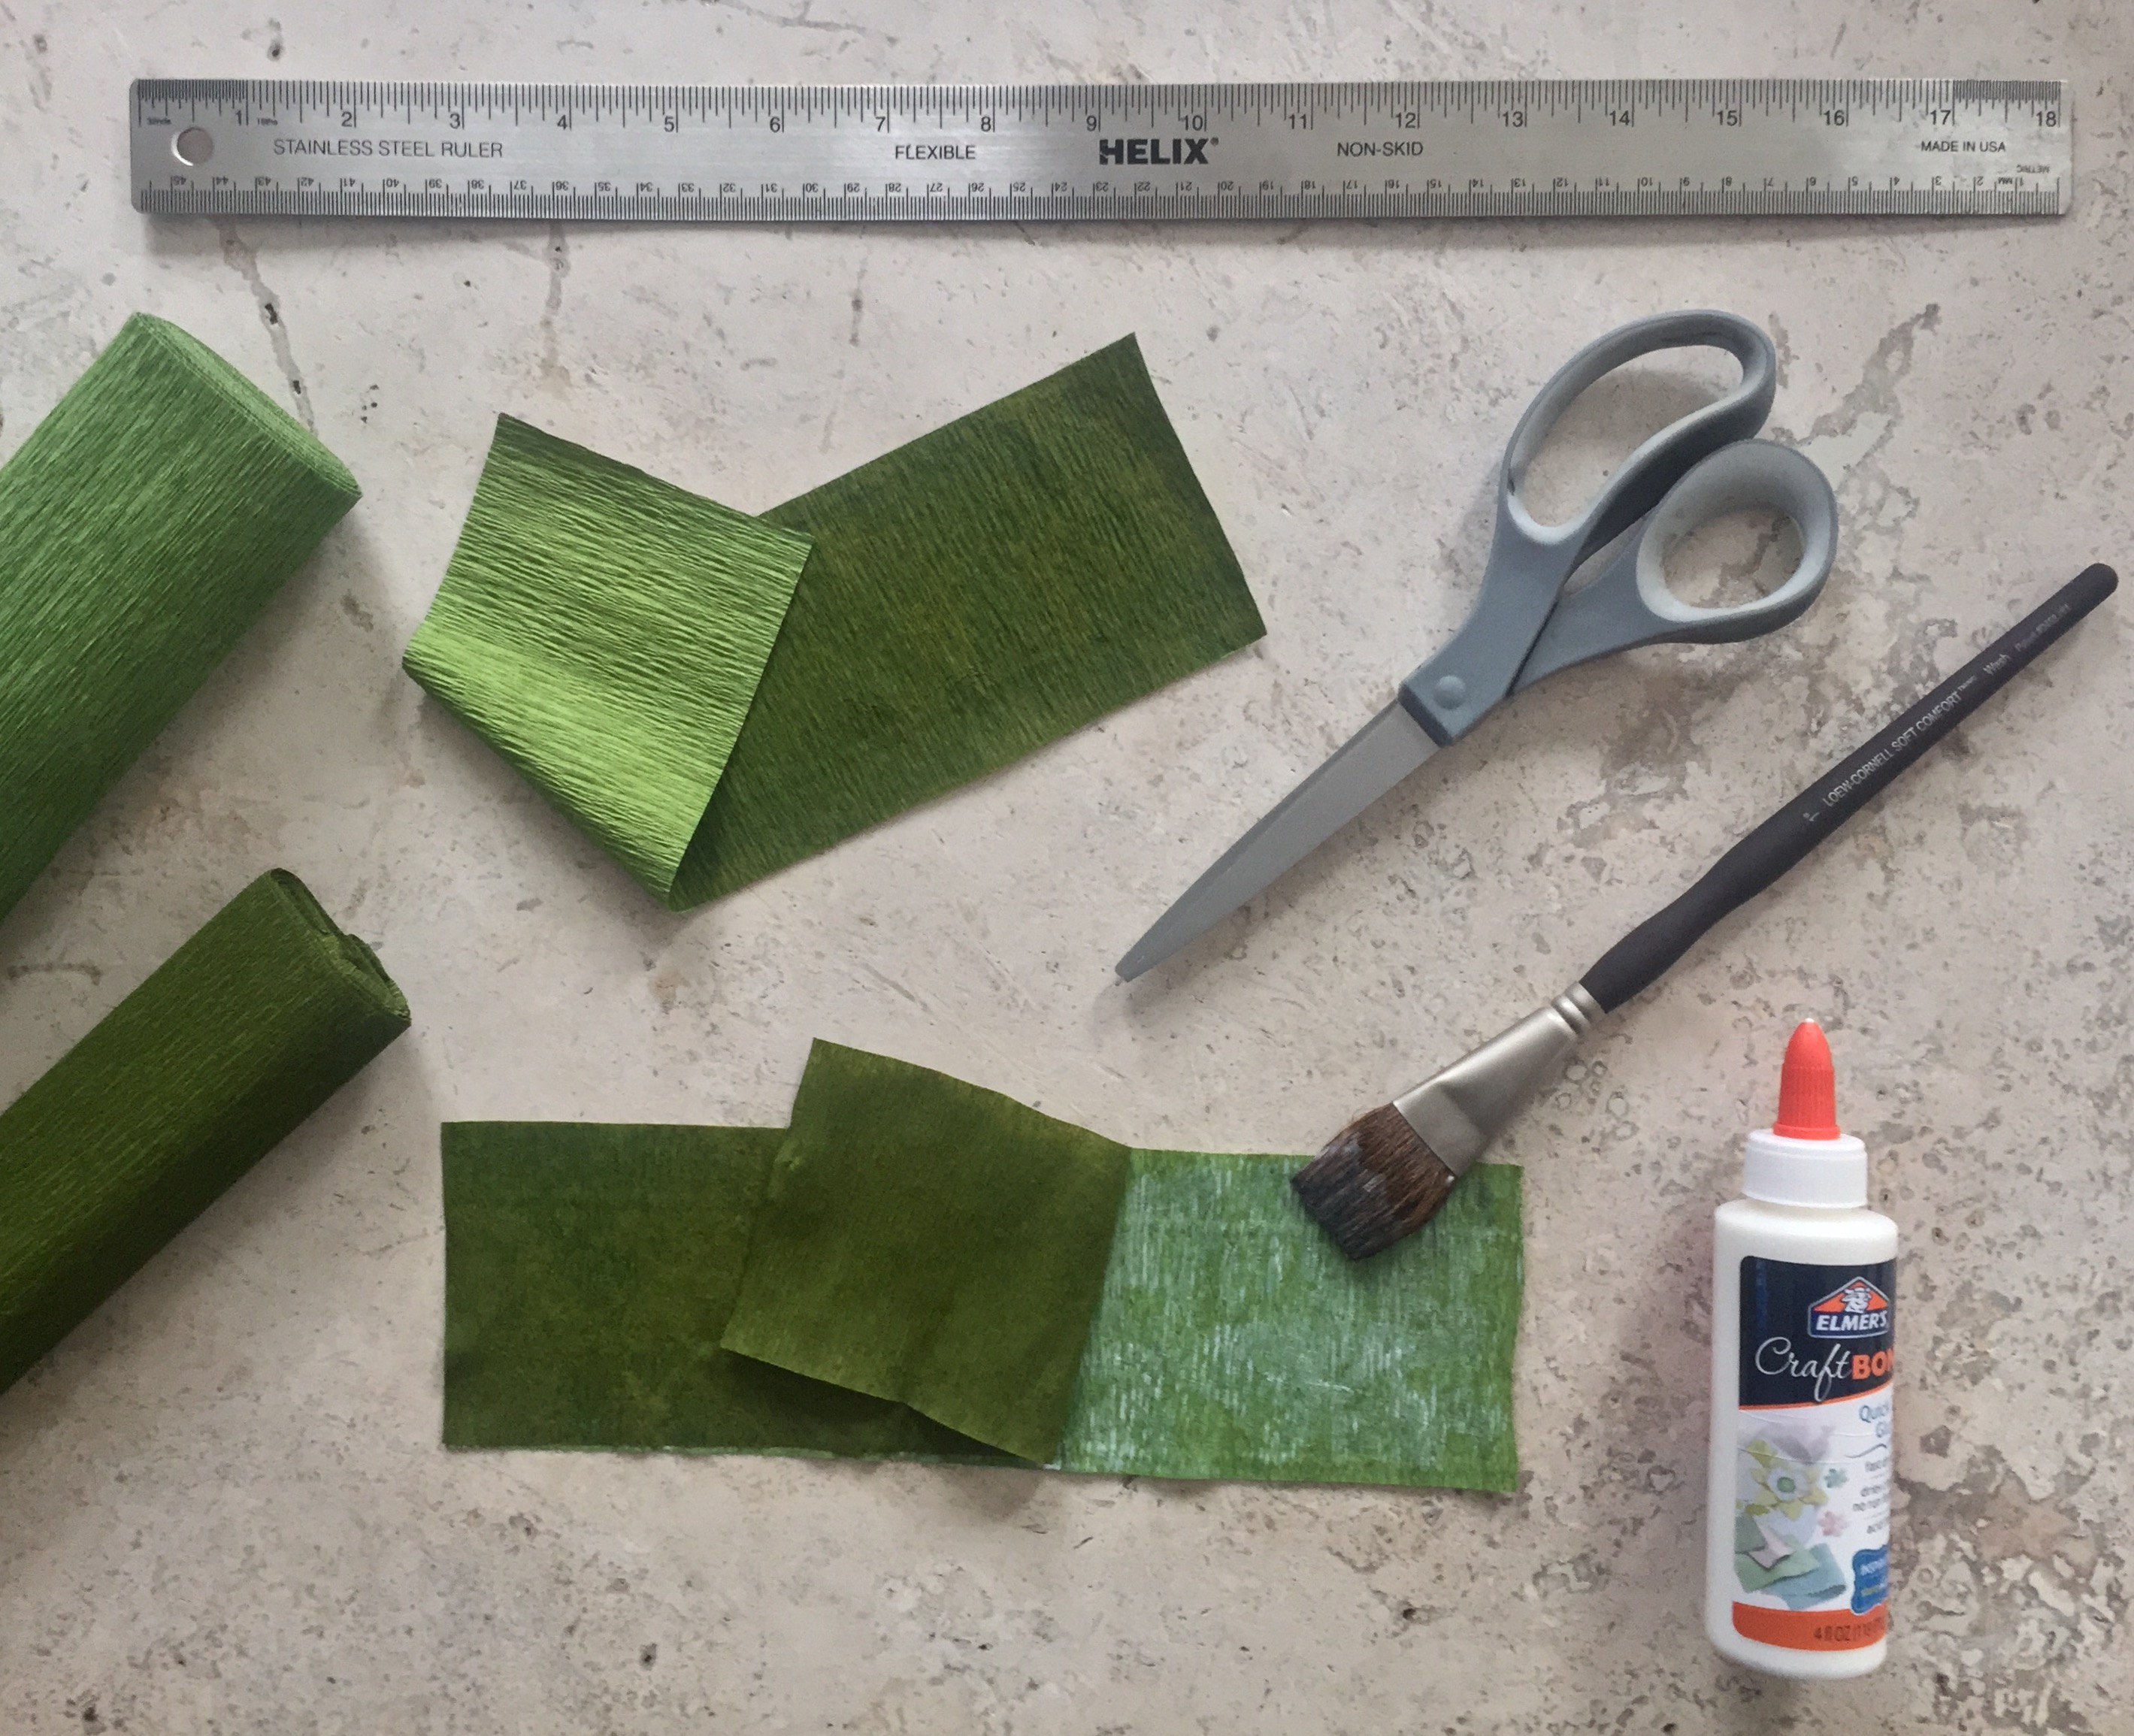
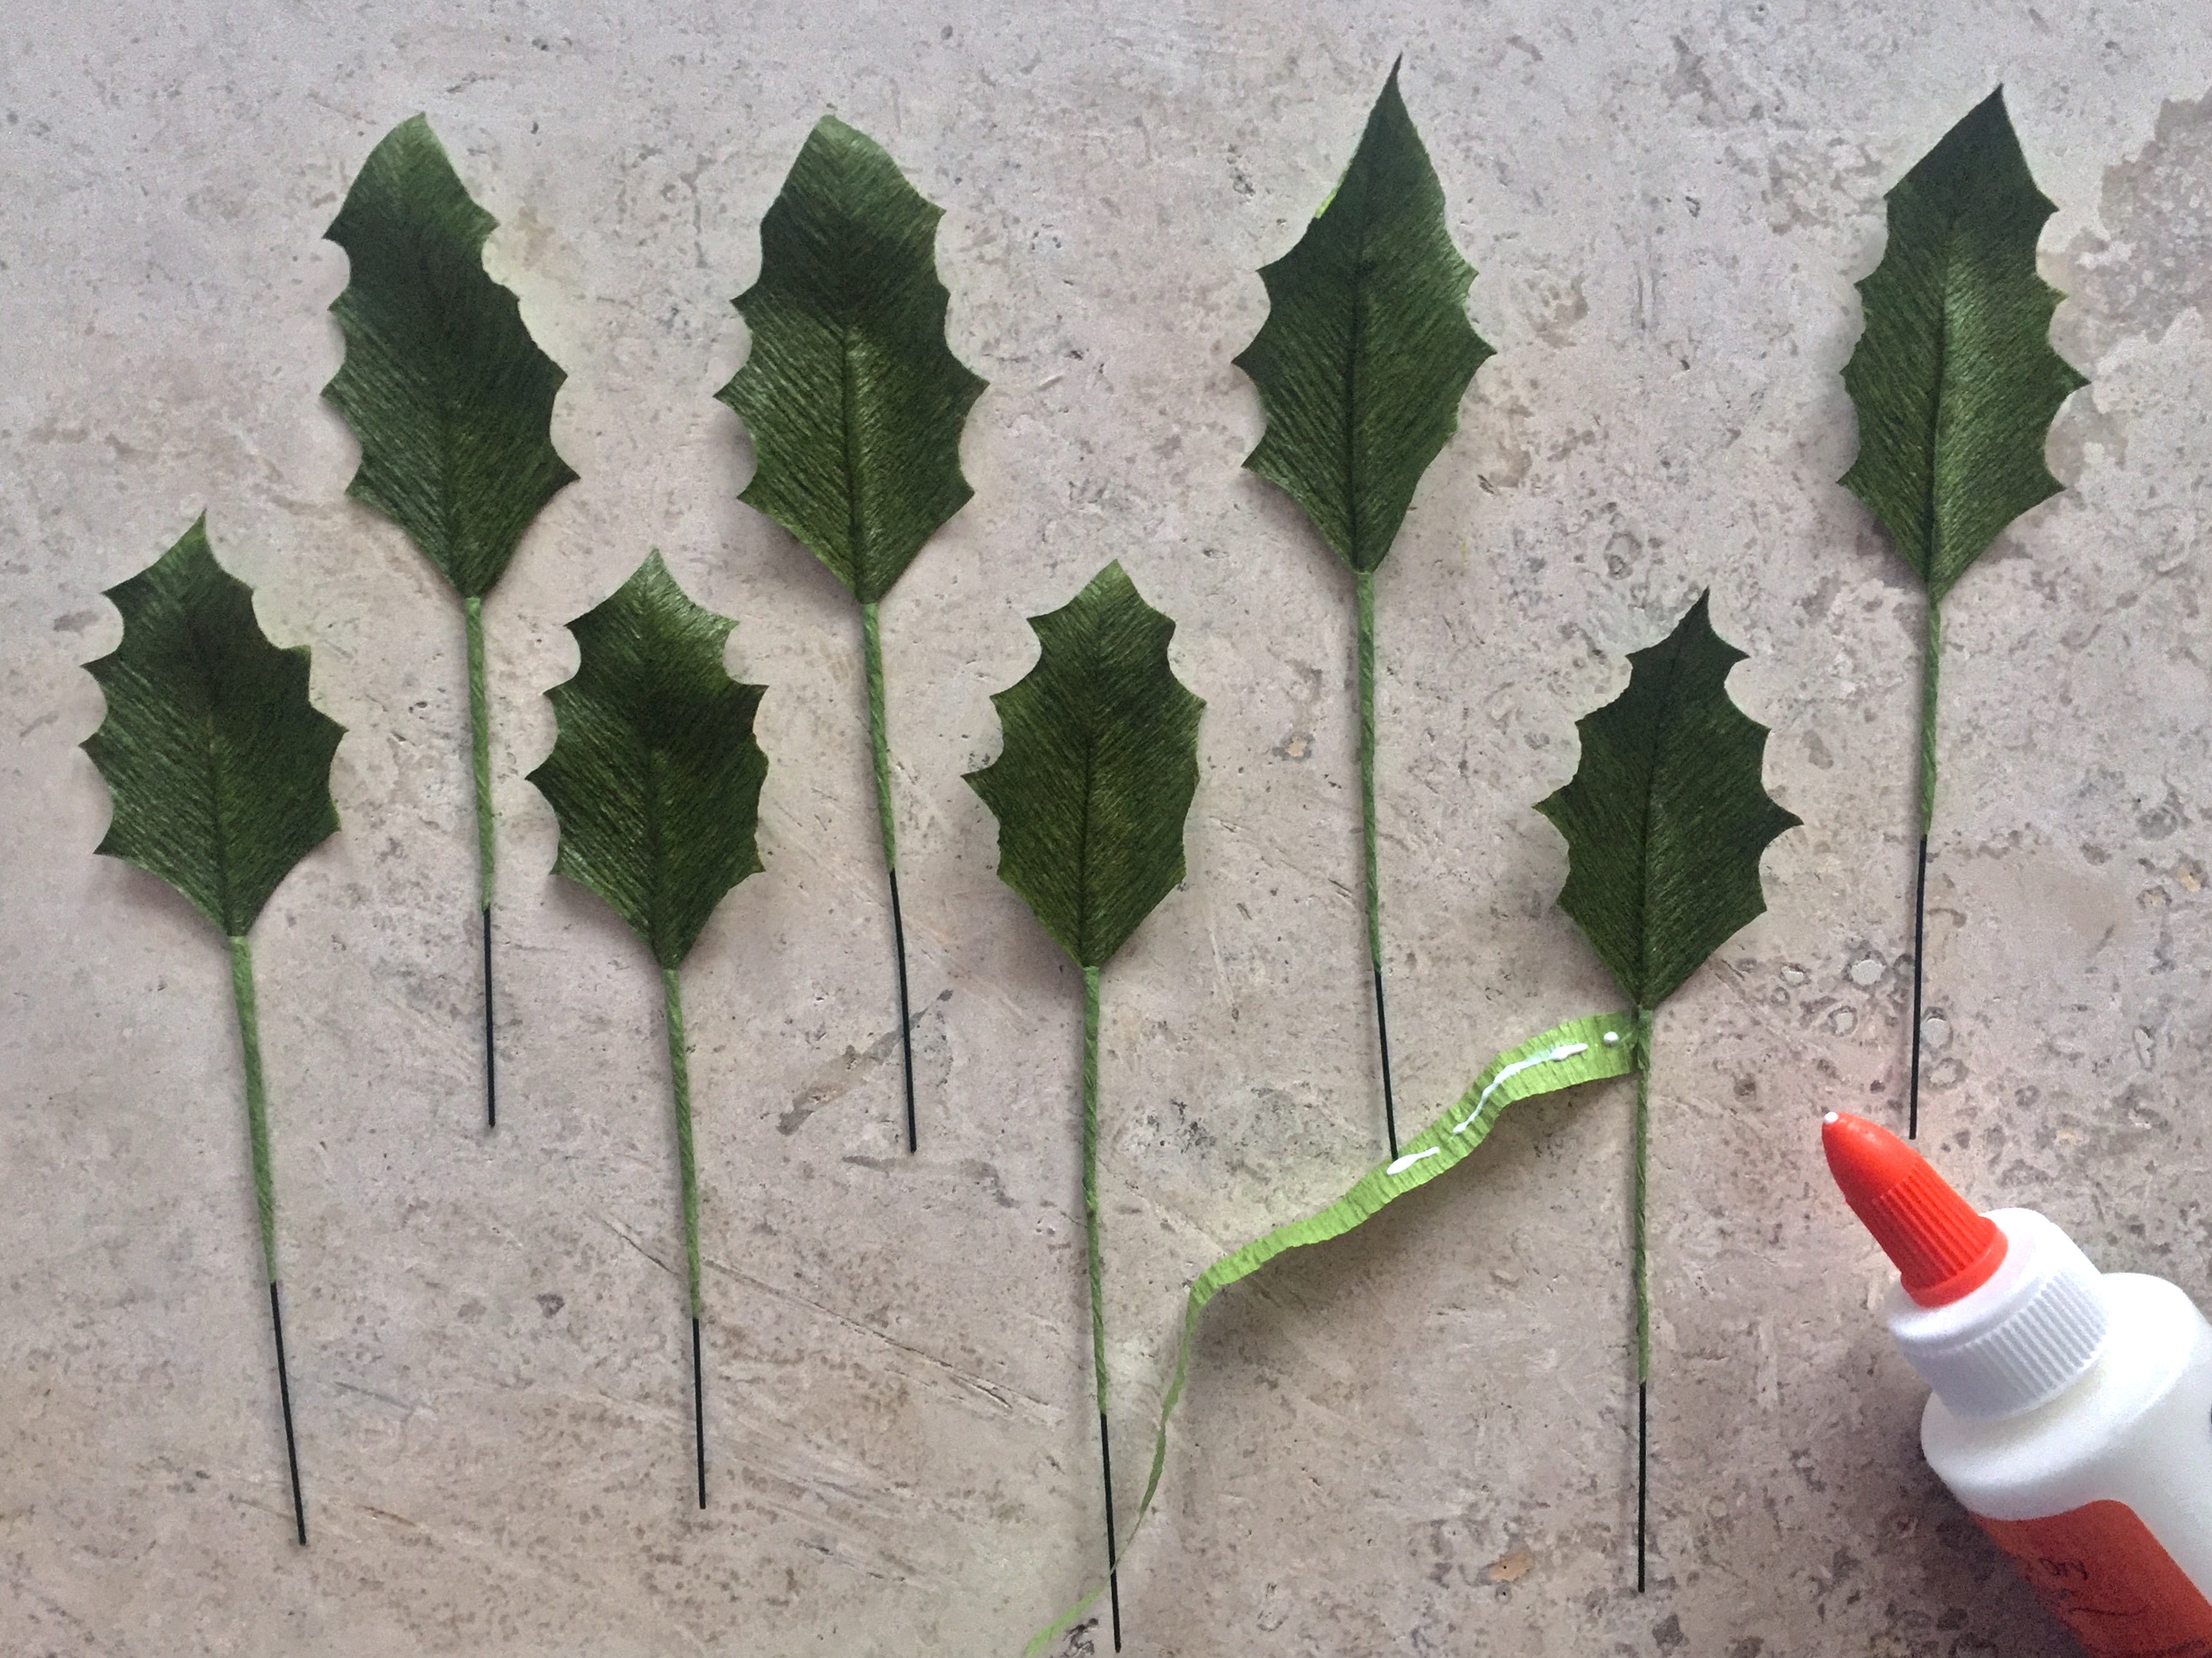
1. Cut out 2 strips of stretched crepe paper that measure 10″ in length and 3″ in height in the lighter shade of green. Repeat for the darker shade of green. You should have 4 strips, total. Glue the darker strip to the lighter strip and let dry.

2. Make 4 even, alternating folds with the grain of the paper. Line up the grain of the paper with the guidelines on your pattern and trace onto your folded strip. Repeat for the other strip to make 8 whole leaves, 4 large and 4 small.
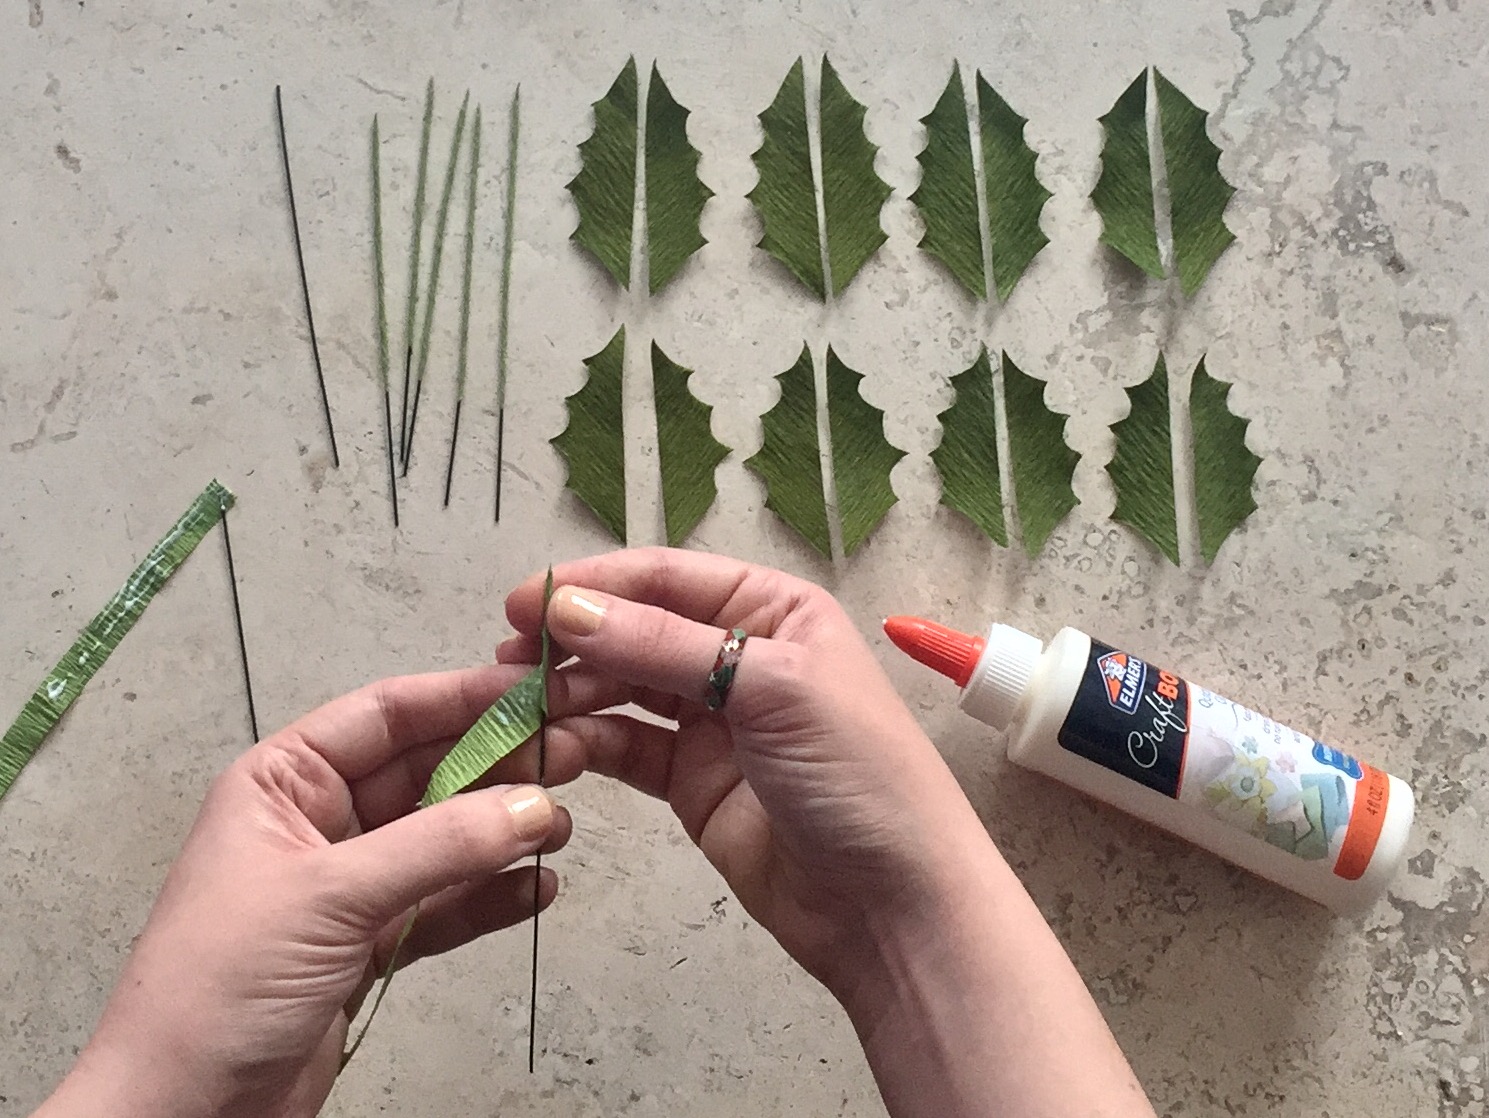
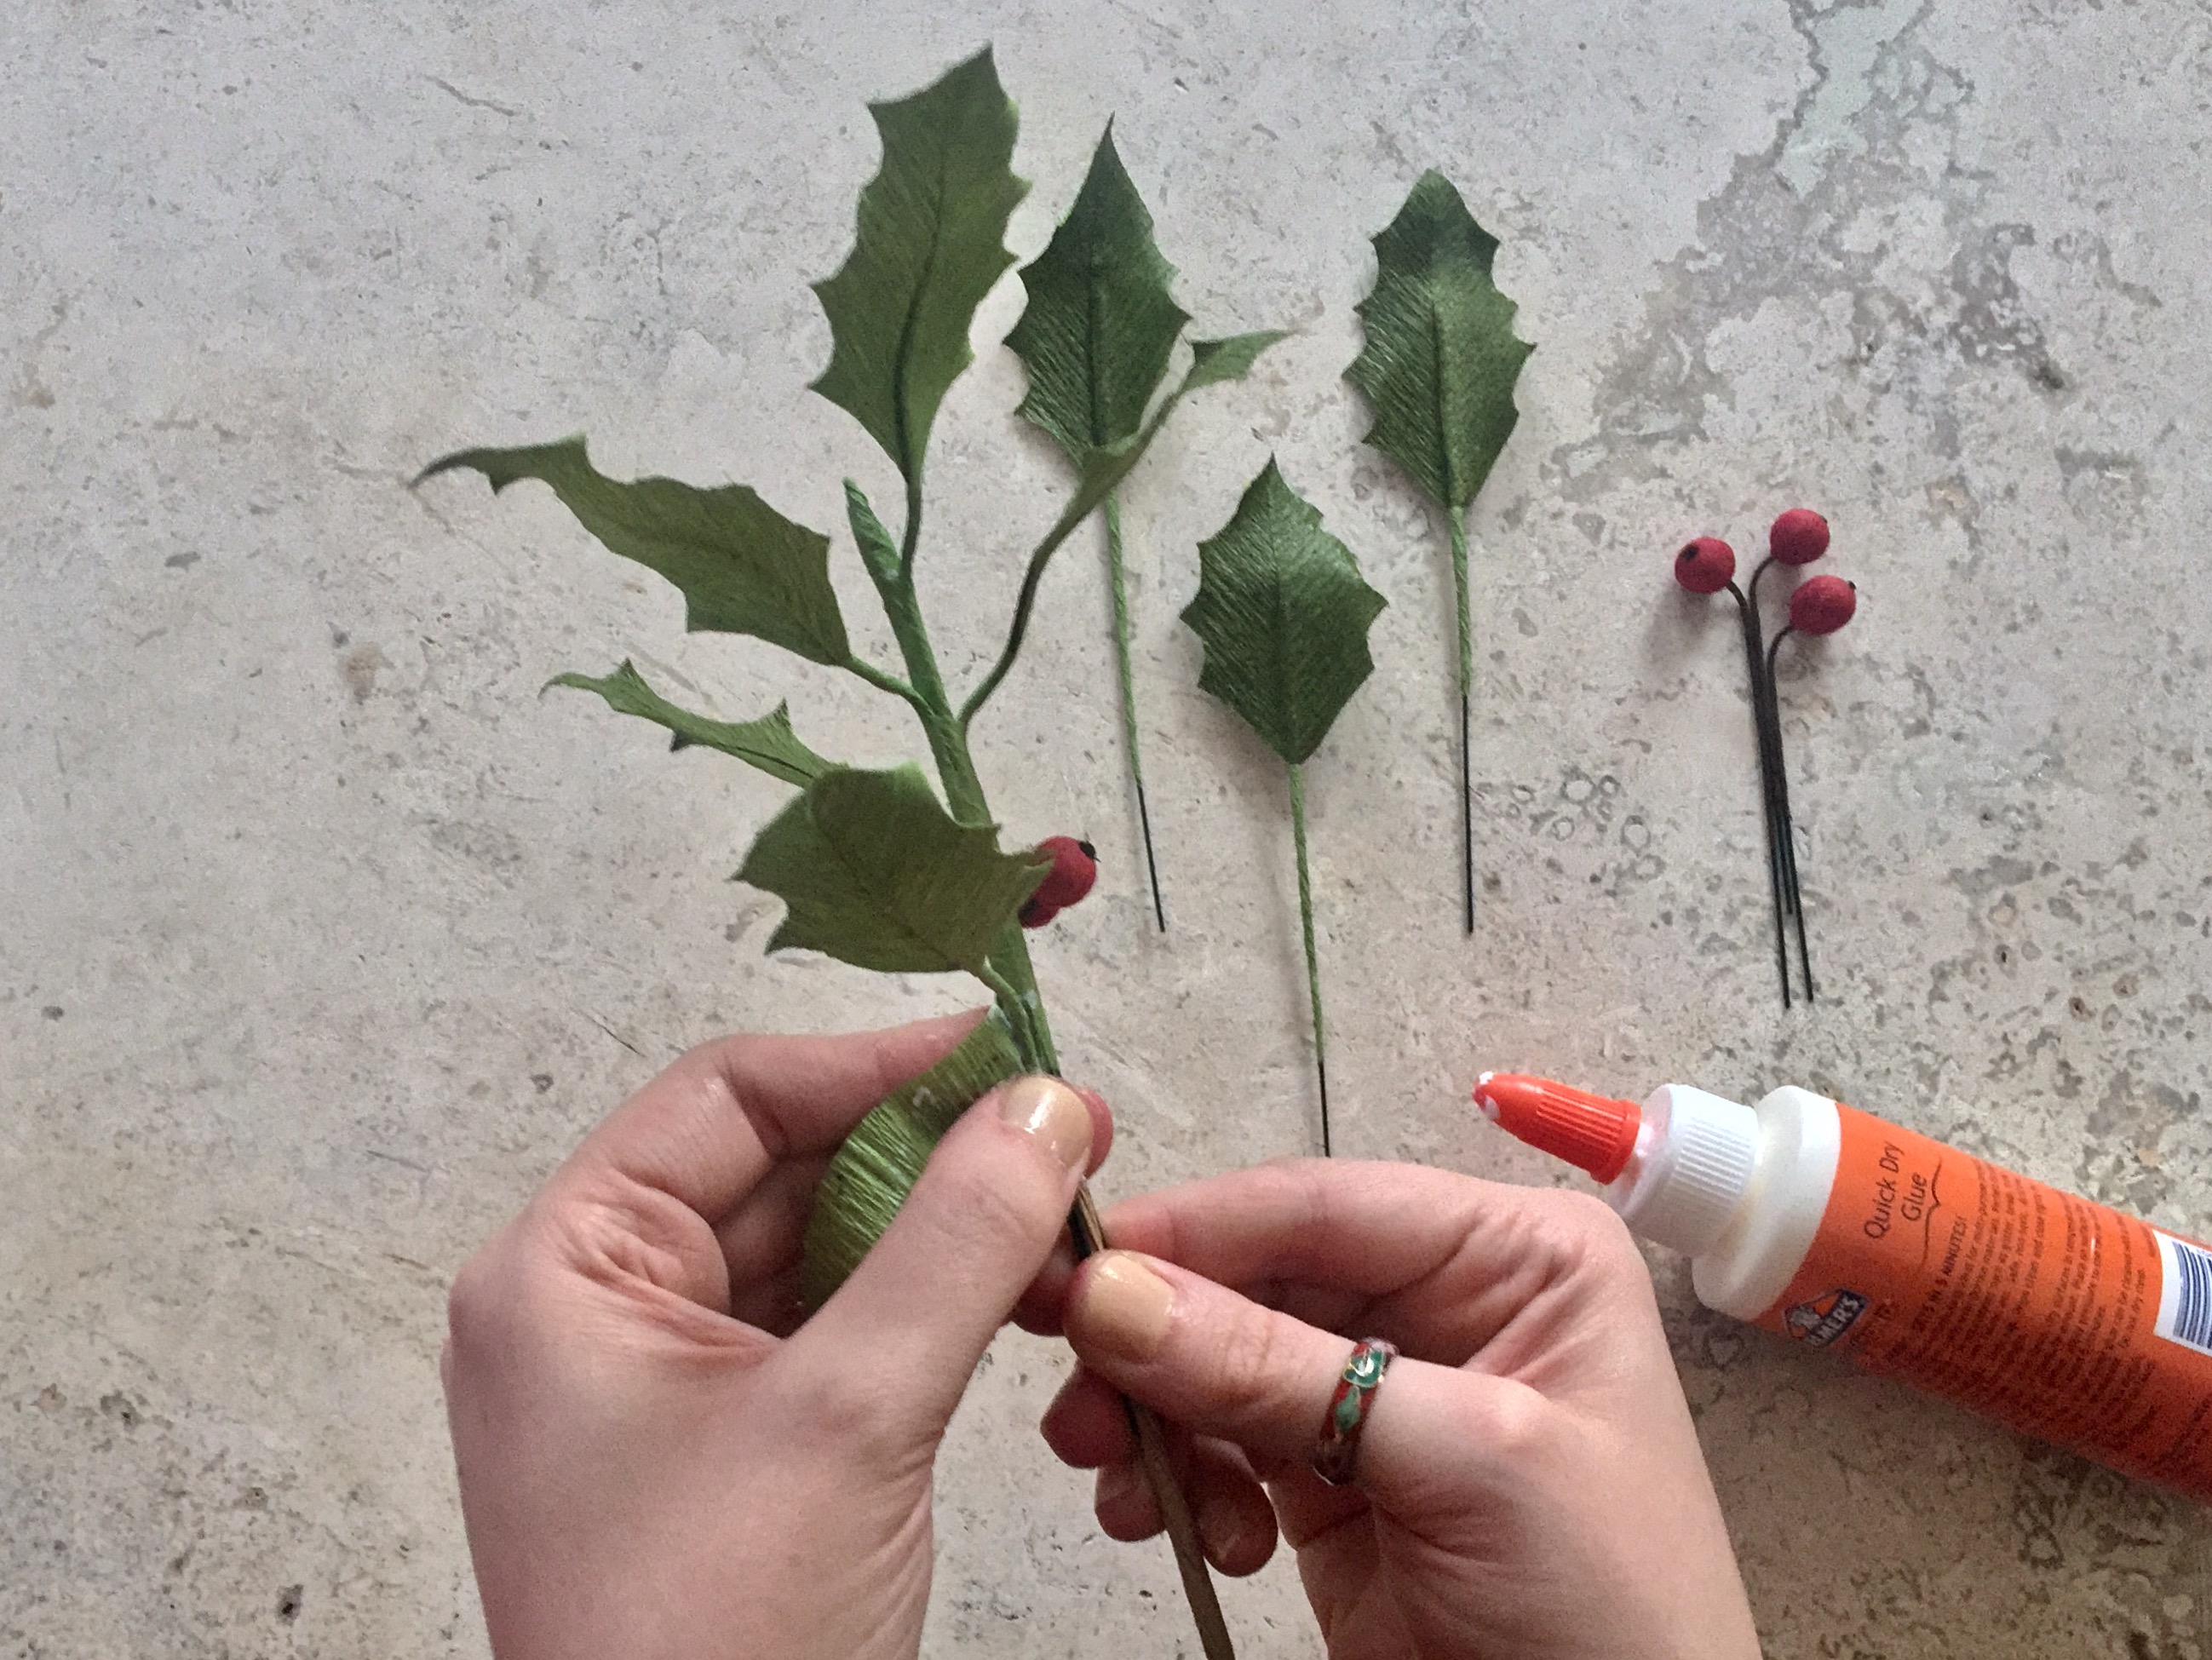
3. Cut 2 of the 20 gauge wire stems into 8 pieces of approximately equal length. Wrap each piece with a 1/4″ wide strip of the lighter green paper and glue, starting at the top and winding your way down.

4. With the darker green sides facing up, apply a thin line of glue to the left side of your leaf. Press a wrapped wire stem halfway up the seam of the leaf and apply glue to the stem. Carefully line up the right side of the leaf to the left side and press down firmly. Repeat for all 8 leaves.
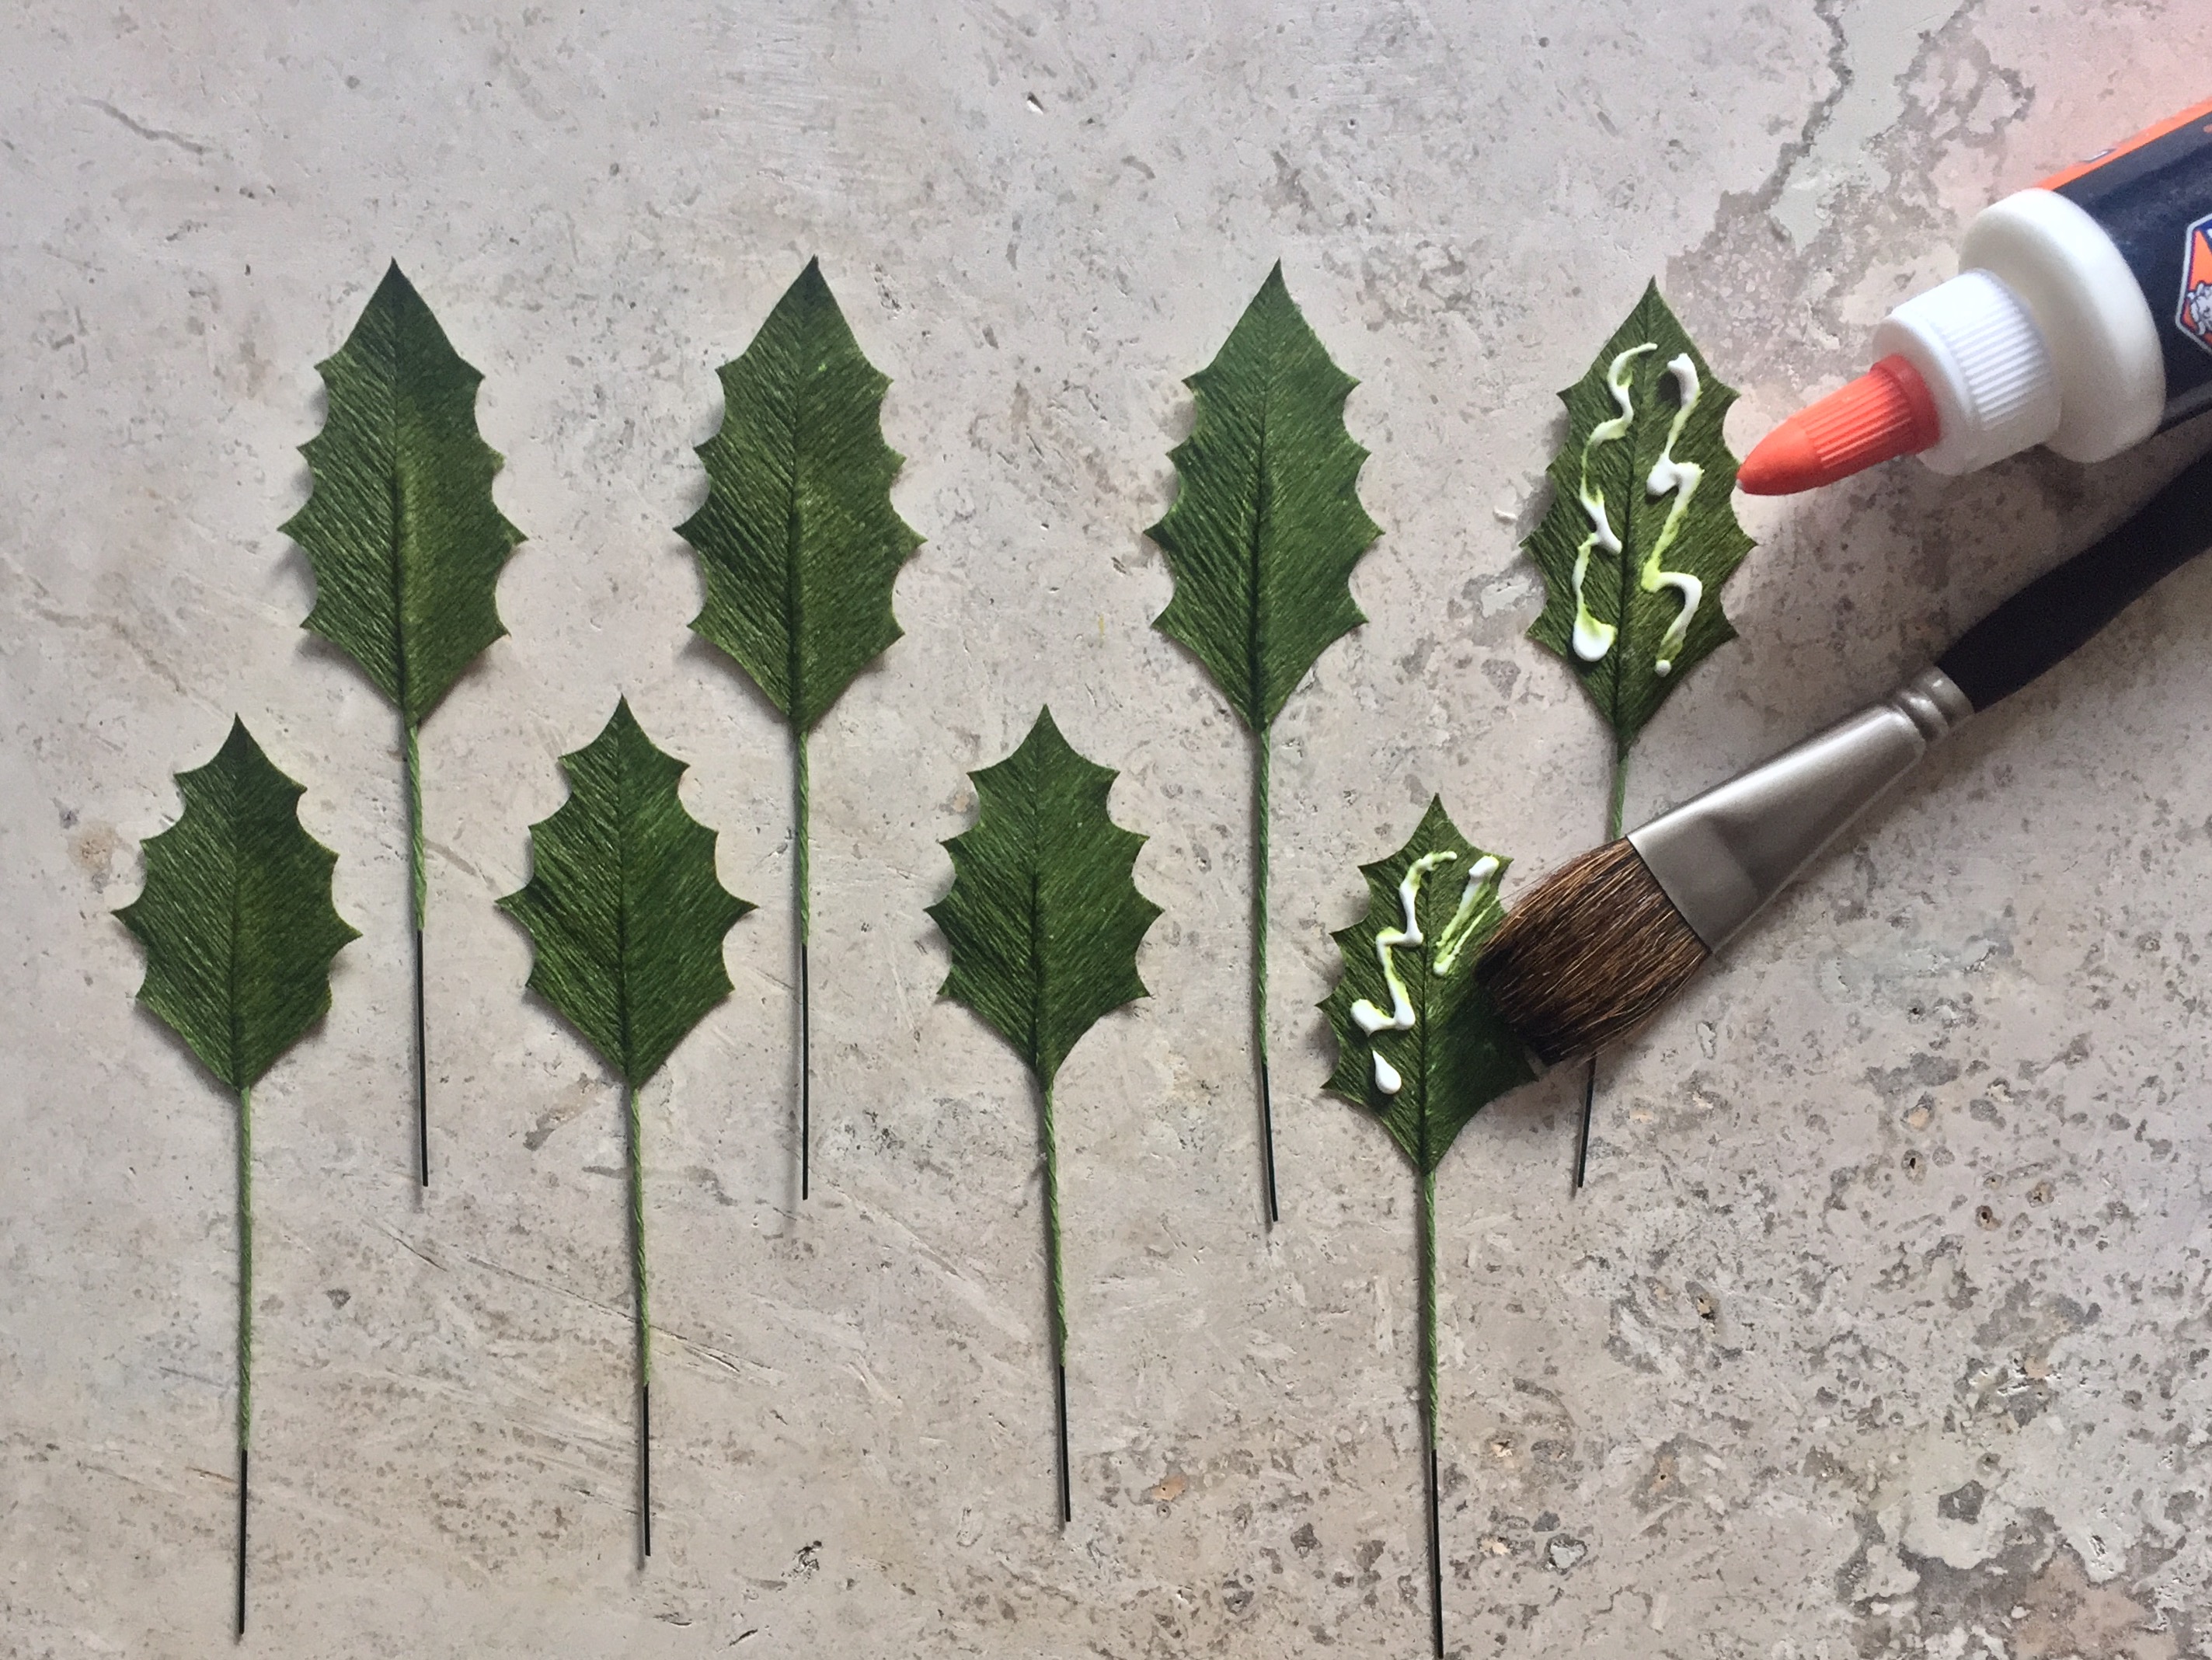
5. Paint a layer of glue onto the darker side of your leaves and set aside to dry.
Berries:
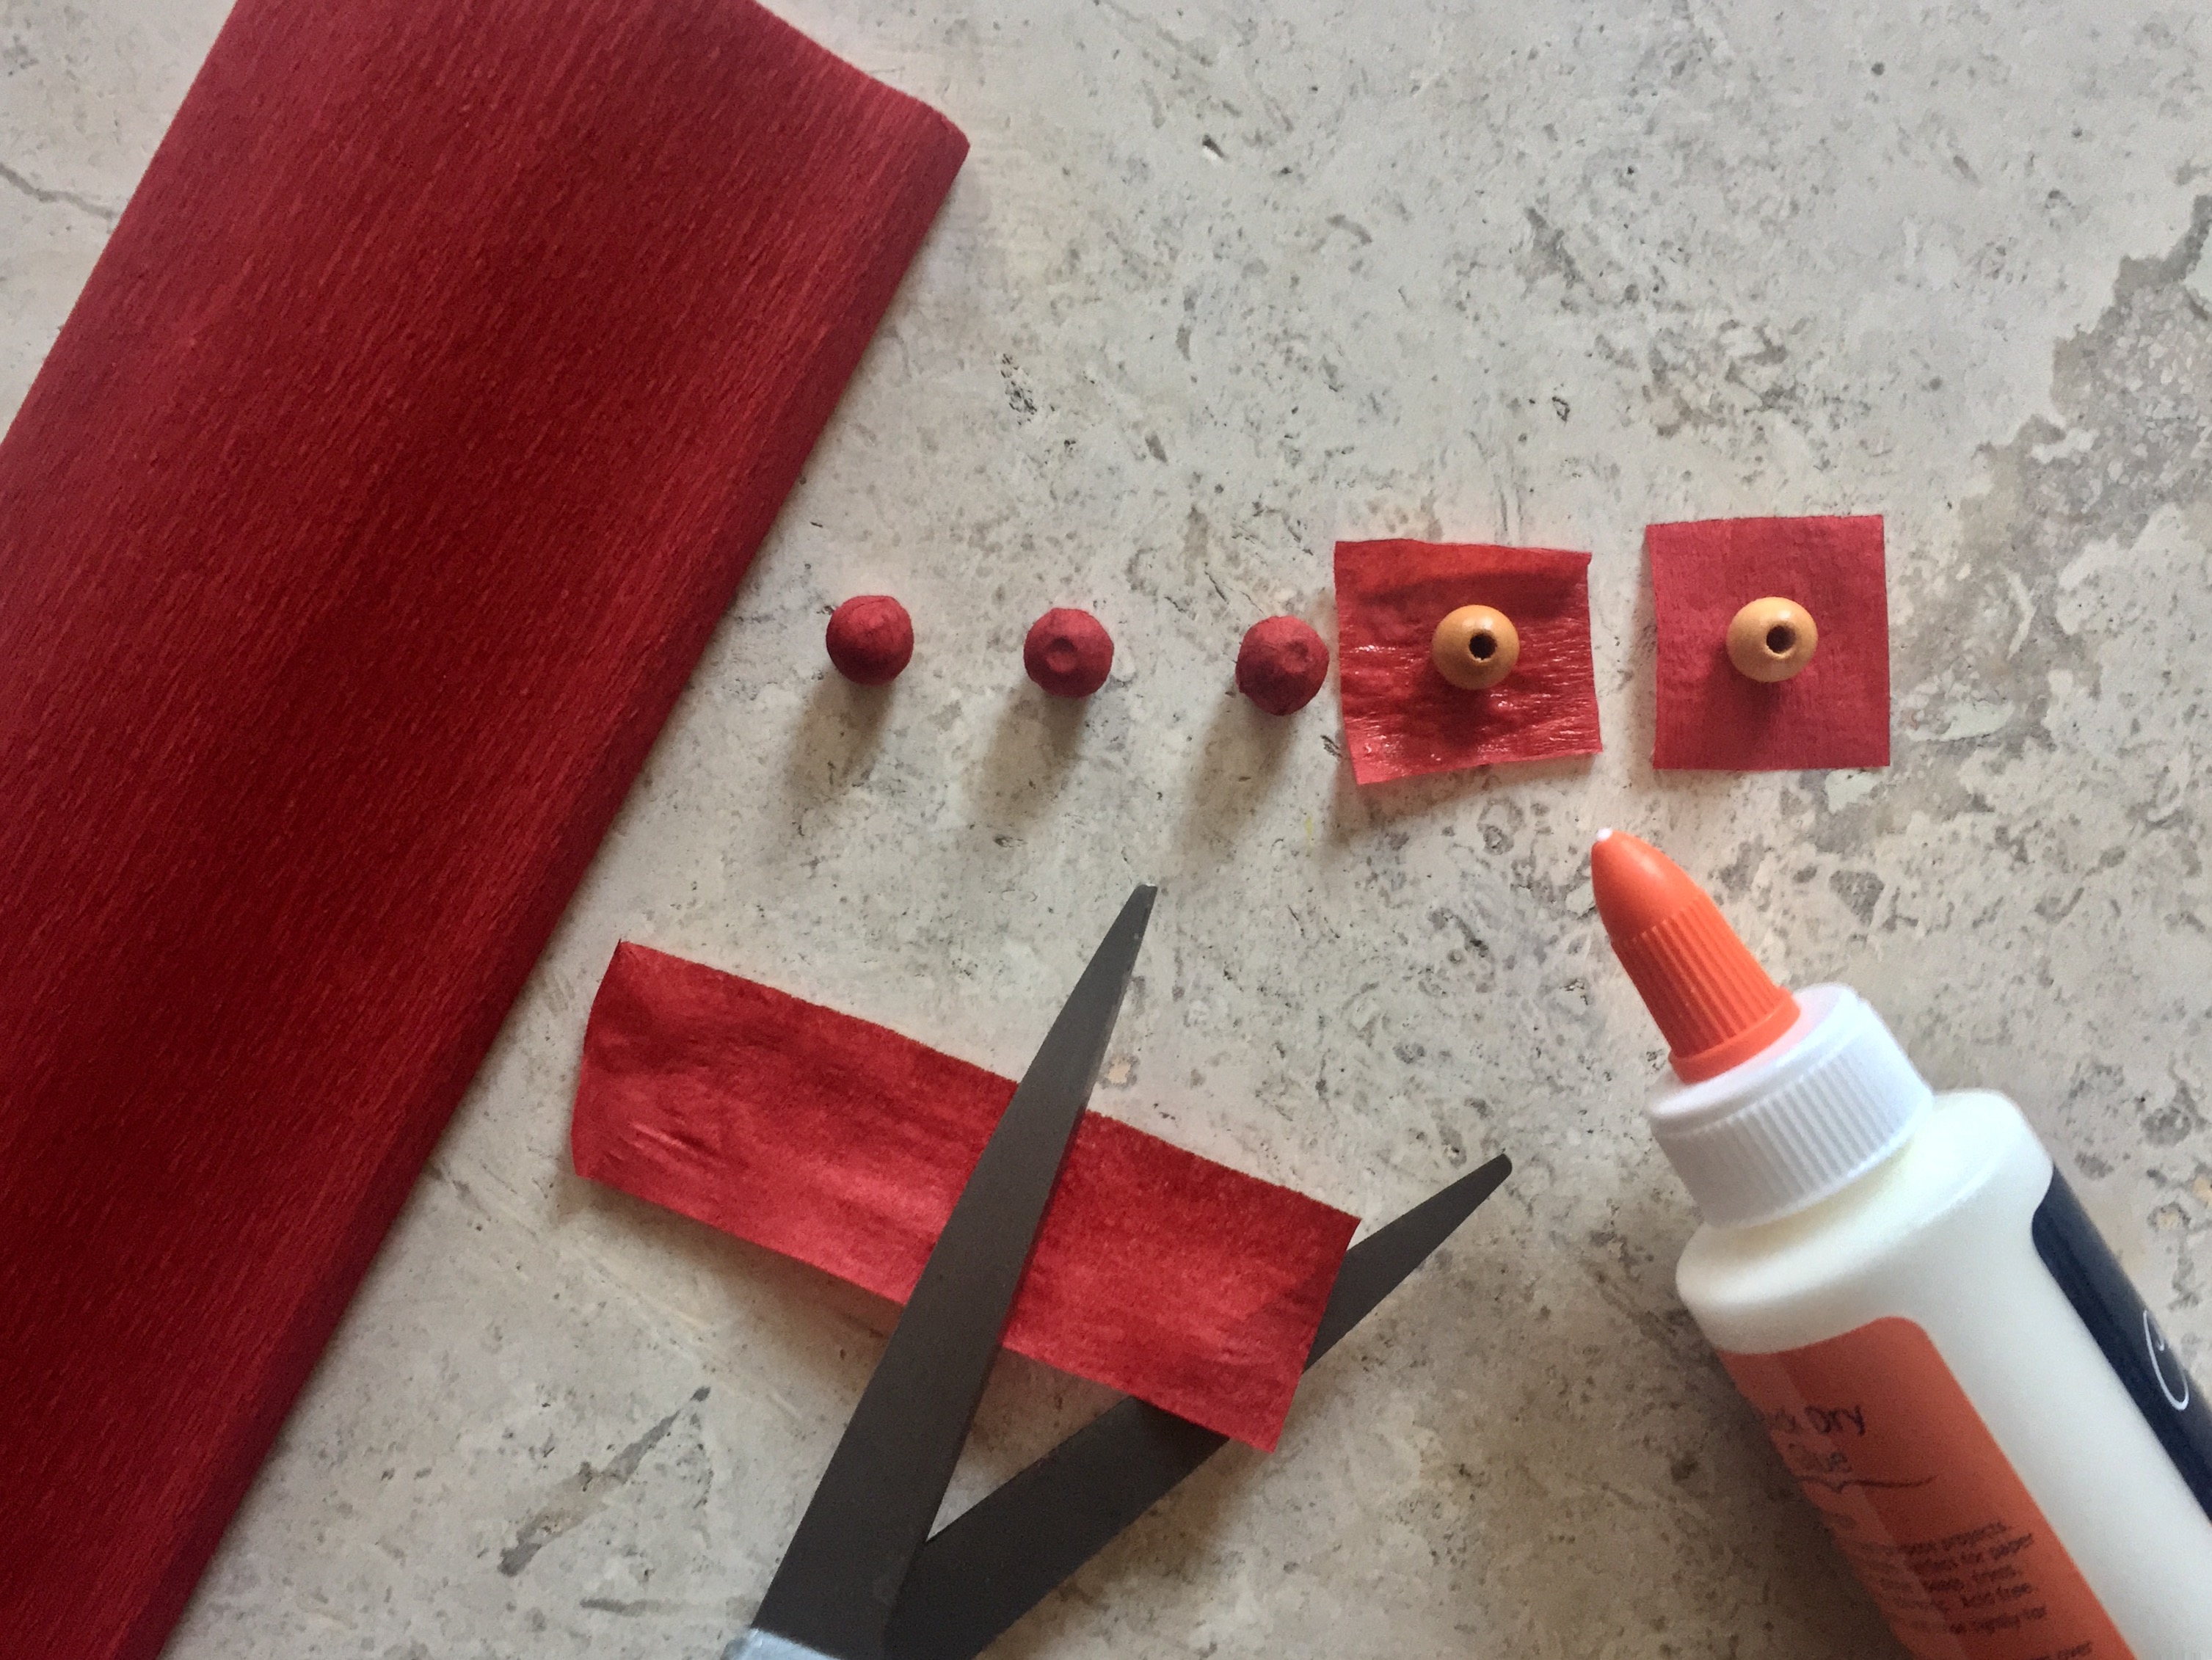
6. Cut out five 1″ X 1″ squares of the red paper and cover each bead. Let dry.
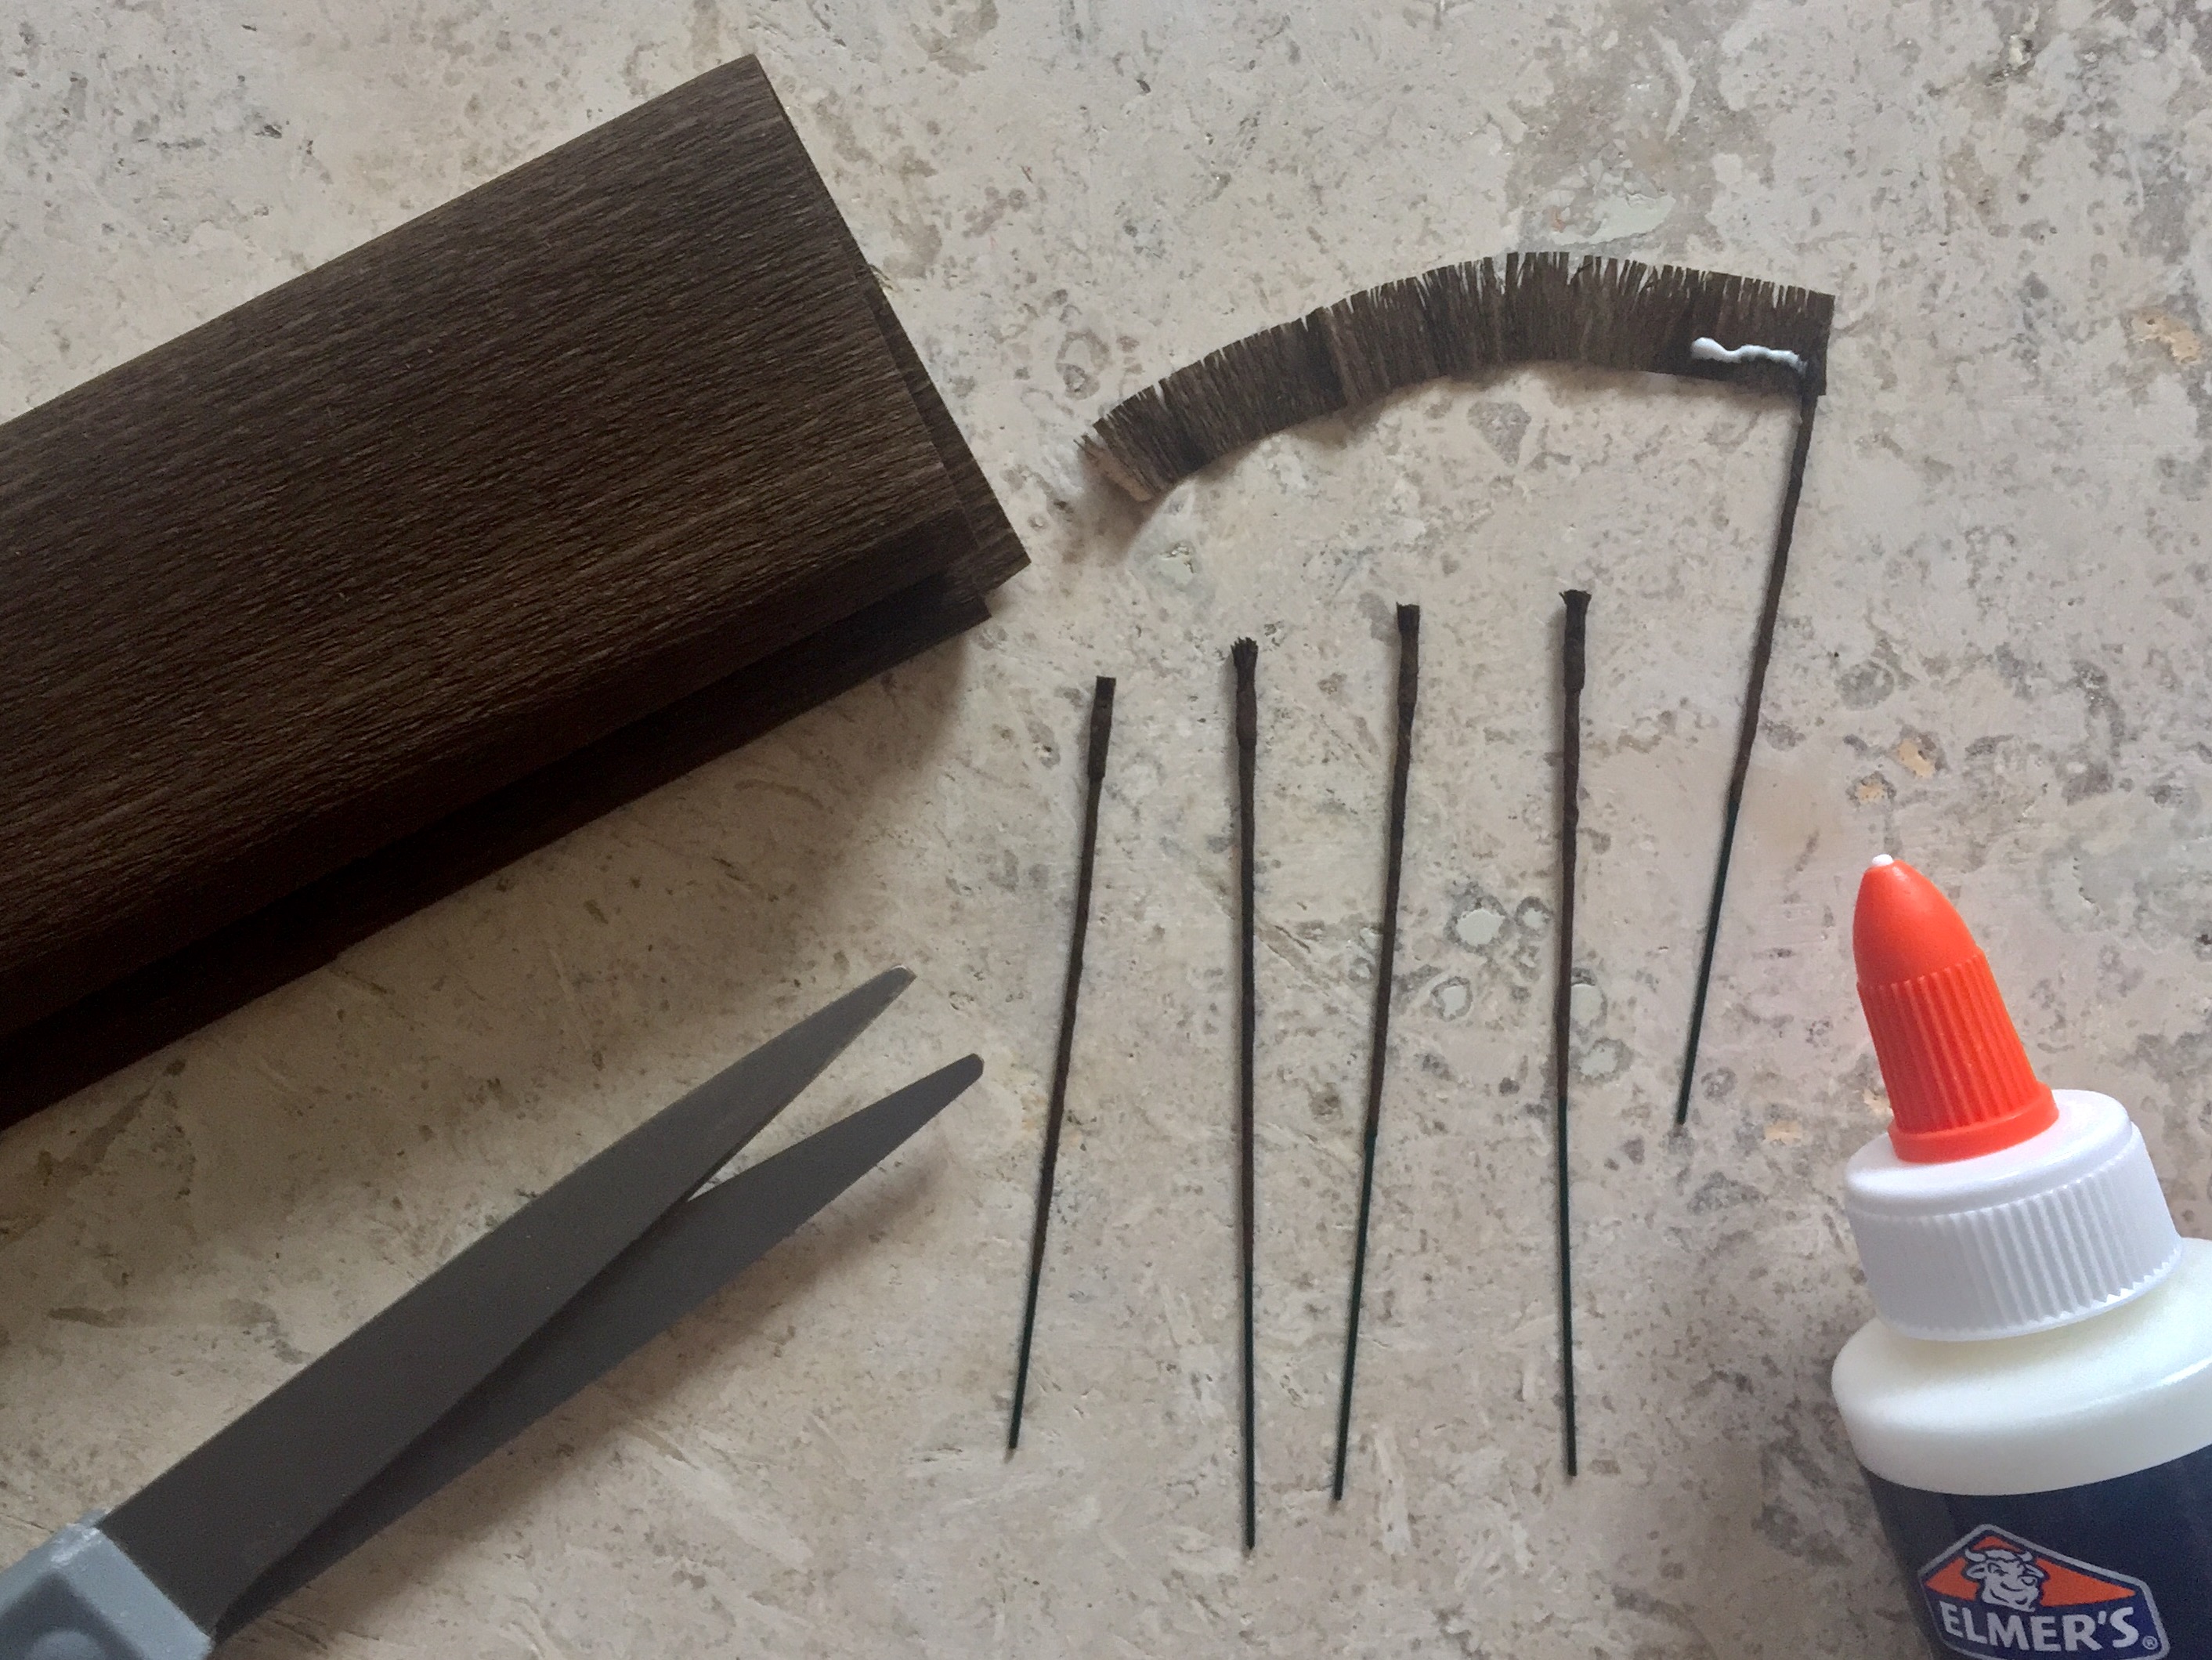
7. Cut the last 20 gauge wire stem into 5 pieces of approximately equal length. Wrap each piece with a 1/4″ wide strip of the dark brown paper and glue. Cut out another very thin strip of the dark brown paper, no more than 3/8″ wide, and snip a shallow, fine fringe on one side. Wrap the tip of each brown stem with a small amount of the fringe and glue.
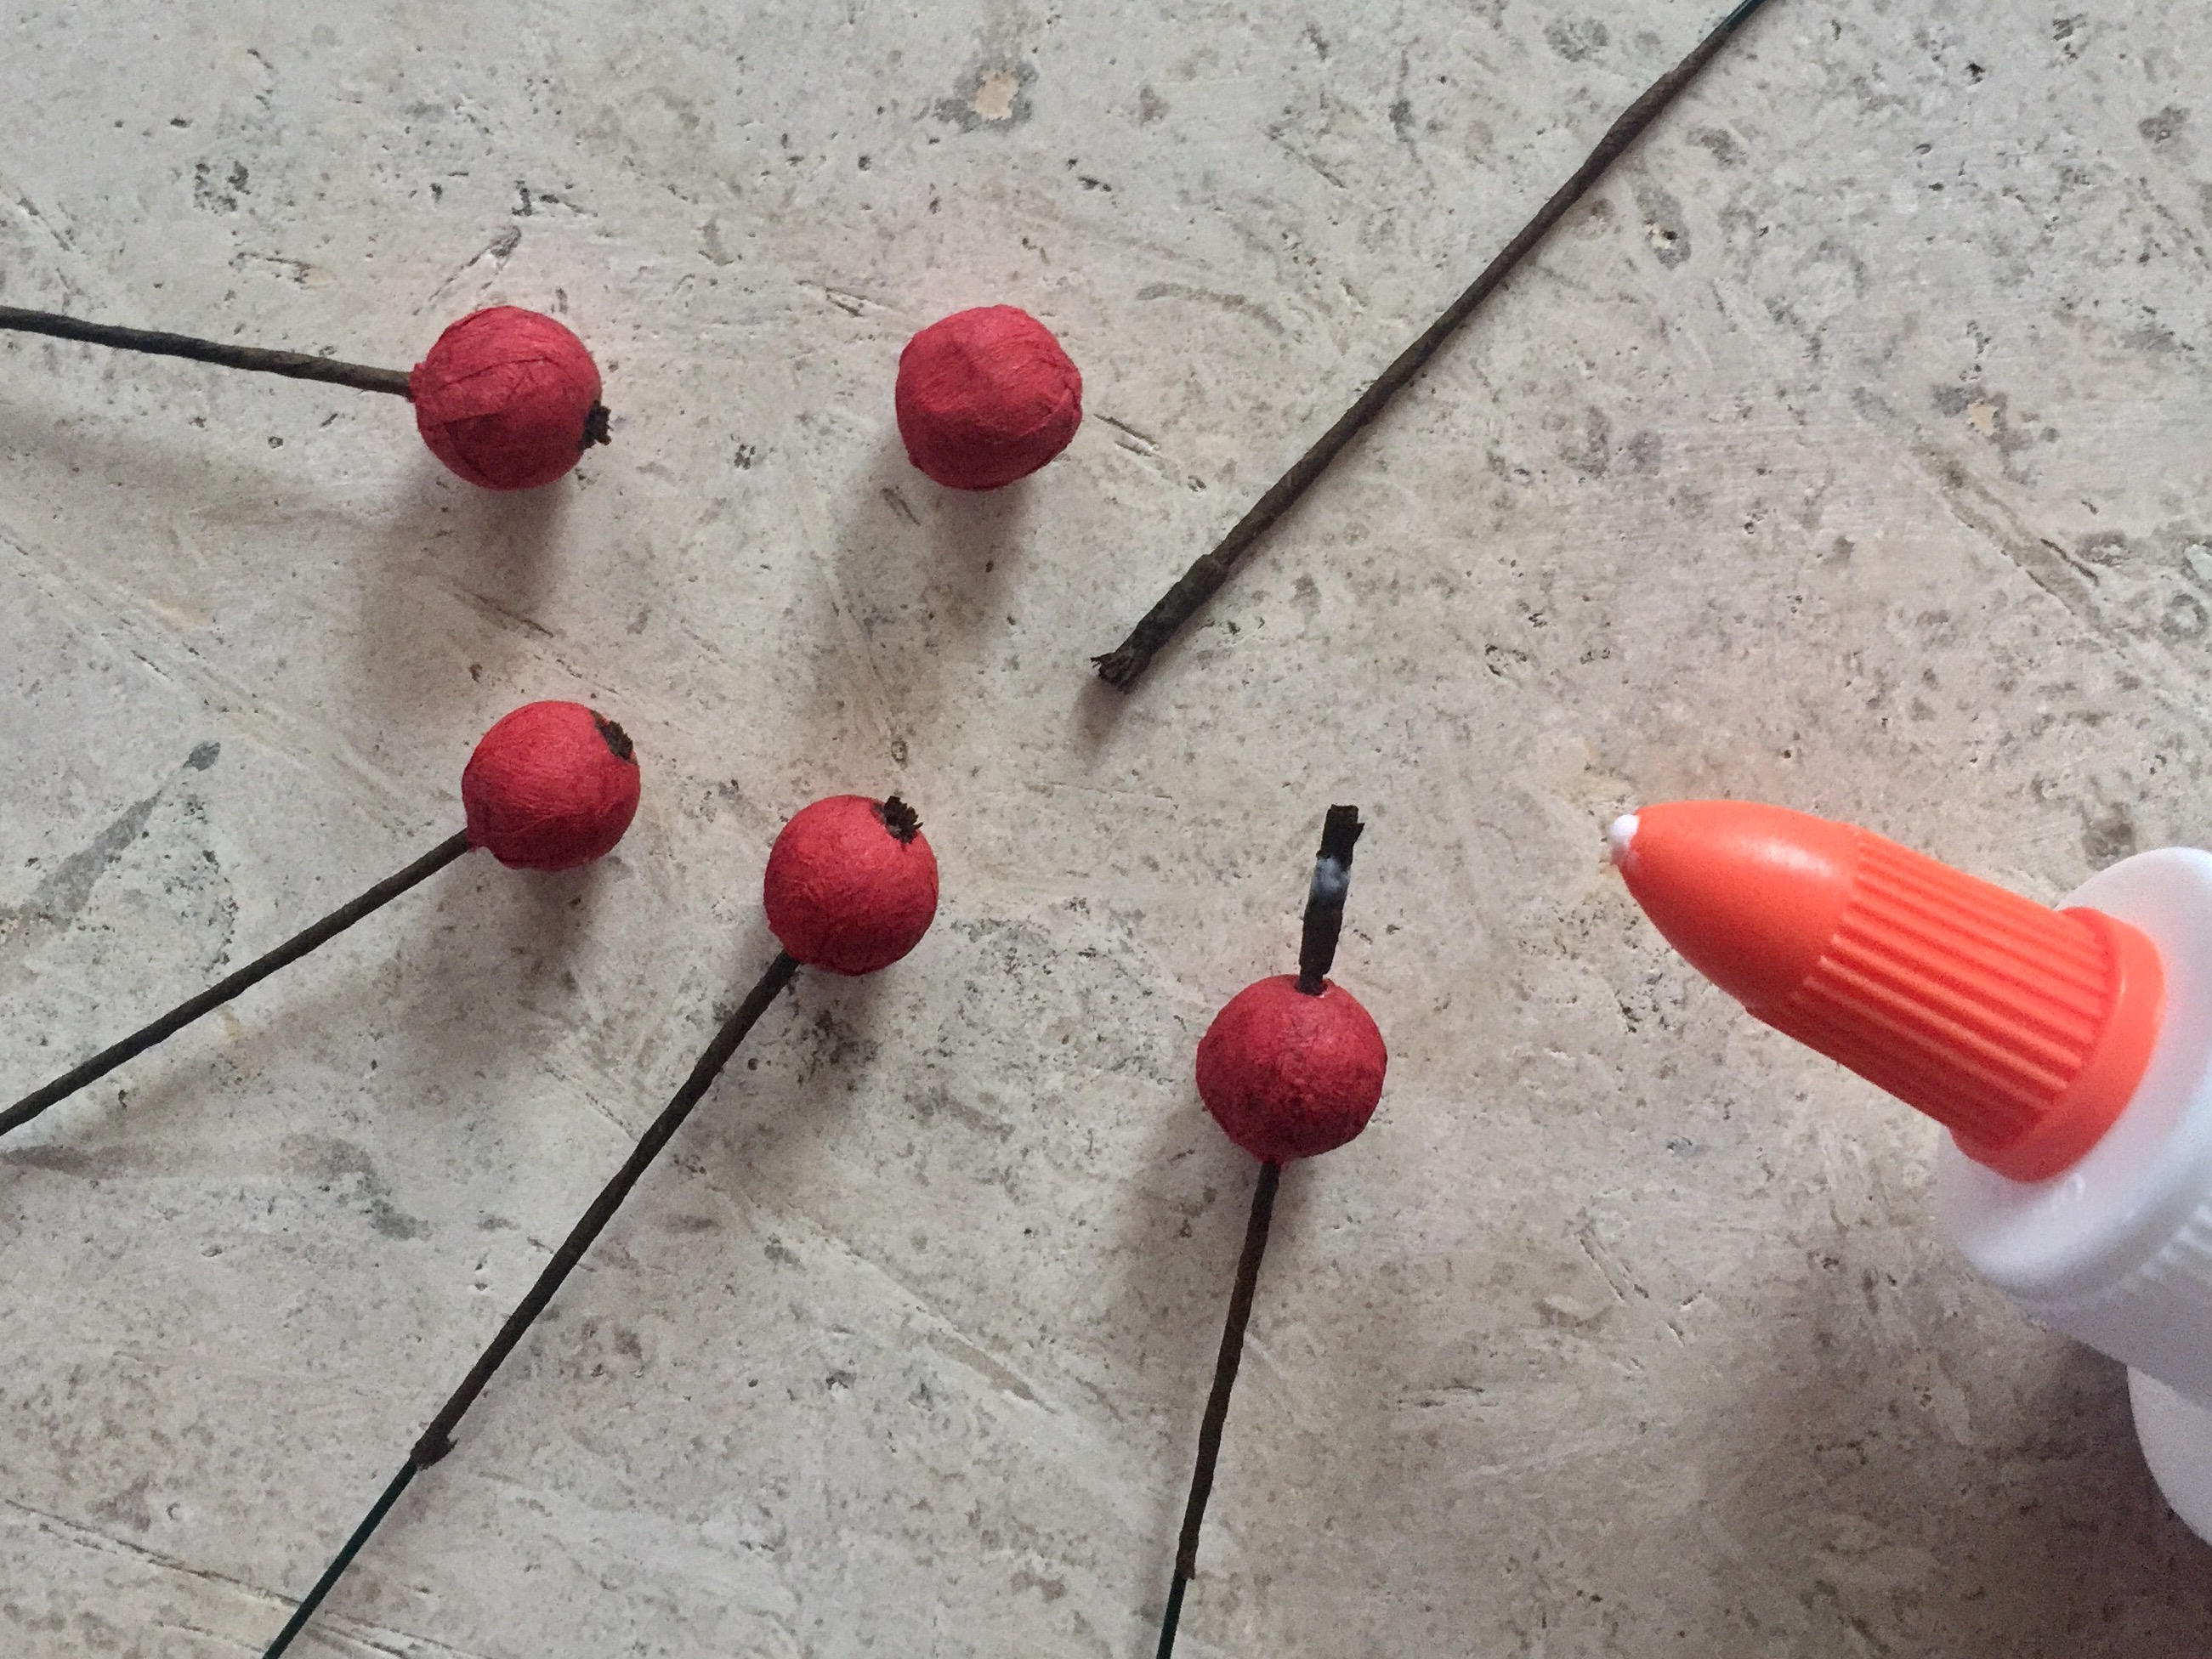
8. Carefully poke the bottom of the stem into the top of the berry and feed the stem down into the berry, stopping just before the fringe. Add a small amount of glue around the base of the fringe and continue to feed the stem all the way into the berry, stopping so a small amount of fringe pokes out of the top of the berry.
Assembly:
9. Wrap an additional 1/4″ strip of the lighter green paper around the base of each leaf, working your way down the stem. Bend each leaf to give it a more natural look.
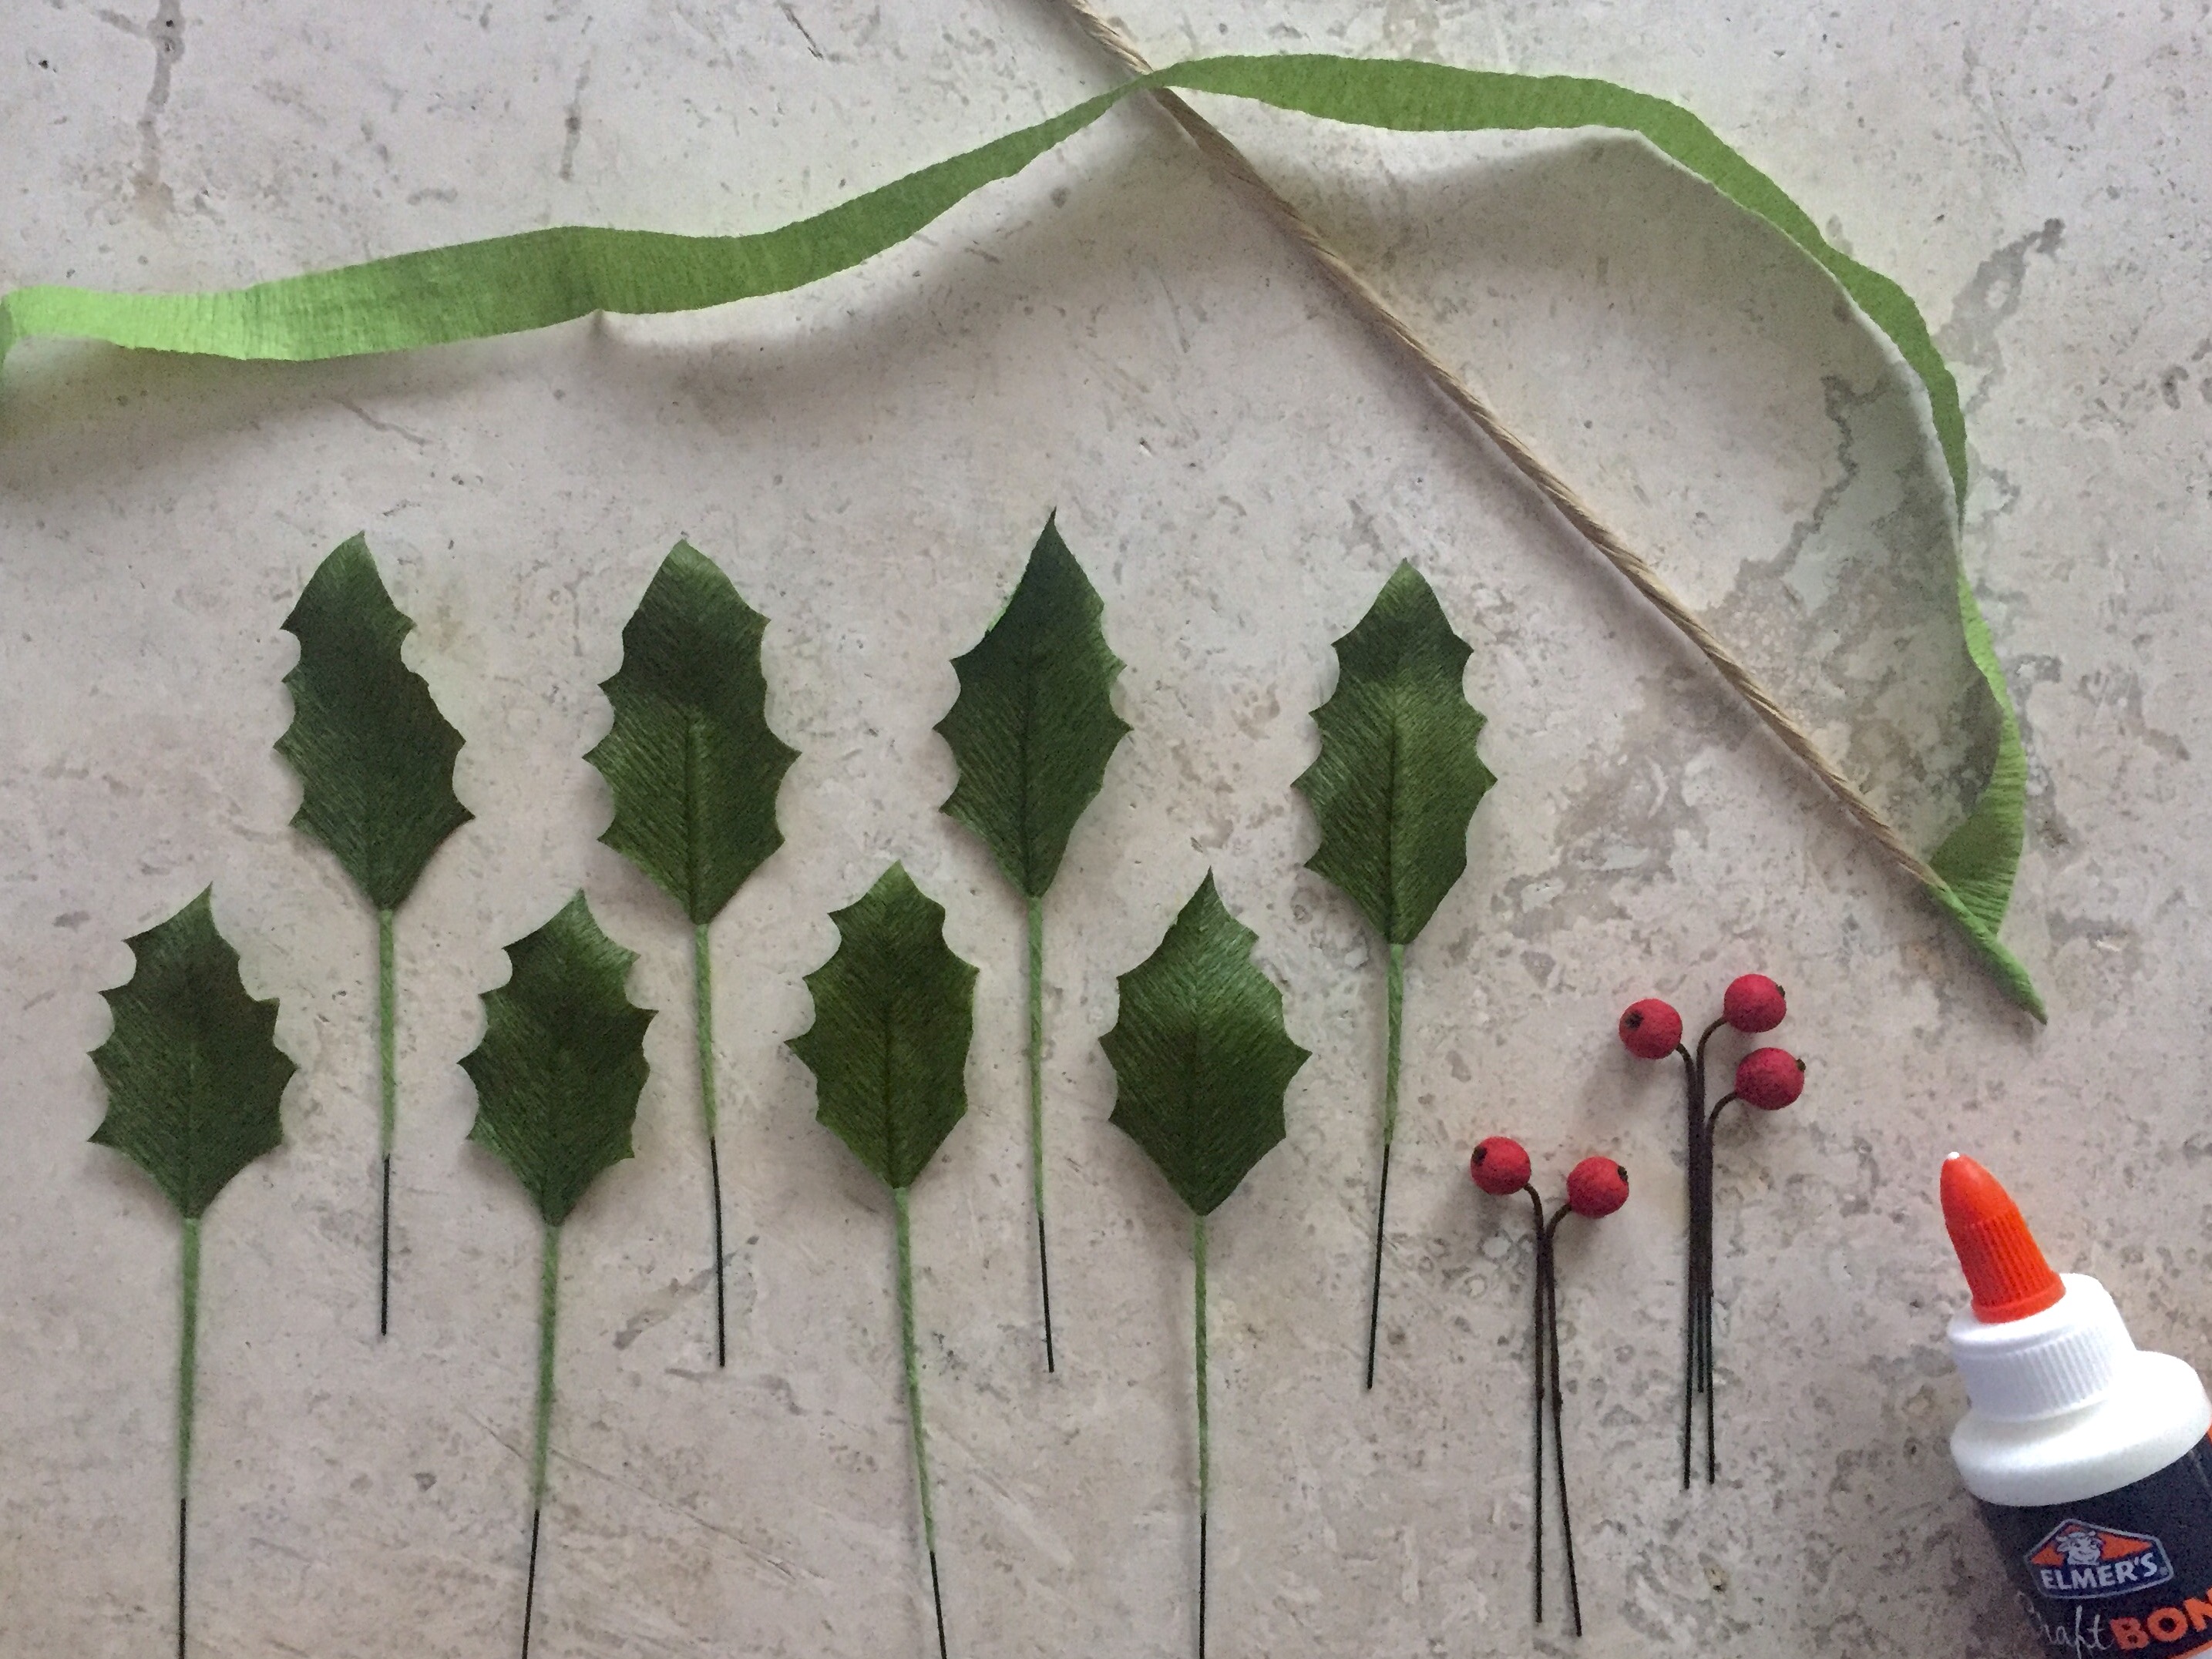
10. Wrap the tip of the 18 gauge paper stem with a strip of the lighter green paper and glue to create a point.
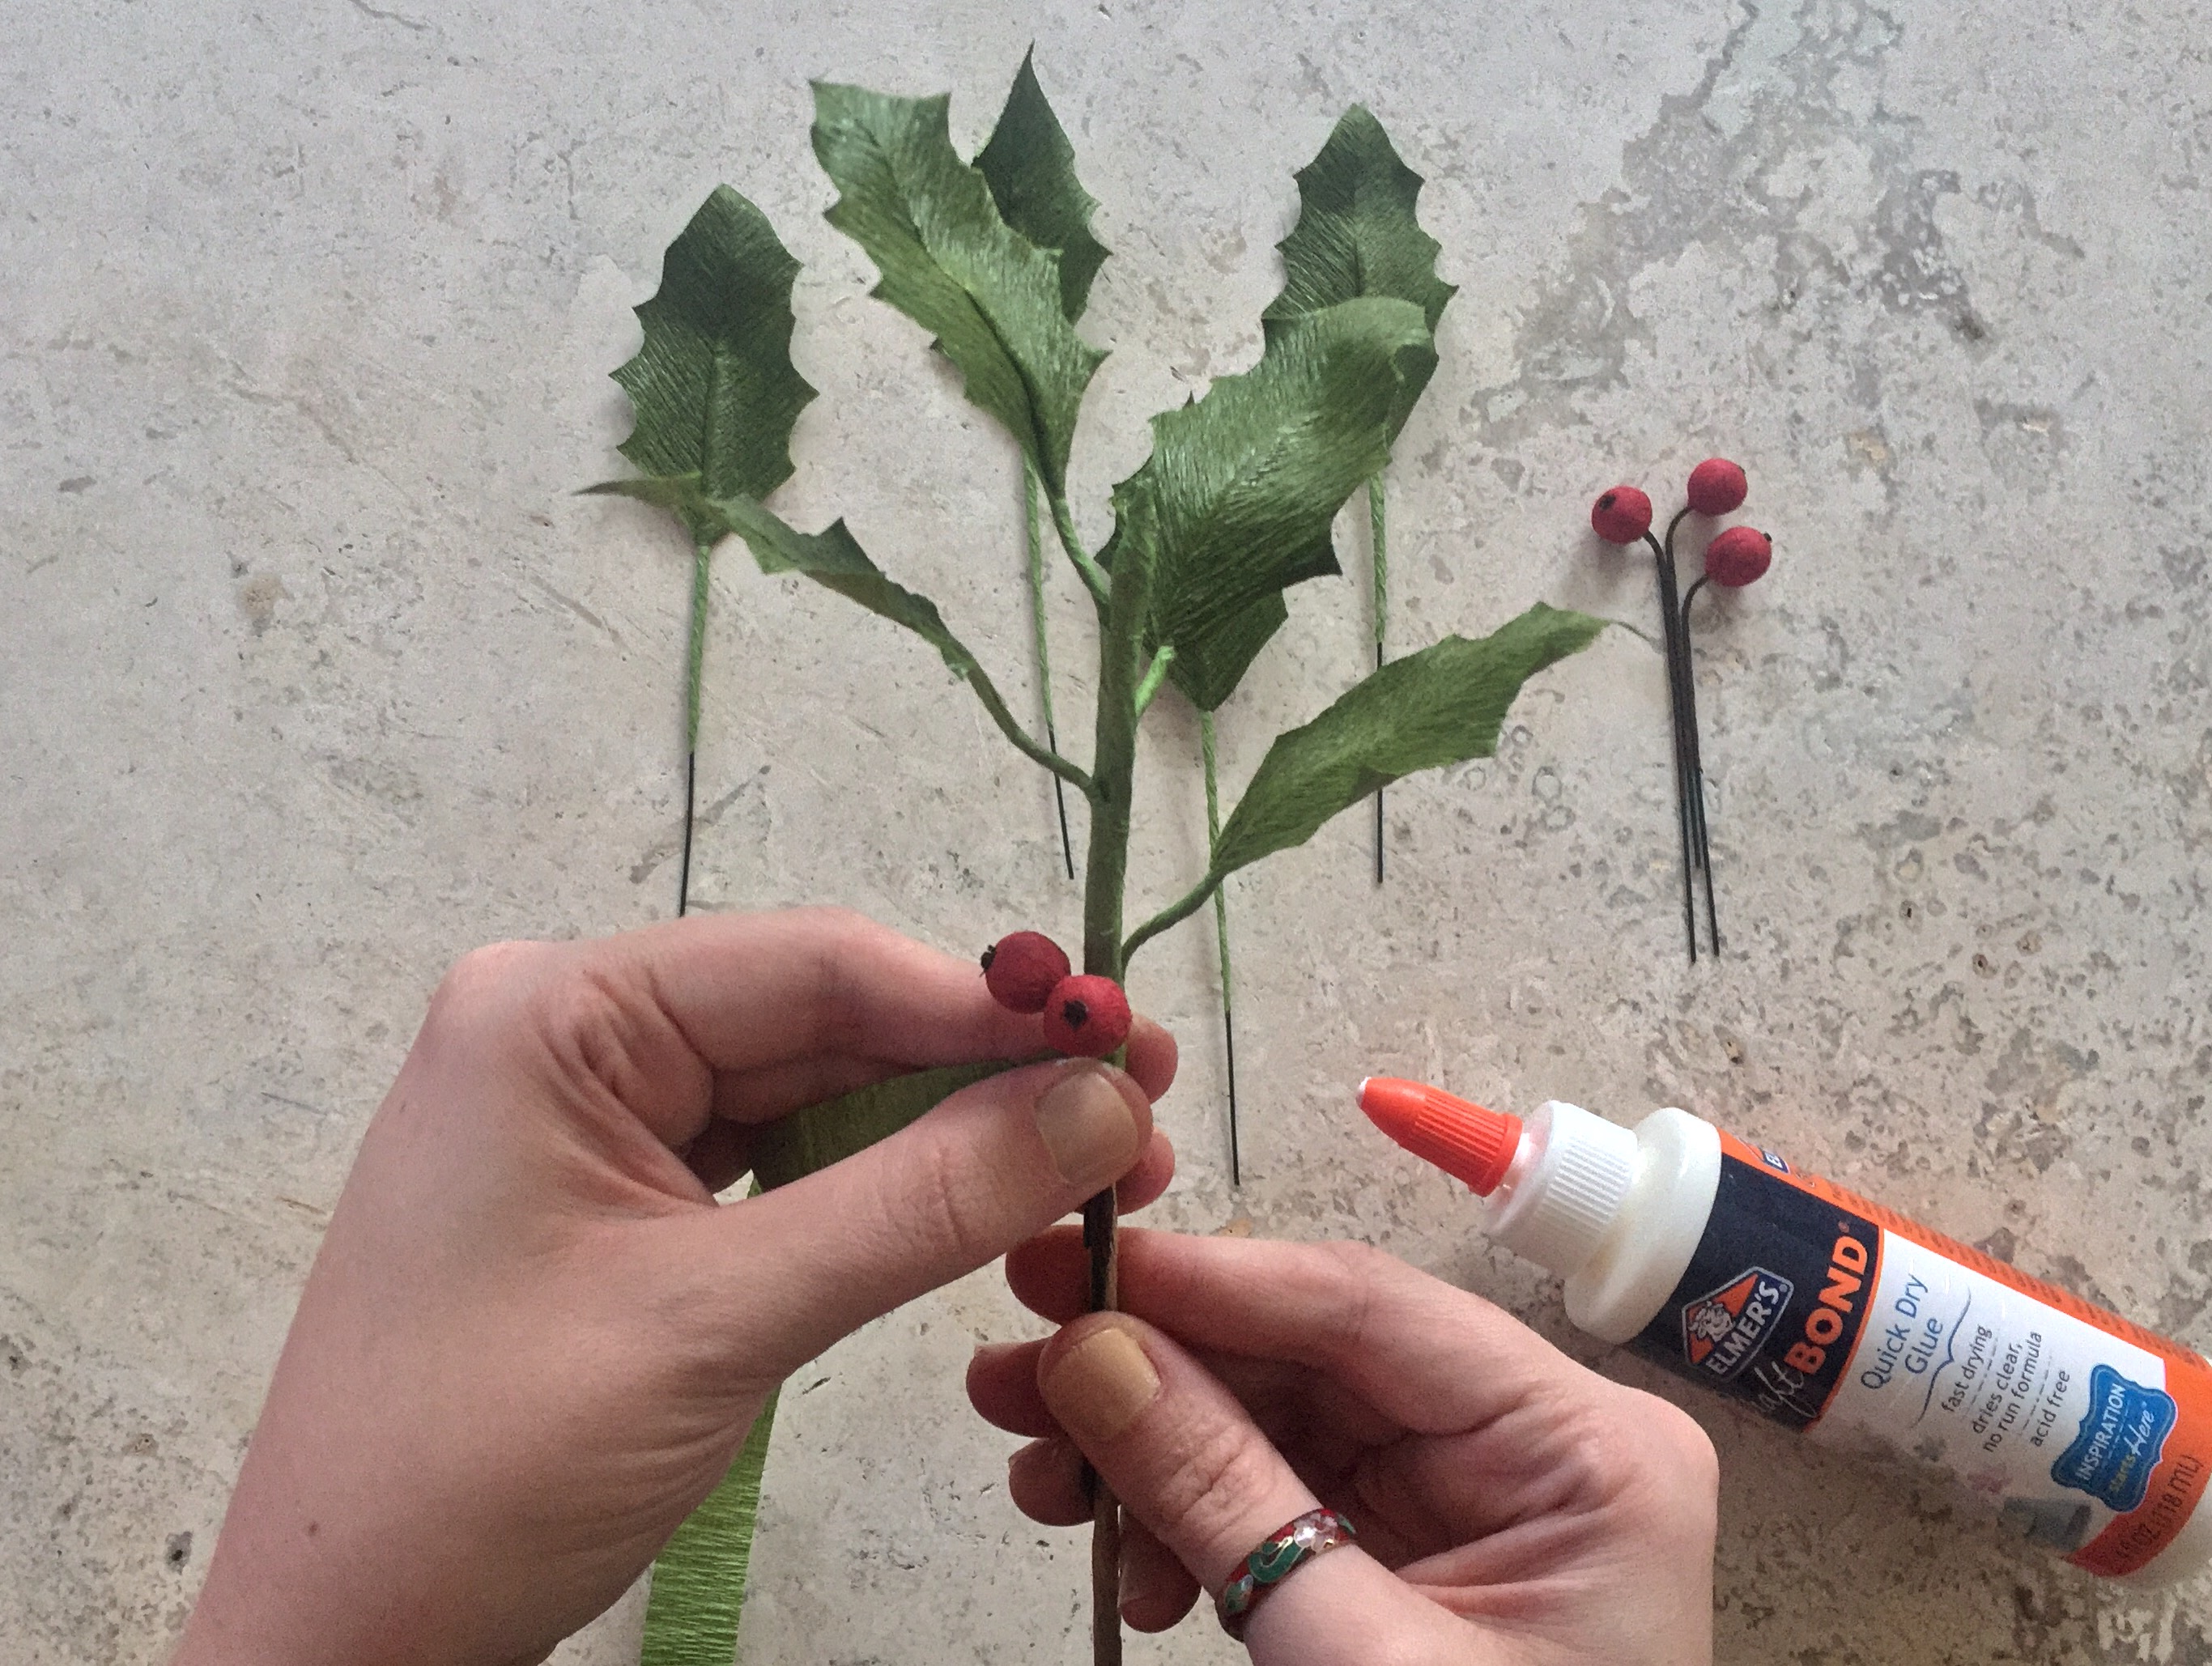
11. Continue wrapping the stem, adding leaves and glue as you go. Make sure to alternate between the small and the large leaves and stagger them as you work your way down the stem. After about 4 leaves, add a couple of berries.
12. Add another leaf or two, the additional berries, and the additional leaves as you continue to wrap down the stem.
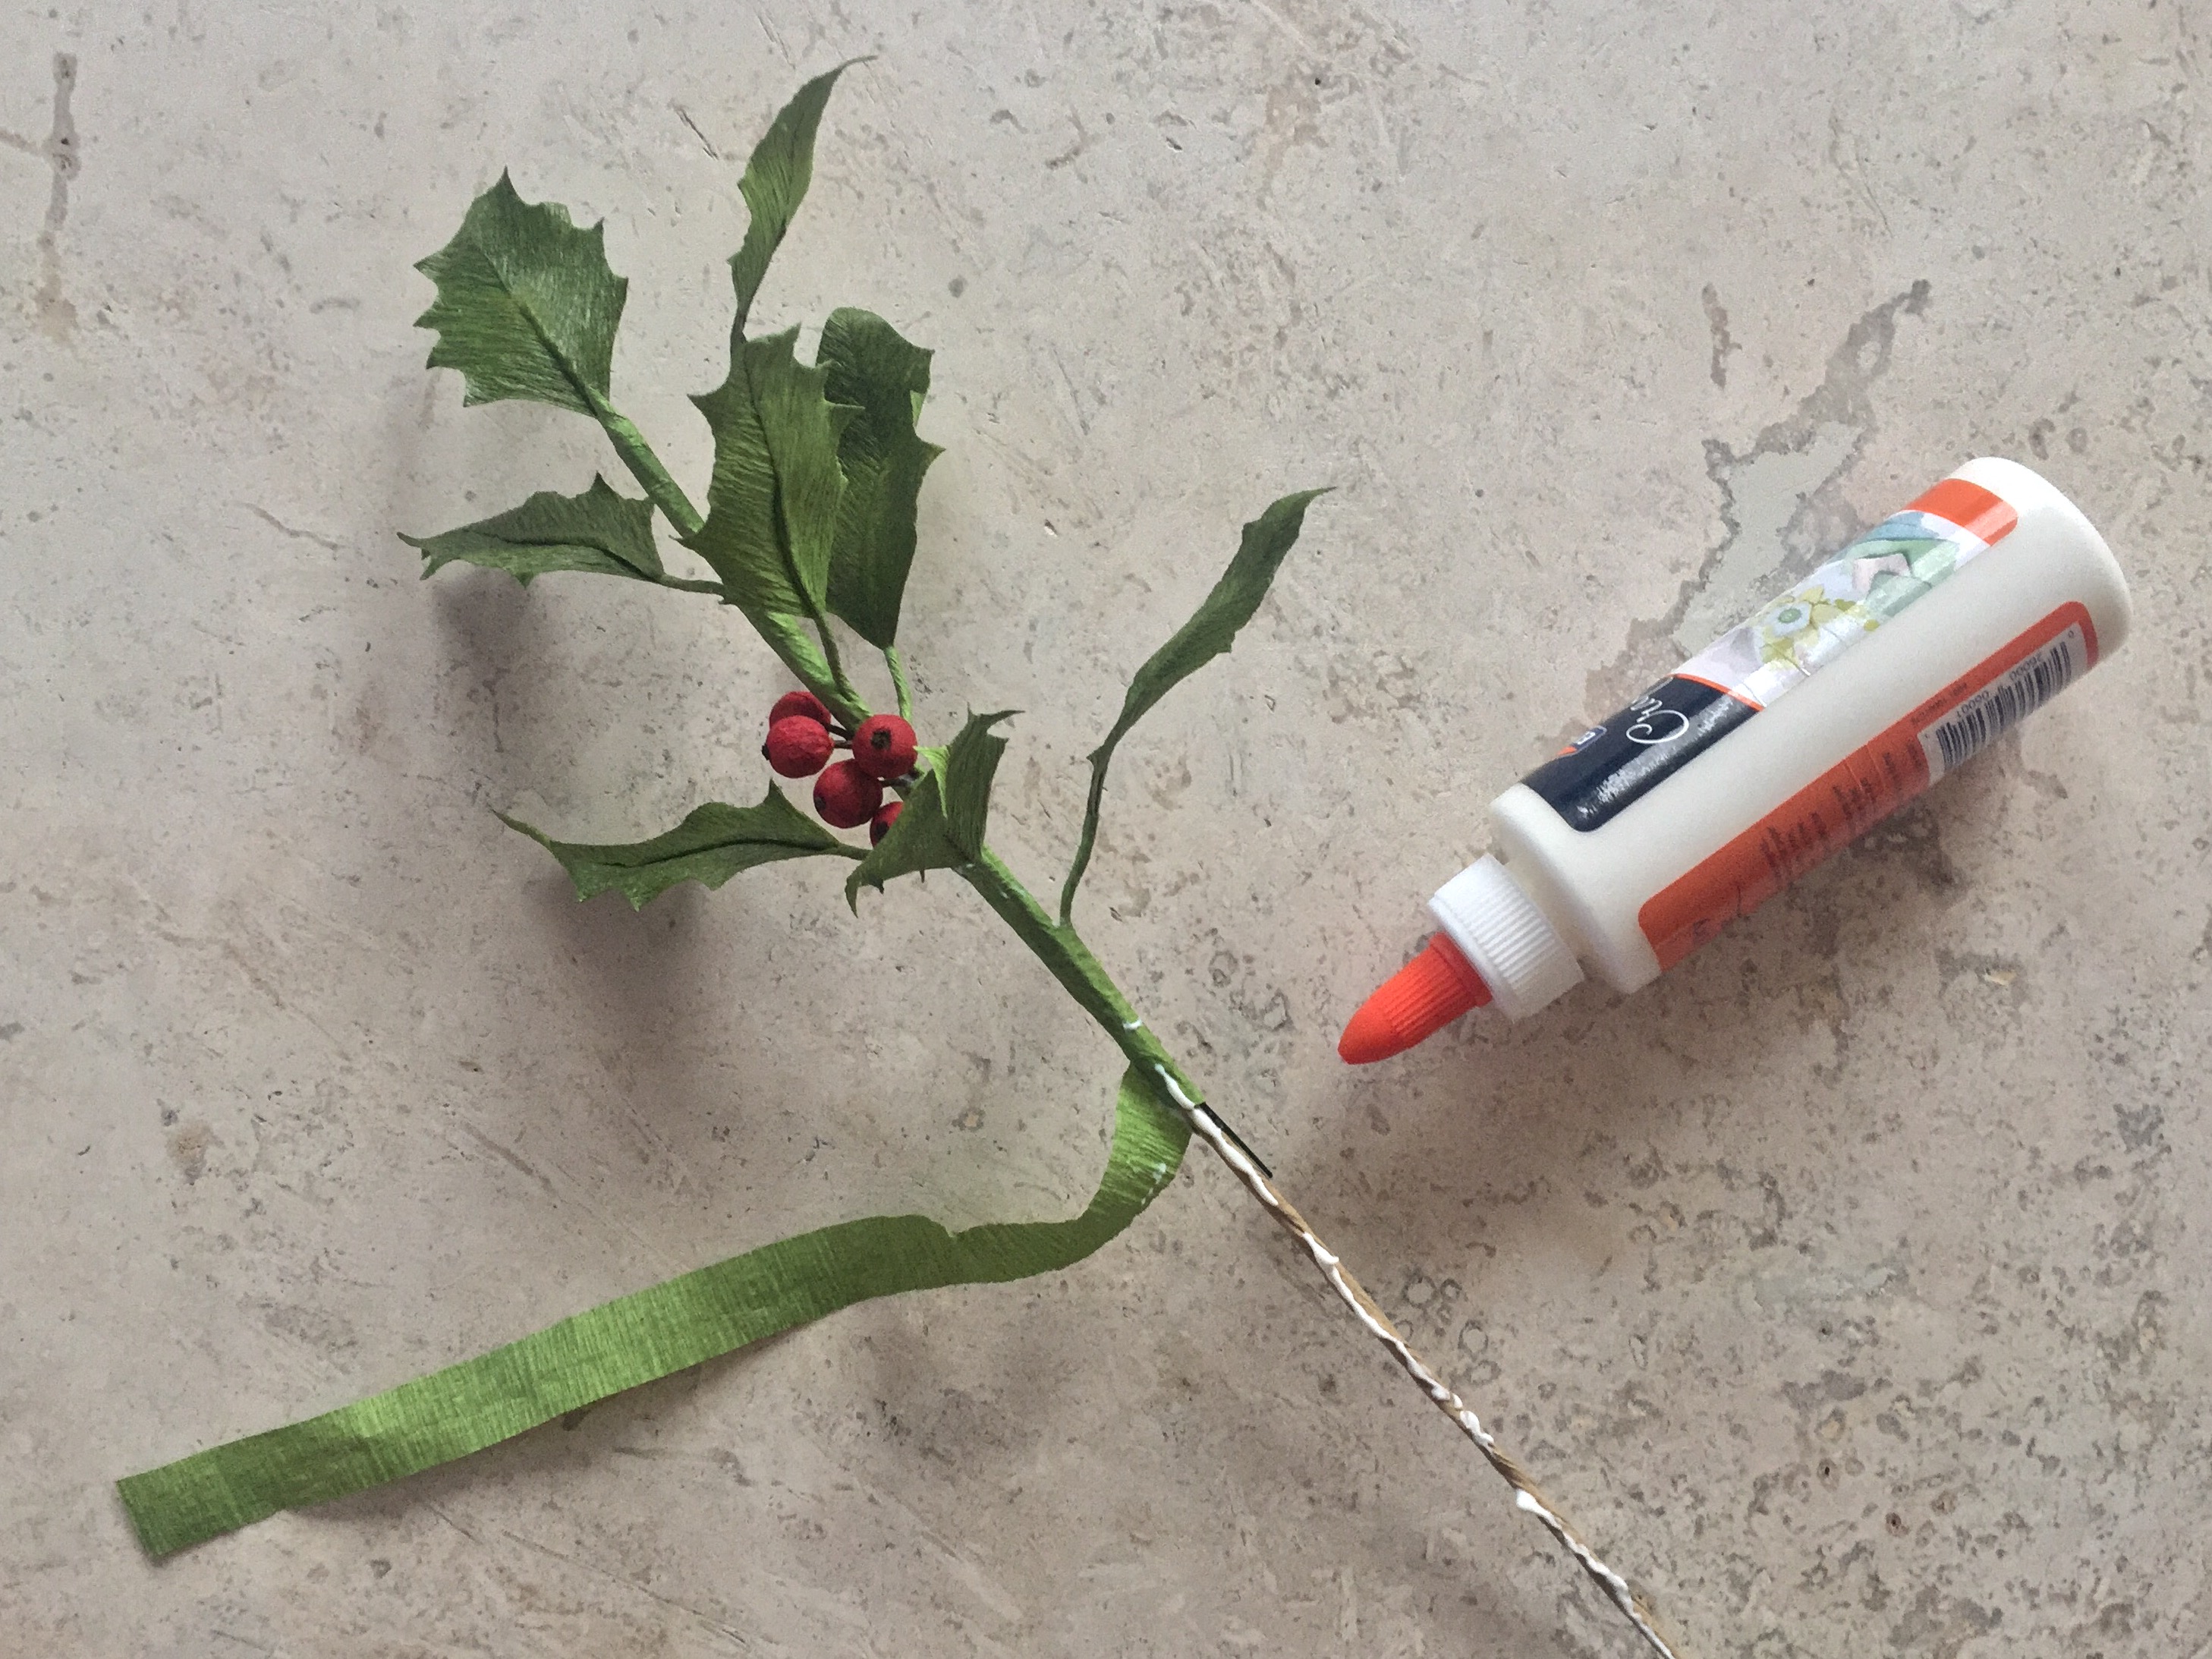
13. Continue to wrap and glue the strip of paper down the entire length of the stem and your DIY crepe paper holly boughs will be finished!
Take a look at more of our holiday paper flower tutorials in the archives, including this Christmas cactus and poinsettia!
Paper flower tutorial and step photos by Tiffany Holloway of Nectar Hollow | Photography by Anna Killian
Comments