

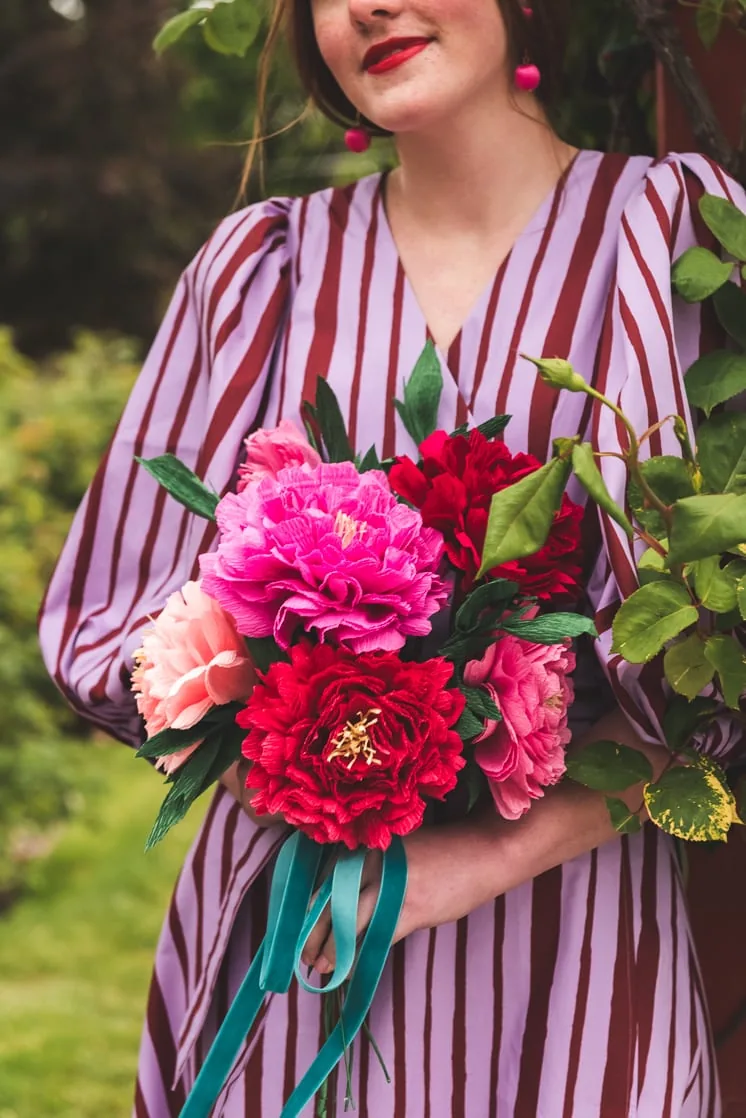
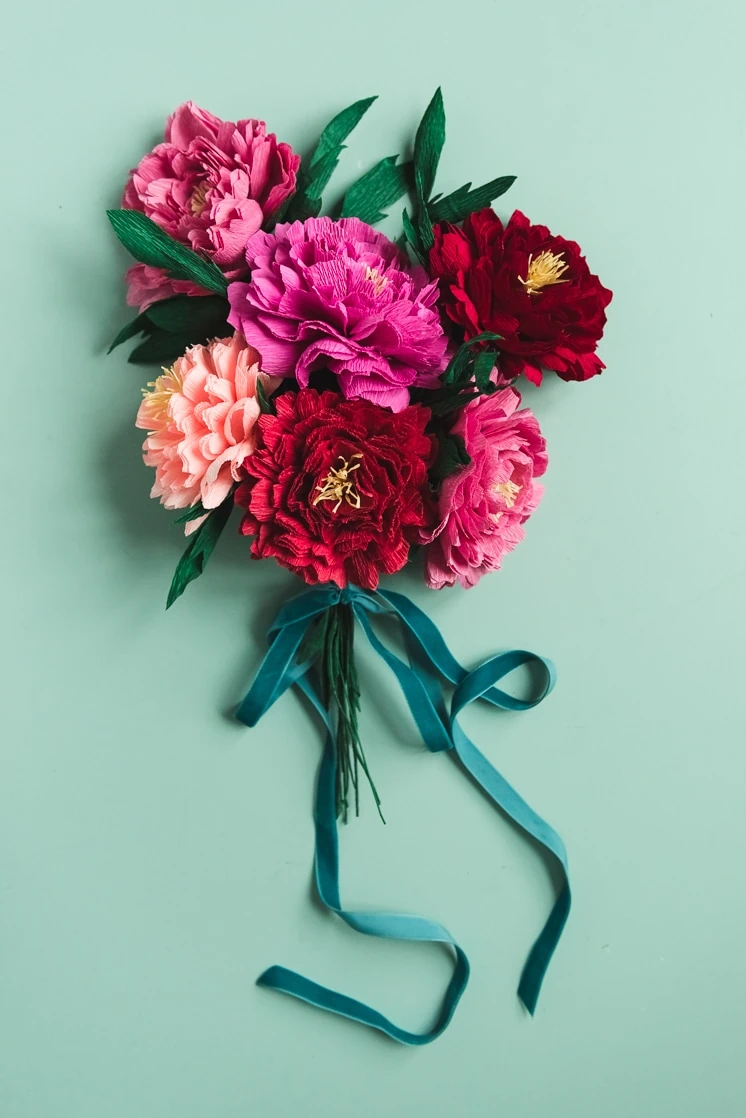
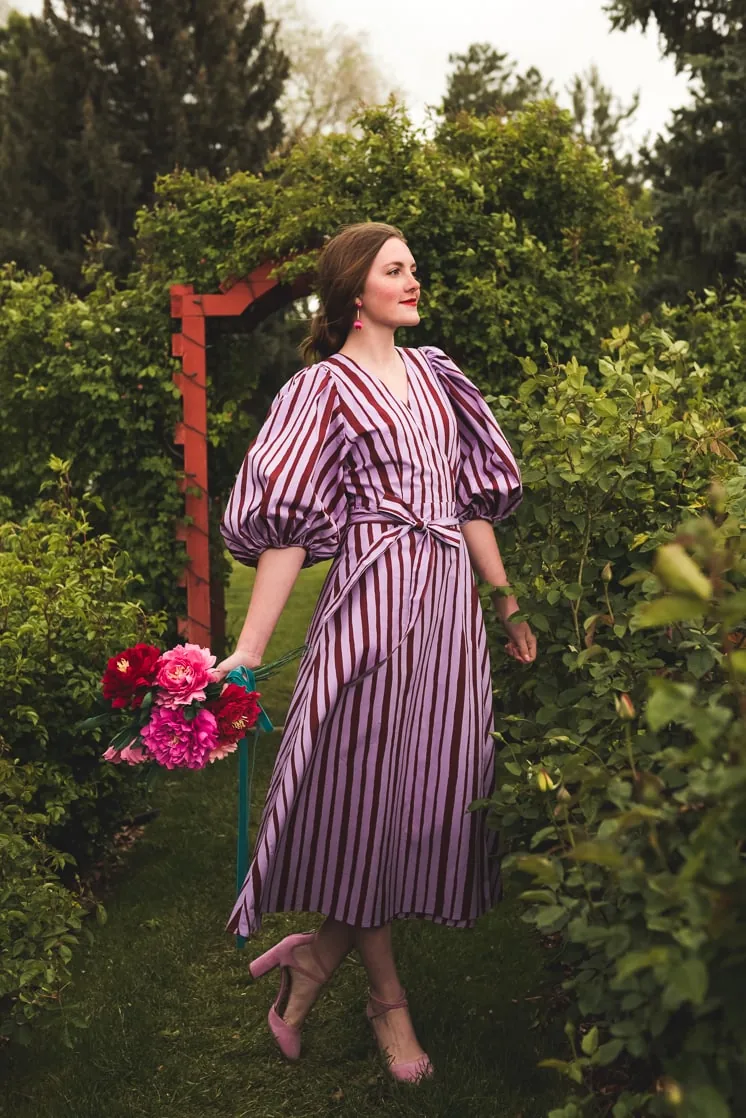
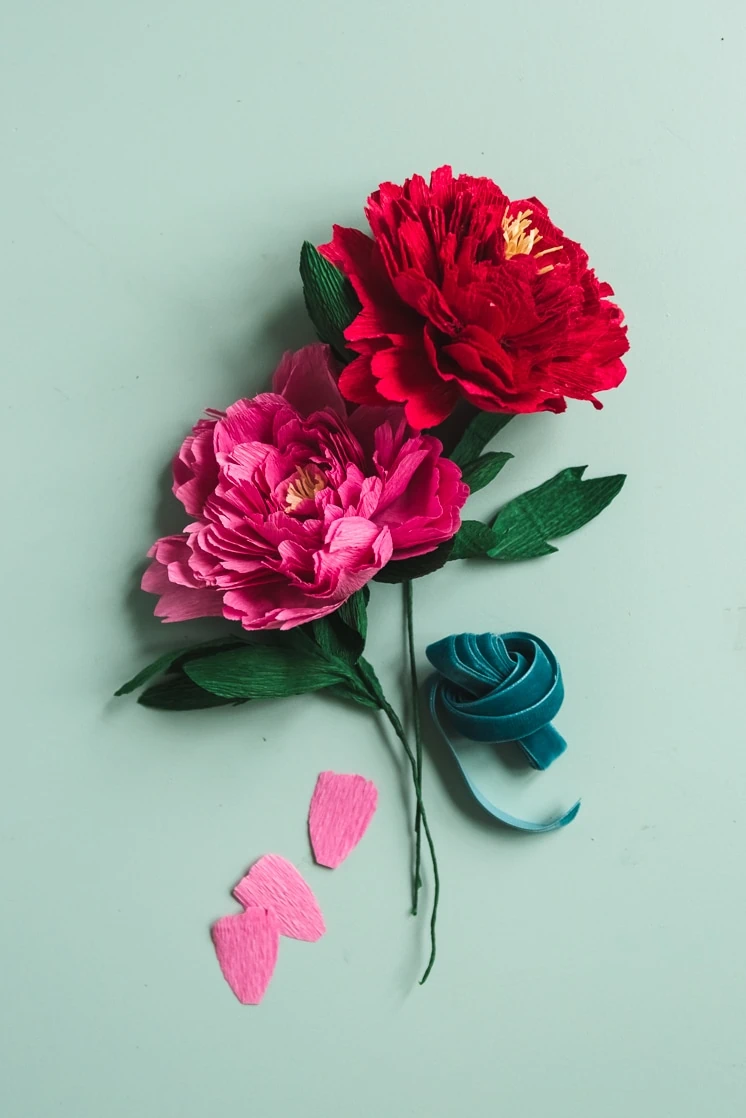
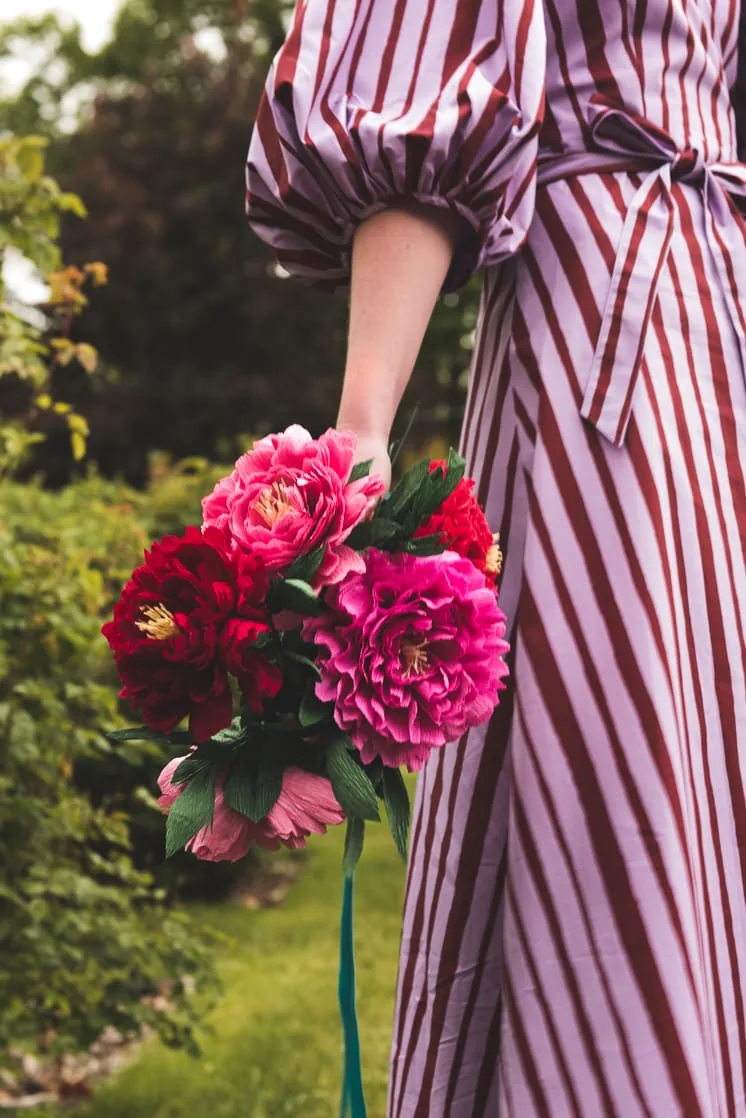
If you’ve been following along on Instastories, you’ve seen the updates I’ve been giving about my garden peonies. They are blooming slowly and not quite in peak season quite yet so we took matters into our own hands and made this gorgeous DIY paper peony bouquet. You can make just one on its own or many for a full bouquet. Think bridal bouquet or bridesmaid. How beautiful would it be?!

 DIY paper peony

Materials:
-
- Crepe paper in reds and pinks and yellow (see our crepe paper guide for where to buy!)
- heavy floral wire
- scissors
- templates
- ribbon for bouquet
- floral tape
Instructions
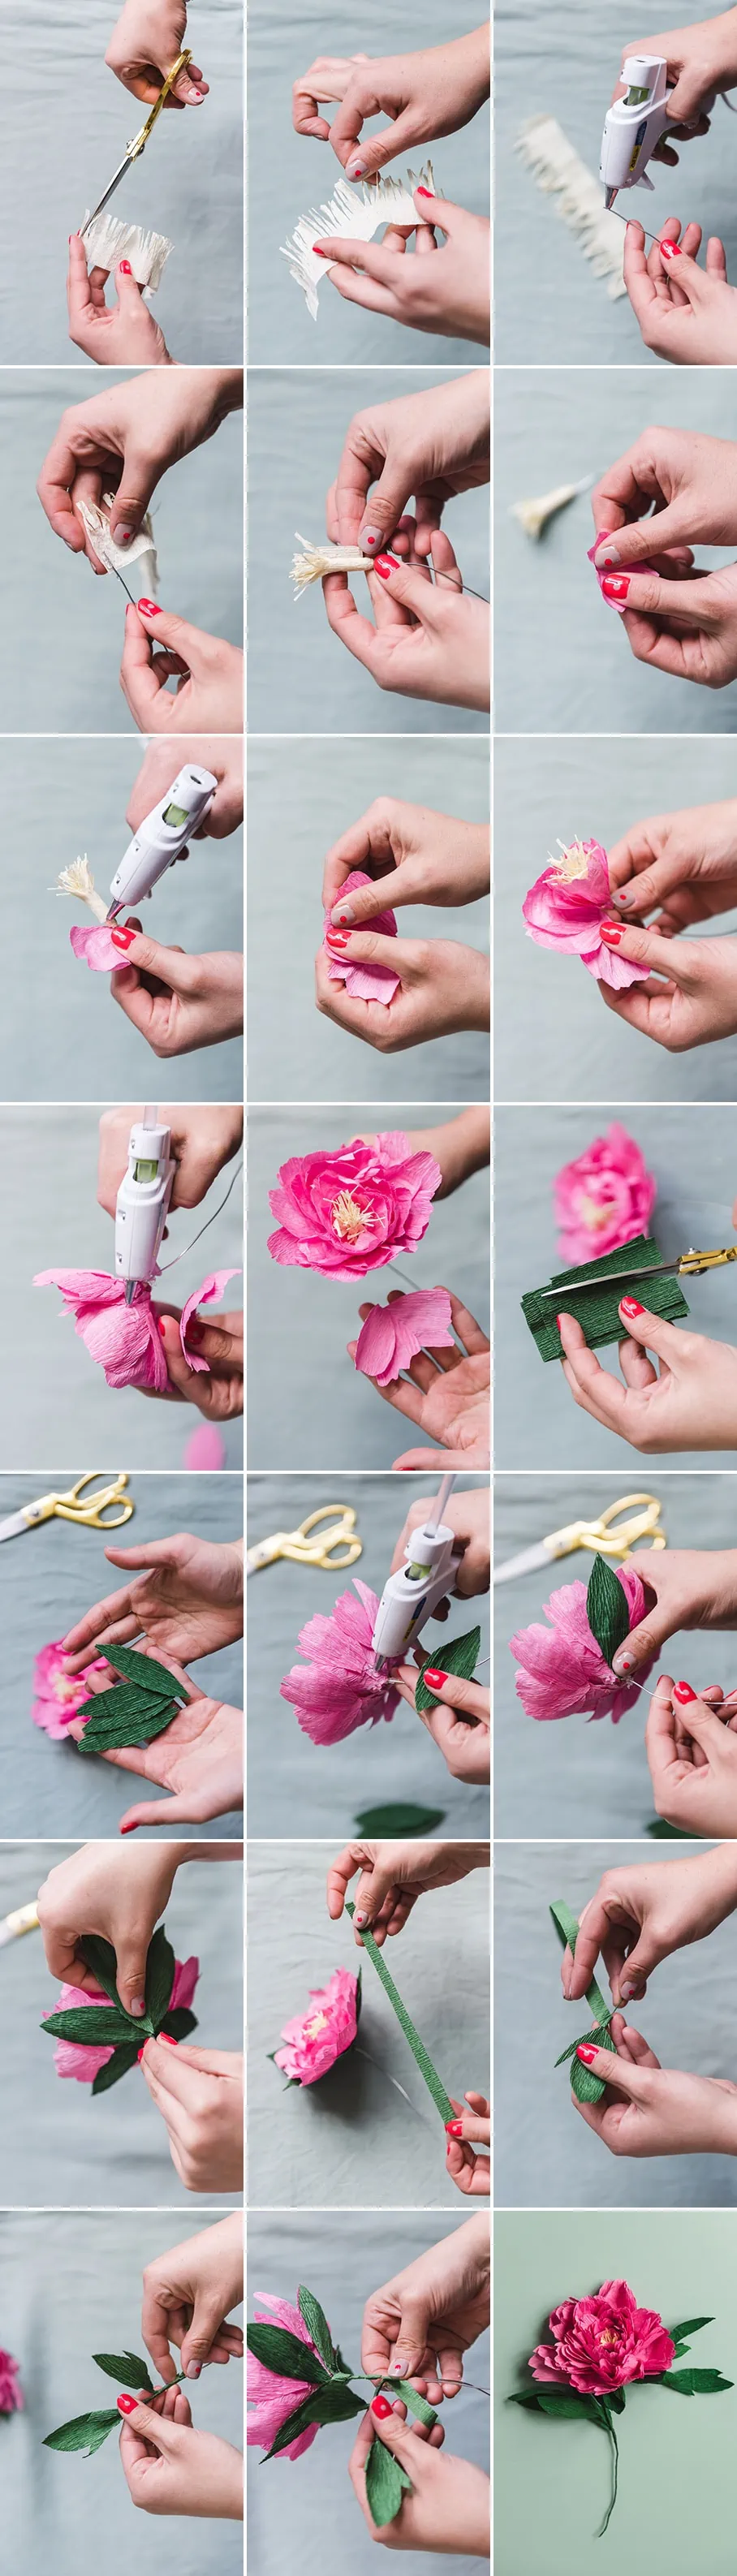
- Cut out an array of petals for your peony (the more petals you cut, the fuller your peony will be!)
- Cut a yellow rectangle (about 2”x1”) stretch the crepe paper to its fullest and fringe cut one edge.
- Cut a piece of wire to the length that you would like your peony to be.
- With a small amount of hot glue attach the yellow paper to the wire and wrap it around to create the stamen.
- Stretch the petals previously cut and begin attaching them to the flower with small amounts of hot glue.
- Continue to fill your flower with petals until it is nice and full! (As you attach the out petals you can glue them higher up to create a blooming effect.)
- Cut a long strip of green crepe paper, stretch it, and attach it to the base of the peony to create a seamless stem.
- Cut out 6-9 leaves from the template depending on how many leaves you would like for your peony.
- Cut two to three pieces of wire between 4”-6” long.
- Gently stretch the leaves, twist the base of the leave and attach it to the top of the wire using floral tape.
- Wrap the floral tape down to the spot you would like to place your next leaf.
- Repeat steps 10 and11 until you have the number of leaves you would like.
- Using floral tape being wrapping the wire stem of your peony from the base of the flower
- Attach the wire with your leaves on it to the stem of your leaf using the floral tape.
- Continue wrapping.
- Repeat step 2.
- Continue wrapping to the base of the flower.


Shop the look:
We’d love to see your own paper peonies. When you make it, use #LarsPaperFlowers so we can spot it!
Comments