
Paper Mart has been our go-to for wrapping for a few reasons, the main one being they are a family run business, which our little Lars family really appreciates and loves. They have been in business for nearly 100 years and the goods just keep getting better. Another reason, and maybe our favorite reason, the low cost for such quality products. From their vast selection of wrapping papers to beautiful ribbons it is pretty much impossible for you to not find what you are looking for! Lastly, we are big fans because, and this is great news for you, Paper Mart gave us an exclusive code for the Lars family, that’s right you, to get 10% off all of your Paper Mart finds use code LARS10. If that’s not something to love, I don’t know what is! Head on over there to use it!
As I shopped around Paper Mart my cart kept accumulating items, what can we say! I loved it all! I found myself sticking to a theme of red and white (so unexpected for Christmas I know) wrapping paper and ribbons. I thought about it for a second, worried I might be going a little overboard with the color themes and then I said “‘Tis the season!” and ran with it. And oh boy, am I glad I did. When the goods arrived I eagerly opened the package and immediately knew what I was going to do with the wrapping paper.
The paper was too fun and festive to just wrap presents in a traditional way. I knew I had to get creative with the wrapping paper and actually had a need for some gift bags and wrapping up some cylinder tubes. So I set out to create a slew of gift bags and wrapped presents that would make Santa himself proud!
Wrapping Paper Gift Bags
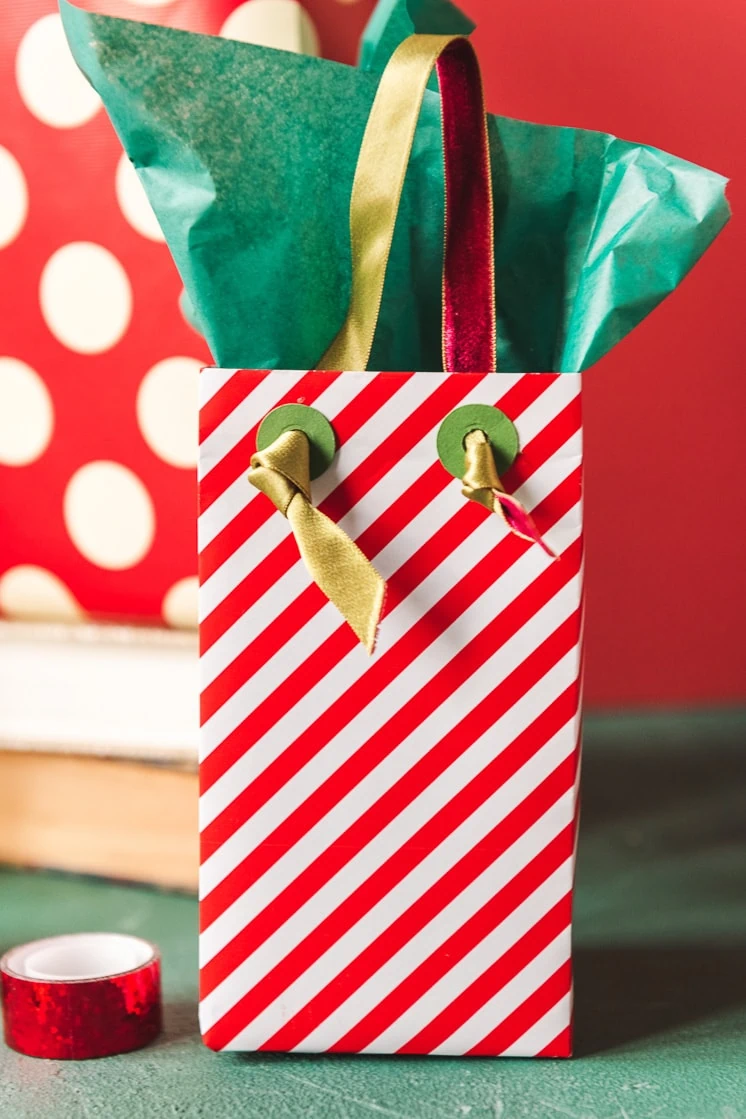
My mom used to turn wrapping paper into gift bags and I loved making them myself. I’m sharing the technique she used to use to create DIY gift bags from wrapping paper rolls while adding in our own Lars flair.
Materials:
- Gift wrap (We got ours from here)
- Glue gun
- Ribbon
- ¼” Hole punch
- Box form (cereal boxes are the best!)
Directions:
- Figure out the size of gift you want to wrap and find a box that will fit it.
- The main trick here is that you’ll only be wrapping one end of the box, not both ends. So take your wrapping paper and fold up the one end like you would normally do but just create the folds.
- Unfold it and for the one end that you are not closing up, fold a 1” fold along the top.
- Package it back up around the box again and this time secure with tape or glue.
- Line the two sides together and secure.
- Punch two holes at the top of the bag on each side and slide your ribbon through the end.
- To create the circle around the hole punch, we cut out a circle on our Cricut and then used the hole punch to make sure it was the same size as the one on the bag. Glue in place.
Origami Festive Christmas Shirt Gift Bag
We tried out this origami shirt technique with some Father’s Day gift bags, a few years ago, but this is a better technique that combines the bag into the shirt.
Materials:
- Various Wrapping Papers, we found ours here!
- Scissors
- Ruler (the longer the better)
- Cardstock for embellishment
- Small poms for embellishment
- Ribbons found here
Directions:
I used this wonderful tutorial from Sweet Paper to learn how to make these lovely shirt bags.
I am by no means an origami master, in fact, quite the opposite but these bags were manageable and once I got the hang of it they flew by and they are soo cute! Definitely worth a little time learning to make them!
Oversized Candy Wrappers
Materials:
Directions:
- Cut a paper to the size of your tube.
- Leave at least 3”-5” additional on both ends of the tube.
- Tape one edge of the paper down and wrap the paper around.
- Fold the untapped edge so you have a nice crisp line.
- Tape the edge down.
- Gently fold in the edges of the tube so that the paper meets in the middle of the tube.
- Gently wrap a piece of tape at the newly gathered end.
- Repeat at the other end.
- Pick a coordinating ribbon.
- Tie a bow around you ends.
- Voila! A giant Christmas Candy!
I can’t wait to see your wrapping paper bag creations be sure to tag us with #HolidaysWithLars as you go creating! And don’t forget to look to Paper Mart for your Holiday needs!
This post is sponsored by Paper Mart. We love our brands who allow us to make beautiful original content.













Comments