

We’re working on spreading that holiday cheer everywhere we go and that means holiday entertaining decor is a must! I like to keep things holiday decorations fresh each year. Don’t get me wrong, I do have my staple holiday items that will make it to the mantle, tree and table top but I think one of the beautiful parts of DIY is that you can constantly freshen up your decor usually (I know some projects can get pricey) for a fraction of the cost.
 I have some entertaining coming my way this season, so the other night as I rode the midnight whim train I pulled out some of my favorite tabletop decorations to find that they were no longer my favorites. Bummer? Yes. Them I remembered what I do for a living and decided to give these little plain glass vases a facelift just in time for the holiday season!
 Burning that midnight oil couldn’t have been more perfectly timed because the next day I discovered Martha Stewart’s beautiful new line of spray paint that offers colors that just might make you cry and I knew exactly what these bland little glass vases of mine needed immediately! The Martha Stewart team was great and provided me with spray paints to complete my task and so I got down to it! To say I love these little guys is an understatement, they were easy and a fraction of the cost of purchasing new decor. I cannot wait to put these on my table this holiday season!
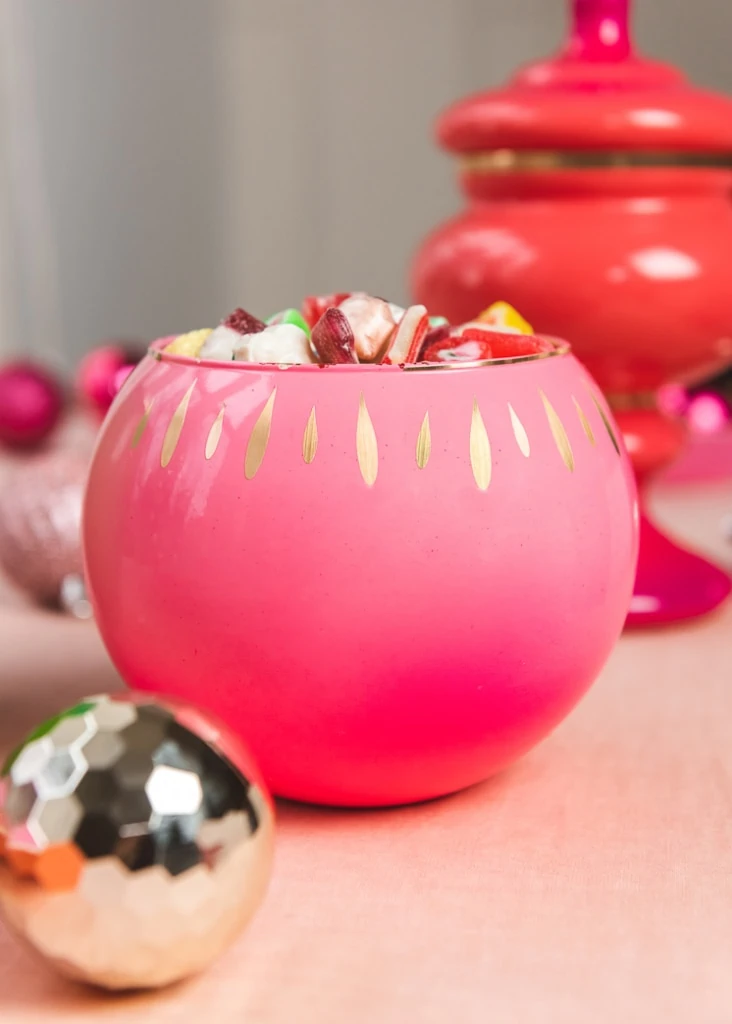
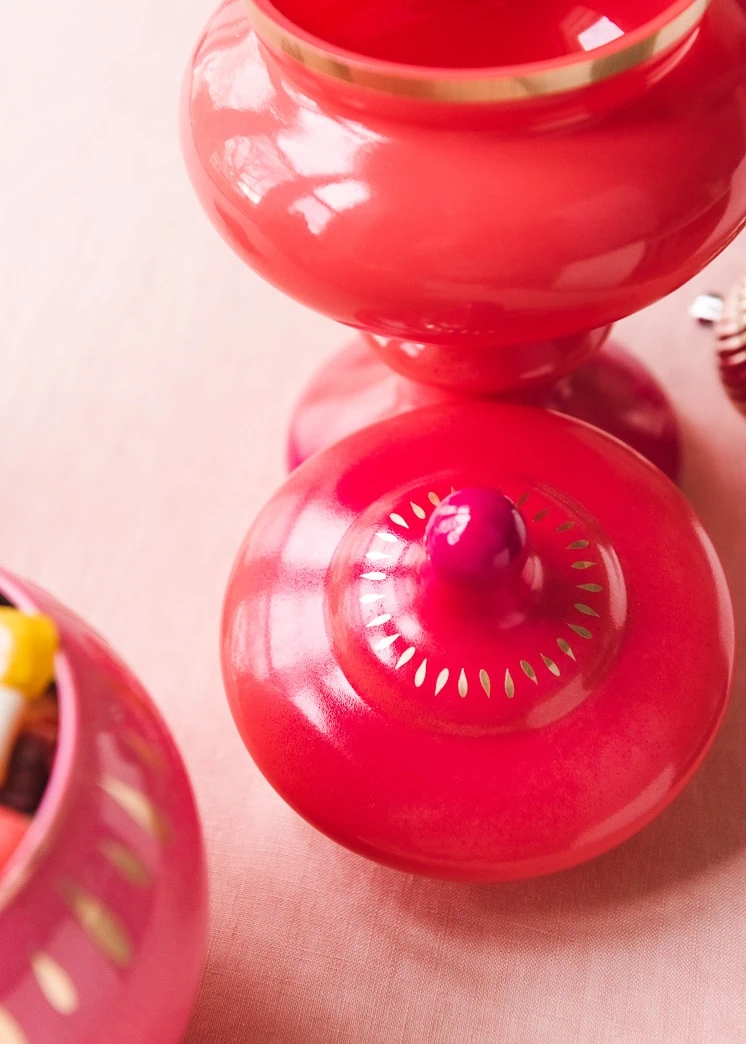
Mid-Century Gold Embellished DIY Vases
I was inspired by some of the Mid-Century ombre glass pieces that I’ve been spotting at vintage markets for years now. I love the colors and details (see here for reference).
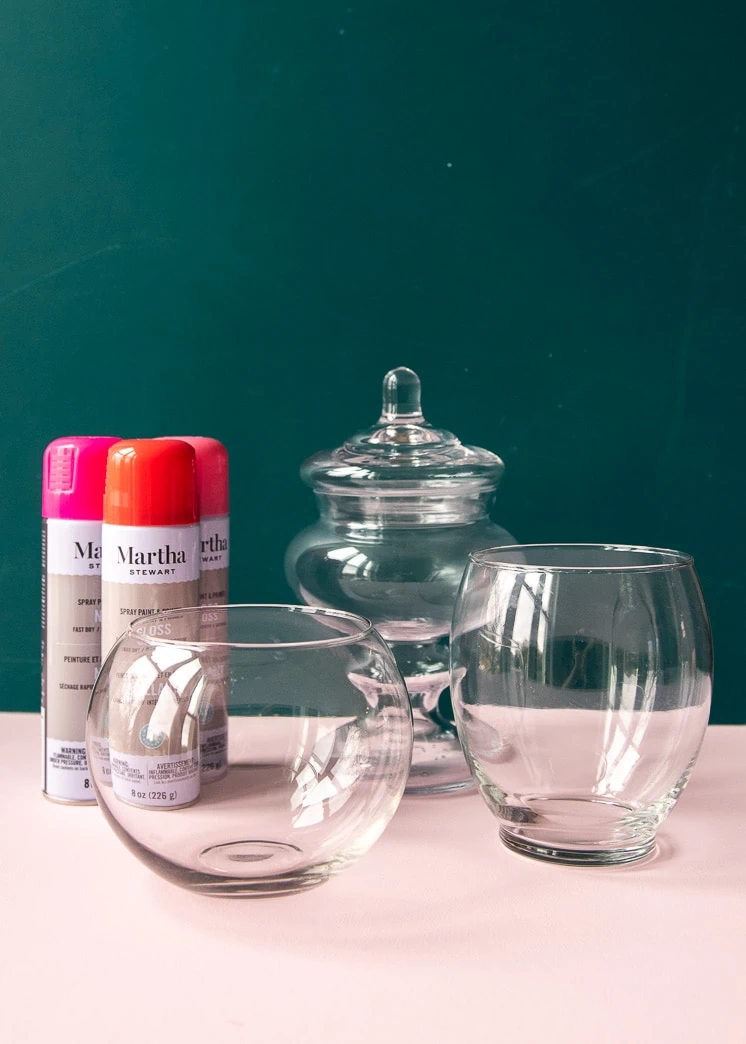
Materials:
- Spray Paint (We love our Martha Stewart spray!)
- Glass Vases, ones you have around the house will work great too!
- Gold Vinyl
- Craft Cutting Machine (you can use a craft cutting knife if you don’t have one!)
- Tweezers
- Gold Template
Find everything we used here!
Directions:
- Wash and dry your vase.
- Spray the first coat of spray paint onto your vase and let dry. Your first coat should be very light. It is very easy for the spray paint to run, light layers of paint are crucial.
- Let first coat dry.
- Spray a second light coat.
- Let second coat dry.
- Continue spraying light coats of paint until you reach the desired look. Our took about 3 coats.
- Once completely dry select the second color.
- Decide which parts you would like the ombre effect on.
- From far away spray a light amount onto the desired areas.
- We achieved our desired look with one coat only but you can do as many as you would like!
- Using a craft cutting machine upload the template and cut the template out onto the gold vinyl. This step can be done by hand as well.
- Using tweezers, gently place the cut out gold pieces to the desired locations.
Before:
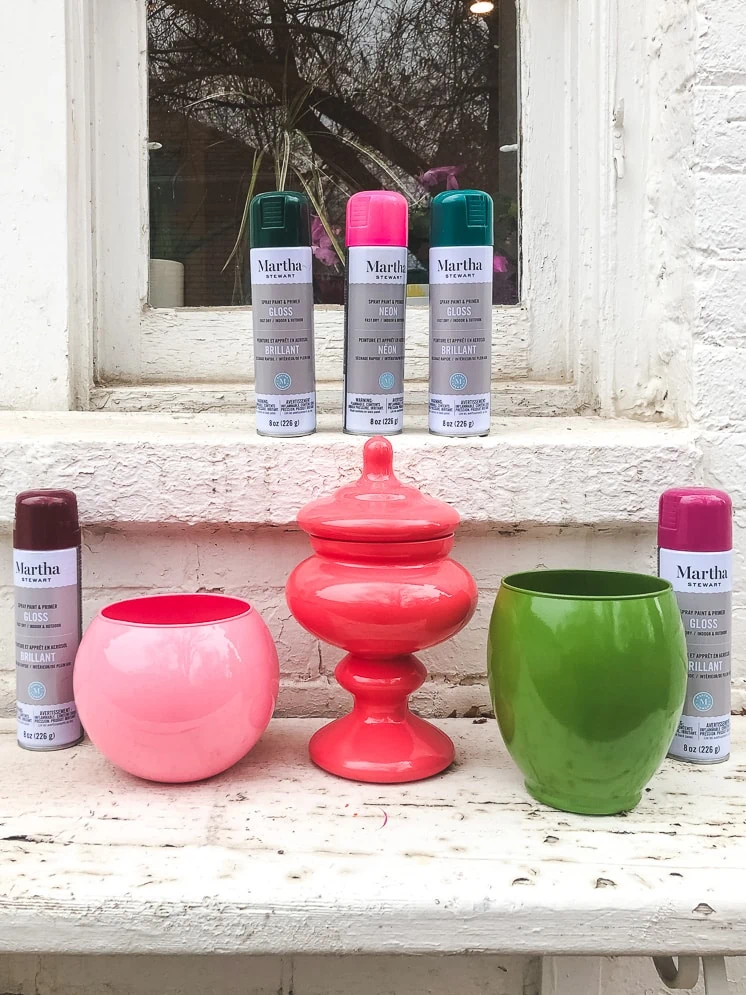
After:

Be sure to tag us with #holidayswithlars we can’t wait to see these beauties on your table!
Comments