


-language about lunch bags
-photos
-categories, tags, etc.
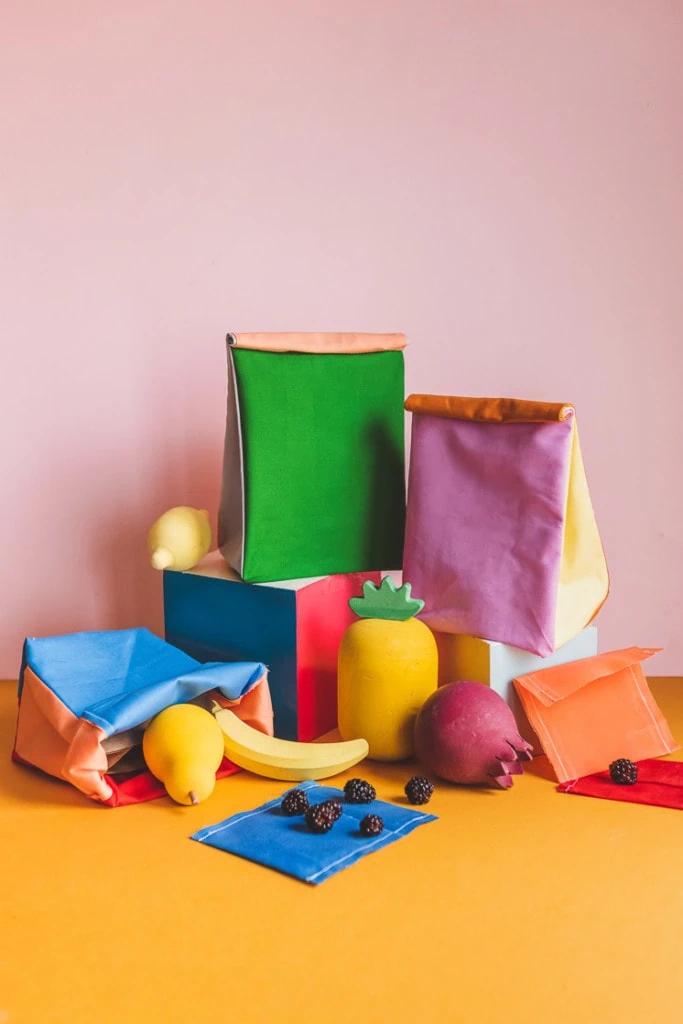
I kind of understand why kids say lunch is their favorite school subject. You’ve been studying for hours, probably starving and maybe you’re dying to ask your friend what they got for number three on that day’s math test. I loved school, but a cafeteria lunch? Not so much. That’s why even as an adult I am a huge advocate for packing my own. Anytime, anywhere, I love having access to fresh foods brought straight from home. And of course there are so many cute options to transport food in! That is why I’ve come up with these DIY beeswax wraps. Totally customizable and easy to make, why be limited to traditional disposable packaging when you can sport these reusable ones instead!
Materials:
Make Your Own DIY Beeswax Wraps
Did you know one study found in 2020 that “9.71 million Americans used 21 or more sandwich bags” in seven days?! If you take into consideration that the run-of-the-mill plastic sandwich bag has been making it into our lunches since the late 1960s, that’s a lot of plastic. Save the planet and your wallet by creating these reusable DIY beeswax wraps. Every little bit helps!

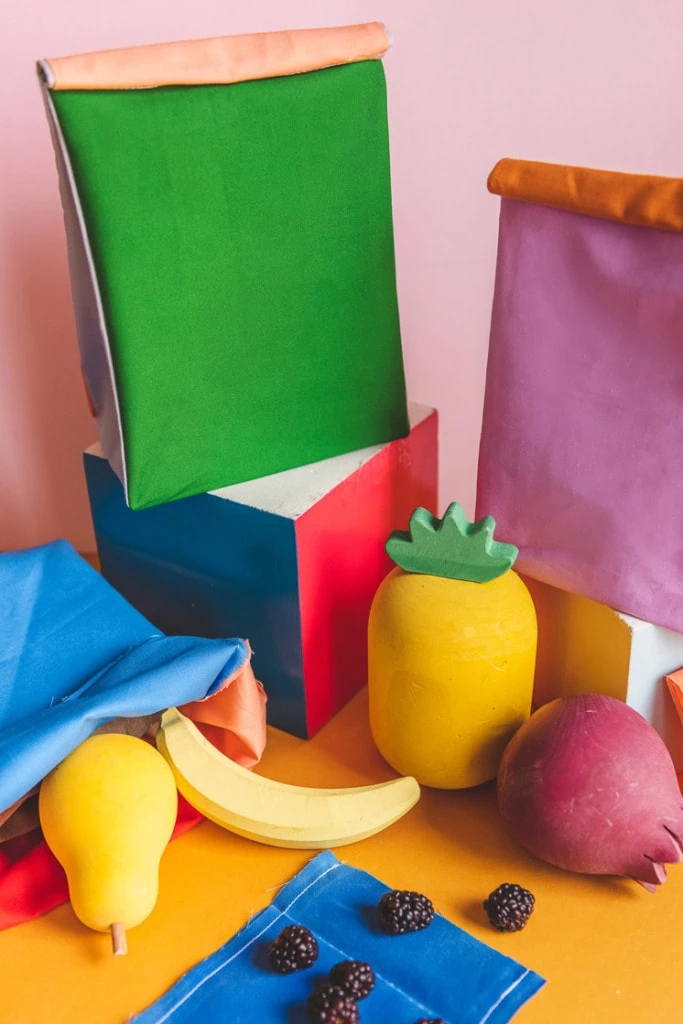
Along with these snack wraps, we’ve made some reusable lunch sacks (which you can see in the photos). Keep your eyes peeled for a tutorial!
What You’ll Need
- Fabric (preferably cotton)
- Beeswax
- Baking sheet
- Tin foil
- Scissors
- Ruler
- Sewing machine
- Timer

Instructions
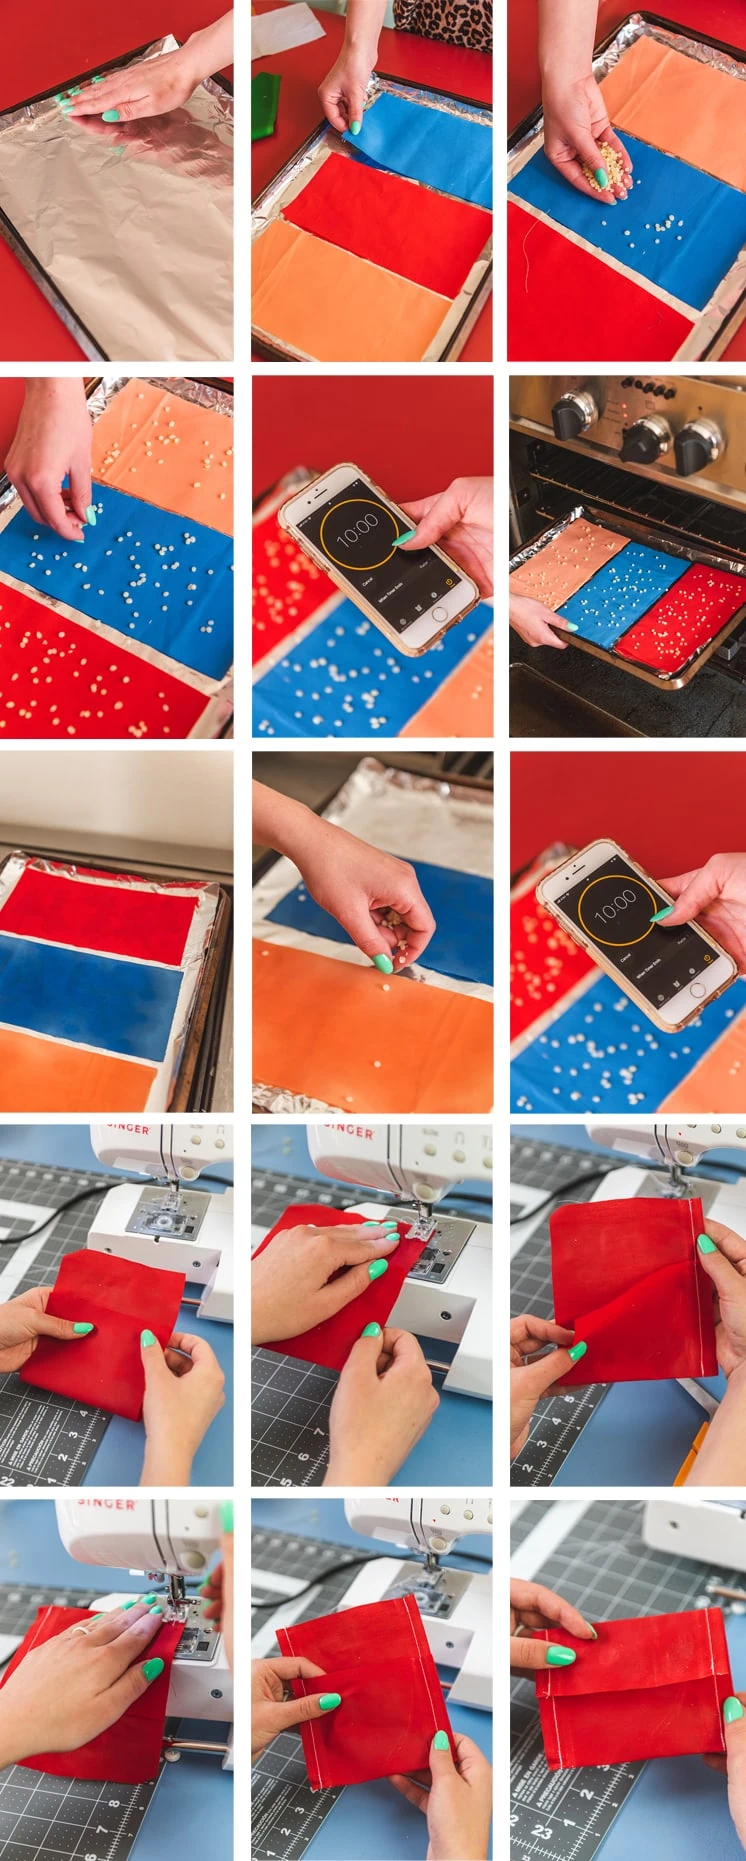
- Measure 5 x 9 inch rectangles onto your fabric. Alternatively, measure rectangles that will fit onto the baking sheet you are using. The measurements aren’t fussy, but whatever size you make cut out rectangles.
- Lining a baking sheet with tin foil, then lay down the fabric rectangles flat side by side.
- Begin to sprinkle beeswax making sure to distribute evenly (Tip: Because the beeswax will melt in the oven, you don’t have to cover generously. Think sprinkling an ice cream sundae instead of salting a sidewalk).
- When all three rectangles have been covered with beeswax, place in the oven at 350 degrees Fahrenheit for 10 minutes. Don’t forget to set your timer!
- After 10 minutes, the beeswax should be melted. When you pull your baking tray out of the oven, the fabric color will look uneven. Don’t be afraid of the splotchiness!
- Sprinkle a second layer of beeswax, especially making sure to target the areas that didn’t have enough wax the first time around. You’ll be able to see them because they’ll be lighter.
- Put back in the oven at the same temperature for another 10 minutes.
- Pull out of the oven and let cool. Fabric should feel firm and waxy.
- Take one rectangle and fold onto itself leaving a 2 inch flap similar to a plastic sandwich bag.
- With a sewing machine, sew up one side using a zigzag stitch. Repeat on the other side.
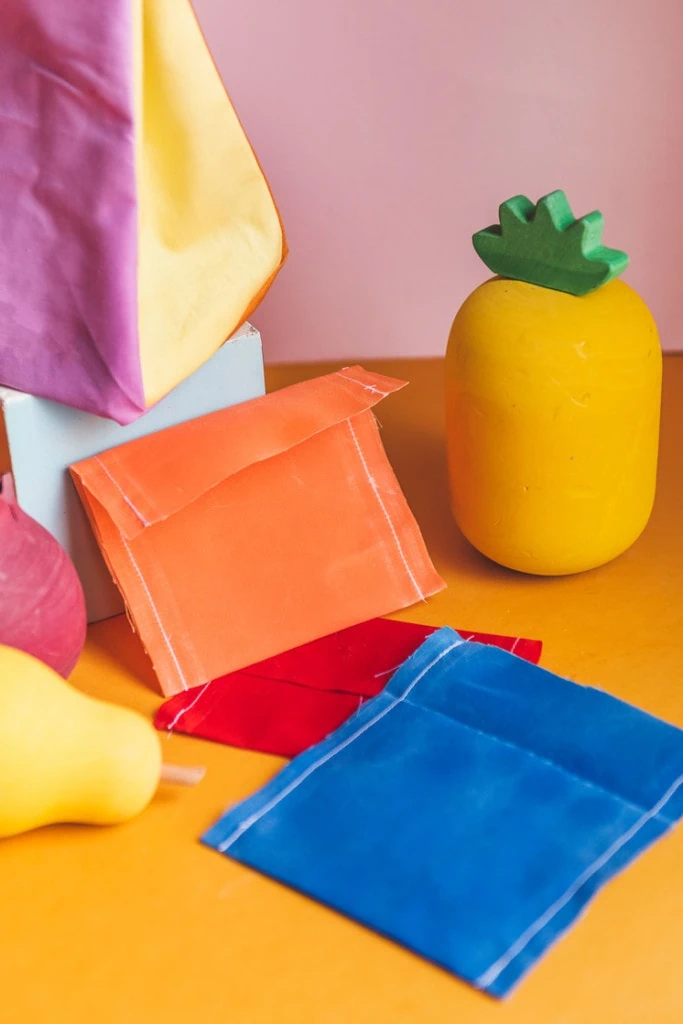
- You should now have a little pouch. Fold over the 2 inch flap to close. Voila! The perfect on-the-go snack pouch!

Can’t wait to see your DIY Beeswax wraps using #larsmakes on Instagram!
Comments