

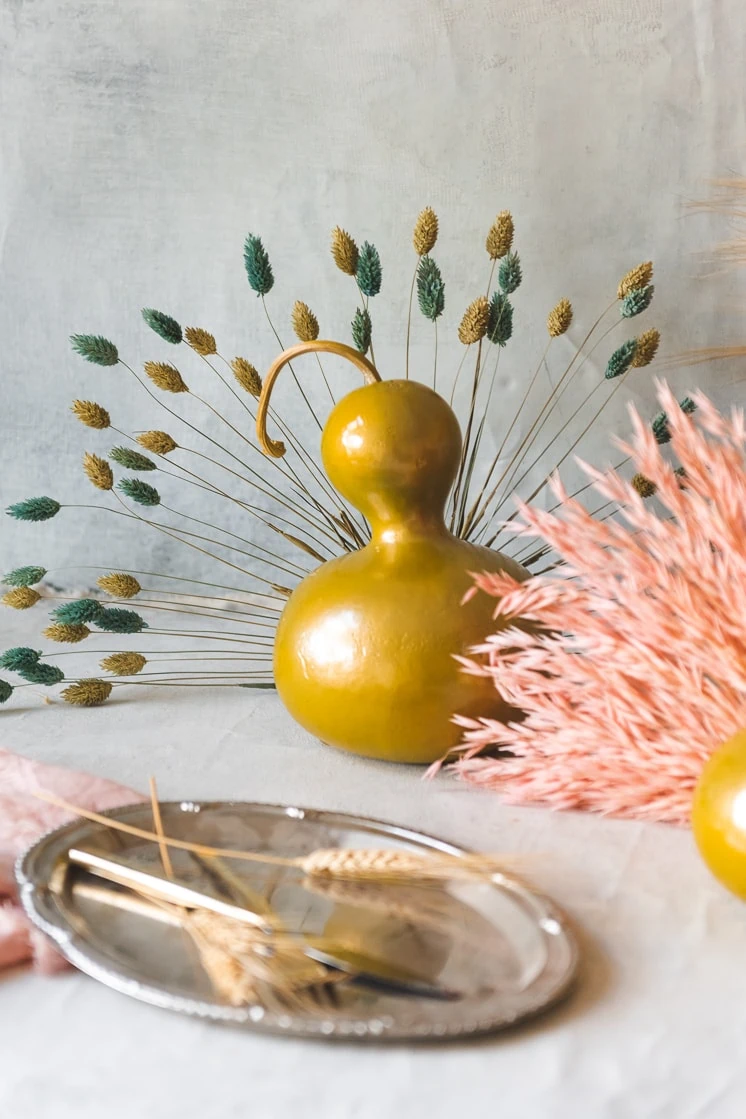
Halloween is only a few weeks away and even though I love getting in the spooky spirit, I’m already thinking ahead to Thanksgiving. We had some preserved flowers leftover from our pumpkin DIY and the natural next step was to turn them into…turkeys!
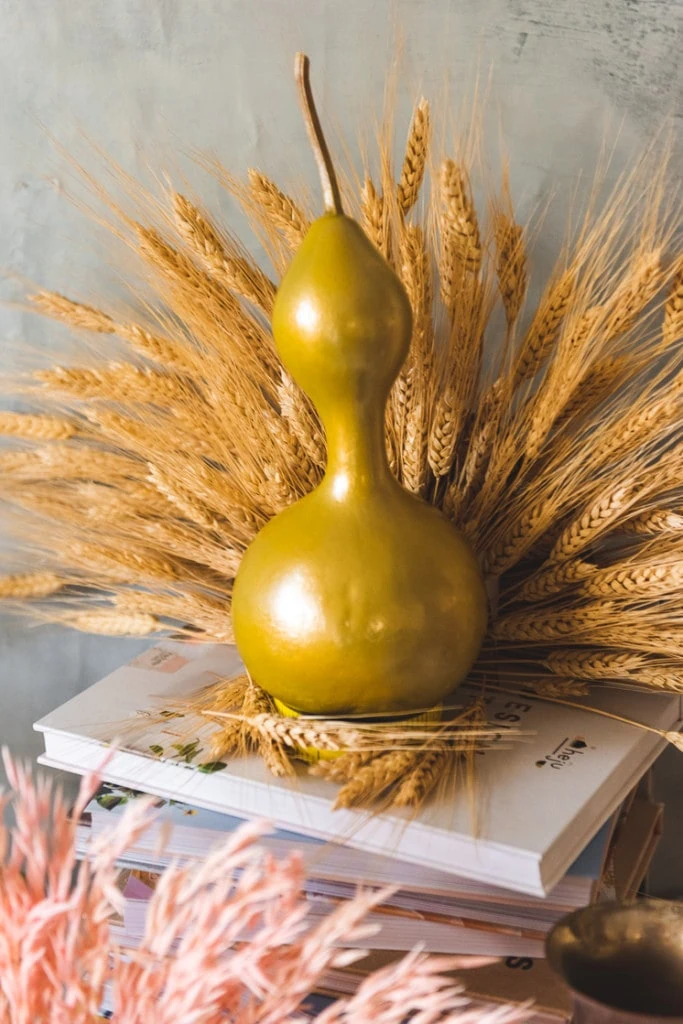
I think these DIY preserved flower turkey gourds would be beautiful as decorations and centerpieces, no?!
Materials:
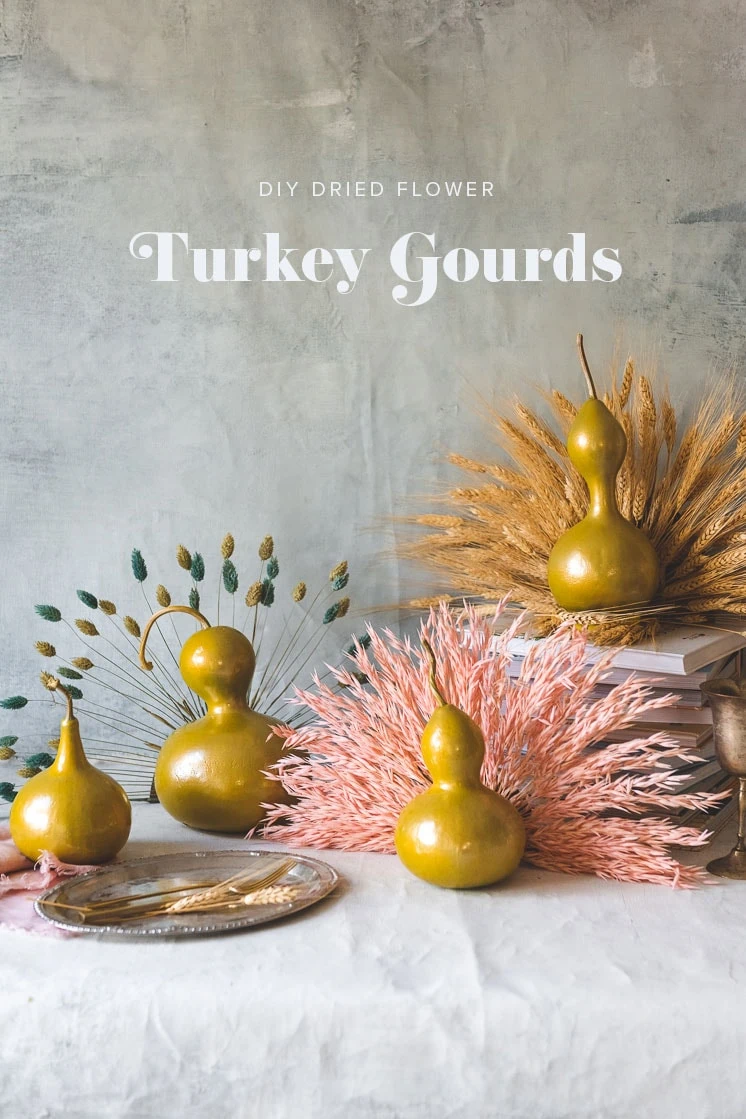
DIY Dried Flower Turkey Gourds
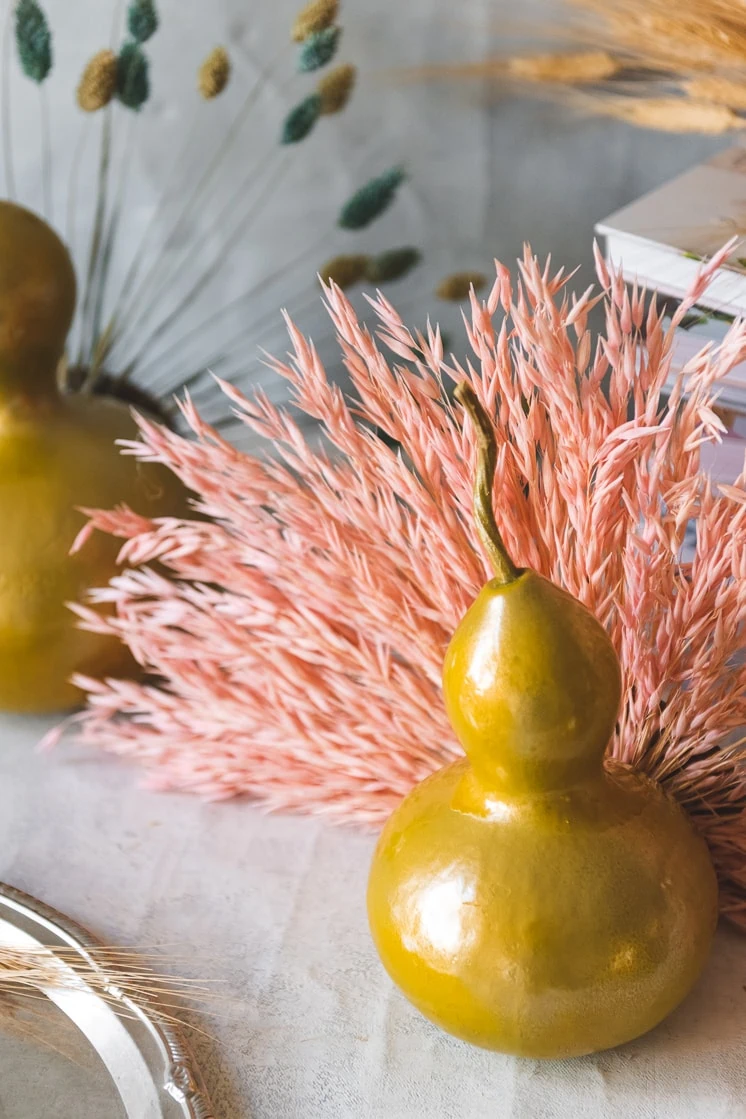
We have a really simple but beautiful DIY for you today—dried floral arrangements for your Thanksgiving Dinner. These are reminiscent of our gorgeous dried flower pumpkin DIY from a few weeks back, and just like that project, you can re-use these in the years to come! Once again, we used the beautiful preserved flower choices from Terrain and they were perfect!
Unlike fresh flower arrangements (which we also love, naturally), these dried floral turkey gourds don’t need water to keep them looking great. This arrangement also isn’t specific to Halloween or Thanksgiving—you can keep it up all through autumn (and maybe winter too, if you’re already dreading the cold months and need something to remind you of slightly warmer days).
Dried Flowers
Did you know people used to think dried flowers represented bad luck? The tradition goes that dried flowers no longer have a “soul,” or “chi,” so they bring bad luck to your home. While we don’t quite follow this line of thinking, make sure to keep your dried flowers in a dry, temperature-controlled place to keep them from accumulating mold, mildew, or dust.
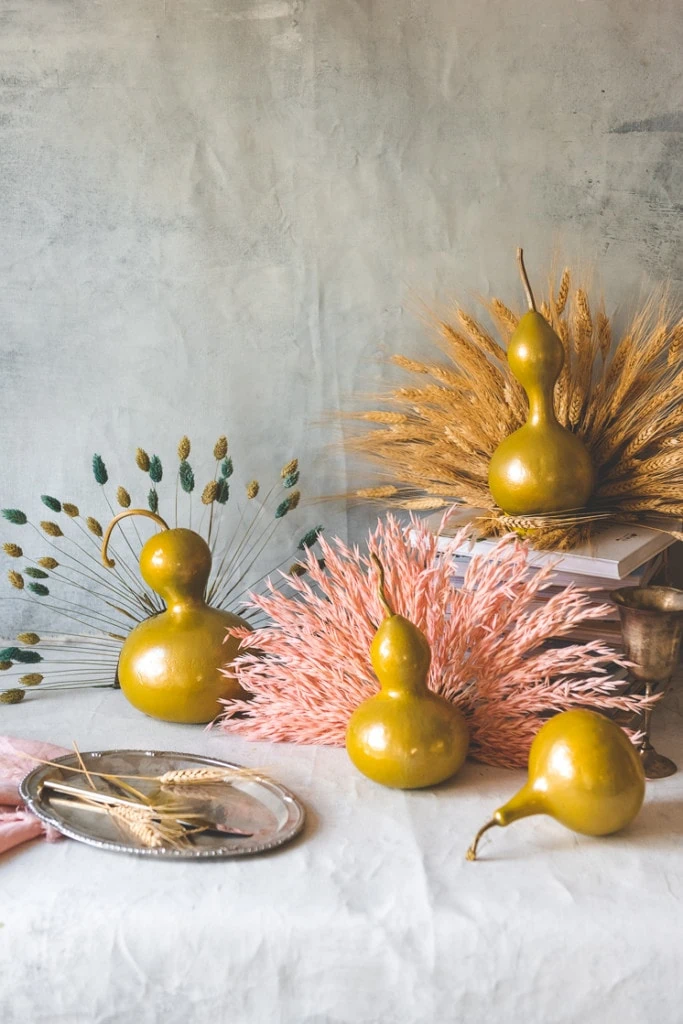
Where to Display Them
We like to put our dried flower arrangements as the table centerpiece, but how amazing would they look on a mantle? You could even put them in a windowsill so your neighbors can enjoy the autumn bounty.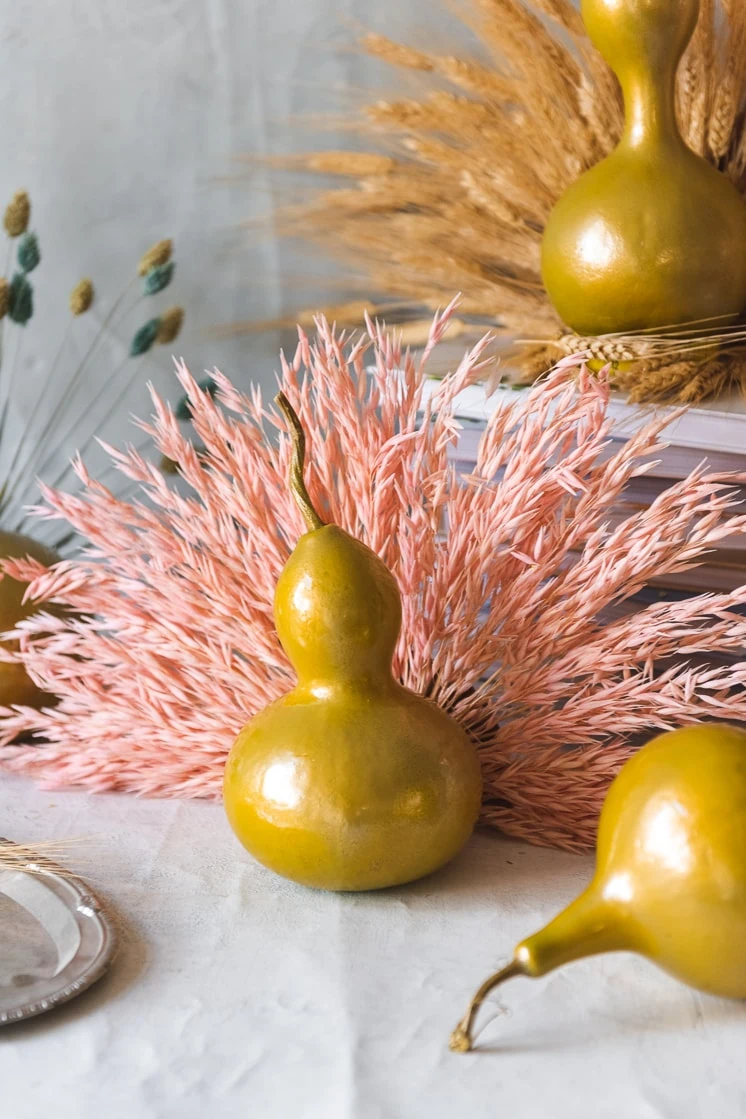
Making the Dried Floral Turkey Gourds
Materials
- Dried flowers (see above for exact links!)
- gourds
- glue gun
- cardboard
- spray paint
Instructions
- Cut out a piece of cardboard that fits behind the gourd. It should be a in a semi circle.
- Identify the center of the cardboard and start gluing the pieces starting from the outside and to the middl of the cardboard.
- Try different patterns with the florals for a unique pattern.
- For more depth and fullness, try different layers of cardboard in front of the other.

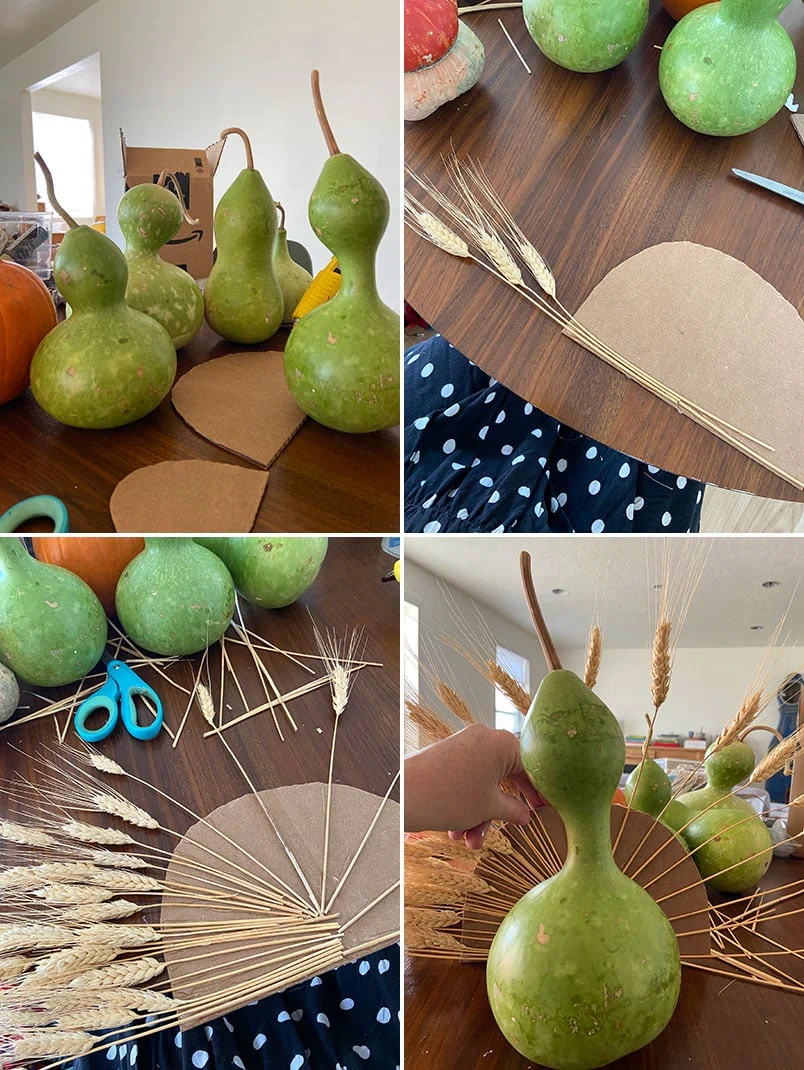
To display
- Pin the cardboard into the back of the gourd. To separate out sprays with different layers, try using a sponge in between each layer.
- If it’s a centerpiece, make sure you glue the back of the cardboard too.
Let us know if you make them by tagging us with #LarsMakes or #LarsGivesThanks
If you liked this project, I have a feeling that you’ll also like the following:
DIY succulent monogram pumpkins
Friendsgiving Tablescape
Origami Cornucopia
Comments