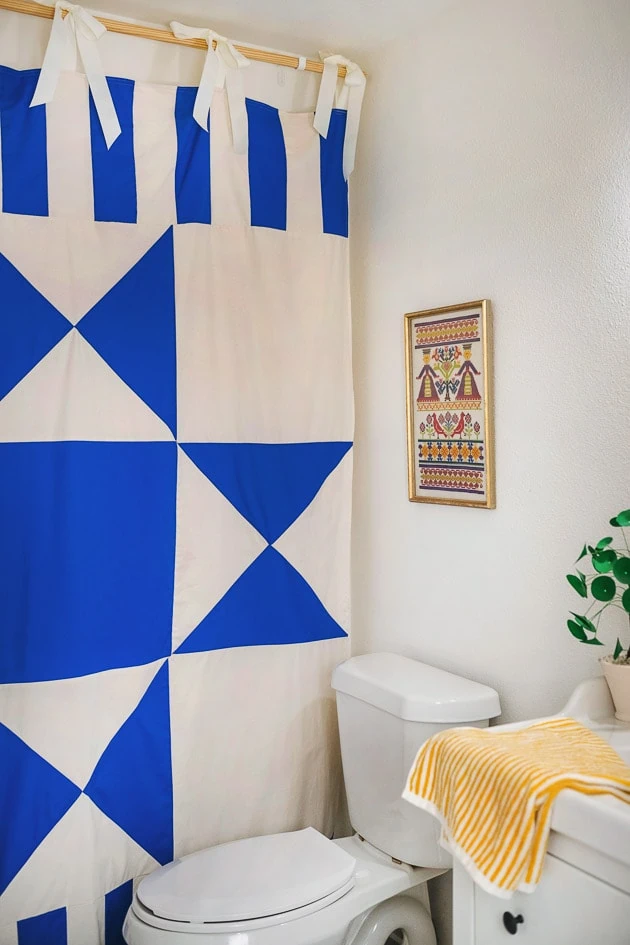
As many of you know, we are knee-deep in remodels. If you’ve been following along, you’ve seen my new closet system, my kitchen remodel, and my upstairs bathroom remodel, just to name a few. In fact, if you’re interested, here’s a compilation of everything we did to our house during our first year living in it! The next big challenge we’re puzzling through is the downstairs studio bathroom.
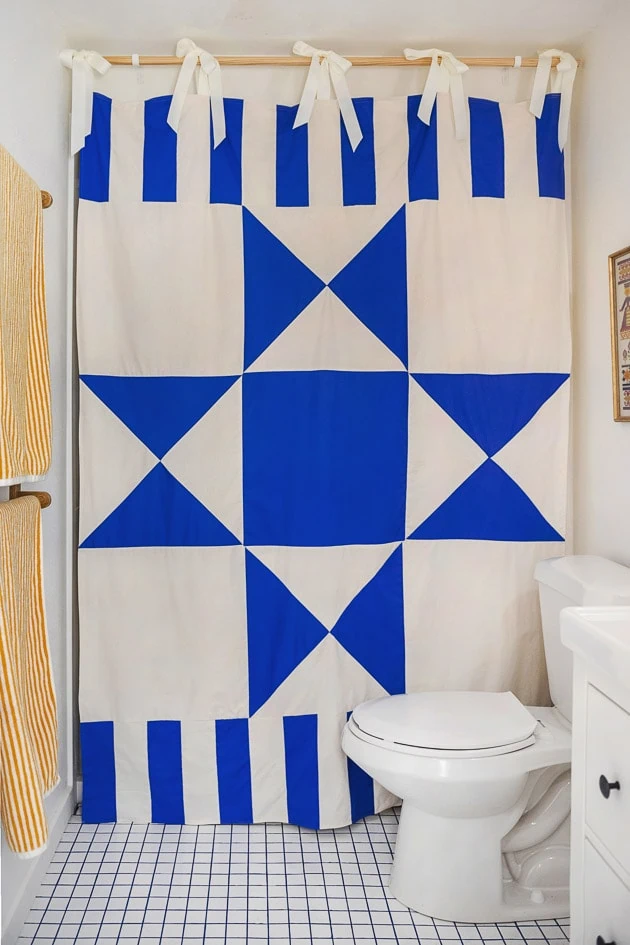
We haven’t finished it, by any means, but we’re excited to say that it’s coming right along. Today we’re thrilled to share our DIY quilted shower curtain with you! This was a bit more involved than we’d originally anticipated, but the result was absolutely jaw-dropping and had exactly the feel we were going for.
Materials:
Quilted Shower Curtain
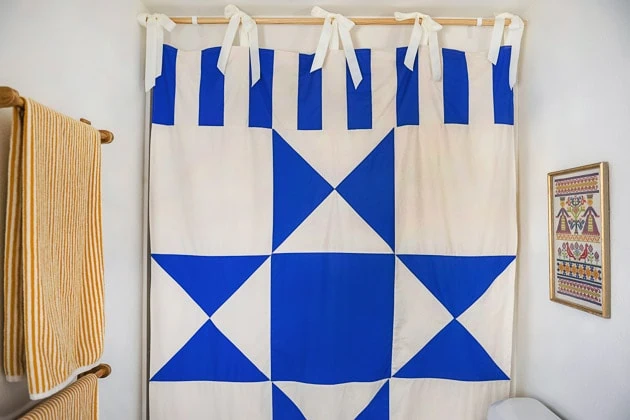
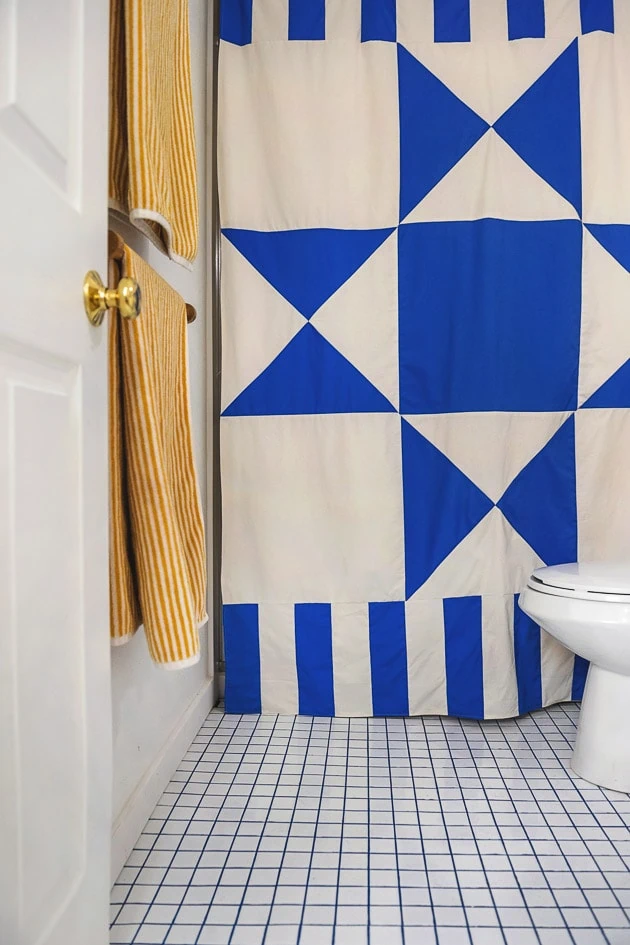
More of a curtain than a shower curtain, I knew I wanted this to be the big, eye-catching statement piece of the bathroom. I mean, I was kind of thinking of this like a whimsical bathroom art piece more than a functional curtain to hide behind when you shower. At first, I went to the fabric store to find the perfect print, but just couldn’t find anything that felt exactly right. That’s when I thought: what if we make our own pattern? In the form of a quilt? That’s when I started getting excited. So we came up with a fun, big, blocky quilt pattern and got to work!
How to Make a DIY Quilted Shower Curtain
First of all, this project involved more than just a few precise measurements. That’s where Fiskars sewing supplies came into the picture. We really couldn’t have done this without them. They have some amazingly useful sewing supplies that make cutting out lots of perfectly geometrical shapes so much easier. For this project, we used their self-healing cutting mat, which is amazing for cutting, but also for measuring fabric squares and triangles precisely! We also definitely couldn’t have done without their Fiskars Rotary Cutter, Fiskars Scissors, or their Fiskars Gridded Cutting Ruler.
All that being said, here’s how to make your very own DIY quilted shower curtain! It’s time-consuming, and requires patience and precision, but if you’re willing to take on the challenge, the result is well worth it.
Calculating your quilt measurements
This is the most important part of the process. Once you have your measurements calculated, the rest is smooth and intuitive!
- First, measure the height and width of the space you’d like your curtain to cover.
- Next, make your own quilt design within those dimensions. If you’re not comfortable designing your own quilt pattern, feel free to use ours as a reference! The space we filled was 62” x 62”. The finished dimensions of each of the squares was supposed to be 20 ⅝”, so we added a square inch onto that to account for the ½” seam allowance all the way around. The triangles were simply ¼ of the size of the squares. Lastly, the stripes on top and bottom were 4 ½” including the seam allowance. (For those, we just did a small ¼” seam allowance).
- So, for your convenience, here’s the comprehensive list of amounts and measurements:
- 1 blue square (21 ⅝”)
- 8 blue triangles (¼ of a square each)
- 4 white squares (21 ⅝” each)
- 8 white triangles (¼ of a square each)
- 14 white strips (4 ½”x 14” each)
- 16 blue strips (4 ½”x 14” each)
Cutting out your quilt pieces
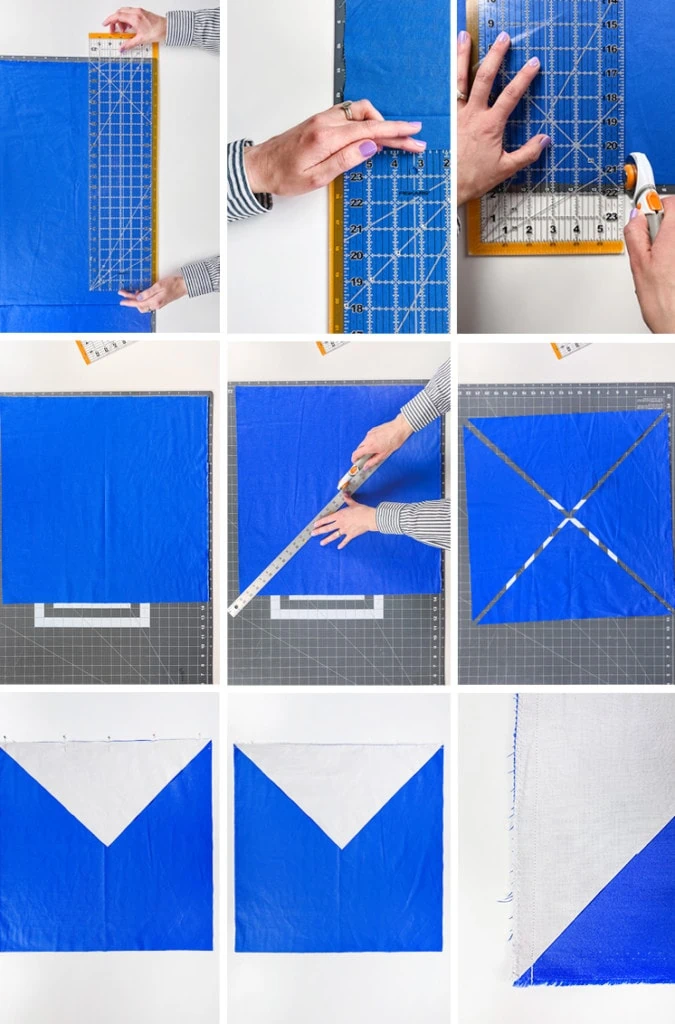
- The first step in cutting out your pieces is to get out your Fiskars sewing tools. You’ll want your rotary cutting set, along with your Fiskars scissors. I can’t emphasize enough how amazingly helpful these tools are!
- Once you cut out one square, you can use it as a template for the other pieces of fabric. That will help speed up the process a bit.
Piecing your quilt together
Now you’re ready to sew the pieces together! The best tip I can give is to try and sew in straight lines. This makes sewing the triangle pieces, especially, much less of a headache. I’ll explain what I mean by that in more detail as we go!
- Start with the center cross of the pattern where the triangles make a square. Sew them into a square, lining up the two triangles on each of the sides together, then sewing the two sets of two together.
- Then, simply sew the rest of the squares together, working from one side to the other in rows or columns.
- Once the center portion is all sewn together, sew the blue and white stripes together. You should have 15 stripes on top, and another 15 on the bottom. Start with blue on the ends and alternate until you have the right amount.
- Sew one striped section onto the top, and one onto the bottom.
The front of your quilted shower curtain is done!
Attaching the back panel
Now that you have your front piece finished, you’re ready to attach the back panel.
- For the back panel, simply line up the front and back panels, right sides together, and sew with a ½” seam allowance. Leave a small opening that’s just big enough to pull all the fabric through and turn it right side out.
- Once you’re done sewing around the edges, turn the fabric pieces right side out. Turn the open edges of the hole under and press the entire thing around the edges to make sure it’s nice and flat. Take extra care to press the open portion to a ½” seam allowance.
- Then, sew very close to the edge of the opening to close it up.
- Last, topstitch around the perimeter 1/2″ in from the edge.
Shower Curtain Attachment
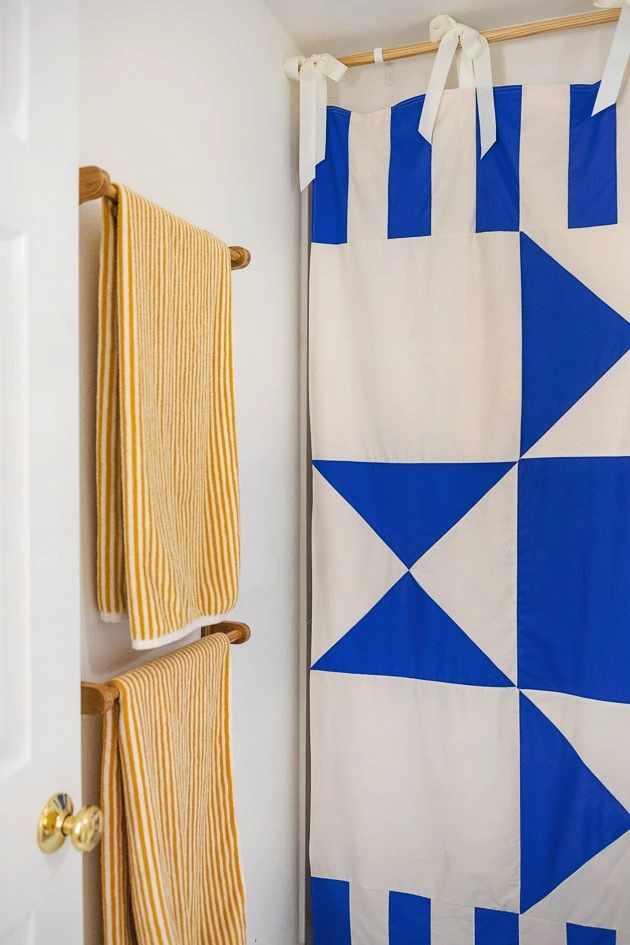
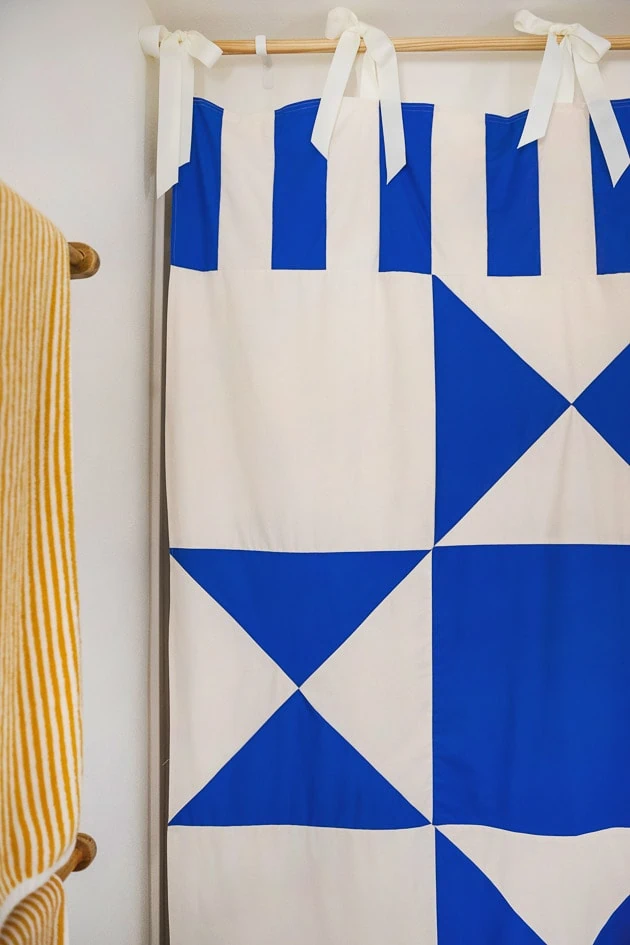
Now, it’s pretty standard to see shower curtain rings holding a shower curtain up, but we wanted to shake things up a bit. We decided to add a little finishing touch of ties, rather than rings, because it felt a bit more classy and artful. I mean, people want to feel inspired even in the bathroom, amirite? The ties are pretty simple. Here’s how to make them:
- First, cut ten pieces of white ribbon that are five or six inches long and 2 inches wide.
- Now you’re going to pin the ties along the top in pairs, spacing them evenly from end to end.
- Tack down each set of ribbon with a straight stitch.
- Done!
Now you’re ready to attach your freshly finished quilted shower curtain to the rod!
Shower Curtain Rod
Okay, let’s talk about this shower curtain rod. Your generic shower curtain tension rod is functional and inexpensive, and you’re totally welcome to use one. But we wanted something that felt a little less like your standard Home Depot shower set up, you know? For ours, we used a wooden dowel (same width as a standard shower curtain rod) and a couple of minimal curtain rod brackets to attach it to the wall. The raw wood had a really fun effect with that blue and white pattern!
After the shower curtain rod is attached, just tie the finished, quilted shower curtain to the rod and you’re done!
Styling Your Curtain
This is such a fun, statement piece that does so much to make a bathroom feel cozy and inviting. If you’re not in need of a shower curtain, the wonderful thing about this statement curtain is that it can be used as a regular curtain, too! Just adjust the length and dimensions accordingly and hang it in front of any wall or window.
My favorite thing about this project is that we had total creative control over most all aspects of it. Since we resorted to sewing, we got to choose the pattern, rather than settling for an already manufactured one. And thanks to all the amazing Fiskars sewing tools we had, it was so easy to measure, cut, and piece everything together in a way that was crisp, precise, and beautifully crafted!
We loved getting to work on this project and would love to see your variations on our DIY quilted shower curtain!
More Inspiration
If you loved this tutorial on how to make a DIY quilted shower curtain, you’ll probably love these other projects: My Bathroom Remodel Reveal, Our Kitchen Remodel Update, Our New Closet System, Lars DIY Wainscoting, How to Paint a Folk Art Cabinet, and Everything We’ve Done to Our House in One Year.


Comments