Hello and welcome to another week of our sewing basics series! This week we’ll be learning how to print and assemble a PDF pattern. If you’ve never done this before, it can be confusing at first. What printer settings do I use? How do I put all those sheets of paper together and make sure they line up correctly? These are all great questions, and we’ll talk about them and more below. By the end of this post, you’ll be a PDF pattern expert!
If you’re new to this series, our sewing basics series goes through the essentials of sewing. It’s a great refresher for those who haven’t sewn in a while, and the perfect way to learn the basics for first time sewists, too. For past sewing basics posts, click here.
Materials:
PDF Patterns: The Basics
First off, why PDF patterns? We’re glad you asked. Back in the day, they didn’t exist. It was all paper patterns. Which are great, because you don’t have to piece them together or print them off at all. So convenient. BUT (there’s always a but, right?). Paper patterns aren’t always the most convenient option. Like what if you want to buy a pattern from Great Britain, Sweden, or somewhere else? Even shipping within the U.S. takes time, and we know that project you’re itching to make sometimes just. CAN’T. WAIT. Hence, the birth of the PDF pattern!
PDF patterns make an instant download and print of your pattern possible. That means you can start on your sewing project the same day you buy your pattern. All you need is a printer, scissors, and tape and you’re all set to print and assemble your very own PDF pattern.
How to Print a PDF Pattern
Note: for this tutorial, we used the Friday Pattern Company Patina Blouse pattern. You can find the PDF pattern here, and a discount code here!
Here are Carrie, Jenny, and Jane, all wearing the Patina Blouse:
Adjusting the PDF Settings
Printing a PDF pattern is simple, once you have the settings correctly adjusted. Here’s what to do:
- First, download your PDF pattern. Often, there will be multiple files available to download. The one you want to print will have the pattern separated into multiple 8.5”x11” pages for printing convenience.
- Once you’ve found the correct file for printing, open it up in Adobe Acrobat. Many PDF patterns have the option to print just your size, rather than all the sizes stacked on top of each other. To do this, you need Adobe Acrobat. It’s a nice perk if you can do it, and makes cutting your pattern out really simple! (If you don’t have Adobe or another PDF editor, skip these steps and go to “Prepping for Print” step 1).
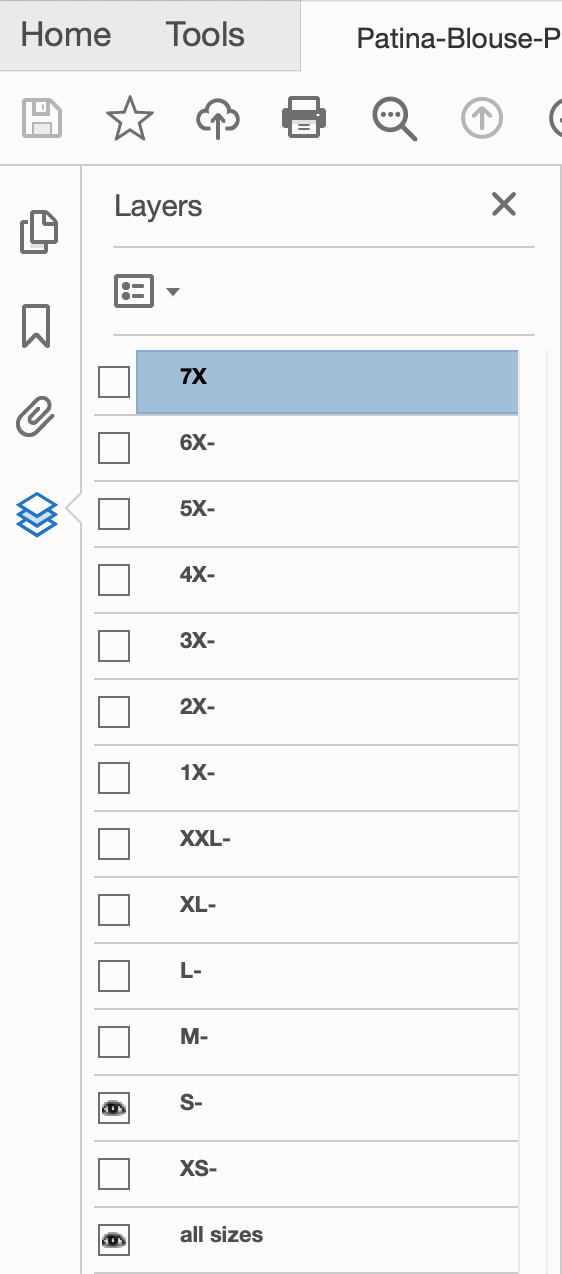
- With Adobe Acrobat open, you’ll see a little icon on the left side that looks like a stack of three squares. That’s the layers icon–click on it.
- When the layers icon is open, you’ll be able to see a column of tabs. Those tabs are the different sizes and can be clicked on and off.
- Now that you can see the size tabs, click off all the sizes except yours. Make sure to leave the important markings on, though, like notches and guides for connecting the pages together. (To figure out what size you are, take your measurements and check the size chart).
- With all the correct tabs clicked on, you’re ready to print!
Prepping for Print
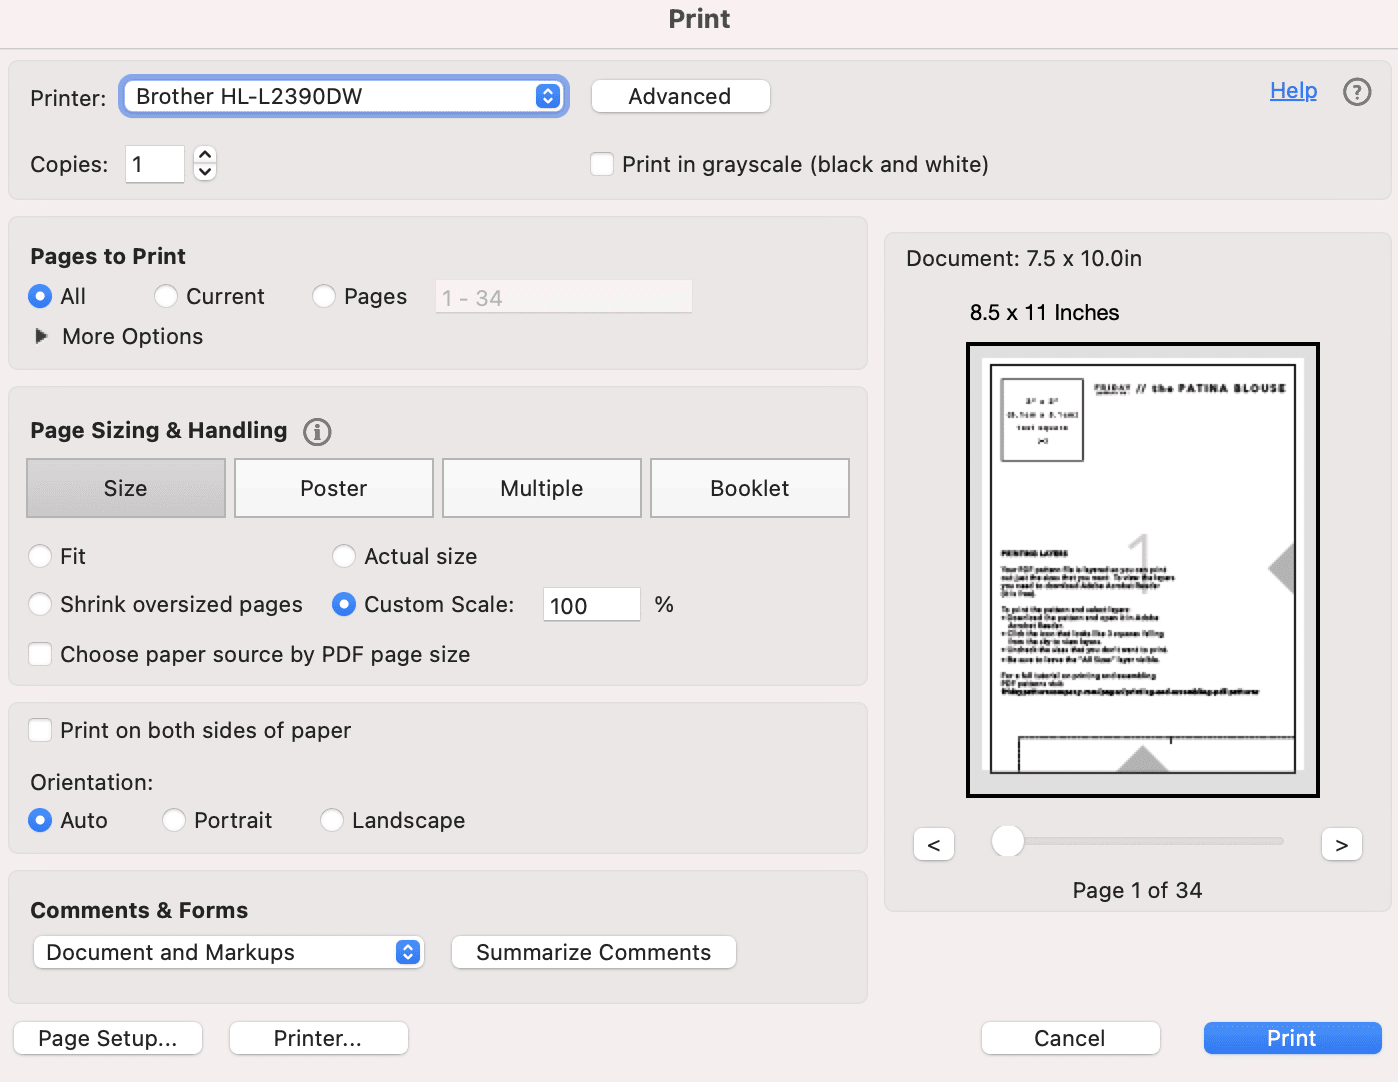
- If you didn’t use Adobe to edit the layers, go ahead and open your file. (If you just edited the layers in Adobe, your file should already be open). Now open the print menu.
- In the print menu, do the following: click single-sided printing, and scale custom 100%. This should make it so the printed pattern doesn’t shrink or get cut off, but prints to the actual size.
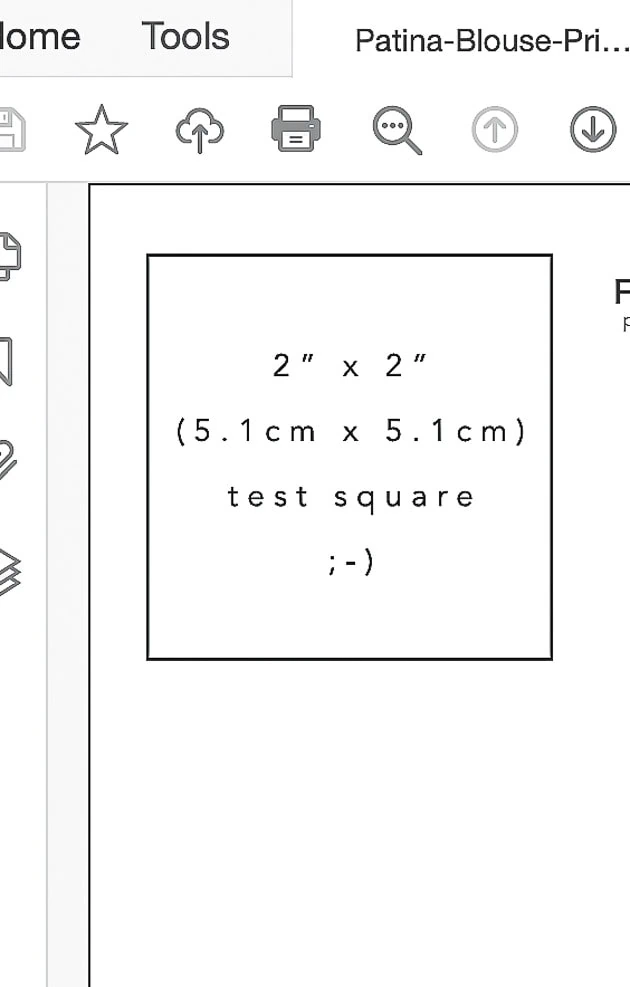
- Now print your pattern! Note: As a fail safe, many PDF patterns have a test page that you can print out and measure with a ruler. If it’s the correct size, you’re good to print.
Once your pattern is printed, you’re ready to piece it together!
Assembling your PDF Pattern
If you’ve printed your pattern correctly, assembling should be a breeze. Here’s how:
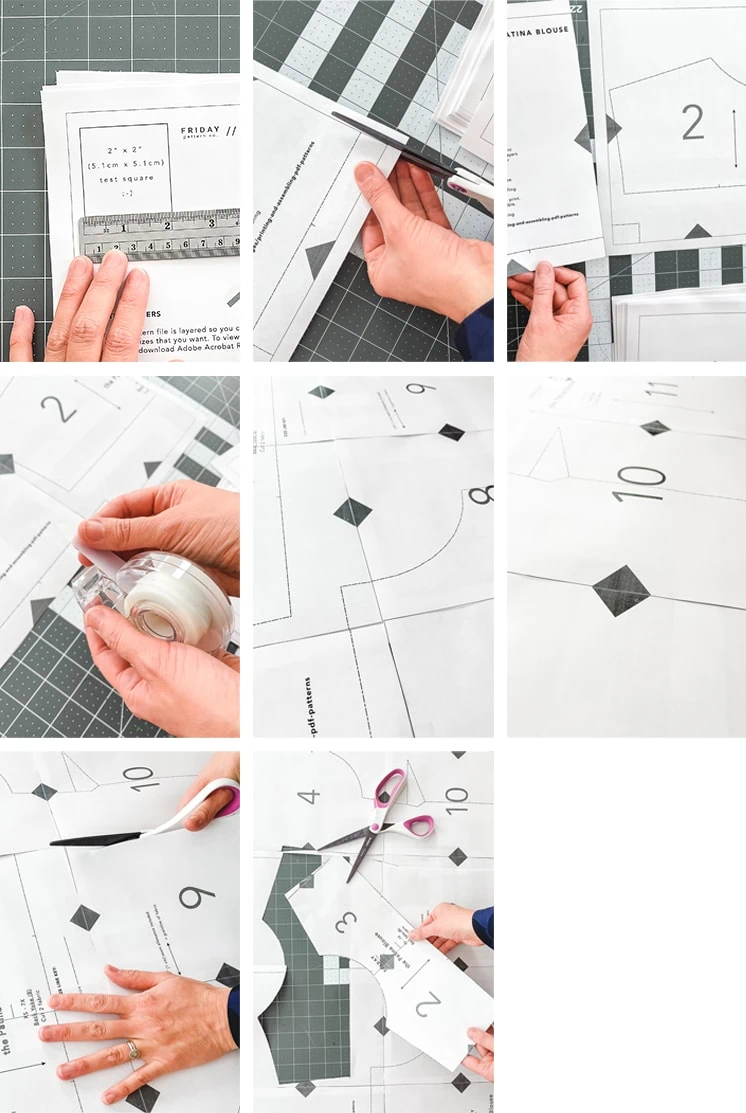
- First, find a nice, large surface on which to lay your pattern pages out. If you’re like me, you may not have a table that’s big enough, so the floor is a perfect option!
- Following the numbers on each page, line up all the pages in a grid block chronologically. Note: most patterns have some sort of system for aligning the pages, like arrows, dots or lines. Use these to precisely align each page. There will be a white margin around each printed page that’s outside the printable area. I like to cut those margins off so I can see where to align the pages better.
- I find that the easiest way to assemble the pieces is to tape as you go. That way the pages won’t slide out of place as you lay each paper down.
- Once all the pieces are taped together, all you have to do is cut out your size along the lines and you’re done!
Now, we want to hear from you: How did printing and assembling your PDF pattern go? Leave your questions and comments below, and let us know if we can clarify anything for you.
Now that you know how to print and assemble a PDF pattern, stay tuned! In a couple of weeks, we’ll be teaching you how to read a pattern so you can get sewing.
More Inspiration
Interested in learning more about sewing? See our Sewing Basics series here! Need inspiration on where to buy patterns? Try some of our favorite companies: Friday Pattern Company, Birgitta Helmersson, and Merchant and Mills.





Comments