If you didn’t catch it, we were recently featured on the home renovation show In With The Old, on Magnolia Network. I’ve been doing a deep dive into each space we tackled. Yesterday it was all about the Scandinavian folk-inspired staircase and today I’m sharing more about the carved flower balusters. It’s arguably my favorite element of the whole house. Let’s dive in!
____________________
Click here for all the before and after photos from the home renovation
See the full kitchen renovation here
Read about the kitchen cabinets here
Click here to read more about the kitchen hardware.
If you’re interested in seeing the oven, click here.
See how we turned the fridge into a cabinet
Carved flower balusters
If you haven’t read about the Scandinavian folk-inspired staircase yet, I recommend you starting there first before digging into this post so you can see how everything came together.
Ok, now that you’ve read up 😉 I want to tell you all about the magic of these carved flower balusters.
It started when I was trying to think of something unique I could do for the balusters. I mean, if you could do ANYTHING to reflect your personality in your home, what would YOU do?! It opens up a new world, no?!
Since I wanted to bring in a lot of Scandinavian folk-inspired elements, I looked for a lot of flat sawn baluster inspiration and there’s a lot of goodies out there.
Baluster shape inspiration
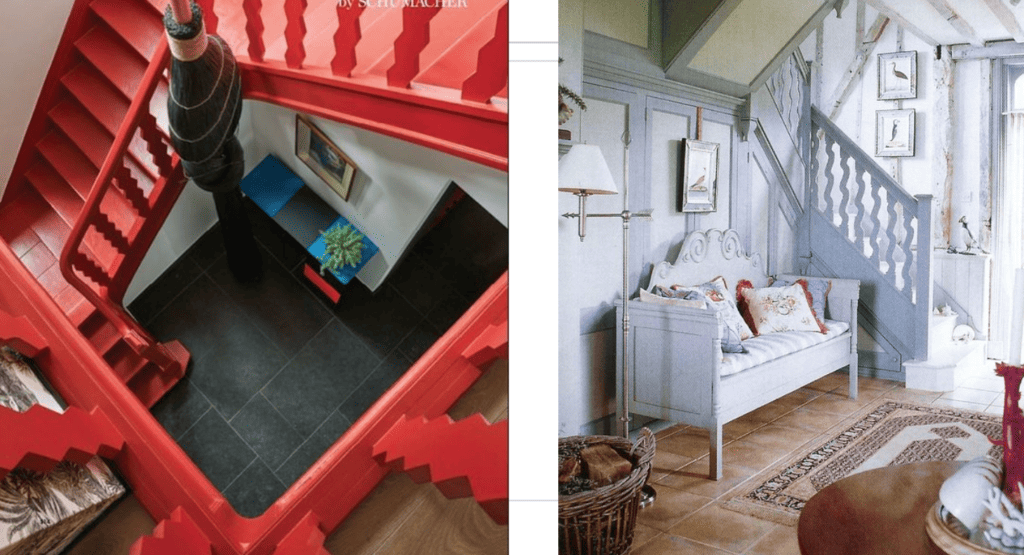
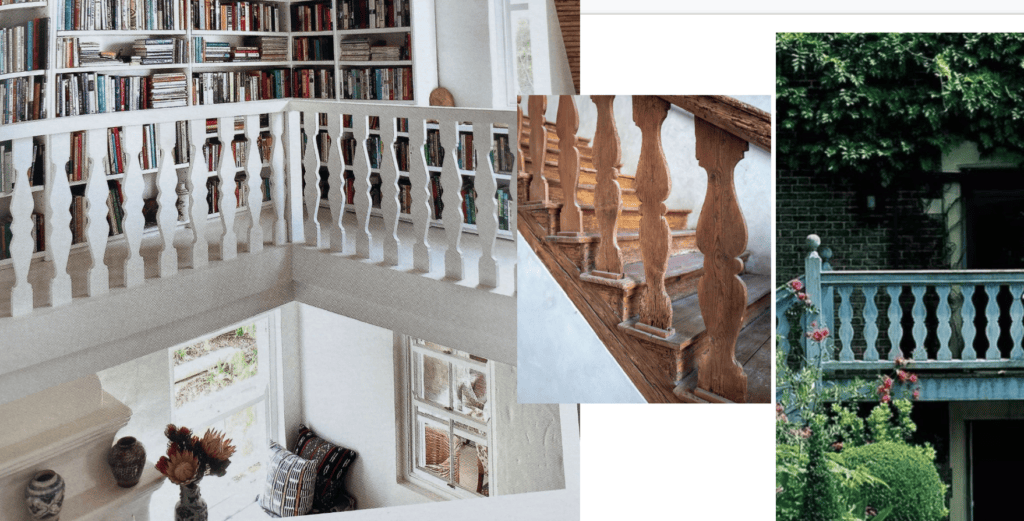
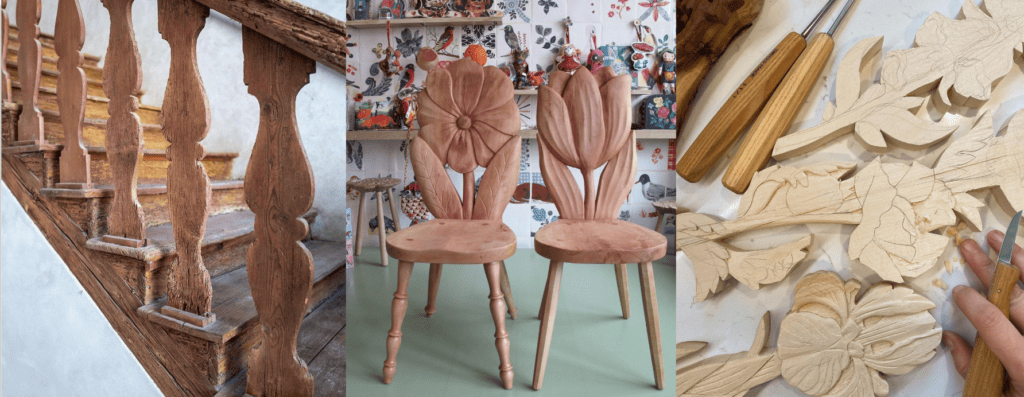
Flat sawn balusters are just like how they sound–they are wood cut with a saw in a fun shape. They were oftentimes used for porches during the Victorian times, but were also found in Scandinavia, which is where I drew my inspiration. Here’s a few that I considered.
I started to narrow in on the above shapes, specifically the middle one. I liked the natural wood and how it would tone done the rest of the patterns and colors that I planned on using around the house (still TBD!).
Finding the right shape
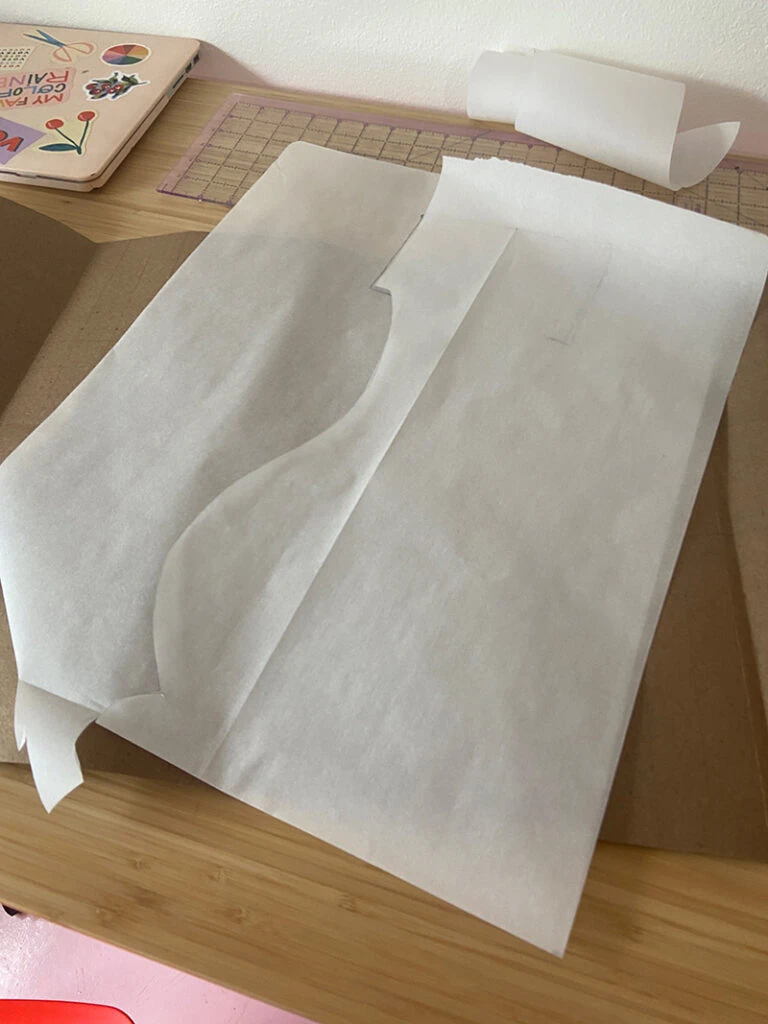
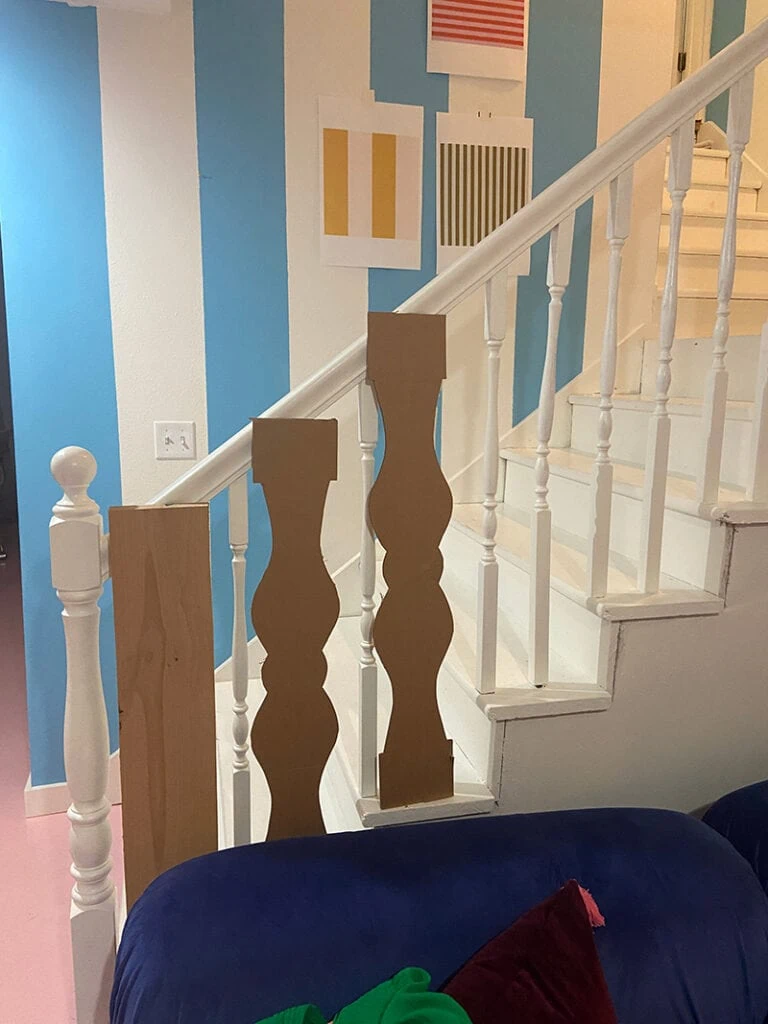
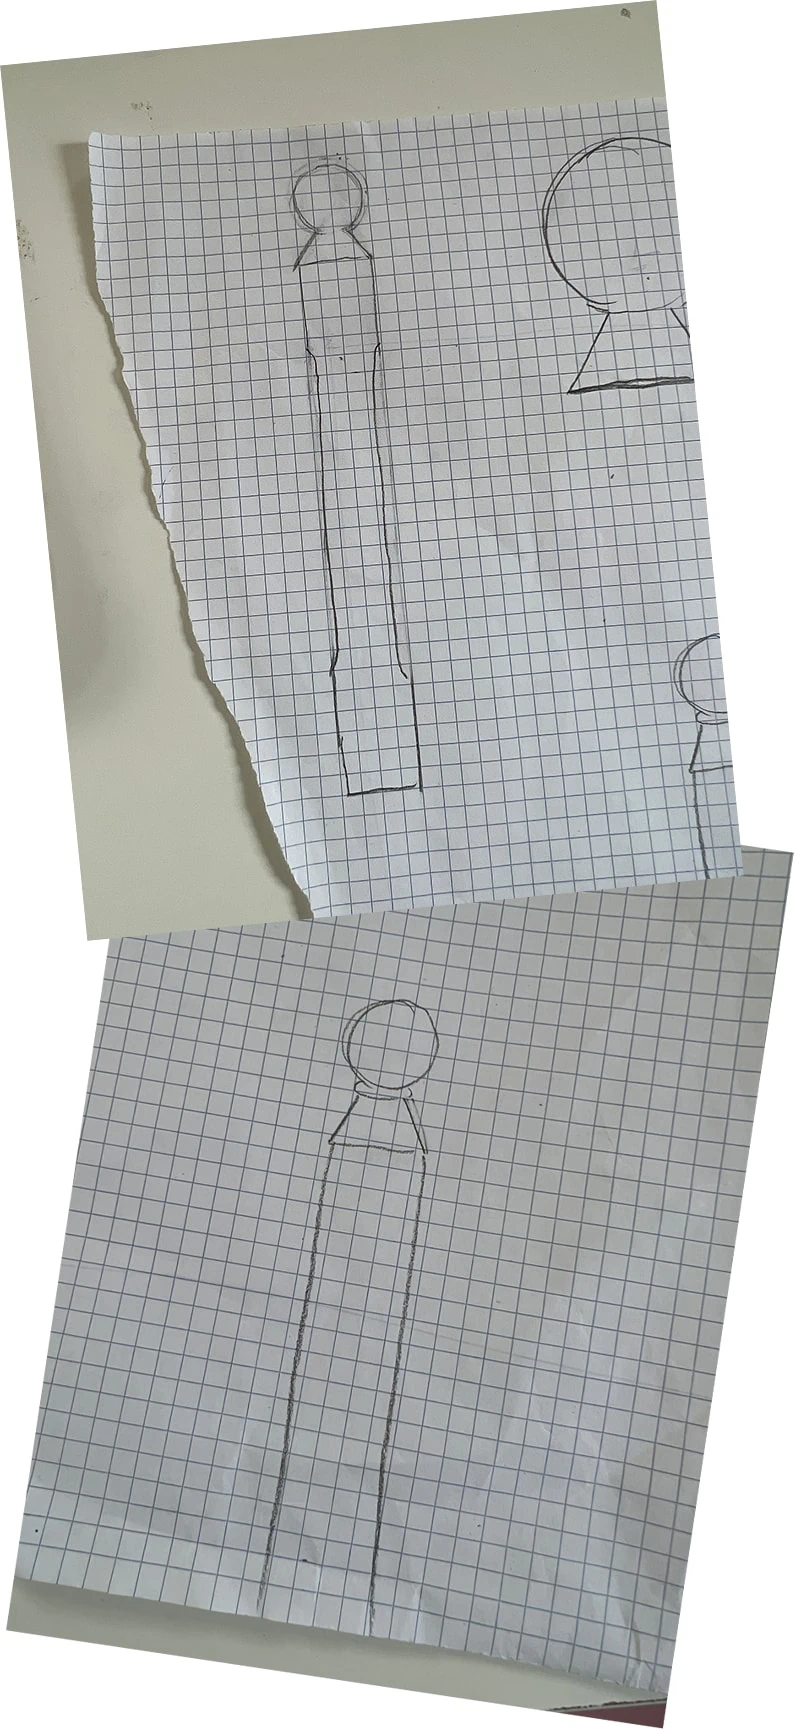
Let me start out by saying that getting the right shape was not as simple as I was hoping. I did it old school by drawing it then coming up with a mock up in paper then cardboard.
And I didn’t love it. It was way too “hippy” and not in the 60s way, but more in a woman’s figure way?
Carrie on the team then put it into Illustrator and worked it out based on the sketch I made so it was much more acccurate–thank you Carrie!
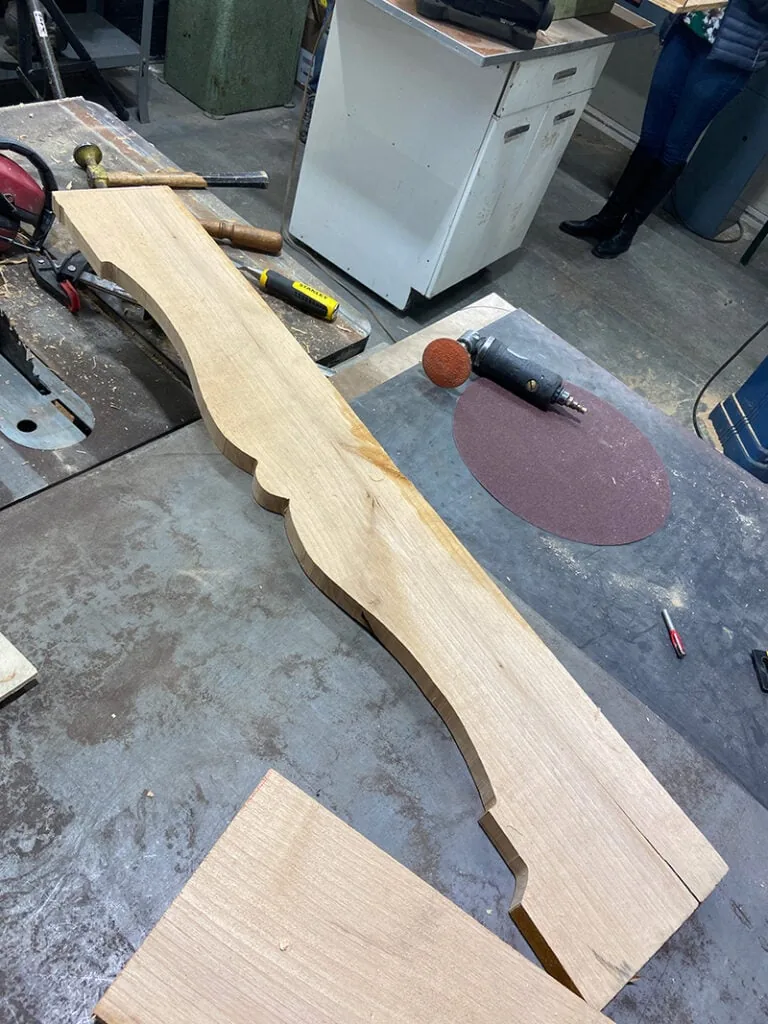
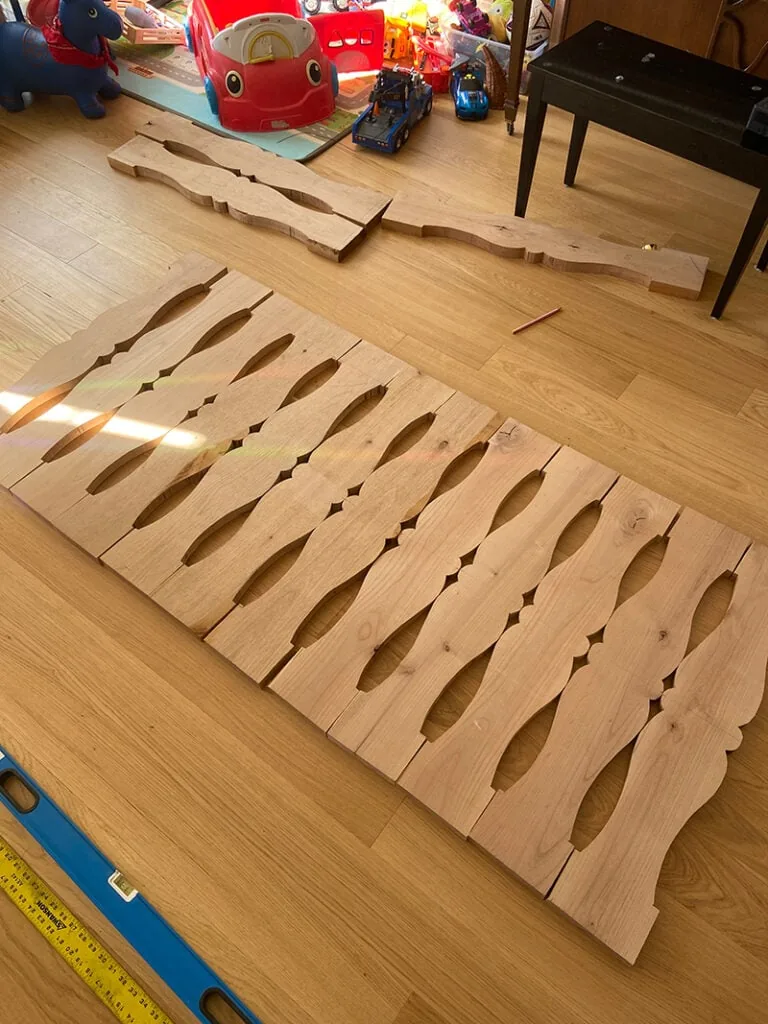
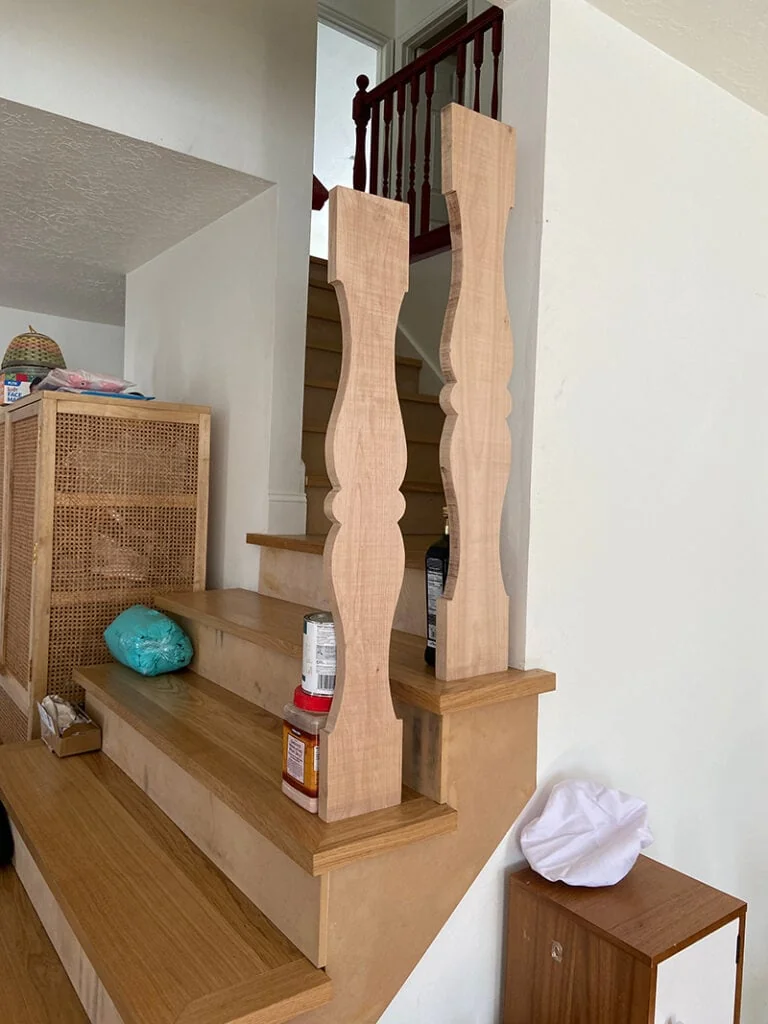
Then we printed it off as an engineer print at Staples and brought that into Tanner’s, my brother in law, workshop where we cut out the shape. You can see all of this on the show. He was so so so helpful.
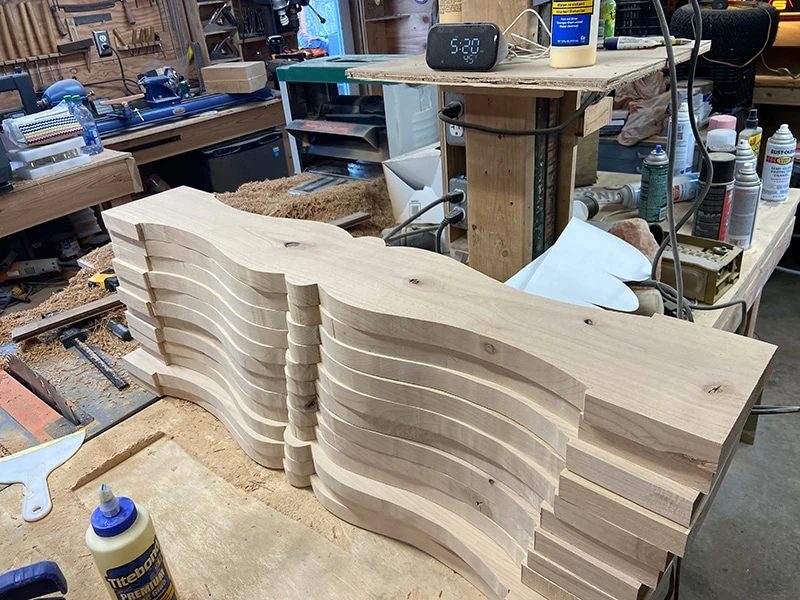
You can read all about this process of cutting out the shapes on this post, but suffice it to say, it was a much bigger process than we all expected. Tanner brought in Quinn Peterson, to help him cut them out and soon things were rolling.
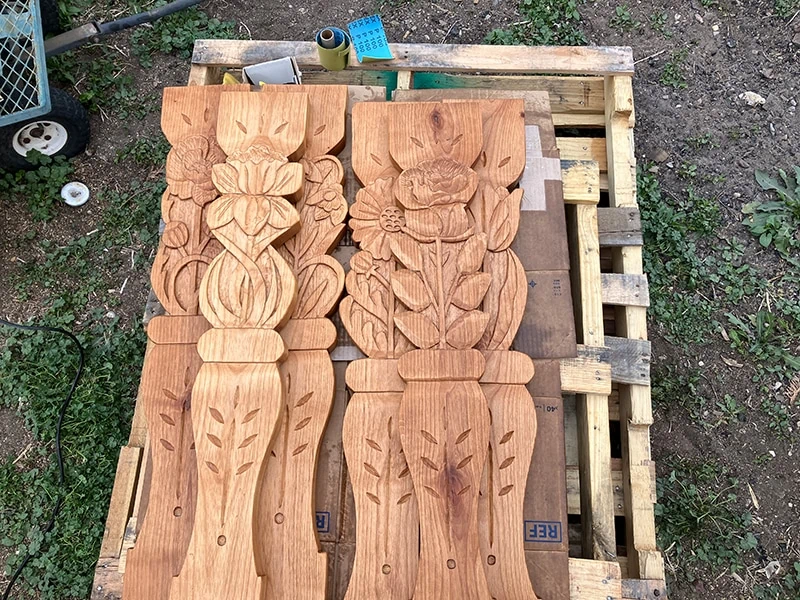
So pretty all laid out.
This got me super excited.
Decorative balusters
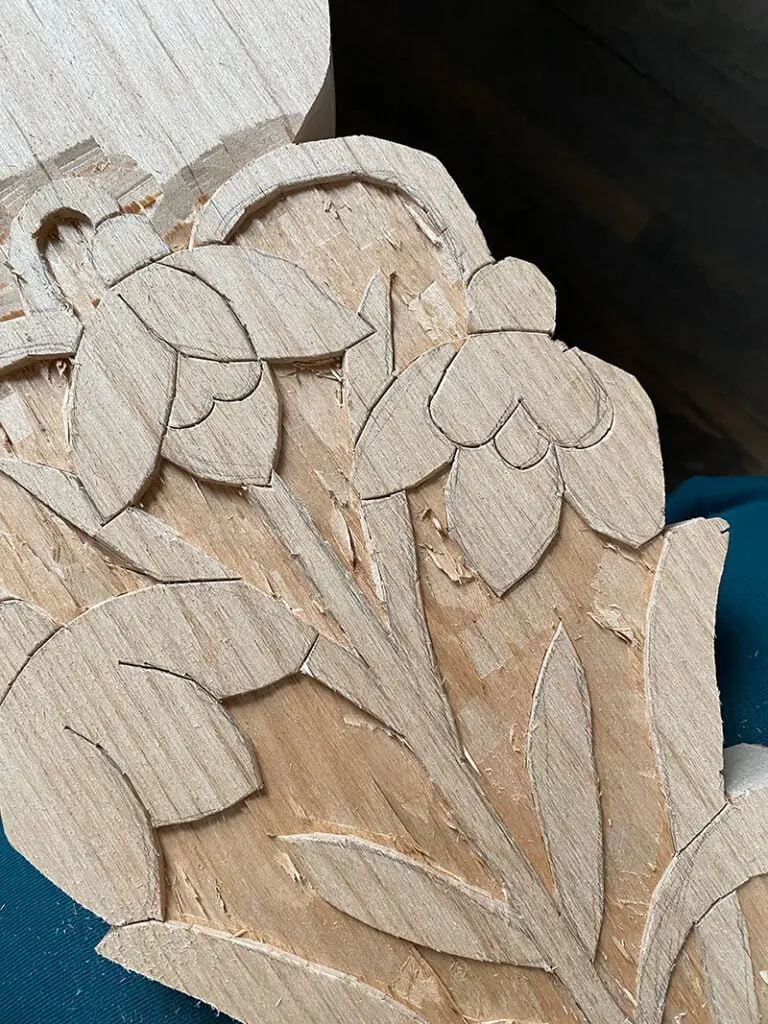
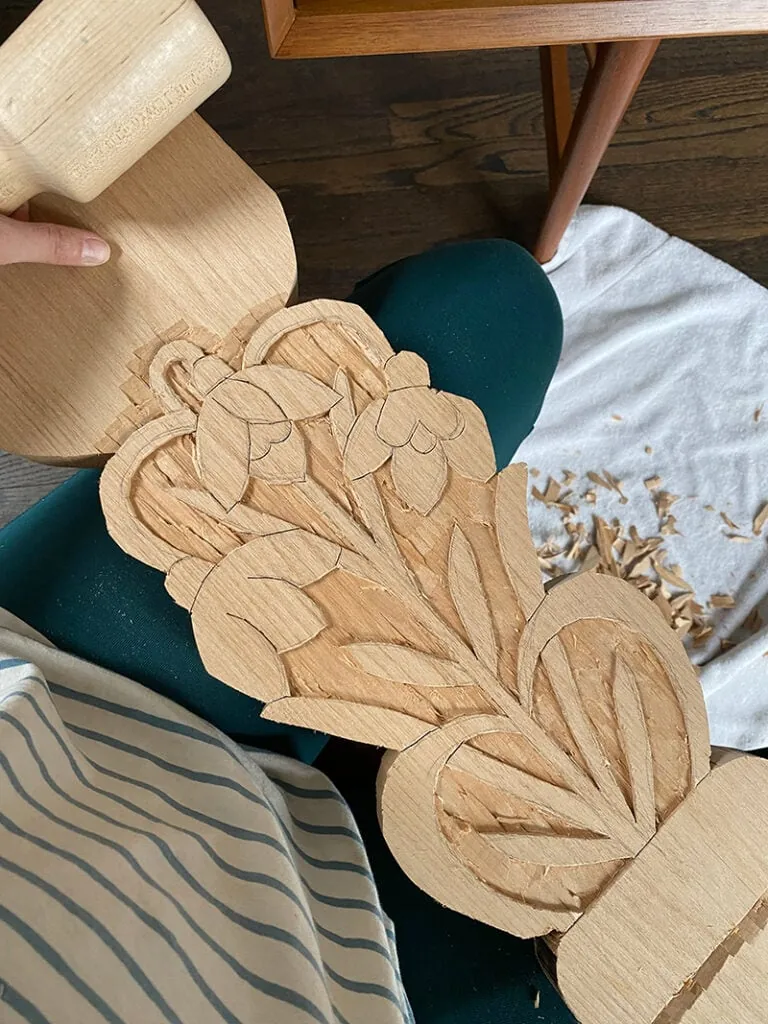
As for the actual decorative carving on the balusters, I recalled some previous inspiration from one of my favorite artist/illustrators, Nathalie L’été. She designed these gorgeous wood chairs in the middle below and I think someone else carved them for her. They’ve been on my inspiration board for years. I wanted to figure out how I could combine the idea of a carved flower into a baluster.
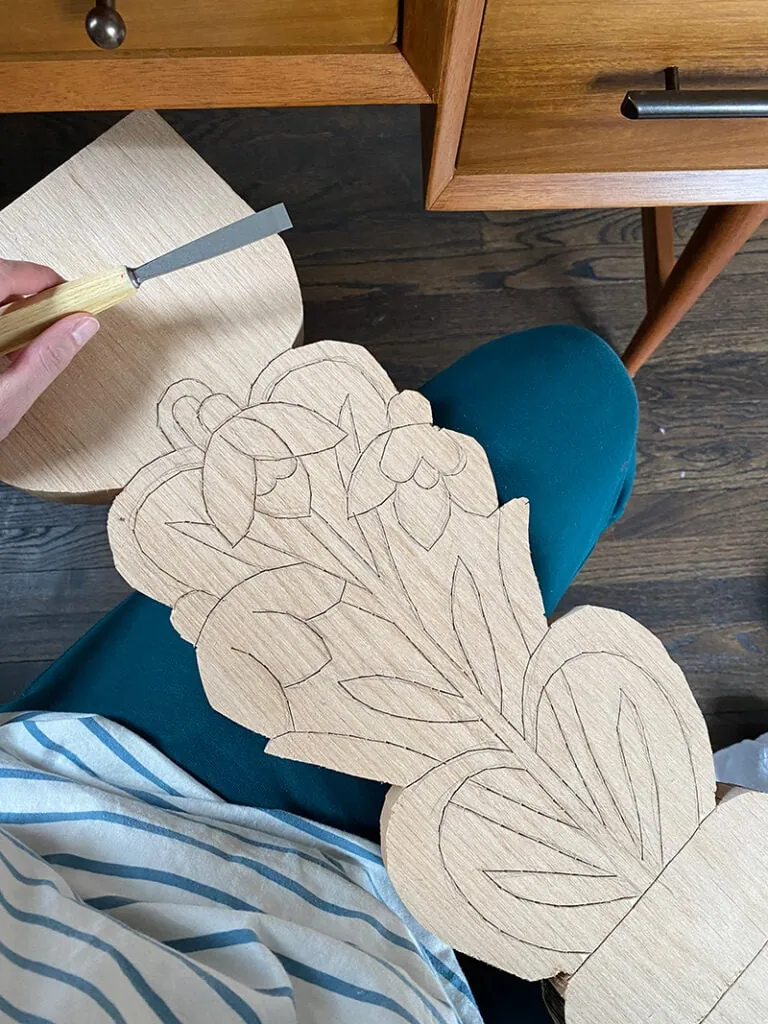
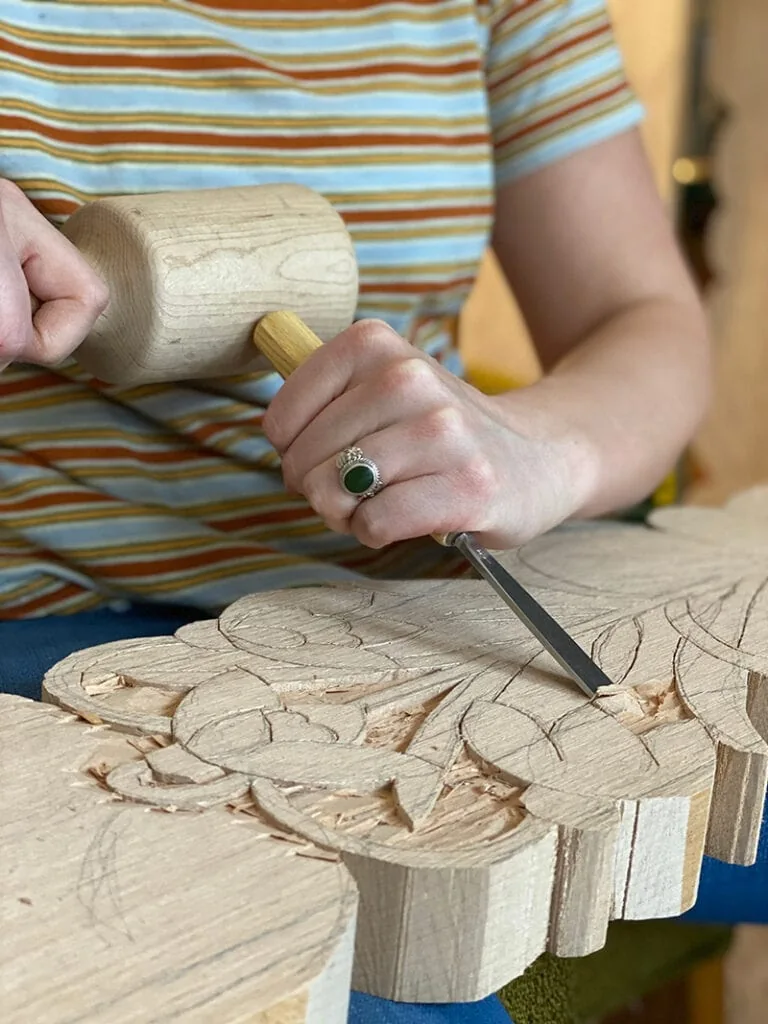
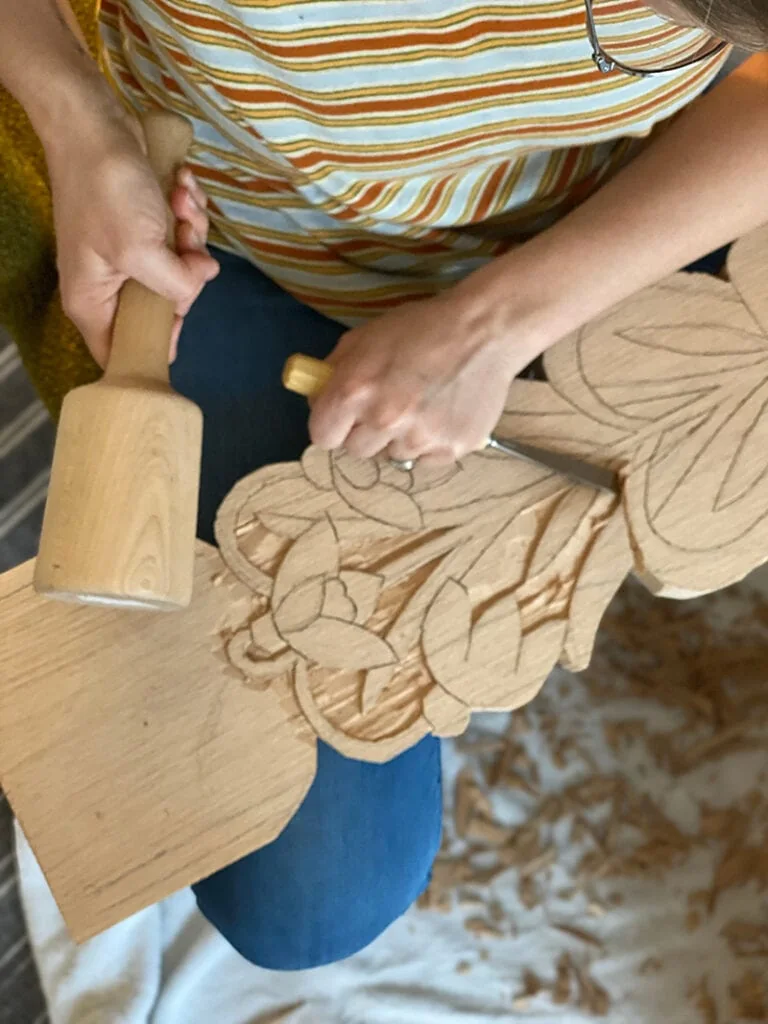
It hit me when my friend, Jill DeHaan posted the image on the right on her Instagram. She was the perfect person to bring on this project! She’s all the best things wrapped into one– an incredible designer, illustrator, artist, and wood carver. She’s got talent oozing out of her pores.
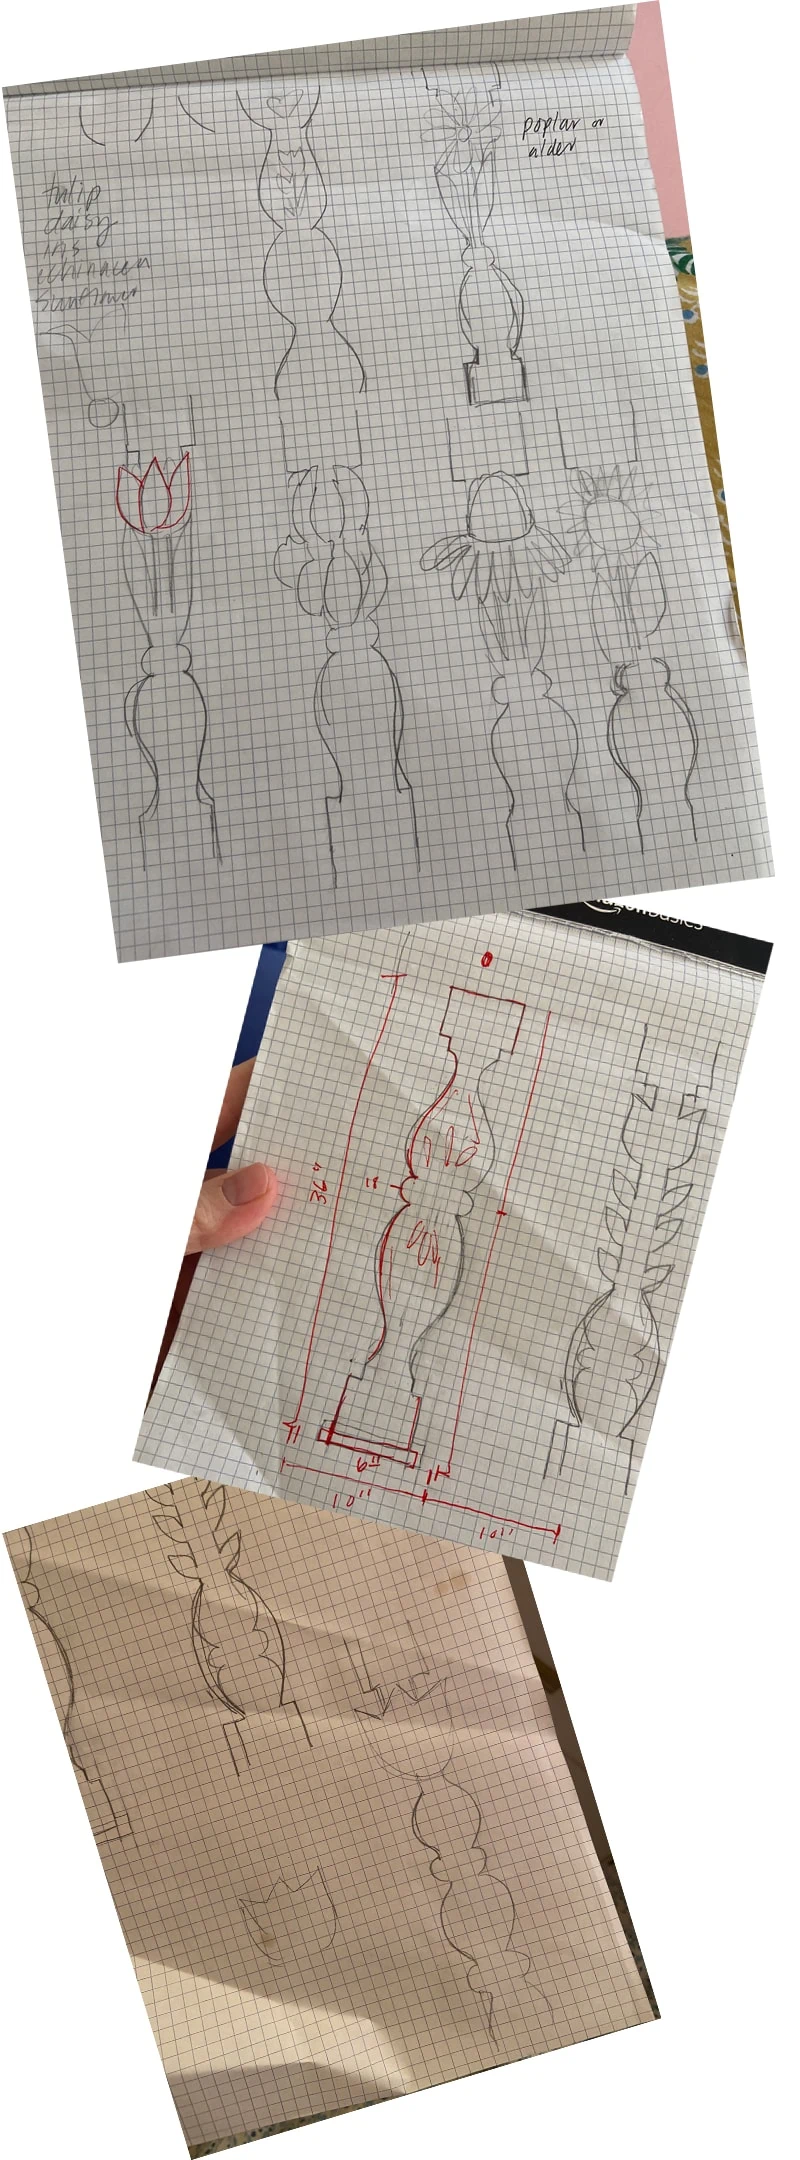
I broached the idea and I think she must have sensed my enthusiasm because she was on board from the get go. I sent her the inspiration above with some sketches I had made.
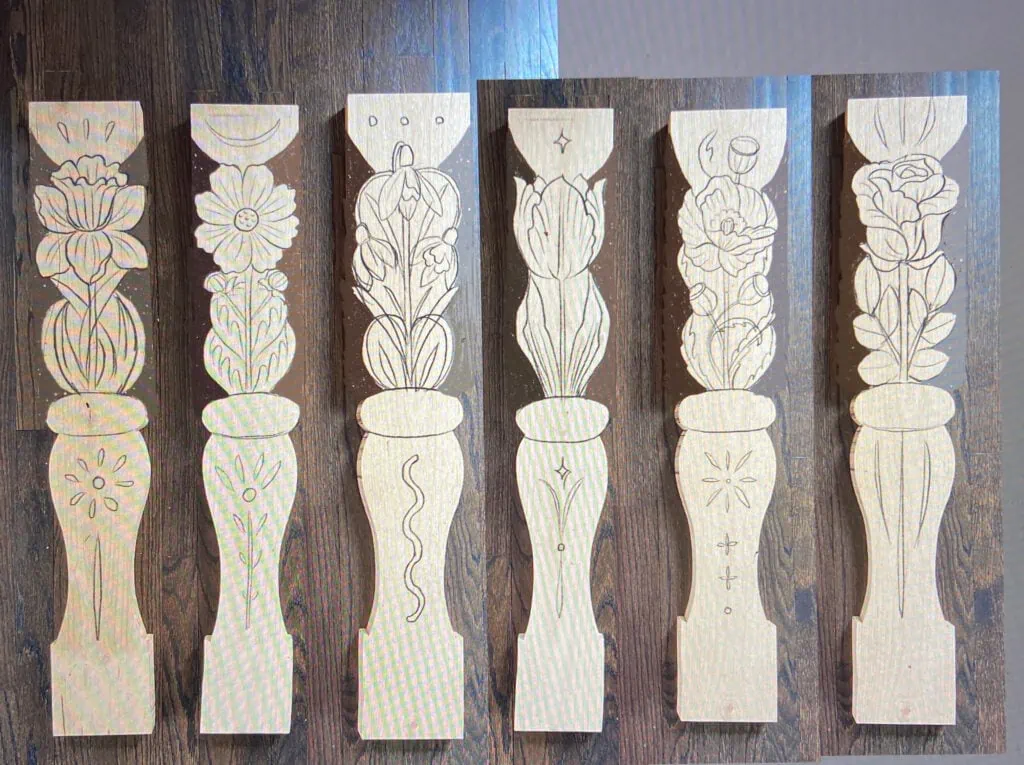
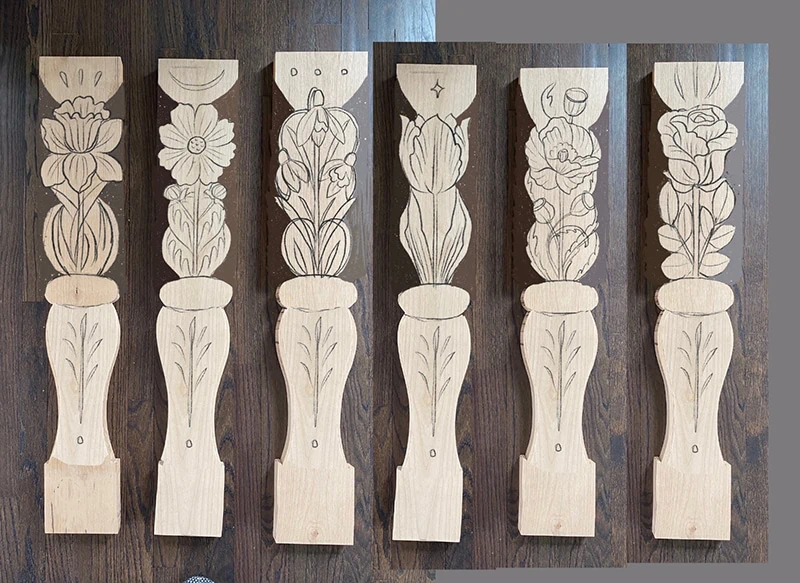
And then she came back with her own with plenty of options, which you can see here. Notice the top design and bottom designs that I got to pick from.
I decided to go with the three dots at the top and this for the bottom:
But they were all so good and hard to choose from. What would you have done?!
Birth month flowers
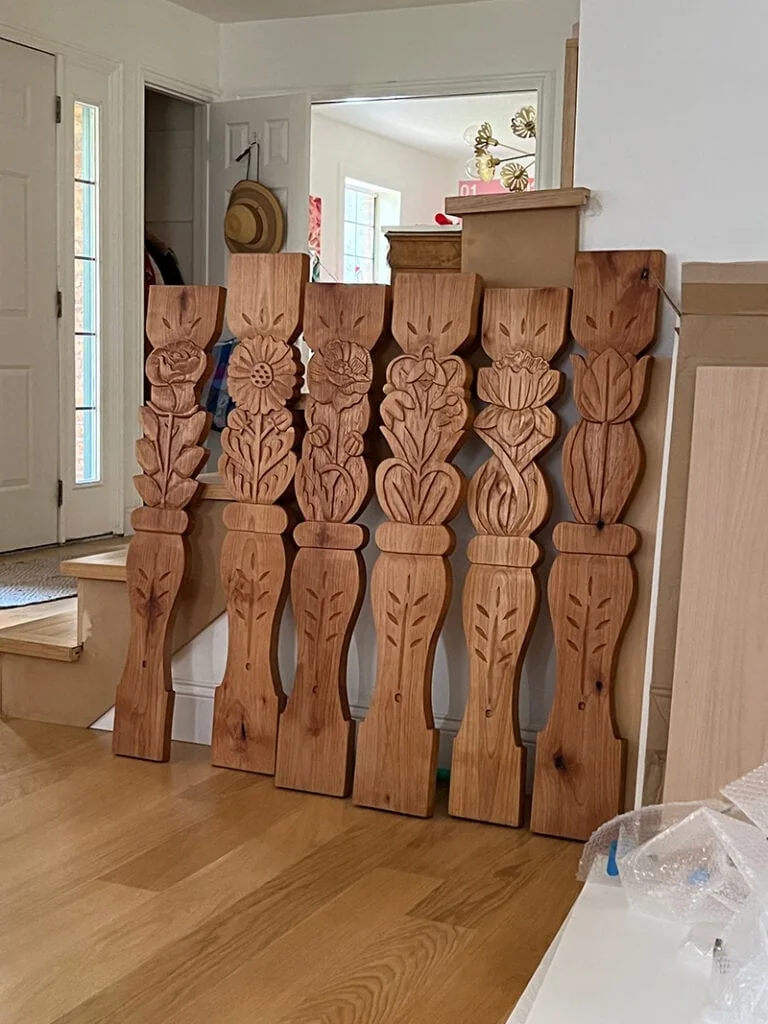
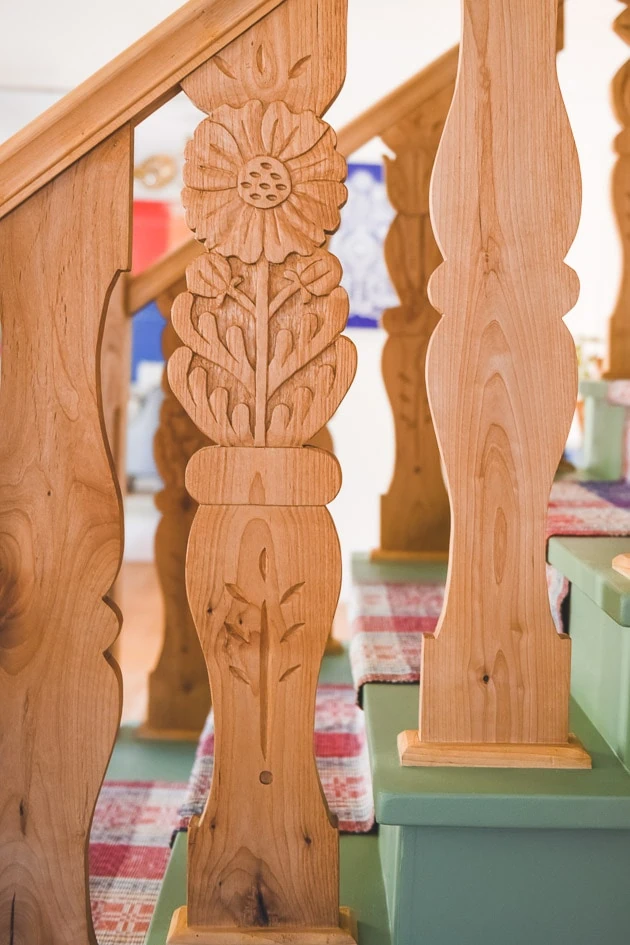
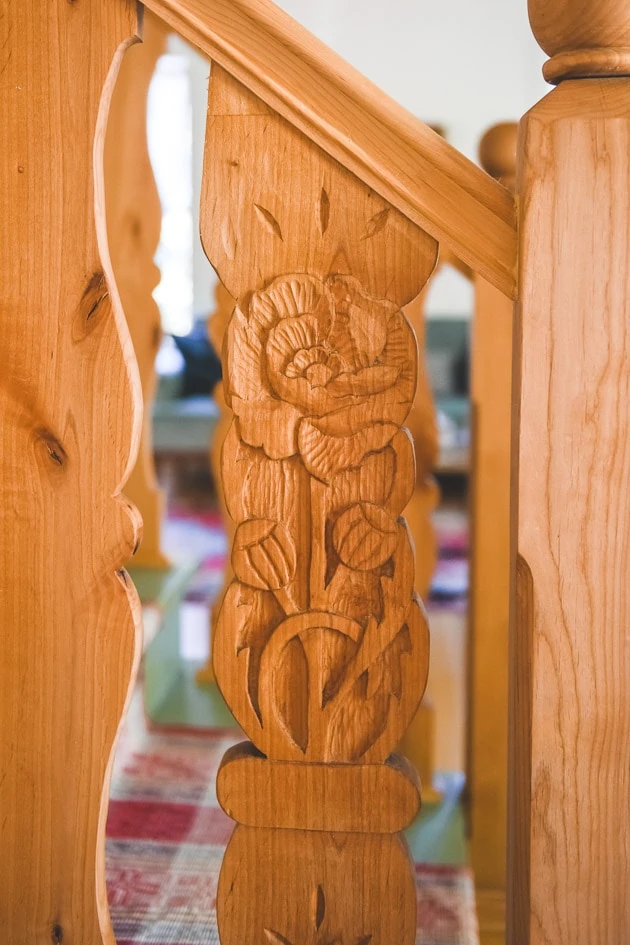
As you saw in the show, I chose flowers based on our birth months and their symbols because I wanted to tie in something personal.
- snowdrop for January for Jasper
- marigold for October for Paul
- June for me and Patty Sessions, my ancestor who we dedicated the house and show to
- Narcissus for December for Felix
- Poppy because I liked it 😉
- Tulip because I liked it 🙂
Staining the wood
When I received the balusters in person, I realized that the carved ones were going to be much thicker than the plain ones we were also using. I got nervous that they would really stand out so I had a local carver, Jessica Adams, come in and take down some of the thickness of it.
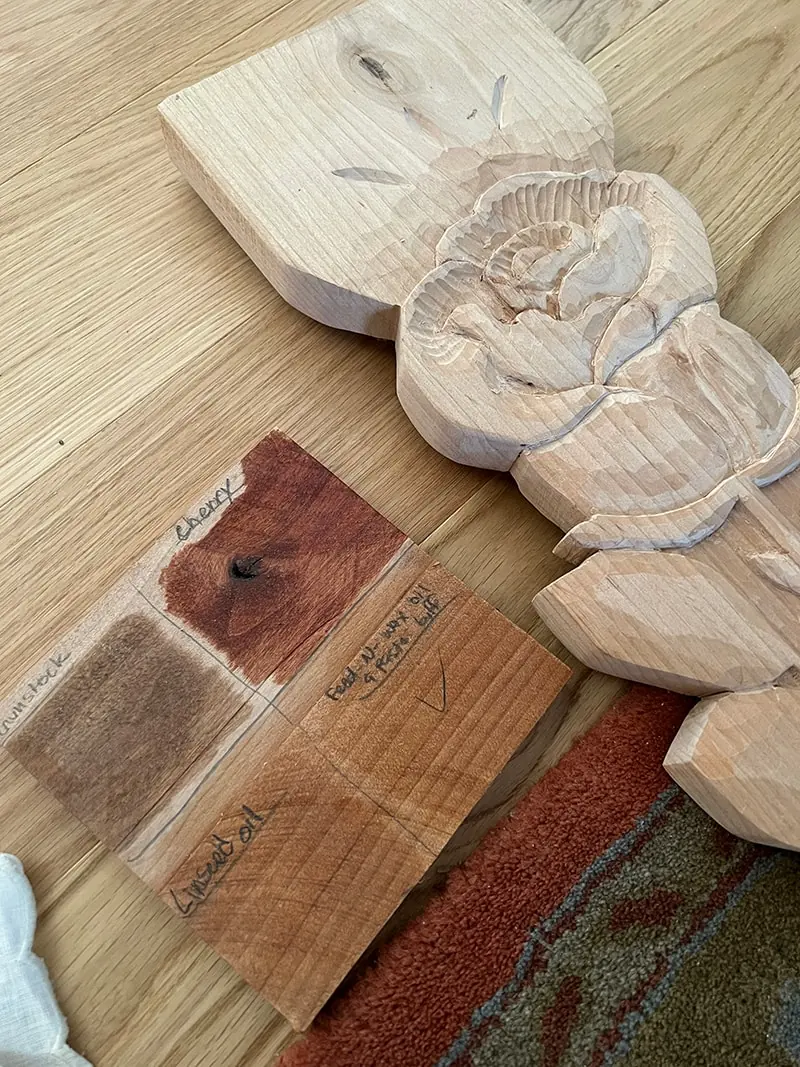
Jessica also stained them for me. She used a method of setting them by the fire so they would soak in the feed and wax and they came out very dark.
In fact, so dark that I got nervous about how they would play with the wood of the stairs. I talk more about that in this post.
However, I found out that over time they really lighten up. In fact, right now they are so light that it kind of seems like they weren’t stained at all. I’m considering trying out a different technique or maybe doing another onto them.
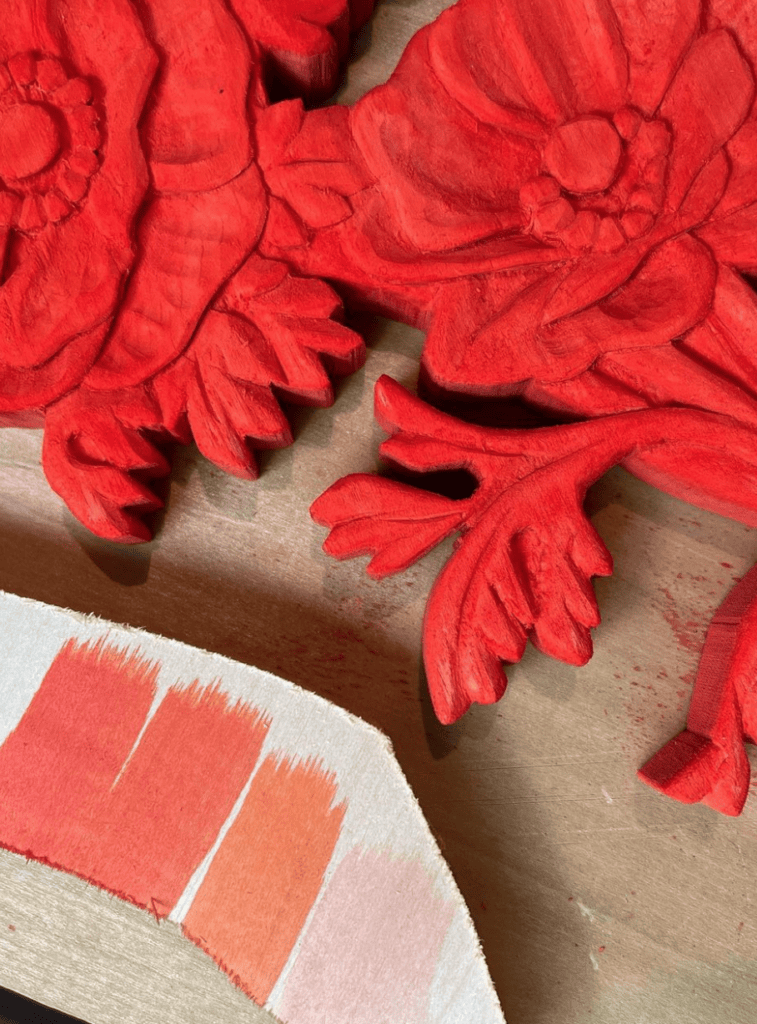
Staining them a color?
Jill recently shared on her Instagram how she stained another project in a bright red and this really got my wheel turning. Could you imagine?! I’d have to hold off on making this decision until I thought through the rest of the space, but you better believe that it’s on my mind.
Newel post
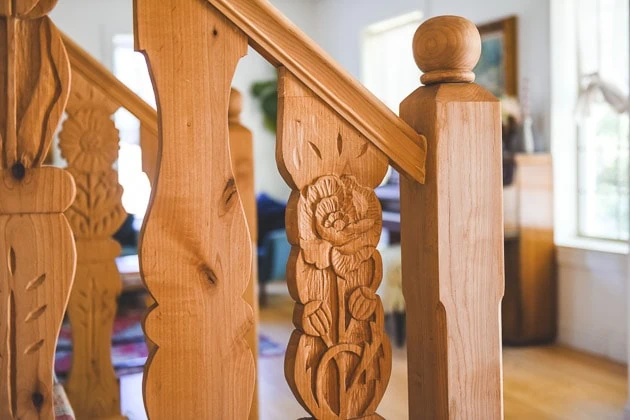
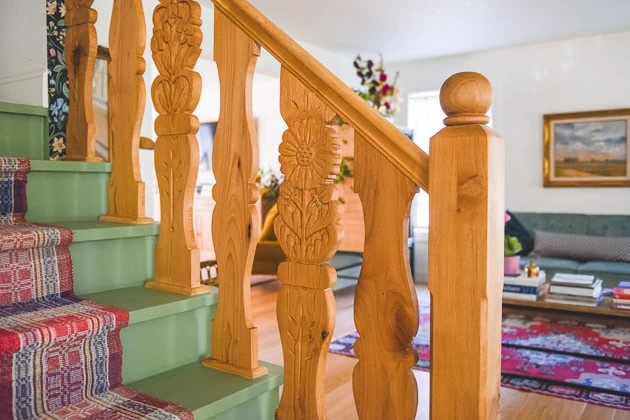
Before I share the final photos I want to share a bit about the newel post. The newel post is the post at the bottom of the stairs that is oftentimes more stately than the rest. Based on my inspiration, I was more attracted to something simple. Tanner and Quinn once again pulled through and made it happen. In hind sight, I may have taken the width to something a bit smaller, but I still love it!
I love the slight indentation on the sides which creates a slightly less boxy feel.
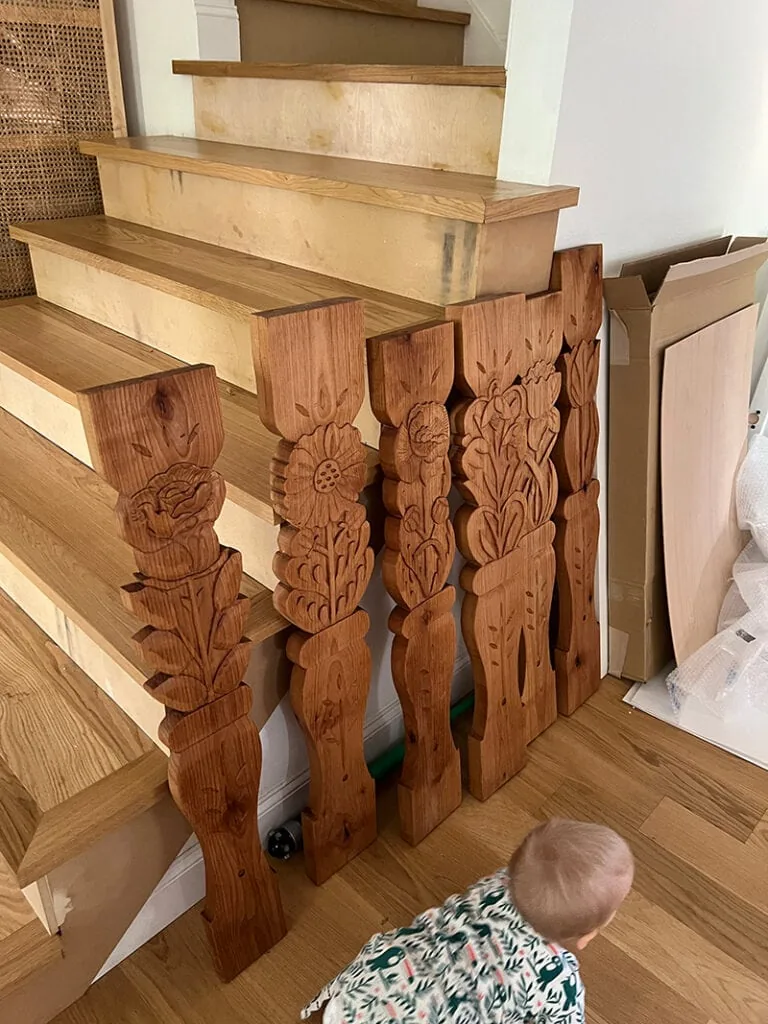
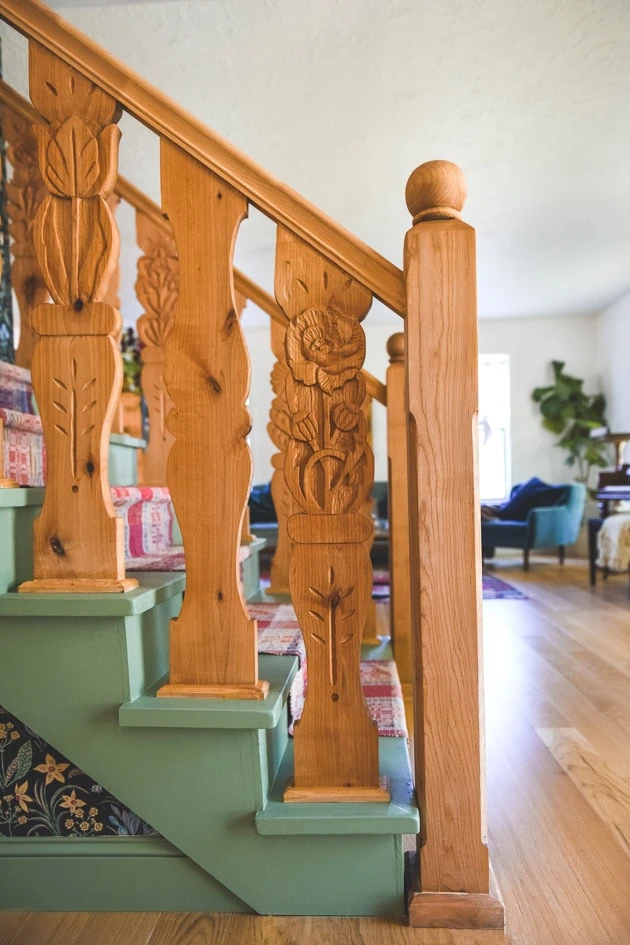
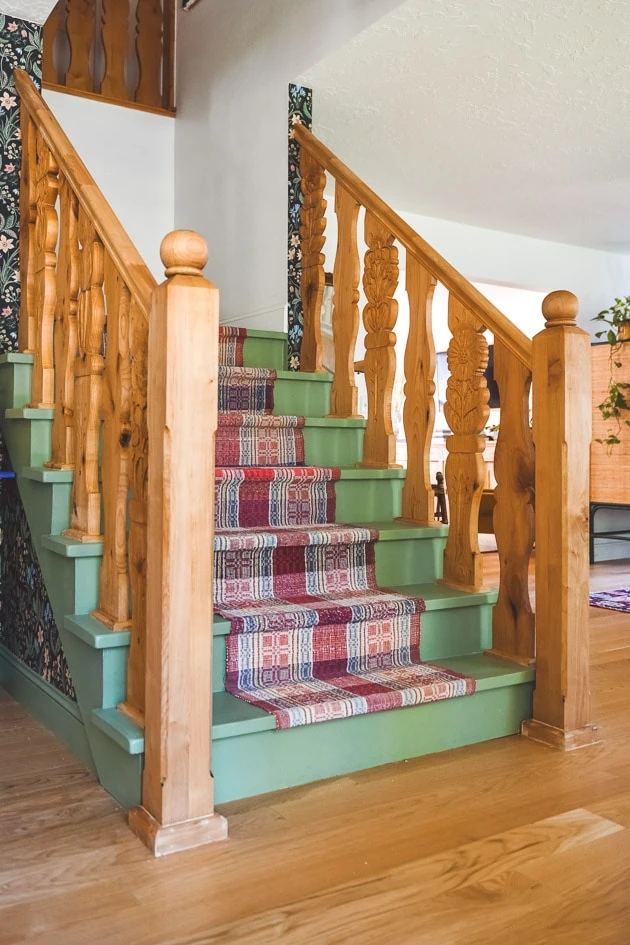
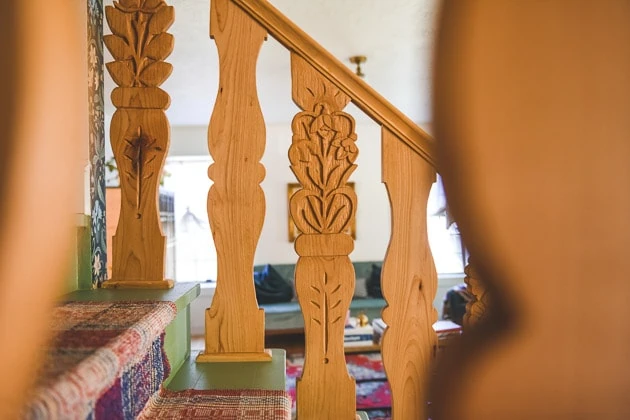
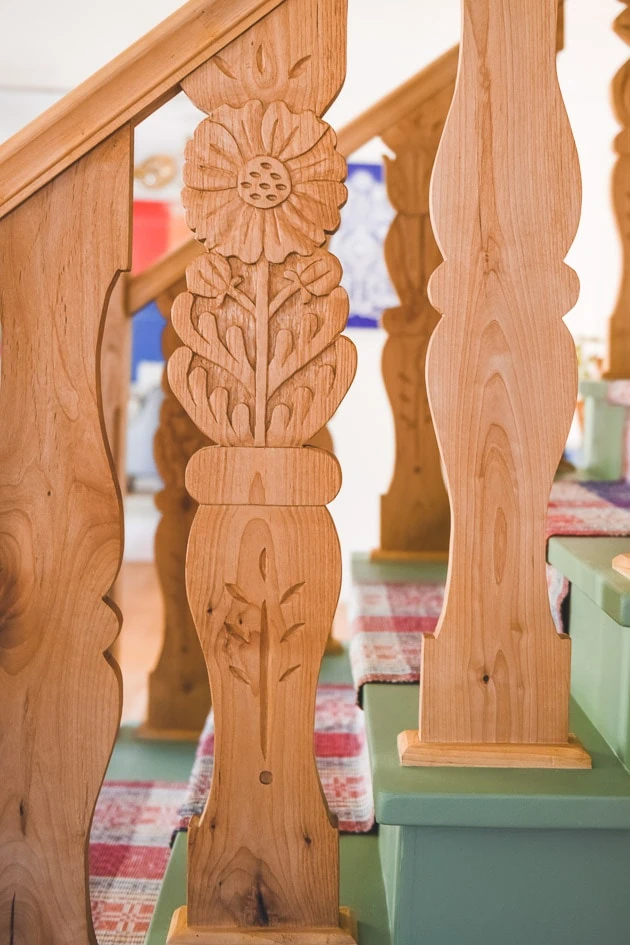
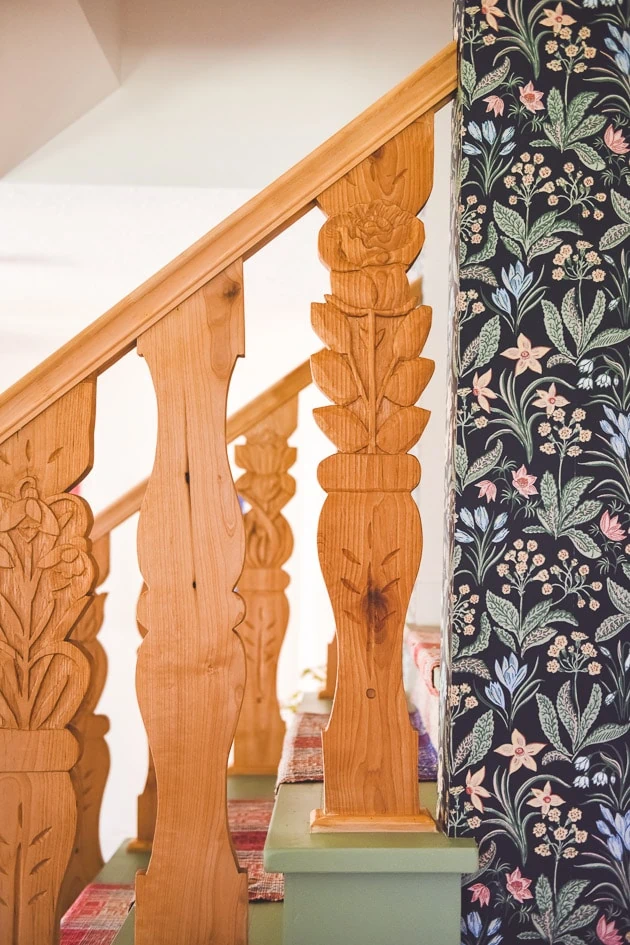
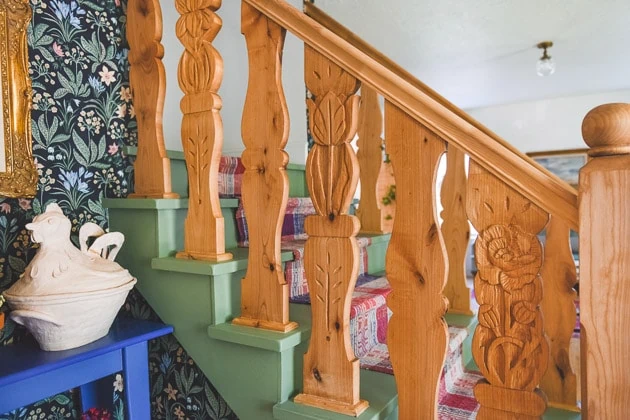
Floral carved balusters
Ok! Here are the final photos. I could share them for days, and I just might 😉
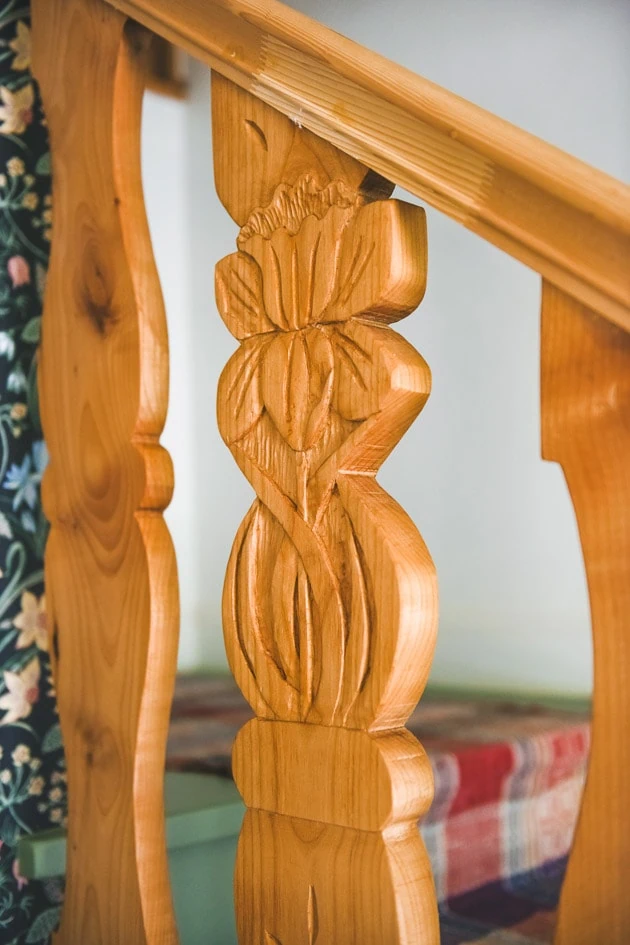
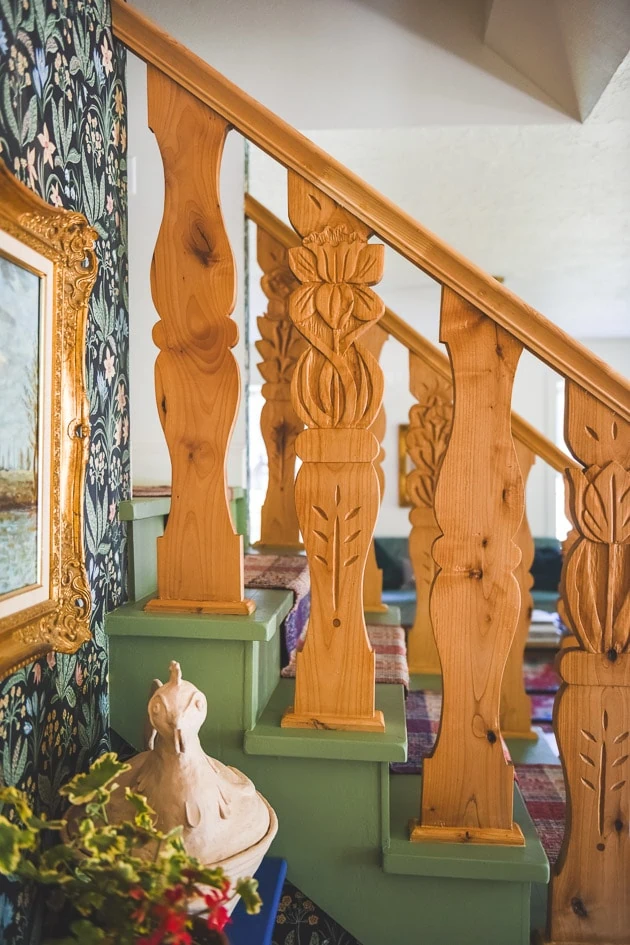
Well, there you go! Every single detail you could ever ask for (probably more ;). Jill did such an amazing job as did Tanner and Quinn. It was the biggest labor of love and I am so grateful for everyone who contributed to it. It’s really so remarkable. I can’t wait to finish off all the other spaces so they can really shine like they were meant to!
Let me know what you think!


Comments