

If you didn’t catch it, we were recently featured on the home renovation show In With The Old, on Magnolia Network. I’ve been doing a deep dive into each space we tackled and we are now onto the Scandinavian folk inspired staircase.
____________________
Click here for all the before and after photos from the home renovation
See the full kitchen renovation here
Read about the kitchen cabinets here
Click here to read more about the kitchen hardware.
If you’re interested in seeing the oven, click here.
See how we turned the fridge into a cabinet
Materials:
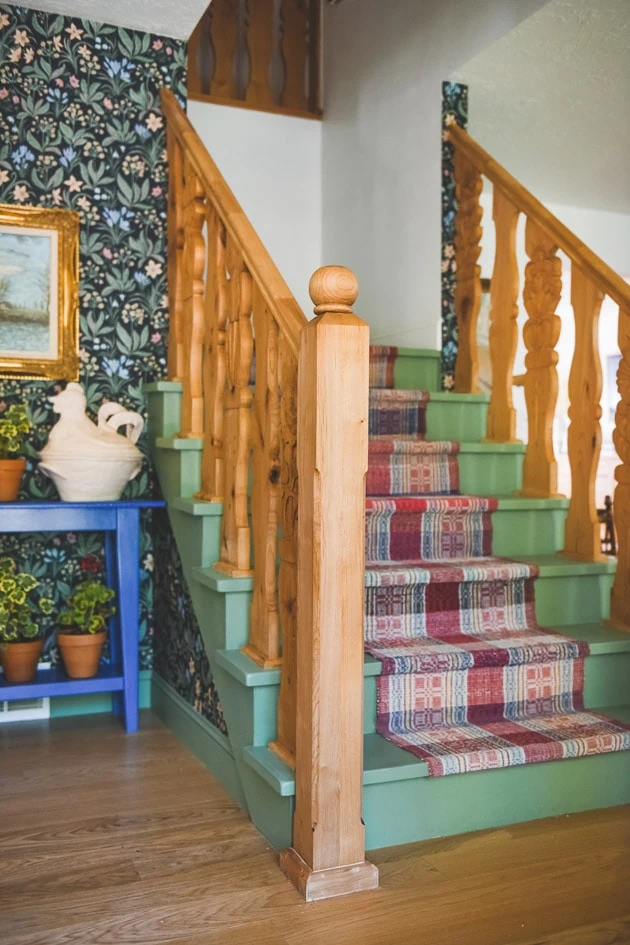
A Scandinavian-folk inspired staircase
As I’ve mentioned, when we moved into our home there was an existing staircase and banister, but we had to remove it when we put in the wood floors. It was all for the best though because I was hoping to replace it at some point. In the mean time, no banister + two toddlers could be a recipe for disaster. Once Felix started to crawl my nerves were a mess and I was anxious to get something in there but also hesitant to make any rash decisions not knowing the direction of any of the adjoining rooms.
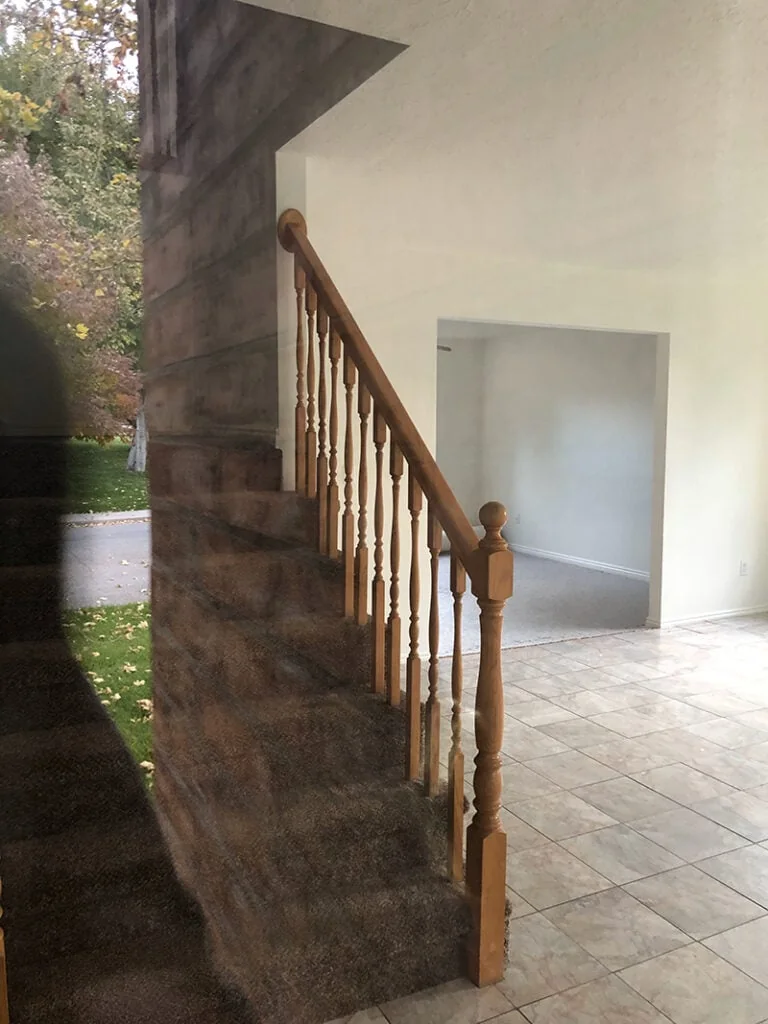
Here’s what the staircase looked like long before we ever owned it. I captured this one through the window when we were dreaming of buying it.
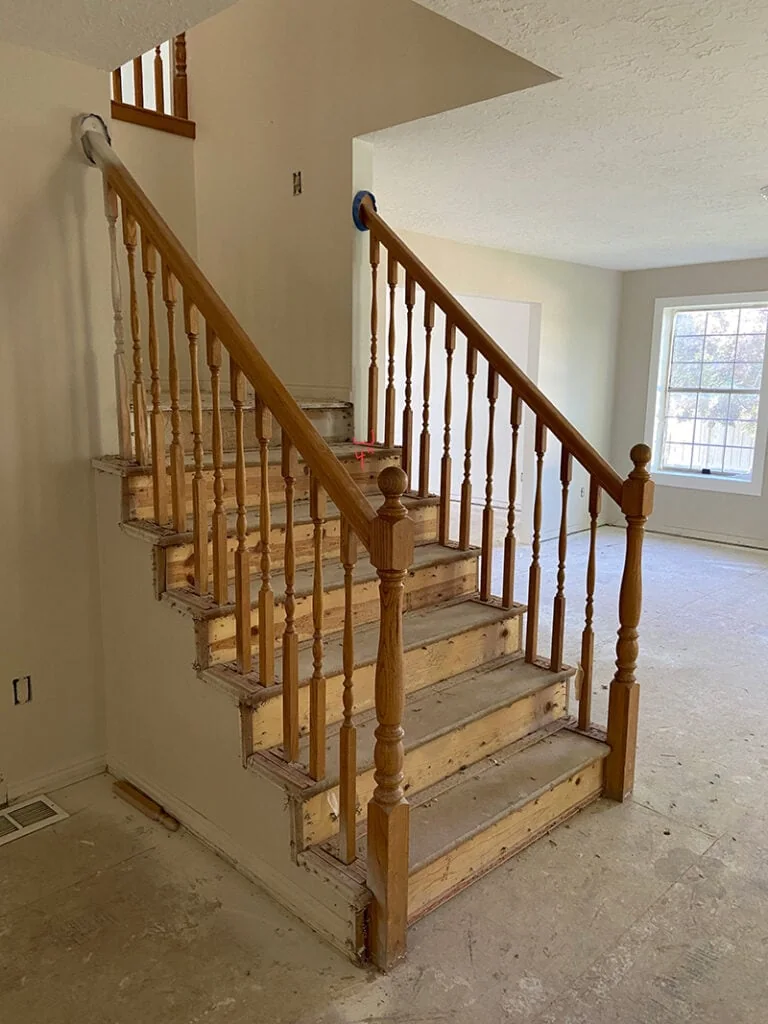
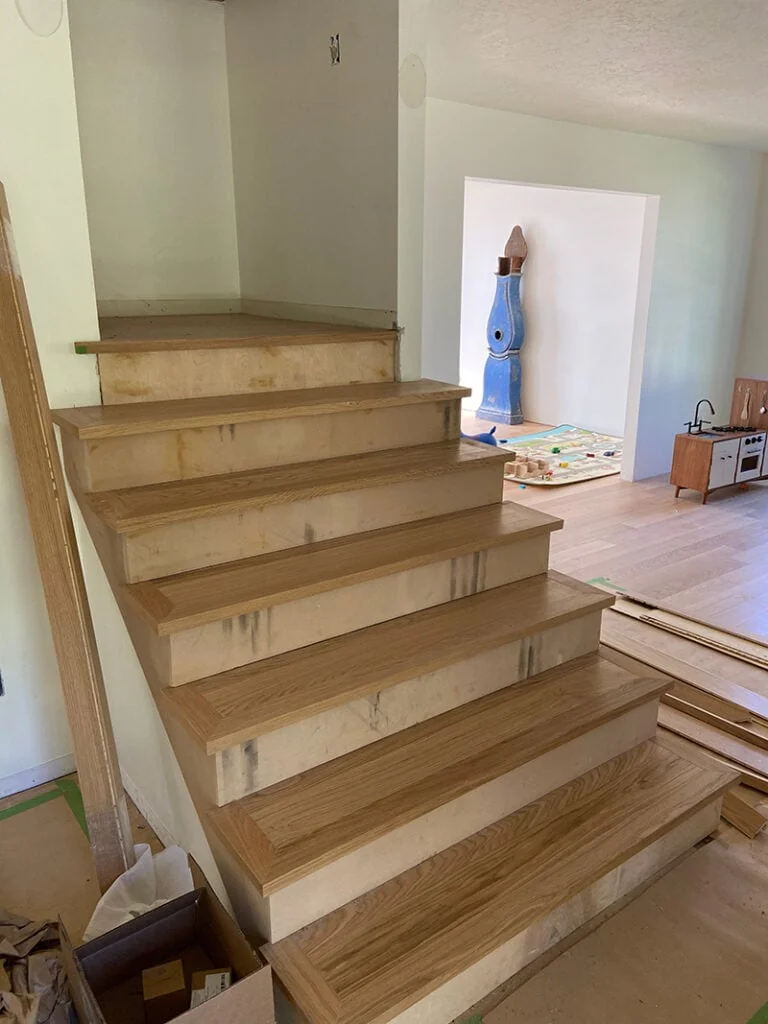
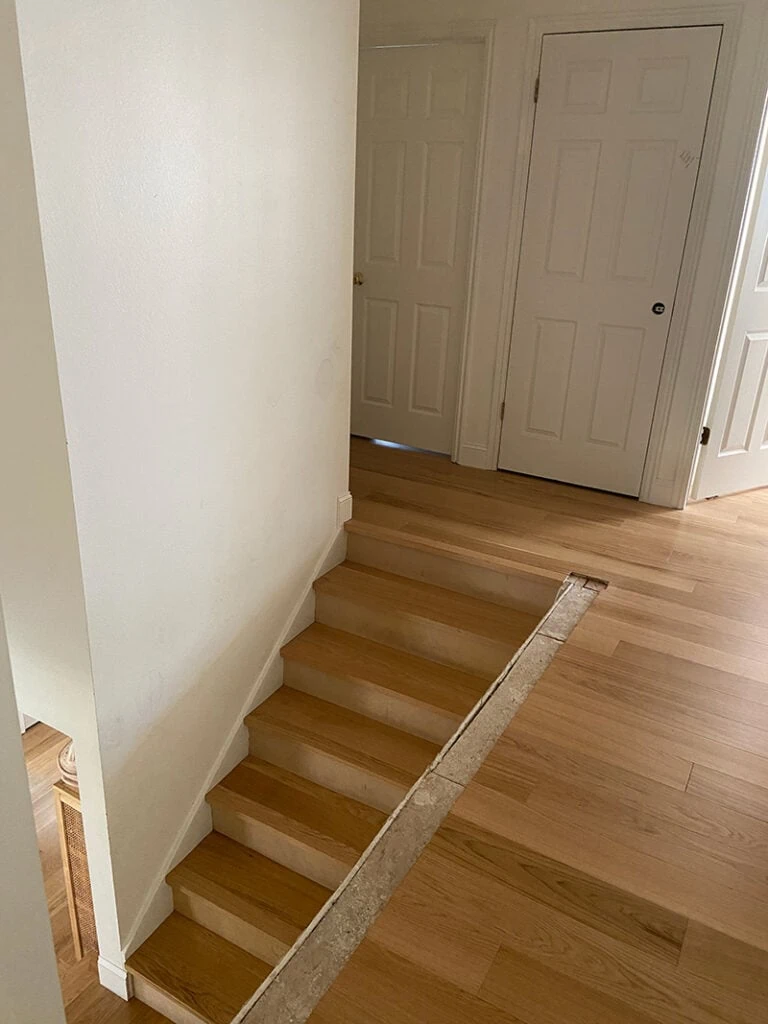
Here’s what the staircase looked like once we put in the floors
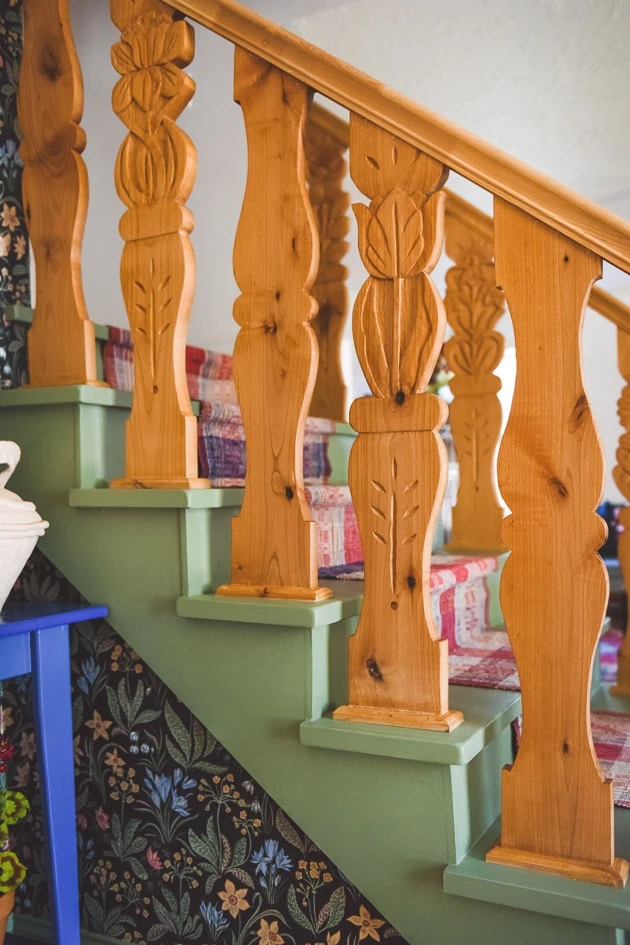
For the upper staircase, I got so desperate for personality in the early days that I used some leftover red paint from something and went to town. It was the completely wrong sheen and everything, but at least it had something going on. Please notice the missing baluster in the middle and think about the heads that fit perfectly inside. 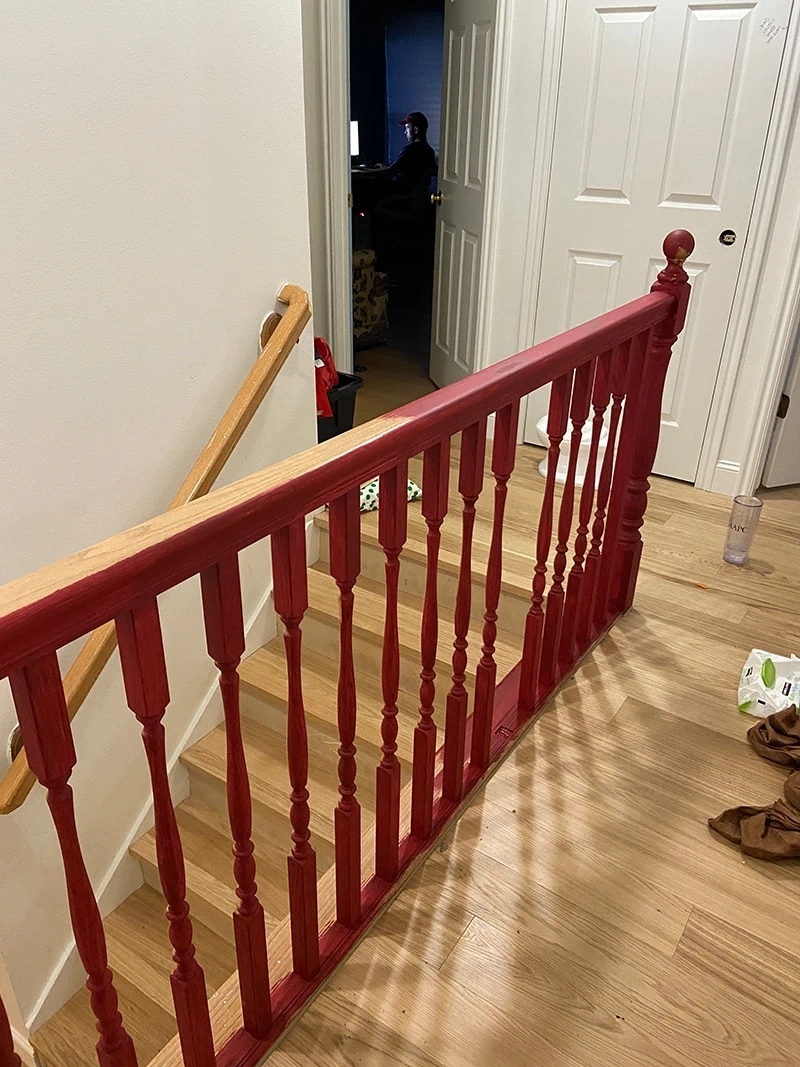
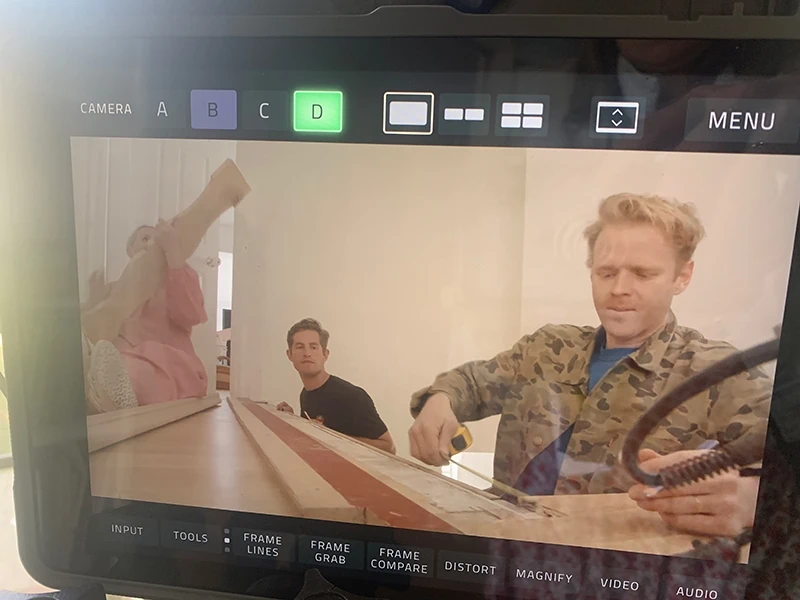
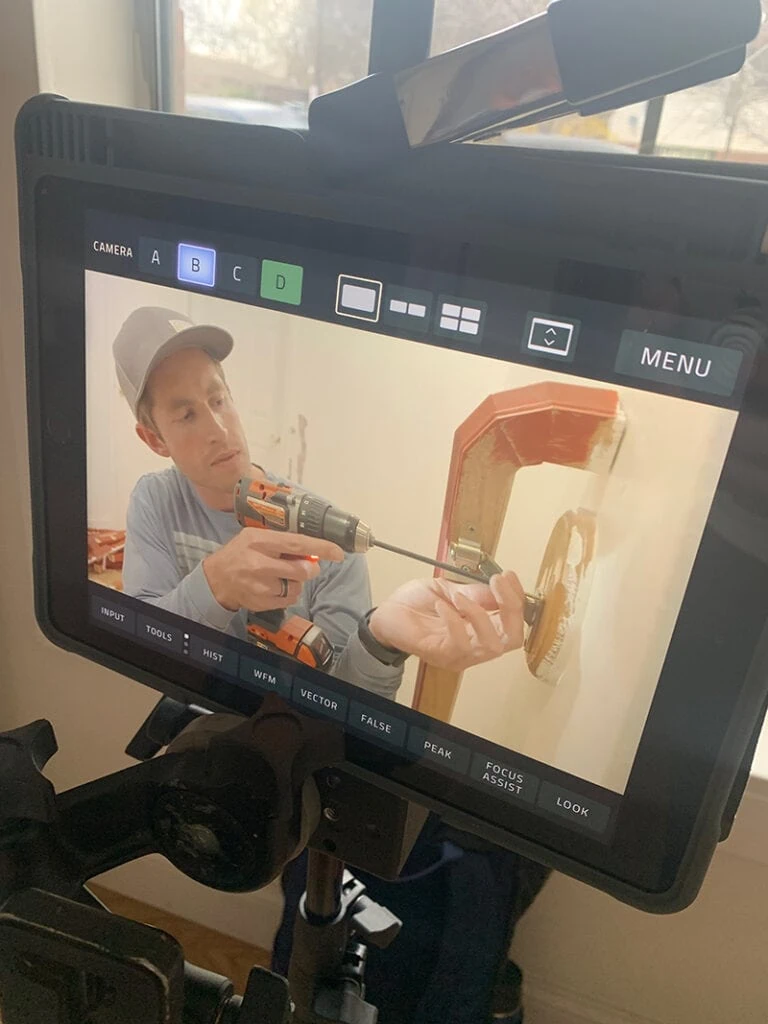
Here are some shots of the video we filmed of the day Zak and Tanner took out the banister. 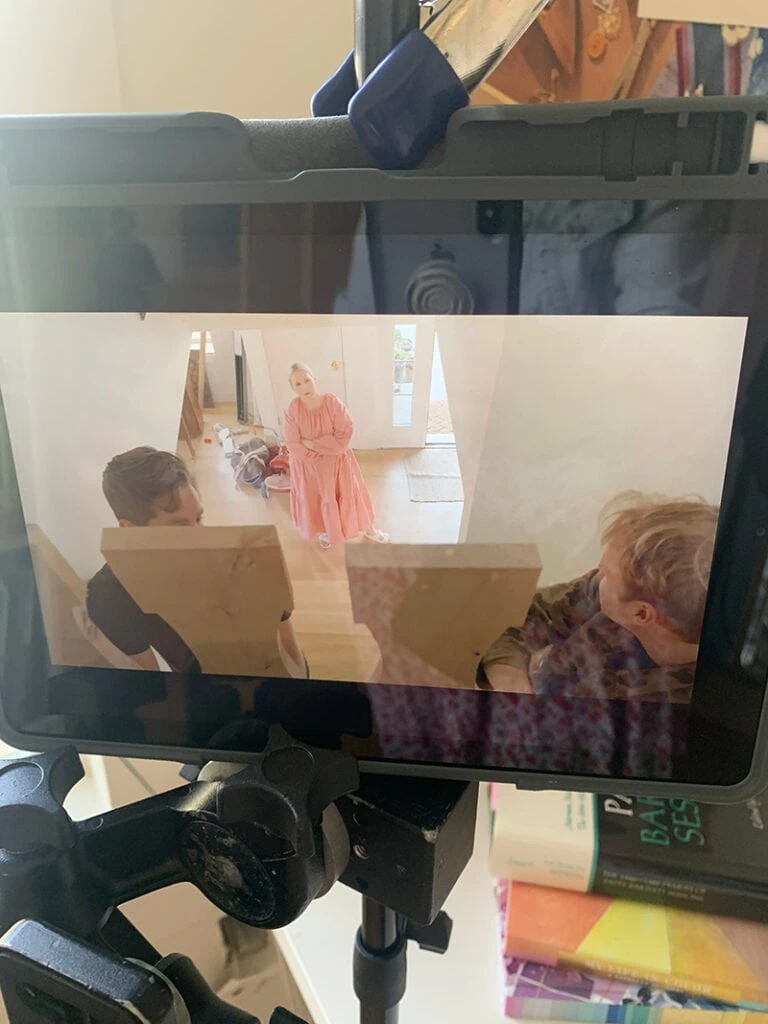
Removal
And this is what we were left with for a month or two. YIKES! 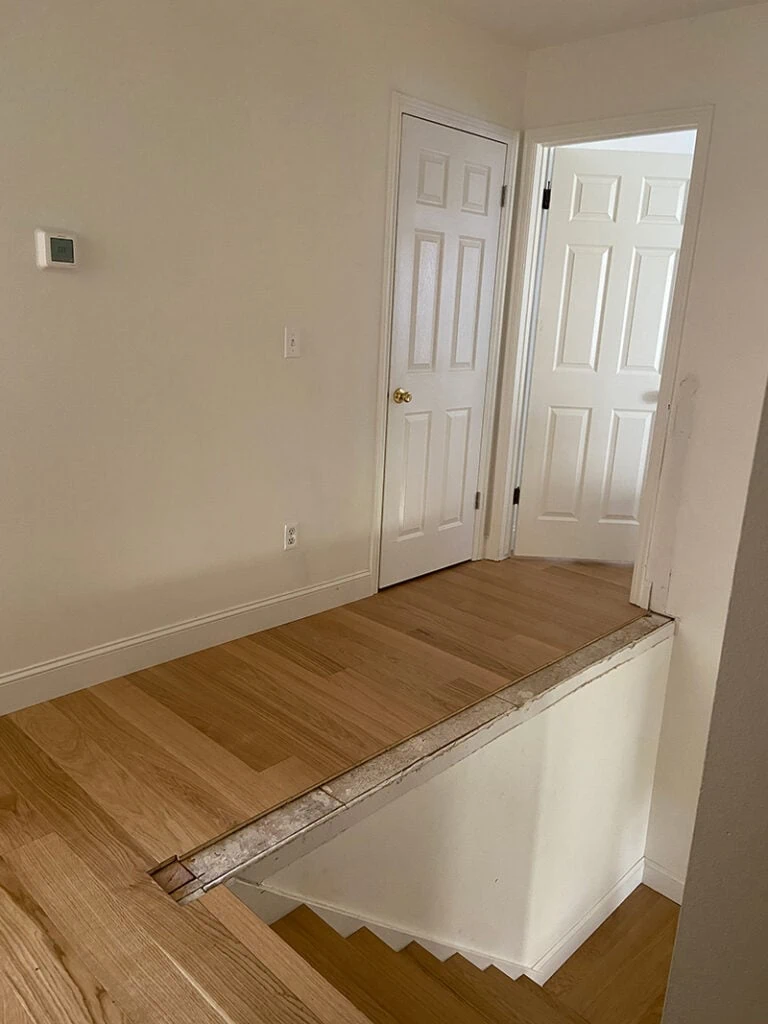
The plan
The show gave me the impetus to put something in faster than I was anticipating so I just went for whatever I wanted to do and let the consequences follow. Here was the plan:
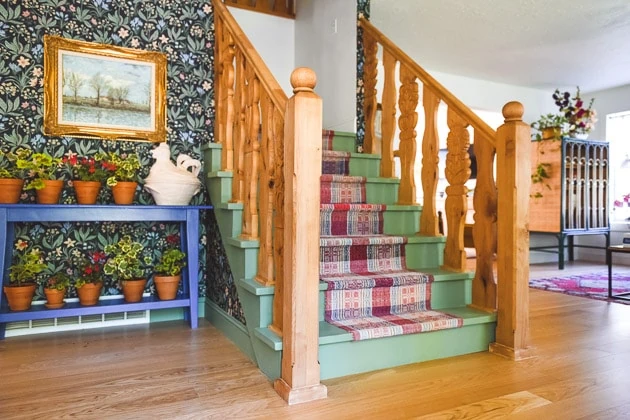
- Install a flat sawn baluster on the top and down the stairs
- Jill DeHaan to carve 6 of them to go down the stairs
- Tanner and Quinn to cut the shapes and install the banister
- Install wallpaper on the two walls
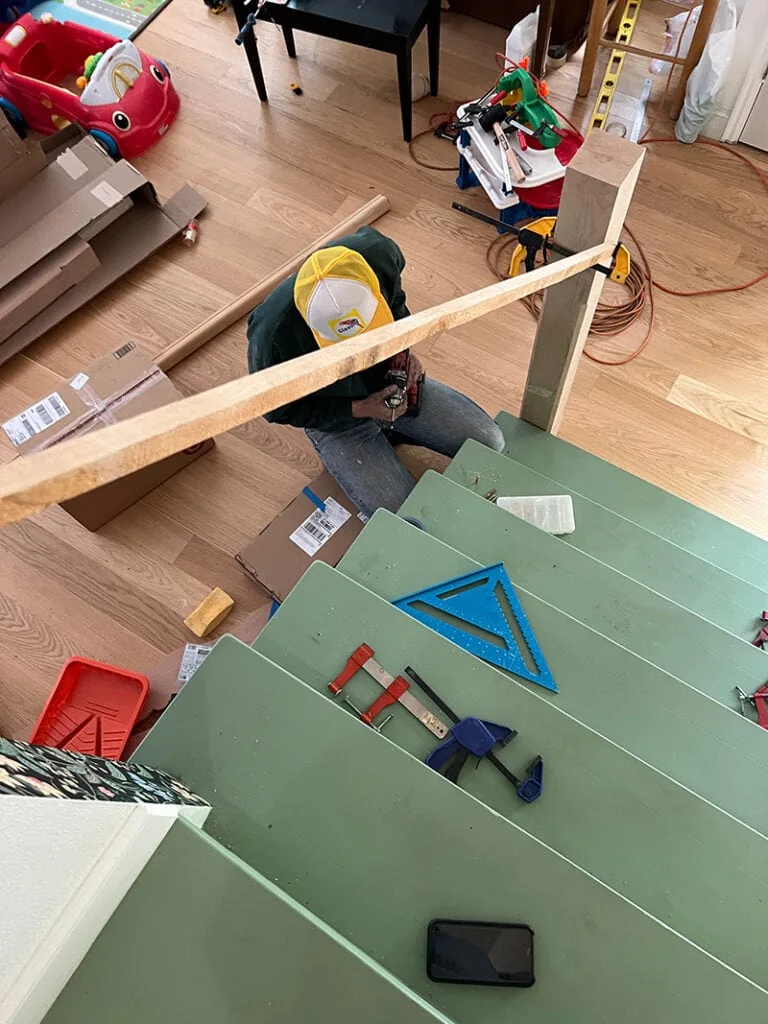
Install flat sawn balusters
I showed the idea to the guy who knows how to make anything happen, my brother in law Tanner Boyes. Tanner is talented at pretty much everything but right now he is working on designing and making his own car and restoring vintage Porsches called Specter at his studio, Specter Design. As luck would have it, he has installed staircases before and he graciously offered to do this for me. And much like all projects I put out into the universe, it was a much bigger project than any of us were anticipating.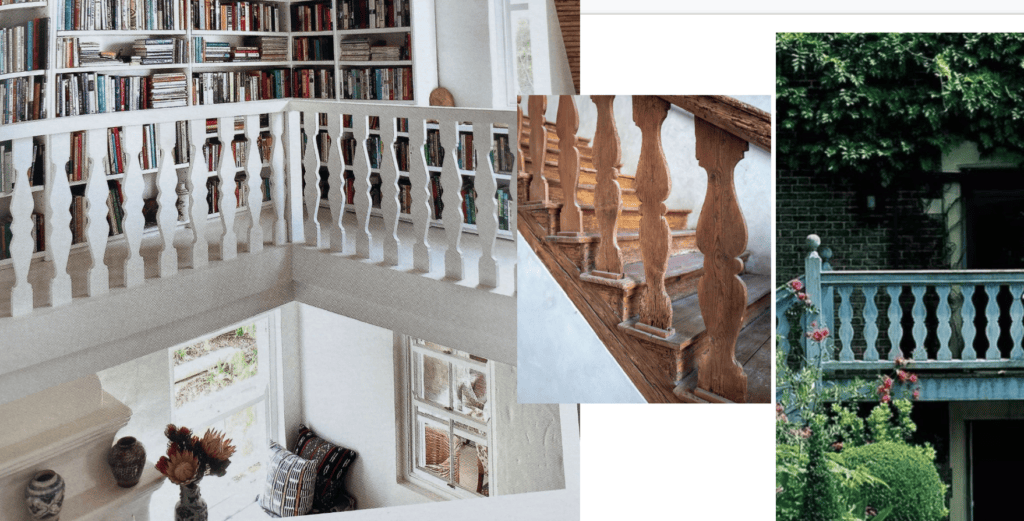
Inspiration
Here’s what I started with for inspiration. I wanted a rather simple shape along with a newel post at the bottom that felt super simple. It felt super folk at the same time.
Selecting the wood
Thankfully, Pat’s husband made guitars and owned a guitar shop so she knew her wood species. Together we went up to Salt Lake to figure out what type of wood we would need to use. Here’s Pat in “figure it out” mode. 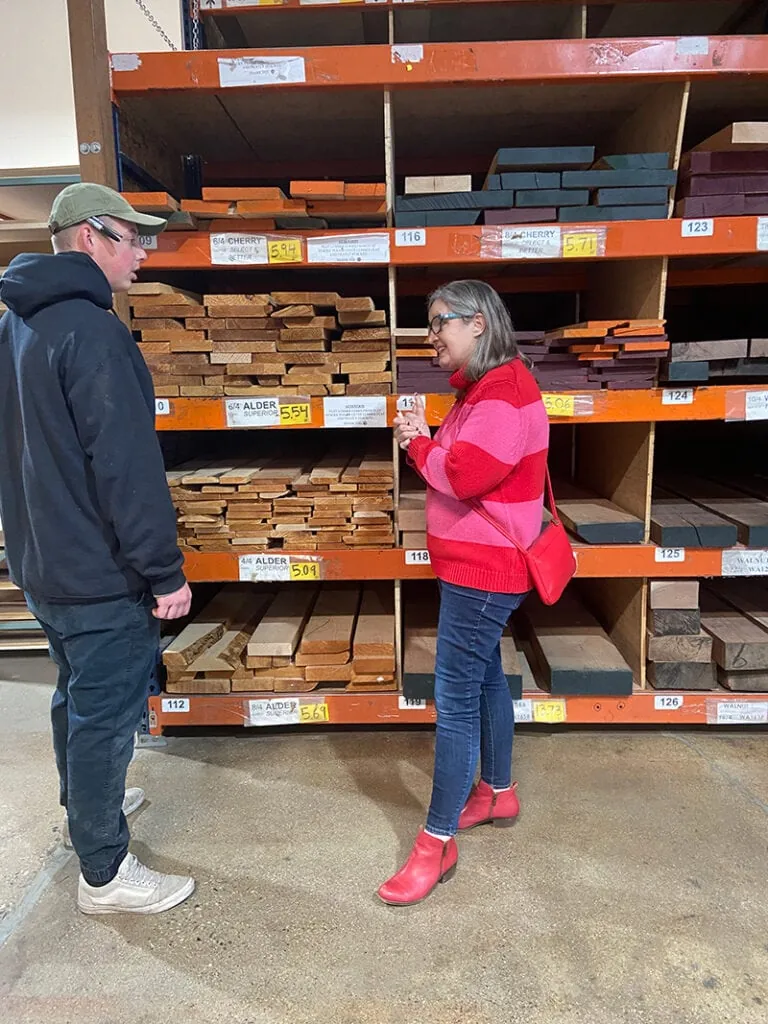
And Felix came with us on multiple trips. I’m trying to think why I had to go there so many times, but it became a once a week trip for a few weeks as I sent Jill a sample so she could see if she could carve into it or something went wrong with the others. We went with an alder, something soft enough to carve but sturdy enough for a banister. I didn’t mind if there were knots in it as I thought it kind of added to the look. 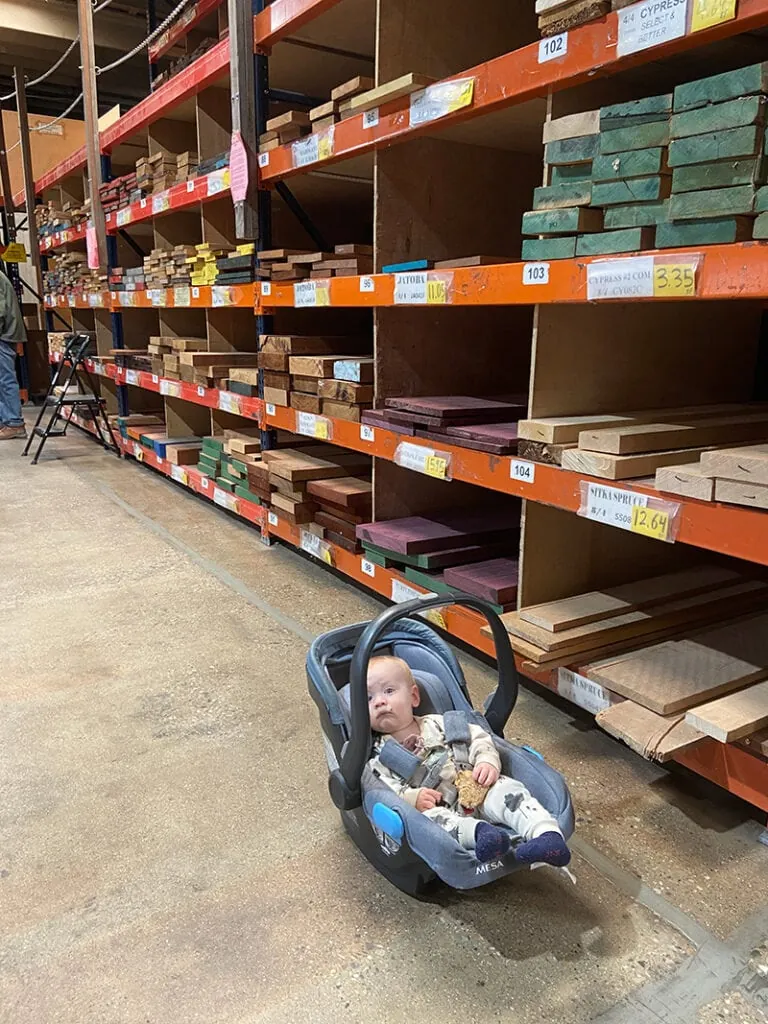
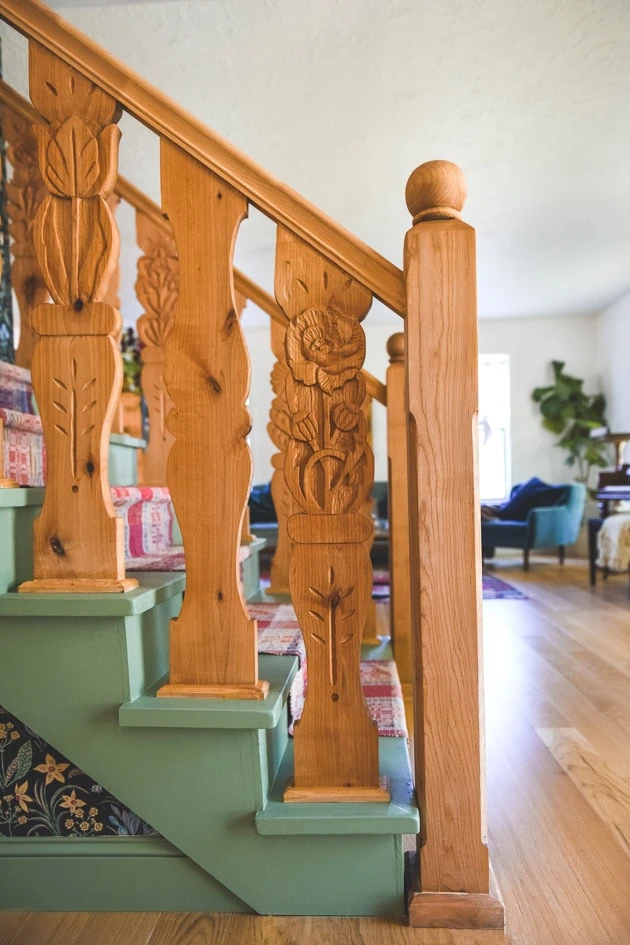
Folk-inspired balusters
I’m going to do a separate post about the creation of the balusters tomorrow because there were a lot of great details that I want you to know about. But I’ll give a brief summary here.
I brought in a design and Tanner made a template to cut them out. Here it is taking shape. Pun intended!
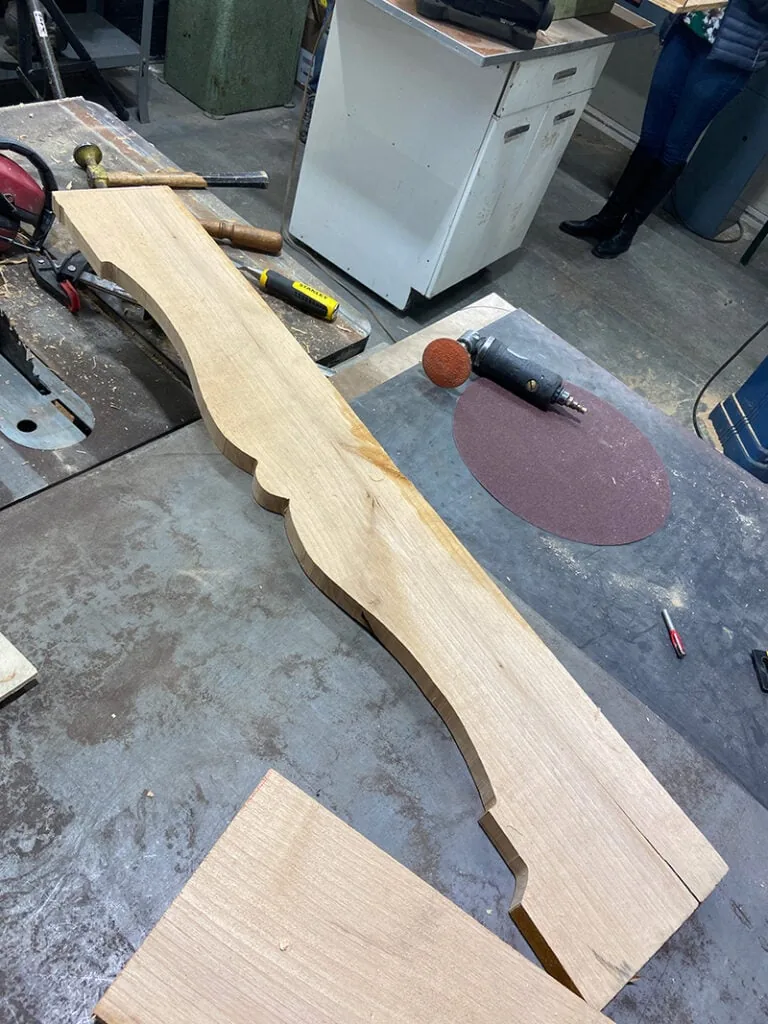
After working out the shape back and forth, we landed on these cut balusters. 
Carved balusters
Then I got the carved ones back from Jill DeHaan and they were out of this world dreamy. I mean, look at these. Jessica Adams oiled them for me and all of a sudden I realized how much wood was going on in the house–the floors, the balusters. For me, it was too much. 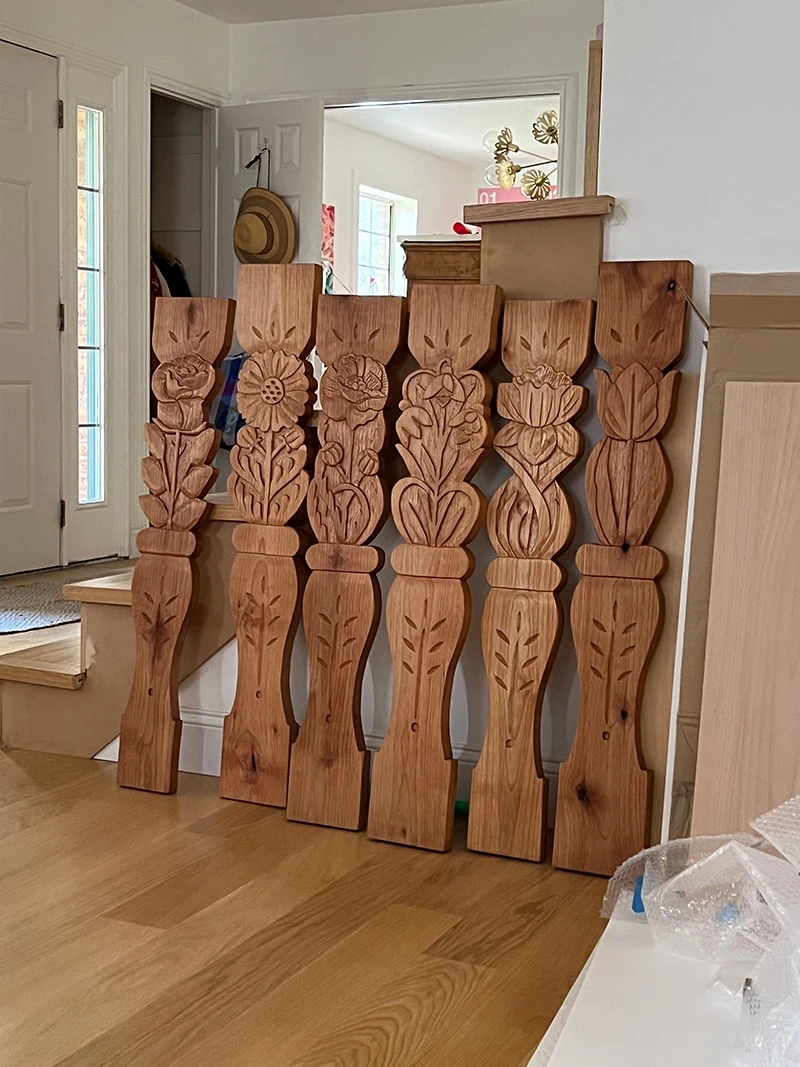
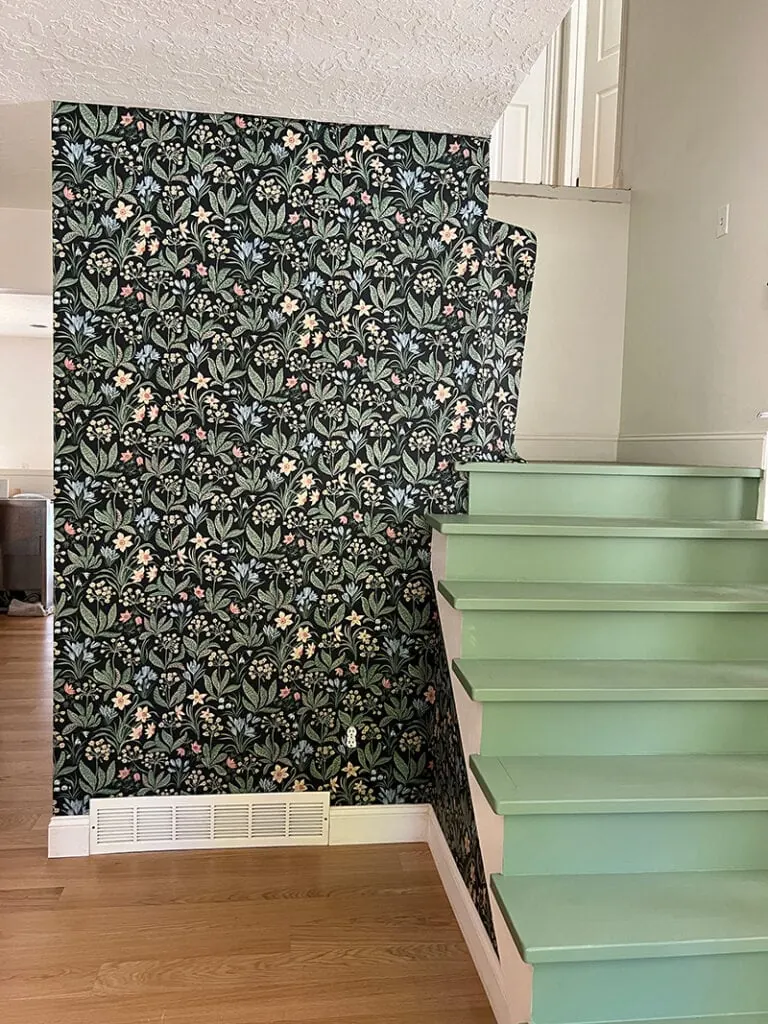
I felt like we needed to break up the wood of the balusters with the wood of the floors so I added in another project: paint the stairs.
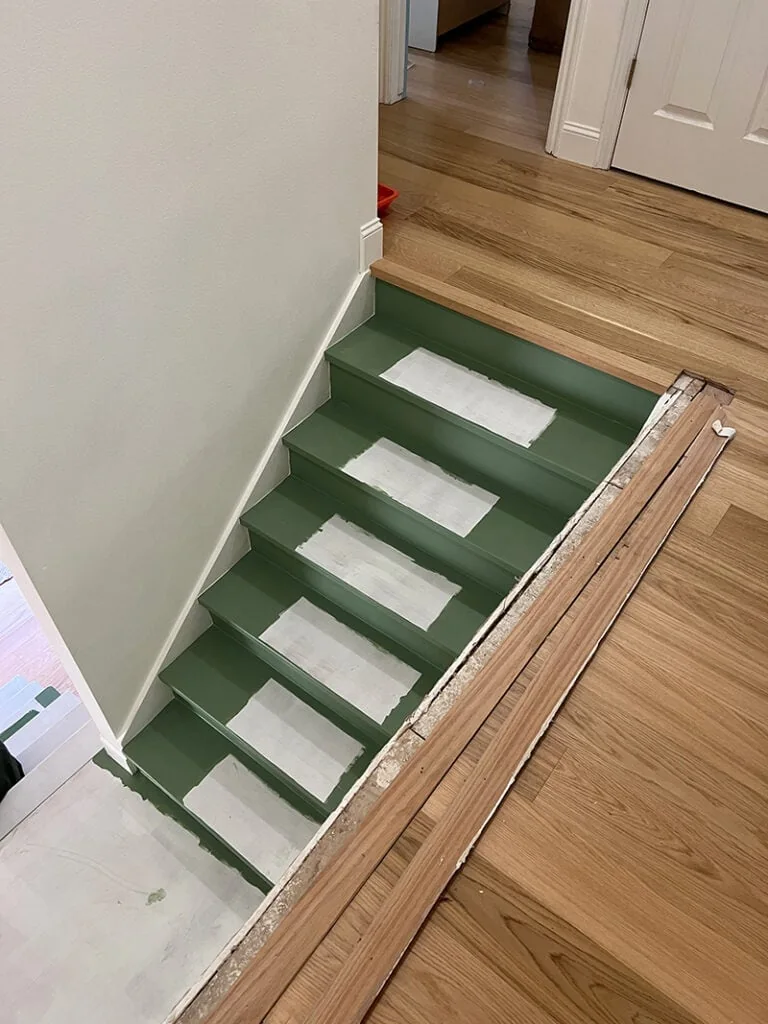
Painting the wood stairs
Pat once again put on her Handy Nanny cape and came to the rescue by priming the stairs. The Stuga wood had a finish on it so they had to be lightly sanded before they were primed. 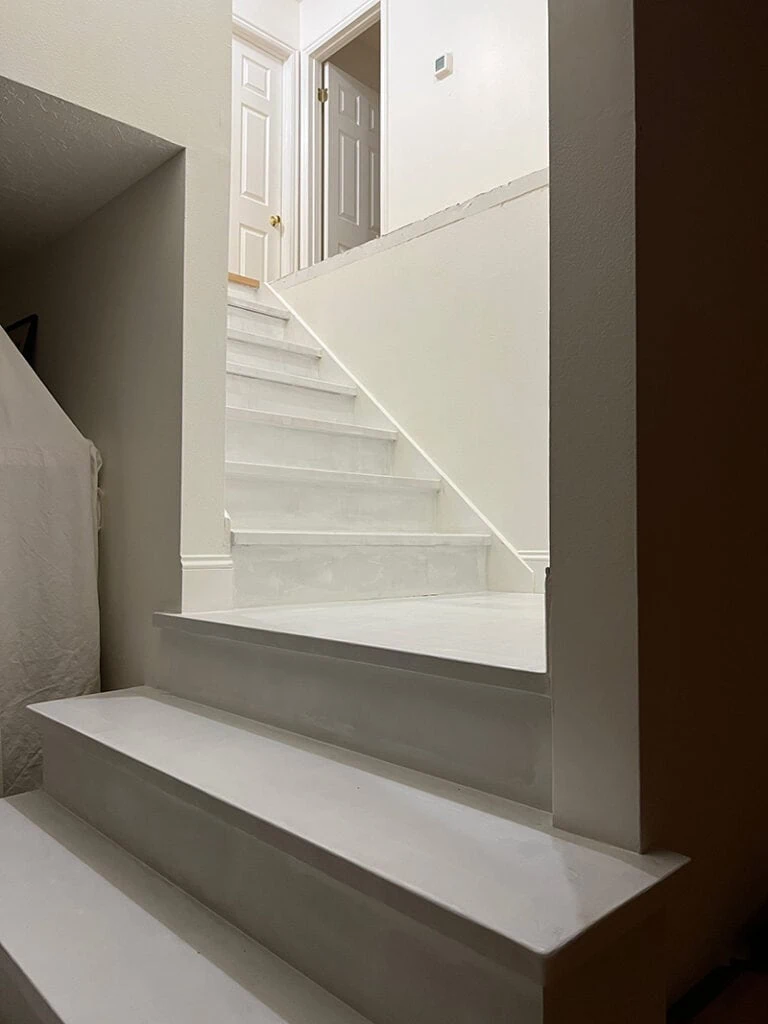
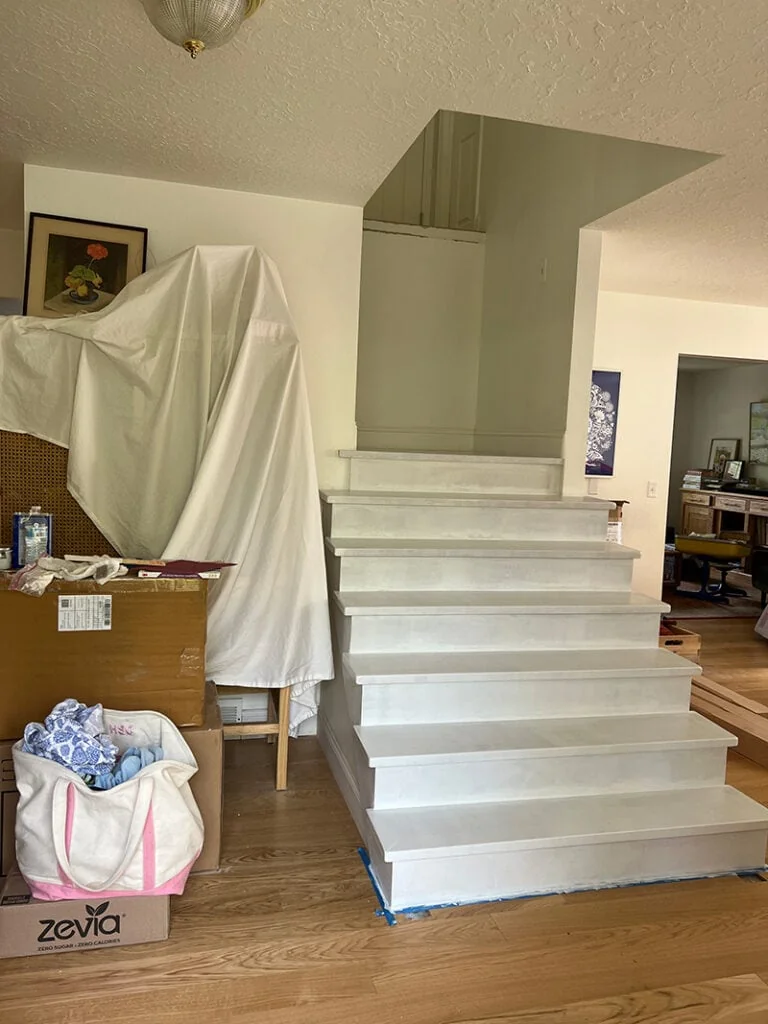
I know I keep on mentioning how fast the decision making had to be, but I can’t underscore it enough. Especially since time was running out and I had added in additional steps like the painting of the stairs which tacked on a few days.
Selecting the color
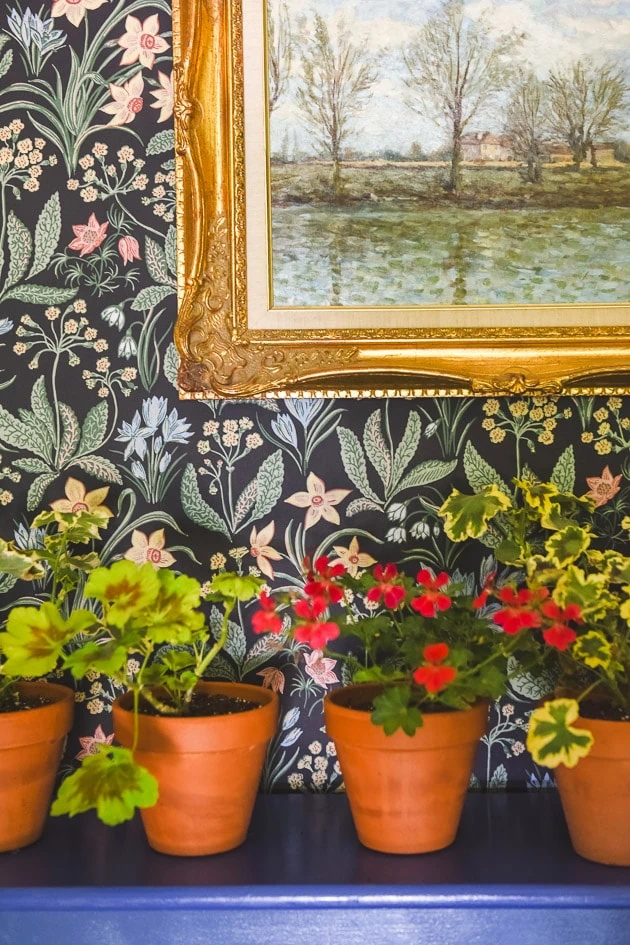
For the color, I needed something that would go with the wallpaper I chose (actually I can’t remember which came first). I looked to the wooden sign that my mom had hung at her French country furniture store in the 80s and 90s. It was called En Provence and it was on Pacific Coast Highway in Corona del Mar. It was the loveliest shop of all time. 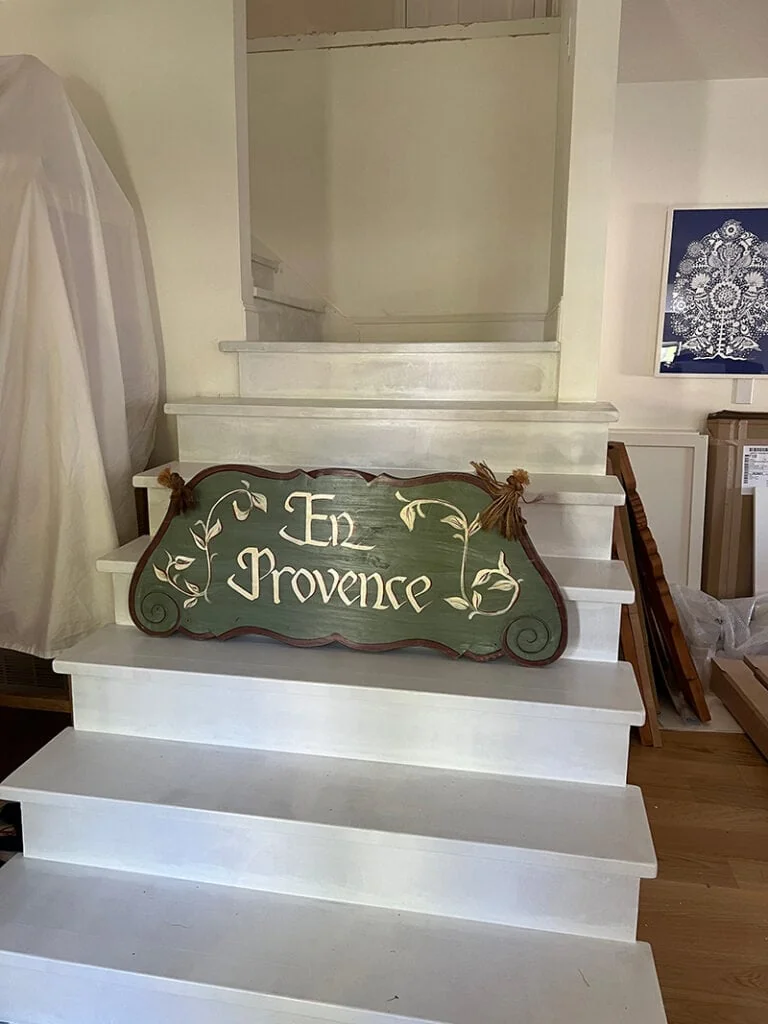
My uncle made and painted the furniture like he had this sign and I wanted to mimic the same color so off to Ace Hardware once again for paint samples once again, a weekly adventure. 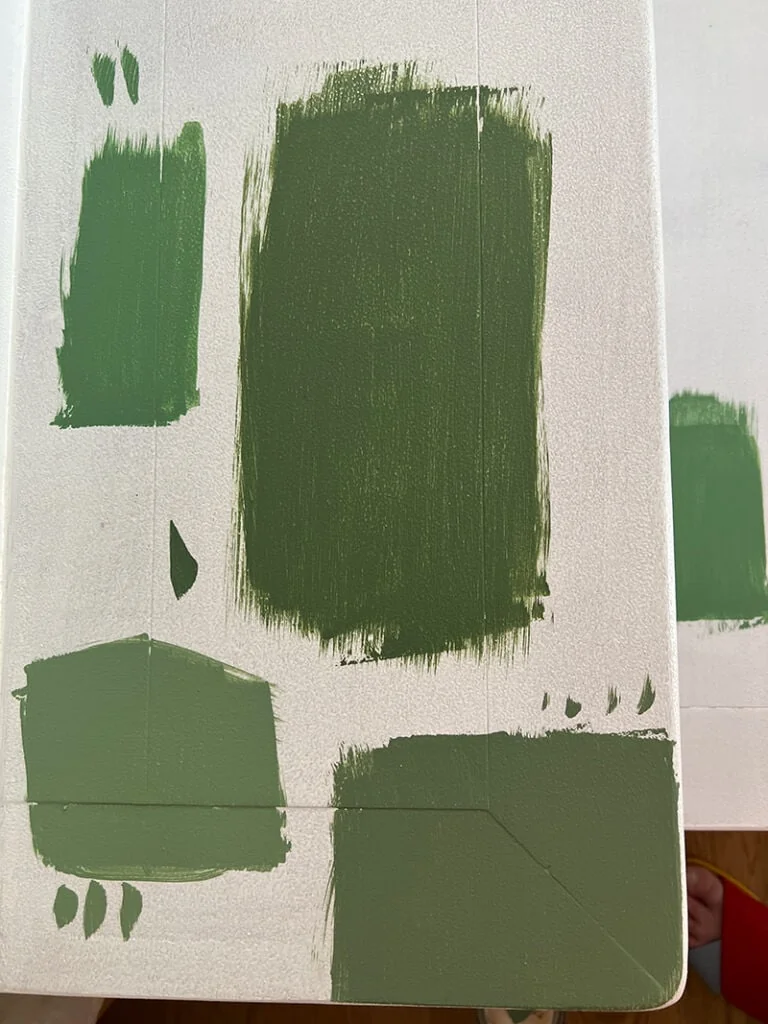
And Pat got to painting the stairs the green. I think its the one on the bottom left. 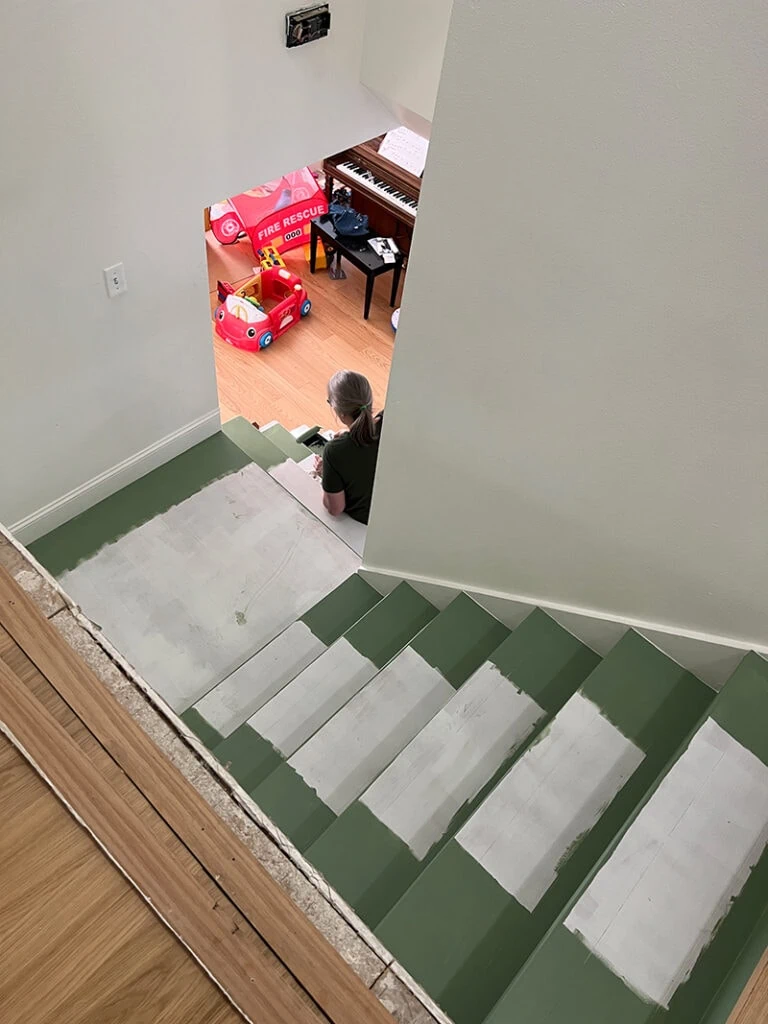
And then she added in the wallpaper, which she was really getting good at.
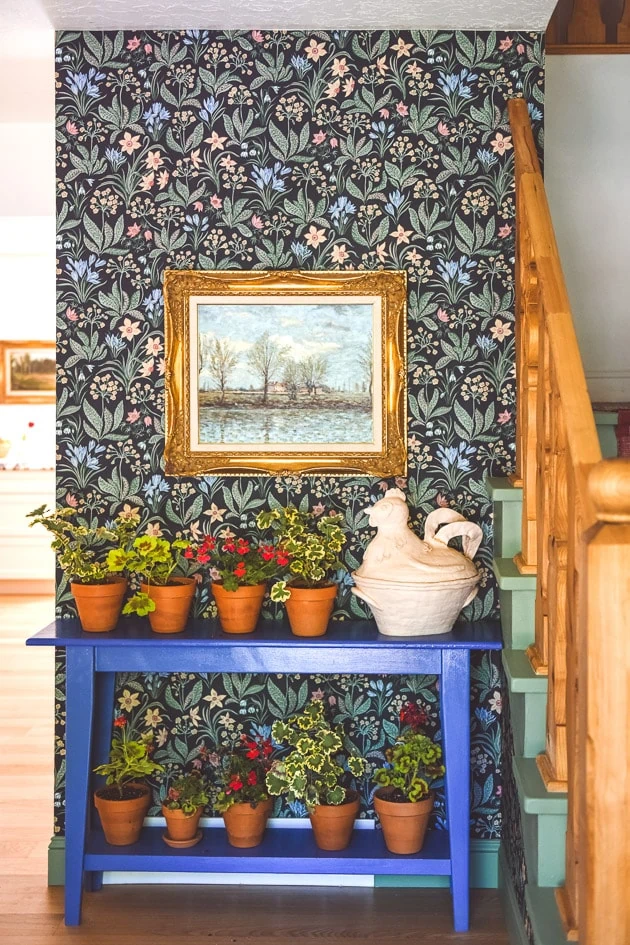
Scandinavian inspired wallpaper
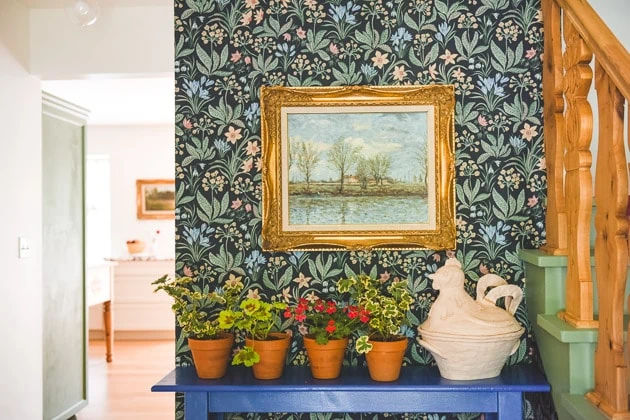
I looked at a lot of wallpaper options and decided to lean into the floral motif. I found this beautiful floral wallpaper inspired by Swedish artist, Carl Larsson from Sandberg Wallpaper out of Sweden. I’ve been a huge fan of Carl Larsson since I was a girl and it definitely felt like a full circle moment. They have a great collection of wallpapers inspired by his home.
Next, it was time to install the balusters, which was rather tricky. Quinn Peterson is another guy who just knows how to do it all and came to help out Tanner. I don’t know what sorcery they used, but they figured out how to install the balusters 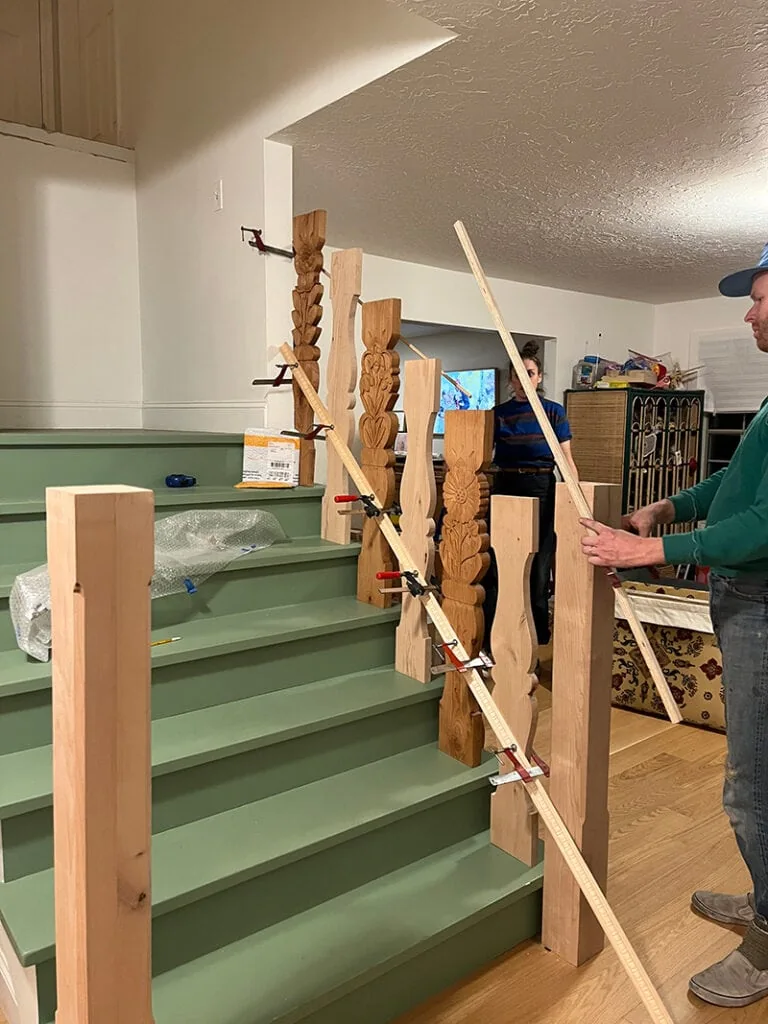
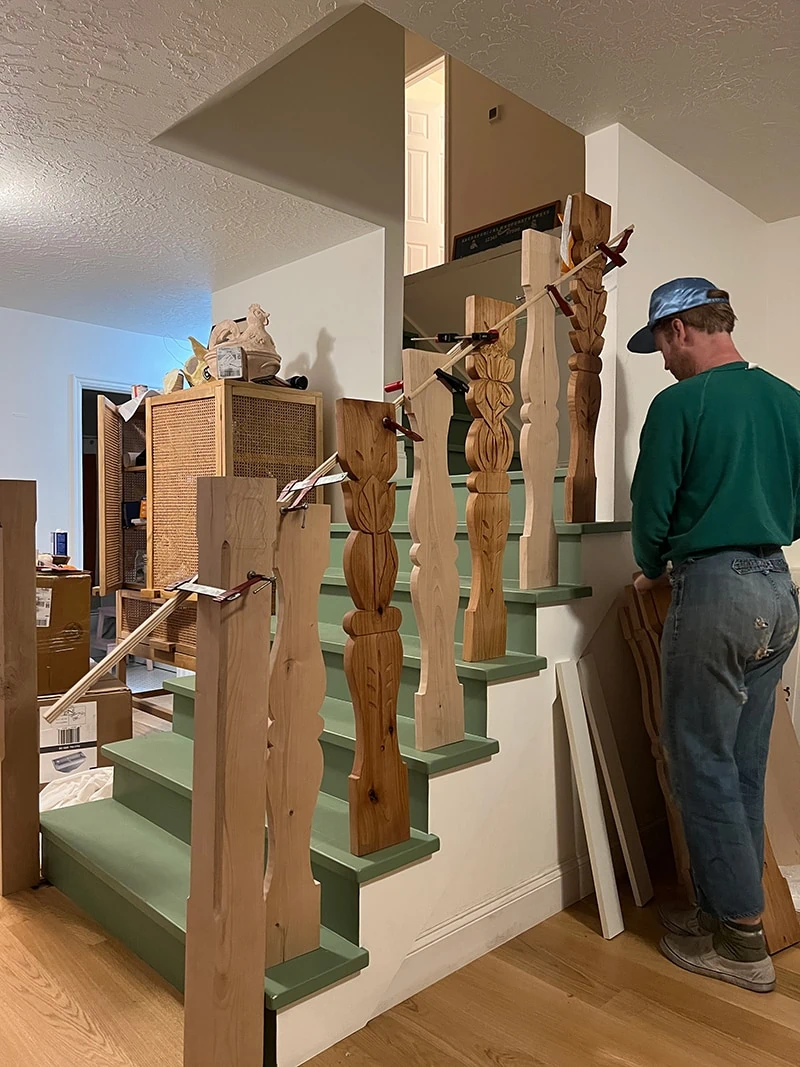
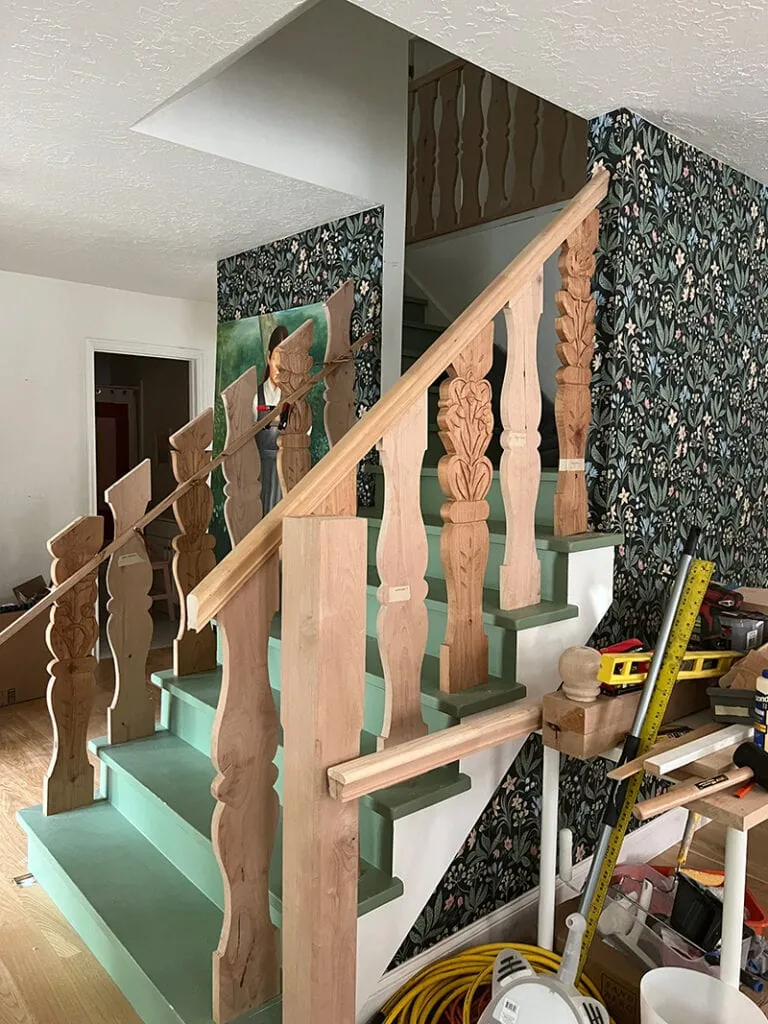
The newel posts where in and it was really starting to feel sturdy. 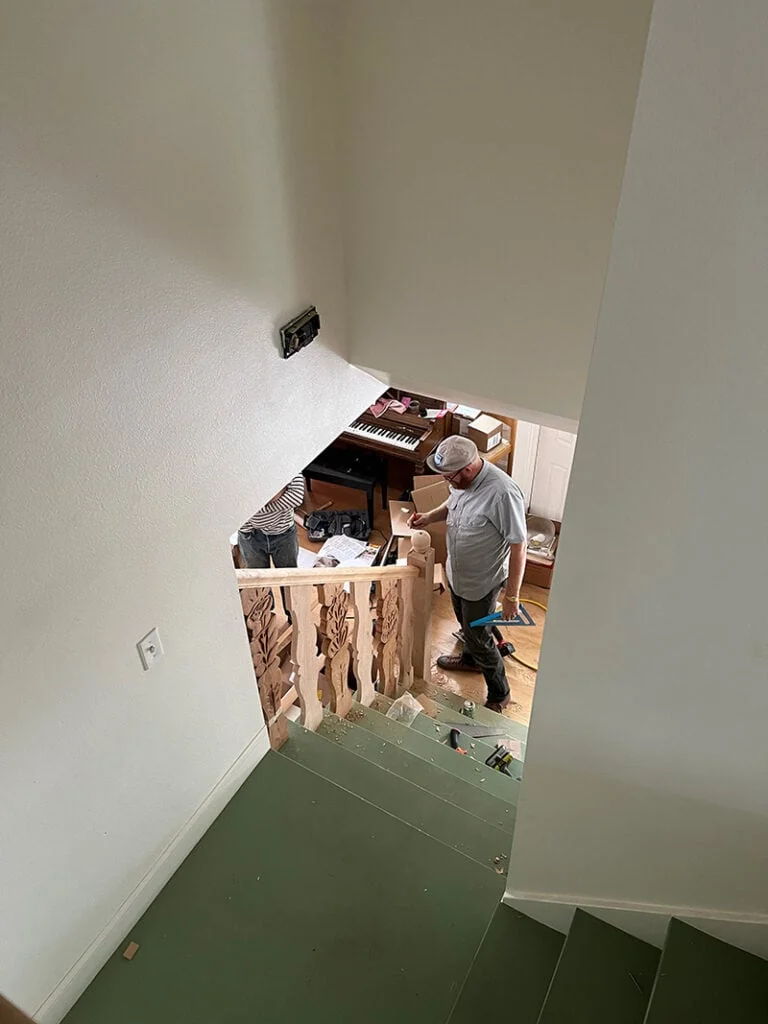
You can see that the carved balusters were stained first so the coloring is off. 
My sister, Caitlin, and Tanner stained all the balusters and it was starting to look more consistent.
Antique stair runner
We added on an antique runner from this Etsy seller in Vermont named The Textile Trunk. She had this one that had lots of reds in it. It wasn’t long enough for both sets of stairs so we just put it on the first flight and I love what it added to the look.
Styling
Next came the styling. I’ll be honest, I had so many other things going on, that I was rather hands off. Pat graciously brought in a lot of her own furniture to try it out, which is where that blue table comes from. I wanted to dig into the Carl Larsson vibe and decided to bring in geraniums onto the table.
Jill absolutely nailed it with the wood carvings.
And thanks to Pat who brought in her rocking chair! Ha! She really saved the day in so many ways. 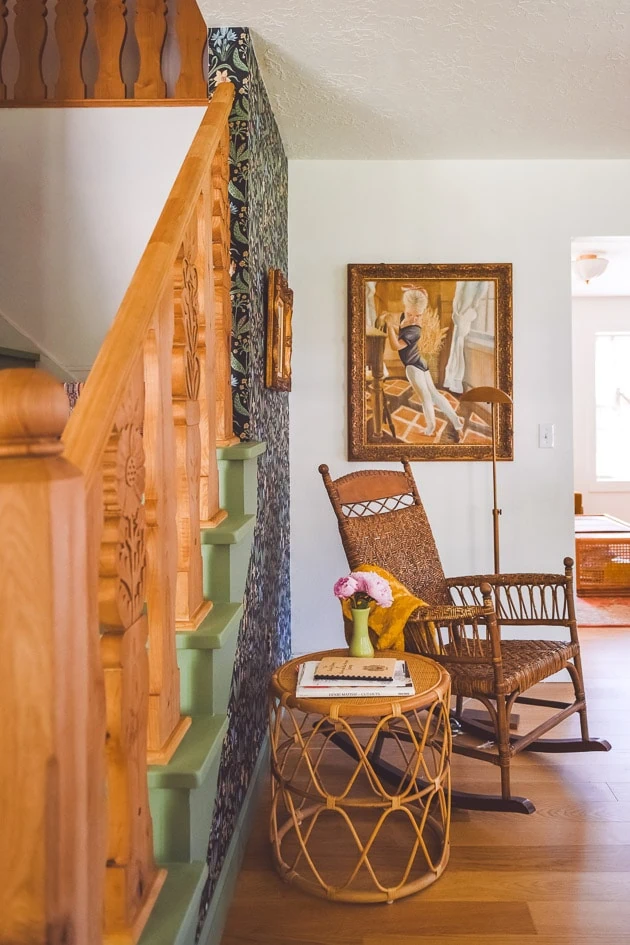
And my parents loaned me all of their artwork so I’d have something up on the walls. I wish I could keep them! They’re so beautiful. They are all by my uncle, Dean Bradshaw.
OK! That’s it for now. Again, I’ll be talking more about the balusters tomorrow. Stay tuned!
I’d love to hear your thoughts!
Comments