

Our tortured artist party has us bringing paintings and painters to life with Halloween costumes!
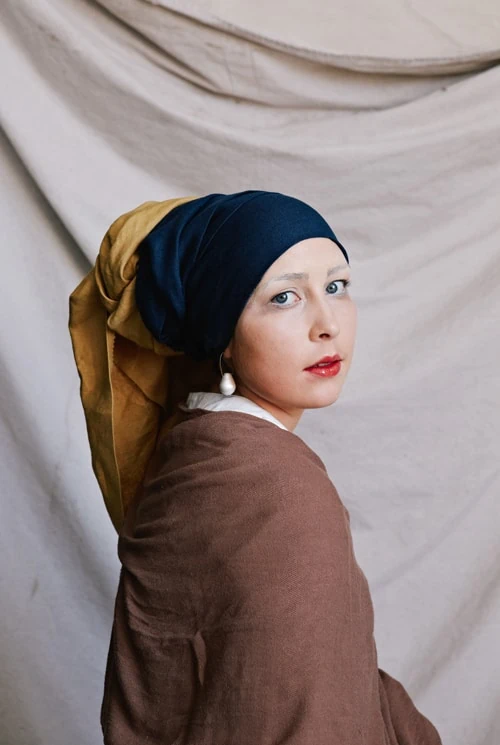
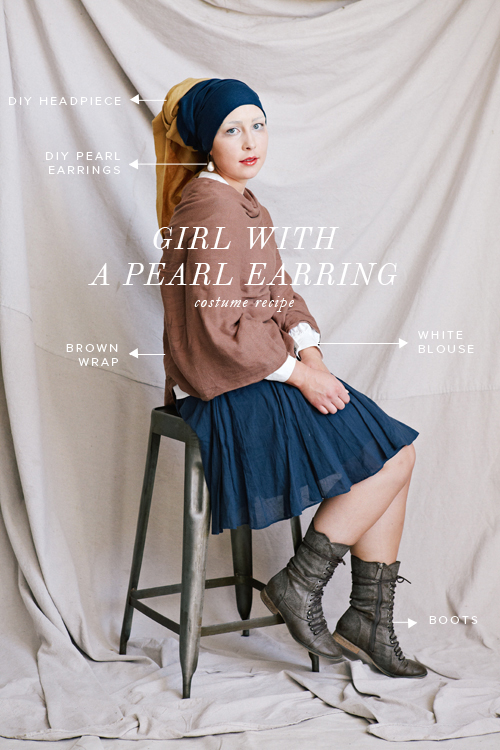
Use the tutorial below to create your own Girl with a Pearl Earring costume!
Materials:

Girl with a Pearl Earring: headdress tutorial
Materials:
- a yard of indigo fabric (we used this one from onlinefabricstore.net)
- a yard of mustard linen fabric (we used one called “Cappucino Irish Linen” from onlinefabricstore.net)
- scissors
Instructions:
- Cut the blue fabric into 2 strips about 6-8 inches in width
- Cut the yellow fabric into a strip about 10-12 inches in width
- (Optional) Press the cut edges under on both sides so that they don’t show
- Imitate the painting as best you can. I started off by putting the model’s hair into a high bun and draping the yellow fabric over top. The bun gives the yellow fabric the volume.
- I had her hold the tip of the yellow fabric against her forehead as I wrapped the blue pieces around her head, making sure to cover her hairline.
- Hide the ends of the fabric by tucking them underneath the folds. You can cut off extra fabric that isn’t needed. If you’re worried about it staying put, you can use safety pins to keep everything in place.
Girl with a Pearl Earring: brown wrap and earrings tutorial
Brown Wrap
For the brown wrap, simply drape the fabric around the shoulders and secure with safety pins.
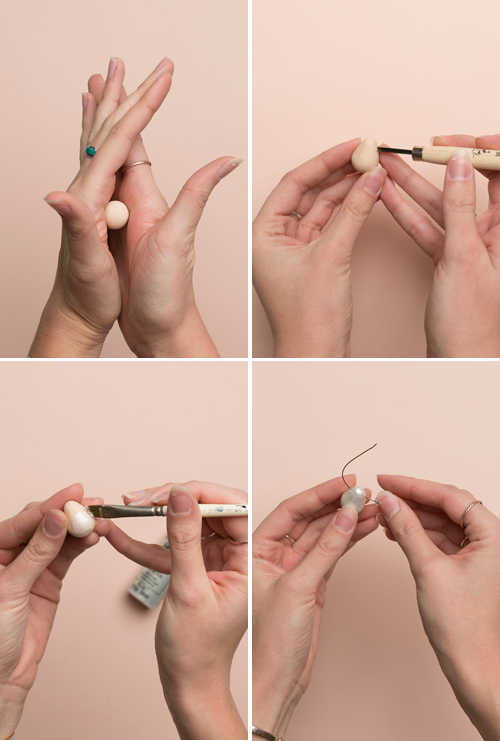
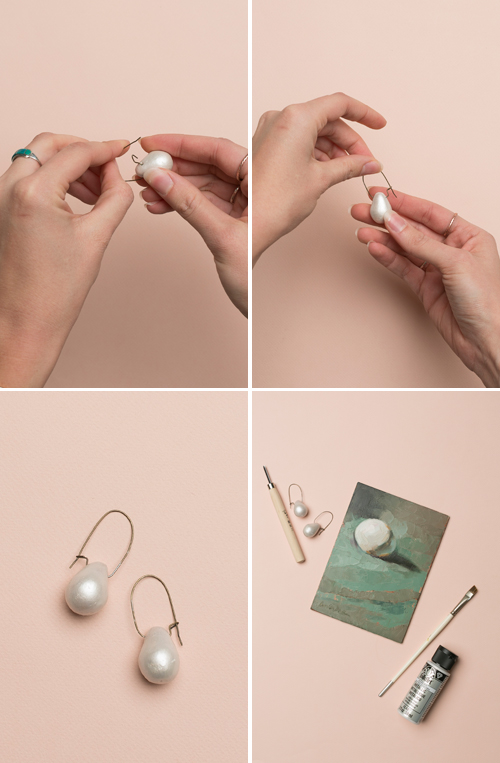
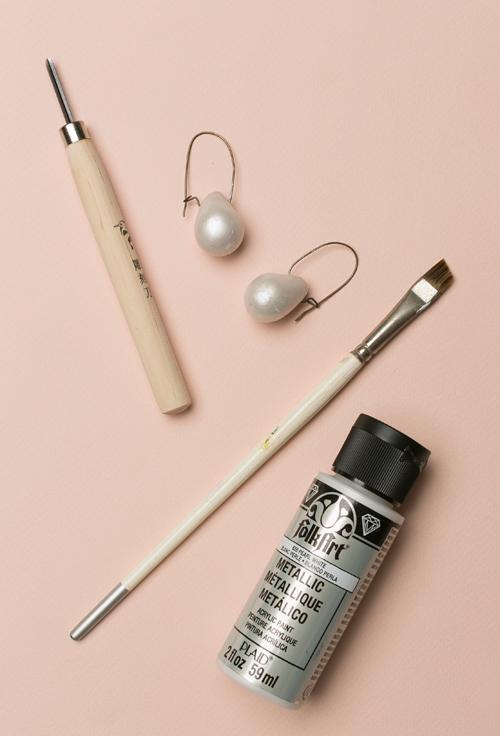
Pearl Earrings
Materials:
- Inexpensive craft clay (the kind you bake in the oven)
- Dangle earring clasps
- Metallic acrylic paint (Folk Art has a Pearl White color)
- Paintbrush
- Baking sheet
- Oven
Instructions:
- Form clay into the desired teardrop shape.
- Bake clay in oven following packaging directions then let cool.
- Paint the clay. I had to put on about 4 coats of paint. Let dry.
- Attach dangle earring clasps. I just used clasps from a pair of old earrings!
Done!!
Girl With a Pearl Earring: makeup tutorial by Rubie Huber
This face was so much fun to do but also a challenge! While our girl Morgan did look strikingly like the gorgeous original painting, she also had VERY dark eyebrows that we wanted to downplay. Getting rid of eyebrows can be tricky. You’re going to have to use Elmer’s glue sticks if you want it to look super legit (I recommend watching a youtube tutorial for this!).
For Morgan, I just combed out her brows with normal brow brush and set them with gel. Once that dried, I used a Maybelline Cover Stick (get it here) in white to go over them a few times. I set that with translucent powder and then covered the full top half of her face with a pale full coverage foundation. Spreading the pale base from the top of the forehead over the eyelids and to the top of the cheekbones really gave her a light and airy look.
For her eyes, I used white eyeliner on the lower waterline, then some light grey shadow underneath to create the same effect as the painting. Finish the eyes off with a single layer of mascara.
My favorite thing about this look is the wet lips. I used a pinkish-red lipstick all over her lips, then covered it with a juicy wet lipgloss (the kind you had in junior high that just goops on deliciously).
I set the whole face with a few spritzes of NYX Dewy Finish Setting Spray (get it here) instead of powder so her makeup would stay but keep that oil painting sheen.
Be sure to check out the rest of our tortured artist Halloween costumes here! You can also view Halloween party ideas here to create your own themed party!
Comments