

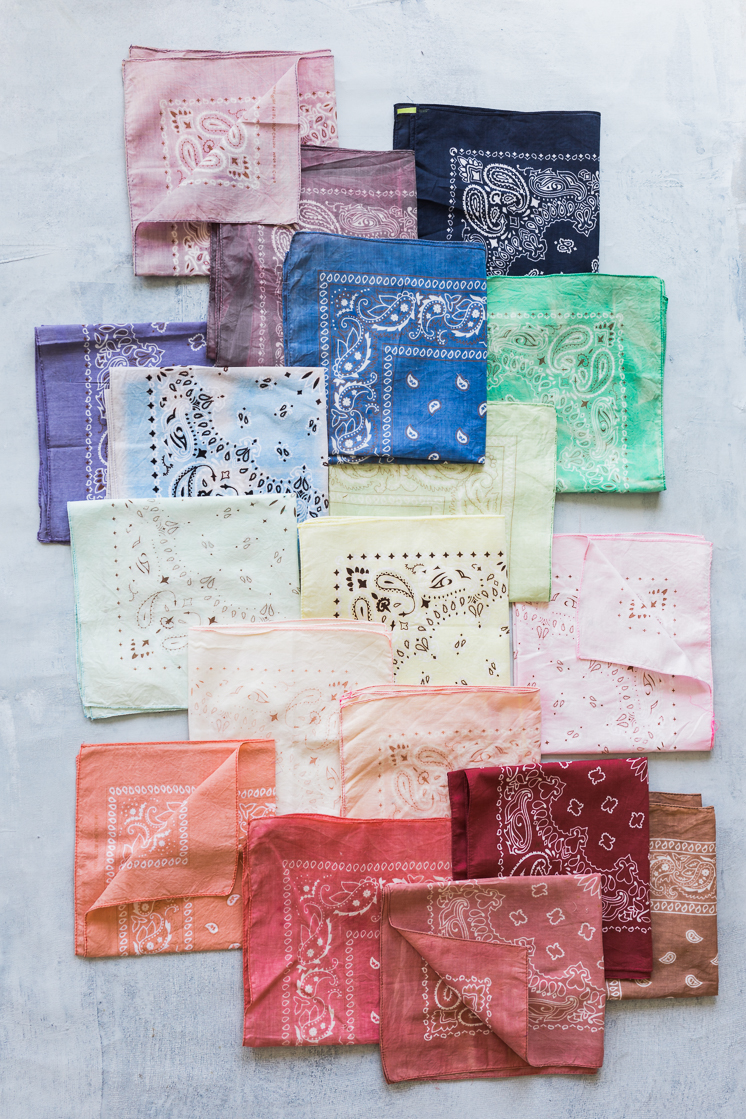
 A few weeks back we threw our “Say hi to Pie” Fourth of July party. You may or may not have noticed that the napkins we used were actually red bandanas that we bleached to give them a softer and more subtle color. We loved the end result so much and quickly decided we needed to create a whole rainbow of bleached bandanas. Especially since a good ol’ bandana makes a perfect necktie of neck scarf!
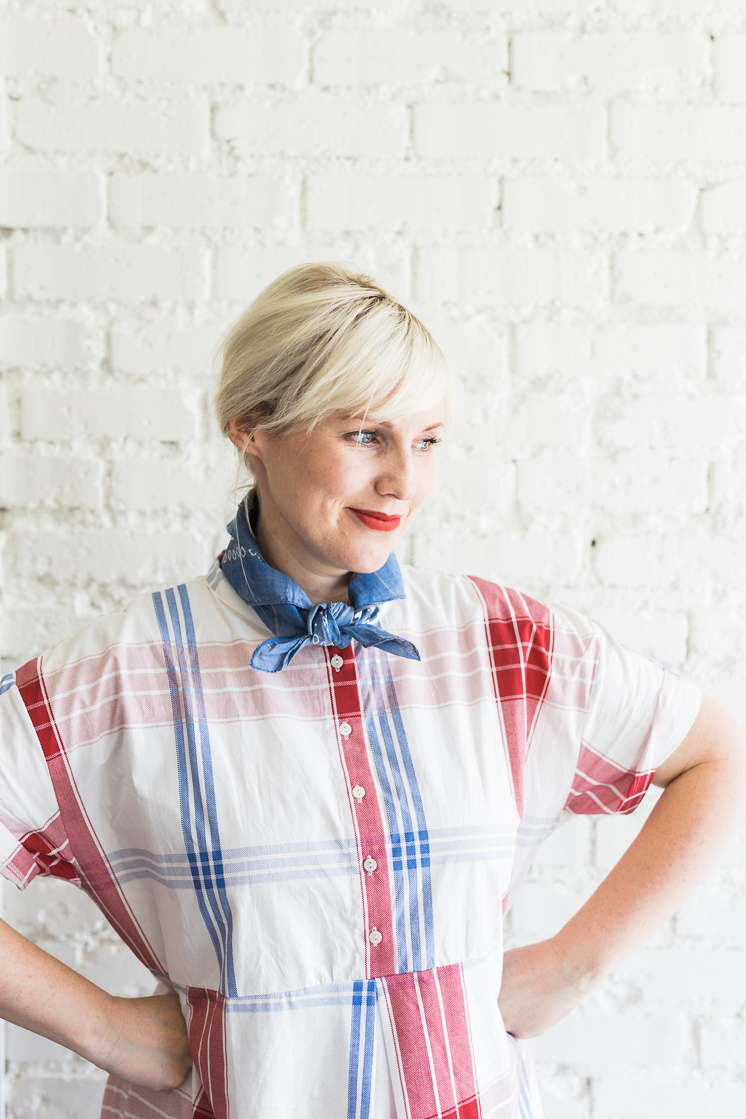
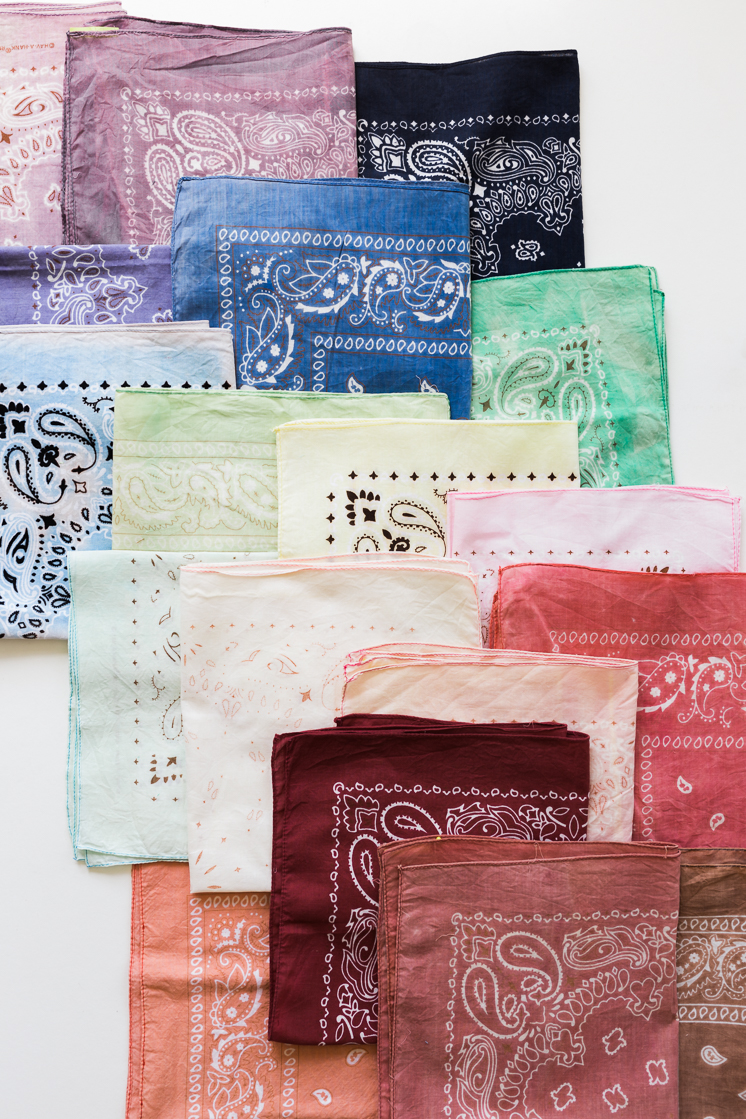
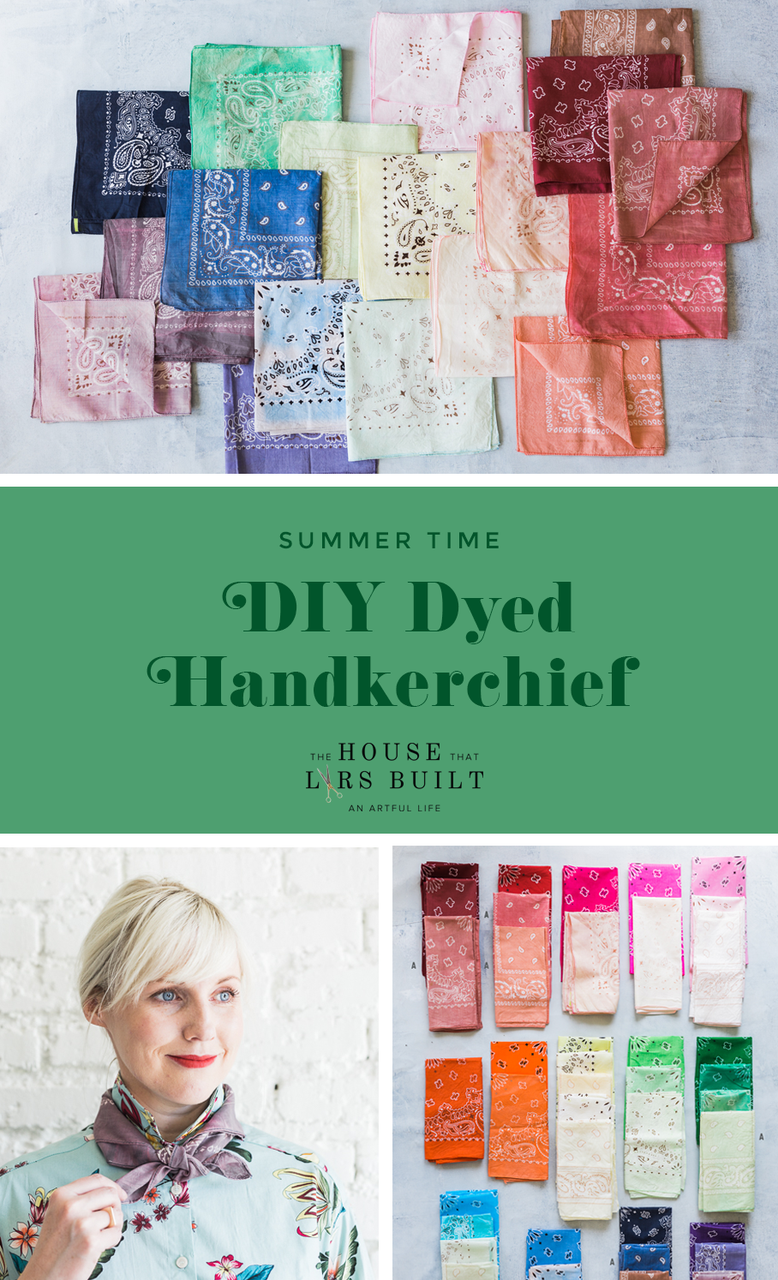
These DIY Dyed Handkerchiefs flaunt tinted colors that are so much prettier than the ones you buy at the craft store. And all you need is a little bit of bleach to achieve the look! It’s amazing how different the resulting colors can be depending on the amount of bleach and the amount of time you soak them. Whether you use them for napkins, accessorize your outfit with them, or wrap a gift with them, they add a beautiful touch!
Make sure to check out the entire DIY!
It was quite the experiment dying all of the bandanas and the Lars team learned a lot about the nature of fabrics and dyes. Our major takeaways?
- 100% cotton bandanas work the best
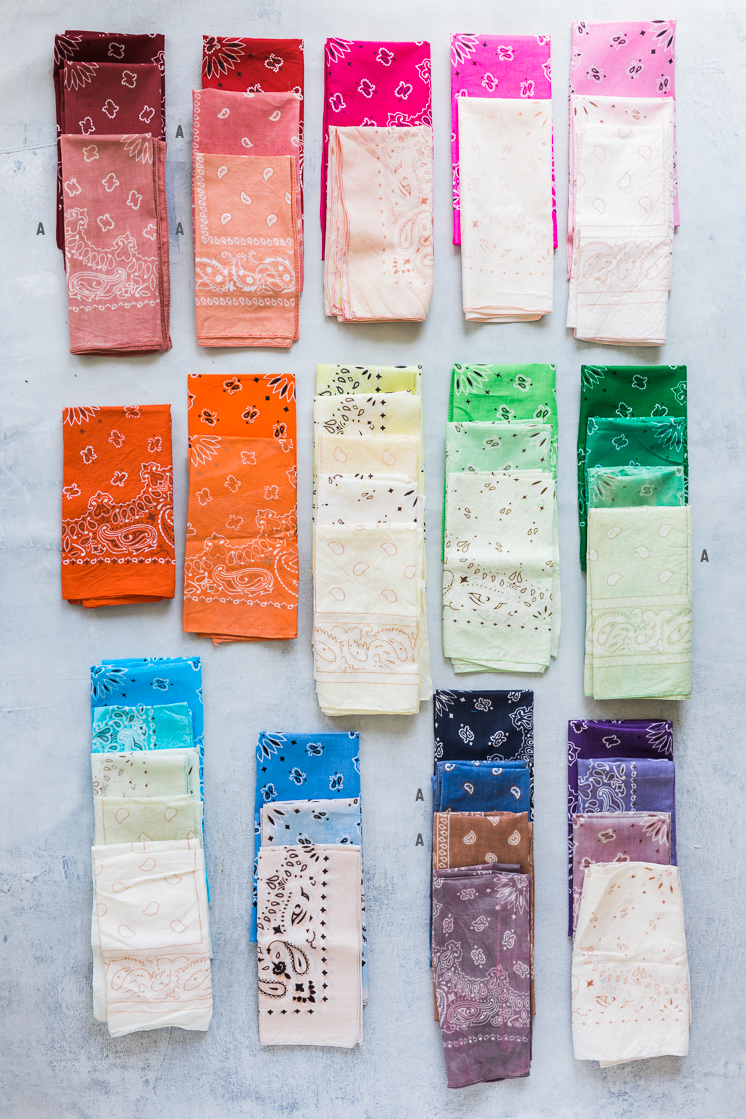
- Different brands of bandanas achieve different results because of the different dyes they use
- The color continues to dilute after you remove a bandana from the bleach solution
- Some colors need only a few seconds in the solution while others need up to 30 minutes. This is where experimentation comes in!
- The ratio of water to bleach affects how quickly the color will dilute.
- The colors will be prettier if you use a fresh bleach solution after each different colored handkerchief.
Note: The majority of the bandanas were purchased from Joann and the ones marked with an “A” were purchased from Amazon.

DIY Dyed Handkerchiefs
Materials:
- 100% cotton bandanas (we bought ours from Joann and this rainbow set of bandanas from Amazon)
- Bleach
- Water
- Plastic gloves
- Bucket or plastic container to mix bleach solution
Instructions:
- Fill a container with 2 parts water and 1 part bleach
- Take each bandana, one at a time, and unfold completely and submerge in the bleach solution
- This is where you enlist a bit of trial and error. *Biggest tip: Take the handkerchief out of the solution before it reaches the desired color. It will continue to fade long after you remove it.
- Let hang dry.
- Wash after to soften up the handkerchiefs and remove stiffness.

Comments