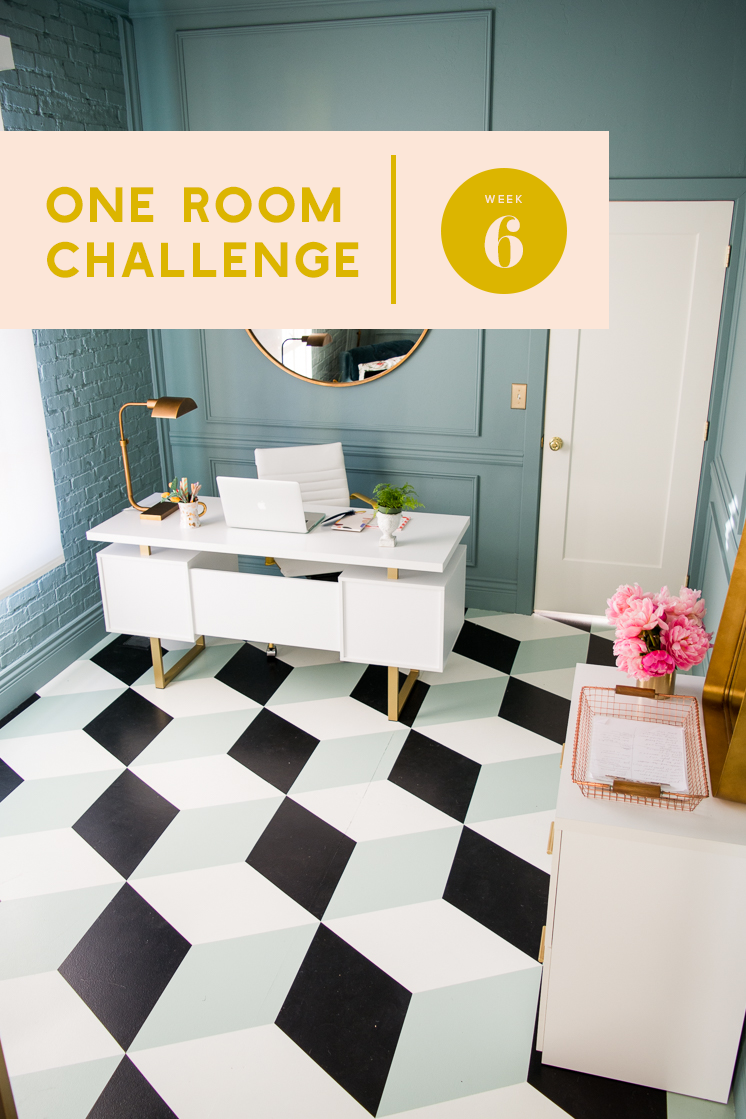
And here’s what we have so far this week:
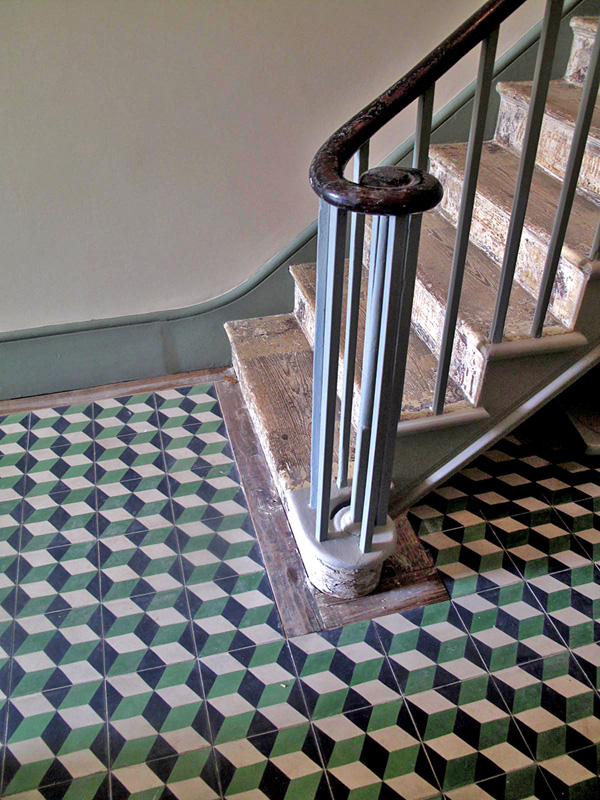
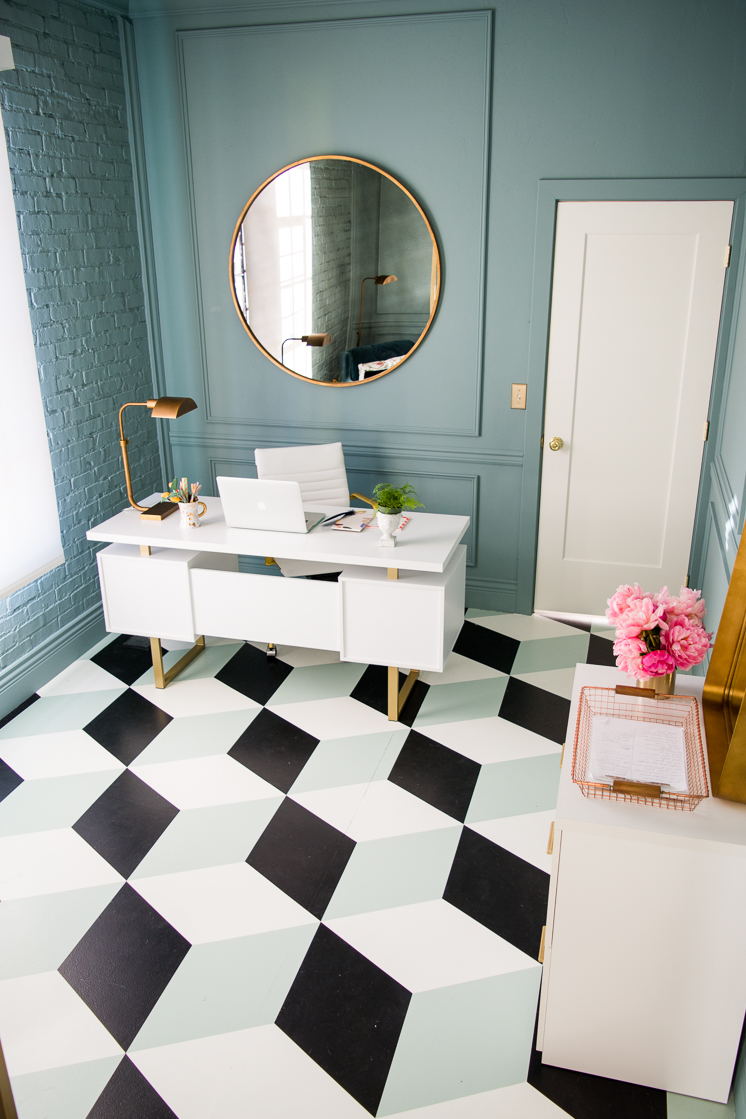
There’s nothing better than a beautifully tiled floor. My most recent excursions to Cuba and Paris both left me in awe of the stunning tile work. So when we began to brainstorm ideas for our studio makeover, I knew immediately tile would be my flooring of choice. That is until I realized I would have to sell my first born child to afford it. I racked my brain for alternatives and decided we needed to do a DIY rendition. Almost a year ago we painted our floor to imitate a multi-colored checkered floor, and if we did it once, we could do it again!
I’ve loved a tumbling block pattern for quite awhile, and I especially love the way the French use it in their interiors. Thanks to insight from a reader, I found out its history goes back quite a while! The Rhombille tile pattern, as it is also known, dates back to ancient Greek tile and mosaic patterns. It has also been used in Italian floor tilings from the 11th century! Isn’t that fascinating? It was also a popular quilting pattern in 19th century America. The tumbling block quilt pattern was said to have been used during the Underground Railroad. When slaves saw a tumbling block quilt hung over a fence, they knew it was a sign to pack up their belongings and escape. Its historical background made me love it even more!
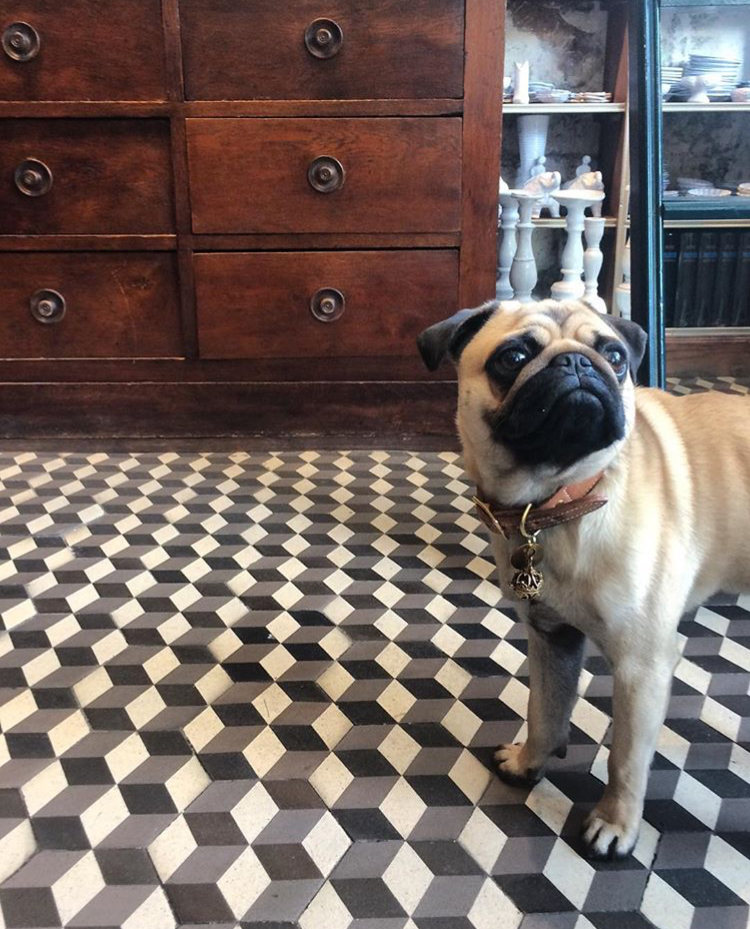
Here’s one of my favorite shops in Paris, Astier de Villatte as shot by Katie Armour of The Neo Trad from her Instagram. I love the small scale of the pattern and the neutral colors, but we’re going much larger and a bit more colorful.
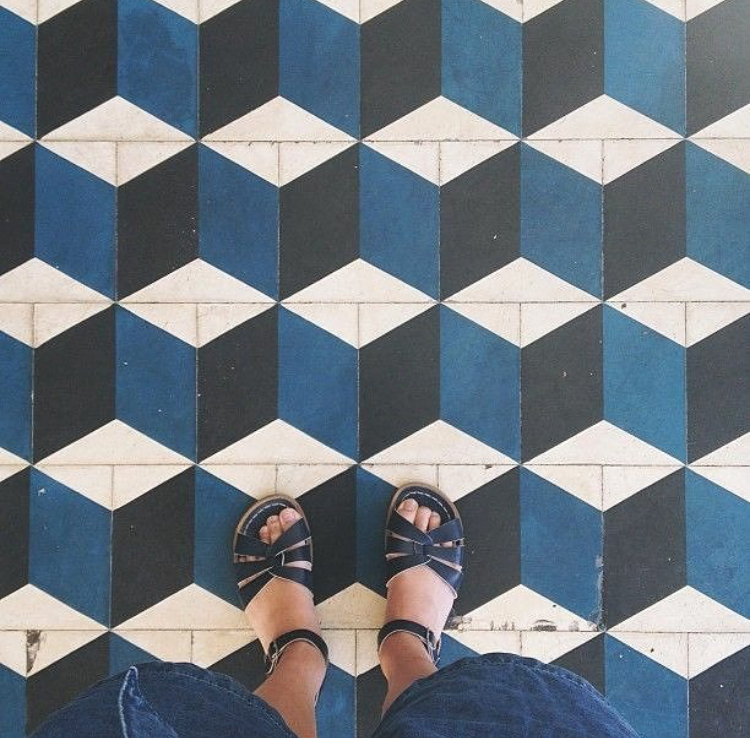
And another inspiration image from @fineanddandyco. I love the colors here and the slightly larger scale of the blocks.
And another smaller scale, but lovely color palette from Charles Tashmina Architecture via Desire to Inspire.
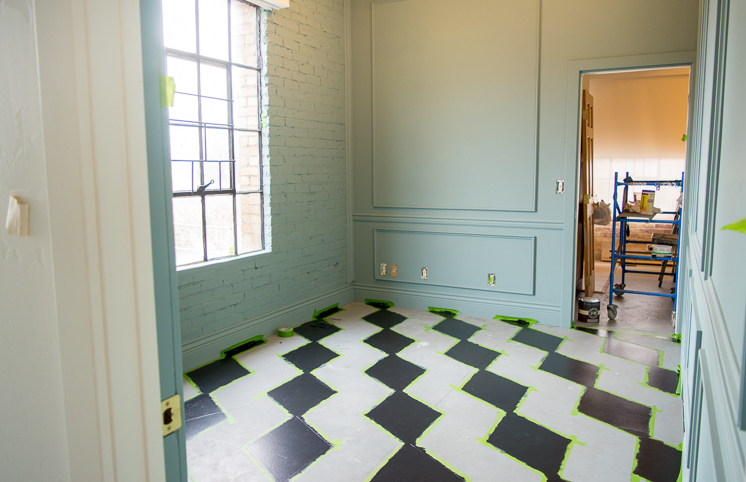
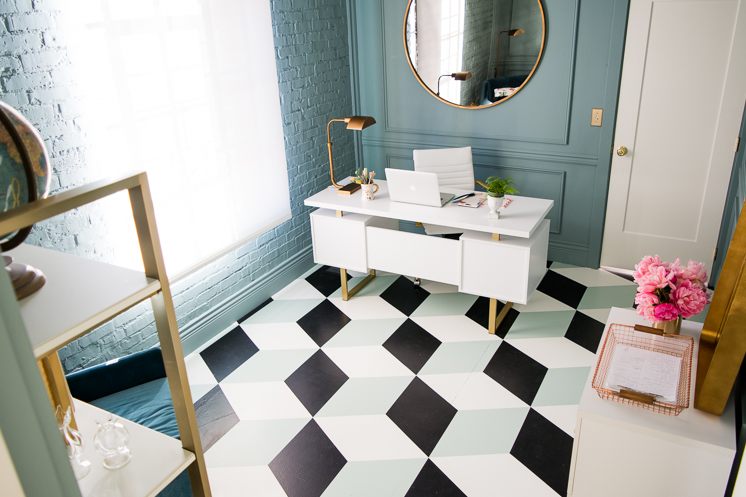
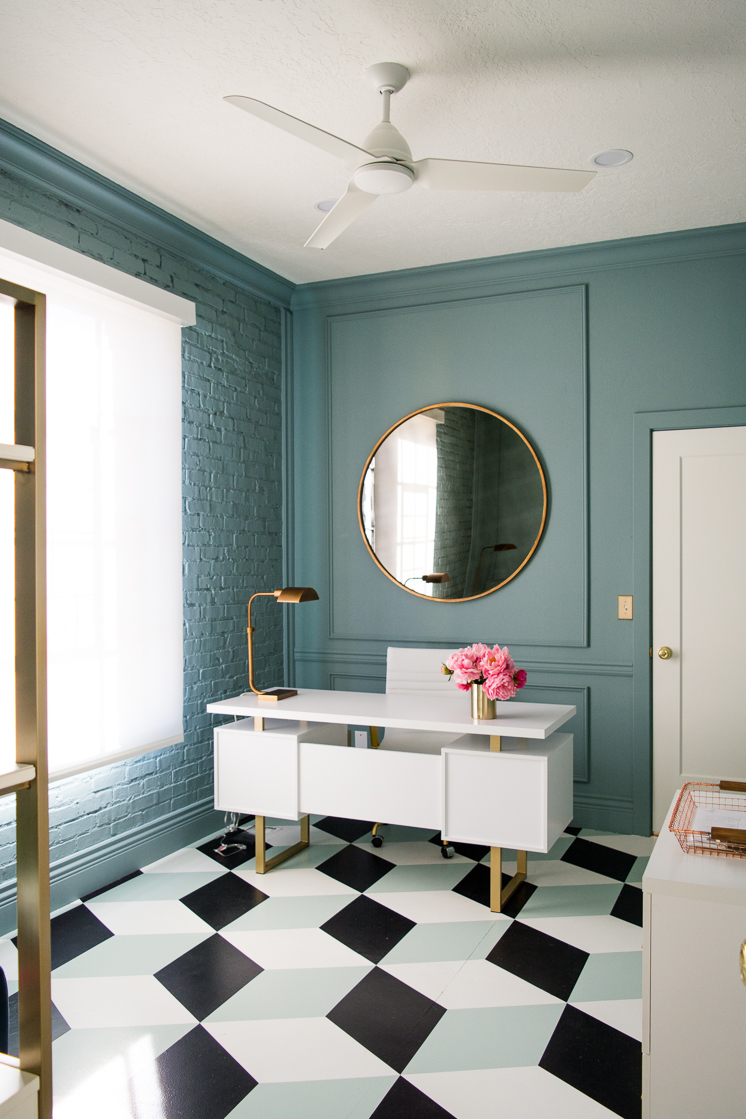
This leads me to this DIY Tumbling Block Painted Tile. We wanted the classic look of a black and white checkered floor but elevated and more interesting. Again, we turned to Farrow & Ball for our paint colors. We chose three colors to create an eye-catching, geometric pattern: Wimborne White, Pitch Black, and Teresa’s Green. The floor paint we chose is specifically meant for floors and has an eggshell finish, which will hold up much better under high traffic.
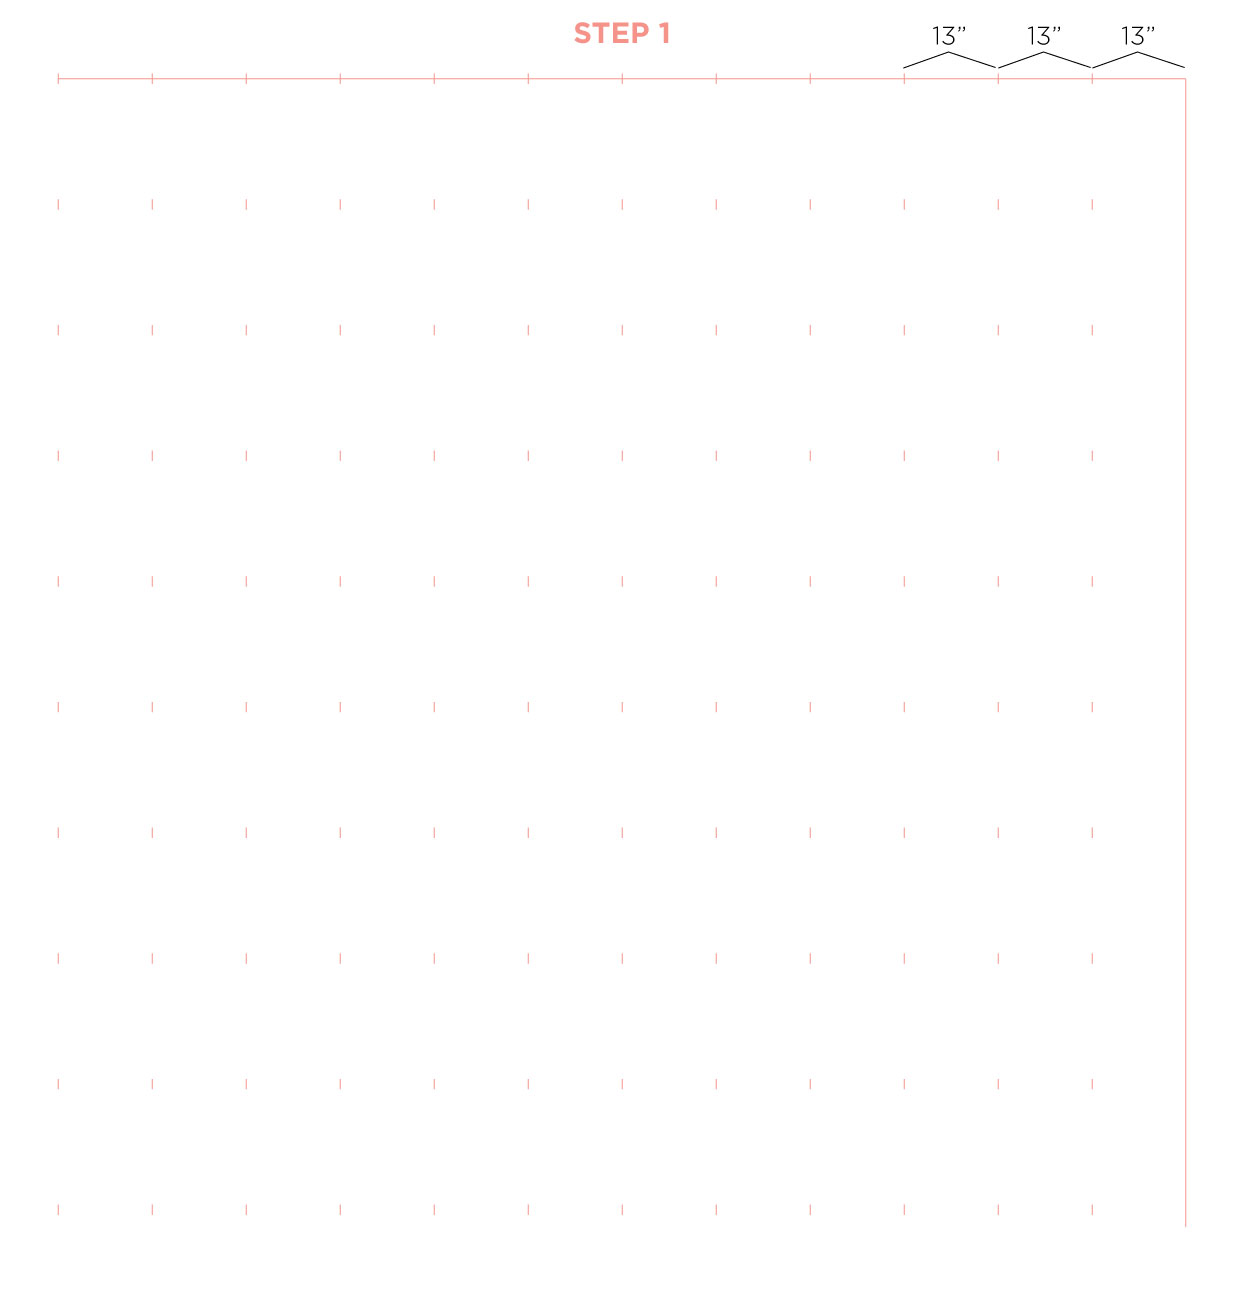
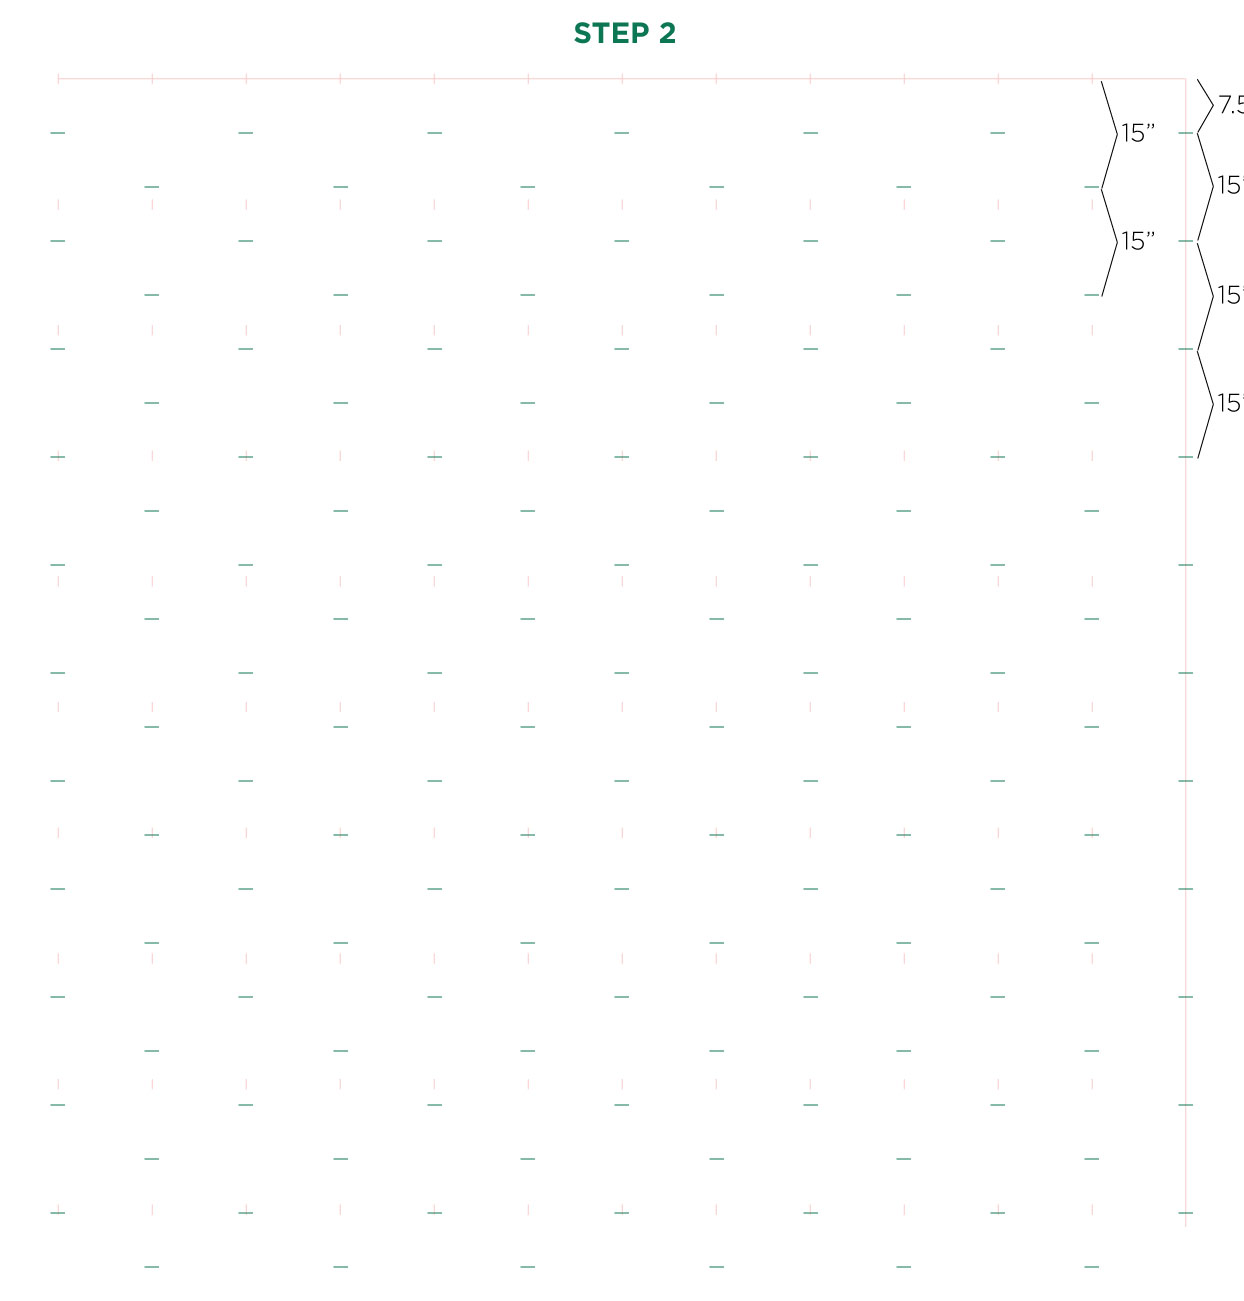
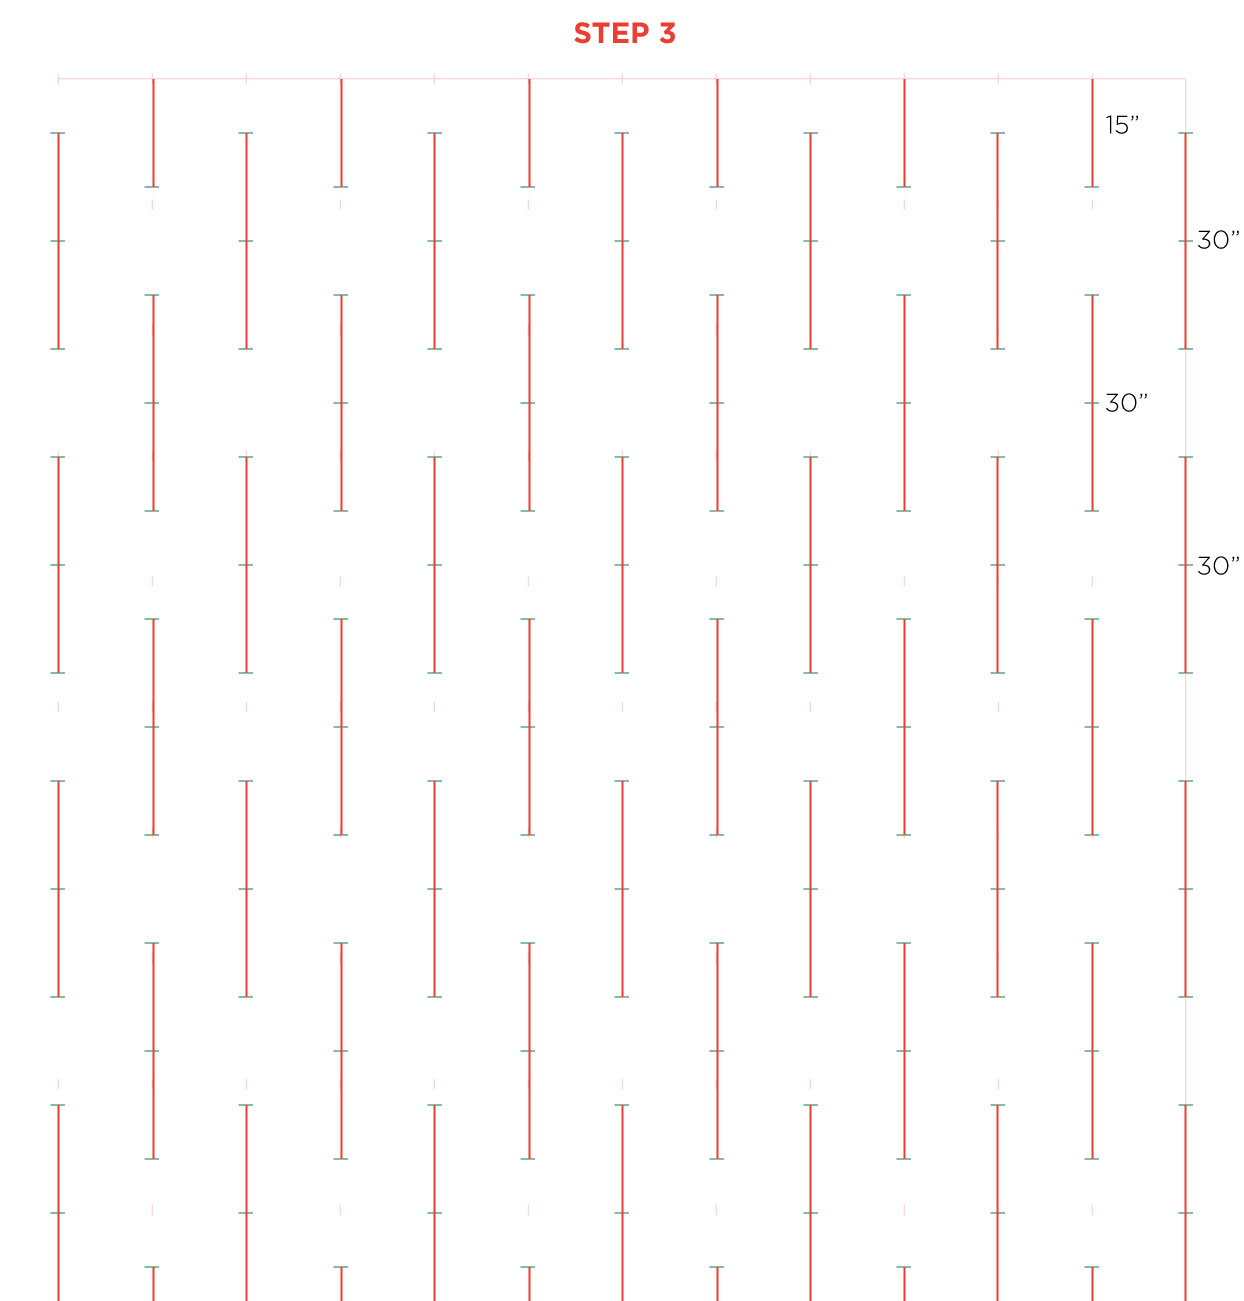
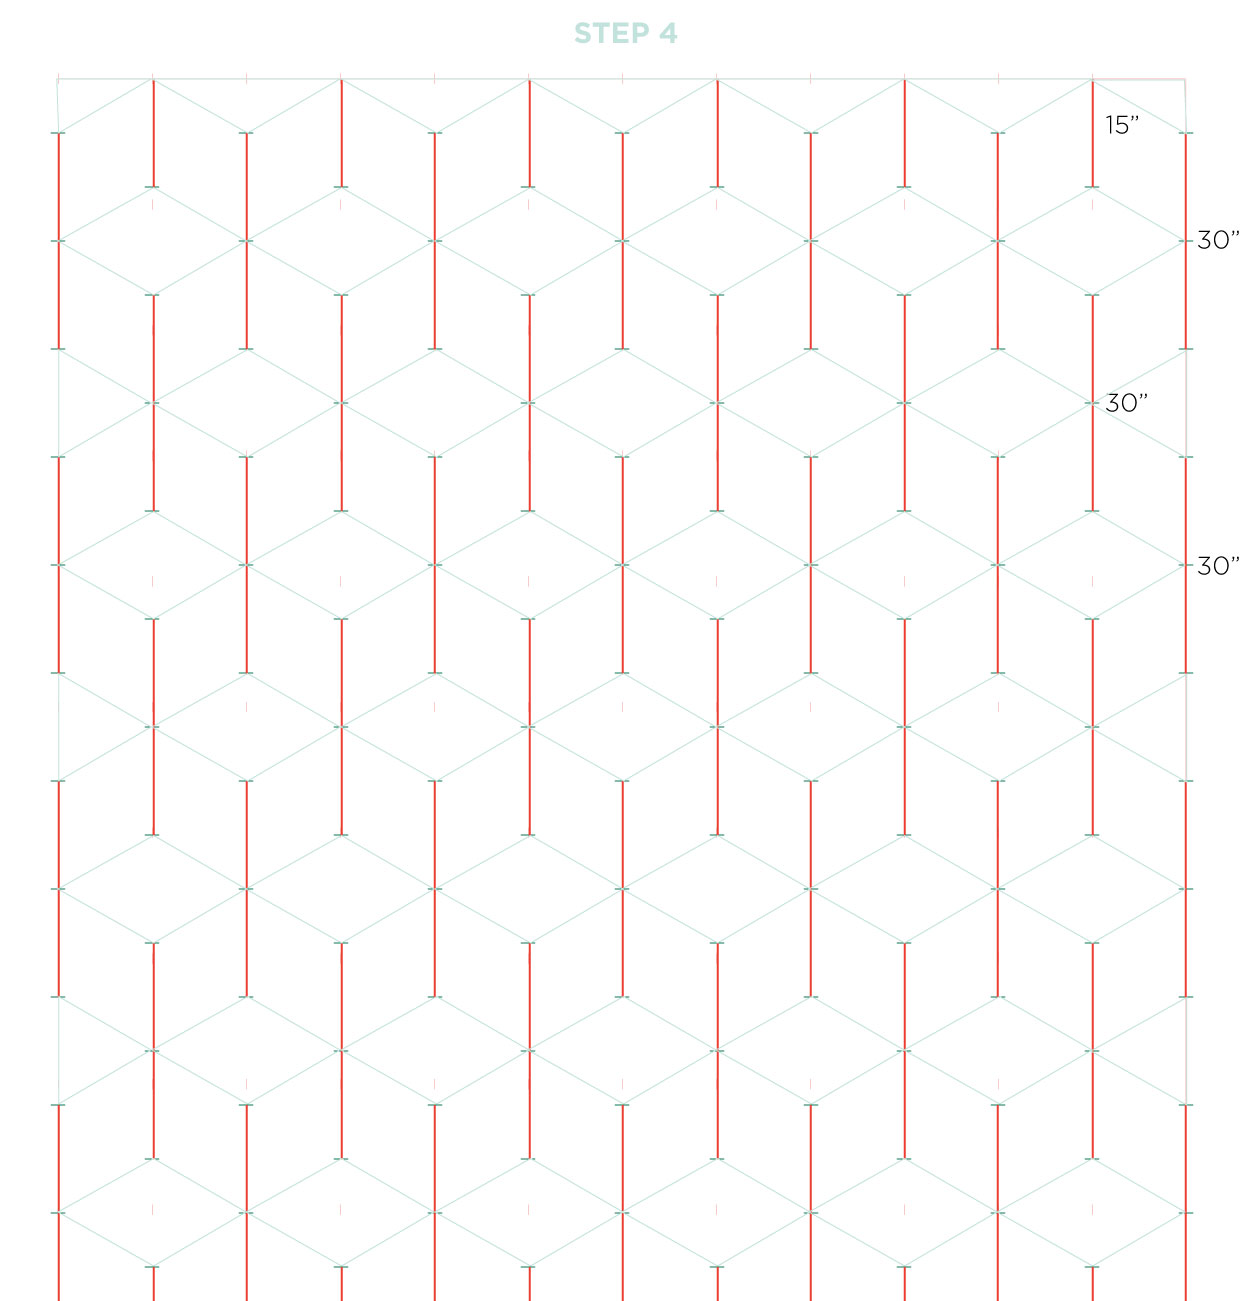
This certainly was not a simple process. It requires precise measurements and lots of time and patience to complete the floor. Thankfully our in-house mathematician and handy wonder woman, Mary, was able to create a measurement pattern to follow. We’ve provided a schematic so you can easily follow the instructions and achieve a similar look! The basic steps are as follows:
DIY Tumbling Block Tile Floor
- Clean your floor to prep for paint
- Using the schematic provided, mark off the pattern using a ruler and a pencil
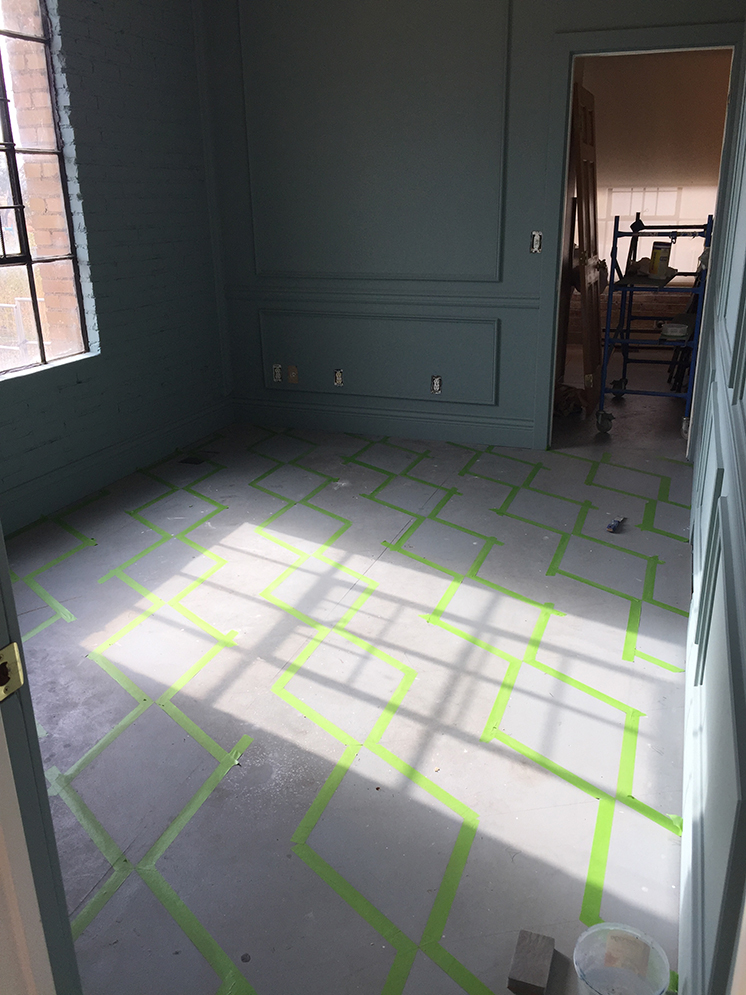
- Tape off the pattern for one color block. You’ll want to use high-quality painters tape to prevent bleeding.
- Make sure to thouroughly stir your paint before applying any coats.
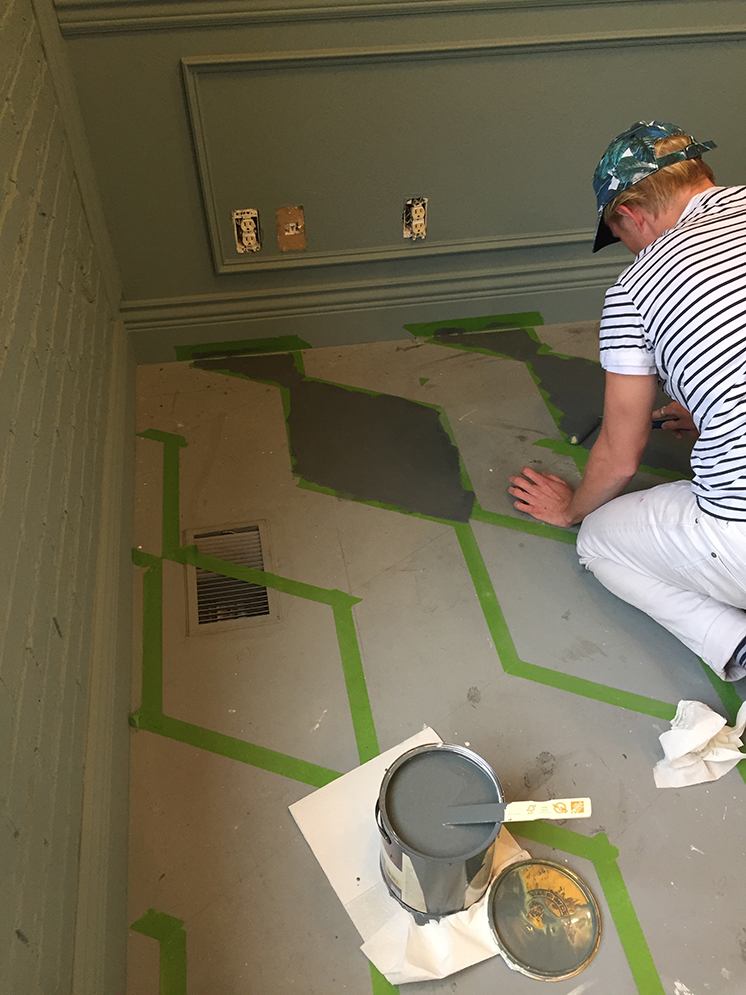
- Choose one color to start with and prime only for those diamonds. Then once dry, paint only the primed diamonds. Let Dry.
- Remove tape and repeat steps 3-4 for the other two colors.
As for the painting
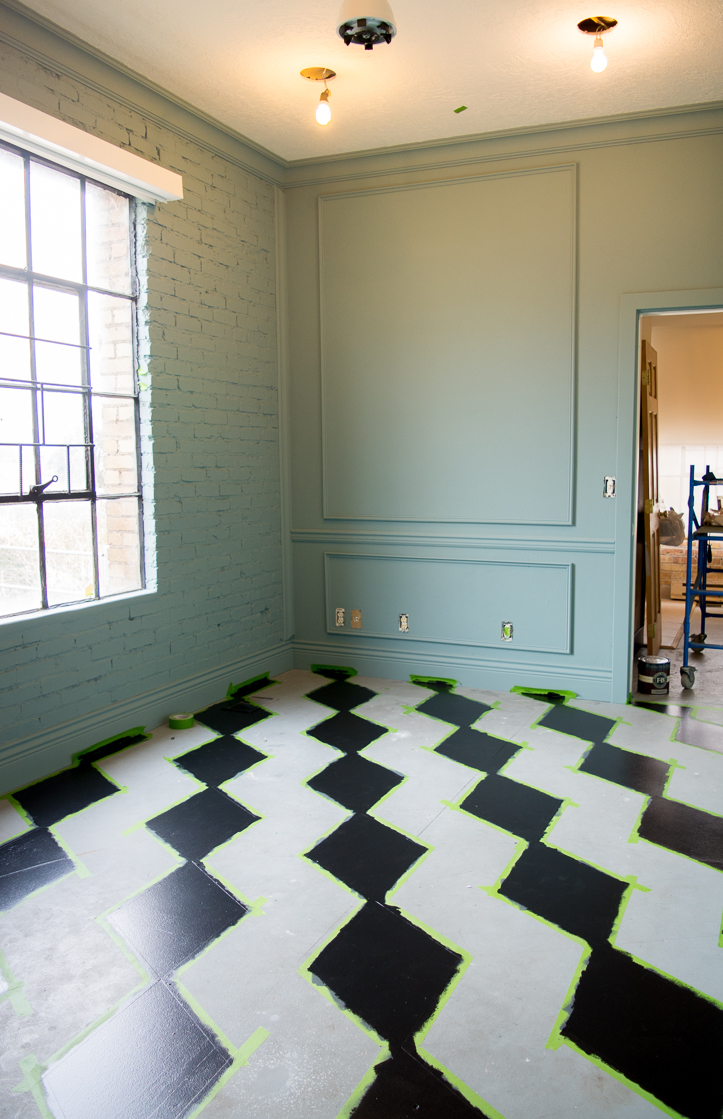
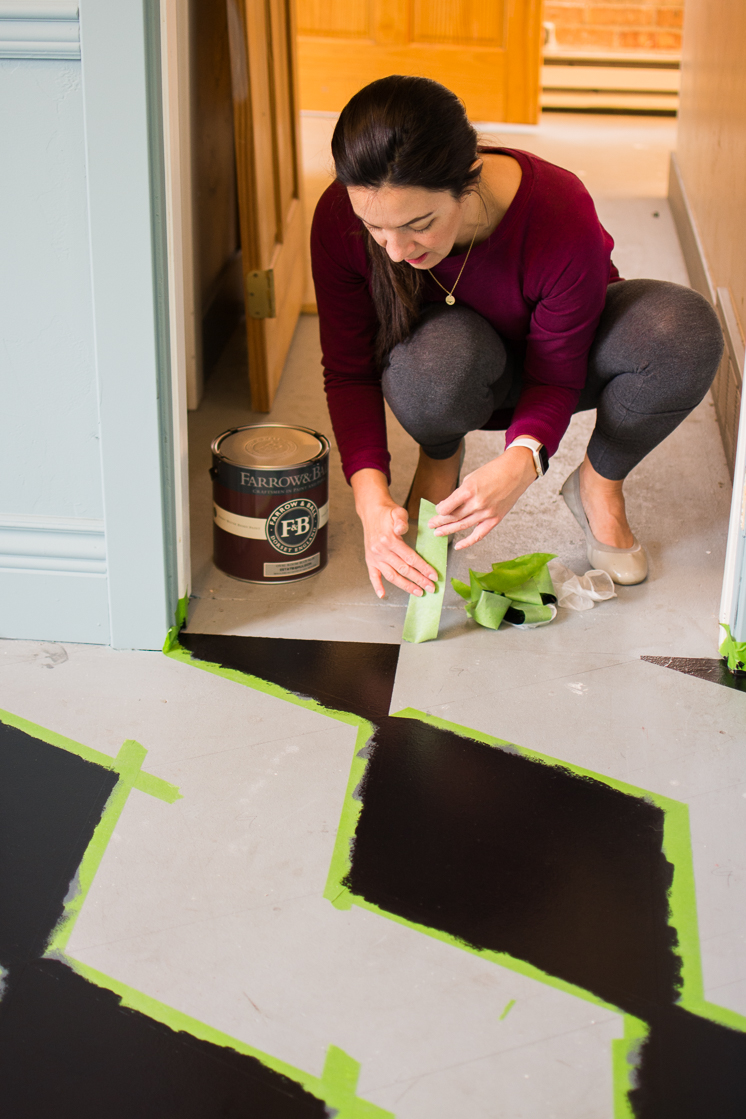
1) Mary marked off the pattern using the above geometry with a pencil
2) Once the pattern is drawn onto the floor, mark it off with painter’s tape.
3) Make sure you give it a good pressing down so no paint gets underneath the lines.
4) Add in floor primer. We used Farrow and Ball’s dark primer for floors and let it sit for 24 hours.
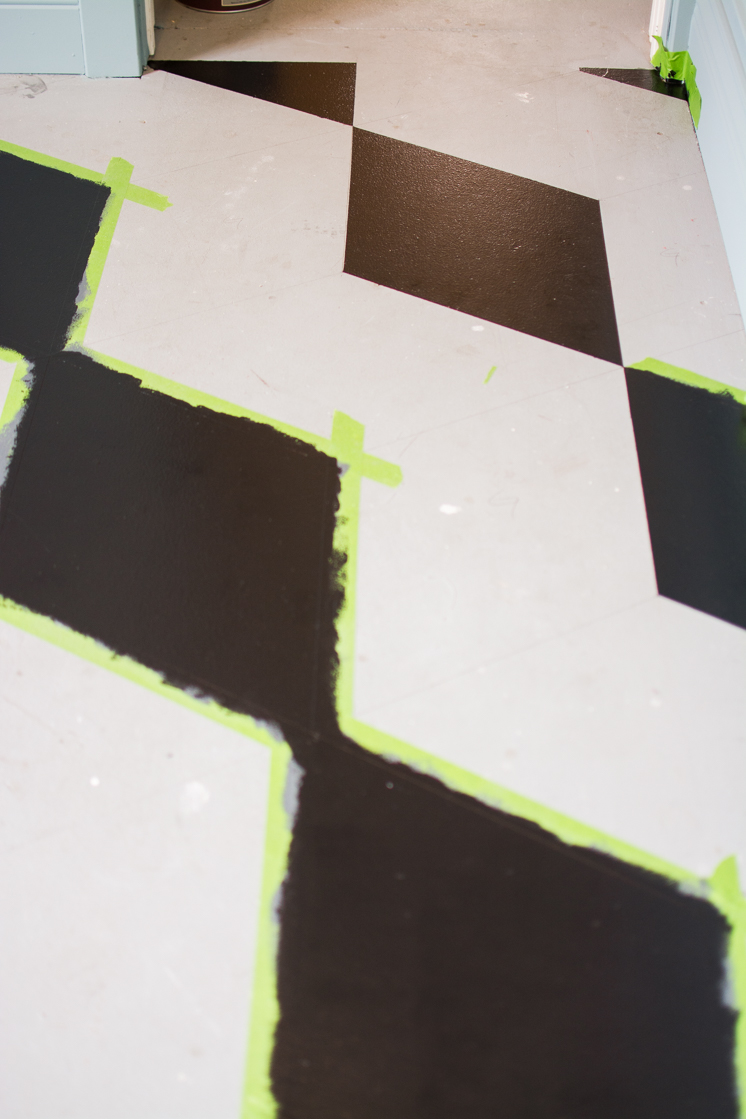
5) Then Mary got to painting the first layer of black, let it sit for 24 hours and then added a second coat.
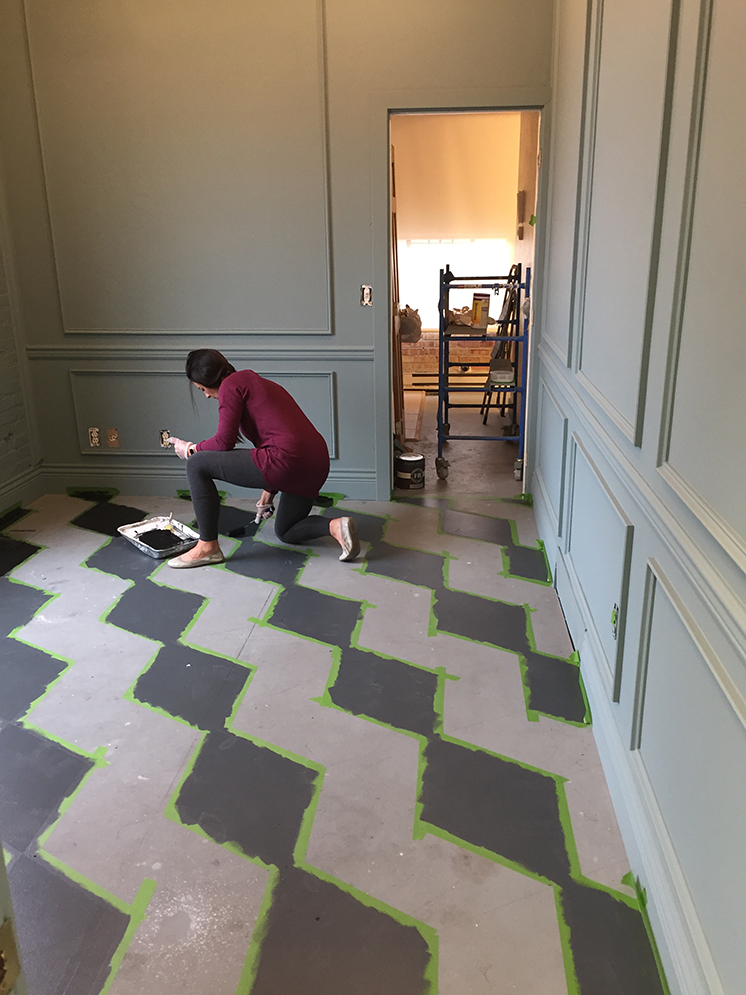
6) This may be the most satisfying part: peeling the tape. Make sure to go slowly so you don’t lift paint off the ground.
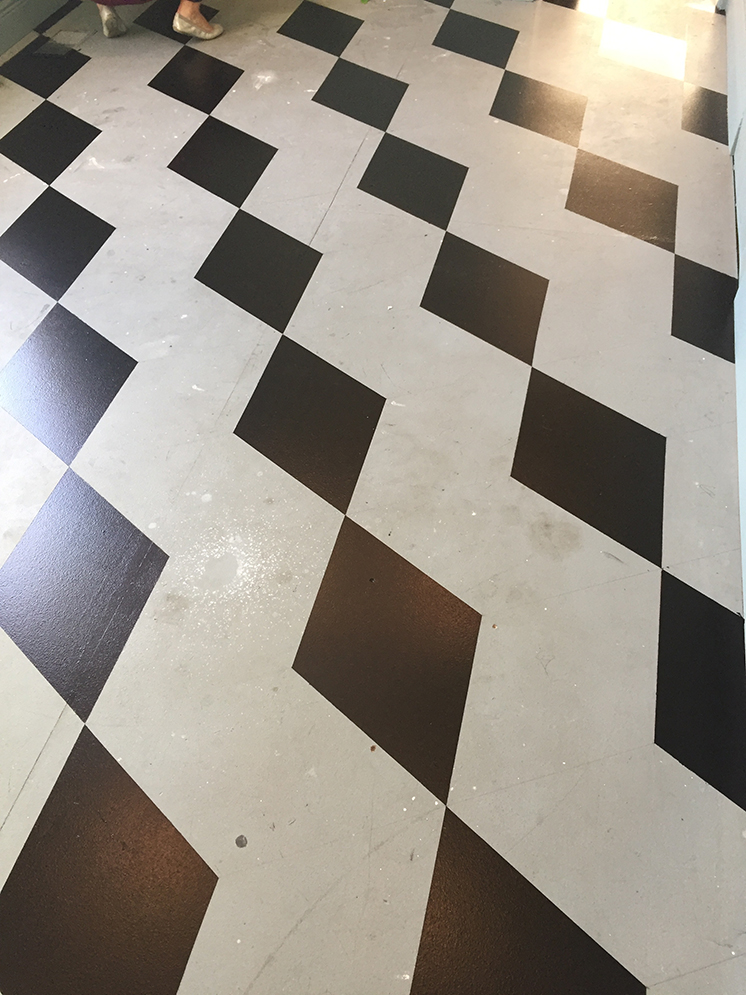
And voila! Here’s all the tape removed! We’re starting on the second color today and then the third later this week so we’ll have plenty of gorgeous photos to share in our VERY FINAL reveal next! Stay tuned!
Listen, I didn’t do a thing with these floors other than ask that they happen, but here I am on my way from the bathroom and stopping in to take credit for everyone else’s work.
And voila! Here she is! Turned out, huh?!
You can check out the other weeks here: WEEK 1 | WEEK 2 | WEEK 3 | WEEK 4 | WEEK 5 | Week 6 | Week 7
Boxwood Avenue | Coco & Jack | Design Manifest | IBB for DWD | The House That Lars Built | Little Green Notebook | The Makerista | Making it Lovely | Old Brand New | Old Home Love | The Painted House | Megan Pflug Designs | Pink Pagoda | Erica Reitman | Sacramento Street | Simply Grove | Jill Sorensen | Sugar & Cloth | Vintage Rug Shop | Waiting on Martha *
Media Partner House Beautiful | TM by ORC
Media Partner House Beautiful | TM by ORC
Photos by Clara Sumsion Jones and in process photos by Mary Nielson



Comments