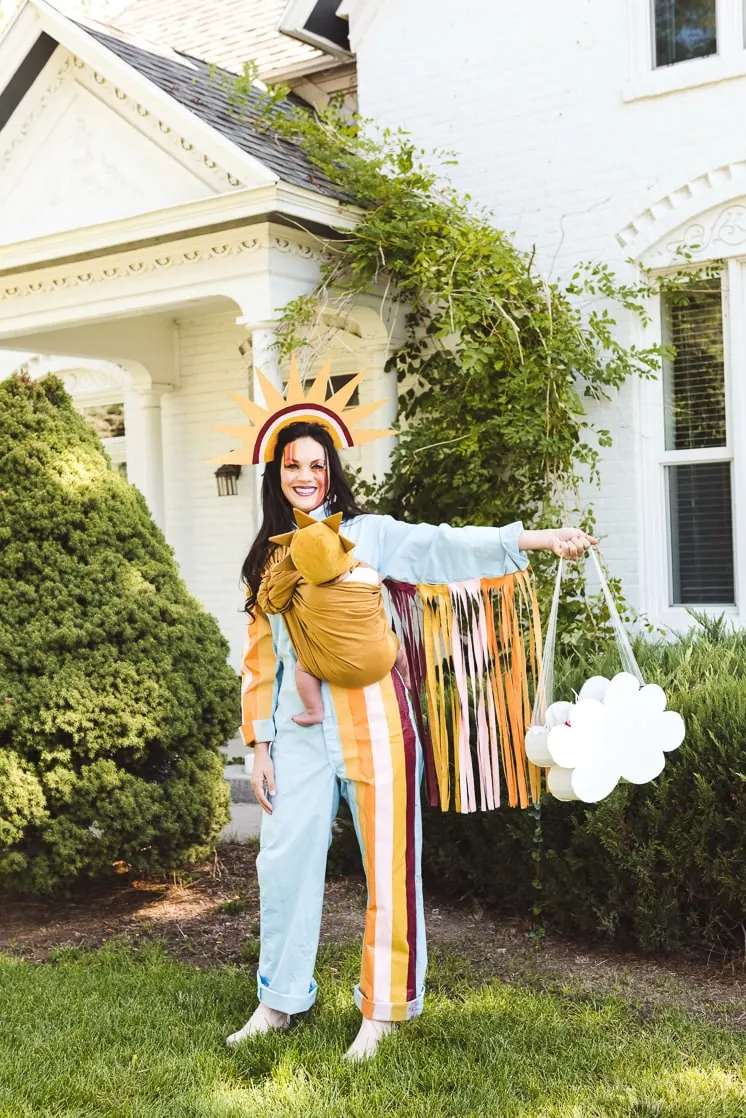
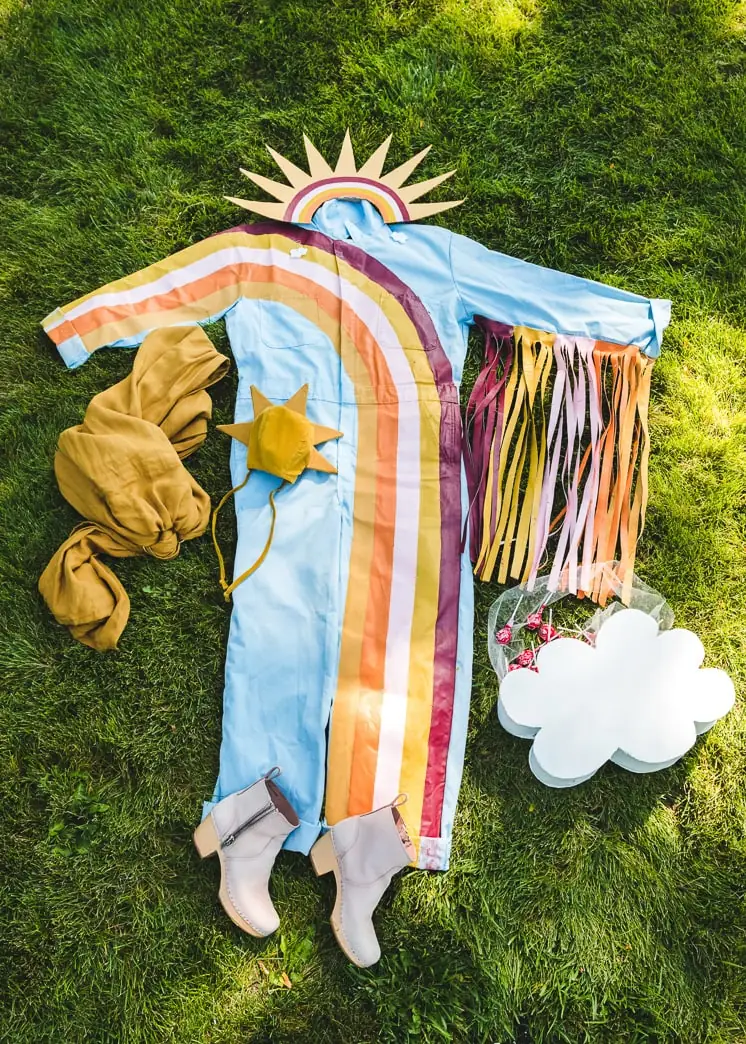
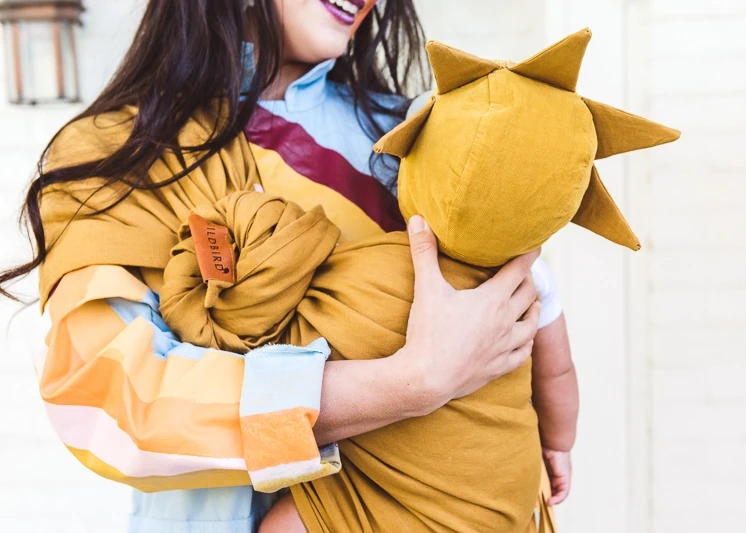
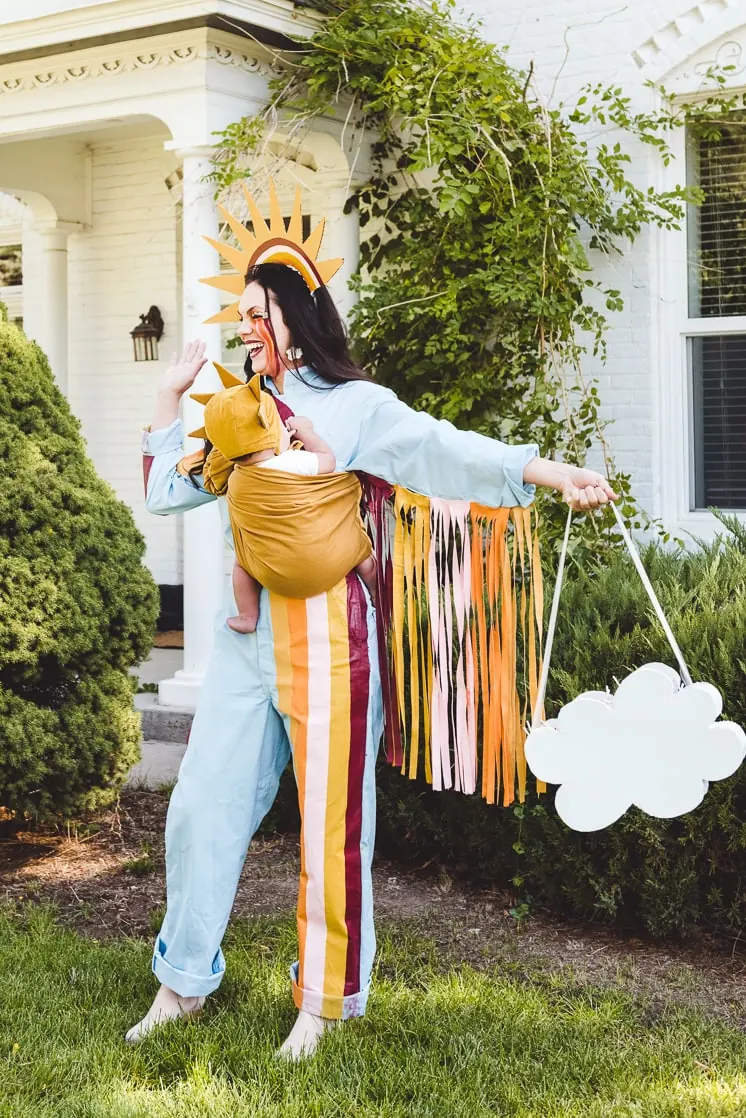
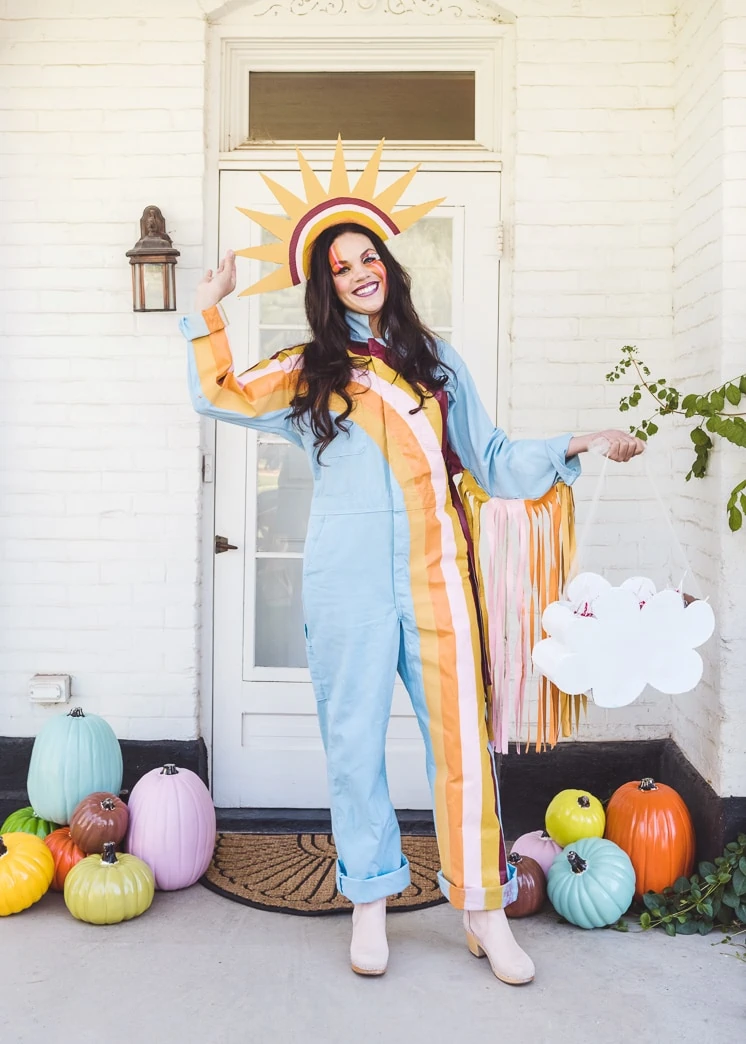
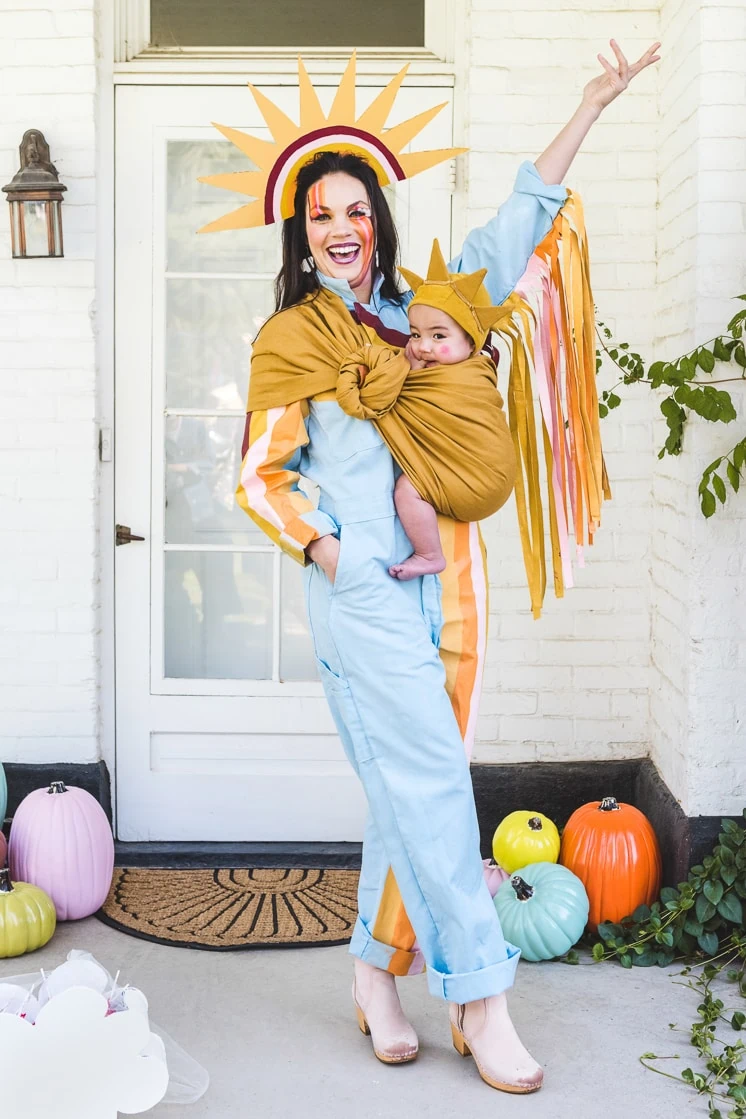
 Wildbird has done it again and launched yet another line of the most lovely slings in the most lovely colors for this season! If you haven’t experiences a Wildbird sling yet you truly need to jump on board it was a game changer. Wildbird made time with Boo (Jasper) easy and productive (remember our collection?!). So we figured all you slinging’, and soon to be slinging, parents out there could use an easy and clever Halloween costume that not only looks amazing but accommodates your tiny human like this rainbow and sun mommy and me costume. Let’s be honest, I’d wear the jumpsuit every day of the year! And if I could, that adorable baby too!
 Rainbow Jumpsuit
Materials:
- Dye (we used Rit colors Kentucky Sky, Peacock Green, and Sapphire Blue)
- Hot water
- Jumpsuit
- Paint (we used acrylic and house paint on ours!)
- Paint brushes
- Blow dryer
- large stainless steal
- pencil
Directions:
- Wet the jumpsuit, this will help your jumpsuit absorb the dye when you dip it in.
- Follow the instructions on your bottle of dye to dye your jumpsuit. (We dyed ours in boiling hot water and set it sit for 20-30 minutes in the dye to get to desired color).
- Wash and dry jumpsuit.
- Lay the jumpsuit flat and figure out how you would like your rainbow design to look on your jumpsuit.
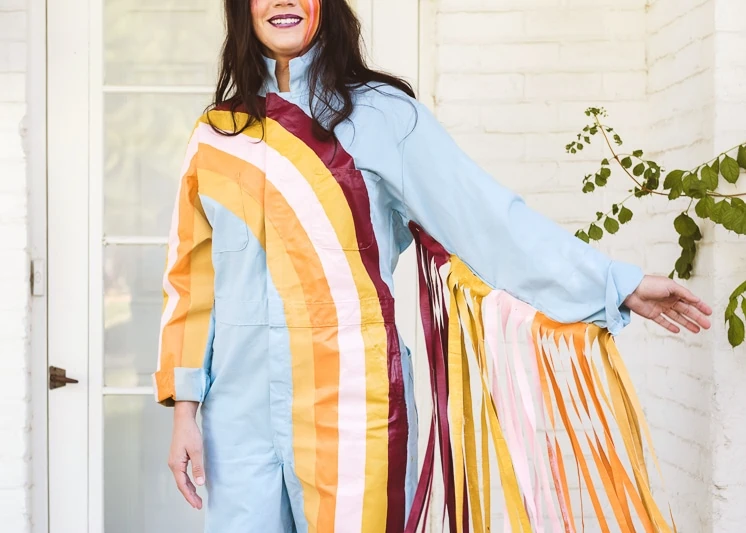
- Using a pencil draw the stripes of the rainbow onto the jumpsuit, ours ran down the leg and extended all the way to the wrist on the opposite side.
- Using paint and begin paint in the stripes according to the paint order you have picked. Let dry.
- Paint a second coat. This step is optional and might not be needed depending on how the first layer goes. Let dry.
Fringe for jumpsuit:
Materials:
- White cotton (can be cheap!)
- Paint (same paint from jumpsuit)
- Safety Pins
- Small roller sponge brush
- Rotary cutter
- Cutting Mat
Instructions:
- Lay white cotton flat on top of a trash bag to protect the surface you are painting on.
- Using the roller brush Paint 3″-4″ of fabric using the paints from the jumpsuit.
- repeat with each color of paint.
- let dry
- flip over the fabric and paint each strip to match the other side.
- let dry
- Fringe the fabric using the rotary blade. We cut our fringe pieces to 1/2″ thick and left 1″ at the top to use to pin it to the costume. our fringe pieces were about 22″ long.
- Fold the 1″ piece and the top down half an inch and use the lip to attach to the arm using safety pins.
Headpiece:
Material:
- Cardboard
- Paint (the same paint from the jumpsuit)
- Headband
- Template
- x-acto knife
- Hot glue gun
- Template
Instructions:
- Print out the template
- Trace your the template onto cardboard
- Cut out cardboard with x-acto knife
- Trace lines from the template onto the cardboard
- Paint in the base coat of yellow on the sun rays
- Paint in the stripes on the rainbow
- Let dry
- Attach to headband
Sun Ray Bonnet
Materials:
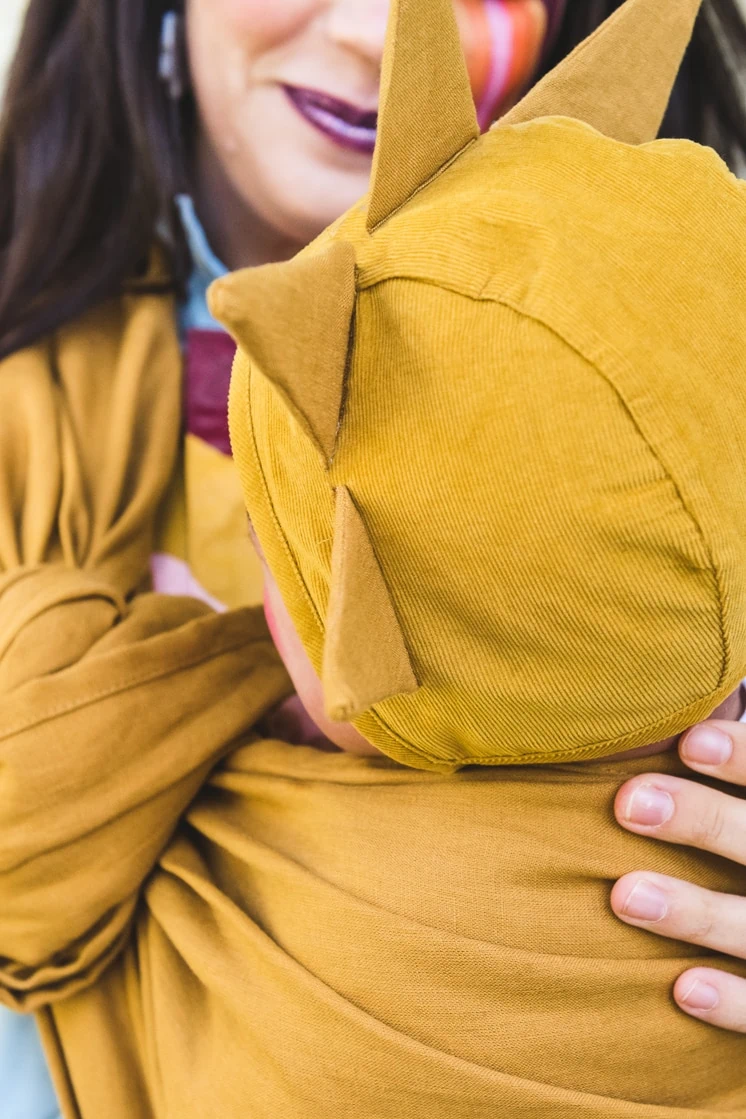
- Baby Bonnett (we used one from Briar Baby!)
- 1/2 yard fabric to match the bonnet you choose
- sewing materials (by hand or machine)
- Cardboard
- Template
- Rotary cutter
- dye (optional in case you need to dye to match the color of your bonnet or even both!)
Directions:
- Trace your small ray template onto the cardboard
- Cut out 5 small rays using an x-acto knife
- Double your fa
- Trace the large ray template onto the coordinating fabric
- Cut out 10 large rays
- Using pins attach two pieces of the cutout large ray fabric
- Sew up two sides of the ray to the point.
- repeat steps 6-7 with remaining pieces.
- Take the small ray cardboard piece and put into the sewn rays
- Sew along the bottom of the piece to secure cardboard ray
- Separate the two pieces at the bottom, fold under, and gently press.
- Repeat with all pieces.
- Attach the rays by sewing on one edge of the pressed fabric, then attach remain edge of pressed fabric to opposite side.
- Repeat with all the pieces.
Cloud treat bag:
Materials:
Directions:
- Trace 2 of the cloud bag template
- Cut templates out
- Using spare cardboard cut a long strip about 4.5″ wide and 34.5″ long
- Bend the cardboard to make it flexible so it can line line the cloud.
- Use the hot glue gun and attach one end of the now flexible cardboard to the edge of one of the clouds.
- Repeat step 5 to attach the remaining cloud piece to the two other pieces.
- Paint cloud white
- Cut tulle to the desired length for strap
- Attach strap at the open ends of the long strip of cardboard using hot glue.
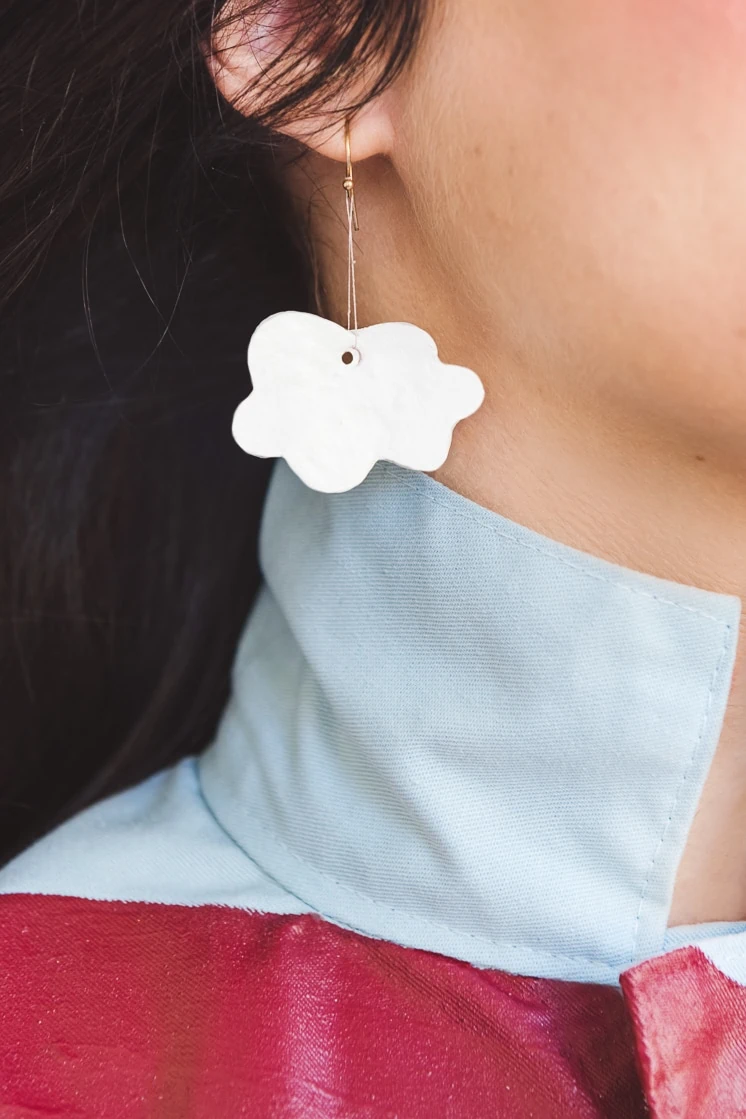
Cloud Earrings:
Materials:
Directions:
- Roll the sculpey clay flat to about 1/4″ thick
- Trace the template out onto the clay twice
- Cut out the two traced pieces
- Follow instructions on sculpey to bake your earrings
- Once baked and cooled paint earrings white (or buy white sculpey to elimate this step!)
- Take a small piece of thread and thread it through the hole on the cloud
- Tie it off creating a 1/2″ loop
- Attach loop to the earring
You can find the templates for the following items in our shop!
- cloud earring
- cloud bag
- sun ray
We can’t wait to see how you recreate this costume! Tag us with @HouseLarsBuilt and @Wildbird and use the hashtag #WildbirdHalloween to enter their costume contest!
This post is sponsored by our friends at Wildbird



Comments