


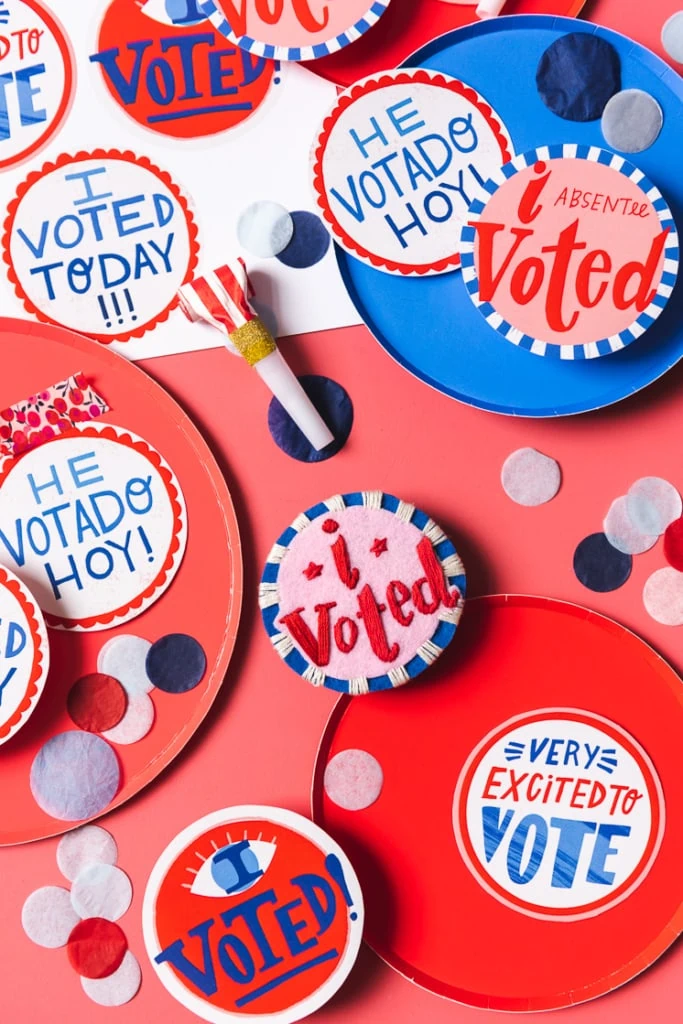
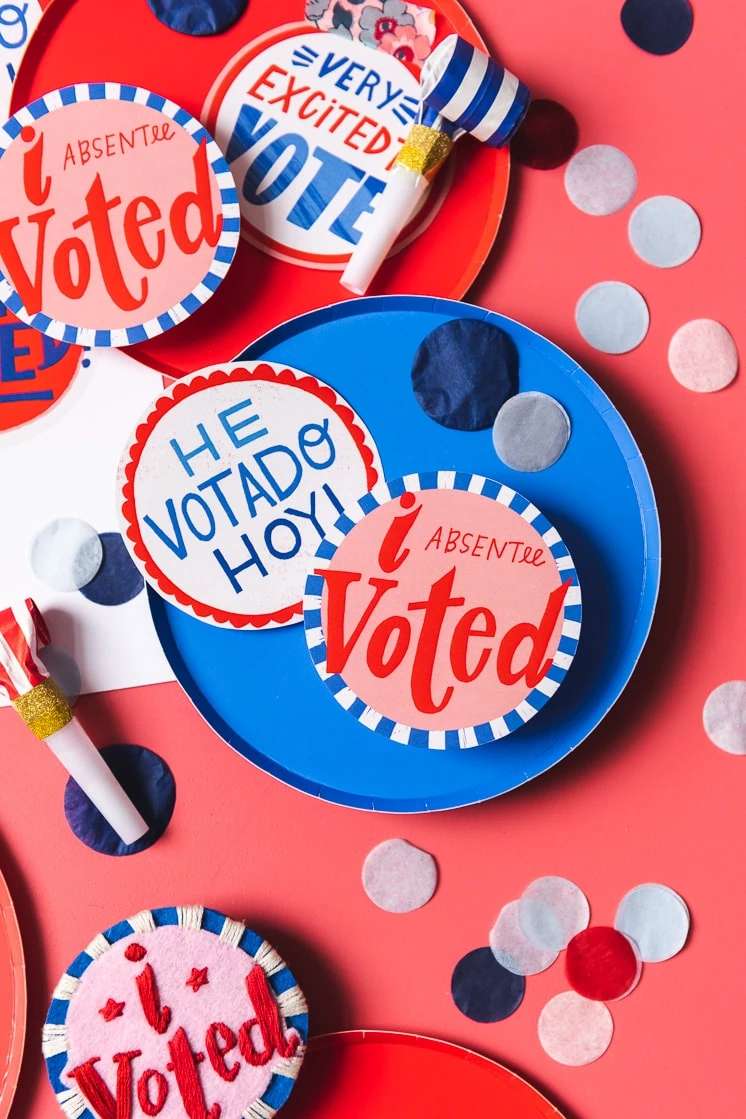
We, the Ladies of Lars, are so proud that we have the opportunity to vote! We created these “I Voted” Pins to celebrate the chance we all have to exercise our voices and do our civic duty.
There are two templates here–a printable version with 5 different versions as well as an embroidery version complete with a step by step pattern. Print out the pin, embroider it if you want, and hand them out to anyone who wants to show off that they voted! Make them match to show your solidarity as a group or customized each pin you make to represent how different our voices can be! Every vote counts, and we think that exercising your right to vote deserves such a cute pin to encourage others to stay involved too!
Materials:
Embroidered “I Voted” Pattern
As you know, we’re getting more and more into embroidery (Celebrity crush dolls anyone?!) and the idea of making something that will last a little bit longer than a throw away sticker is really appealing. In this way, it acts more as a patch than a pin. We couldn’t be more proud to let people know that we voted so might as well keep it up all year long!
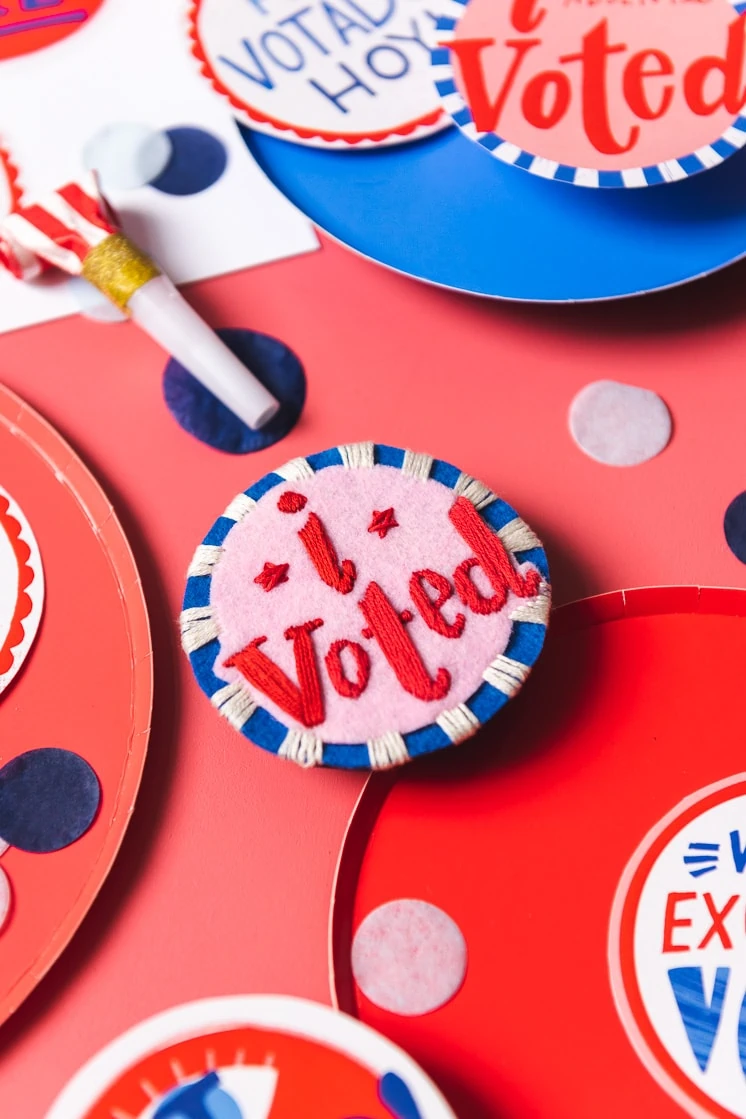
How to embroider an “I voted” pin
Materials: see above
Instructions:
- Print out the “I Voted” embroidery pattern. Use a sharp pencil to poke through the paper on the felt along the lines of the type (you can also use embroidery transfer paper).
- After poking through with a pencil, remove the paper and lightly connect the dots to create lines.
- Trace around the pattern pieces and cut out pieces following instructions on pattern.
- Once pieces are cut embroider the type with a satin stitch on the smaller pink circle.
- Once that is done, center it on the background felt color and pin them together.
- To connect the back and front, whip stitch the edge of the front circle to the back circle following white stitching.
- Attach last circle to back to create backing.
- Using hot glue attach the broach piece with hot glue.
- Wear around to let everyone know you voted!
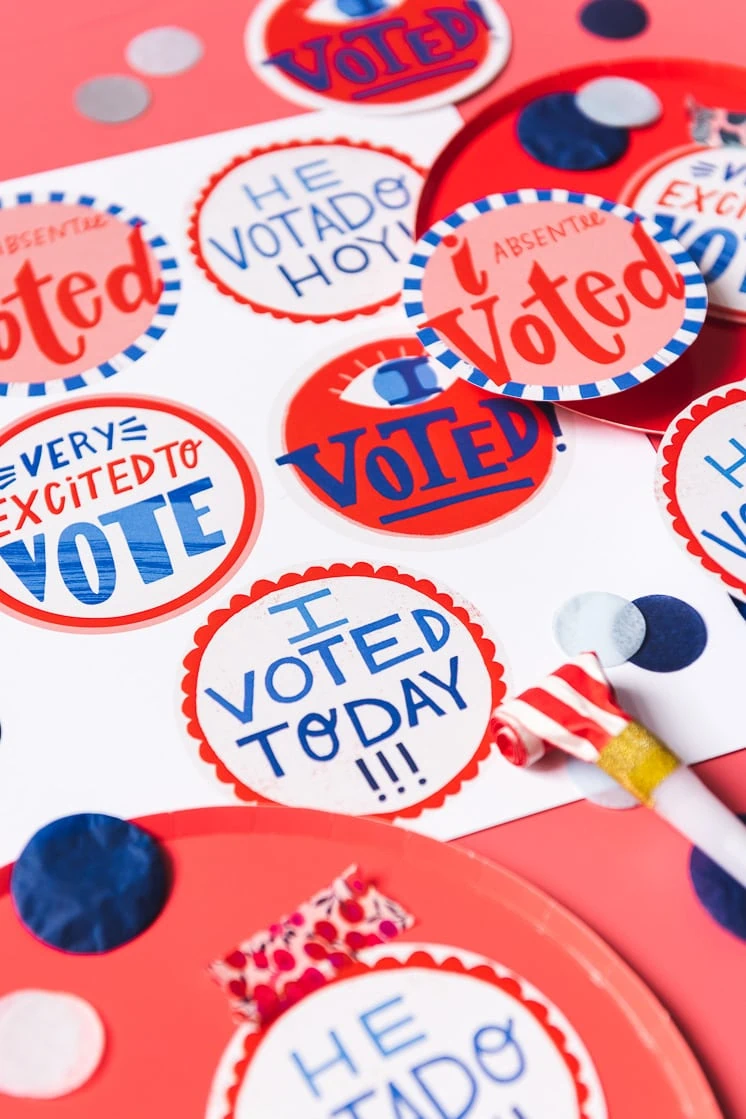
If you are printing stickers use the instructions on the sticker paper to create your stickers!

“I voted” printable stickers
Make your own “I voted” stickers by downloading our set of 5. There’s an option for “I absentee voted” and even one in Spanish. You can find the full set here.
We can’t wait to see you wearing these around! Will you be printing yours off as a sticker or embroidering them? Be sure to tag us with #larsmakes so we can see them!
Comments