


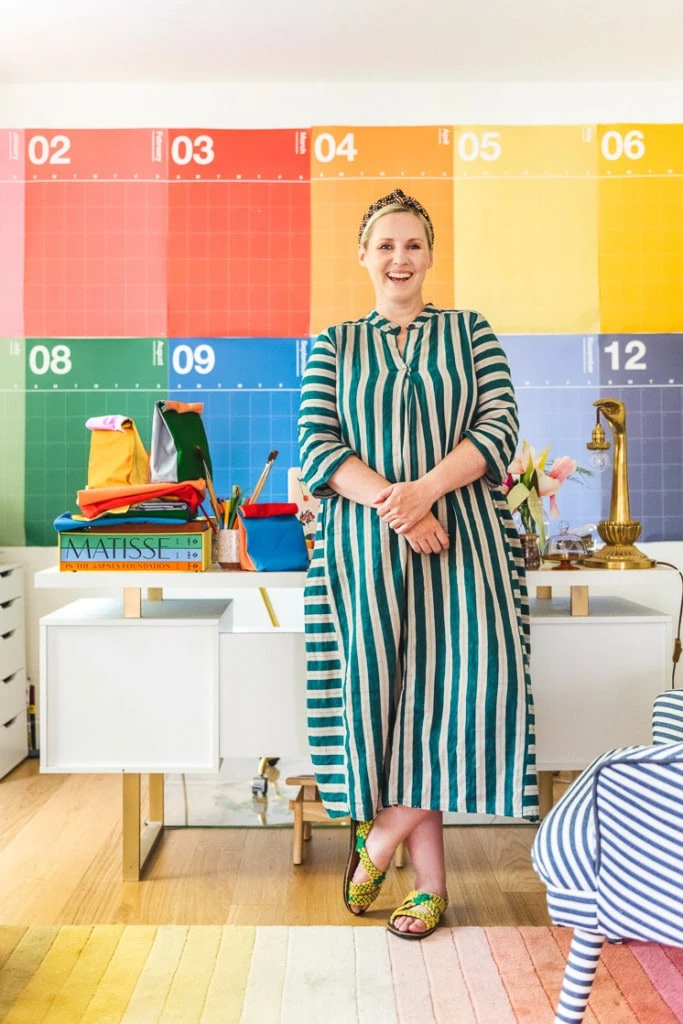
Picture this: you’re on top of things. You woke up early for school or work (or to get your kids up), you exercised, meditated, took a refreshing shower, got ready, and put together a great outfit. After eating a delicious, nutritious breakfast, you packed a sumptuous lunch in the reusable, colorblocked, DIY lunch sack that you made yourself. You didn’t even neglect any of the food groups while you packed your lunch. You strode out of your home with a toss of your luscious locks and arrive to work or school in a glamorous electronic vehicle, on public transit, or by foot or bike. You also probably have a signature scent and a high-power job making the world a better place. You are beauty, you are grace, you are Miss United States.
I’m positive that I’m not the only one who imagines that whole scenario with a healthy dose of “yeah, right. In my dreams” and an eye roll. But a girl can dream! And right now part of my dream is to pack myself scrumptious lunches in a reusable lunch sack, okay?
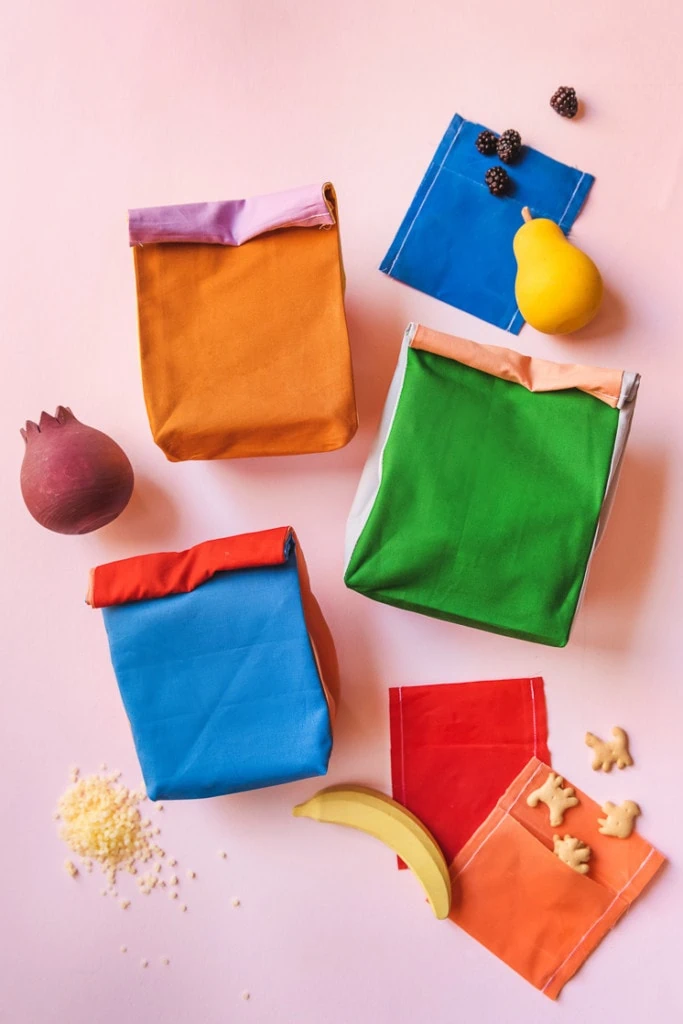
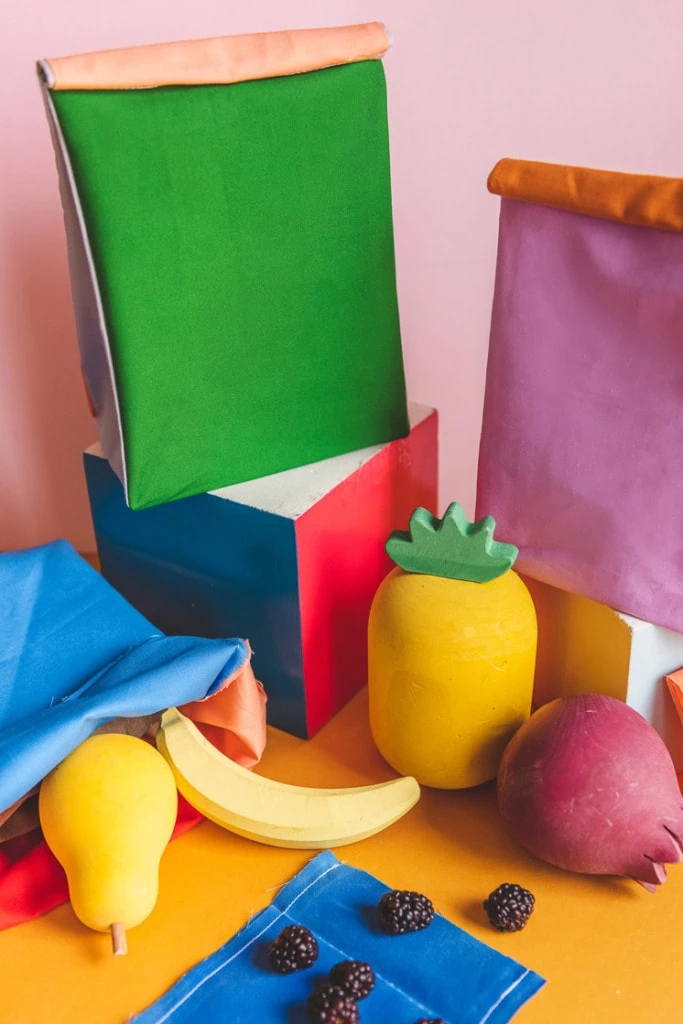
Back to school is the perfect season to turn over a new leaf, and we made these lunch sacks to encourage ourselves to save money and the environment with homemade lunches in an eco-friendly container.
Materials:
While I definitely don’t live the lifestyle described above, a colorful and eco-friendly reusable lunch sack is within my reach. I think it’s safe to say that it’s within yours, too! And maybe one day we’ll all be there with our imaginary put-together dream girl, living our best lives.
Make Your Own Reusable Lunch Sack

Materials
You’ll need some fabric (cotton is nice here) in a few fun colors, matching thread, scissors or a rotary cutter and mat, a ruler, sewing pins, an iron and ironing board, and a sewing machine.

Instructions
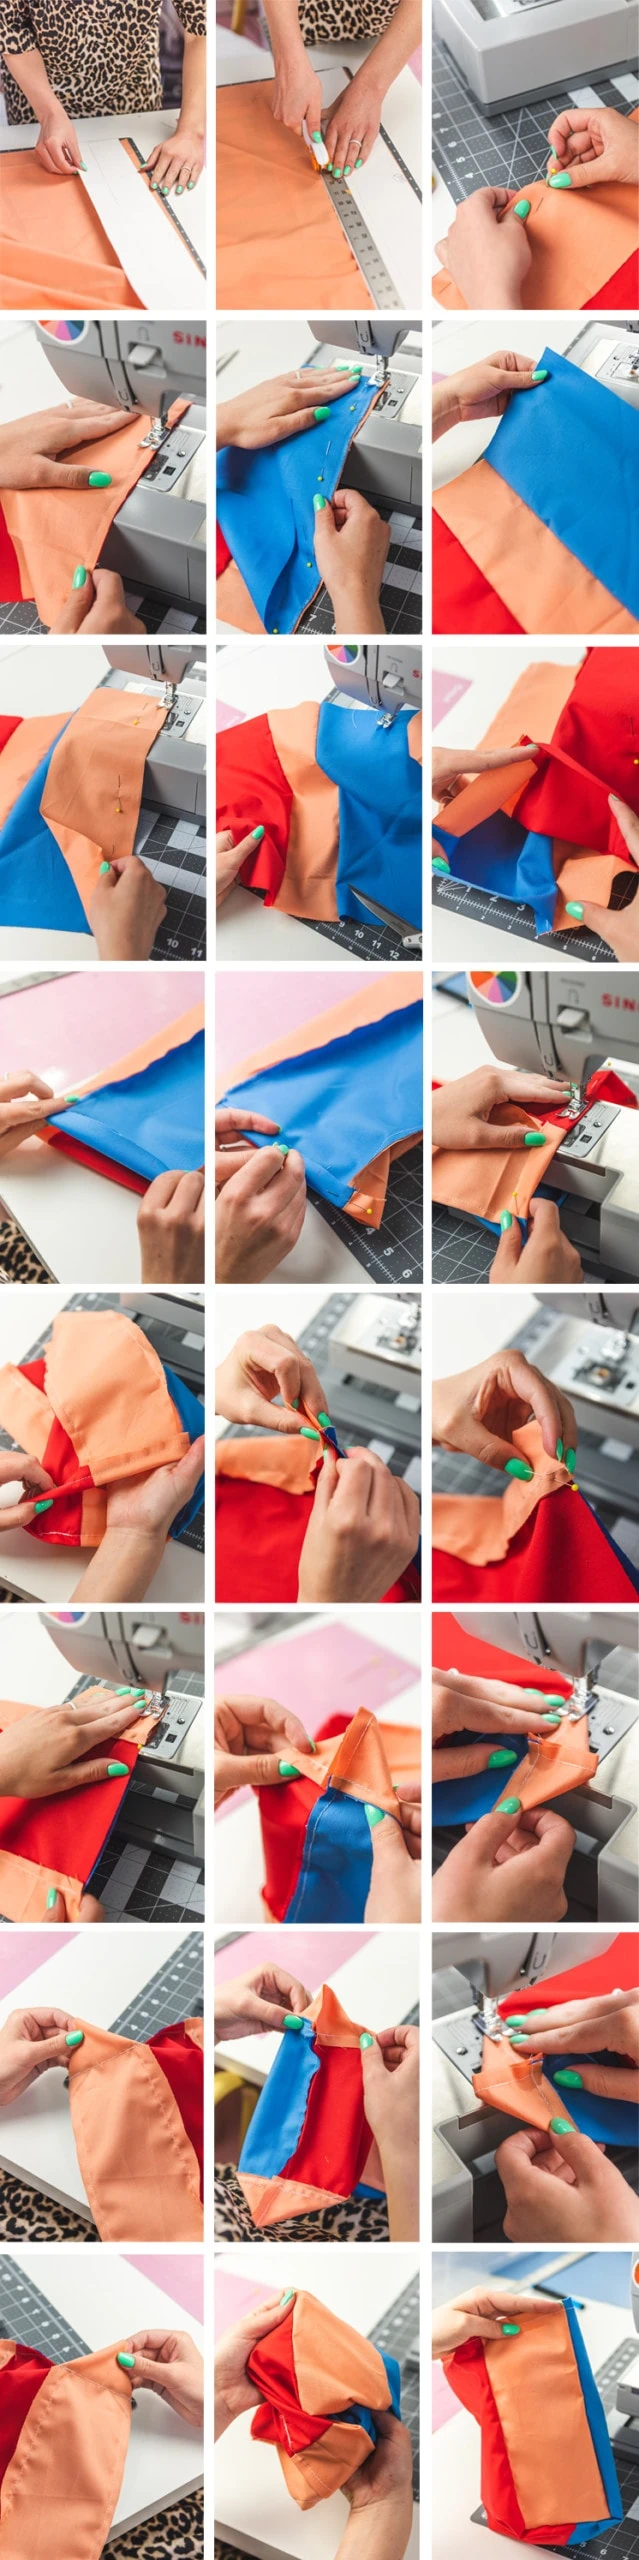
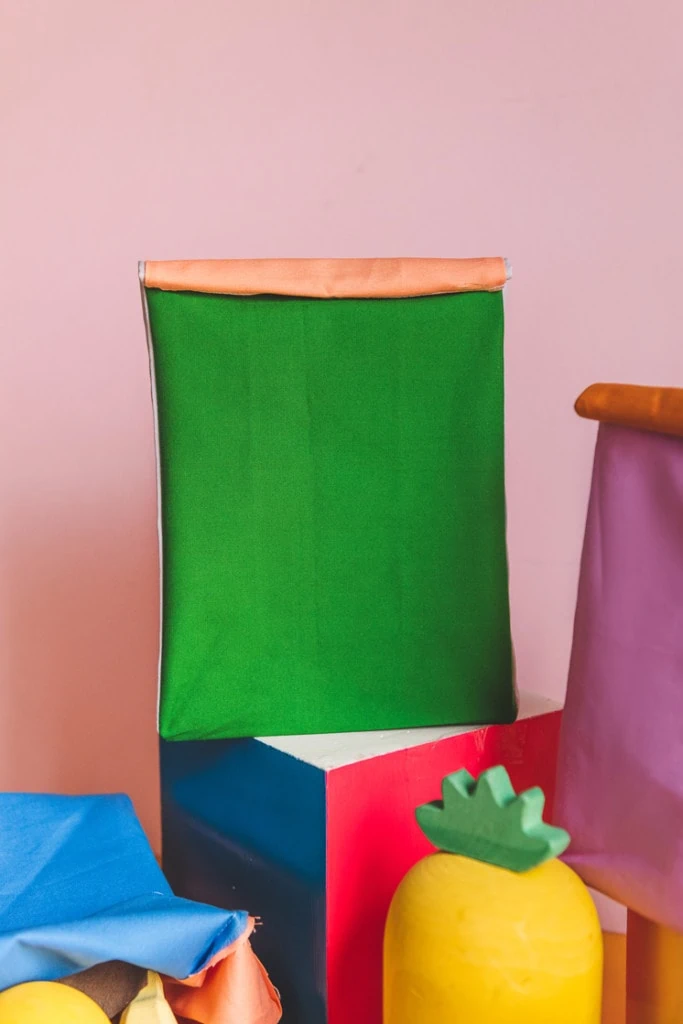
- First pick out your colors! We used three colors for each lunch sack.
- Download and print the DIY Reusable Sack Lunch Pattern.
- Measure out and cut your fabric. You’ll need two different colored rectangles that are 6×10″ for the front and back of the bag and two of the same colored rectangles that are 4×10″ for the sides of the bag.
- Pin the rectangles together along the long sides.
- Sew all the sides together. This will make a long strip.
- Press all the seams flat.
- Pin the end rectangles on the long side together (with the right sides together). This will make a loop.
- Sew the rectangles together and press the seams flat.
- Fold the fabric at one opening on the loop back toward the seam side half an inch. Fold it over again to hide the raw edge and pin.
- Sew the hem that you just pinned.
- Now let’s finish the bottom of the bag. Pin the bottom of the lunch sack together so that the seams between the front and back meet on either side of the side fabric.
- Sew the bottom of the lunch sack closed.
- From the bottom where you just sewed the lunch sack closed, set it on a flat surface so that the base forms a rectangle with triangular flaps coming off each side.
- Pin the triangular flaps and sew them from corner to corner. Repeat this for the other side. Now that the 2 triangular flaps are sewed cut off the excess fabric.
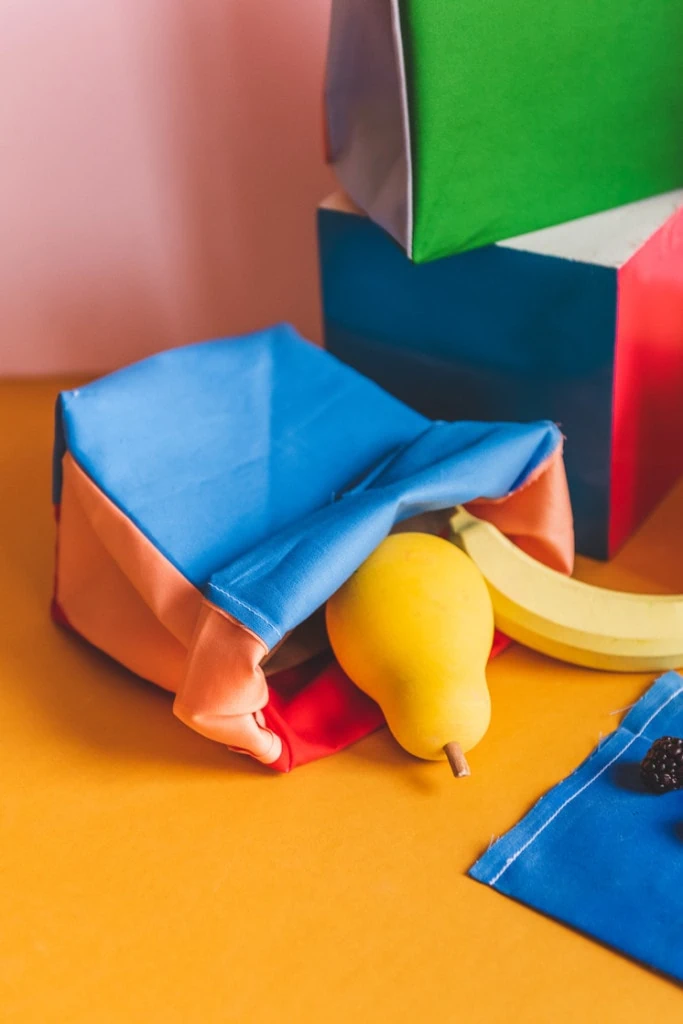
- Turn your lunch sack right side out and put together a great sack lunch! Yum!
Looking for more back to school inspiration? Check out these back to school stickers (and find them in our shop), this whiteboard upgrade, this apple paper lunchsack DIY, these creative homeschool activities, these dorm room tips and tricks, and more!
If you make these lunch sacks we’d love to see them! Tag us on Instagram with #LarsMakes and check out this video of our process!