Are you ready for spring yet? I know I am. Once Valentine’s Day is over, it seems like winter just drags on. I’m so done with the random snow flurries and cold spells amidst the teaser spring weather. Spring can’t come soon enough! You know how much I love spring–I mean, it’s the season of flowers, so can you really blame me? It’s beautiful!
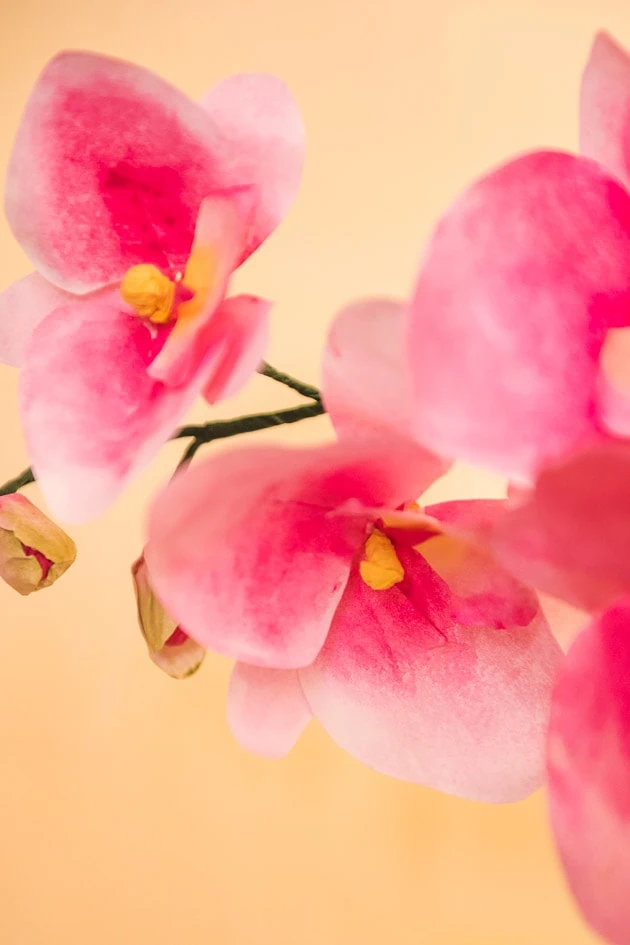
In order to help give spring a nudge in the right direction, we have a brand new paper flower for you this year! Welcome this delicate, DIY paper orchid while you’re waiting for the flowers to start blooming. We think it just might do the trick.
Materials:
DIY Paper Orchid
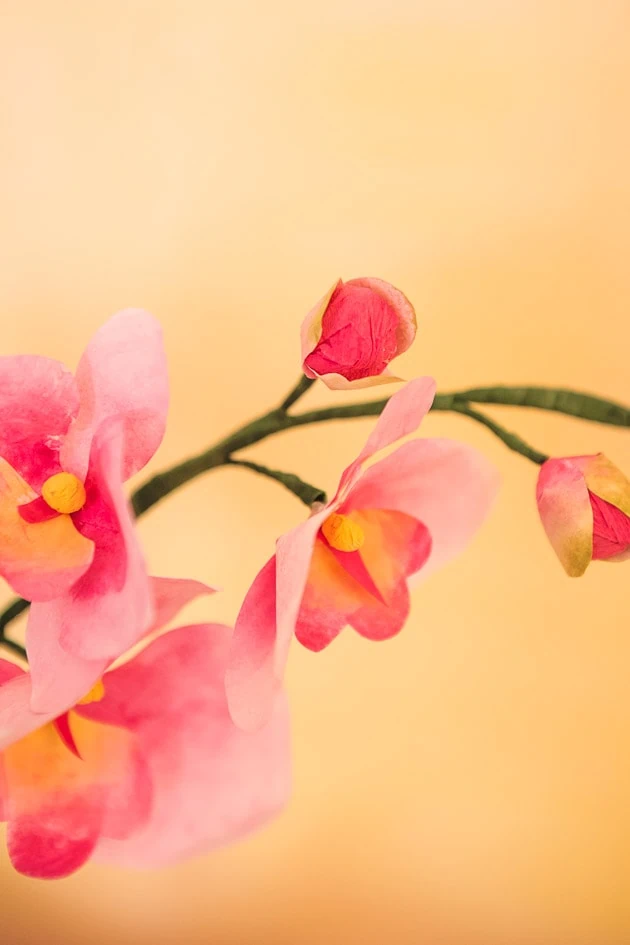
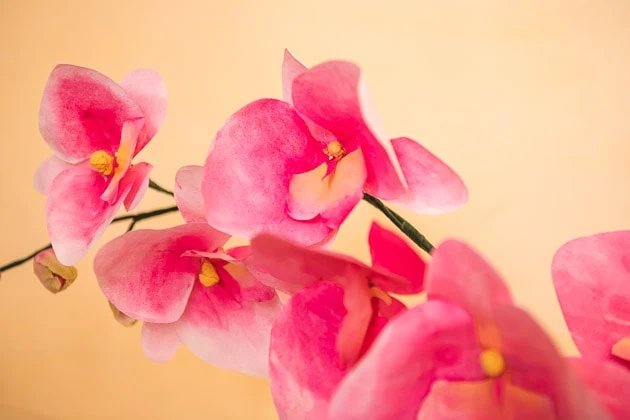
Since it’s a fresh, new year, we were ready for a fresh, new flower. We wanted something delicate and beautiful to combat the winter, something original and different from what we’ve done before. Hence, the birth of the DIY paper orchid! Instead of using our tried and true crepe paper, we went for a softer, more delicate look, imbuing traditional printer paper with a delicate, watercolor-like texture. We love the way the paper gently curls and drapes like the petals of real orchids, and the watercolor texture is a lovely little touch. Ready to learn how to make your own?
How to Make a DIY Paper Orchid
Making your own DIY paper orchid is surprisingly simple! Here’s how to do it:
Prepping the Paper
- First, download the paper orchid templates found here.
- Using the Cricut maker or scissors, cut out the templates on regular white 8 1/2″ x 11″ paper. Feel free to cut out as many as you’d like–we used three small full bloom, six large full bloom, and eight buds. For the leaves, we used one small, one medium, and two large.
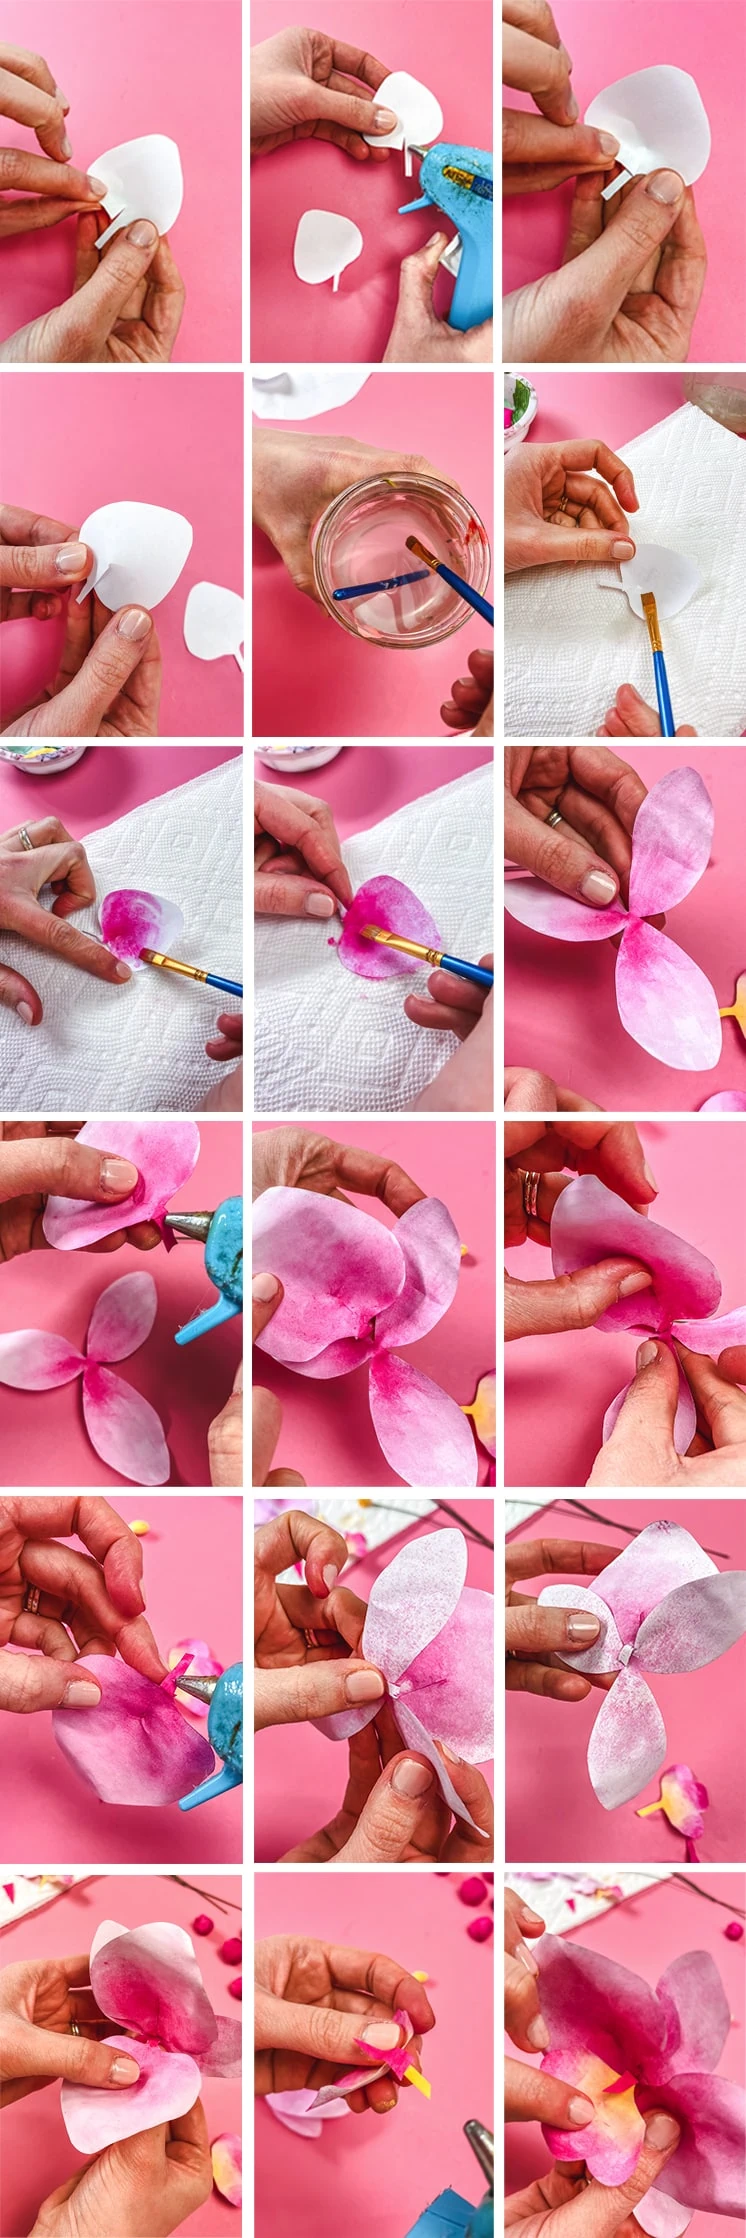
- Now it’s time to glue the petals. This will give them a bit more shape. To do this, take a petal. It should have a small cut in the bottom near the base. Gently move the side with the stem over on top of the other side. Secure with a dab of hot glue. It should now gently cup in the center.
- Repeat step 3 for the rest of the petals and buds.
Prepping Your Workstation
- Prepping your workstation will help make the latter steps much easier. You’ll want a jar of water to water down the paint and rinse out brushes. You’ll also want paint brushes (one with a wide, rounded tip works well for this), a paint palette or plate for your paints, and some paper towels to paint on. This is a bit messy so you’ll need them. We especially liked paper towels because they’re more absorbent than newspaper or some other protective covering for your surface.
- Once your work station is prepped, you can start painting!
Painting the Pieces
Now you’re ready to paint! You can use a variety of methods for this–watercolor, gouache, and acrylic paint all work well.
- Take a petal and wet the entire front (curved inside) with water. This makes for a smooth texture in your gradient.
- Then, using a watered down color of your choice for the petal (we used pink), paint a gradient. Start with more concentrated color at the bottom and more watered down at the edges of the petal.
- Repeat steps 1 and 2 for all petals.
- For the two tone petals, repeat steps 1 and 2, but paint one color in the center at the base (we used yellow), and one color at the tips (we used pink), blending them smoothly where they meet. Use the same process for the buds, except paint the side that bumps out, rather than the inside.
It will take a bit for the petals to dry, so you can do the other steps while you wait.
The Stamens
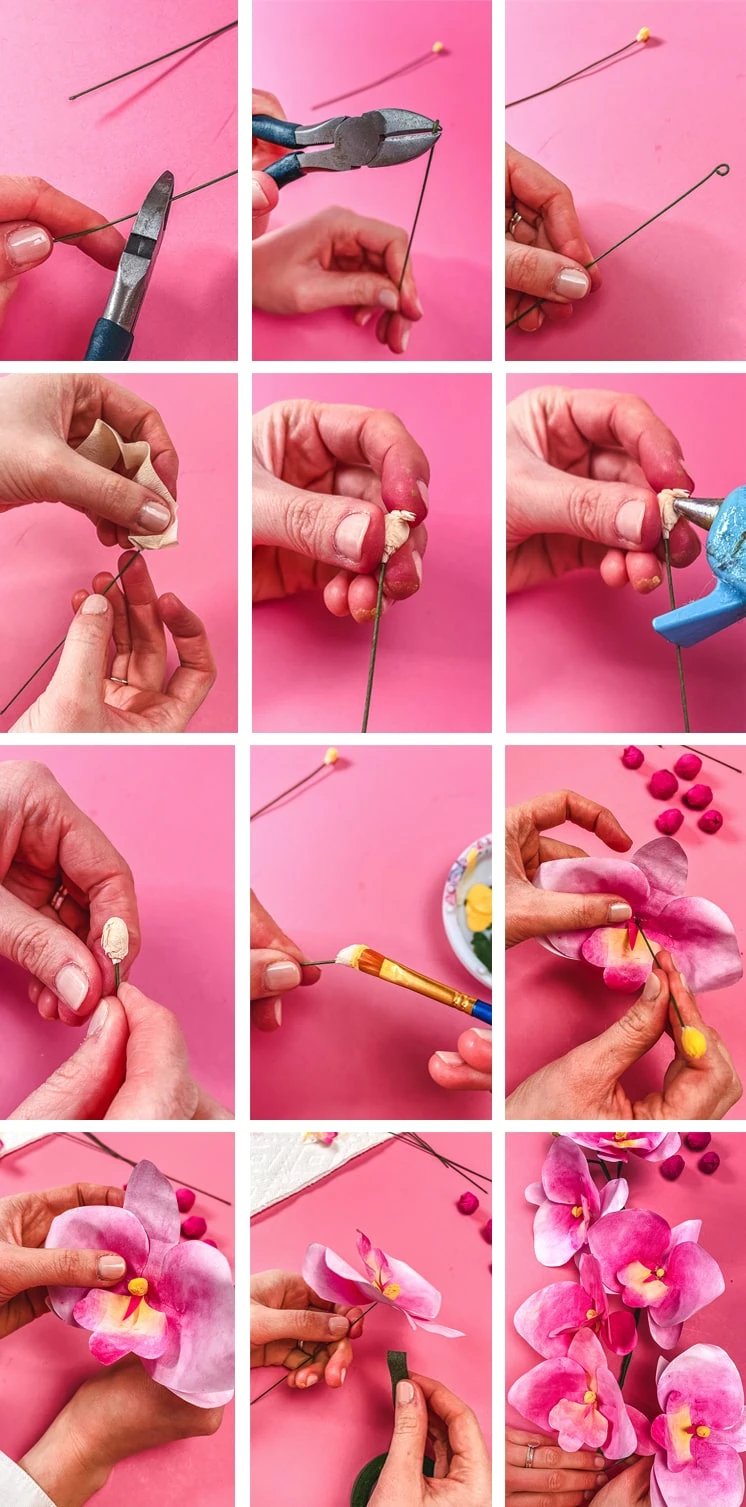
- For the stamens, first use needle nose pliers to bend a small loop in the top of a piece of 24 gauge wire.
- Now, wrap a thin strip of crepe paper around the loop. Bundle it up so it’s nice and neat and secure with a dab of hot glue.
- Next, paint the stamen a color of your choice (we used yellow).
- Let the paint dry before adding it to the flowers!
The Leaves
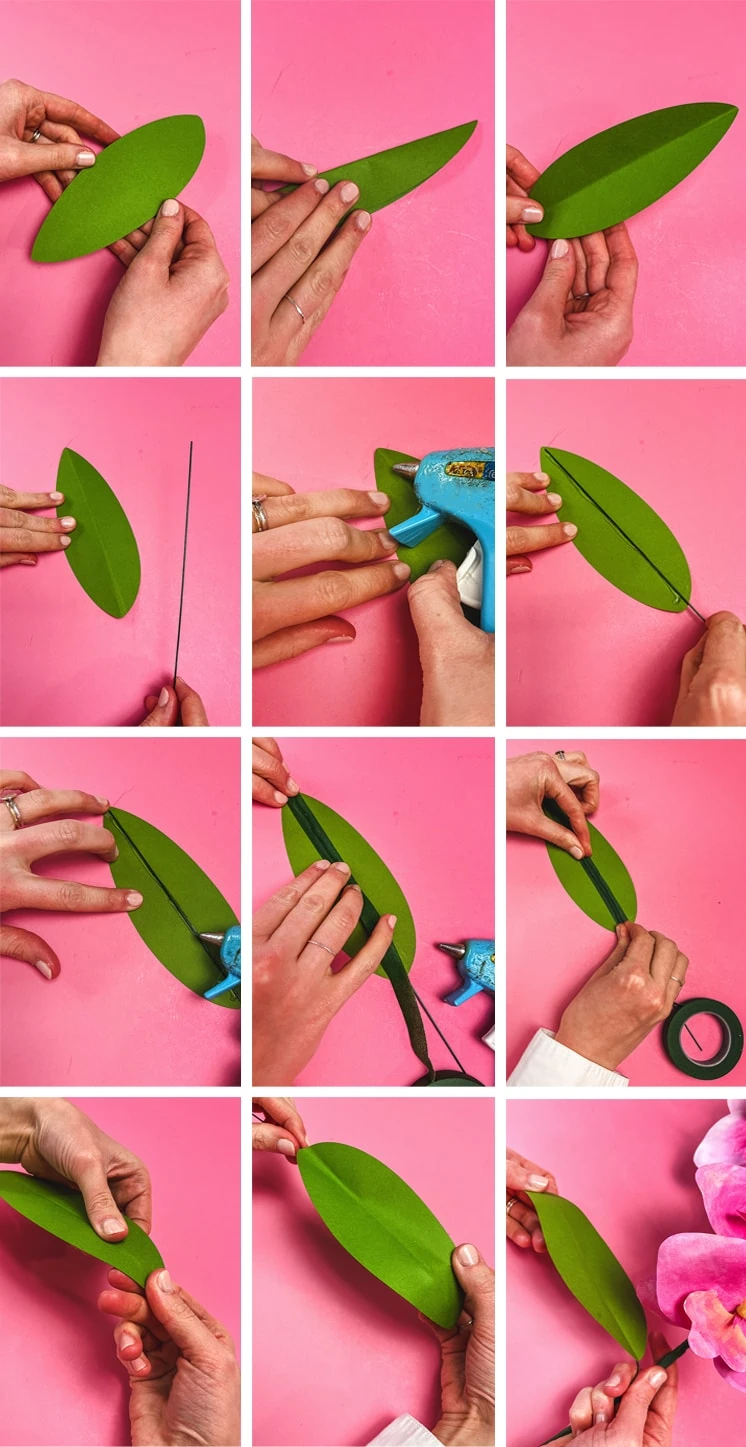
- First, using your Cricut maker or scissors, cut out the leaf templates on green card stock paper.
- Next, fold the leaves in half. If you’d like, you can score the back of the leaf before folding–this makes folding much easier!
- After folding, flip the leaves over and hot glue a piece of 18 gauge wire along the fold line. Extend three or so inches of the wire past the base of the leaves so you can bind the leaves together later.
- If you’d like to cover up the wire, you can hot glue a strip of floral tape on top. Then flip the leaves back over.
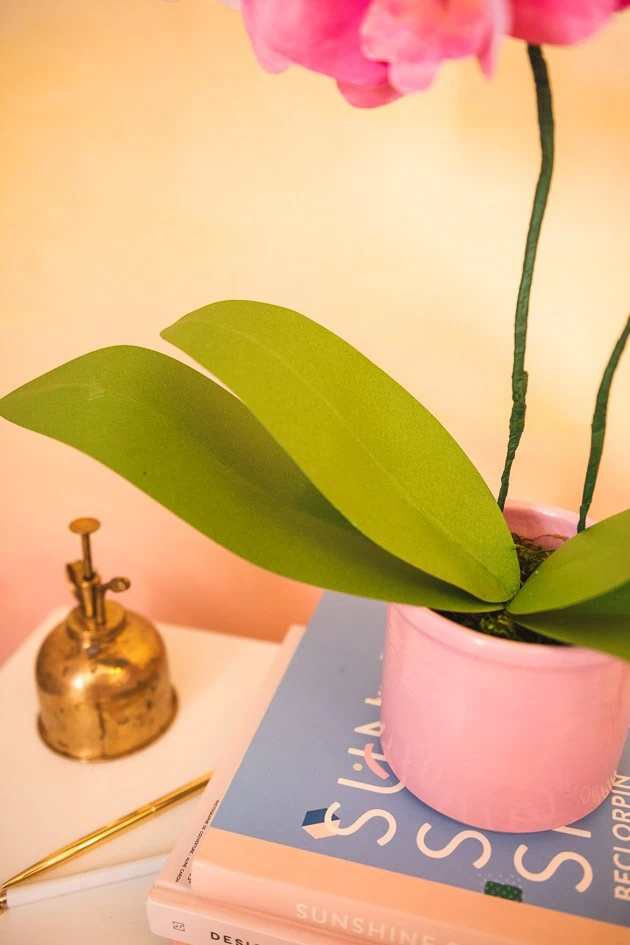
- Now wrap all your leaves together with floral wire. Put the smaller leaves on top, and bigger ones on bottom. Use our photos as a reference to see leaf placement.
The Buds
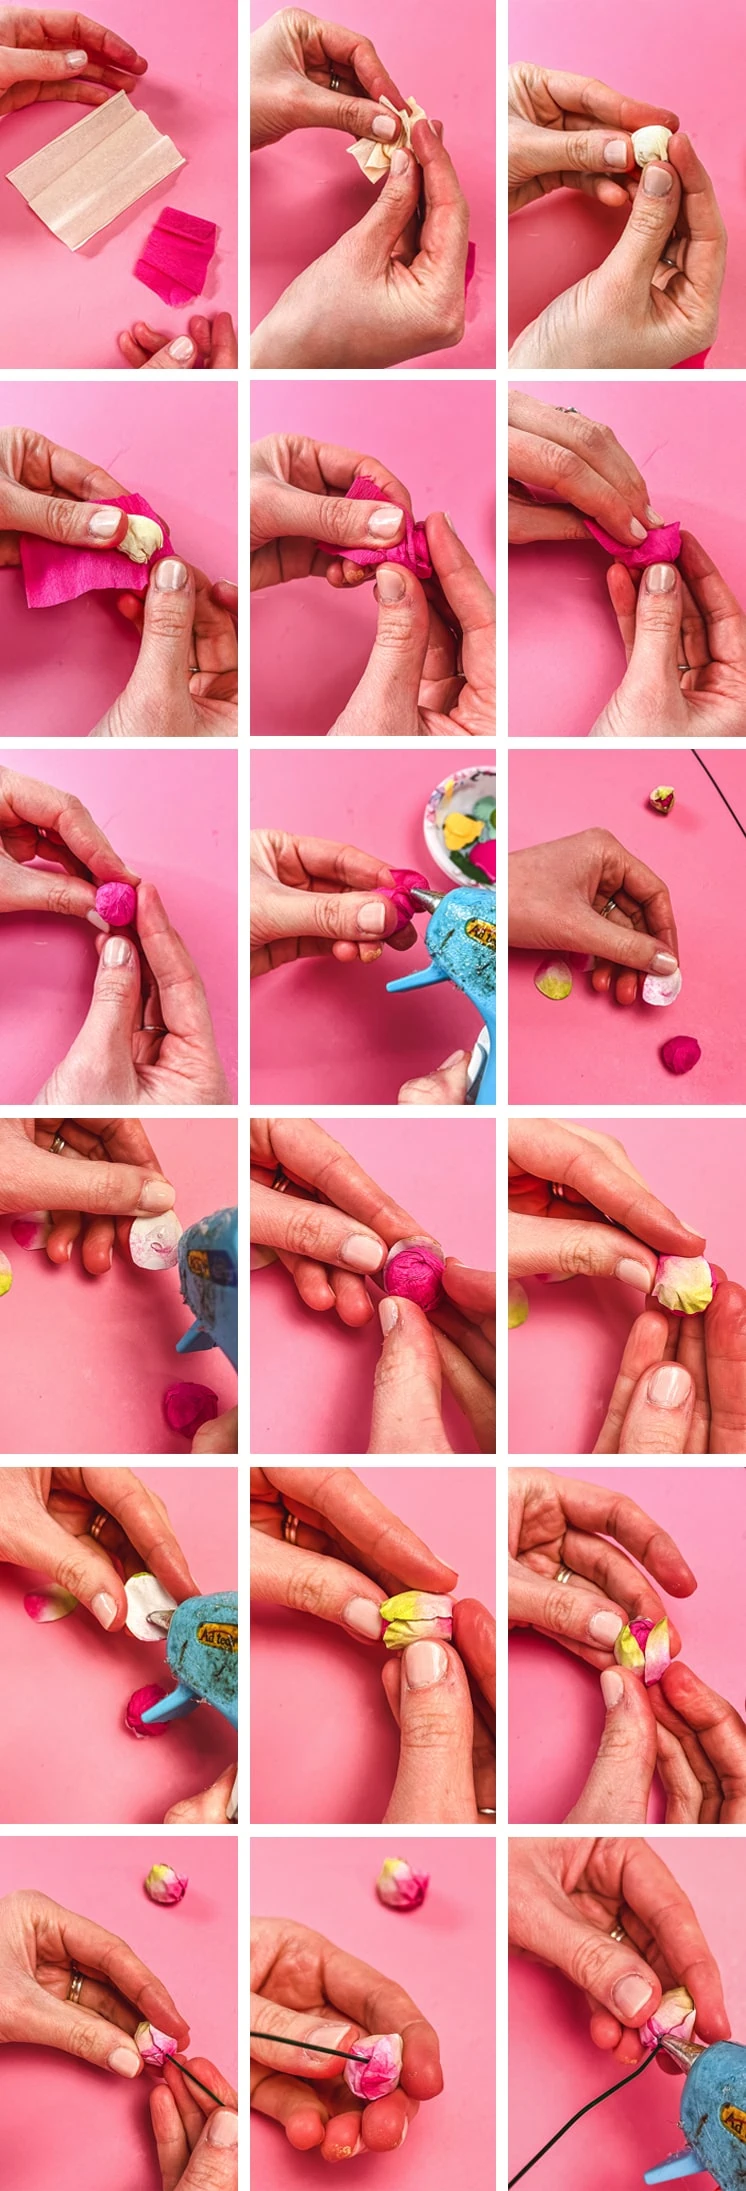
- For the buds on your paper orchids, bundle up a little ball of pink crepe paper so it’s nice and neat, then secure with hot glue.
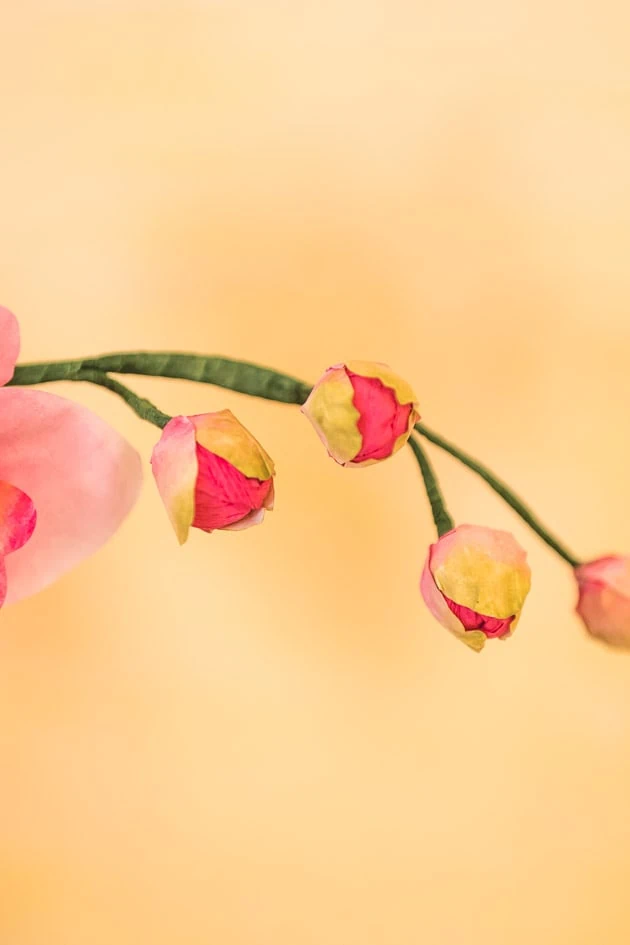
- Once the bud petals are dry, you can secure them to the pink ball with a dab of hot glue. Use three petals per bud, pressing them into the shape of the ball as you go. You can also leave some of the buds partially open, like we did.
- After the bud petals are glued on, stick a piece of 18 gauge wire into the bottom of the bud a few centimeters and secure with a dab of hot glue.
- Now wrap a thin layer of floral tape around the wire.
Assembling the Flowers
Now that the petals are dry, you can assemble your paper orchids!
- First, hot glue the two large petals to the three petal piece, using the step photos as a reference. Wrap the bottom strips around to the back and secure with a dab of hot glue.
- Next, hot glue the little triangle piece to the scalloped petal, with the point towards the scallops.
- Now, hot glue the scalloped petal onto the main flower with the other petals. Again, wrap the extra strip of paper around to the back and secure with a dab of hot glue. Note: if you’d like, you can curl the petals around your finger to contour them to the shape of a real orchid petal.
- The stamen is next! Take the end of the wire and poke it through the center of your paper orchid. Pull it all the way through so the stamen is pulled up snugly against the petals.
- Flip the flower over and put a dab of hot glue at the site where the wire pokes through.
- Once the hot glue is dry, wrap a layer of floral tape around the wire, making sure it’s butted up tightly against the flower’s back.
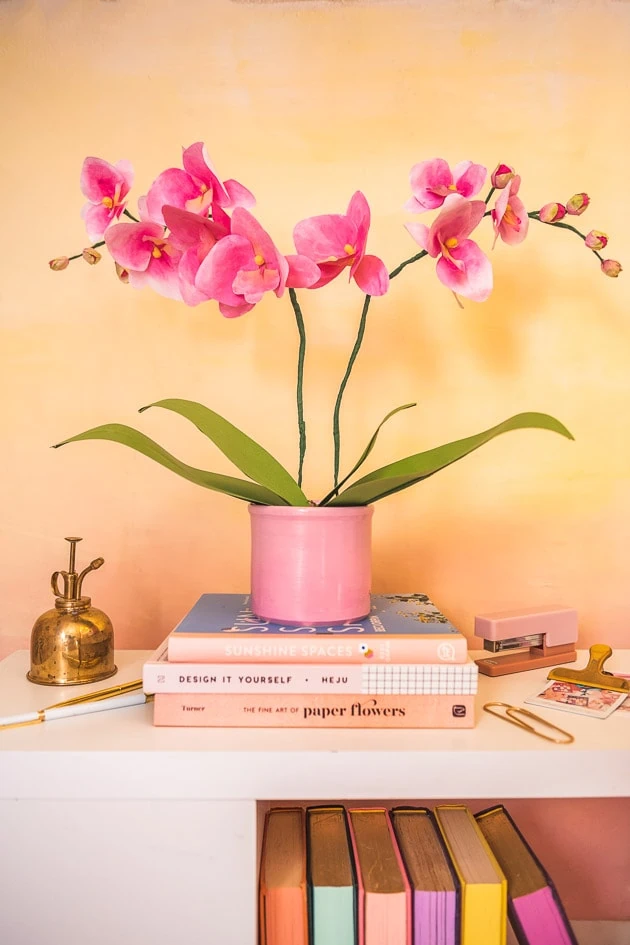
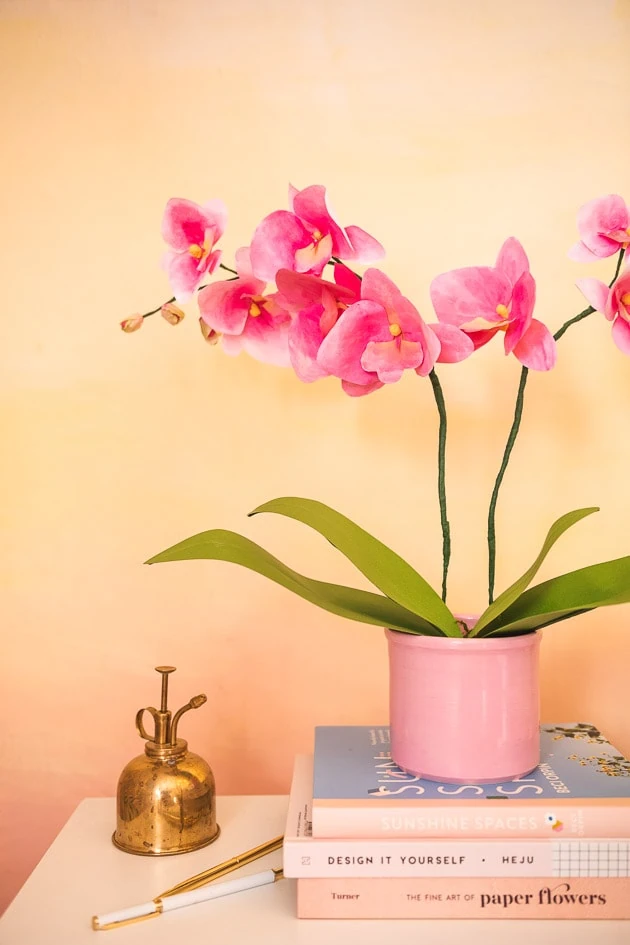
- Using our photos as a reference, secure all the flowers and buds together with floral tape. Start with the smallest buds, then partially opened buds, then small flowers, then large. We separated our flowers into two separate stalks. You can do as many or few as you’d like!
- Make sure to leave a large length of sturdy wire to work with at the end for the stem, wrapping the whole thing in a layer of floral tape.
Finishing Touches
Now all that’s left is to put your paper orchid pieces together in a pot!
- Place a thick disc of floral foam into your flower pot. The foam disc should fit snugly in your pot.
- Poke the orchid branches into the foam, making sure it’s deep enough that they won’t tip over.
- Next, poke the leaves in so they’re close to the stems of the orchids.
- Arrange the stalks and leaves by bending the wires until you’re happy with the arrangement.
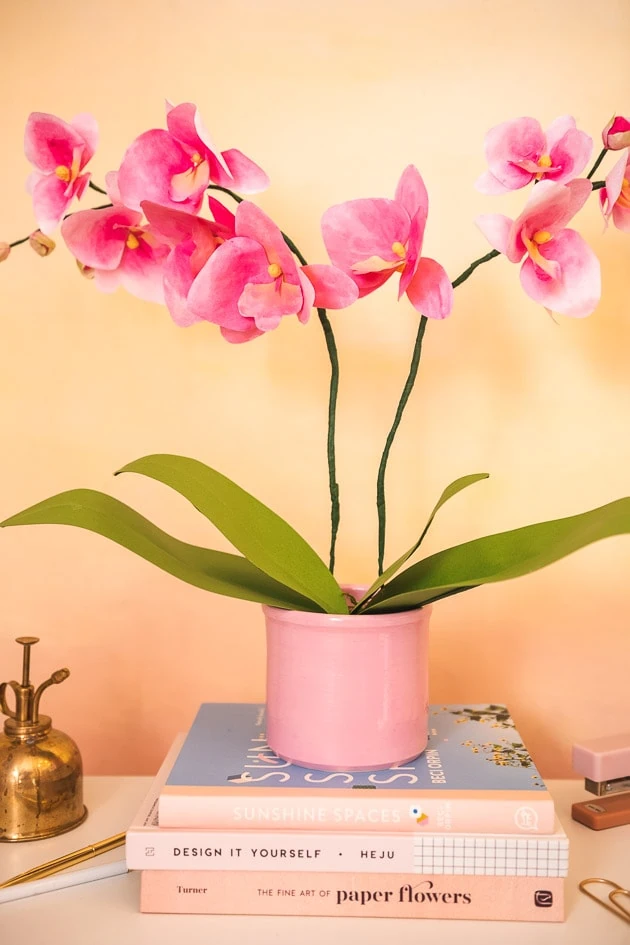
- Voilà! You’ve just made your own DIY paper orchid!
Styling Your DIY Paper Orchid
The wonderful thing about all paper flowers, in my opinion, is that they look great pretty much anywhere. And since they’re paper, you don’t have to worry about perfect lighting to keep them happy. Stick them on your desk while you’re working, put them in the bathroom for a pop of color, next to your bedside table, or on the mantle. Honestly, these little beauties are so lovely they’ll do justice to any room or situation. We would love to see what you do with yours! Let us know in the comments.
More Inspiration
If you loved this tutorial on DIY paper orchids, you’ll want to check out our other paper flower tutorials. We have so many! Try our DIY Paper Hollyhocks, or these Poppies, Peonies, and Posies. Have a spring or summer wedding coming up? Here, here and here are some beautiful bouquets to choose from. You can also check out this holiday flower roundup if you’re interested!


Comments