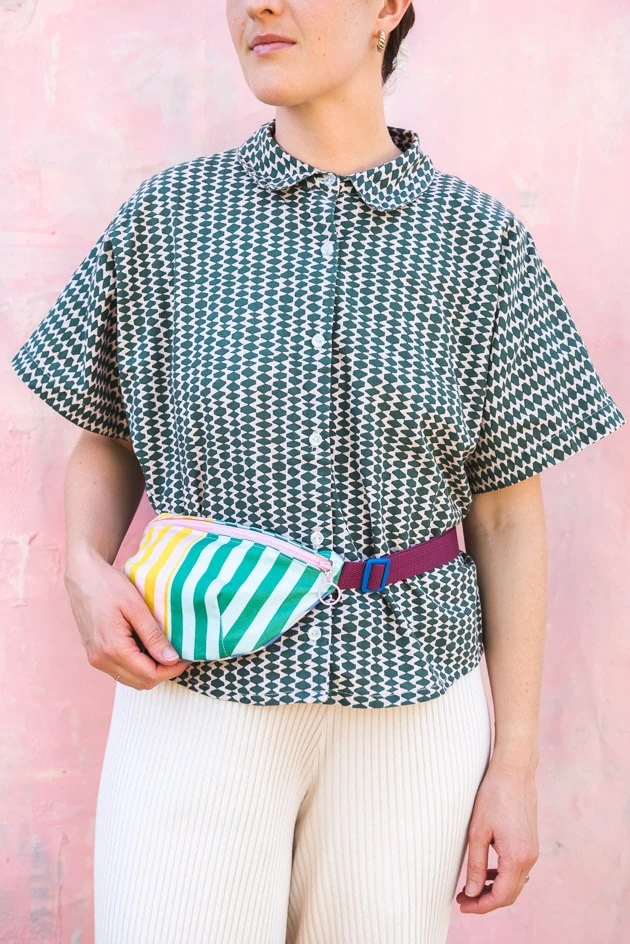
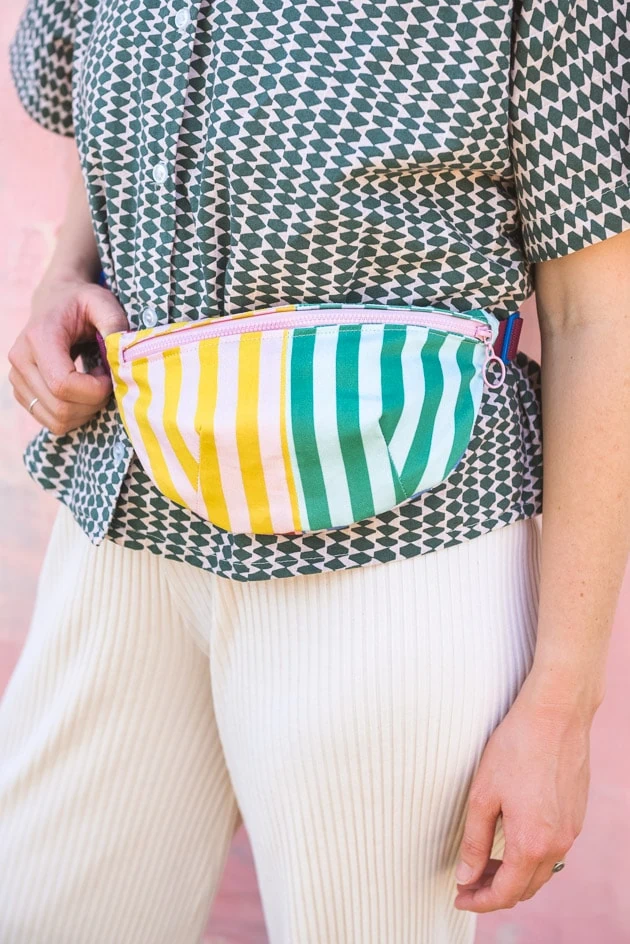
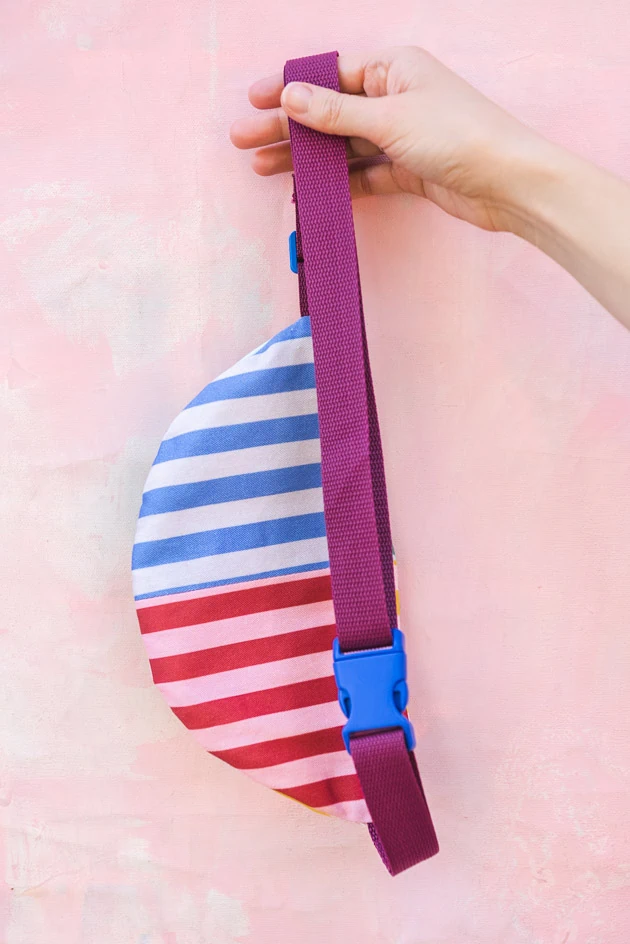
Remember when I mentioned my tentative plans to go to Europe at the end of the summer? Well the time has come! In just a few weeks, I’ll be in France! I can’t tell you how thrilled I am to go on this little girls trip (I love my boys but I’m flying solo with the gals this time! Freedom)! Prepping everything to travel got me thinking–I need a bag that’s small and convenient enough to carry around with me everywhere while in France. The obvious solution was a fanny pack, but I had an incredibly hard time finding one that adjusted to the right size for me while still meeting my need for color and personality.
That’s how our DIY fanny pack was born! It’s the perfect solution to all my travel needs, with an adjustable strap perfect for any body size. Scroll down to learn how to make your own!
Materials:
Fanny Pack Featuring Colorblock Stripes
My main requisite for this fanny pack was color. If you haven’t read my thoughts on the need for color, see this post and then this one. Well, the world’s lack of color extends to functional accessories like fanny packs. It’s pretty insane to me the number of black fanny packs that appear in a google search. I knew mine, on the other hand, had to be colorful and make me feel happy whenever I put it on.
Well, the perfect opportunity presented itself. We’ve been working on a few different bold stripes to add to our Spoonflower shop, and settled on four different colorways that are amazing together. For all the stripe options we considered, click here.
How to Make a DIY Fanny Pack
Prepping the Fabric
- First, prewash your fabric and tumble dry. Here’s the fabric we used.
- Meanwhile, download, print and cut out your fanny pack pattern found here.
- When your fabric is washed and dried, iron it out flat.
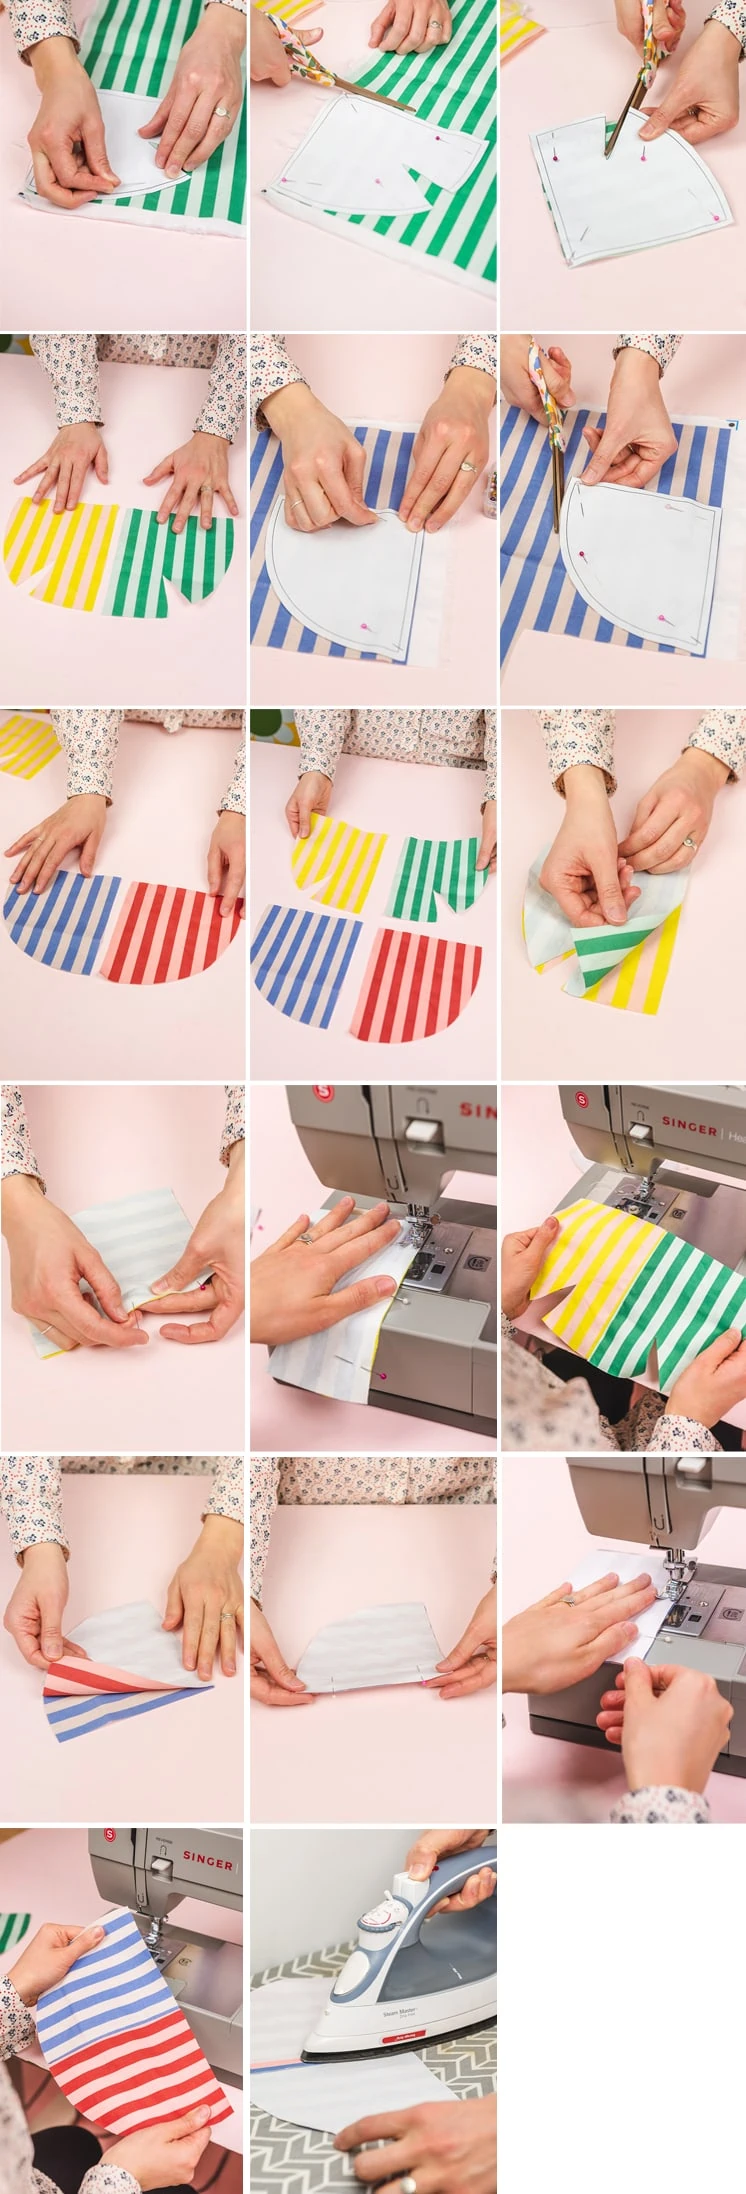
- After you’re done ironing, follow the instructions on the fanny pack pattern (here) to cut out your pattern pieces. Make sure to cut the pattern pieces out with the stripes running vertically, if you’re using stripes. When you’re done cutting, you should have eight separate pieces total, two of each of the four colors.
First Sewing Steps
Now you’re ready to sew your fanny pack together!
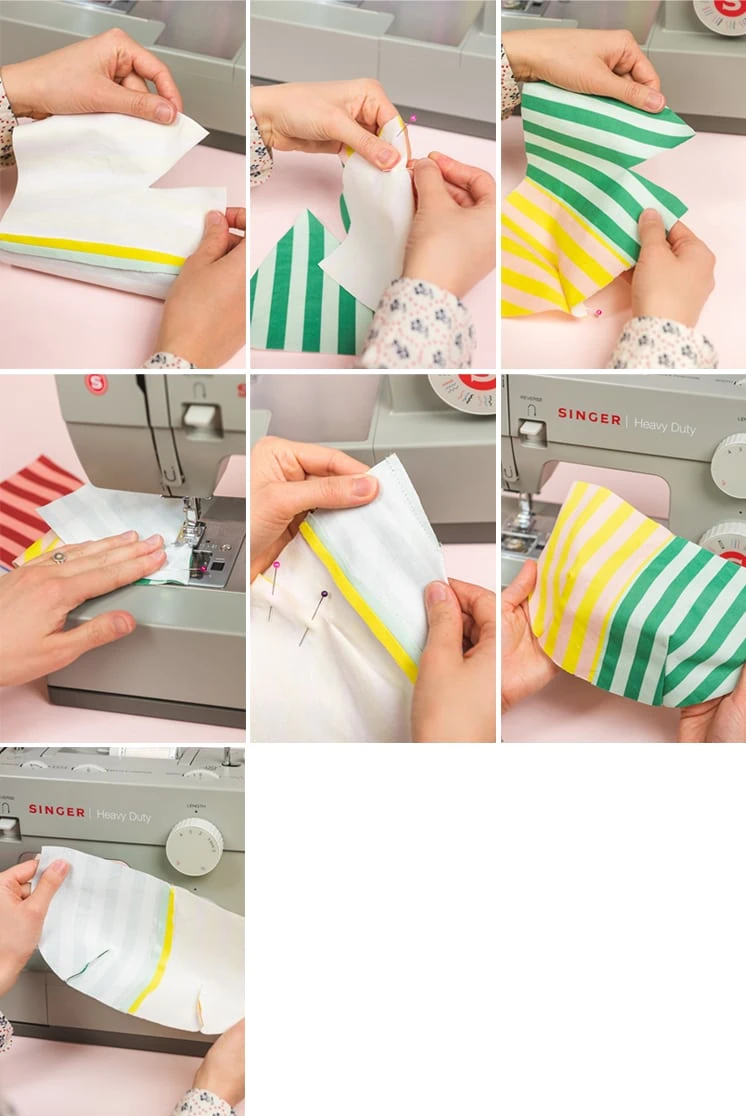
- First, with right sides together, sew the darts, then iron out the crease.
- Next, sew the two front pieces together along the center seam with right sides together. Repeat for the two back pieces. Do the same for the lining and iron the center seams flat. You should now have four pieces of fabric total–two front, with the stripes sewn together along the center seam and mirrored, and two back, again, with the stripes mirrored and joined at the center seams (see fanny pack pattern visual to see how the stripes should be mirrored).
Sewing the Zipper
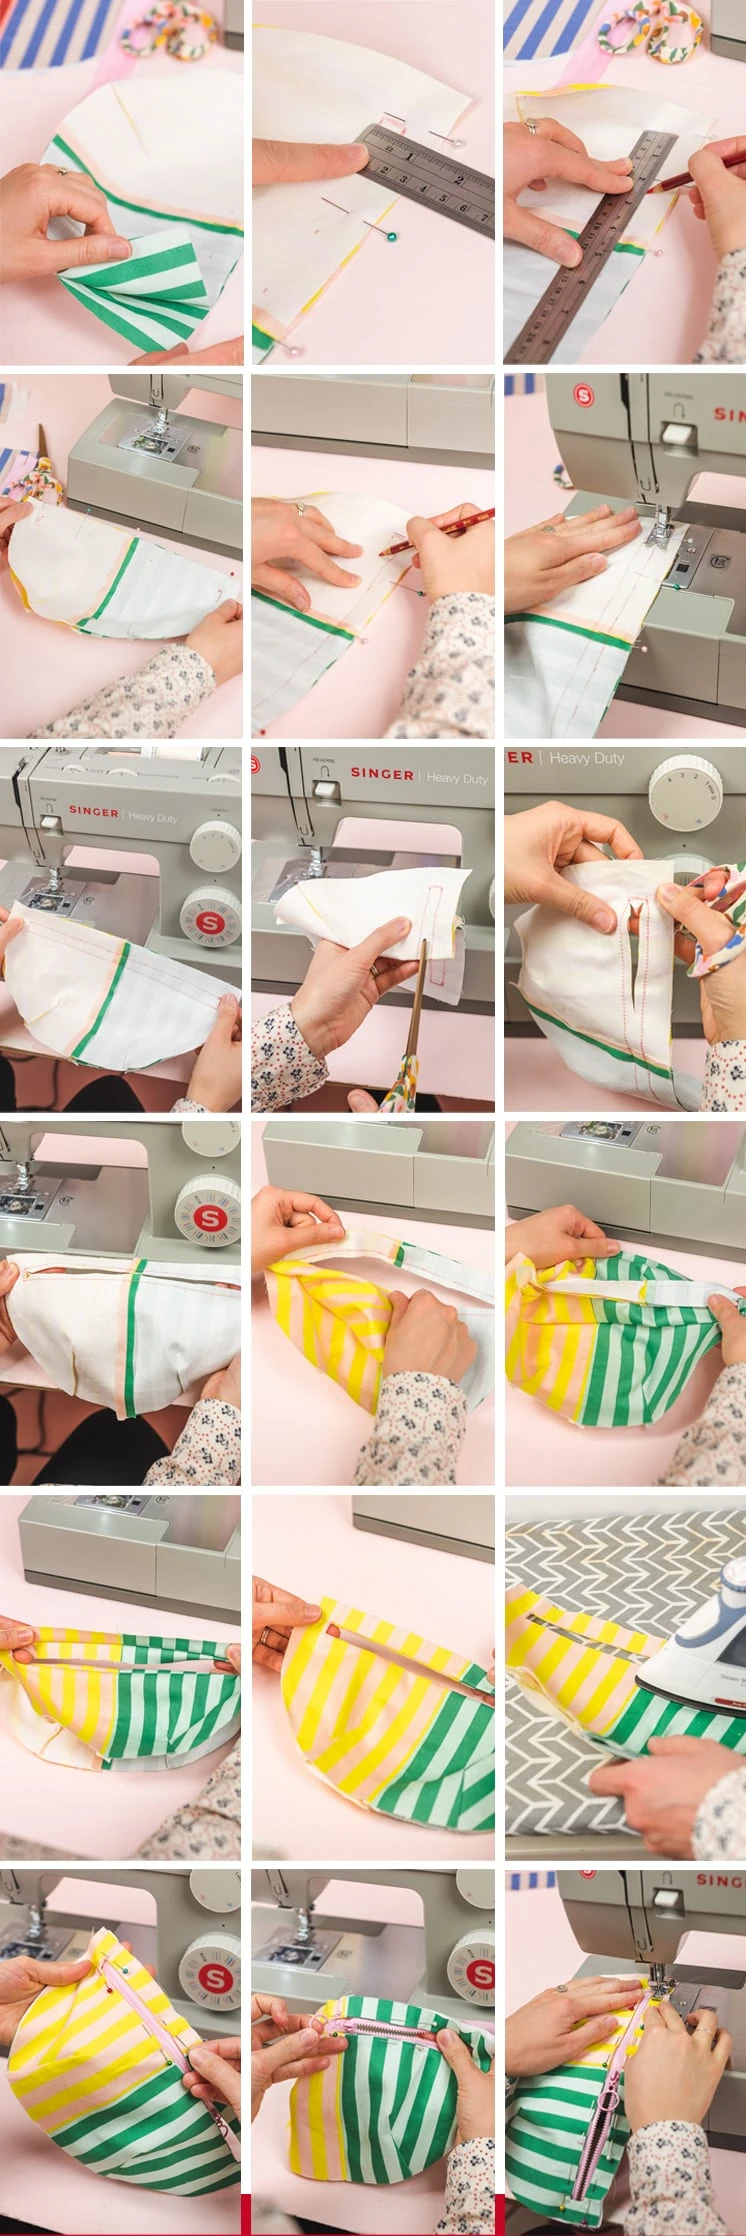
- Now it’s time to sew the zipper. For this, line up the two front pieces (outside and lining) with right sides together and pin in place.
- Use the guide on the fanny pack pattern and a fabric marker or pencil to trace the zipper stitch line onto the wrong side of the outside front piece.
- After that, sew the two pieces together along the zipper stitch line, backstitching at the end.
- Now cut a slit down the center of the box you just sewed. At both ends, leave about a centimeter and cut a slit to each corner, as shown in the step photos.
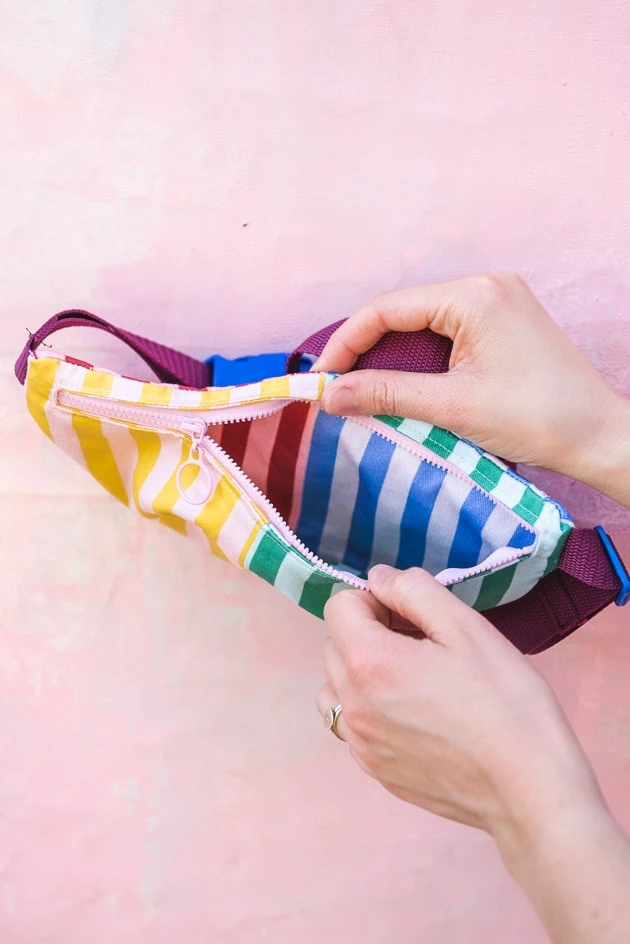
- Next, flip the pieces of fabric right side out and iron. You should now have a neat little rectangle in the center of your two front pieces.
- Now, pin the zipper in place inside the box with the front of the zipper facing the front. Using the zipper foot, sew all the way around the box. If needed, you can unzip the zipper a bit to make it easier to sew.
Adding the Lining and Straps
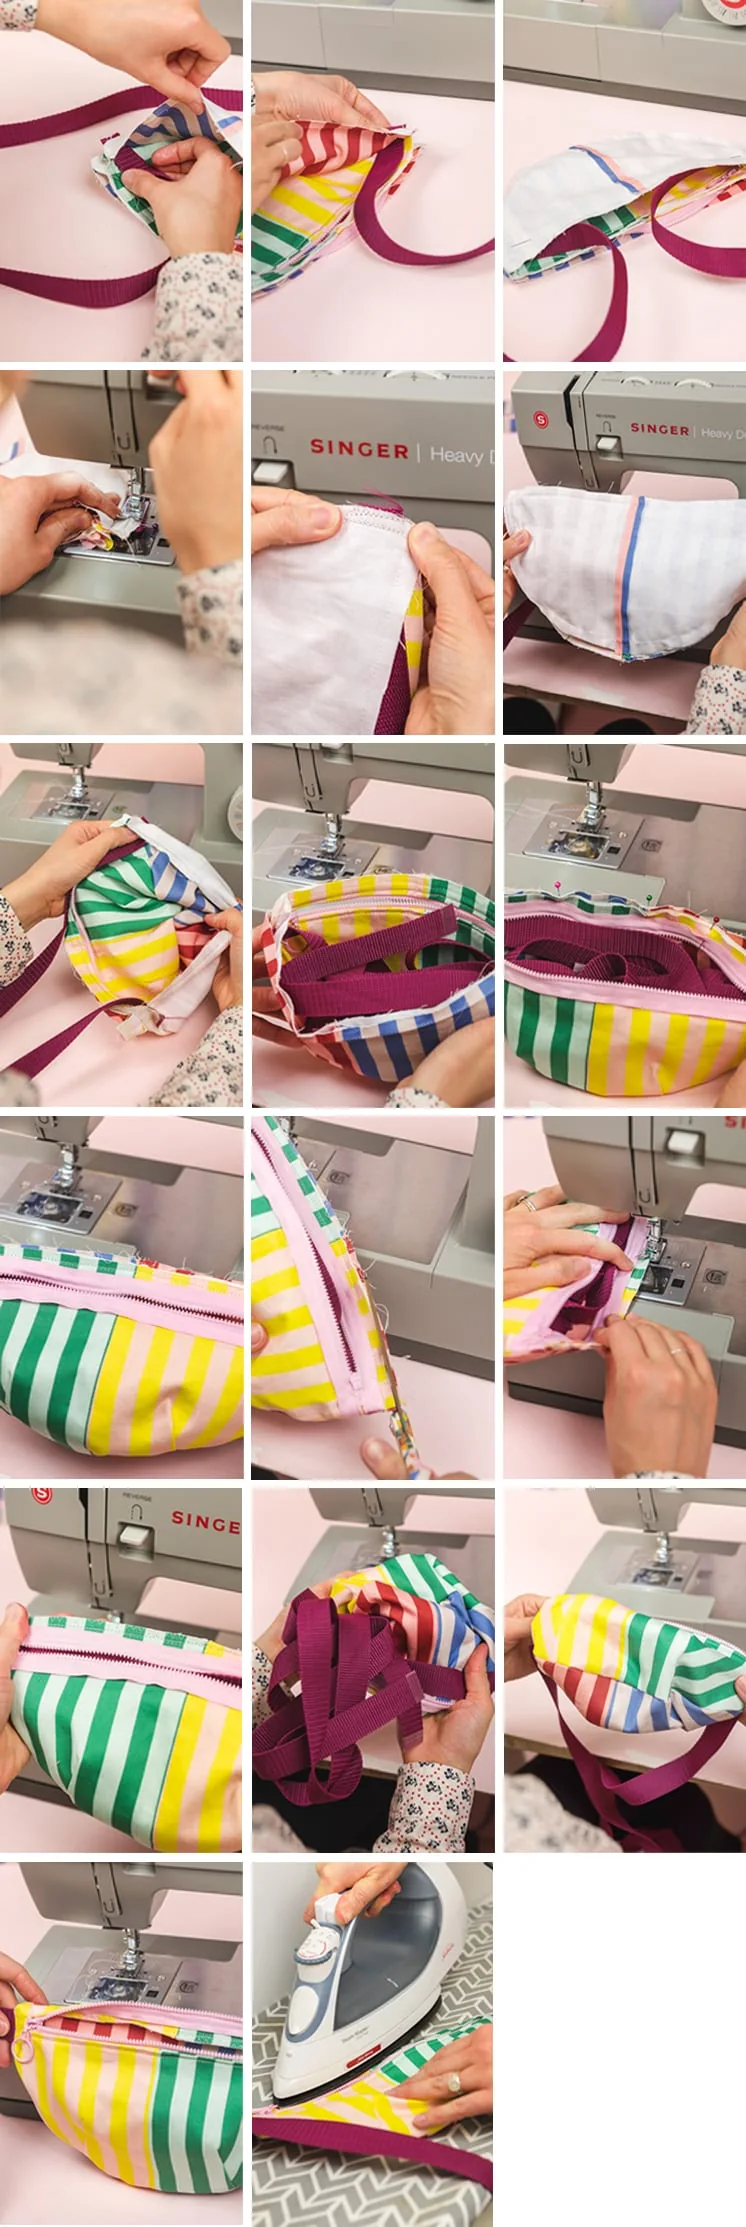
- For the lining, take one of the back pieces, line it up with the top front piece and pin, right sides together. Take care to make sure the second front piece is out of the way.
- Next, pin the straps in place (you should have two straps that are each 1 yard long). They should be positioned towards the top of the pouch on either side of the zipper, with each end flush with the raw edges of the fabric. The strap should be sandwiched between the two fabric pieces, hidden from view.
- Now sew around the “U,” making sure to not sew across the top yet and reinforcing across the straps.
- After sewing the first set, repeat for the other two pieces, sewing one front piece to one back piece with right sides together, avoiding the top. You should now have two separate, closed pouches back to back.
- Once all the pieces are sewn, stack them inside each other, then line up, pin, and sew the top. Make sure the zipper is open at this point so you can flip the fanny pack after sewing.
- Now, finish the straight raw edge with a zig zag or overlock stitch, then flip it so it’s right side out and iron.
Finishing Touches
All that’s left now is to add the buckle and adjustable strap!
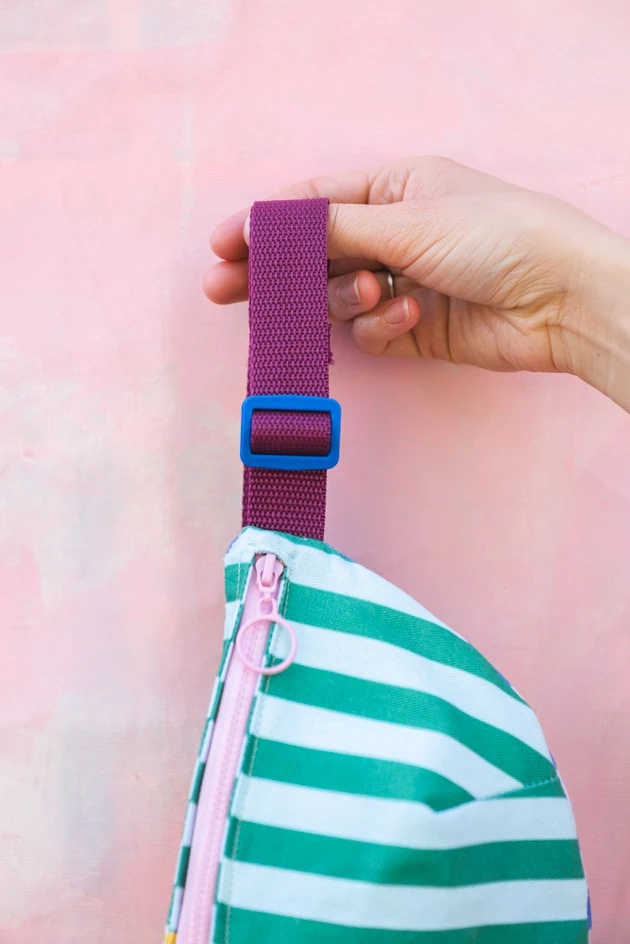
- You’ll make the strap adjustable first. For this, take the adjustable strap slider and feed the strap through as shown in the photos.
- Now, wrap the fanny pack around your waist and adjust until it’s a comfortable fit. Slip around the buckle, cut off the excess (see photos for the visual on how to do this) and sew into place.
- Done!
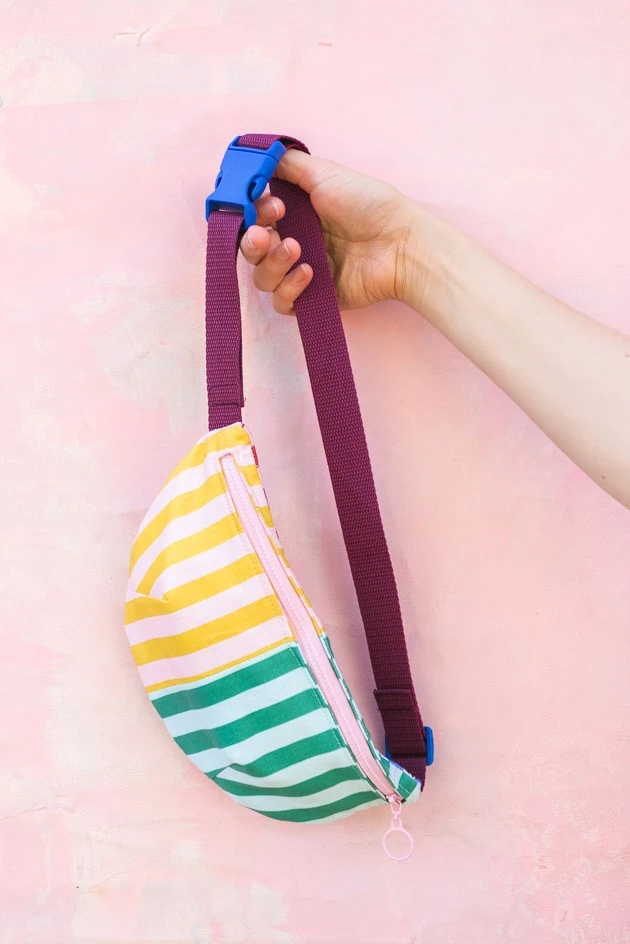
More Inspiration
Looking for more sewing projects? Try these pencil cases and a whole host of sewing projects on the blog! Also see our shop for plenty of templates and patterns. Wanting to improve your sewing knowledge? See our sewing basics series!


