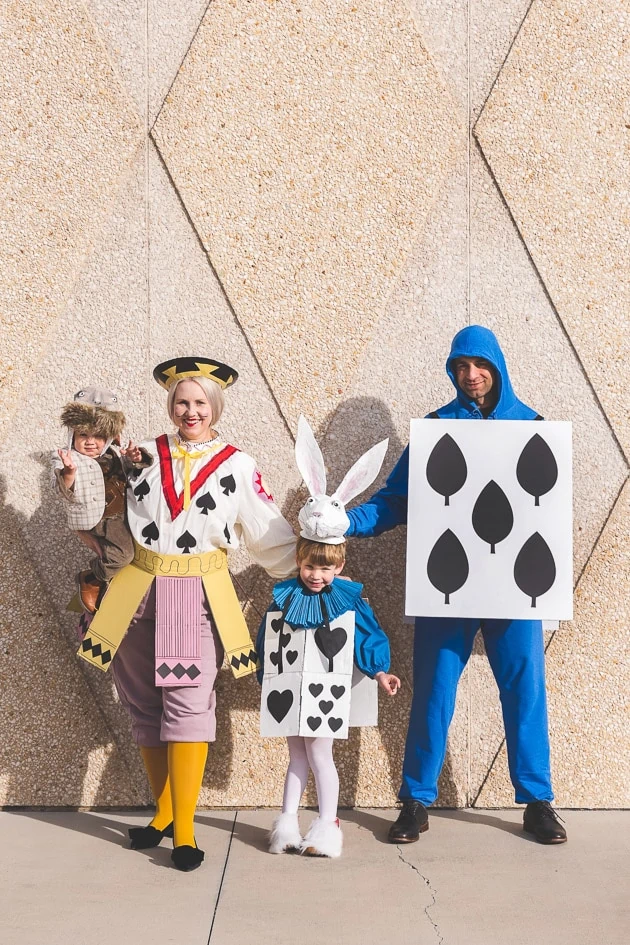
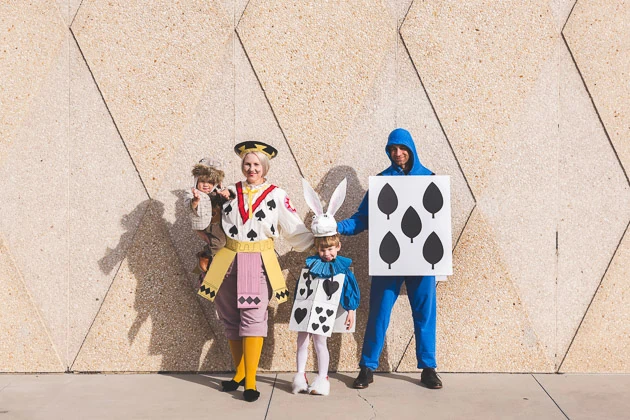
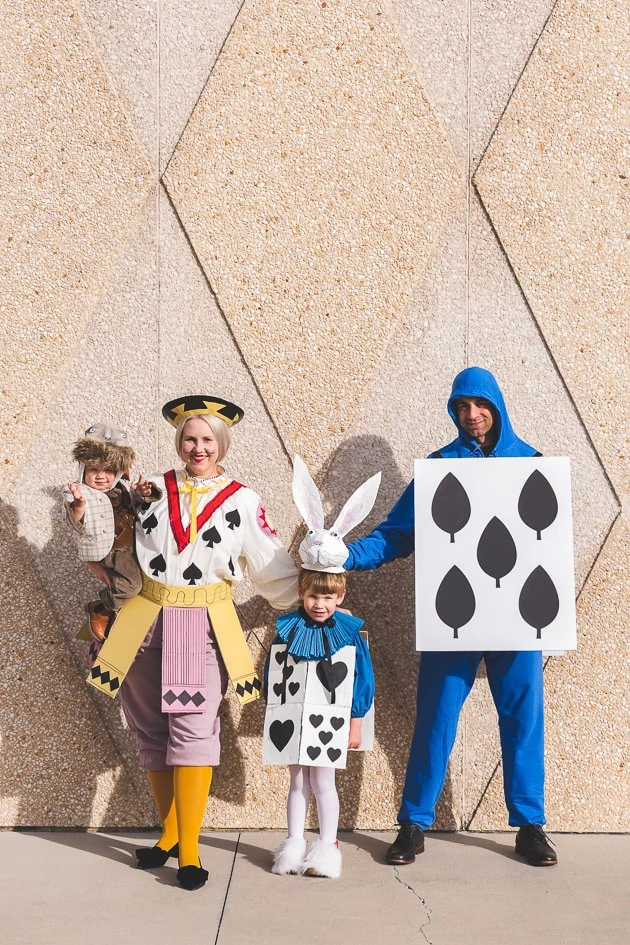
Last year’s family costumes were some of my favorites of all time (see them here, if you missed them). They were so good I thought it would be nearly impossible to top them! But since the theme of classic children’s books was a hit (for me as much as anyone), I thought we’d try our hand at some Alice in Wonderland family costumes. Scroll down to learn how to make these show-stopping costumes!
Materials:
- Cardboard
- Card templates
- Gaff tape
- Newsprint
- Paper mache paste (flour and water)
- Acrylic paint
- Faux fur (white and brown)
- puff sleeve blouse
- Mauve sweats
- Yellow tights
- Pilgrim shoes
- Blue sweatsuit
- Cricut maker
- Scissors
- Staples
- Ribbon
- String
- Elastic
- Crepe paper
- Walrus outfit (vest and jacket--check your local thrift stores!)
Costume Inspiration
For years now, I’ve had my eye on this amazing vintage fabric, illustrated by Charles Voysey. The fabric features beautiful, classic illustrations of Alice in Wonderland characters. The colors and way in which he depicts the characters is stunning, and I couldn’t get it out of my mind. Then I thought–why not make this stunning fabric into our family costumes?! An excuse for my children to dress up as a walrus and card-wearing rabbit was an opportunity much too good to pass up. That’s how these Alice in Wonderland family costumes were born.
How to Recreate Alice in Wonderland Family Costumes
These costumes aren’t exactly what you’d call “simple” or “quick”. That said, they’re stunning, and so worth the time, if you plan ahead. Here’s how to recreate these Alice in Wonderland family costumes:
Walrus
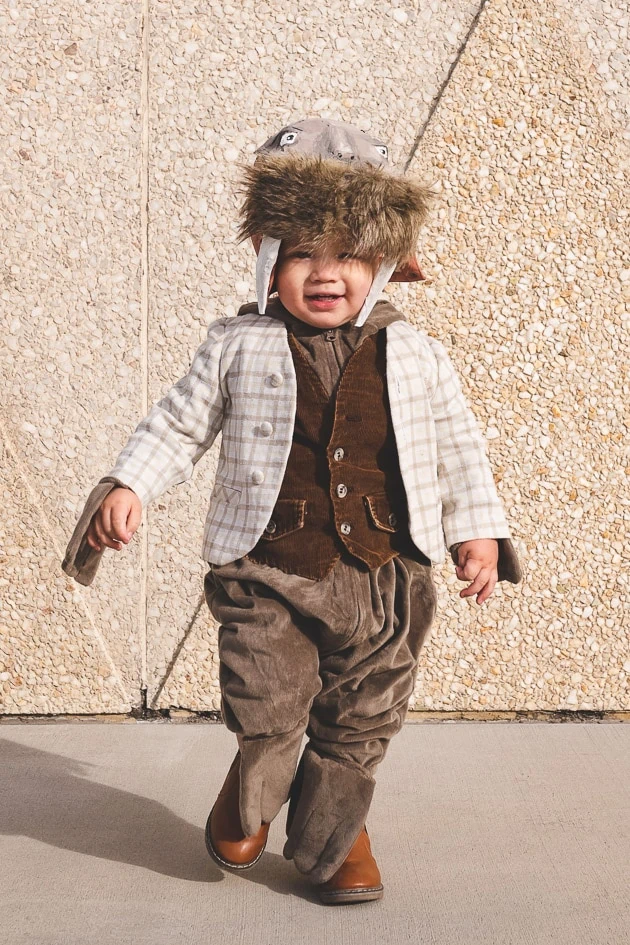
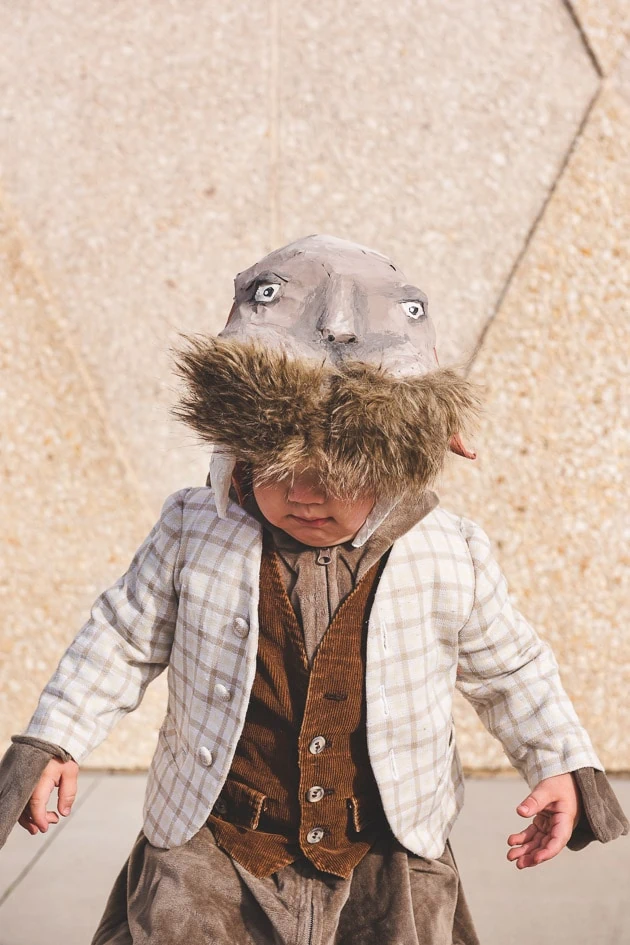
I had my heart set on a walrus costume for either Jasper or Felix this year. Jasper’s getting to that age where he’s a bit more opinionated when it comes to costumes, so since Felix didn’t object, we decided the walrus was best for him. Here’s how to make it:
Hat
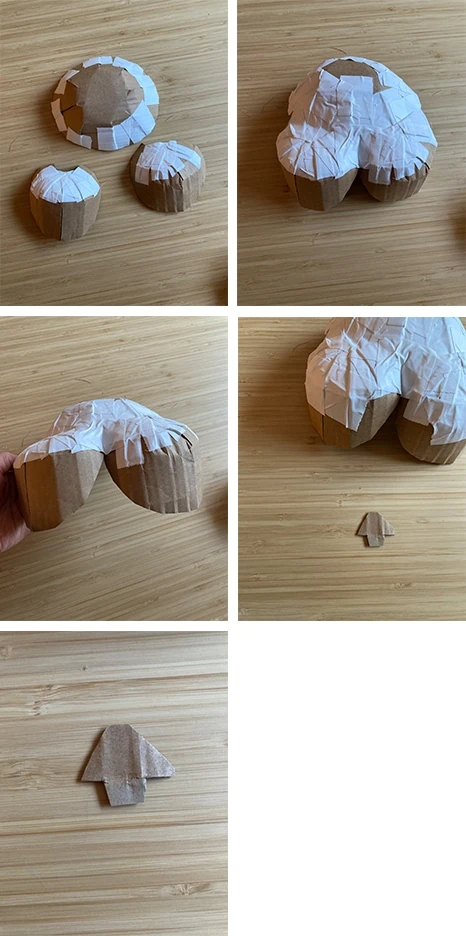
First, I have to give credit to the mastermind behind the paper mache, Carrie. The job she did on that paper mache walrus and rabbit was too much! Here’s what to do for the walrus hat:
- The paper mache hat is the most important part of this costume. First, make the cardboard understructure, using our photos as a reference. We used gaff tape to stick the cardboard pieces together because it’s amazingly sticky.
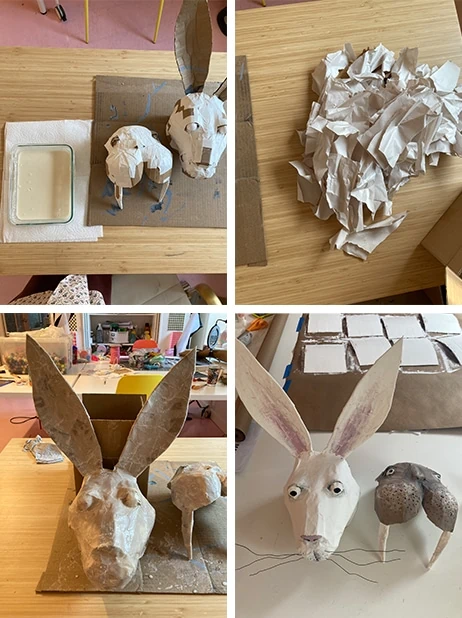
- Once the pieces are cut and assembled, you can add a few layers of paper mache. To make paper mache, add one part flour to two parts water, mix, then heat in the microwave or on a stovetop until it thickens just a bit. You don’t want it too thick, just enough so it’s not like water anymore.
- Once the paste is made, rip up strips of newsprint, dip into the paste, and apply until your walrus is fully coated. Let dry completely (this can take at least a couple days, so plan ahead)!
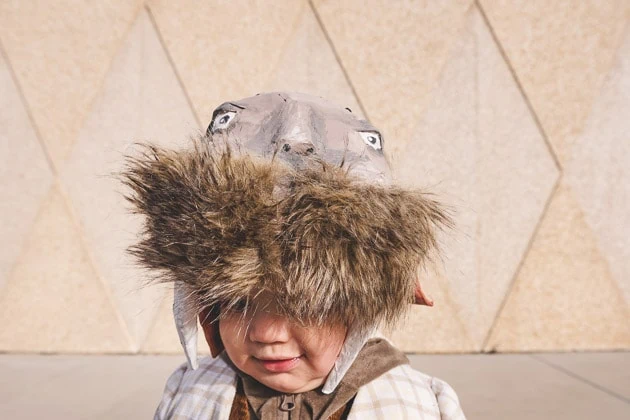
- When your walrus is fully dry, go ahead and paint in the details and add finishing touches, like fur.
- To attach the hat to your child’s head, tie a piece of string to either side of the head and tie around your child’s chin.
Walrus outfit
For our walrus outfit, we went the simple route and bought a walrus jumpsuit so we could focus on that paper mache showstopper hat. We found ours here. We also found some clothing (courtesy of my sister!) that was perfect for it–check out your local thrift shops for options.
Rabbit
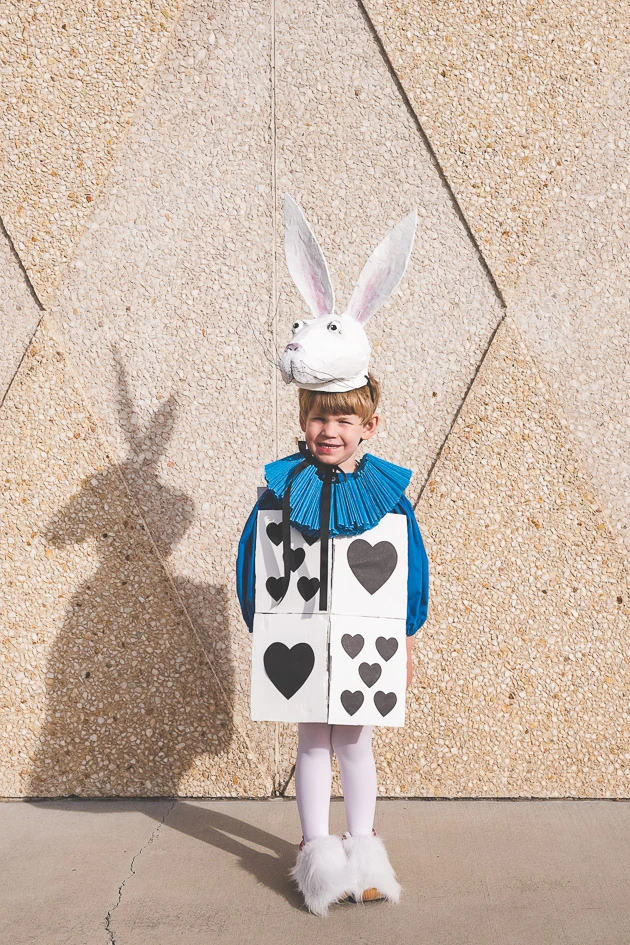
We decided to have Jasper be the rabbit, thinking he’d be content with the choice if he got to wear an awesome paper mache hat. Well, content is a relative term–at least we could take the photos before he changed into his spider man costume. Ha! Here’s how to make the rabbit portion of our Alice in Wonderland family costumes:
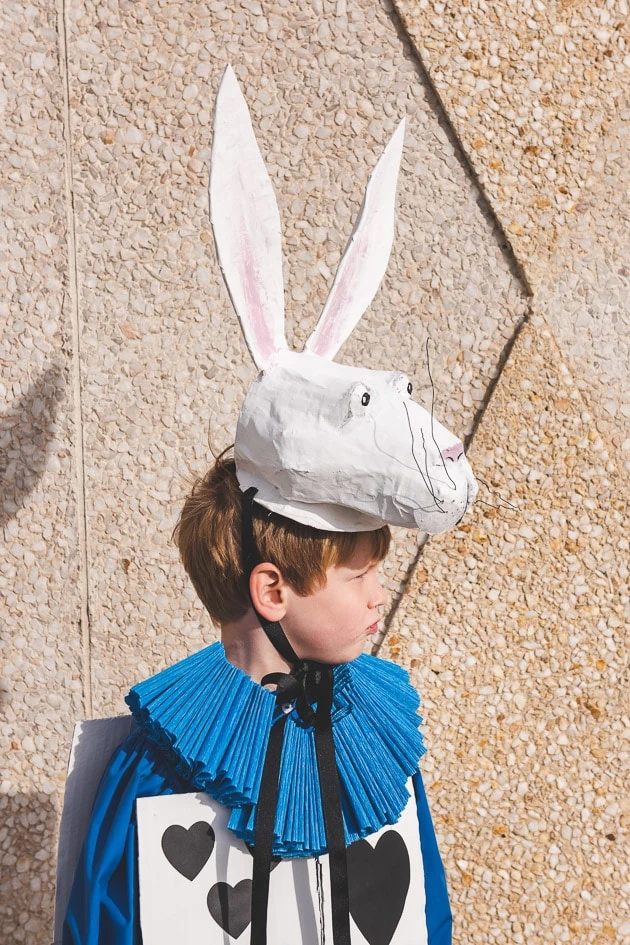
Rabbit hat
- First, cut out and assemble the rabbit understructure, using our photos as a reference.
- Next, follow the instructions above to add the paper mache to your rabbit understructure. Tip: we found that, once coated in paper mache, the ears started to sag a bit. To help with that, prop a cardboard box up behind the ears to keep them from falling backwards as they dry. Once dry, they’ll stand up fine with the help of the stiff paper mache.
- When the paper mache is dry, paint the rabbit and add any embellishments you’d like. We painted some thin, floral wire black and turned it into whiskers.
- To attach the hat to your child’s head, tie a piece of string to either side of the head and tie around your child’s chin.
Shirt
The easiest option here is to buy a shirt with puff sleeves for our child. We couldn’t find one that would arrive in time, so we DIY’ed a shirt instead.
Collar
For the collar, we used crepe paper, string or yarn, an embroidery needle and the same technique as for our vintage clown costumes. Easy!
Cards
- For the cards, cut eight pieces of cardboard that are each 6 ½” wide and 9 ¾” tall.
- Once they’re cut, paint them all white. We used white house paint and a large brush to speed up this process. We also painted them at the same time as Paul’s cards.
- When the paint is dry, use the cricut to cut out the card shapes using the templates. Tape in place on the white paint.
- To attach to each other, use ribbon and staples. For attaching the front and back, again, use ribbon and staples.
Feet
For the rabbit feet, all you need is some white faux fur. Tear it down to the size of your child’s shoe and safety pin some elastic on to hold it in place.
Brittany’s Outfit
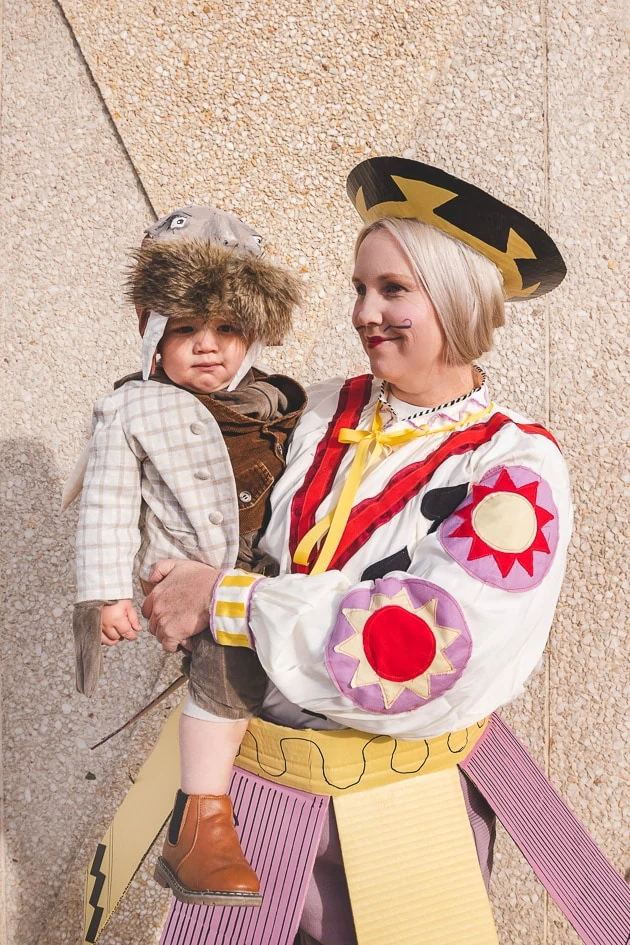
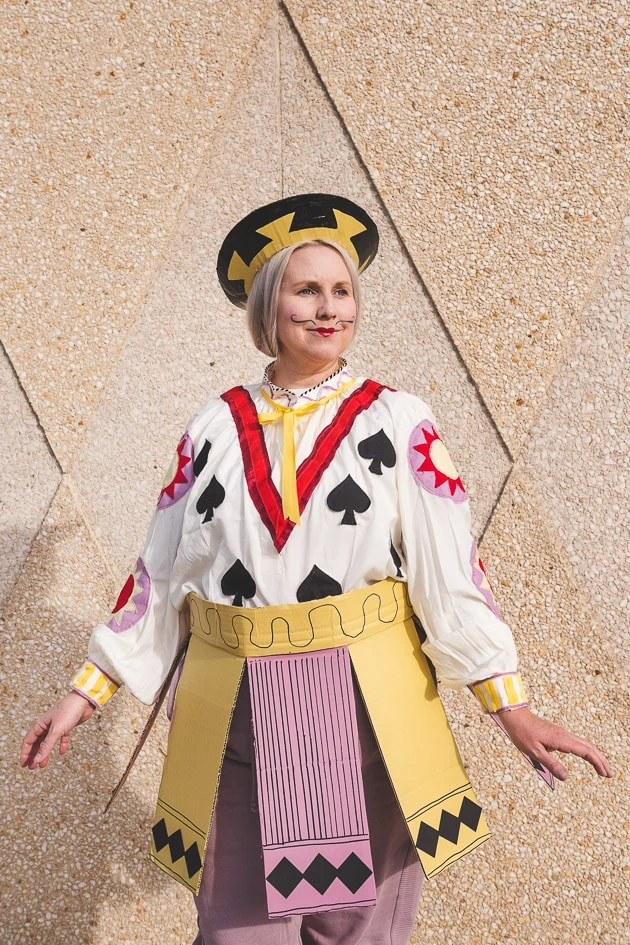
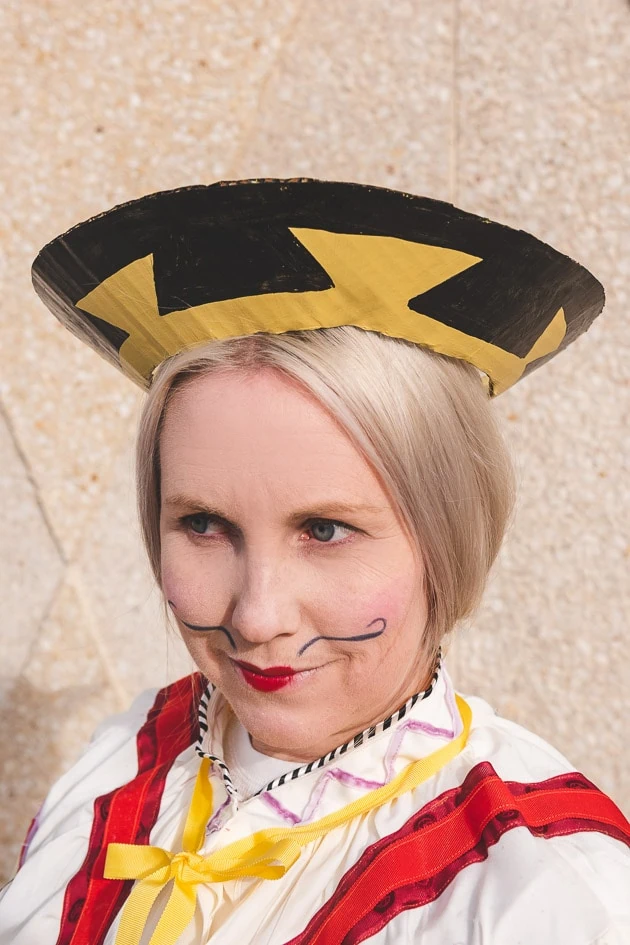
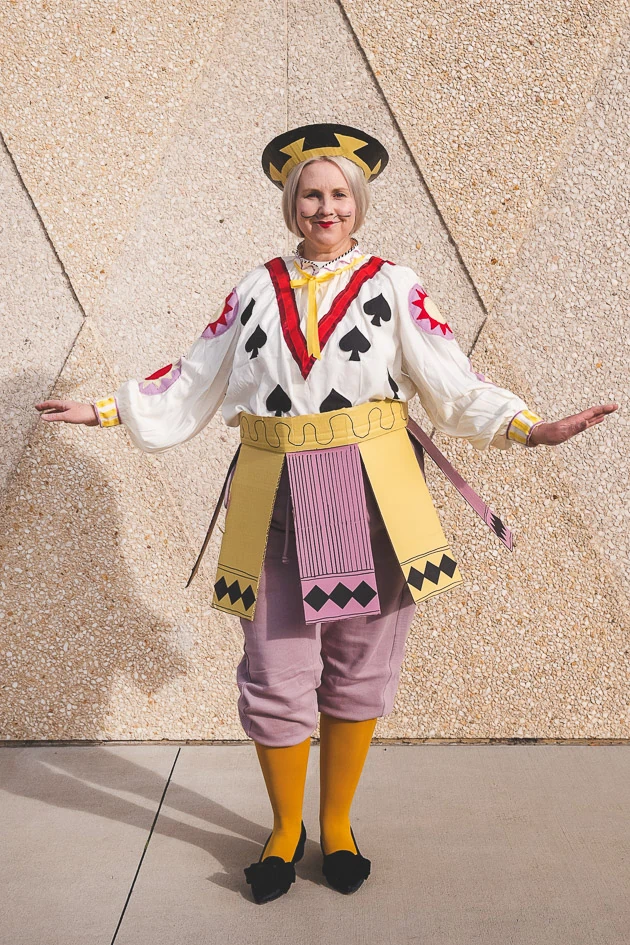
I’m not sure of the official name of Brittany’s character, since we based the costumes off illustrations instead of the book’s official character names. That said, we’ll call her a knight. Mostly we had to make this costume because the outfit was just incredible. Here’s how to recreate it:
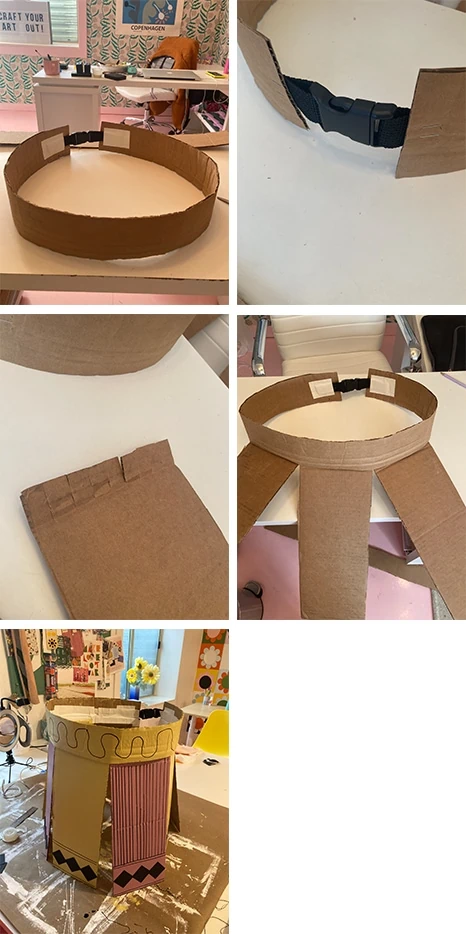
Cardboard Skirt/Hat
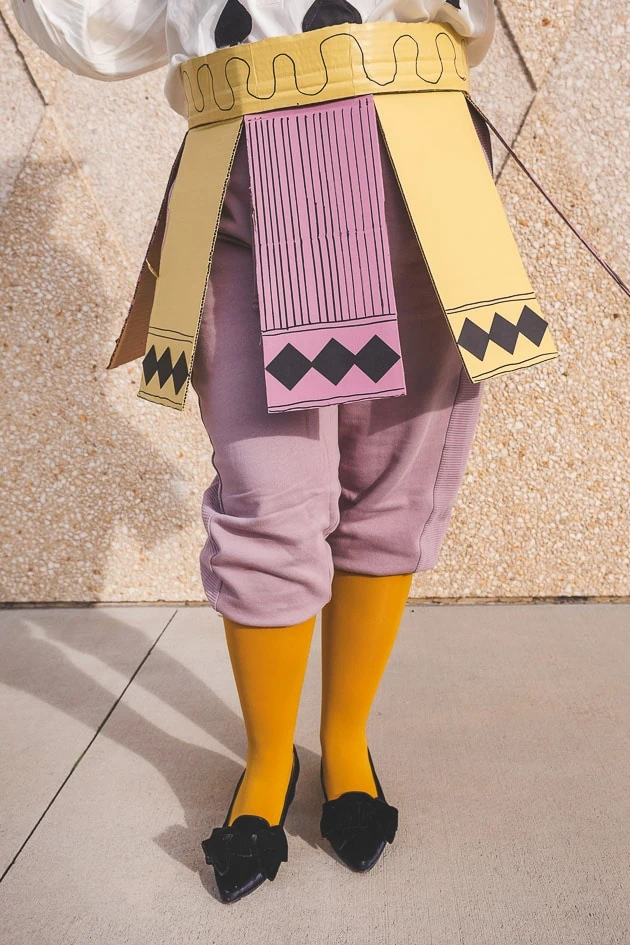
- Using our photos as a reference, cut out and assemble the shapes for the cardboard torso, skirt, and hat pieces.
- Now paint them, using our photos as a reference.
- Oh, and that makeup?! Have fun with it.
Pants/Tights
For the pants and tights, we used a mauve pair of sweats, cut off and gathered at the knees, and these golden yellow tights.
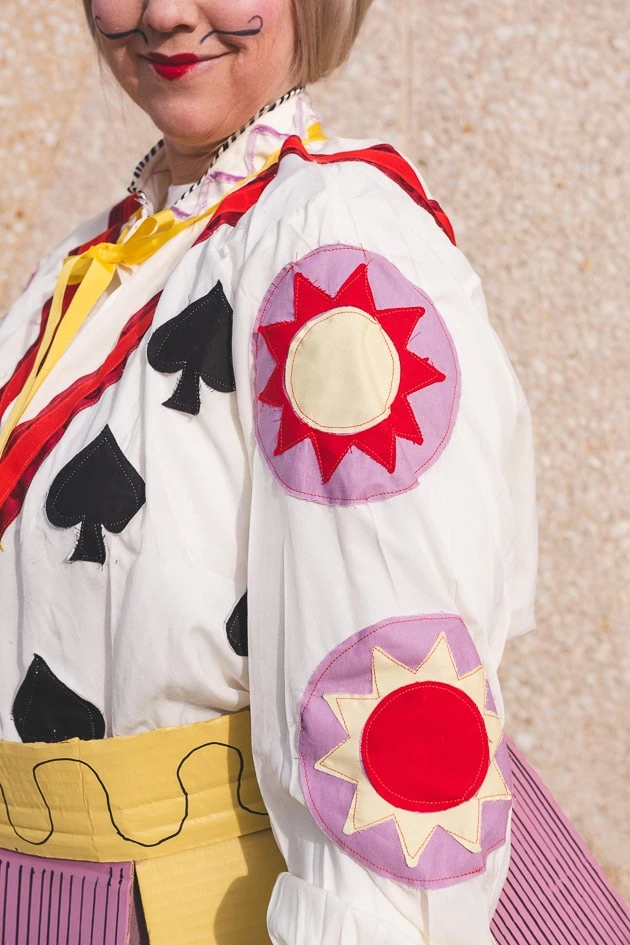
Blouse
The next element of Brittany’s outfit was the blouse. We needed to find some great puffy sleeves, which we found here. Then we cut out fabric embellishments and appliquéed them on with a simple zig zag stitch around the edge. See our photos for the shapes we used!
Shoes
The shoes needed to be vintage-looking, sort of like pilgrim shoes. Brittany happened to own just the pair already!
Paul’s Outfit
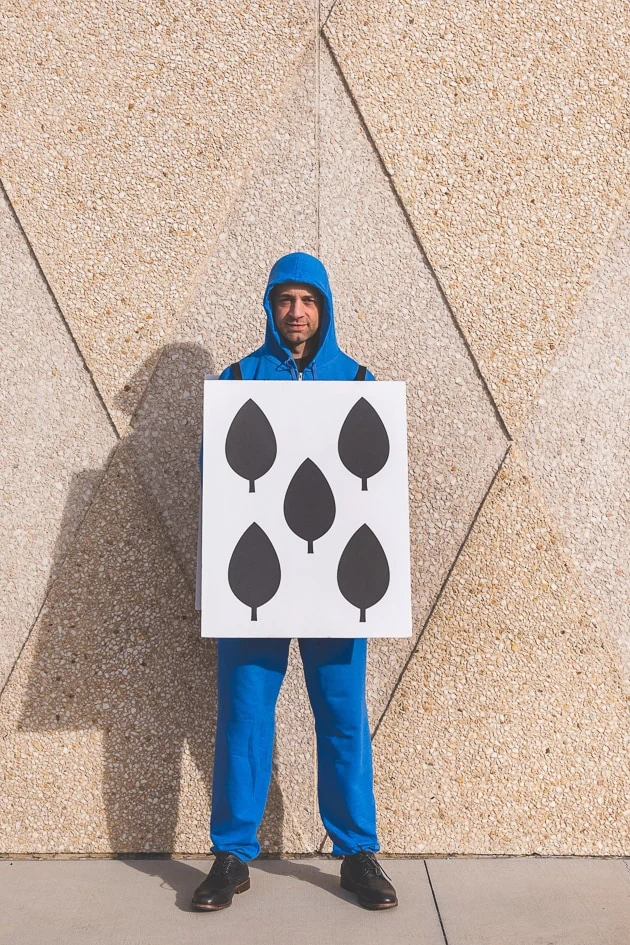
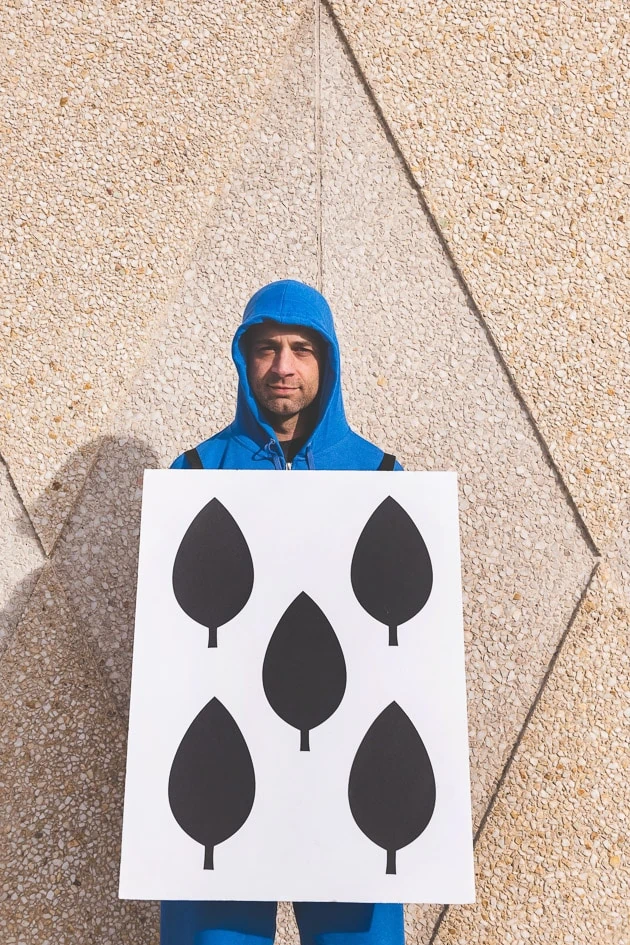
Last outfit of our Alice in Wonderland family costumes to complete was Paul’s. His character was a card man wearing an all-blue outfit/hood. This was a simple costume to figure out! Here’s what we did:
Blue Outfit
For the blue outfit, we bought a simple blue sweatsuit with a hood. We found our’s here and here.
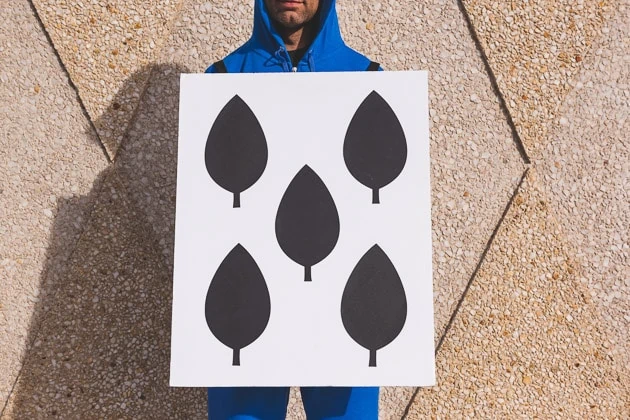
Cards
- To make the cards, cut two large pieces of cardboard. They should be the same size, big enough to cover the torso all the way to the shoulders and down to the knees.
- After cutting the cardboard down, paint them both white. We used house paint and a roller to speed up the process. Note: if you’d rather, you can also use white foam core or mat board and skip the painting.
- Once the paint is dry, cut out the card template pieces on the cricut with black cardstock and glue or tape in place on top of the white paint.
- Last, attach the two pieces of cardboard together using ribbon and staples. We also used gaff tape for extra support.
Shoes
The last essential element of Paul’s costume were the shoes. Like Brittany, he needed some classic-looking shoes. We ended up using some simple, black ones Paul already had. We’d also recommend checking your local thrift shop–there are often hidden gems there.
And that’s a wrap! What do you think of our Alice in Wonderland costumes?
More Inspiration
Loved these Alice in Wonderland family costumes and want more costume ideas? See these classic Halloween costumes for kids! Also see our vintage clown costumes, Barbiecore costume, wild things costumes and Campbell’s soup cans. Then check out our blog archives for tons more costume ideas. And see this post for tons of last minute Halloween ideas from our shop!





0 Comments