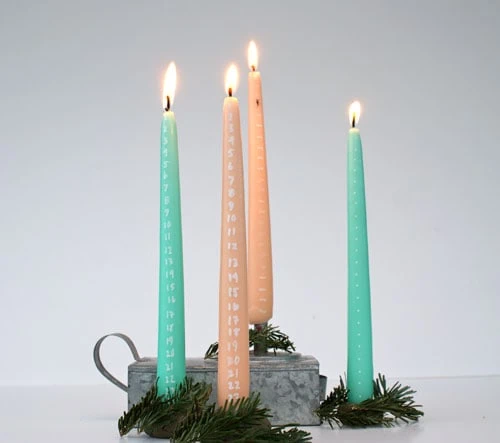
It’s always exciting to use advent calendars and mark down the days until Christmas. (That’s two days away now!).
We’ve got a DIY advent candle tutorial for today’s Christmas crafts challenge. Christmas decor already calls for candles, so why not add a little something extra?
Read below for the full tutorial!
Materials:
DIY advent candle
Materials:
- Candlestick(s)
- Paint pen
- Ruler (I used centimeters to fit the size of my candle. A 9 1/2″ candle perfectly fits 24 centimeters and therefore 24 days).
Instructions:
- Measure out your 24 days on the candlestick
- Mark with paint pen, labeling one side with the days and the other side with dashes or dots
- Now you have your advent candle! Watch it melt down the days until Christmas!
Advent calendar DIY & inspiration
Many of the advent calendars featured here on the Lars blog are Christmas crafts! Just like these advent candles, use your advent calendar as holiday decor! This Christmas bulb advent calendar can hang on your wall or mantle to countdown the days until Christmas. This Christmas home advent calendar, available in the Lars shop, is a beautifully illustrated calendar! All you have to do is print it and cut the dotted lines. You know I couldn’t pass up a rainbow advent calendar tutorial. This rainbow ombre advent calendar is perfect for all ages to open up little trinkets or candies in the countdown to Christmas.
Be sure to check out the Lars Christmas shop for all of your holiday crafting ideas. Happy adventing!


