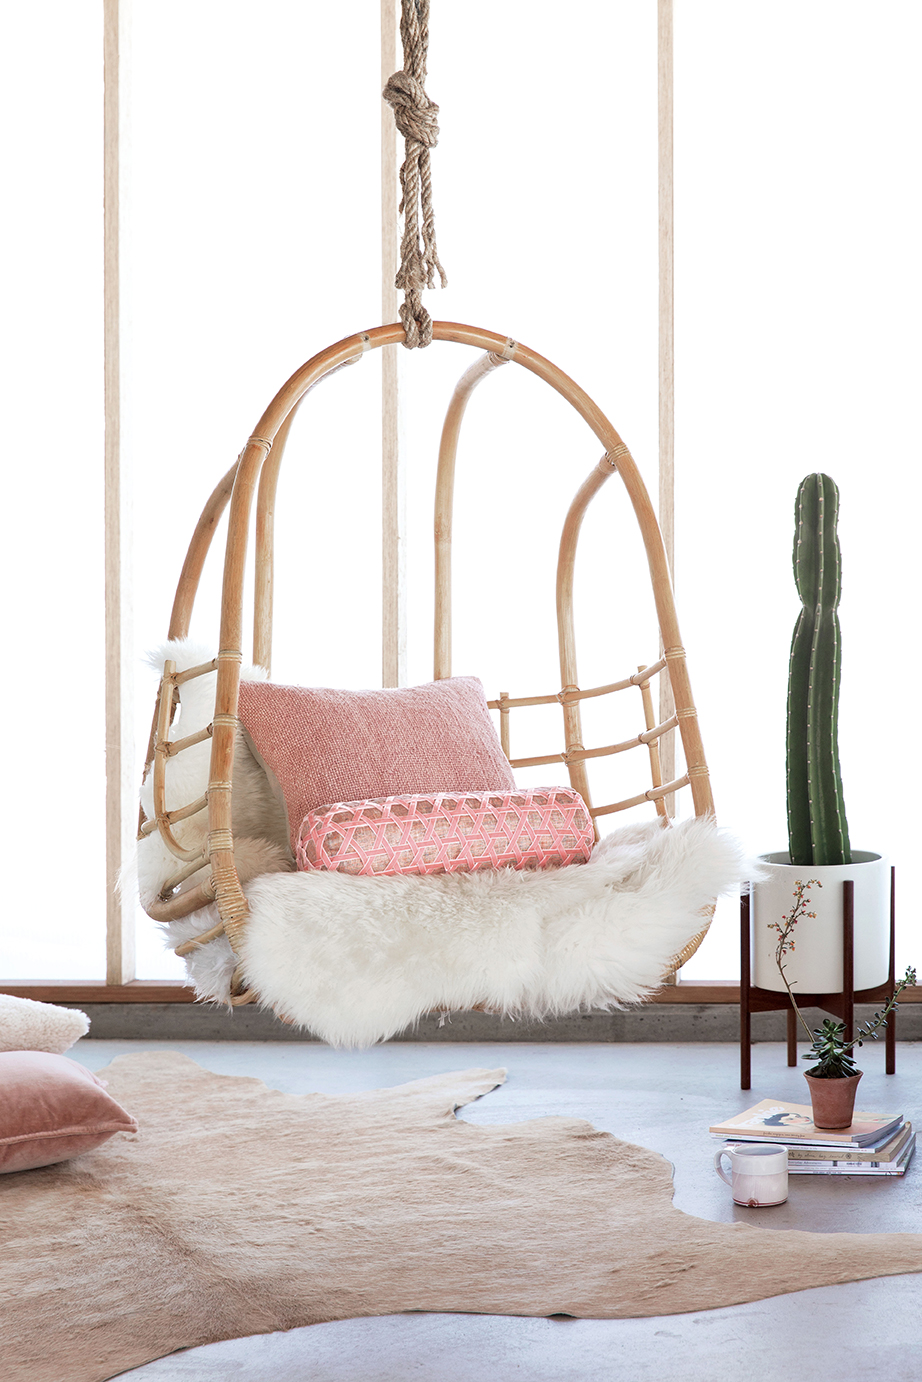
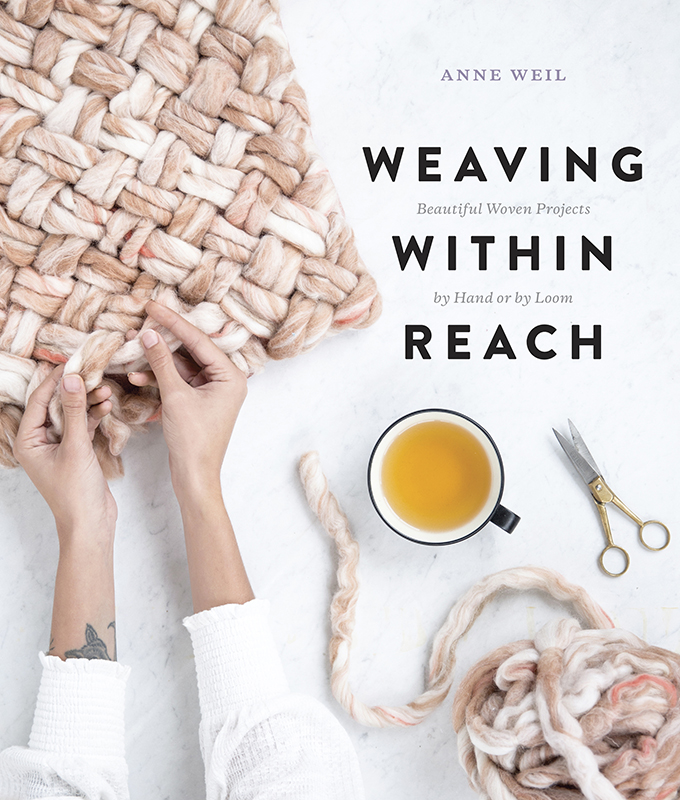
My good friend Anne Weil of Flax and Twine just released the most lovely book chock-full of weaving projects! Weaving is something I have yet to master but I’m certainly going to be trying my hand at a few of her projects! The book it titled Weaving Within Reach: Beautiful Woven Projects by Hand or by Loom. I love the variety she offers in the book, from home decor to accessories, there is something for everyone. I’m thrilled to be able to share one of my favorite projects from the book, the Velvet Ribbon Bolster Pillow. This is such a lovely way to jazz up a traditional throw pillow.
Try the project and make sure to grab a copy of Anne’s beautiful book!
Velvet Ribbon Bolster Pillow
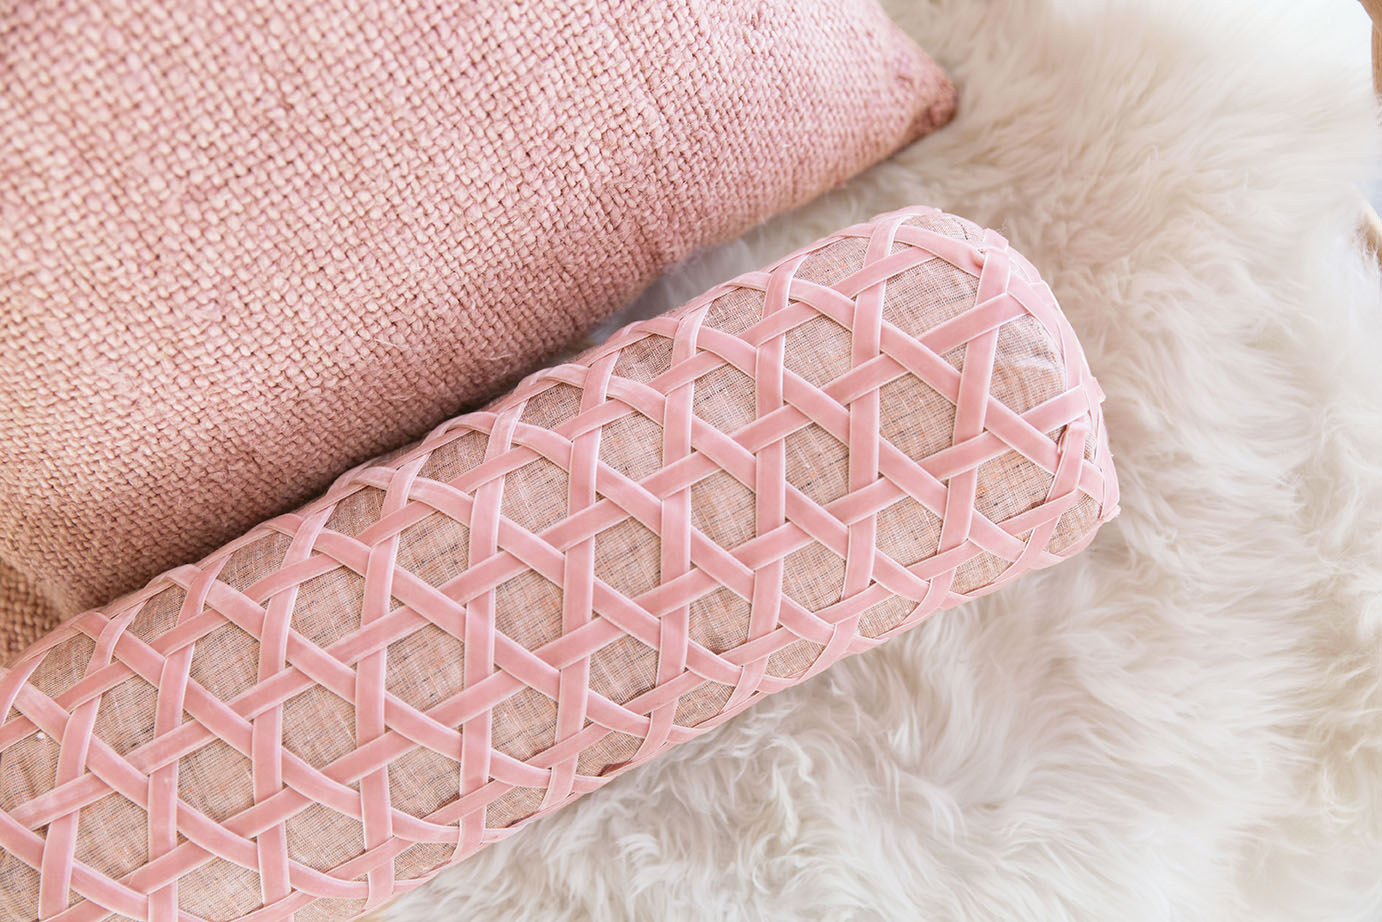
Not all basket weaving needs to be completely utilitarian. Go with the unexpected and use luxurious velvet ribbon and this traditional cane-weaving pattern to embellish a bolster pillow in a most beautiful way.
PROJECT TYPE
Non-loom
SKILL LEVEL Intermediate
TIME REQUIRED 5 hours
TECHNIQUES • Cane weaving pattern, instructions follow
MATERIALS & TOOLS
• 25 yd (23m) of ⅜” (1cm) velvet ribbon
• 6″ × 16″ (15cm × 40.5cm) neck-roll pillow or bolster form
• 1″ × 6″ (2.5cm × 15cm) piece of paper
• Embroidery or sewing thread in coordinating color
• Scissors, tape measure, straight pins, sewing needle
FINISHED SIZE
• 18″ (45.5 cm) long, 6″ (15cm) in diameter
1. Cut 6 lengths of ribbon that each measures 47″ (119cm), and group them into 3 pairs.

2. Find the middle of one pair of ribbons. Lay the ribbons vertically and parallel to one another, 1″ (2.5cm) apart, with their middle lying across the end of the bolster. Use a 1″ × 6″ (2.5cm × 15cm) piece of paper to help with spacing. Pin these ribbons into place at the seam on the bolster end, the circumference seam (A).

3. Lay the middle of a second pair of ribbons on top of the bolster end at approximately a 45-degree angle to the first pair so that the ends continue around the circumference seam 1″ (2.5cm) apart (B). Pin
into place.

4. Weave the next pair of parallel ribbons at an angle under and over each of the 4 pinned ribbons (C). The ribbons you are weaving should catch in the “V”s of the other ribbons so they don’t slide around. The shape should create a hexagon in the center (D).

5. Bring the ends of the first pair of ribbons around the length of the pillow to meet each other and pin them into place, overlapping the cut ends (E). Repeat with the second pair of ribbons so that they
overlap the first pair at the other end; pin them into place.

6. Bring the third pair around to pin, but weave the end of the ribbons under and over the ribbons
already secured to the pillow, as in step 4 (F). Secure all ribbons to the circumference seam with pins,
maintaining 1″ (2.5cm) spacing.

7. Check to make sure woven pattern is correct on both sides, the ribbons are 1″ (2.5cm) apart, and the tension on the ribbons around the pillow is as desired (tight, but not compressing the pillow). Fold one cut end of each ribbon over ¼” (6mm) and secure the folded end to the ribbon below it with needle and thread, maintaining its tension around the pillow (G). Trim the ribbon ends underneath the sewn fold to ¼” (6mm). Repeat for the 5 remaining ribbons.

8. For each ribbon, unpin and slide the loop until the ribbon seam is hidden under one of the other ribbons (H). These are the structural ribbons. Repin them into place at the circumference seam.

9. Cut 6 lengths of ribbon to measure 86″ (218cm) each. These will be your wrapping ribbons. Orient the pillow end toward you such that one set of the sewn parallel structural ribbon pairs on the end is horizontal.
10. Line up one of the wrapping ribbon ends across the end of the pillow so that it’s parallel across the end of the pillow to the horizontal pair that is already there. Pin the end of wrapping ribbon under the structural ribbon already secured by the circumference pin (I). Bring the wrapping ribbon under and then over the center V along the parallel line. The ribbon should catch in the V and not slide through.

Next, pin the wrapping ribbon over the structural ribbon where they cross at the circumference seam, using the pin that’s already there (J). Rotate the pillow so that another set of parallel ribbons is horizontal.

11. Repeat step 10 to add 5 more parallel ribbon lines along the edges of the pillow end. As you add these ribbons, maintain the over/under pattern. The wrapping ribbon should always run under the structural ribbon where it starts and over the structural ribbon at the edge of the pillow. After placing all the ribbons, there should be no circumference pins available (K). Remeasure and adjust the circumference pins to maintain 1″ (2.5cm) spacing between them all.

12. These 6 wrapping ribbons will encircle the bolster with 1″ (2.5cm) of space between each other. As you wrap to the other end, the wrapping ribbons will go over all of the structural ribbons that are already in place on the pillow. Start at the top of the pillow and begin wrapping one of the lengths, using the spacing paper, and pinning occasionally as you go (L). Continue to wrap all the ribbons around, pinning every third ribbon or so (M). Go back and adjust if the spacing shifts a bit.
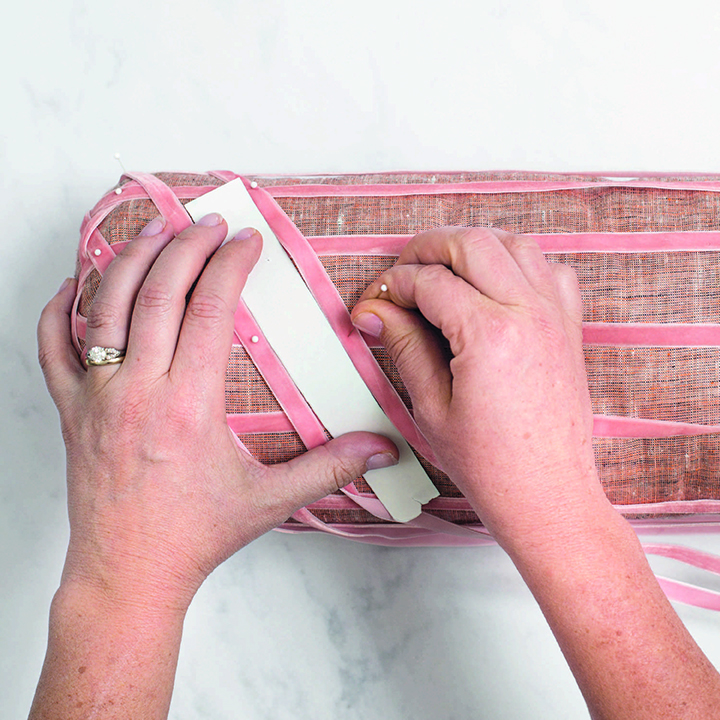
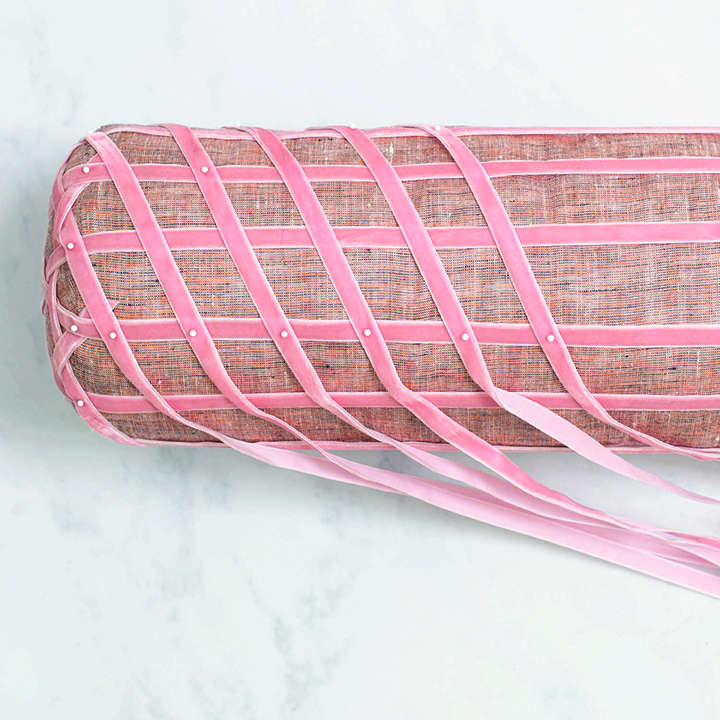
13. As you reach the other end, each ribbon should hit the edge of the pillow such that it will be the start of the parallel edge lines on this end (N). If they don’t, the spacing of the wrapping is a bit off; go back and adjust. At this end, the wrapping ribbon should go over the ribbon that is held by the first circumference pin.
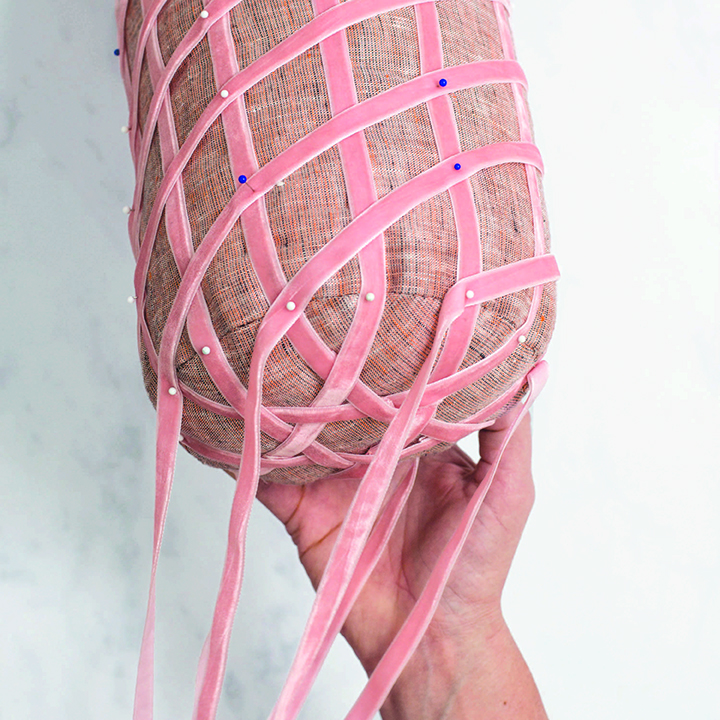
14. Pin each wrapping ribbon into place at the edge and weave it across the end of the pillow, maintaining the over/under pattern (O). The ribbon will end under at the other edge; pin accordingly. Note that in the beginning, you are missing some of the parallel lines that need to be included in the over/under pattern. All the parallel lines made across the end of the pillow should catch in the center V as they cross.
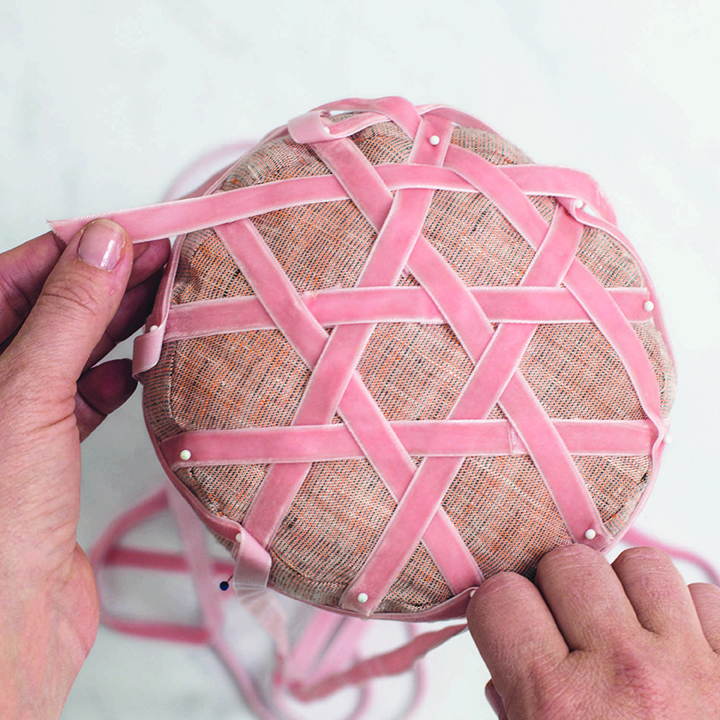
15. After all the parallel lines have been made across the end, every other circumference pin will have one of the wrapping ribbons going into the end, and every other circumference pin will have one of the wrapping ribbons coming off the end. Before you start wrapping back, check all the over/under patterns.
16. To wrap back to the beginning, weave each ribbon over the wrapping ribbon and under the structural ribbon (P). Repeat this over/under pattern for each of the wrapping ribbons back to the other end (Q). As you weave the wrapping ribbons back around, you can remove the pins in this center section as you go.
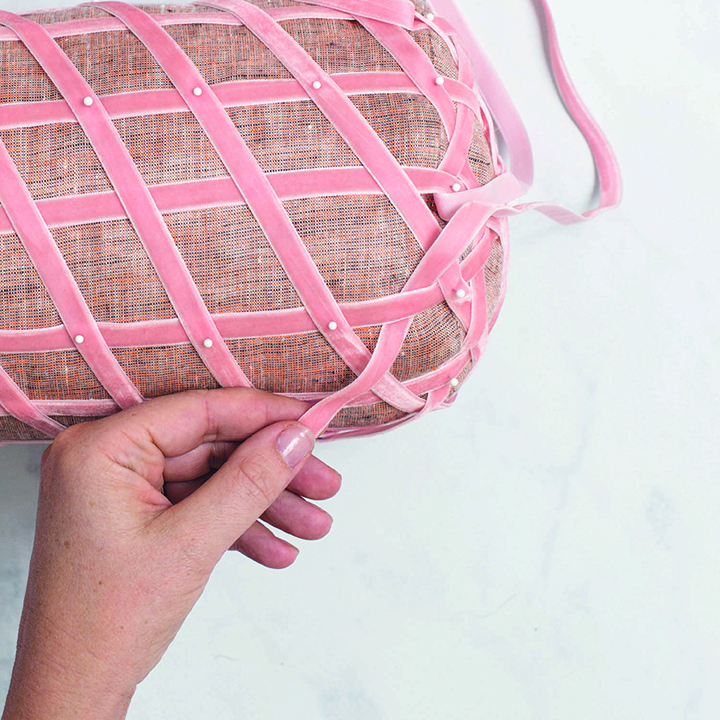
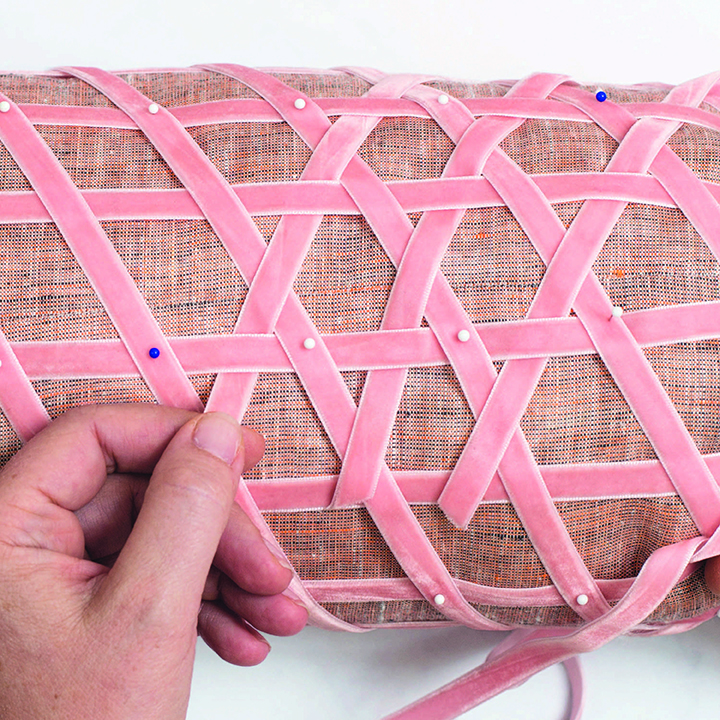
17. The wrapping ribbons will end, in an under position, ready to complete the wrapping cycle. Remove the circumference pin, scoot the structural ribbon out of the way, trim and fold the end of the ribbon, and secure it to the other end of the ribbon with a pin (R). Try to sew the ends such that after moving the structural ribbon back into place, the ribbon seam will be hidden. Readjust the structural ribbon.

18. After all ribbon loops have been secured, remove all circumference pins.
NOTE: The easiest way to make this pillow is to buy a bolster in your favorite color and fabric and find
matching velvet ribbon. Or buy a blank bolster form and sew a cover. I used ¾ yd (68.5cm) of Purl Soho Watercolor Linen in Monarch Gray. Make the pillow cover by cutting a piece of fabric that is 18″ × 20″ (45.5cm × 51cm) and two circular pieces that are 7″ (18cm) in diameter. Sew a cylinder with a ½” (1.3cm) seam allowance so that your cylinder measures 18″ (45.5cm) long × 19″ (48.5cm) in circumference. Stuff the bolster pillow into the cylinder. Hand-stitch the circles with the same seam allowance to each end using the ladder stitch (page 178)
Reprinted from Weaving Within Reach: Beautiful Woven Projects by Hand or by Loom. Copyright © 2018 by Anne Weil. Photographs copyright © 2018 by Rebecca Stumpf. Published by Clarkson Potter/Publishers, an imprint of Penguin Random House LLC.


