

 You know I’m a big fan of ANY place with flowers. Whether they’re peeking out of pots or spilling over the edges of well-manicured lawns, I’m happy. With the start of summer, I’ve been able to start turning some of the inspiration garden images that have sustained me all winter long into actual realities. BUT we need all the help we can get so I was delighted when Troy-Bilt invited us to be part of the Spring 2019 Flip the Yard Campaign!
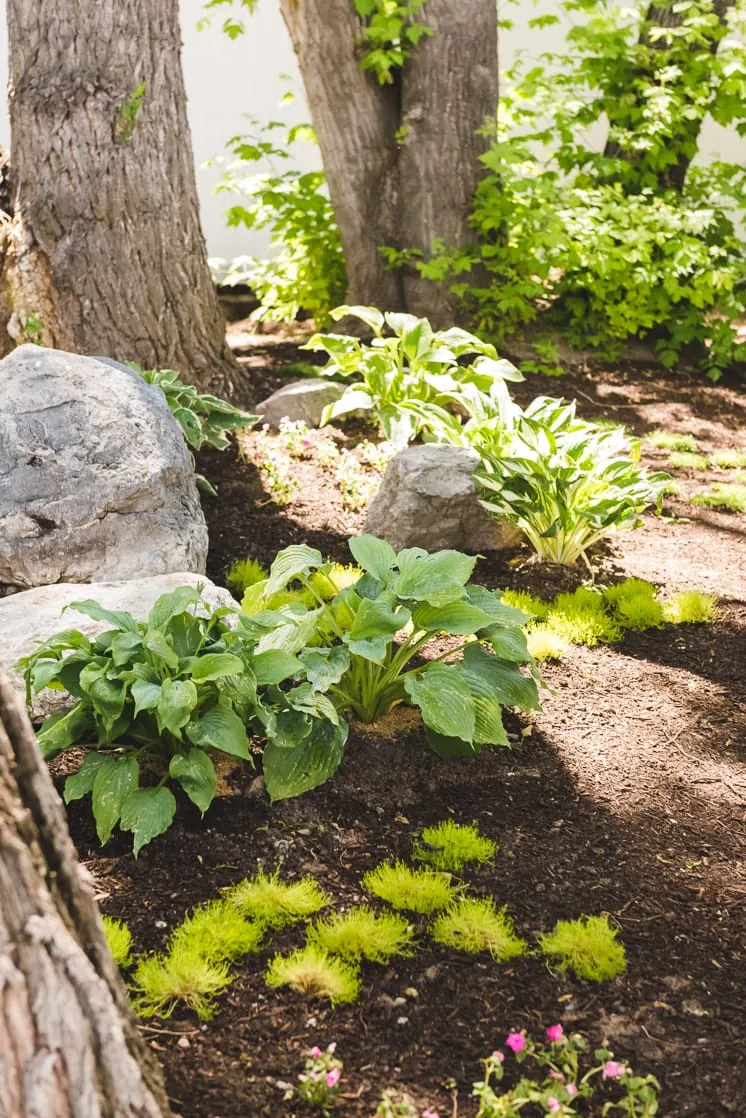
You might remember my business partner Mary bought a house last summer and we’ve been making some pretty big changes inside (take a look HERE). Right after buying she had to replace her sewer line. Yuck! Since then she’s being dealing with the havoc the backhoe caused and a yard that has been desperate for some love too.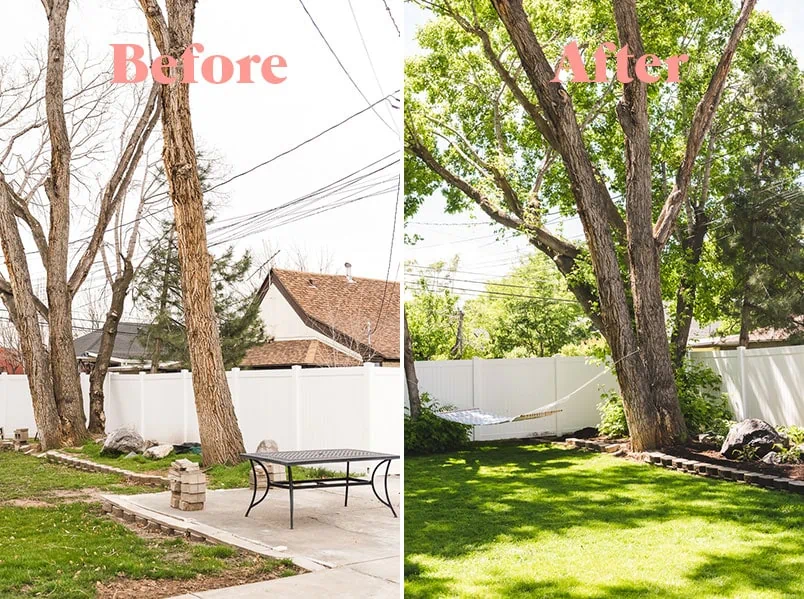
We took a poll on Instagram to see which project we should tackle first! Annnnd drumroll…. you guys picked the backyard! So with a little (actually a lot) of elbow grease, a vision, and the power of the Troy-Bilt tool suite we set out to turn a sad and drab weed pile into a shady garden oasis.
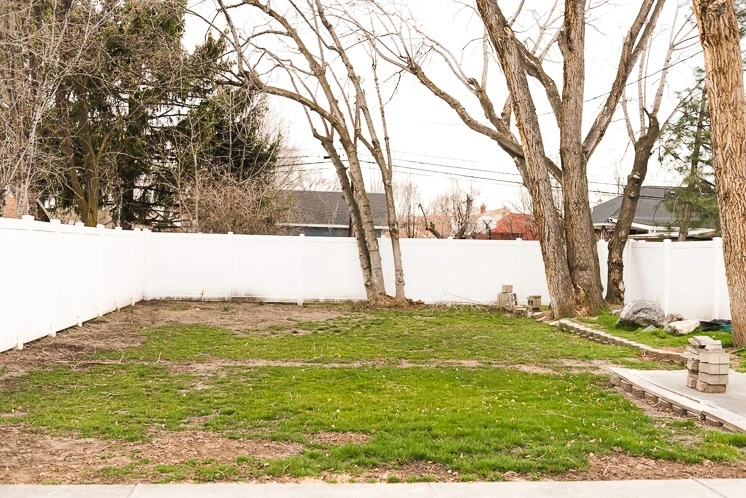
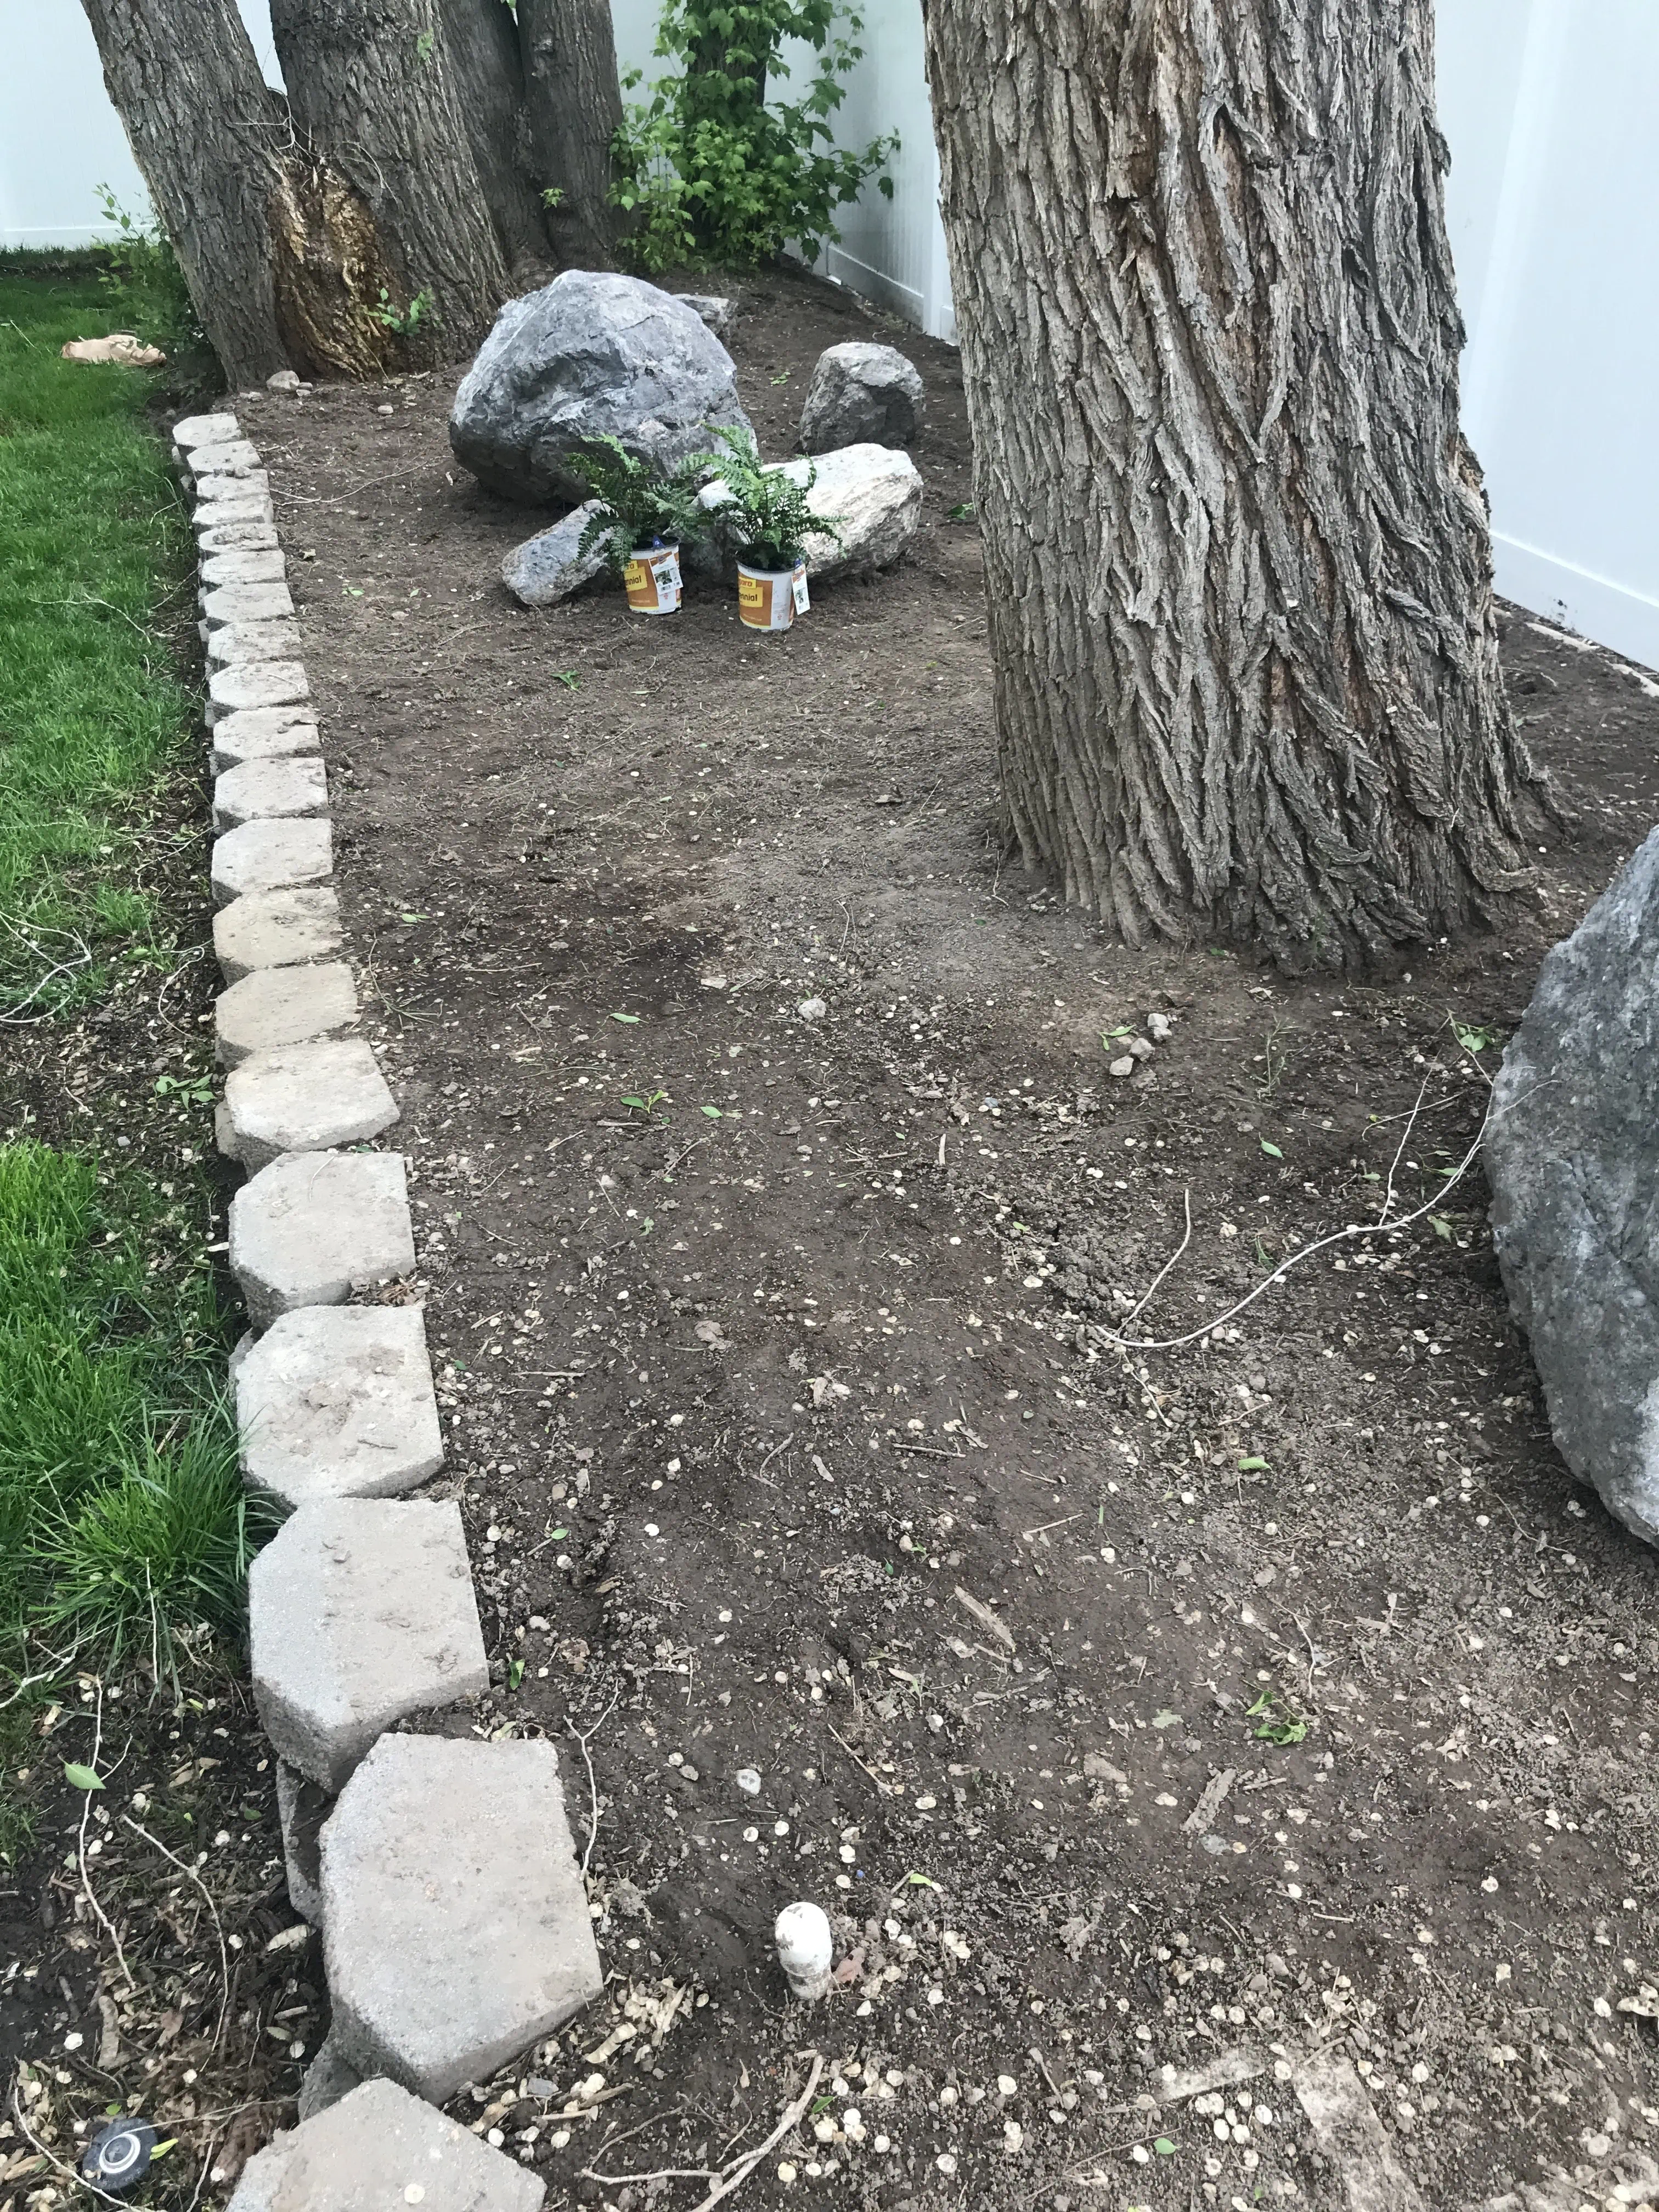
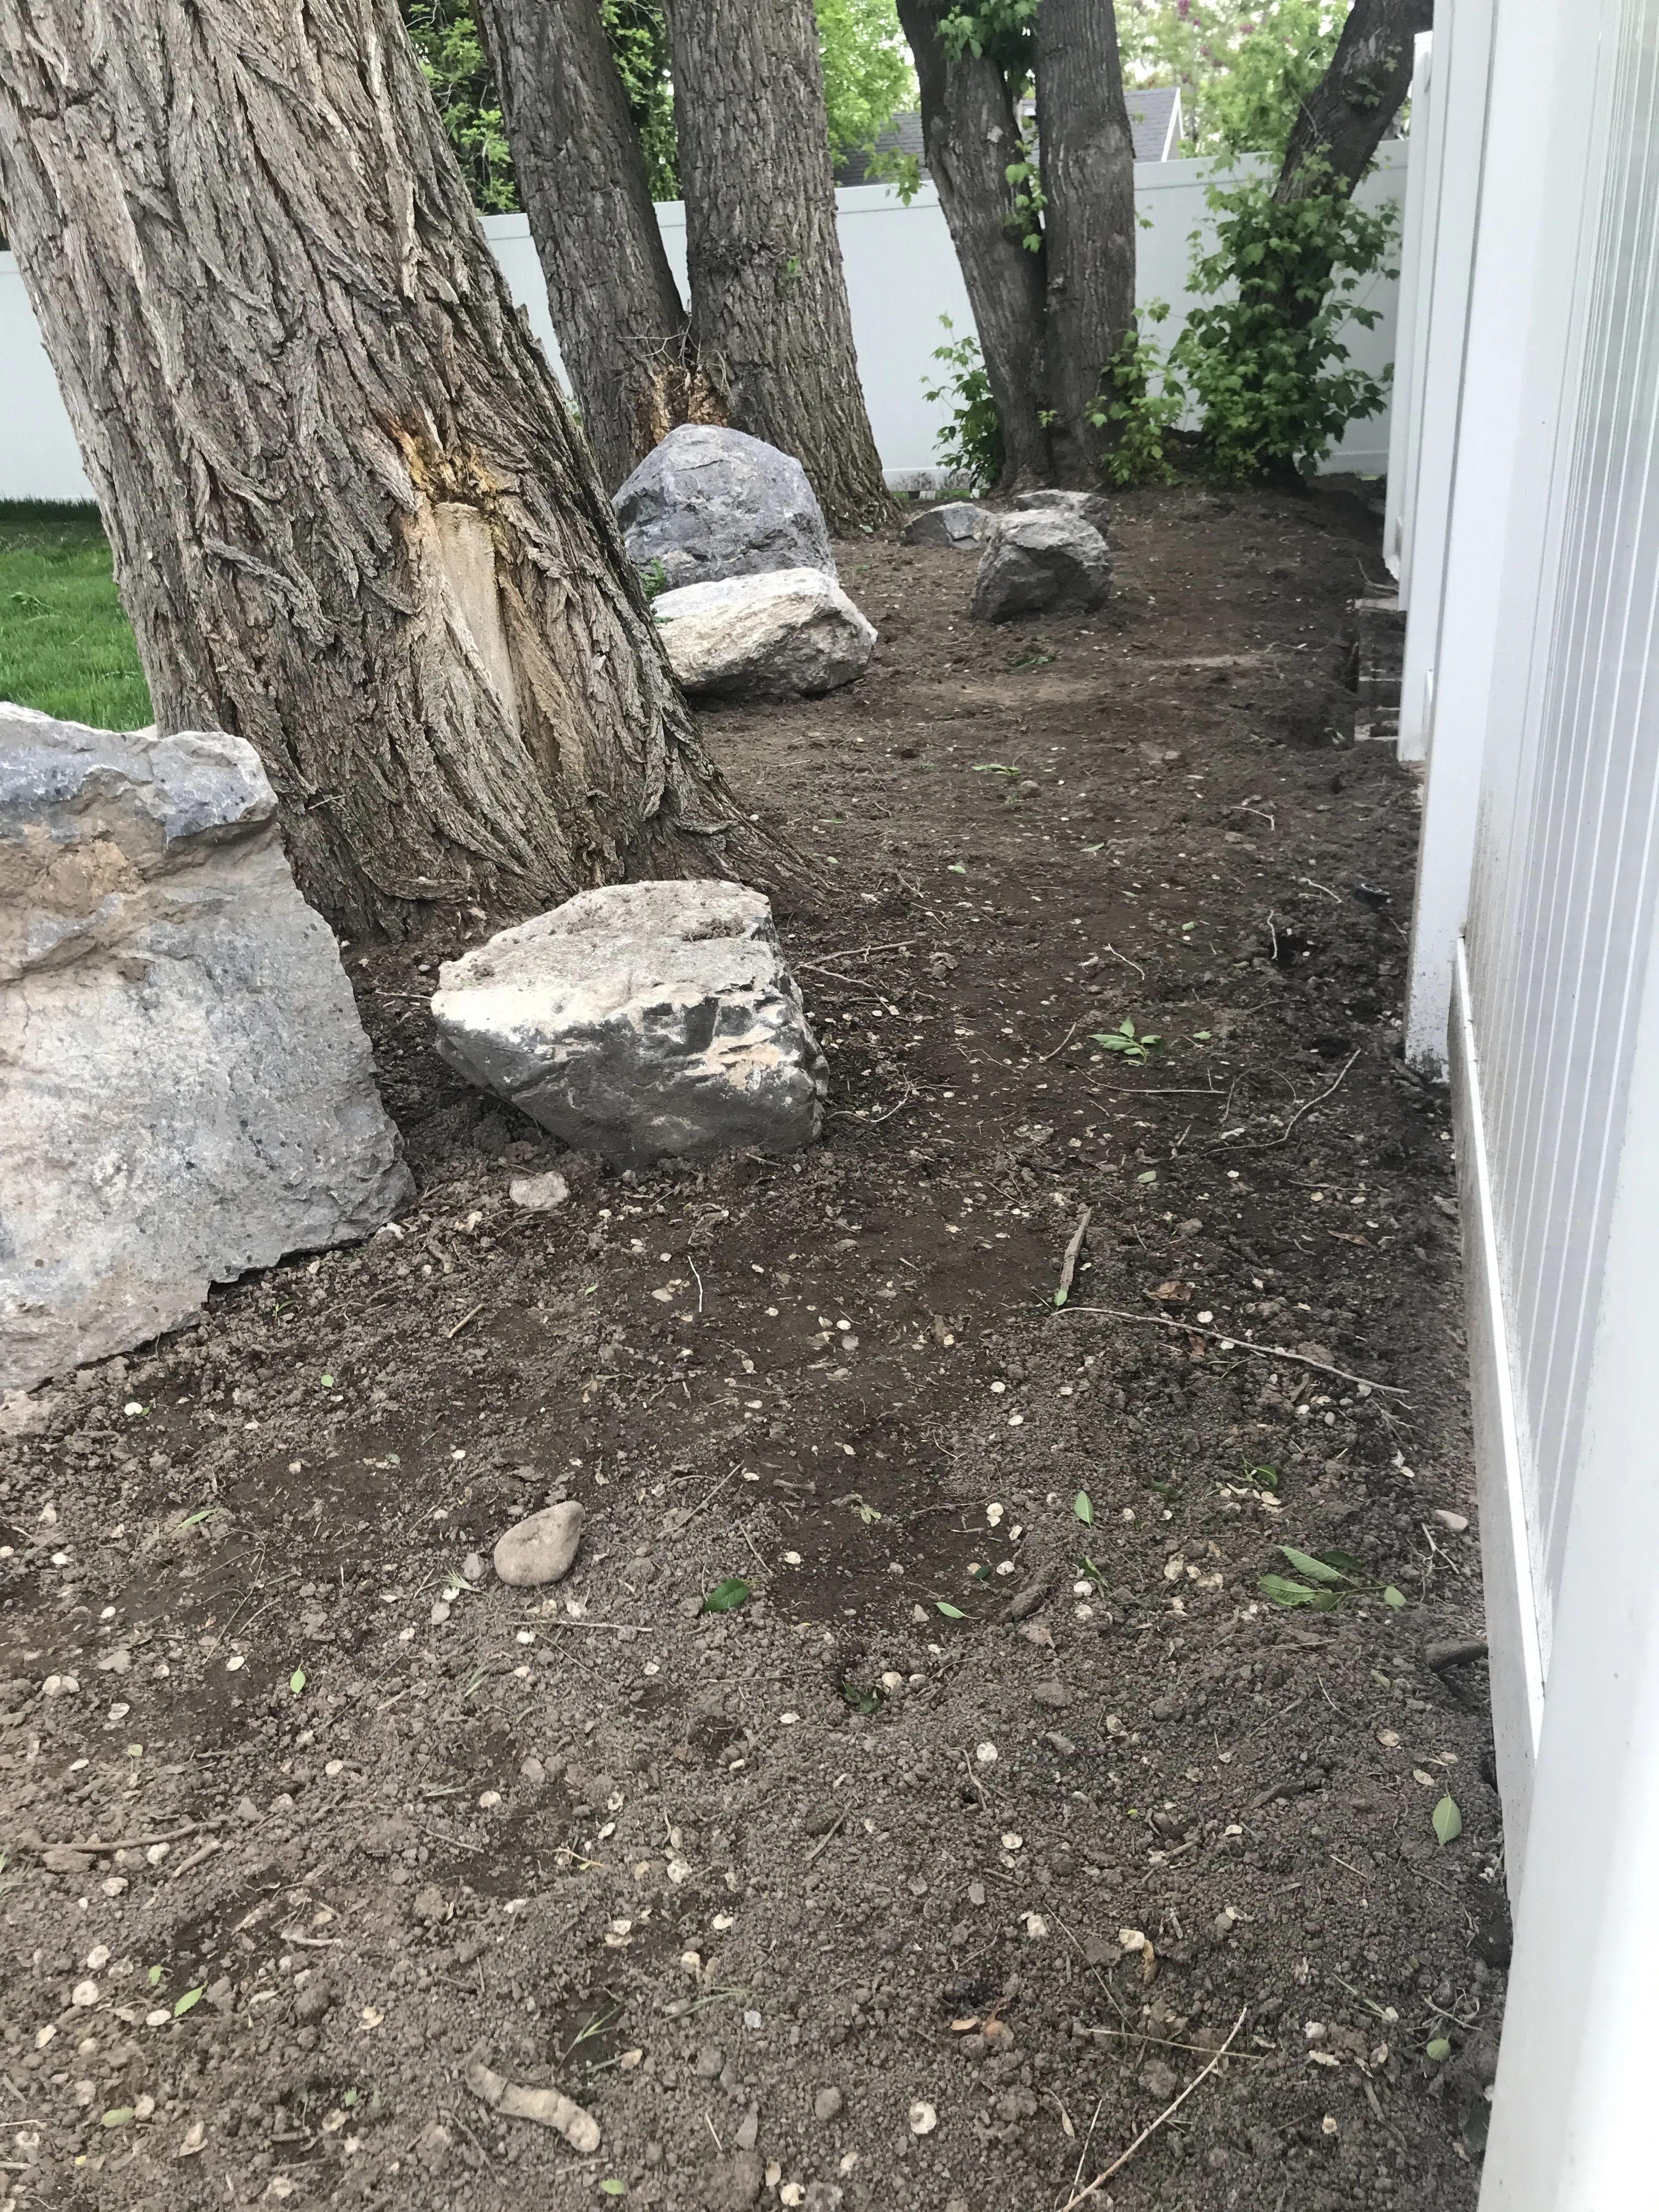
Here are the pitiful before photos:


The challenge was to complete a transformation in one weekend to one section of Mary’s garden with the help of $250 in supplies from Home Depot and the right selection of Troy-Bilt tools. Here are the beauties themselves:
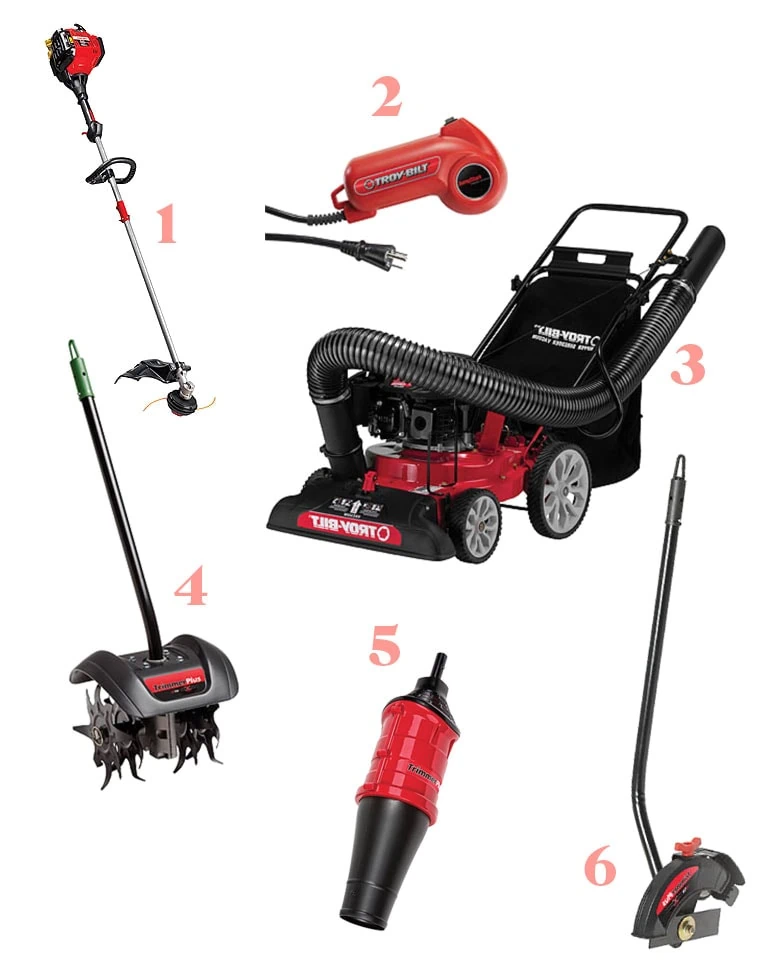
- TB685 EC Straight Shaft String Trimmer
- JumpStart Corded Engine Starter
- CSV 060 Push Chipper Shredder Vac
- GC720 TrimmerPlus Add-On Cultivator
- CB720 TrimmerPlus Add-On High Performance Blower
- LE720 TrimmerPlus Add-On Lawn Edger
Here’s our recipe for a perfect shady garden oasis.
DAY 1:
- Pull the weeds
- Use the GC720 TrimmerPlus Add-On Cultivator to mix organic compost into the old, hard dirt and prepare for planting
- Use the CSV 060 Push Chipper Shredder Vac to chip the twigs and debris that collected on the lawn over the winter
PULL THE WEEDS
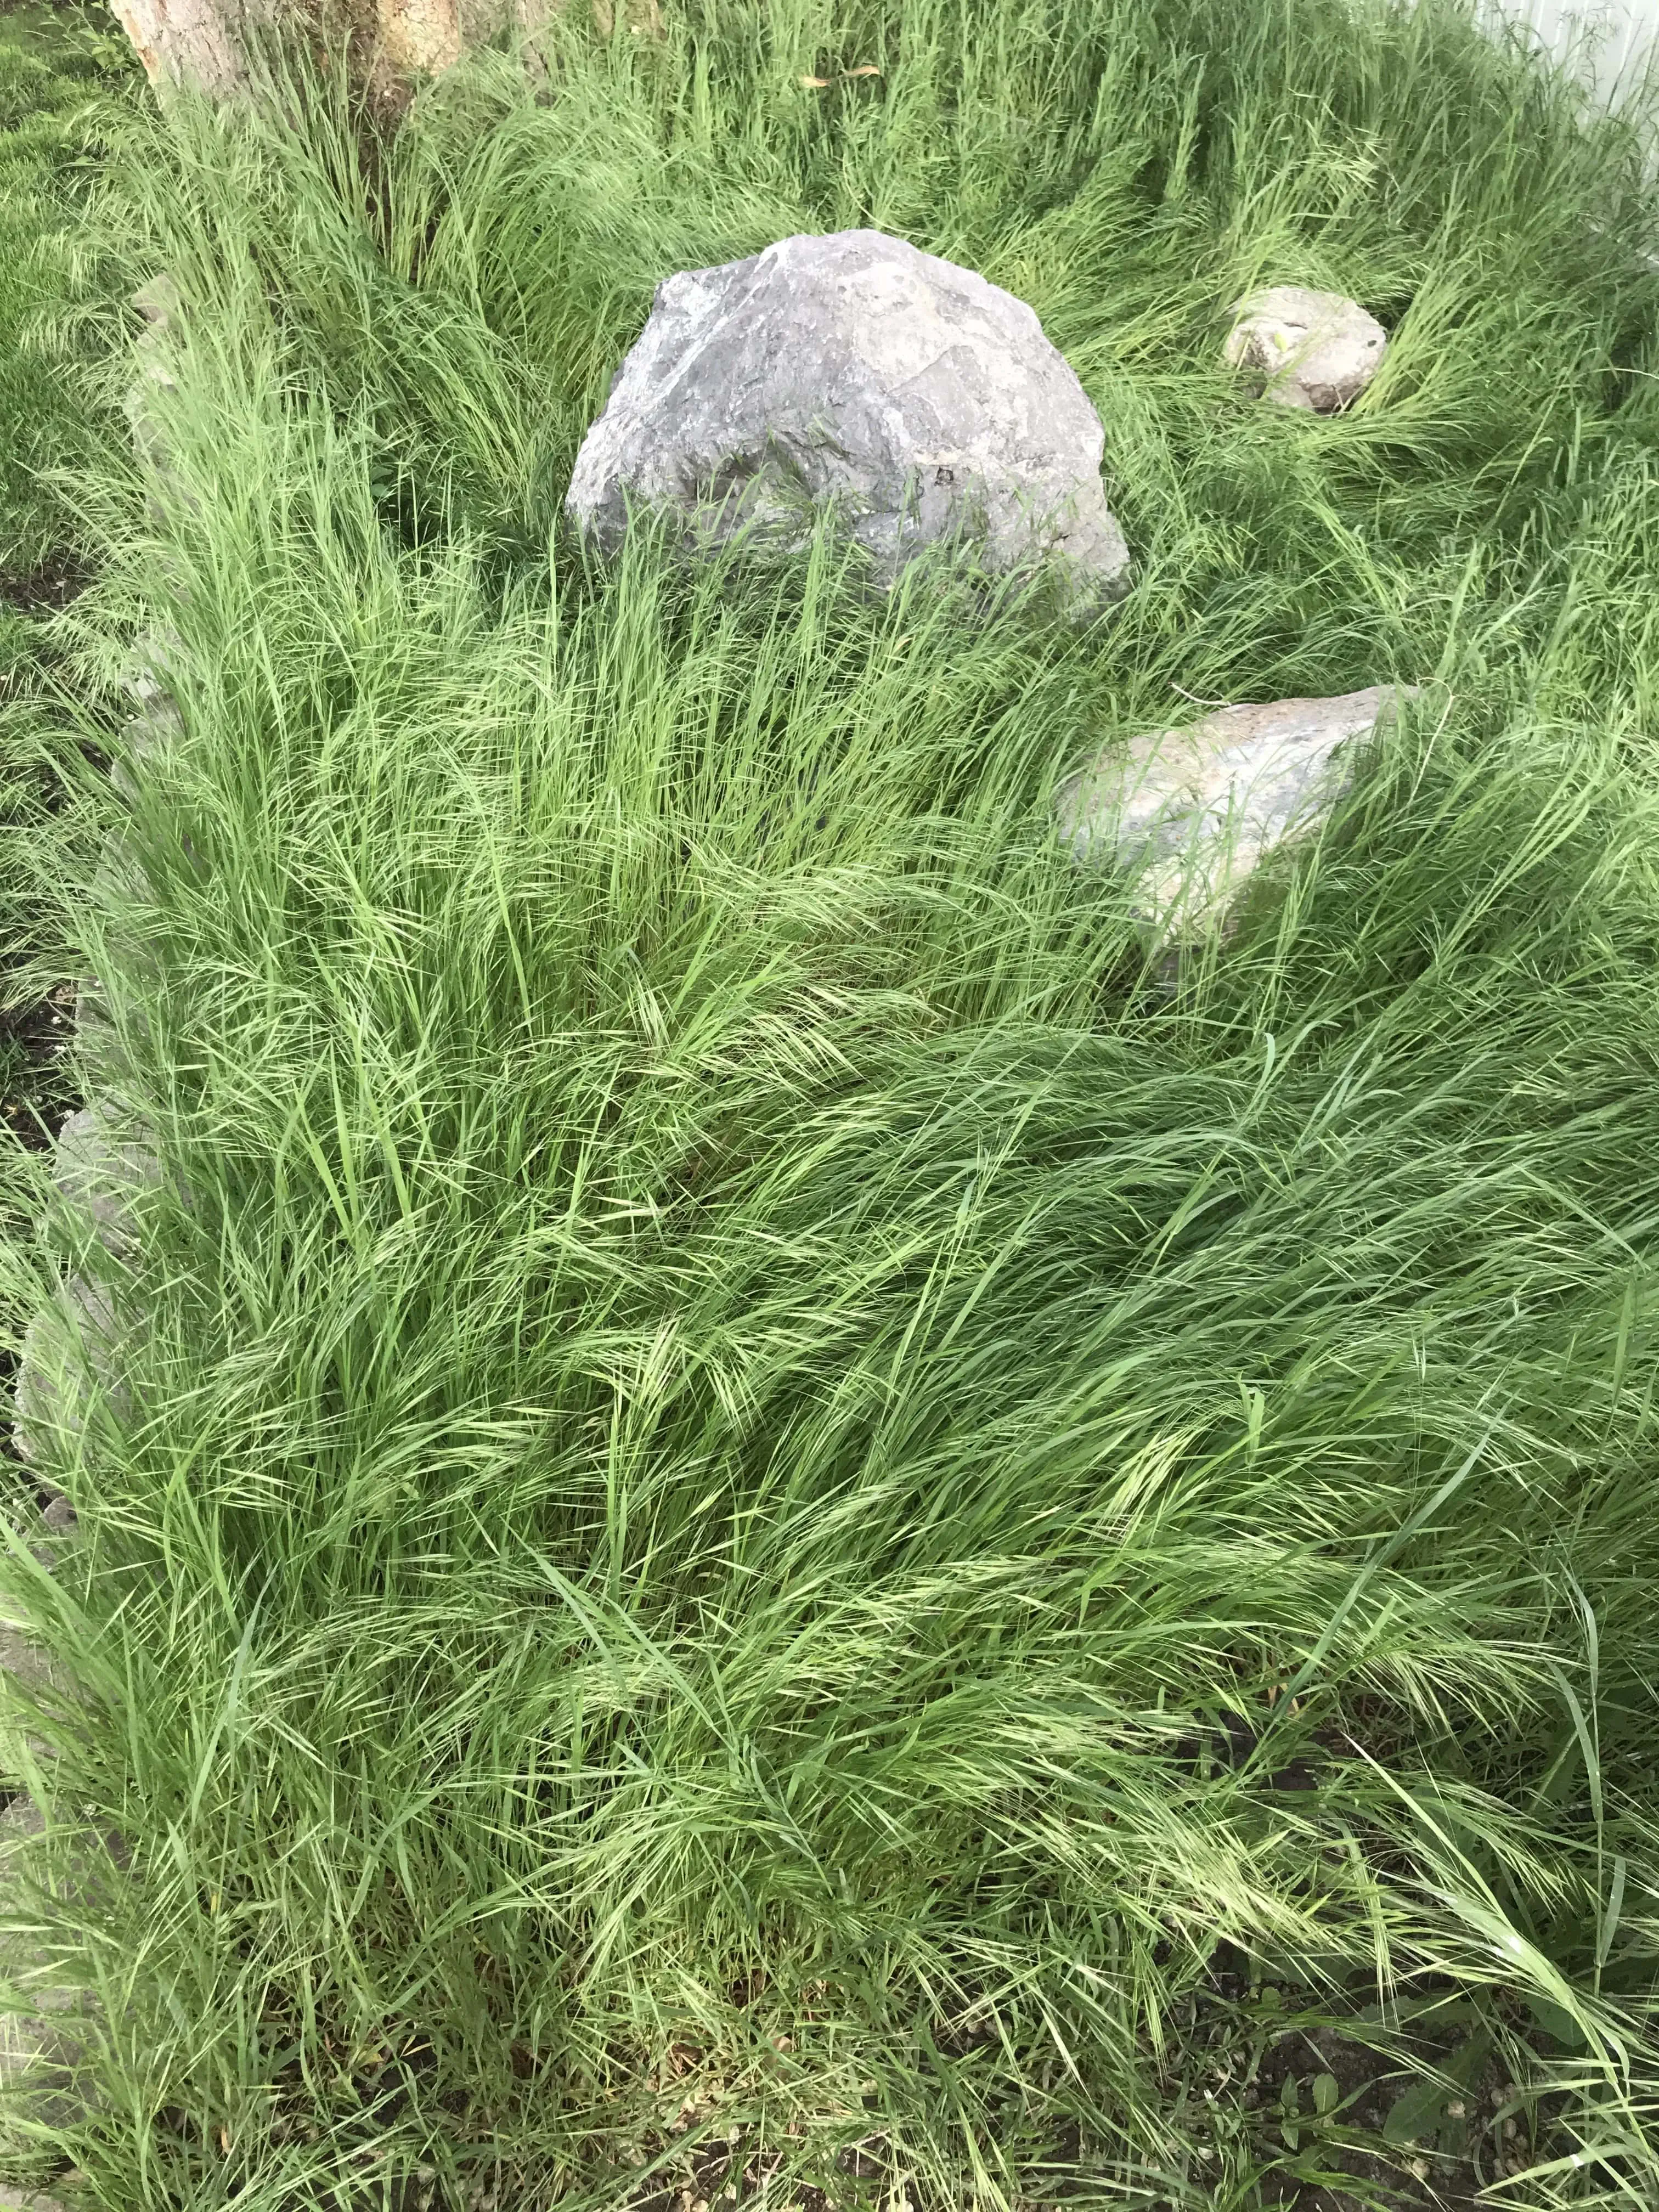
We kicked off the project with weed clearing and dirt prep. There’s nothing glamorous or simplifying about pulling mounds of orchard grass. You’ve just got to roll up your sleeves and dig in. Literally. The fact that it rained for almost two weeks straight prior to the challenge definitely helped soften up the dirt, so it wasn’t too bad. If you have stubborn weeds and hard dirt, I’d recommend soaking them with a hose prior to tackling, and they should come right up.
CULTIVATE
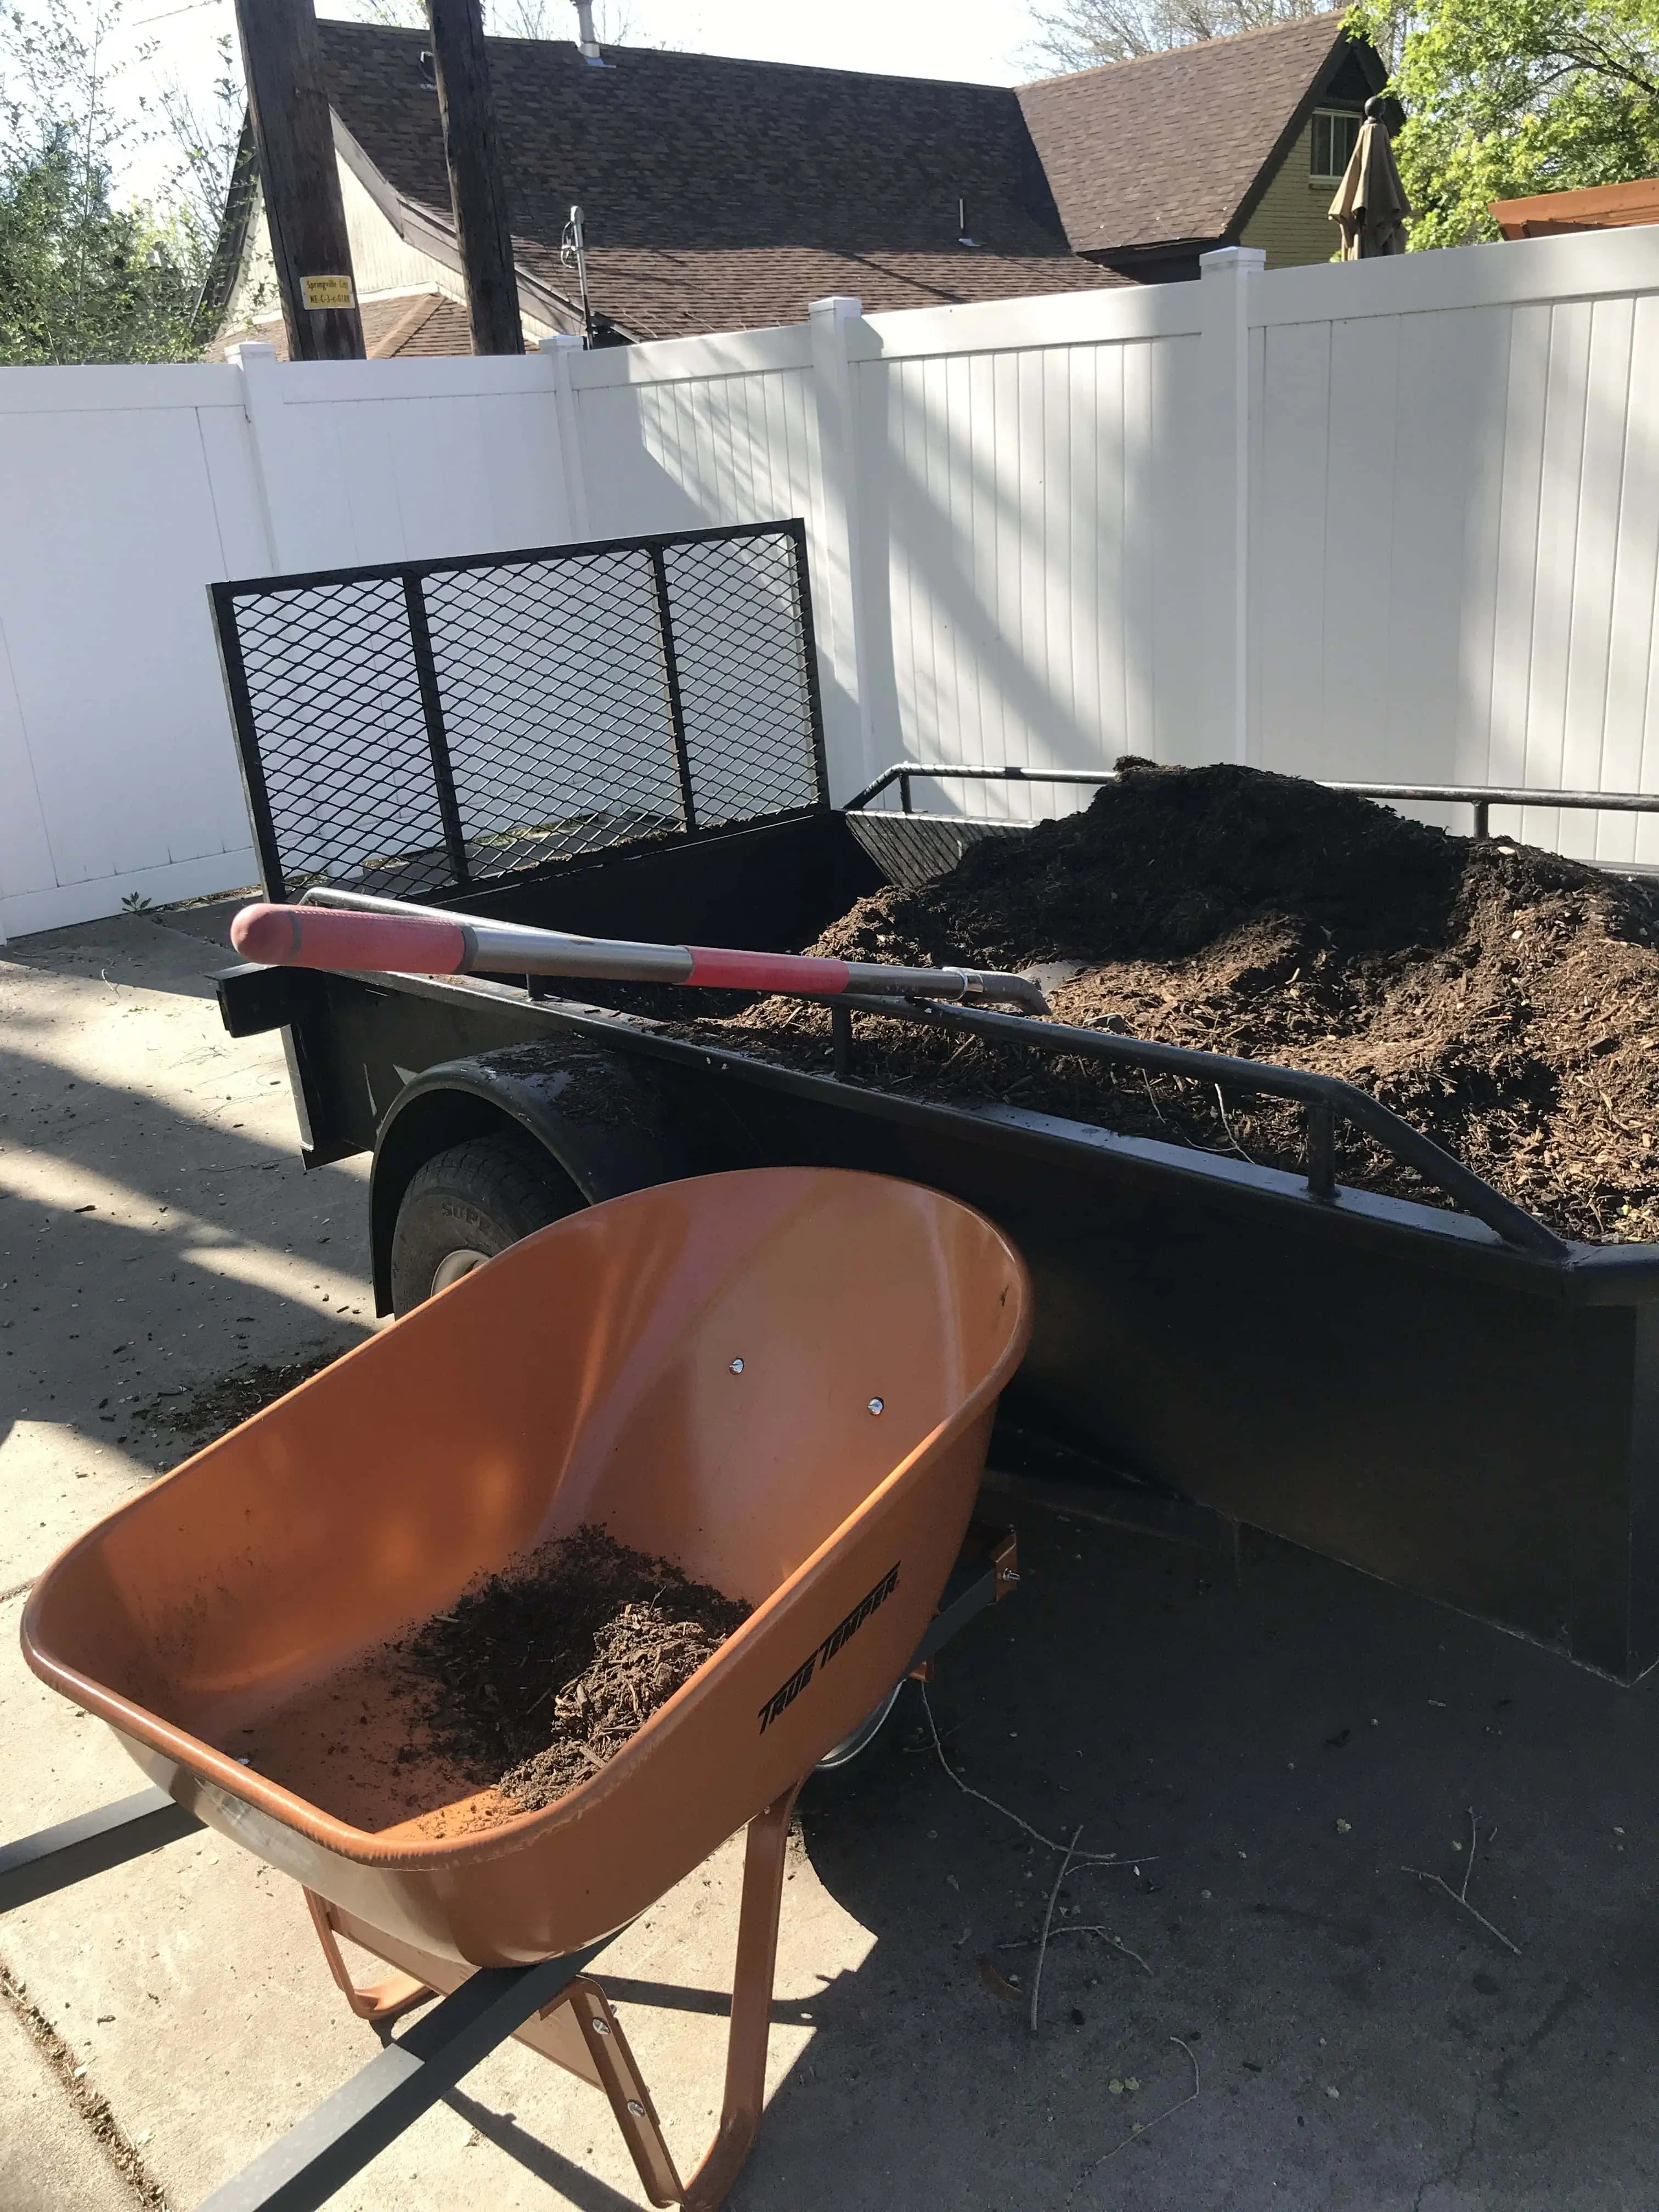
We picked up a couple of loads of compost dirt ($20 a load) from our local water treatment plant. We spread it on top of the newly weeded bed, and then we used the GC720 TrimmerPlus Add-On Cultivator which is an attachment that connects to the TB685 EC Straight Shaft String Trimmer to mix the compost in with the old dirt to make the ground more suitable for planting.
Mary gets almost as excited about the tools as she does about the flowers, so she was quick to select the TB685 EC Straight Shaft String Trimmer. It’s a 4-cycle gas trimmer with attachment capabilities. That means you don’t have to mix the oil and gas (much simpler and more powerful) AND you have the most flexibility in your tools. You have just one base, and then you can pop off the string trimmer head and replace with the cultivator or the edger or the blower attachment (or quite a few others) depending on the job you’re trying to perform.
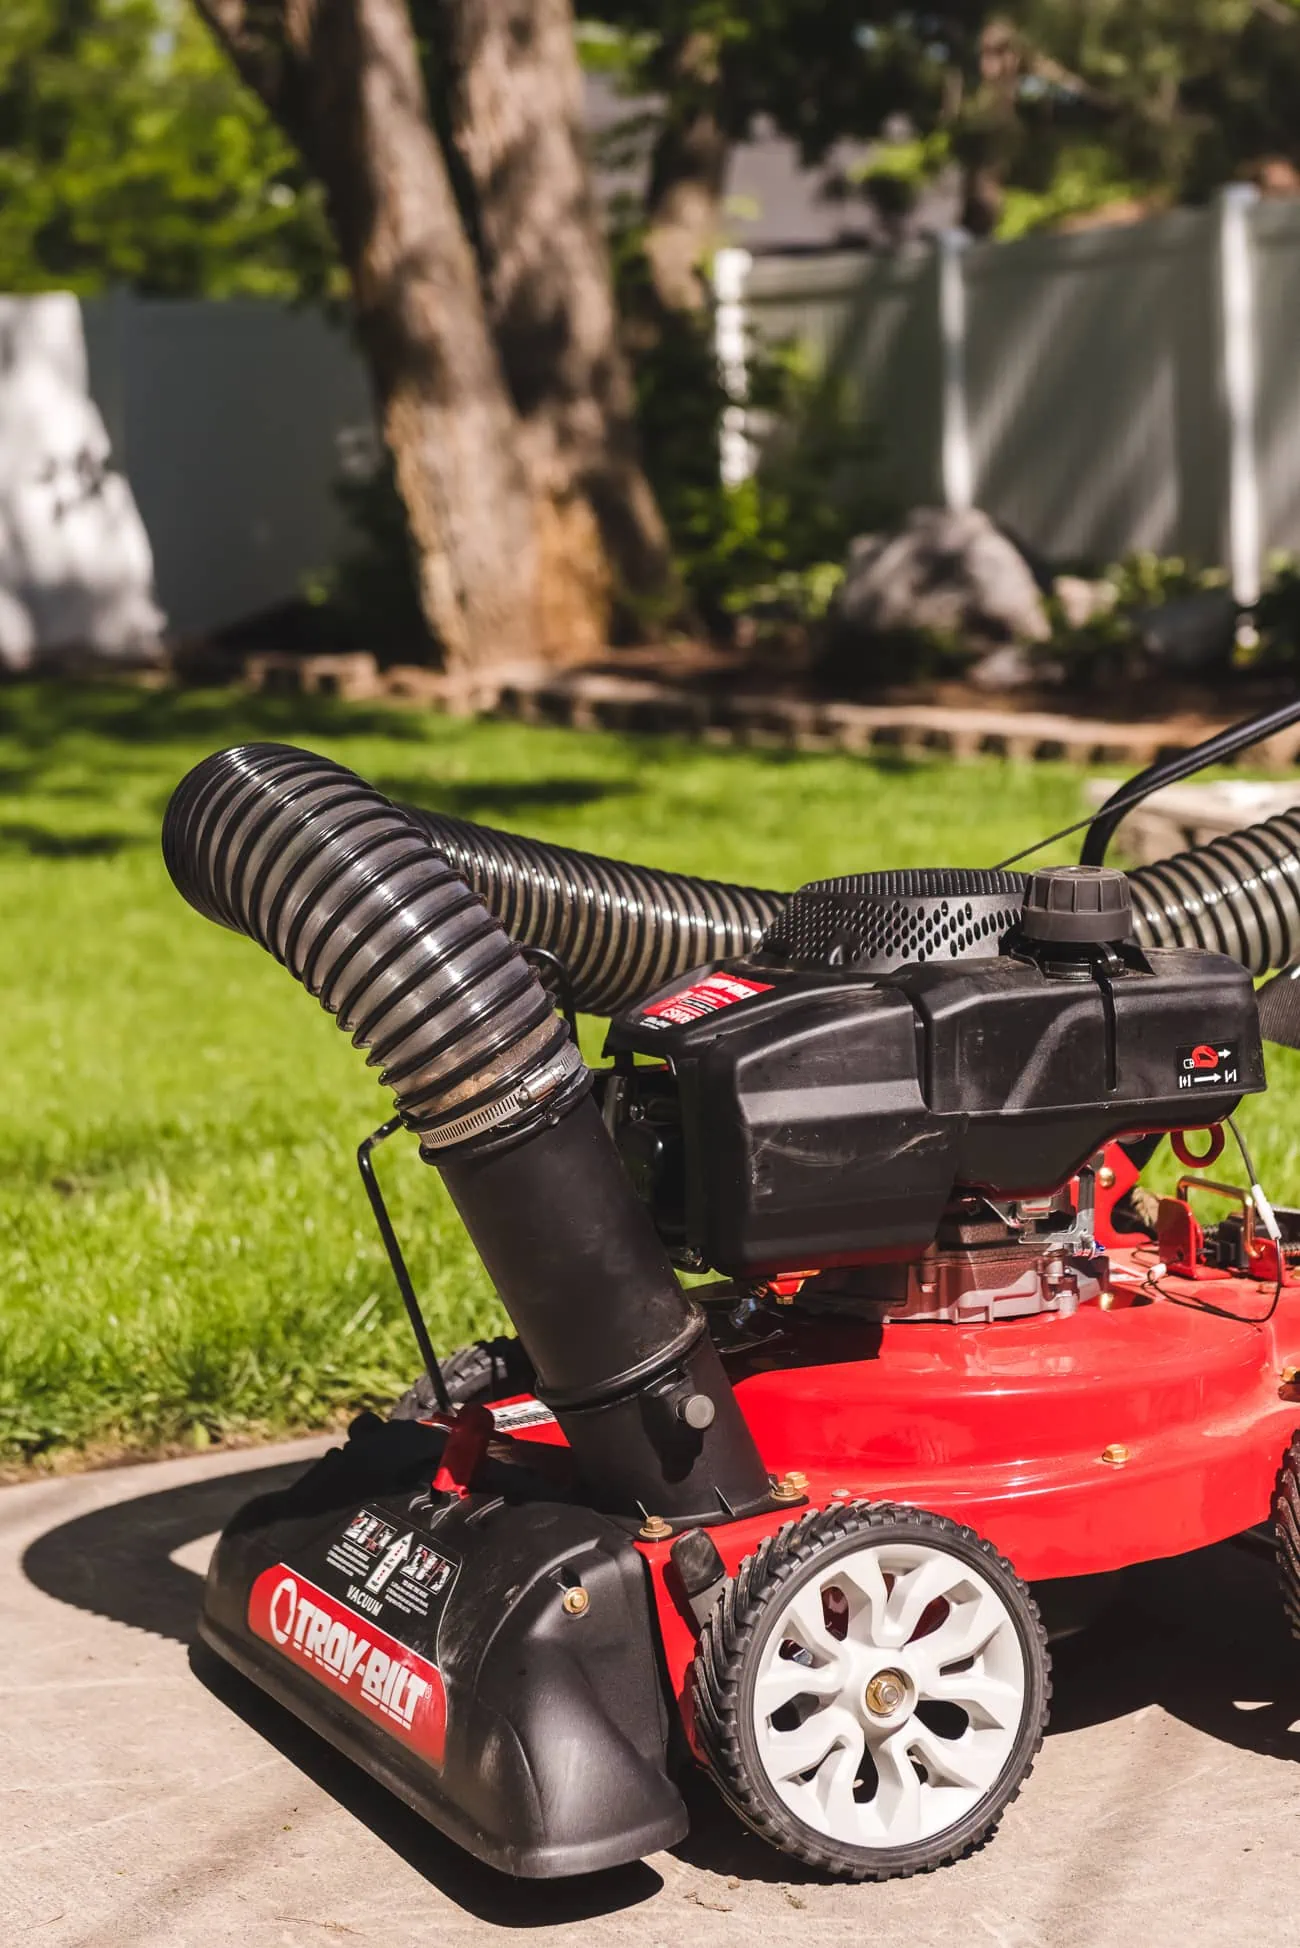
SHRED & CHIP
Mary has two BIG elm trees and two box elder trees that provide the loveliest shade. Unfortunately they are rather messy. Especially when the wind blows. So she was over the moon when she discovered that Troy-Bilt has a CSV 060 Push Chipper Shredder Vac, which is essentially a vacuum for your yard! You push it like a lawn mower, and it sucks up all the leaves and small twigs. It mulches everything it picks up, reducing eight bags of debris into just one. It’s literally the stuff of tidy garden dreams.

DAY 2:
- Edge the lawn with the LE720 TrimmerPlus Add-On Lawn Edger
- Trim the edges with the TB685 EC Straight Shaft String Trimmer
- Mow
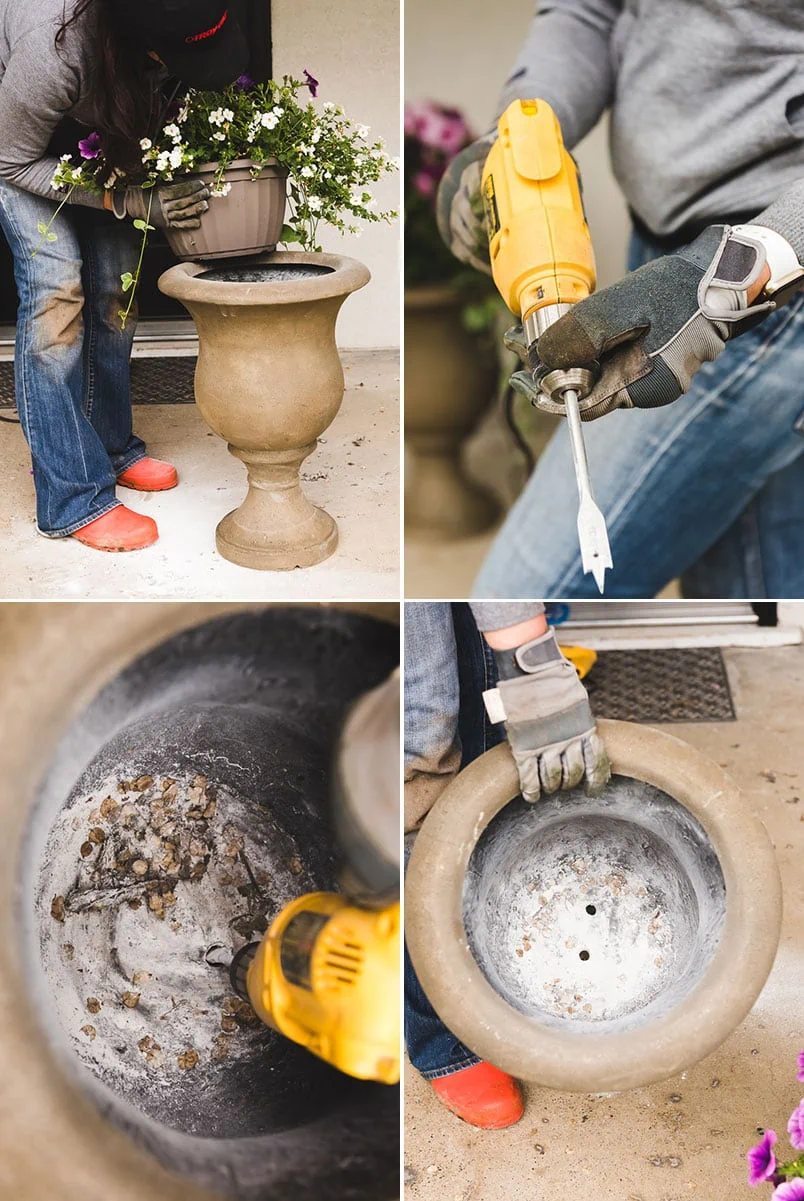
- Drill holes in the pots
- Plant flowers in the pots
- Plant moss, flowers, and hostas in the beds
- Clean up any remaining debris with the CB720 TrimmerPlus Add-On High Performance Blower
EDGE
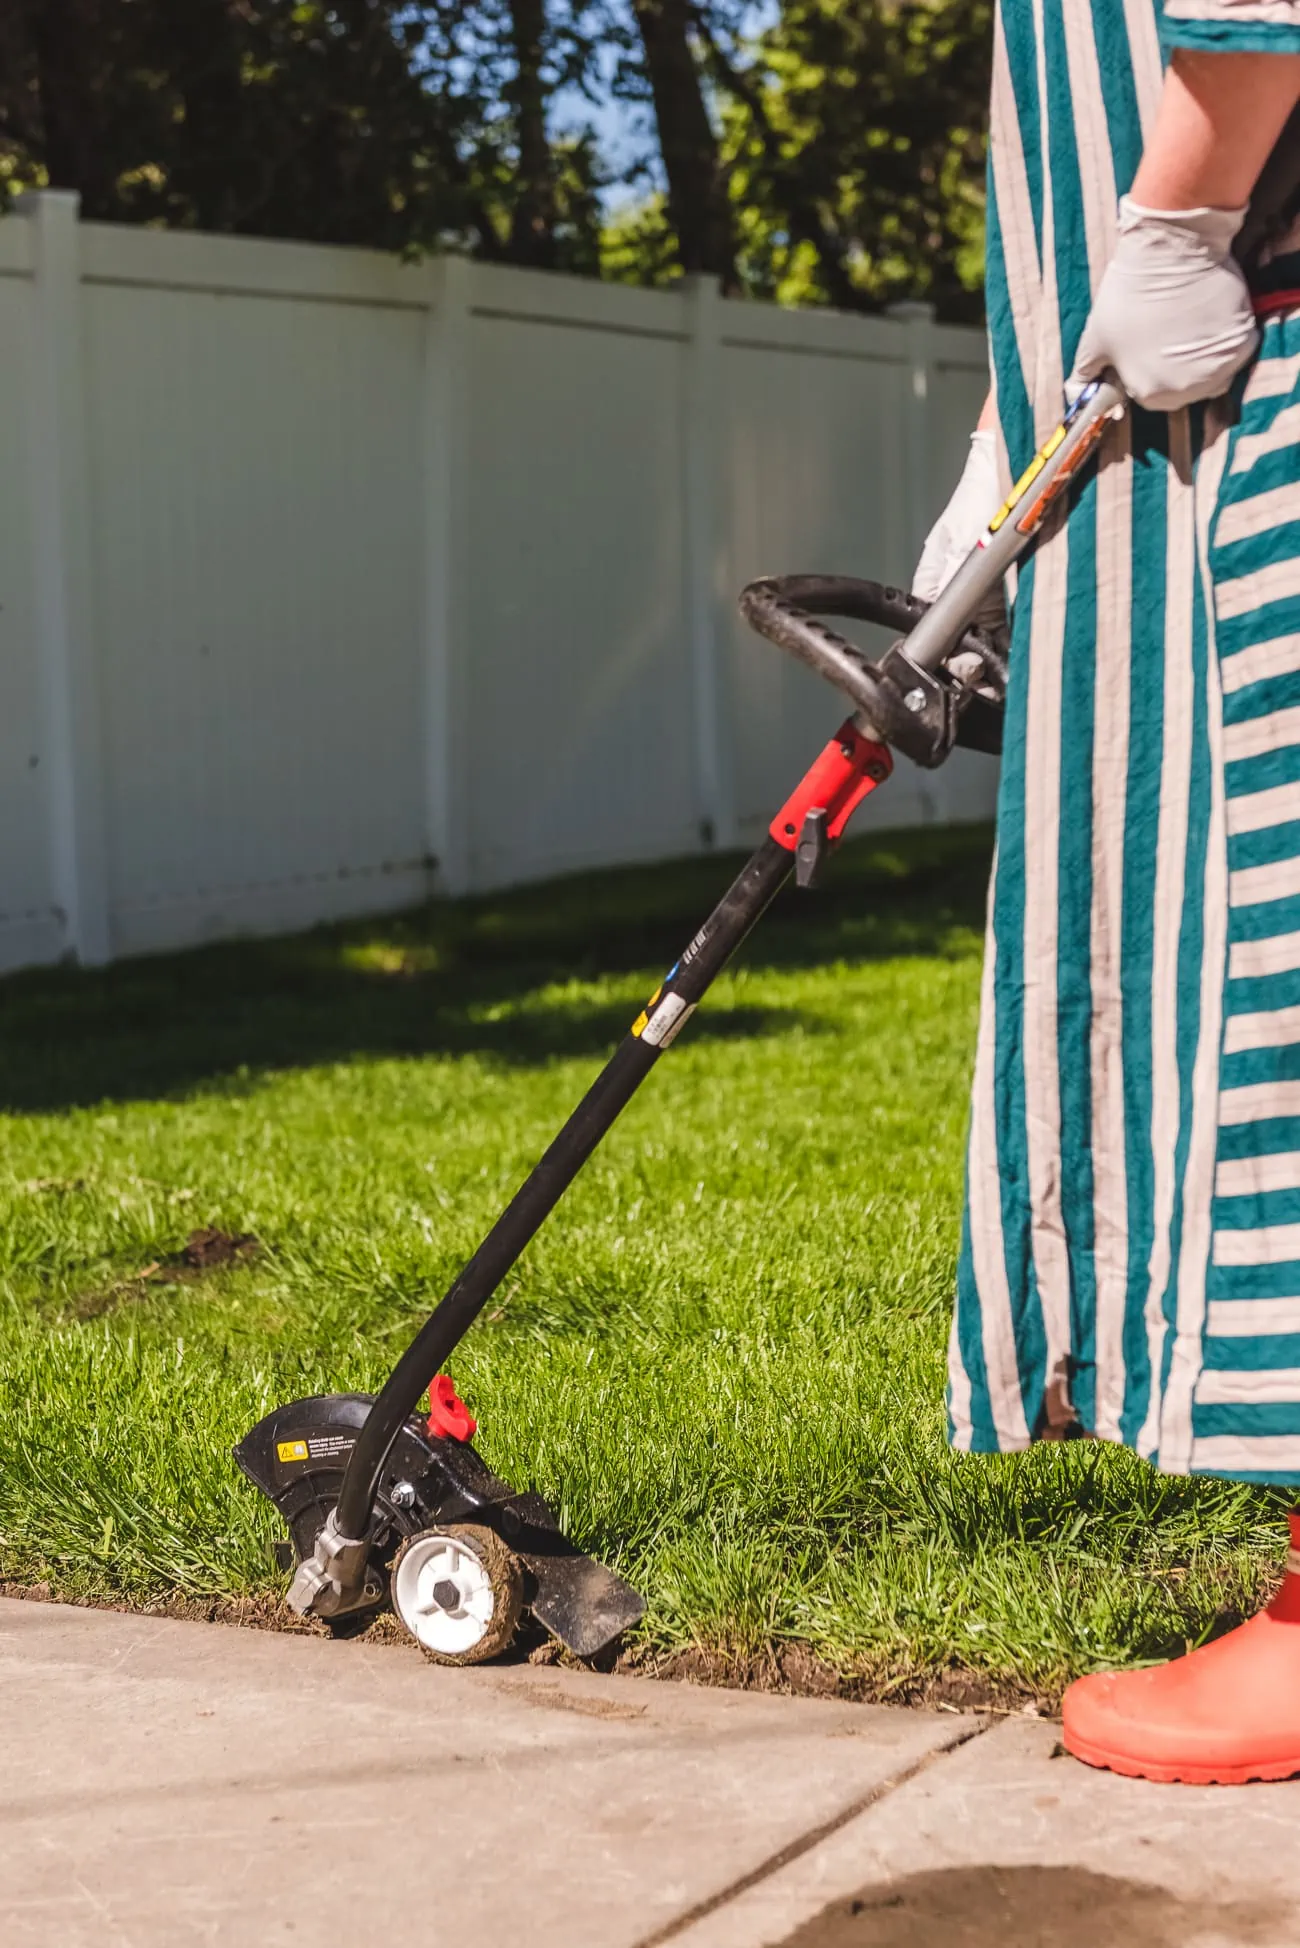
With the weeds pulled and the dirt prepped, we could turn to lawn care and plants on Day 2. We started with edging. The LE720 TrimmerPlus Add-On Lawn Edger is another attachment that connects to the TB685 EC Straight Shaft String Trimmer. It has a guide wheel that slips in snug to the edge of any concrete you might have making it easy to cut a straight line.
Every time we needed to start the trimmer, we used the JumpStart Corded Engine Starter. It locks into the back of the trimmer base. You flip the switch for just 3-4 seconds and it starts right up. No need to figure out how to hold the tool and awkwardly pull the string over and over and over and over. . .
 TRIM
TRIM
 TRIM
TRIMMary’s lawn is bordered by a fence on one side and a short paver wall on the other, so we used the TB685 EC Straight Shaft String Trimmer to clean up the edges. Mary loves this tool because it makes everything neat and tidy, but there is definitely a technique for holding and walking. If you’re a newbie like us, check out Troy-Bilt’s Tips and Techniques.
 MOW
MOW
 MOW
MOWSince the backhoe did a number on the lawn last fall, Mary had a lot of triage to do. A few weeks ago, she leveled the rough spaces with new dirt, sprinkled grass seed, covered it with a bit more dirt just to hold it in place, and then made sure it stayed wet while it germinated. (Since we’ve had a very wet spring, she only had to use her sprinklers minimally.)
Since the grass had a few undisturbed weeks to get going, it was ready for a mow for Flip the Yard. Since her yard is small, Mary opted for one of Troy-Bilt’s walk behind mowers. She has a few tips for creating a shapely, manicured lawn.

 Mowing Tips:

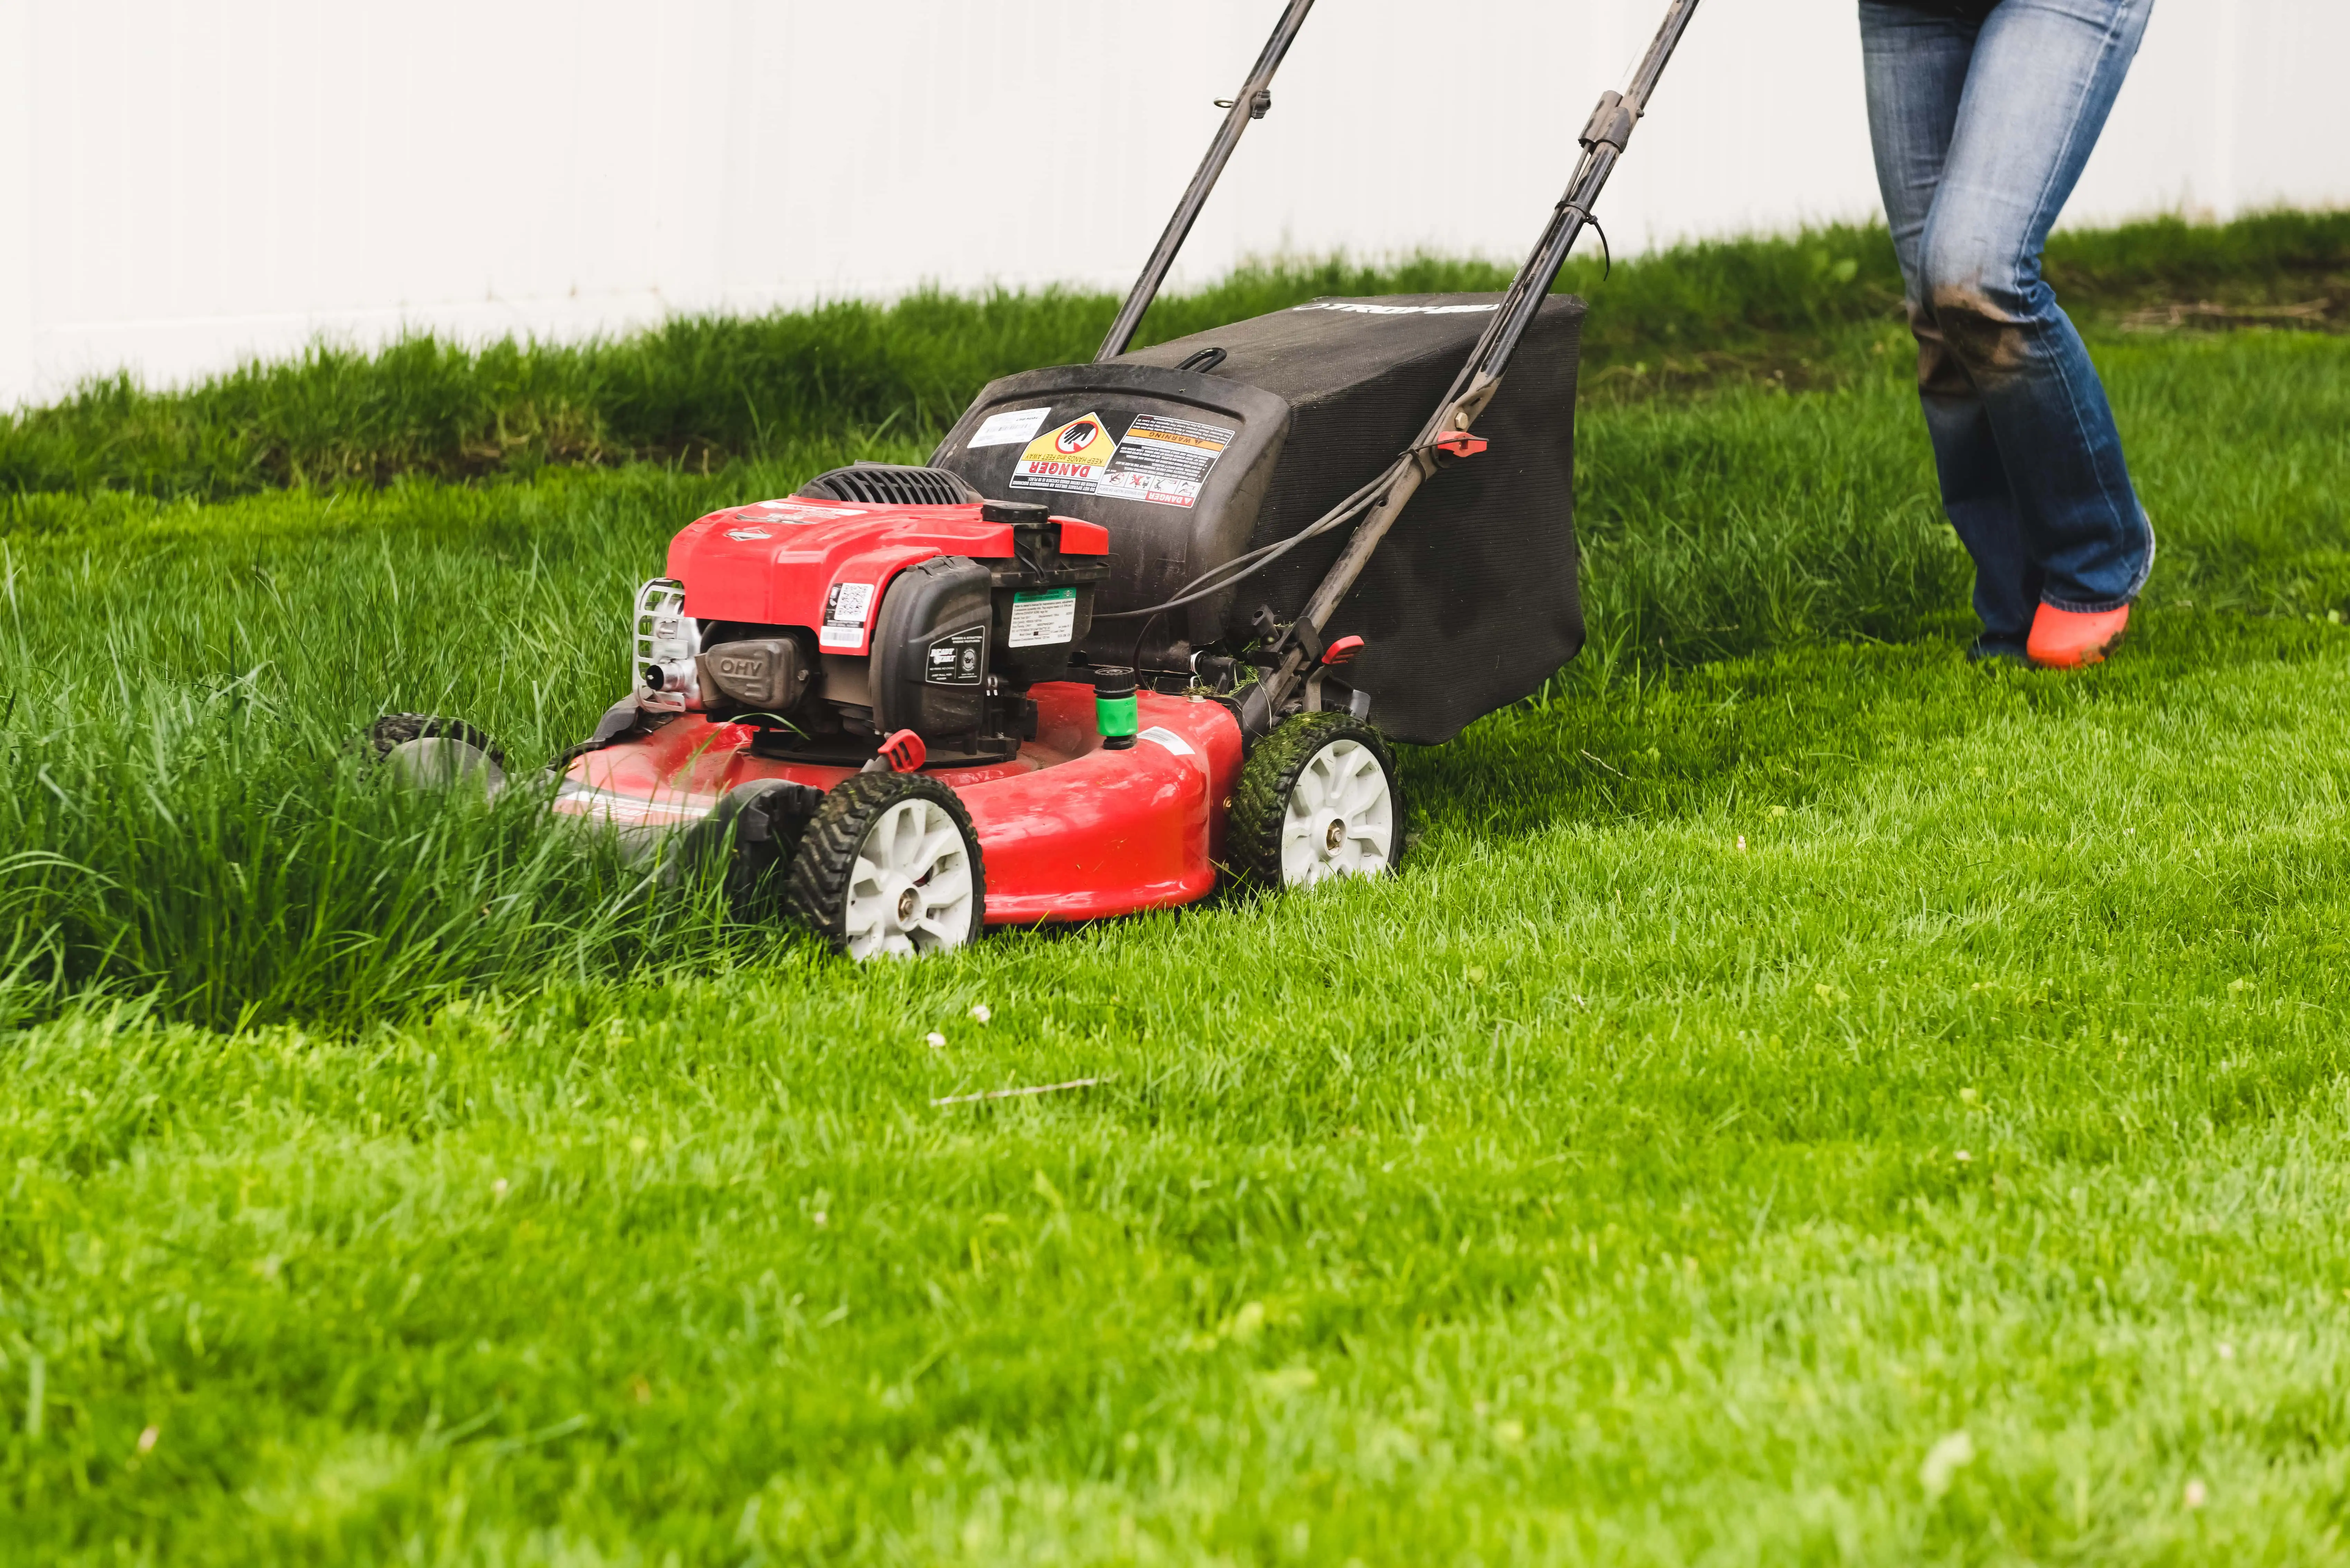 Mowing Tips:
- If you edge and trim before you mow, your lawn mower will pick up some of the grass clippings
- For an even mow, mow in two directions, and then rotate your directions every week. So in Week 1, mow vertically and then horizontally. In Week 2, mow on the diagonals. In Week 3, return to mowing vertically and horizontally, and so on.
- The Troy-Bilt mowers have a hose nozzle that you can connect your hose to in order to clean off the blades. If you use this from the beginning, your blade will stay grass gunk free. But you can’t use it intermittently. If you clean right after you mow, it works great. If you miss a cleaning, the grass gunk will harden and it won’t spray off. You’ll have to scrape it off.
DRILL DRAINAGE HOLES
We found the loveliest pots at Home Depot. The look like granite stone, but they’re made of fiberglass, which means they’re both light and sturdy.
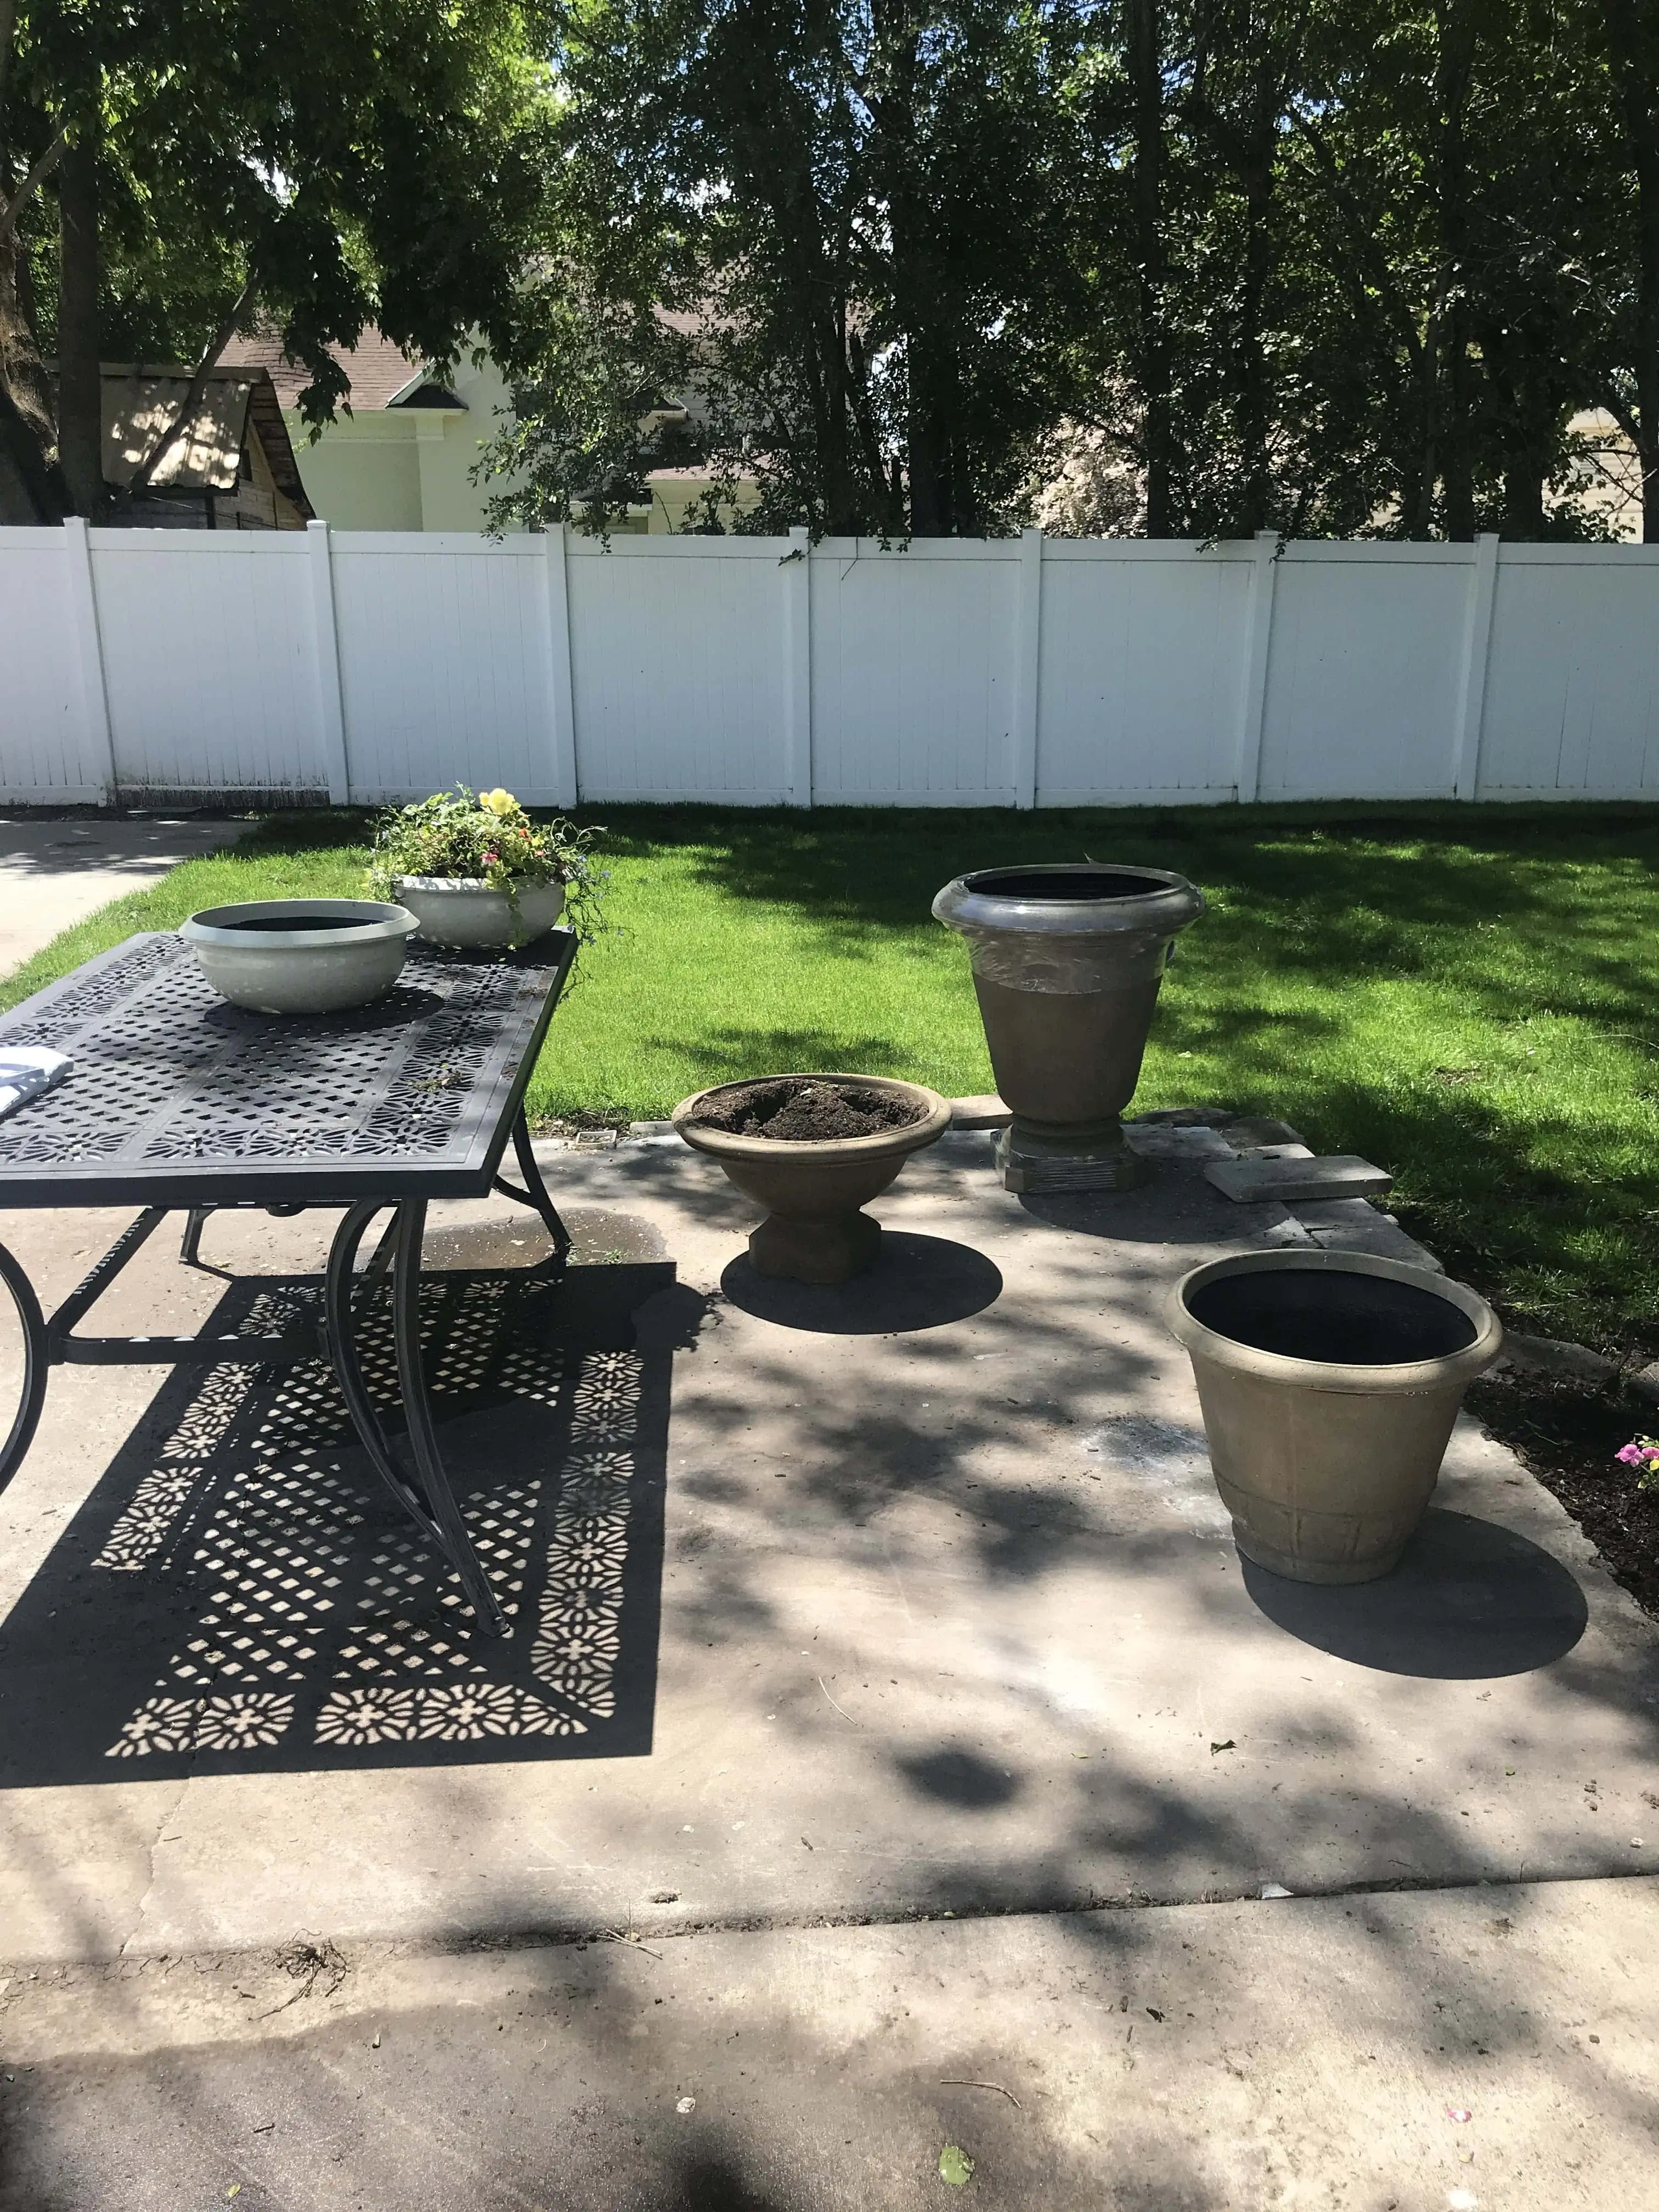
The don’t come with drainage holes, though, so before we planted, we needed to make our own.
PLANT FLOWERS IN POTS
Here are some tips for a successful planting in outdoor pots:
- Drill or unplug any drainage holes.
- Layer the bottom with rocks or bricks for drainage.
- Pour in potting soil.
- Dig a hole for each plants that’s deep enough so the crown of the roots are level (not above or below) with the soil.
- Place the plant and fill in any remaining holes with soil.
- Water.
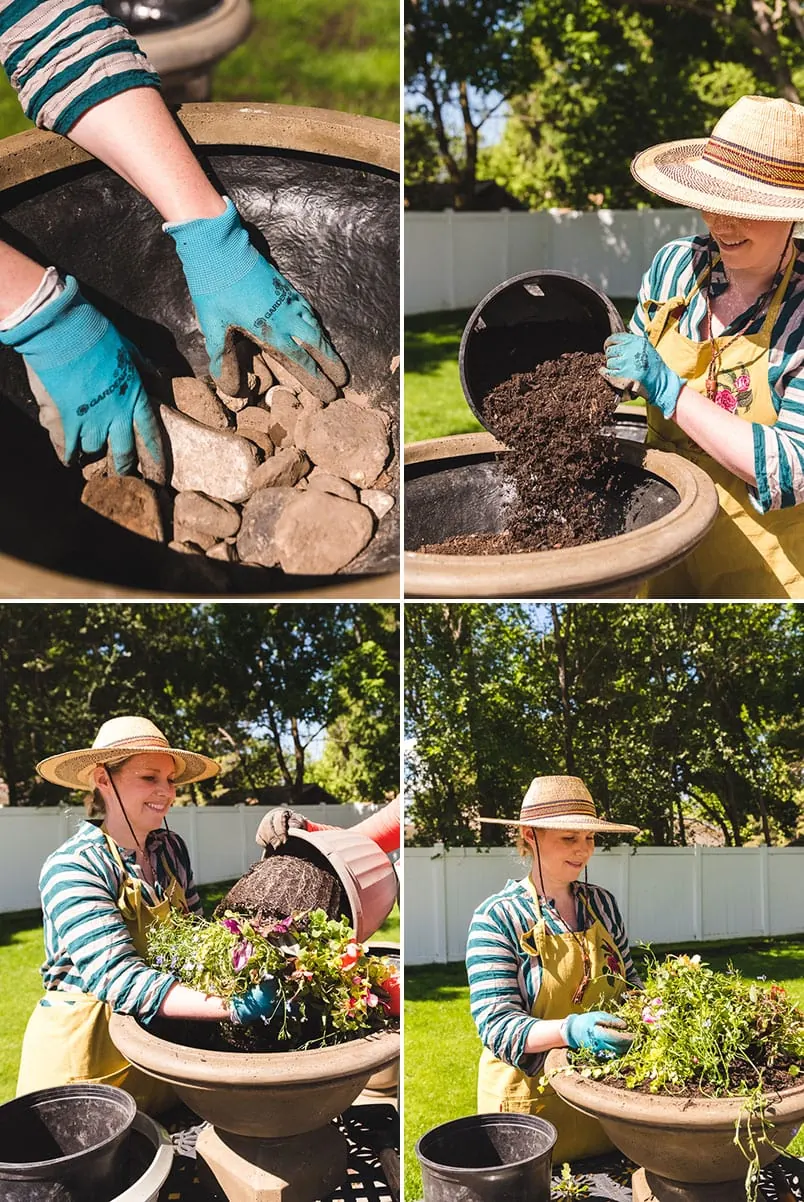
One of my favorite tips for filling pots with an assortment of lovely healthy flowers is to buy hanging baskets that are already full and vibrant Clip off the hangers and then you can either set the basket directly into your pot, or you can remove the basket and plant the entire arrangement.
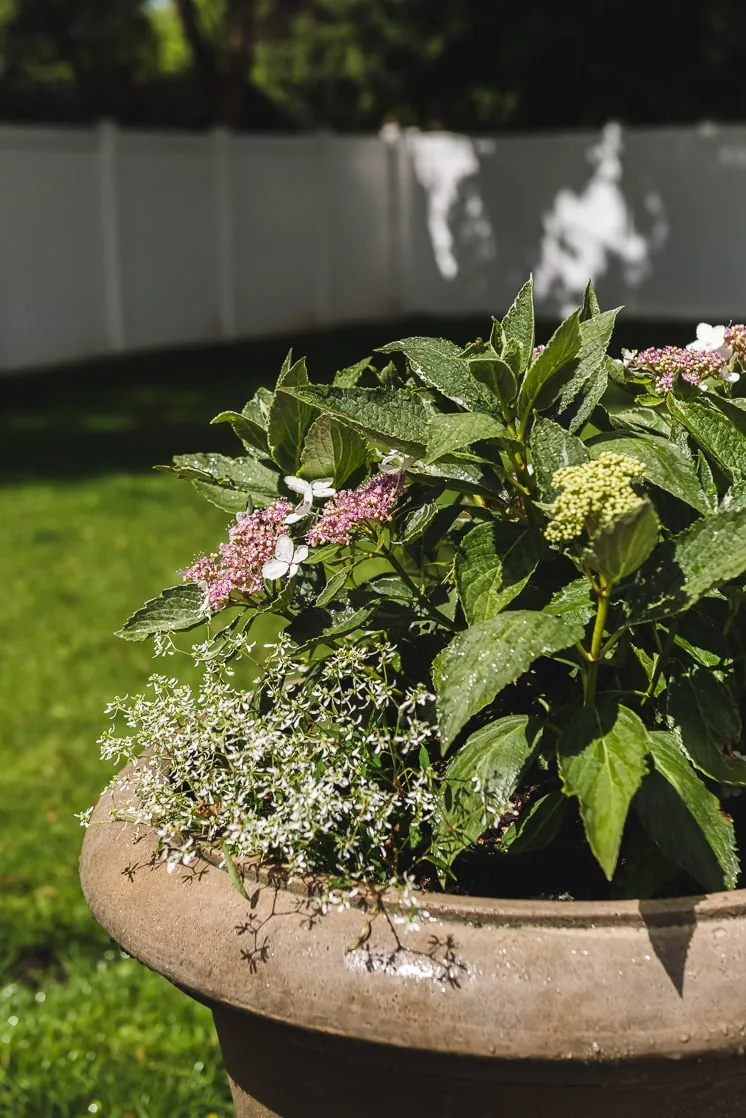
For the pots we selected an assortment similar to the following: Hydrangea, Double Impatiens, Petunias, Hanging Baskets
PLANT BEDS
Since the beds are under the trees, they are in the shade. So we selected an assortment of moss, hostas, and impatiens (all of which love the shade). Before you go plant shopping, take note of the amount of sun the area you’re planting in receives. Garden shops typically arrange their plant sections according to hardiness (i.e. perennial v. annual) and sun exposure (full sun, partial sun, and shade.)
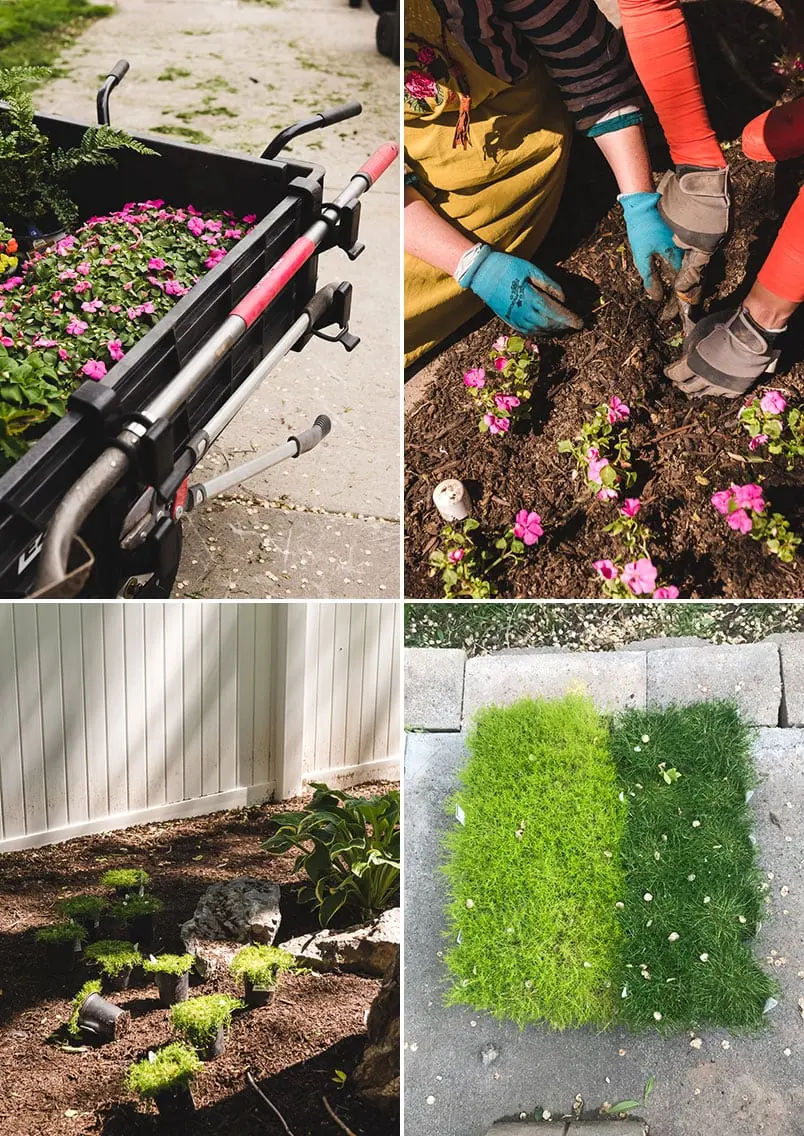
For the beds, we selected an assortment similar to the following: Impatiens, Variegated Hostas, Dark Green Hostas
CLEAN UP
We cleaned up all remaining dirt, clippings, debris using the CB720 TrimmerPlus Add-On High Performance Blower, another attachment that connects to the TB685 EC Straight Shaft String Trimmer.

FINAL REVEAL
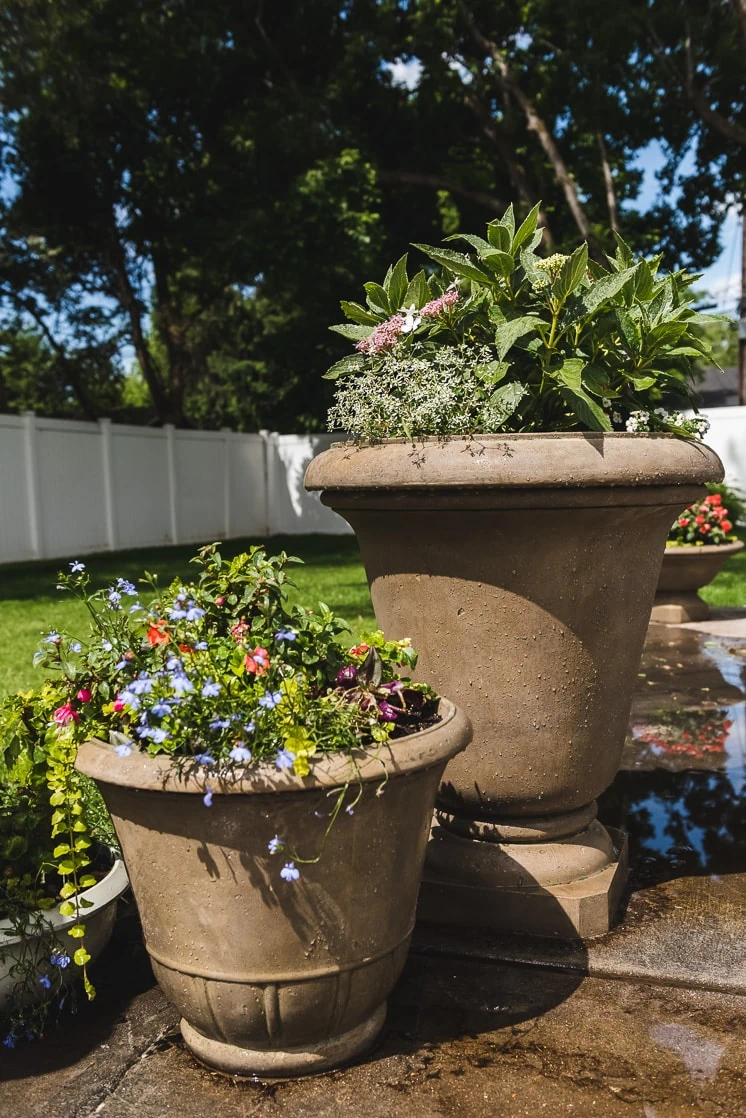
And TaDa!!! The transformation is complete!!!


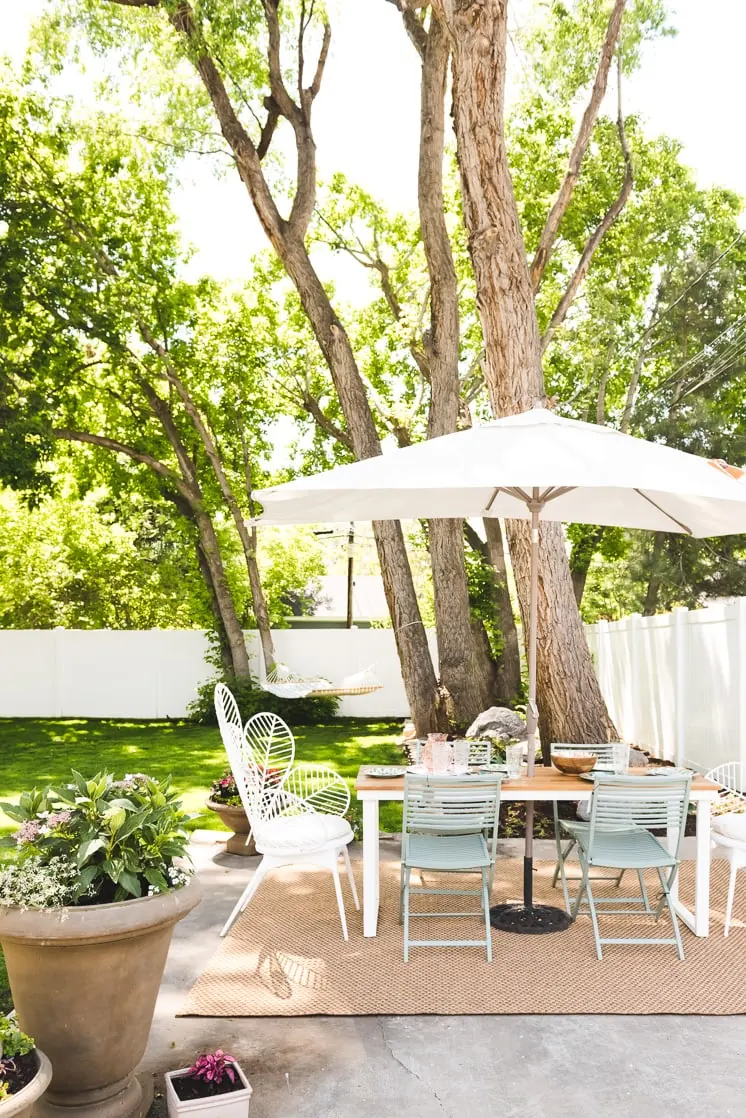

Yard projects can feel so daunting, especially if you’re new to it. But one weekend, $250 at Home Depot, and the right Troy-Bilt tools for the job, really are all you need to create a beautiful garden oasis. And the best news, is that it’s still the beginning of June! Which means we get to enjoy that garden oasis all summer long.
SHOP THE POST

This post was sponsored by Troy-Bilt. All opinions are my own. Thank you for supporting the brands that allow Lars to create unique and inspired content for you.
Comments