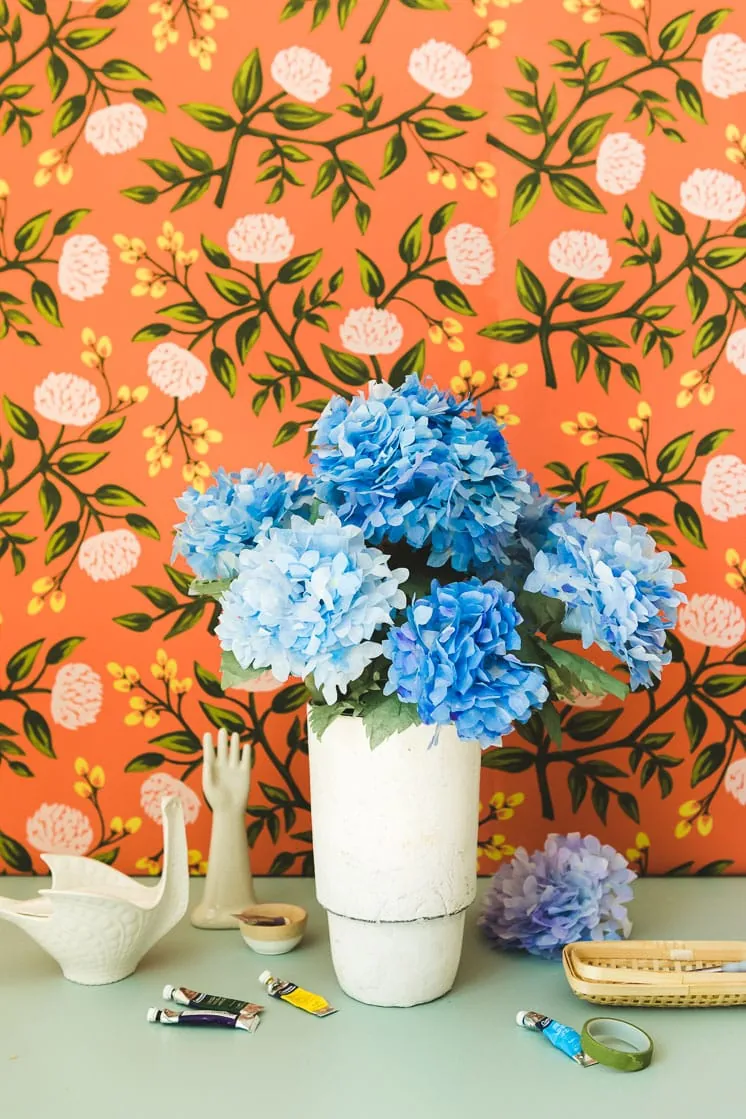
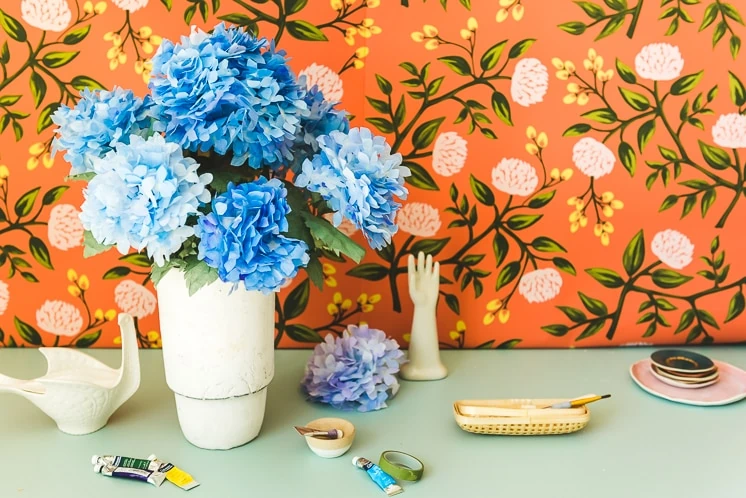
Of course, we had to turn to one of our favorite modes of crafting–paper flowers!
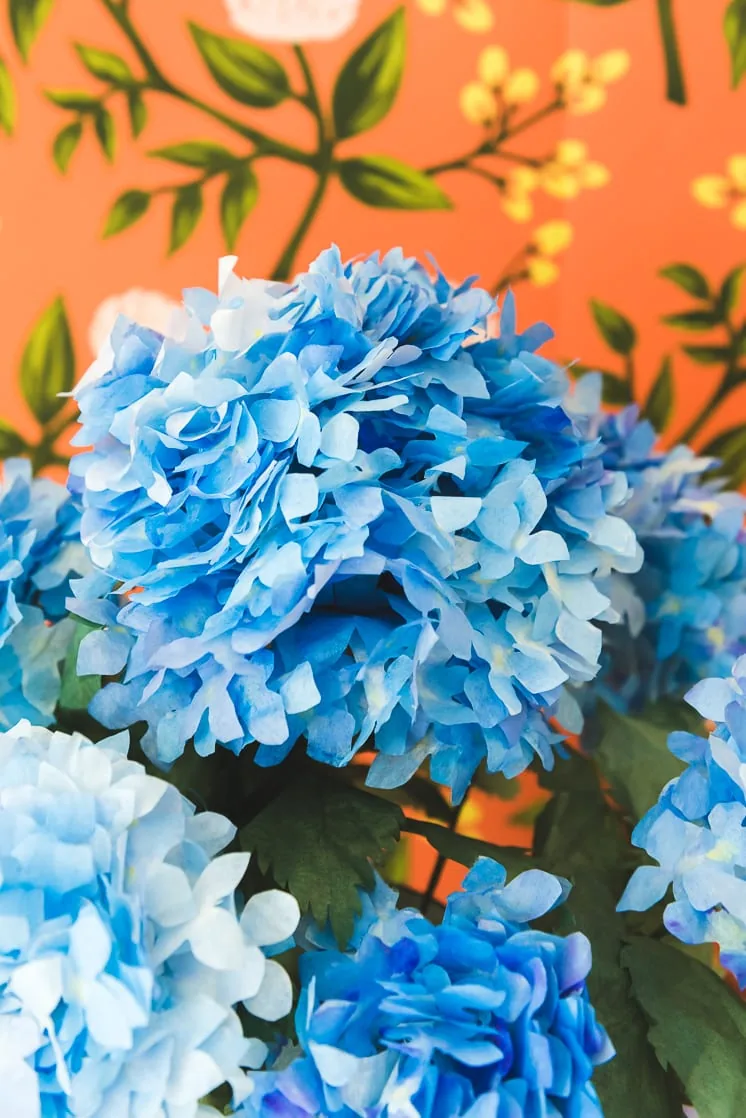
Here at Lars, our flowers are like children; we say we don’t have any favorites, but there may be one or two we definitely have a soft spot for. For me, it’s hydrangeas. I am an absolute hydrangea lover, but then again, I can’t imagine anyone not being a hydrangea lover. There’s just something about those beautiful blooms, the pinks, whites, and blues that really come alive in the sun. Given our history of paper floral arrangements, we decided to make hydrangeas the next flower to bloom year round!
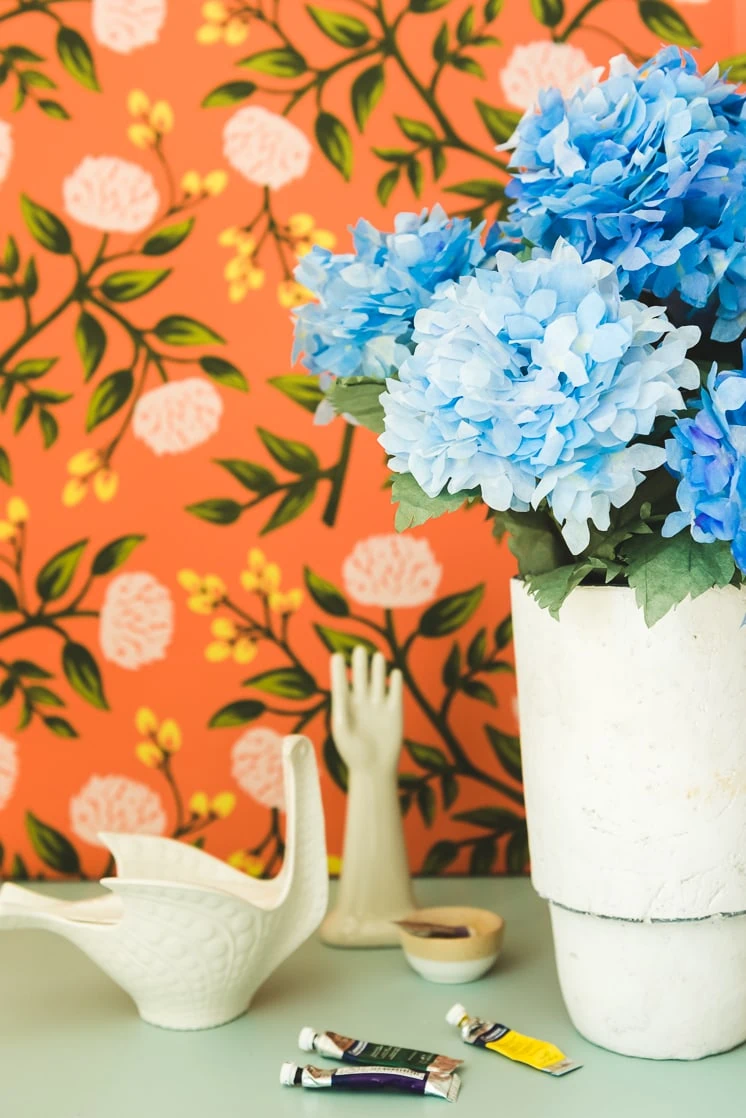
DIY PAPER HYDRANGEAS
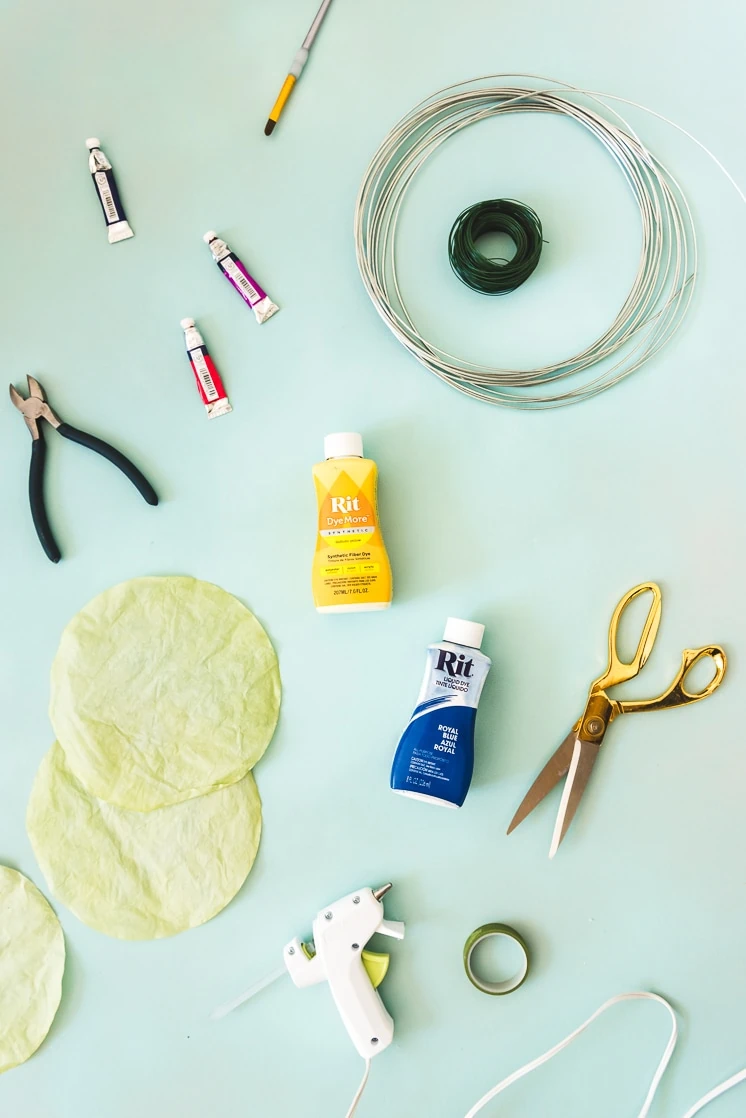
Materials:
- Coffee filters
- Watercolors
- Rit dye (optional, can use watercolor in place of)
- Scissors
- Thick wire
- Thin wire
- Floral foam
- Floral tape
- Planter
- Hot glue gun
- template (get it here)
Directions:
- Choose the color you would like as the base color for your flowers.
- For a small cluster, you will need 7 coffee filters, for a large cluster you will need 21. We used 63 coffee filters to create our plant. You can predetermine the size you would like your plant to be, we dyed A LOT of filters because we weren’t sure how many we would need but only used about half of what we created.
- Fill a bowl of water 3”-4” and dye the desired amount of filters to the color you would like them to be.
- Place dyed filters on a cookie sheet in the oven at 300° Fahrenheit for 20-30 minutes or air dry them.
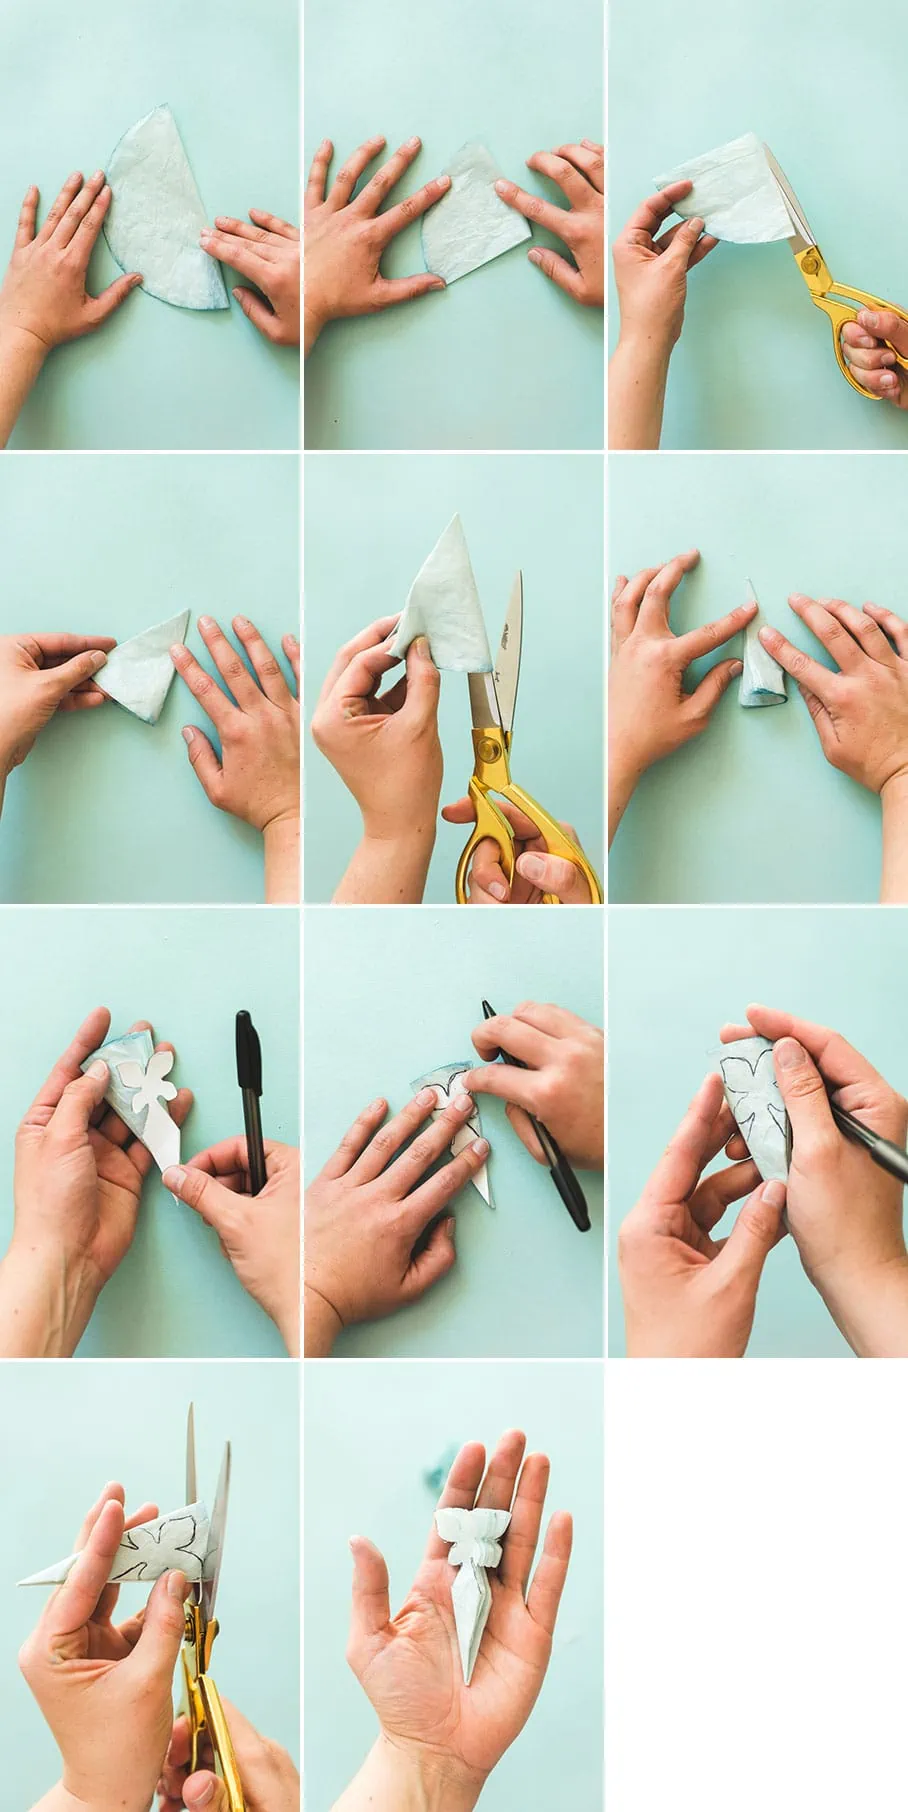
- Once dry fold each individual filter in half, slice the connected edge but do not cut all the way to edge, repeat folding and cutting two more times.
- Trace the stencil from the template onto the flower.
- Cut out the shape of the stencil.
- Once all shapes are cut out, unfold two of the folds leaving the first fold.
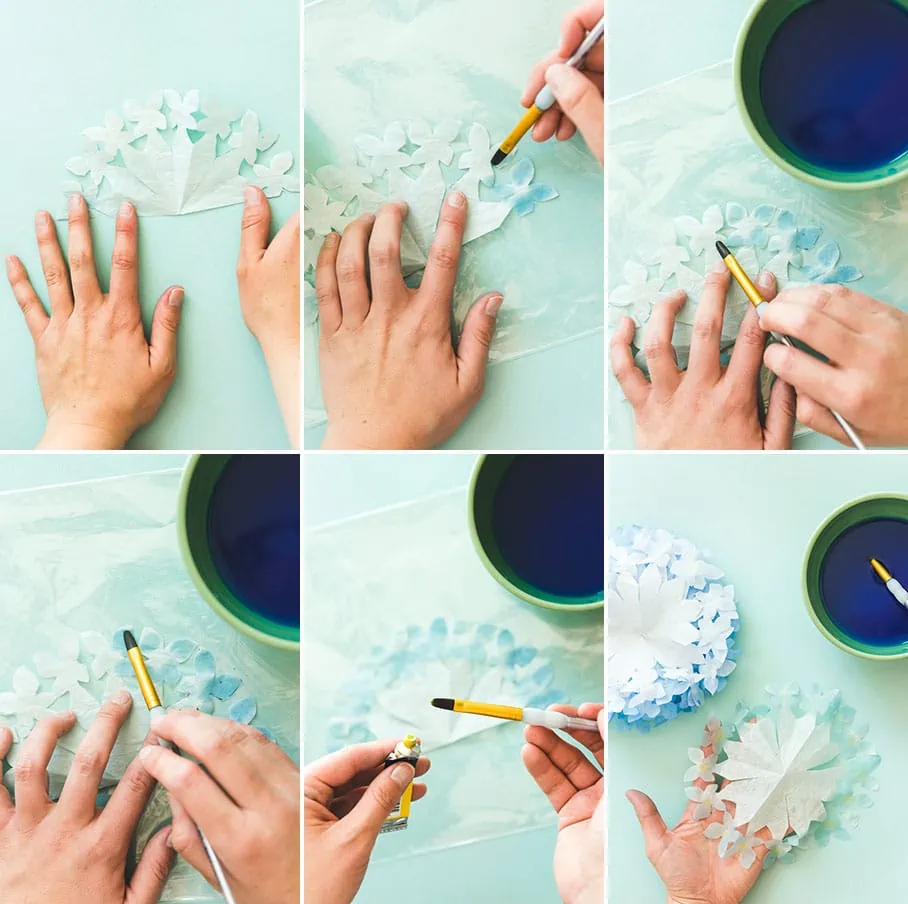
- Paint the leaves your desired color and place a small dab of yellow to the center of each petal.
- Paint the details on each filter and dry in over or air dry.
- Unfold all of the filters and make groups of 7 filters.
- Apply a small dab of hot glue to each layer to keep them intact.
- Gently fold the group of 7 together and apply a small strip of hot glue to the edge to create your cluster.
- Repeat step 13 and create the desired amount of clusters you would like.
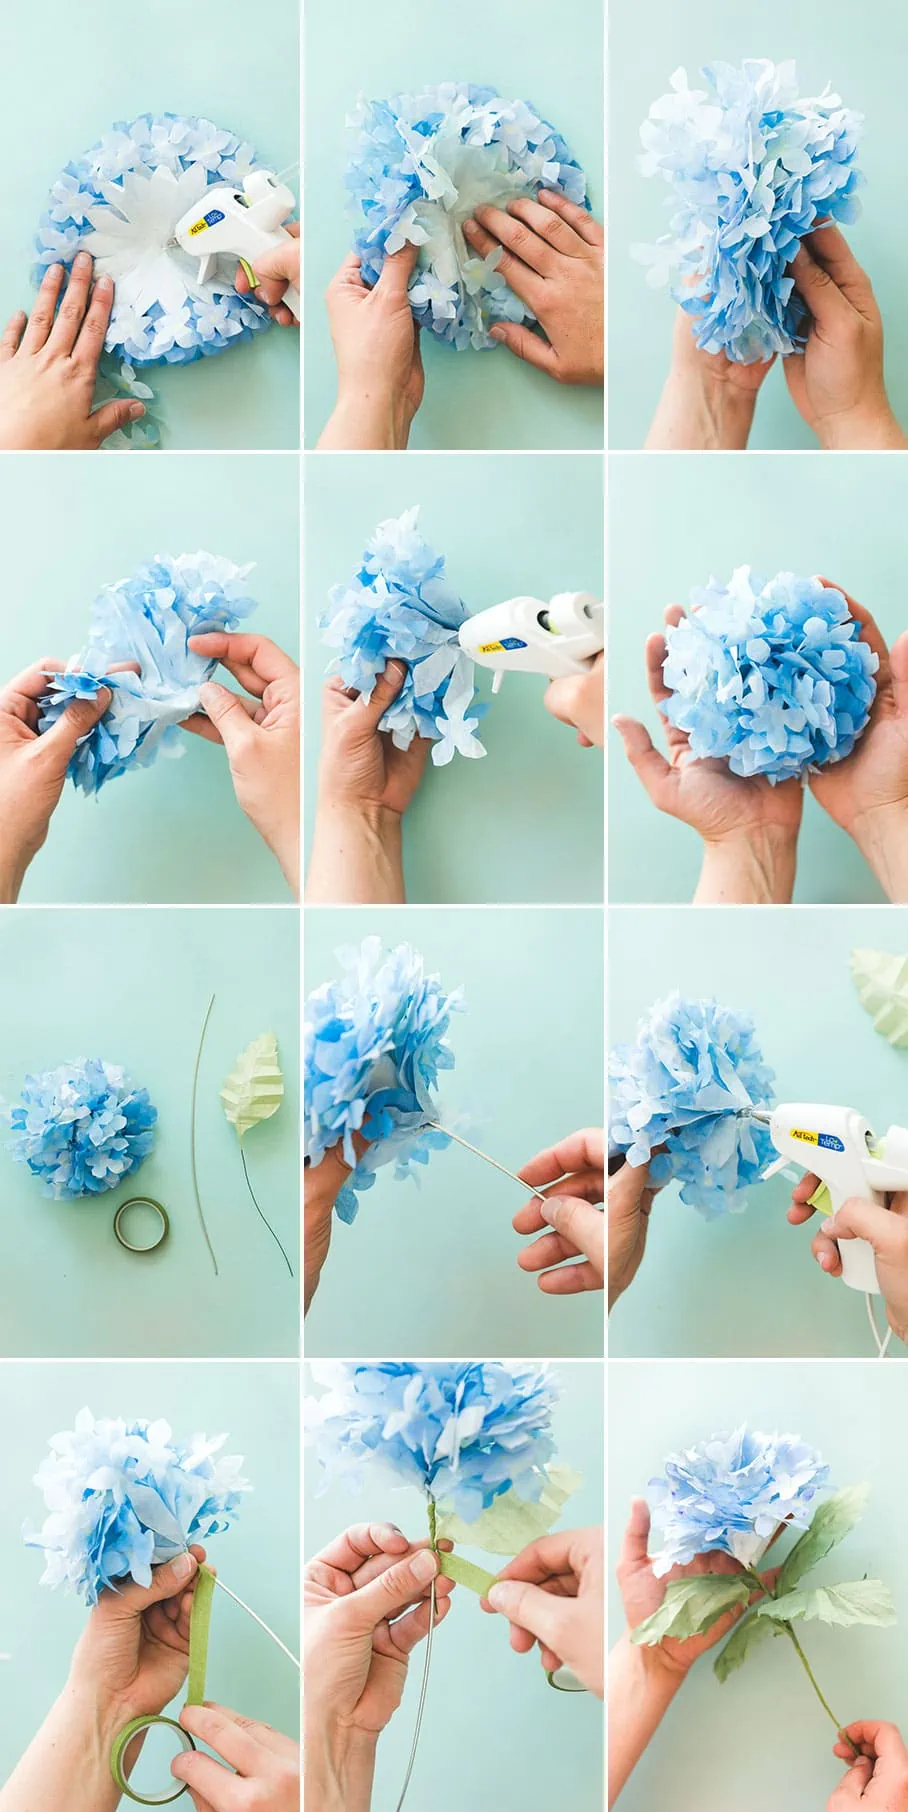
- To create large clusters combine the smaller clusters together with a strip of hot glue and the base of the flower.
- Cut your wire to the height you would like your hydrangeas to be.
- At the base of the cluster, there will be a small opening, apply a small but generous amount of hot glue, and slide the wire in.
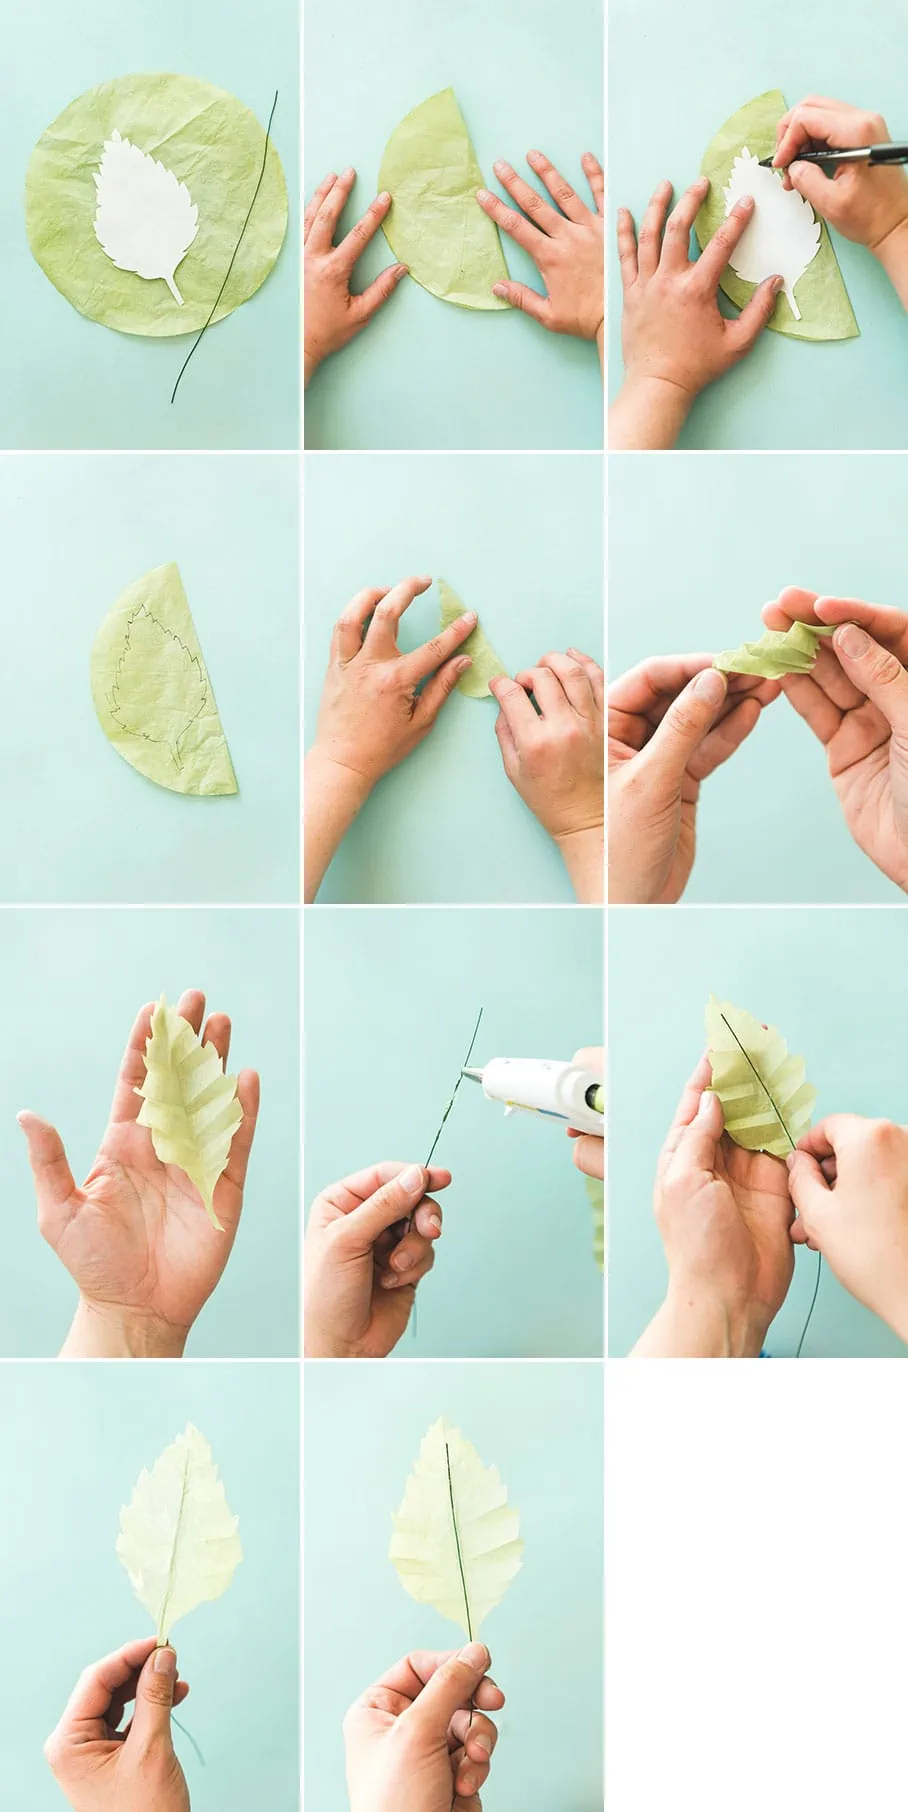
- repeat step 3 and 4. Dye your leaves to the desired shade of green, from one coffee filter you can get two leaves. We gave each stem a generous amount of leaves (minimum of 4 per bunch)
- Fold green filters in half. Trace stencils on and cut the leaves out.
- Fold the leaf in half and fold up on a diagonal.
- Apply a line of thin wire to the back of the leaf, repeat with all of your leaves.
- At the base of your flower begin wrapping the wire with floral tape.
- Gently place leaves in at desired spots and continues wrapping to the base of each plant.
- Place floral foam into the planter you are using.
- Place stems of the hydrangeas into the planter you are using, your leaves should cover the base hiding the floral foam.
How to make a hydrangea blossom
How to paint a paper flower
How to make a paper leaf
How to assemble the paper hydrangea


We can’t wait to see these beauties if your homes! Be sure to tag us with #LarsMakes. And I encourage you to learn more about Nest and how you can support artisans, especially women artisans, around the world. Visit Nest here.


Comments