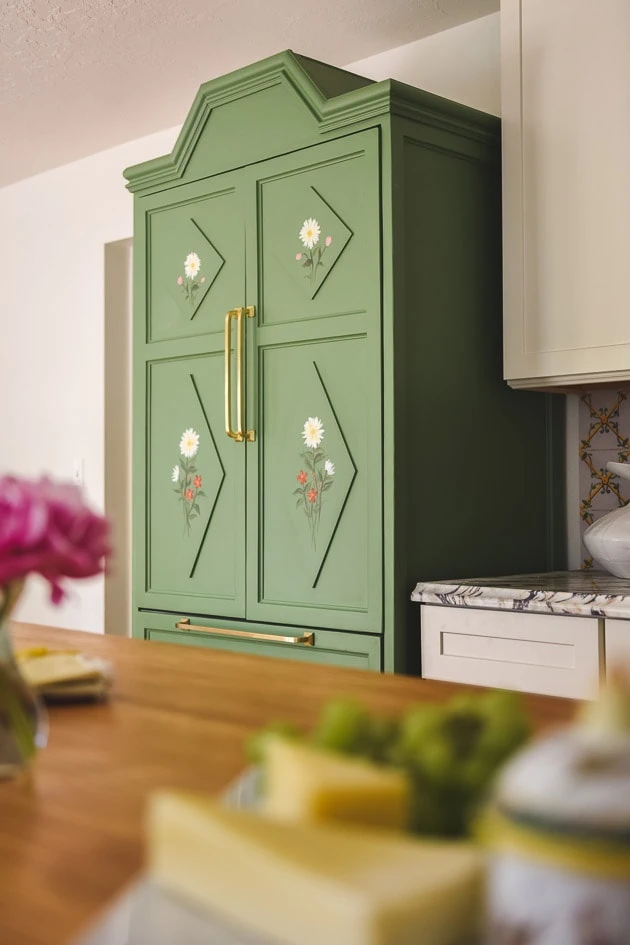
If you didn’t catch it, we were recently featured on a home renovation show called In With The Old on Magnolia Network. I’ve been recapping every single detail about the kitchen and today I’m going more into detail about the panel ready refrigerator and how we turned into a single standing cabinet.
Let me show you how it came to be!
_________________
If you’re interested in seeing all the before and after photos from the home renovation, click here
If you’re interested in seeing the full kitchen renovation, click here.
If you’re interested in seeing the cabinets, click here.
If you’re interested in seeing the hardware, click here.
If you’re interested in seeing the oven, click here.
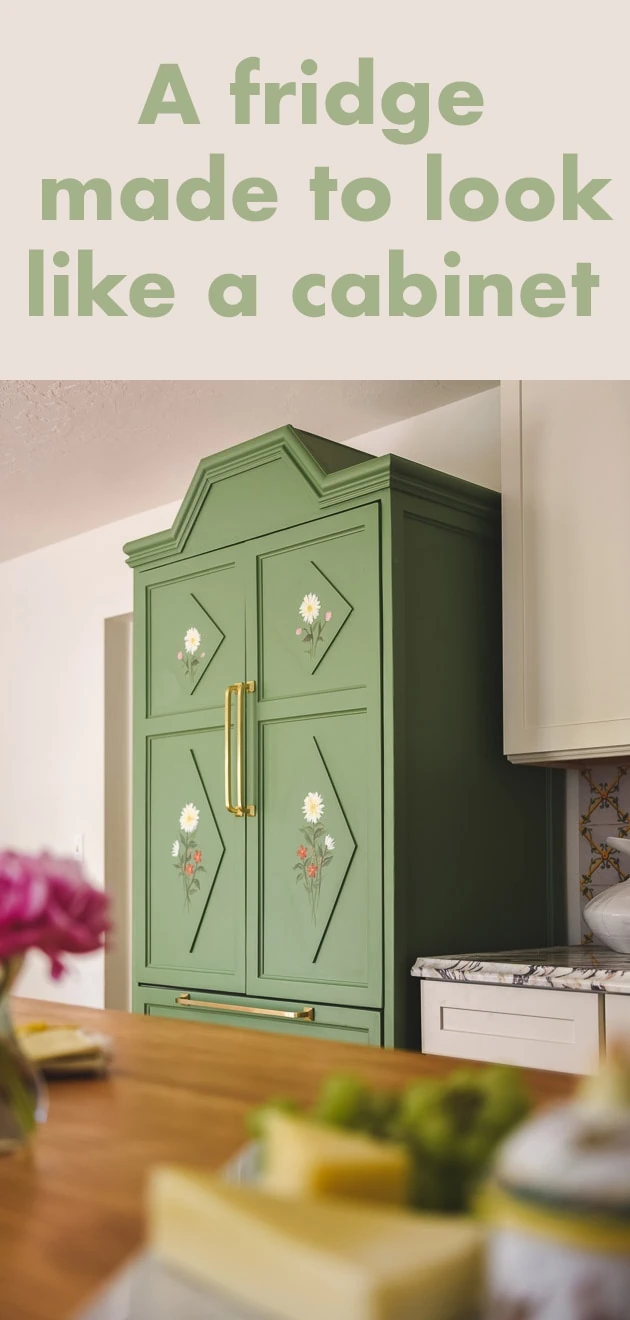
A fridge made to look like a cabinet
The idea to turn a fridge into a cabinet was gifted to me by my ever clever friend, Meta Coleman. Before she stepped in, I had every intention of turning a panel-ready fridge into the same style as the cabinets so it would blend. However, Cliq Studios didn’t offer panels for the fridge so we would have had to have a cabinet maker do it any way and honestly, to make it look exactly like existing cabinets would have probably been trickier because it would have had to have been impeccable. However, in the same amount of energy, we could turn it into whatever we wanted. And that’s exactly what we did!
How to do it
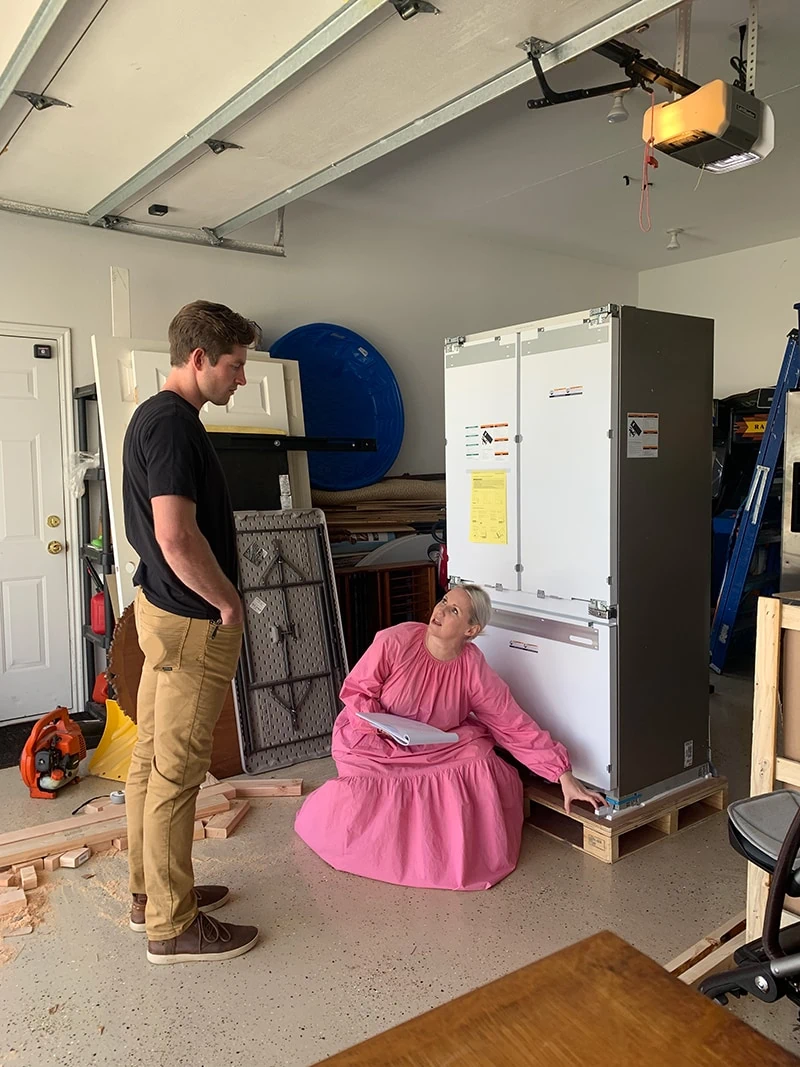
Meta has achieved this idea on other client’s homes so I was relieved to know that it could actually be done. I hadn’t seen pictures of her creations and didn’t know how exactly to do it so we had to figure it all out. And there was a LOT to figure out! And a lot of brave people up to the task, ahem, Handy Nanny Pat!
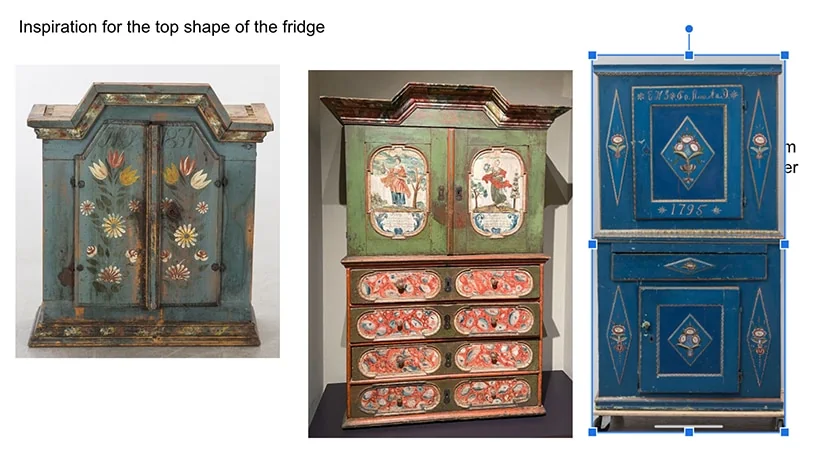
Inspiration for the fridge cabinet
Because the rest of the cabinets were white I felt like I could really go wild to let it shine as a stand alone piece. I decided to go for a Scandinavian wedding cabinet look as evidenced from a trip we took to Denmark in December of 2021. The cabinet in the middle photo below is found in the National Museum of Denmark and it was a major source of inspiration. The proportions were just right for the 36″ panel-ready refrigerator we bought. I collected a lot of additional inspiration and brought in elements from everywhere but these three were the main ones.
Sketching the cabinet fridge
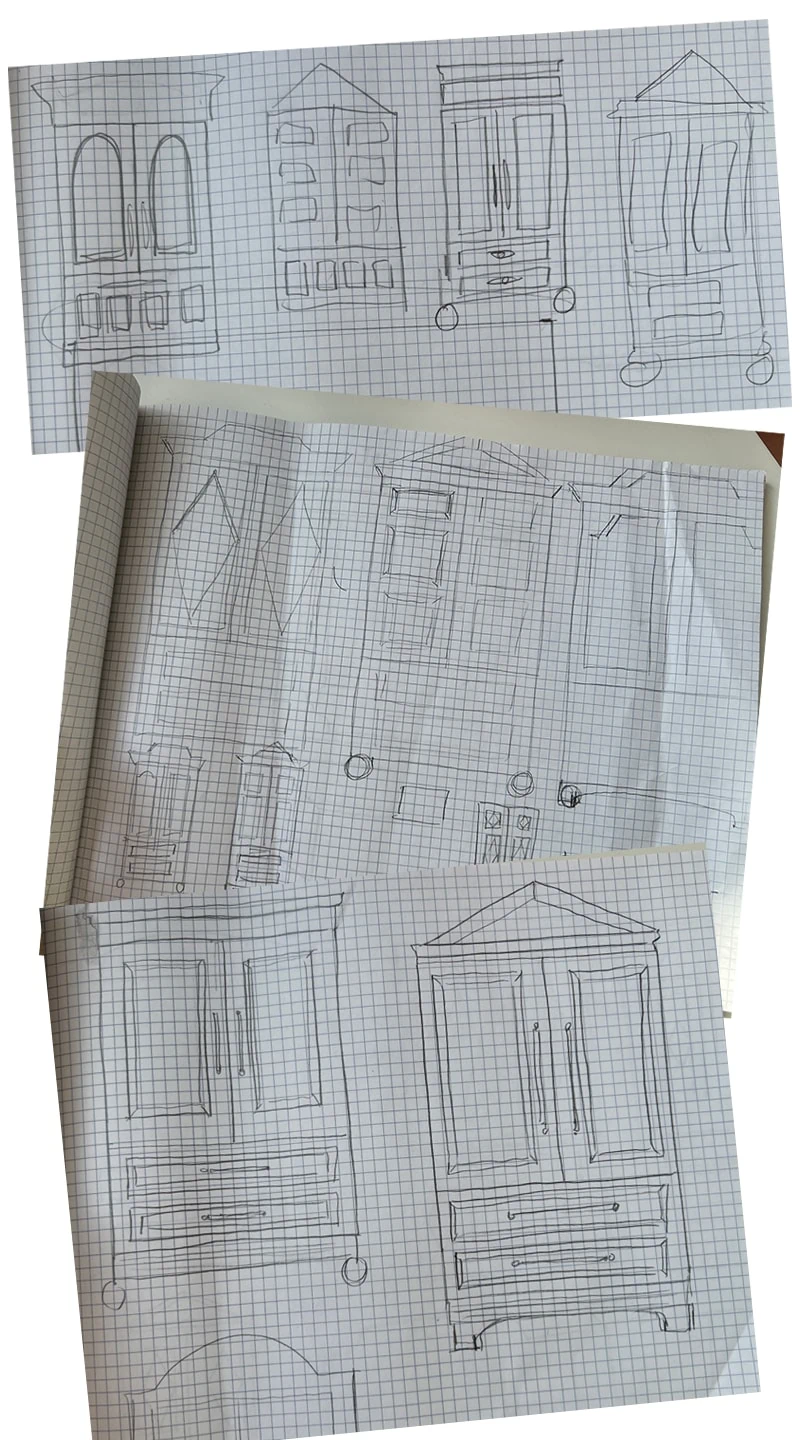
I did a ton of sketching to figure out the shape I wanted. If you recall from the kitchen post, I was going to go a completely different direction on the tile, which meant I was going to go much simpler on the cabinet. As you can see below, I tried out a lot of shapes:
Final design
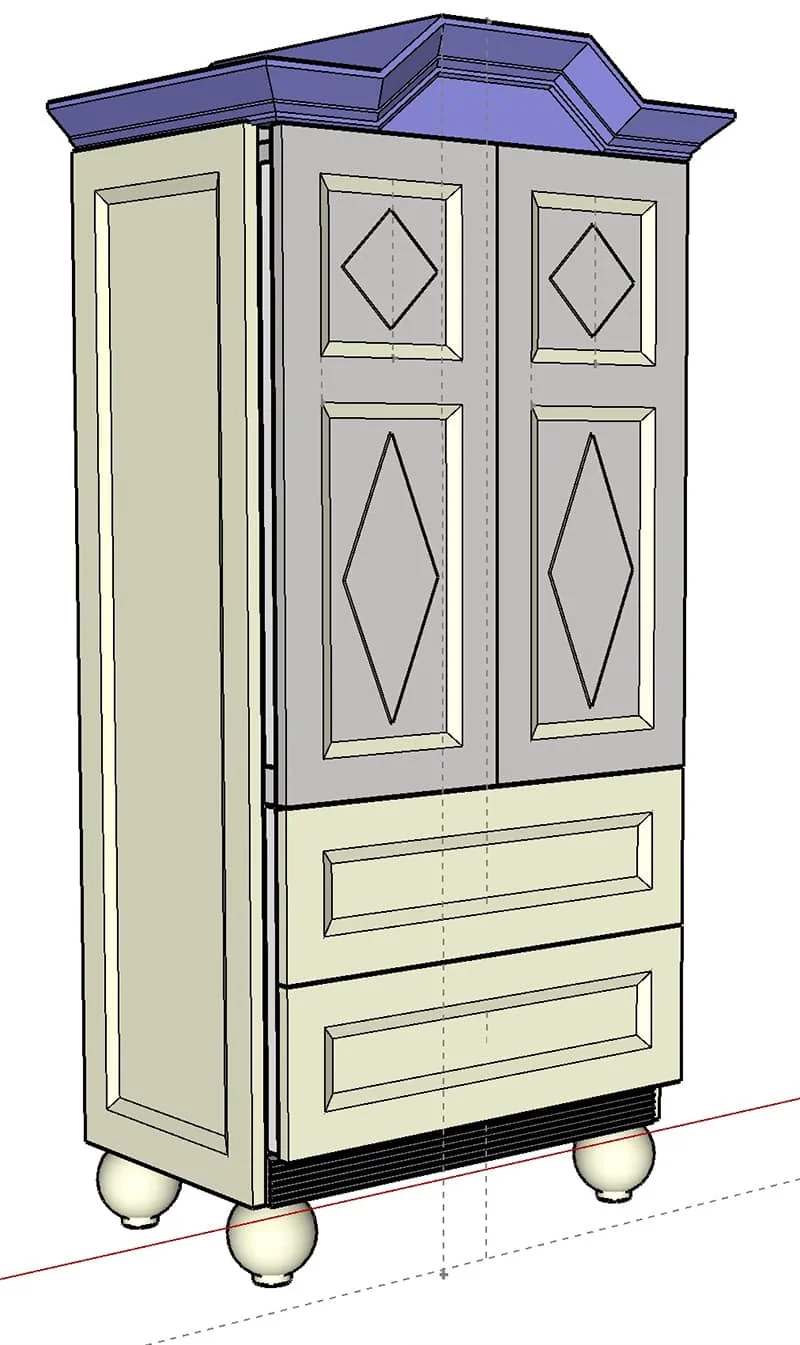
I landed on a final design and a cabinet maker who was going to make it for me made this rendering for it, which was very helpful. It includes trim work on the sides and fronts. Squares on the top and diamonds on the middle panels. The bottom portion of the fridge had a wide base and so I wanted to divide it into smaller drawers that fit better with the proportions.
Ultimately, the cabinet maker had to back out of the project due to time constraints, which left me in a big bind and not too much time to find someone new.
Enter, Handy Nanny Pat to save the day once again!
Pat graciously shared how to make the cabinet if you’re looking to create the same!
How to make a cabinet out of a panel-ready fridge
You will need:
- 3 (4’x8’) sheets ¾” plywood
- 4 Sturdy bun feet, we used:
- Classic Turned Wood Bun Foot | Van Dyke’s Restorers (vandykes.com)
- 1 (4’X8’} sheet Hardboard
- 60’ (approx) 2” x ½” pine trim
- 60’ (approx) ½” Inside corner pine trim, we used:
- RELIABILT 0.5-in x 8-ft Pine Unfinished Wall Panel Moulding in the Wall Panel Moulding department at Lowes.com
- Additional molding trim as needed for the top. We ended up using chair rail molding. The design called for crown molding, but we didn’t have the available width for it.
- Wood glue, we used Titebond.
- Liquid Nails
- Construction screws
- Painters caulk
- Oil based Primer
- Paint
Instructions
- The first step was to build the three sided (plus top and bottom) cabinet that the fridge would sit inside of. Your panel ready refrigerator will come with instructions on tolerances for the dimensions of the cabinet. Ours was approximately 6’ high, x 3’ wide, x 2’ deep. On the back of the cabinet, we left two large openings where the access panel and electric cord on the back of the fridge are. We had the panels for the cabinet cut from the ¾” plywood at Home Depot, and used both wood glue and screws for the construction. The two sides of the cabinet have the 2” x ½”’ trim around the edges, and the ½” inside corner pine trim set inside the 2” trim. All trim corners were mitred. In addition to being decorative, the trim also covers the screw heads from the construction of the cabinet.
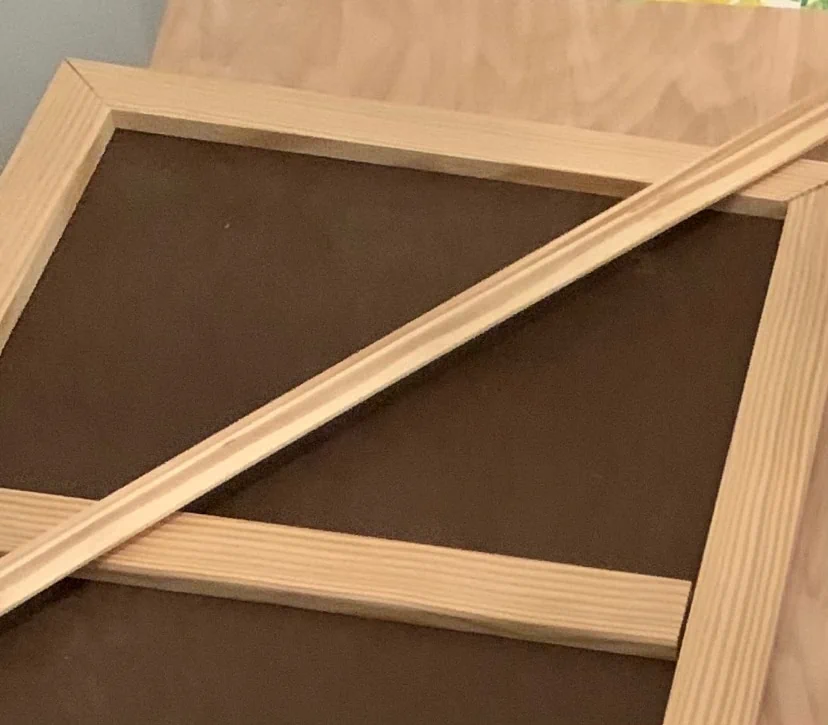
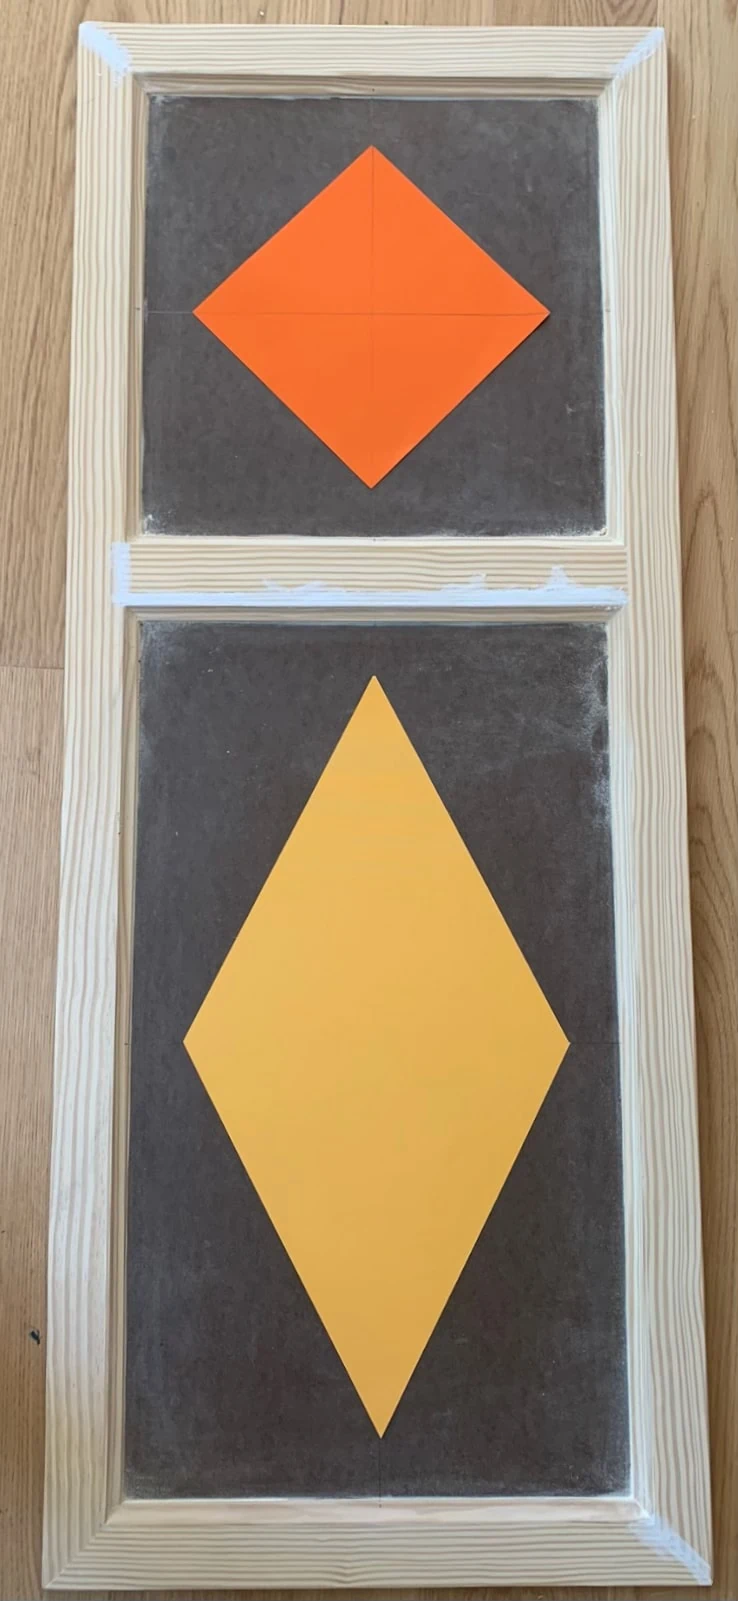
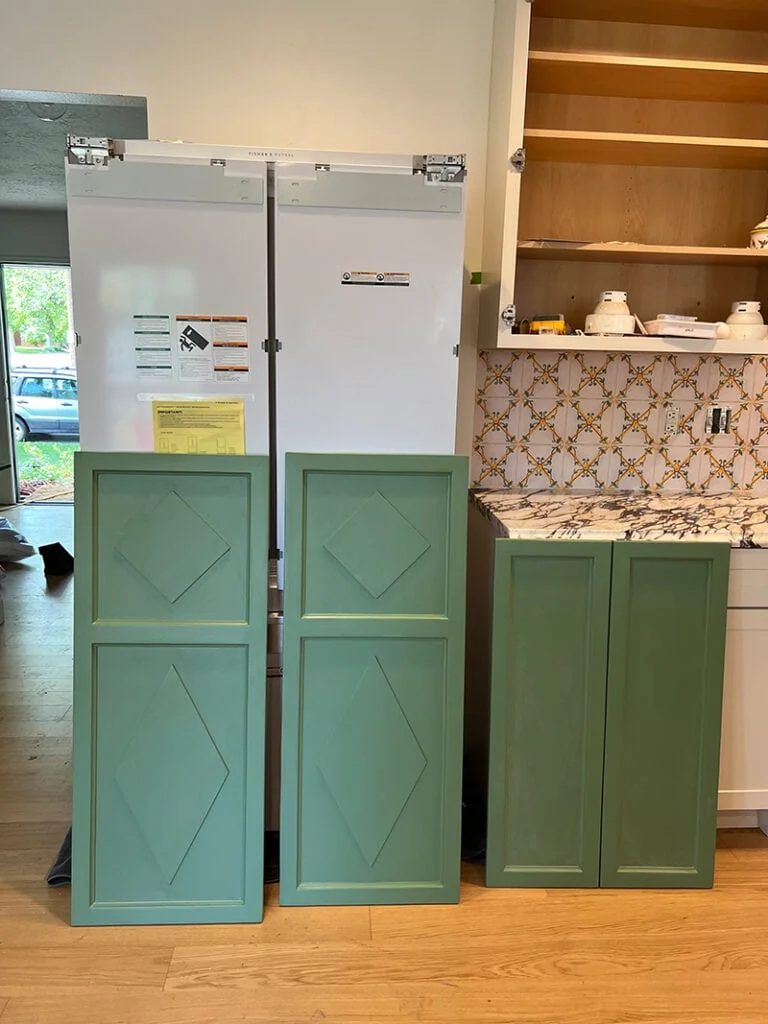
- Next we worked on the door panels. We bought the Hardboard and trim at Lowes. We had the Hardboard rough cut there, and then did the final cutting on a table saw. The door panels have a maximum weight tolerance as well as very specific size and thickness tolerances, so that influenced the choice of materials. The door panels have the same trim treatment as the sides of the main cabinet. Hardboard (MDF) won’t accept standard wood glue, so you have to use liquid nails or construction glue to attach the trim on these panels. On the lower drawer, where the freezer is, we gave the look of two drawers, but it’s actually one. The trim was used to achieve that look. The diamond accents on the front panels were also cut from the hardboard and glued on with liquid nails. Caulk was used to fill in any gaps in the mitered trim and smooth out joints as needed.
- At this point, we sanded, primed, and painted the cabinet and door panels. We attached the bun feet using hanger bolts and added felt pads to the bottom of the bun feet.
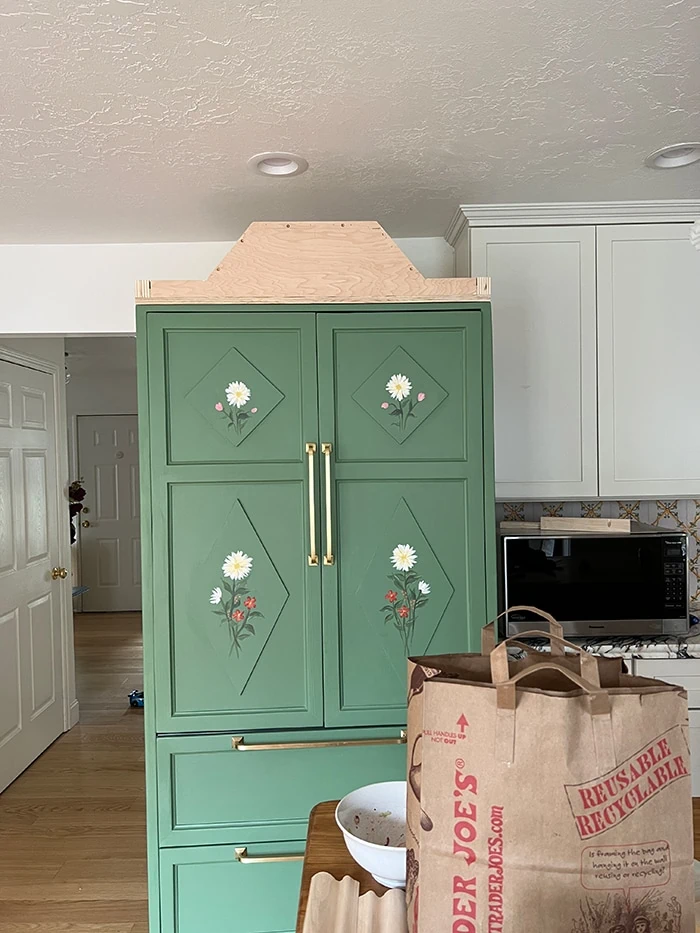
- We were under a tight deadline, and did not get the upper decorative part of the cabinet built until later. So after the cabinet was painted, we moved it into place in the kitchen and positioned the refrigerator into the cabinet. We attached the door panels using the attachment plates provided with the refrigerator.
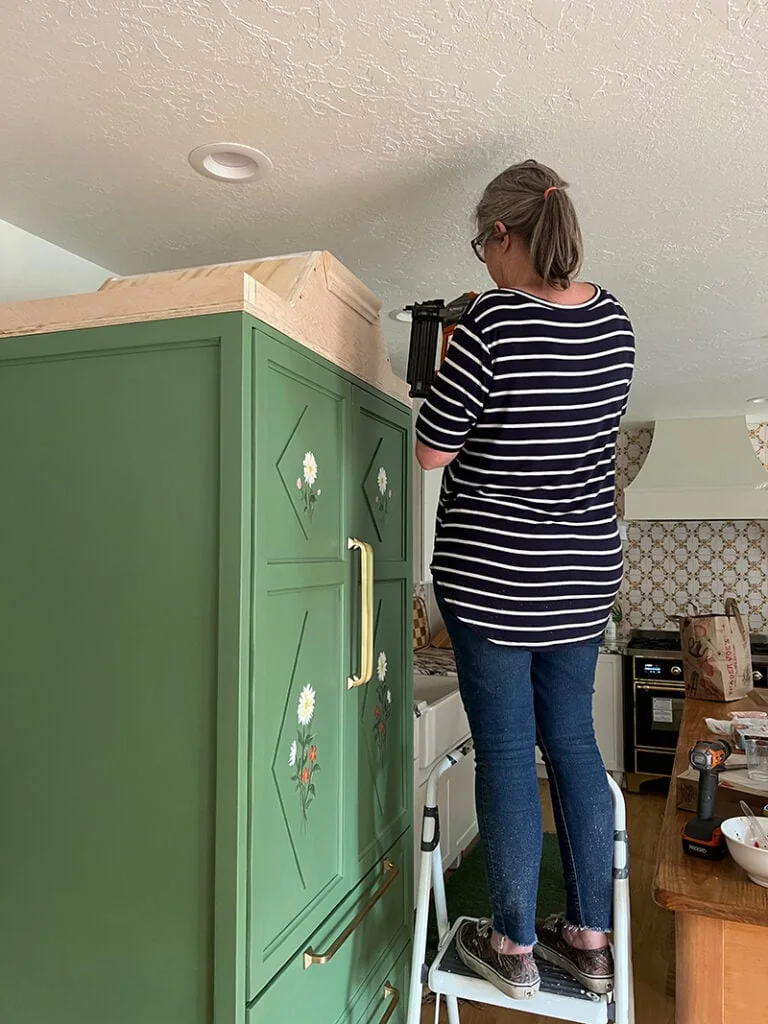
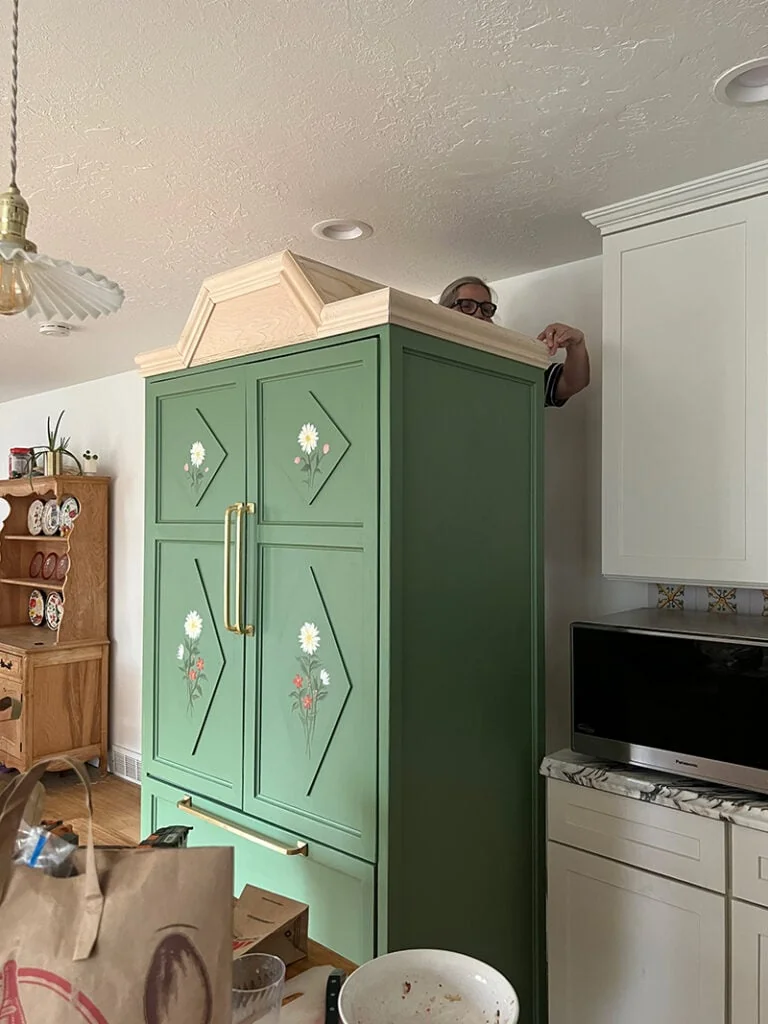
- Then Boom! Covid hit, and the deadline was moved back two weeks!! The upper decorative element was built, attached and painted. We ended up modifying the design a bit and used chair molding rather than crown molding, to accommodate the width we had to work with. We also left a gap notch in the back of the top molding to add a metal bracket and secure the cabinet to the wall, once it was in place.
- In the schematic that the contractor had made, the trim was 3” wide, which in retrospect, would have been better. I used ready made trim that was easily available, but if you have access to a custom made product, I would have 3” trim made. When it really mattered was when it came to attaching the hardware. I had to modify the hardware a bit with the 2” trim that I used. Other than that, I was truly surprised that with some encouragement and perseverance, I was able to build a really special element for the kitchen.
View this post on Instagram
Where it goes from here
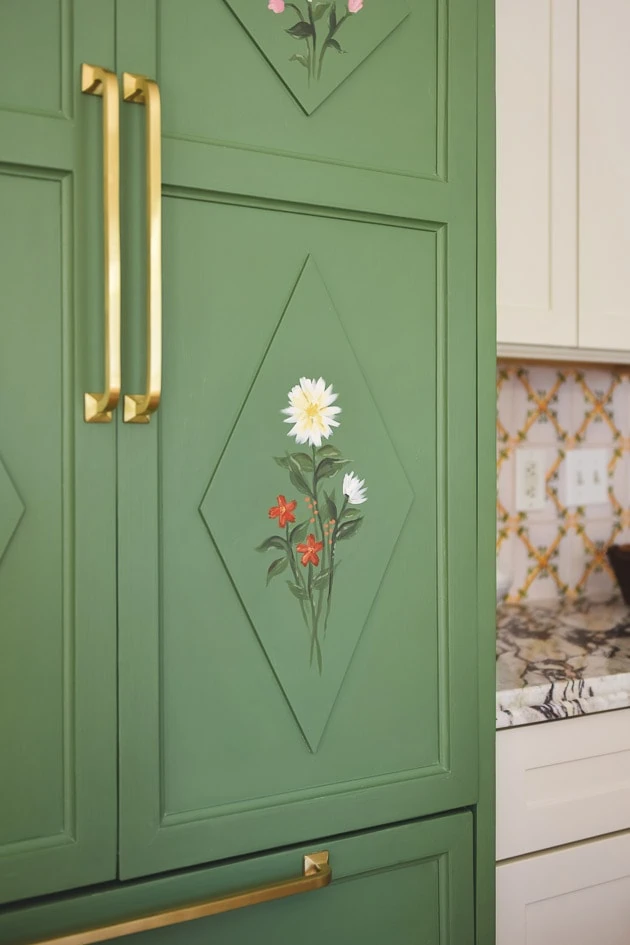
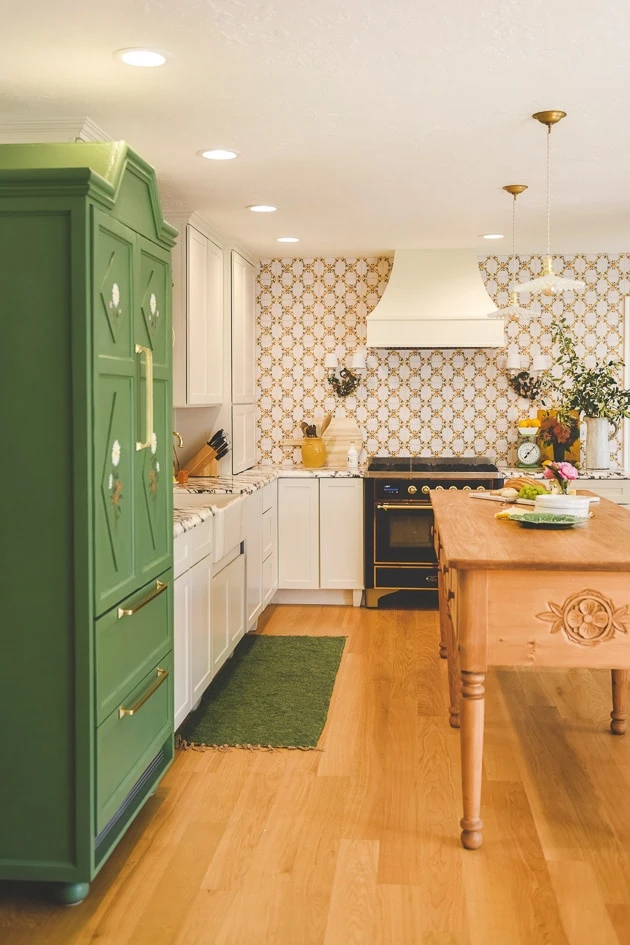
Now, for the show we were up against such a time crunch that I couldn’t achieve the old cabinet effect I was going for. So we painted it solid green and Carrie from our team quickly painted on some flowers. It’s the best we could do in the circumstances and she did a wonderful job. The next step will to be to add on some additional decorative painting and really play up the diamond shapes. Maybe try and make it look aged. I’m also waiting to see what I land on for the tile to help inform the design.
Pat did an AMAZING job on it. I think she even surprised herself! Ha! We are all stunned. And now we have this beautiful kitchen cabinet that is meaningful and full or surprises for our guests who wonder where our fridge is. Ha! Thank you so much, Pat!
Related posts:
If you’re looking to see all the before and after photos from the renovation, you can see them here
You can see the full kitchen renovation here
Kitchen cabinet info
Antique-inspired oven range
Kitchen hardware


Comments