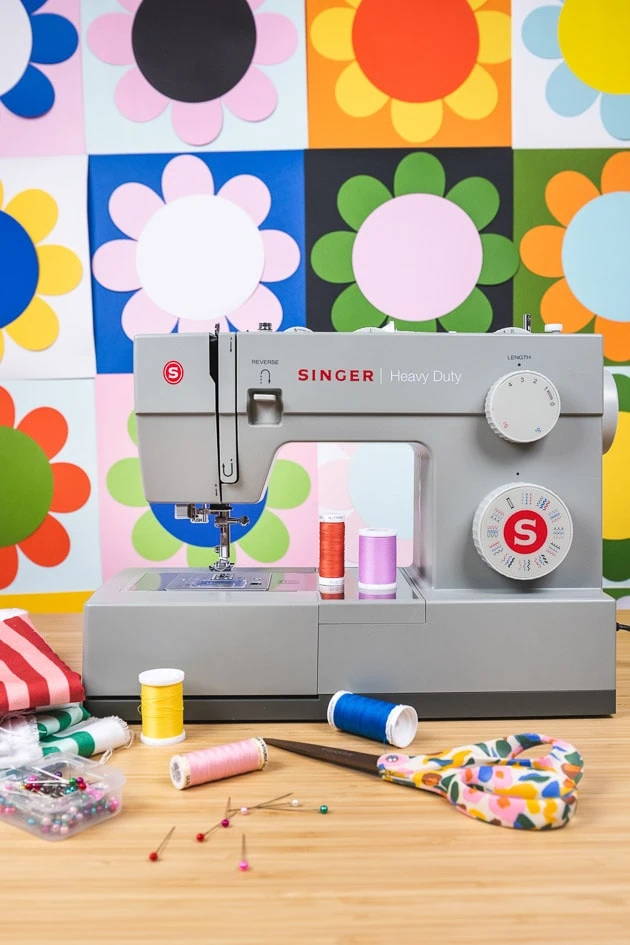
Welcome to this week’s edition of our Sewing Basics series! This week we’ll be learning the parts of a sewing machine.
We know that many of you are already familiar with the sewing basics, but we also know that many of you have a lot you would like to learn. In order to bring everyone up to speed, we’ve decided to help you out with some essential sewing skills that will help you succeed at a wide variety of basic sewing projects.
This Sewing Basics series is designed to give you the basic skills you need to get sewing! It’s for sewing projects you’ve wanted to make but have been a bit intimidated by until now. For those who’ve already learned the basics at some point, it’s a great refresher. And for those who are completely new to sewing, it’s the perfect place to start.
For past Sewing Basics posts, click here.
Parts of a Sewing Machine
Have you ever looked at a sewing machine and been overwhelmed by all the knobs, buttons and gadgets you see? I’m right there with you. It can be confusing, especially if you’ve never taken a sewing class before. Well, not to worry! We’re here for you. Today we’re going to demystify some of those confusing terms, symbols, knobs and buttons so you can use your sewing machine with ease. And lucky for you, once you know the basic parts of a sewing machine, taking on your next sewing project will be a breeze.
For this tutorial, we’ll be using our Singer sewing machine as a reference. While your machine may not be completely the same, there’s a lot of overlap and you should be able to find a similar part variant on other machines. Without further ado, let’s learn the parts of a sewing machine!
Bobbin and Thread Parts
Bobbin winder spindle
Your bobbin winder spindle is the little spindle where you’ll place the bobbin to wind it with thread. To do this, simply slide it on, then push it to the right. It should click and you’ll be ready to go.
Bobbin winder stopper
A little disc to the right of the bobbin winder spindle, this stops the bobbin from winding when it’s full of thread.
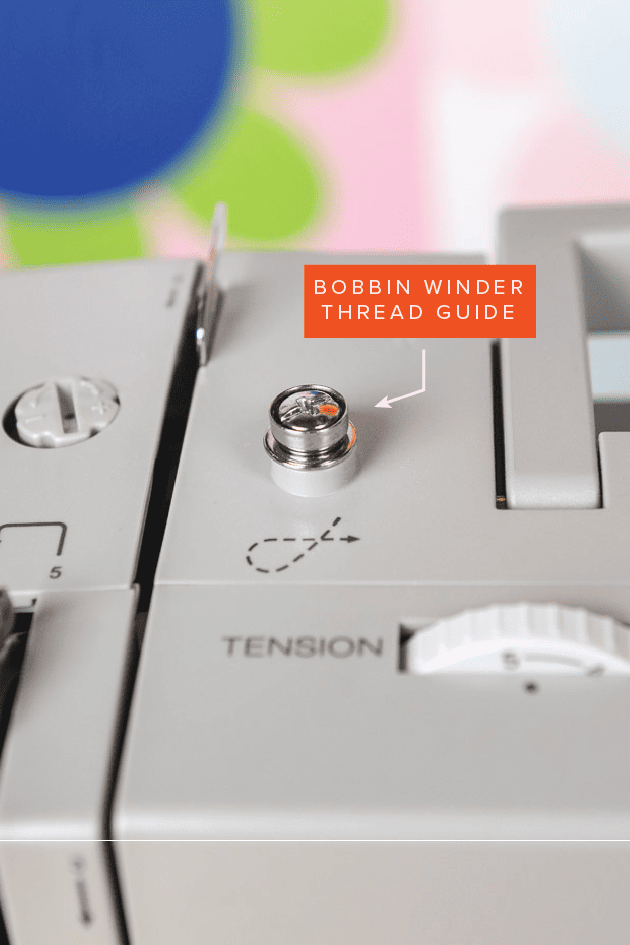
Bobbin winder thread guide
This is the guide you’ll wrap the thread around to wind your bobbin. For more details on threading a bobbin, see this post.
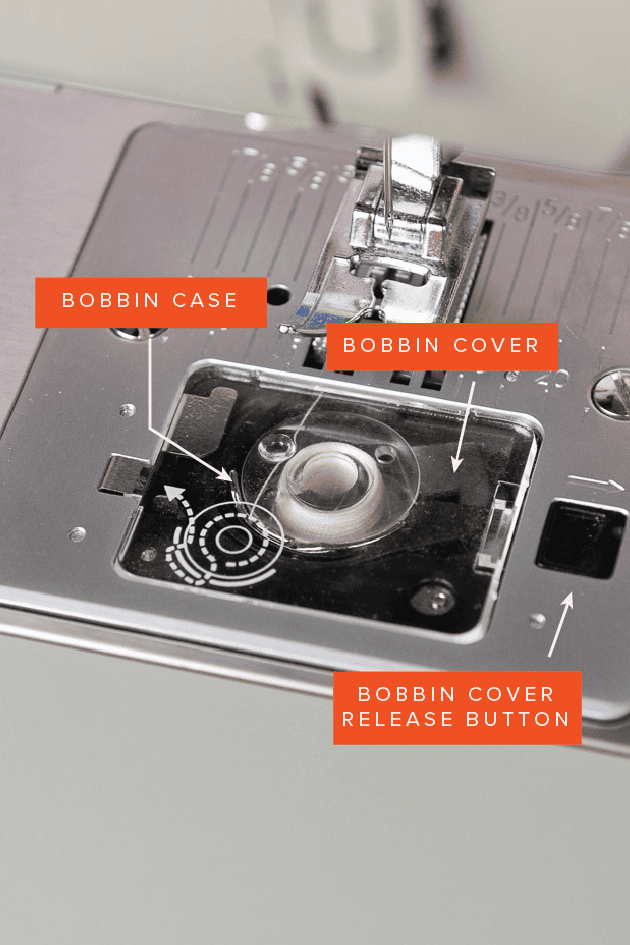
Bobbin cover
The bobbin cover is the clear, plastic cover that covers the bobbin on most top loading bobbins. If your machine loads the bobbin into the front, your bobbin cover will probably look completely different and may not be clear.
Bobbin case
Lying just beneath the bobbin cover, this is where you’ll place the bobbin. To see how to thread your bobbin, see this post.
Bobbin cover release button
Only found on machines with top-loading bobbins, this button releases the bobbin cover so you can access the bobbin and case beneath.
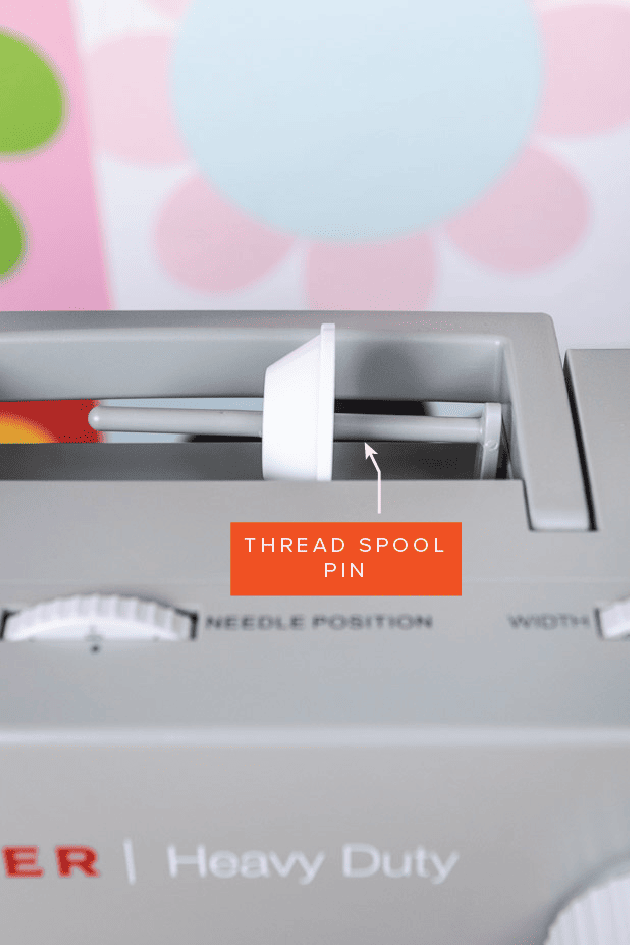
Thread spool pin
This little pin is where you’ll place your spool of thread. On our singer machine, the pin is facing horizontally, but it’s sometimes also upright.
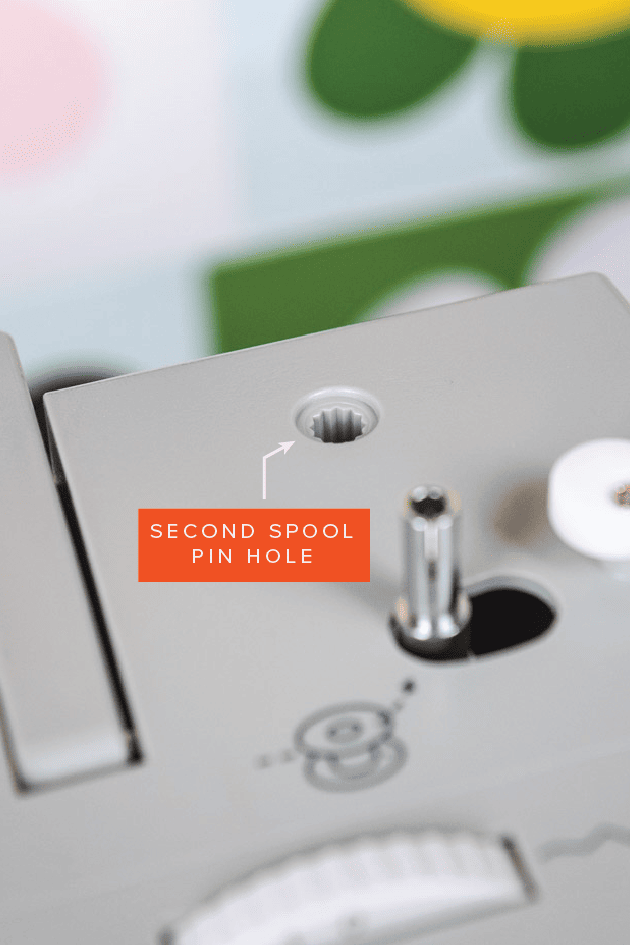
Second spool pin hole
If you’re ever interested in sewing on knits or using a double needle, you’ll want to know about the second spool pin hole. This is where you can put your second spool pin and a second spool of thread. See the accessory section below for more information about the second spool pin.
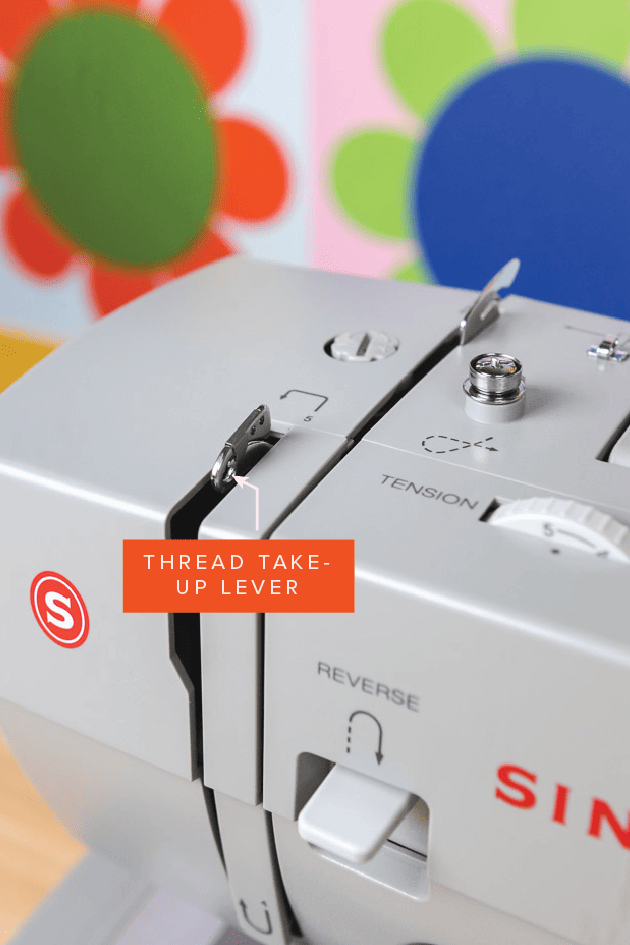
Thread take up lever
This lever moves the thread up and down as you sew. As you thread your machine, you’ll want to make sure the thread is correctly threaded through it. See this post for more details on threading your sewing machine.
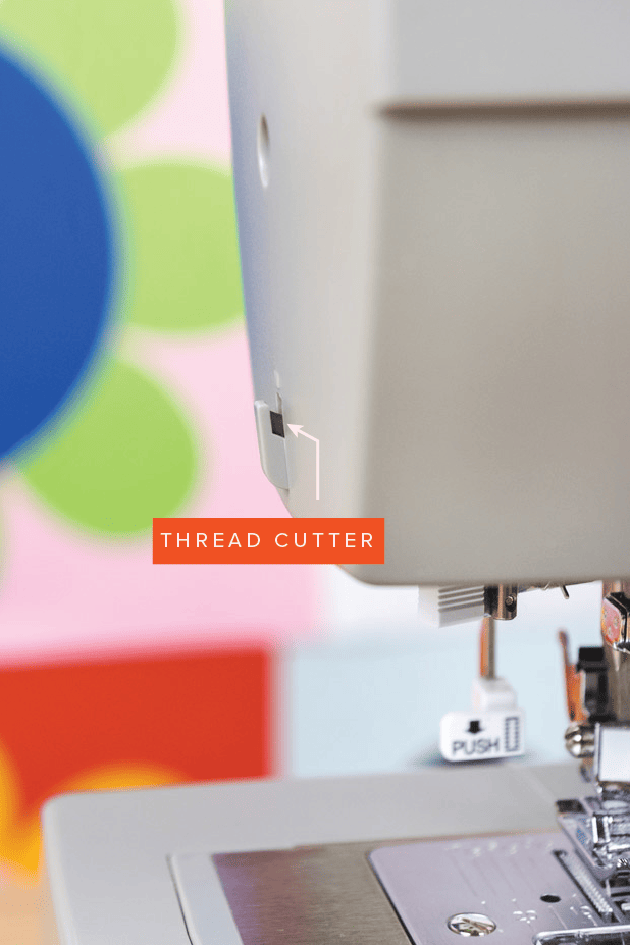
Thread cutter
The thread cutter is a handy little attachment on the left side of the sewing machine. You can use it to cut your threads after sewing. We should note that this isn’t found on every machine, but many have them and it sure is a nice perk that speeds up sewing a bit.
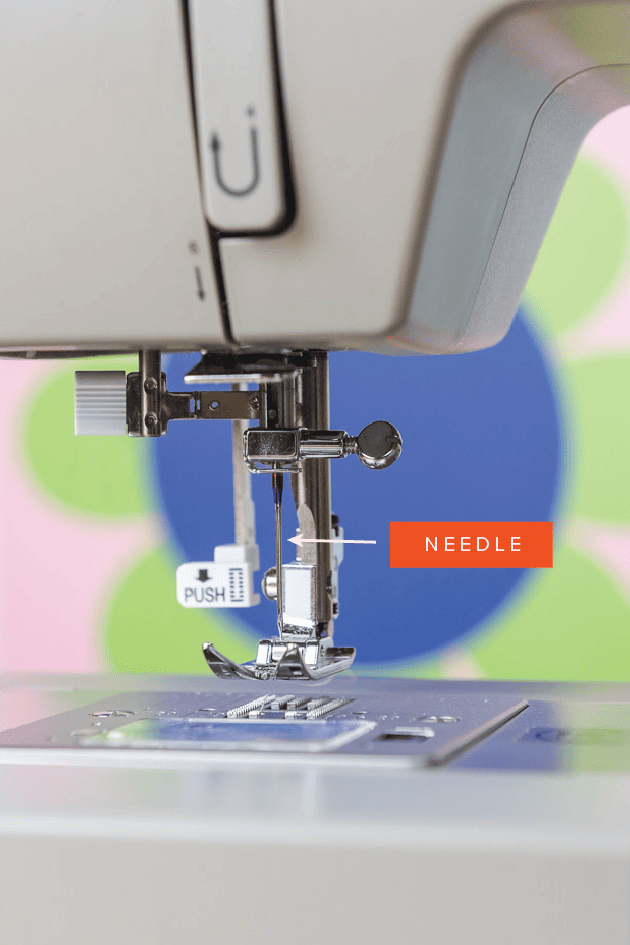
Needle
You can’t sew without the needle! After threading the machine, simply poke the thread through the hole in it and you’re all set to start sewing.
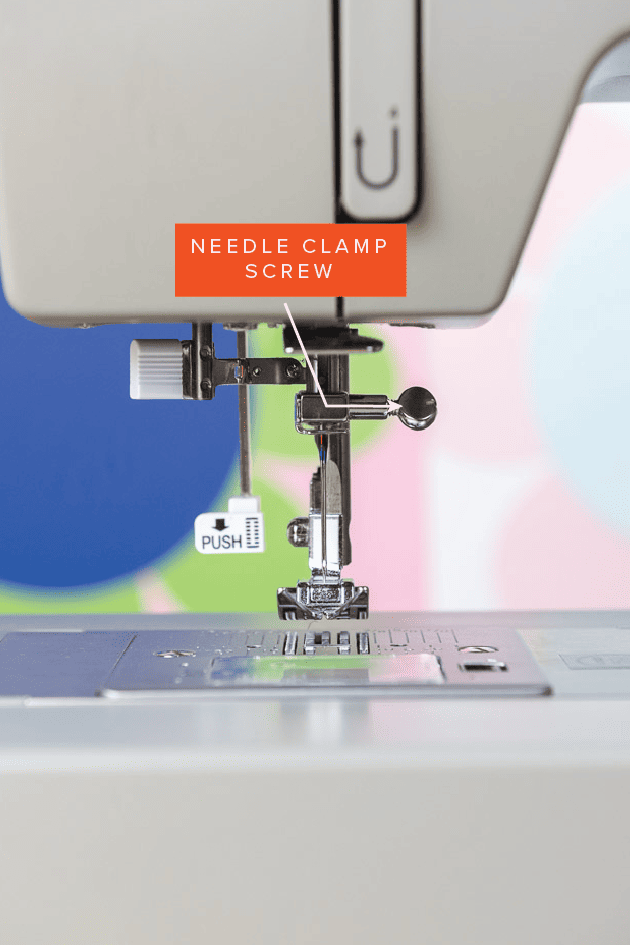
Needle clamp screw
If you didn’t know, you can change out the sewing machine needle pretty easily. All you have to do is twist the needle clamp screw to loosen a bit, and you can pull the needle out and replace it. This is especially handy if you break a needle in the middle of a sewing project.
Machine Settings
This next section of parts of a sewing machine covers basic settings you’ll want to know about before you start sewing. If your stitch isn’t doing what you want it to, check these settings–chances are, something’s up that can be fixed with a quick look at these settings.
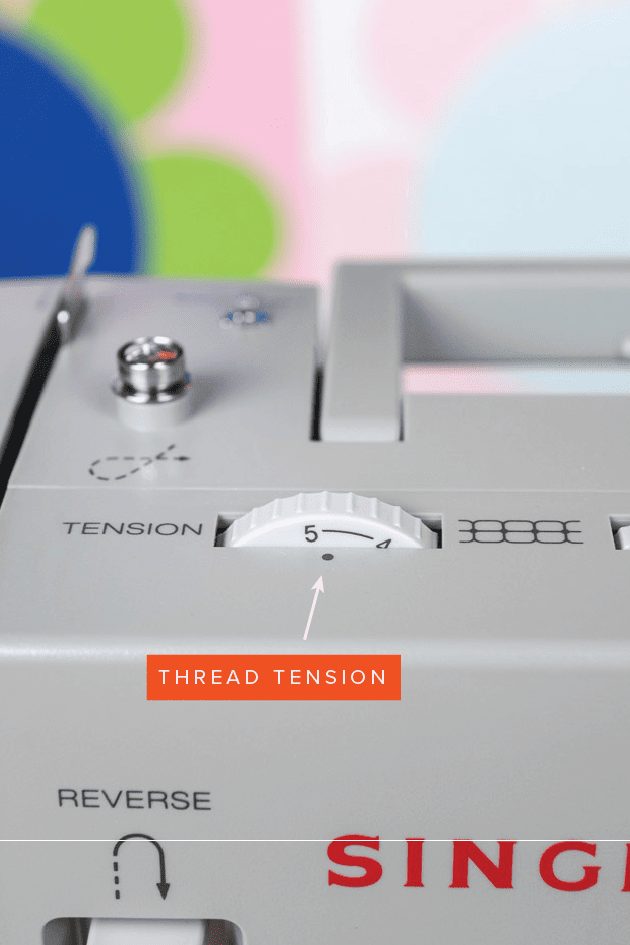
Thread tension
The thread tension controls how tightly the upper spool of thread is held in place. You don’t want it to be too tight or too loose, as both can cause problems. Ideally, your thread tension should be somewhere around 4 or 5 for most standard projects.
Bobbin thread tension
Did you know there’s also a bobbin thread tension? To see it, you’ll have to take off the needle plate like you do for cleaning. It’s a tiny screw located on the front of the bobbin case that can be loosened and tightened to match the upper thread tension. Stay tuned, because we’ll talk all about how to make sure your thread tension is adjusted right in a future post!
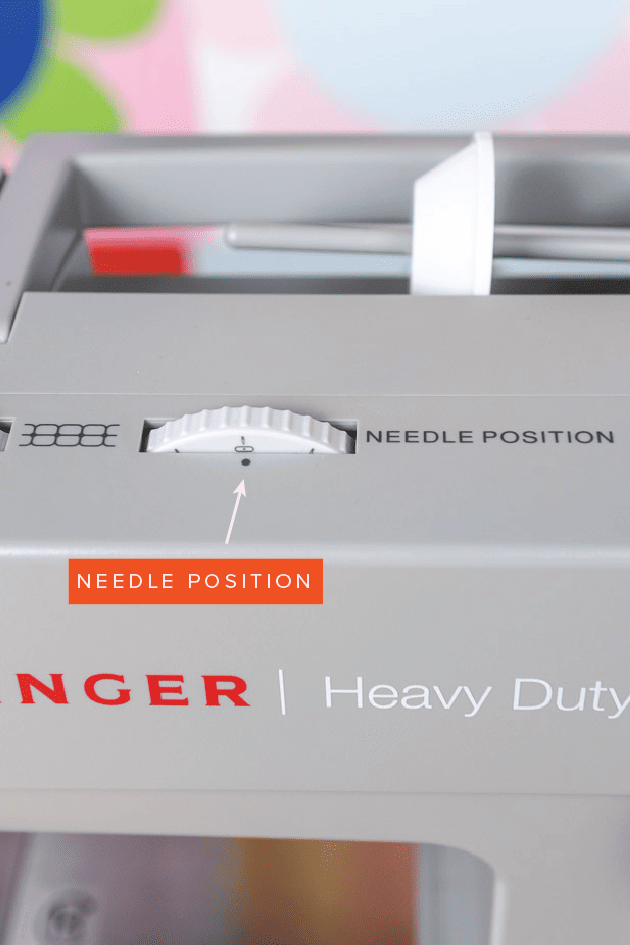
Needle position
The needle position is located on the top middle of your sewing machine. It tells you to which side the needle is aligned; left, center, or right. Normally you’ll want to keep your needle position in the center, and use the stitch type to adjust what the stitch does.
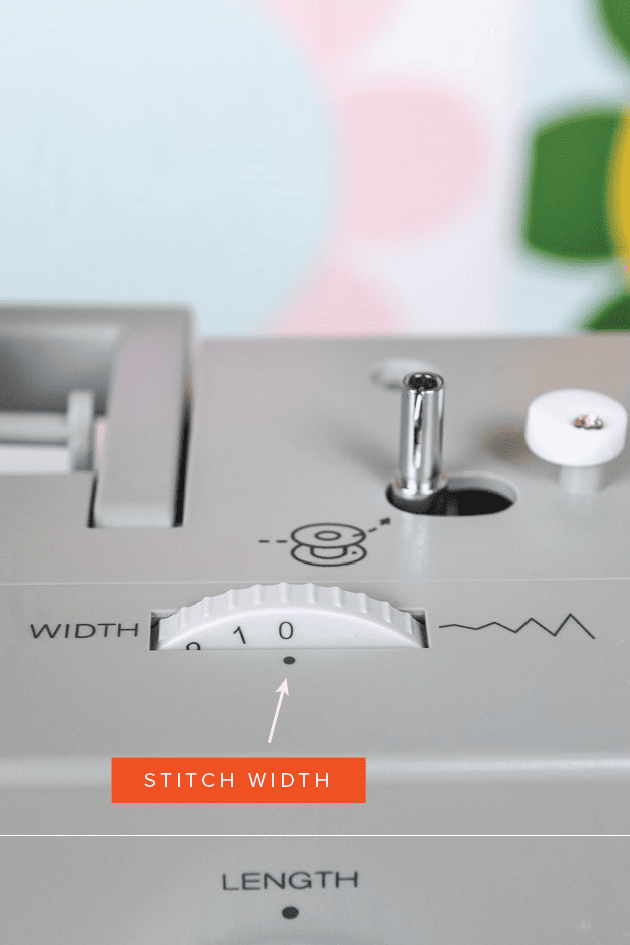
Stitch width
Also located on the top of your sewing machine, on the right side, the stitch width dial adjusts the width of your stitch. For more details about sewing different types of stitches and setting your stitch width accordingly, see this post. And for details on settings for buttons and buttonholes, see this post.
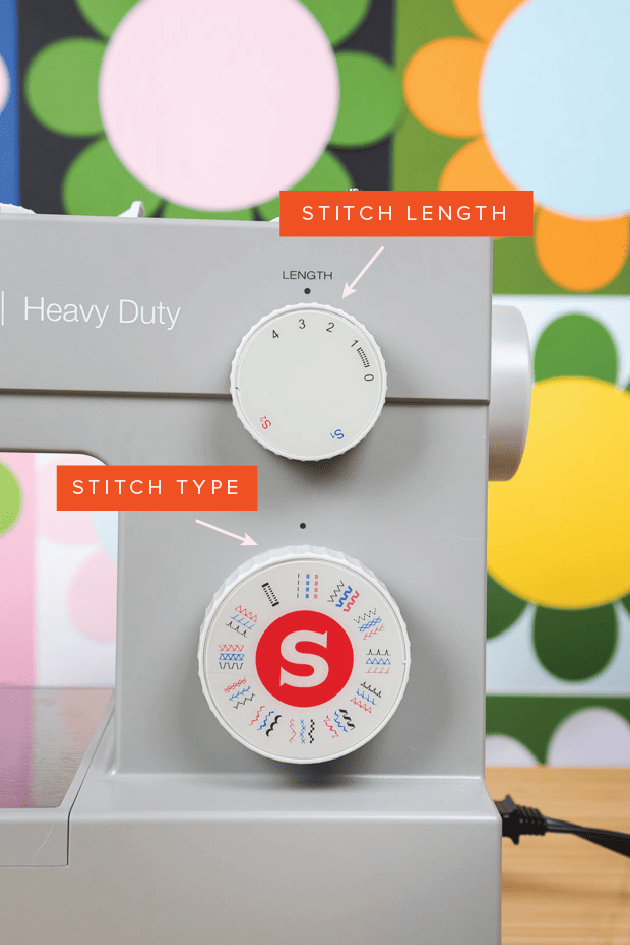
Stitch length
Located on the right front of your sewing machine, this is a round dial that adjusts the length of your stitch. See this post for specific information about what to set your stitch length to for different stitch types, and this one for stitch length info on buttons and buttonholes.
Stitch type
Another round dial located below the stitch length dial, this one adjusts the type of stitch. The ones you’ll probably use most often are straight and zig zag. For more info on this, see our basic stitches post.
Other Parts
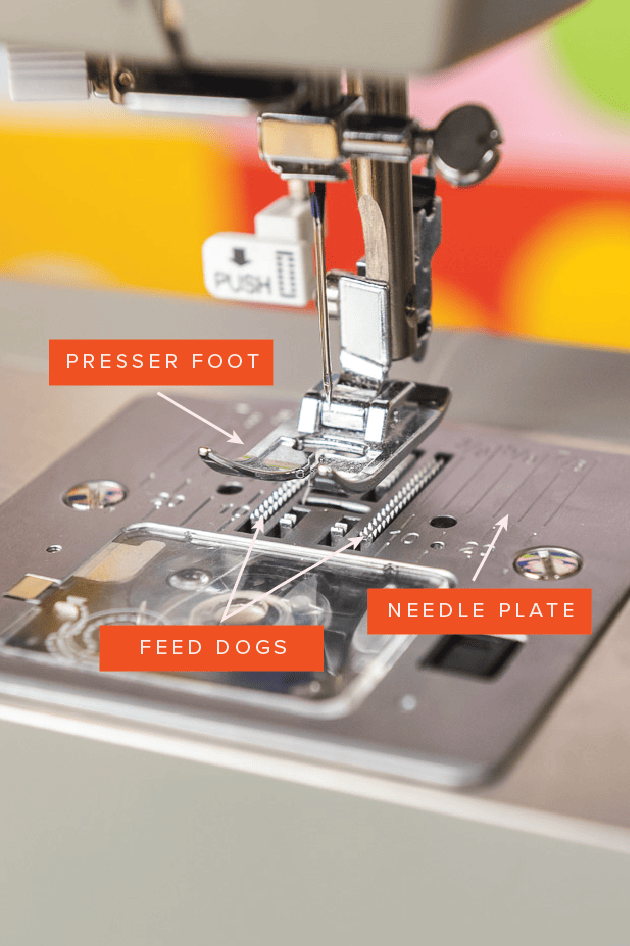
Presser foot
This is located just under the needle. Its purpose is to hold the fabric in place as you sew.
Needle plate
Another useful part of a sewing machine to know is the needle plate. This is the metal plate the fabric rests on as you sew. It’s important so you know what your seam allowance is. The numbers of different seam allowances are all listed on the needle plate itself, so you can stay on track easily as you sew.
Feed dogs
The feed dogs are located just below the presser foot. They’re the poky little rows that help pull your fabric through the machine as you sew.
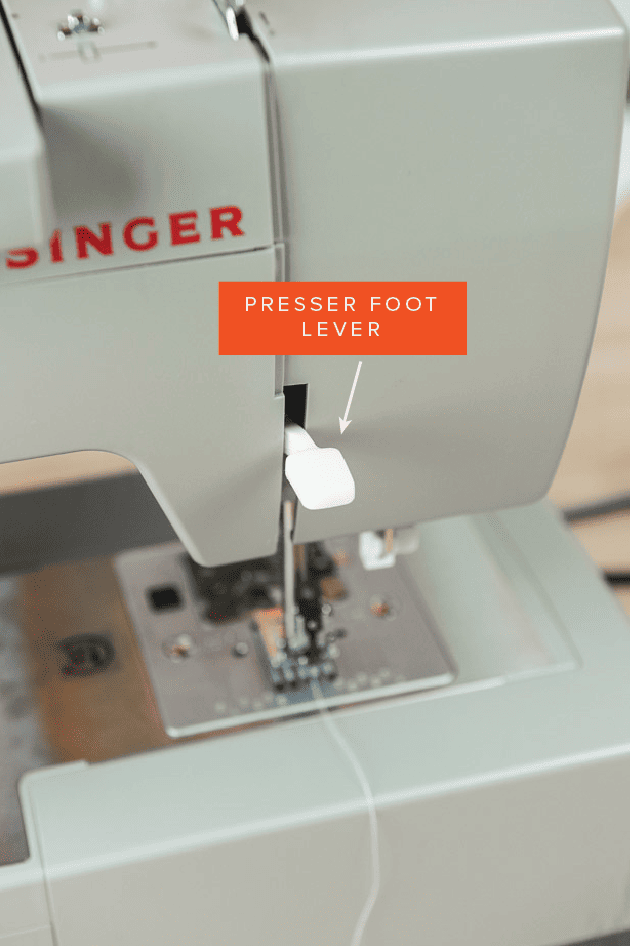
Presser foot lever
Usually the presser foot lever is either located on the left side or back of the machine on the left side. It’s used to drop the presser foot into place and lift it up when you’re done sewing.
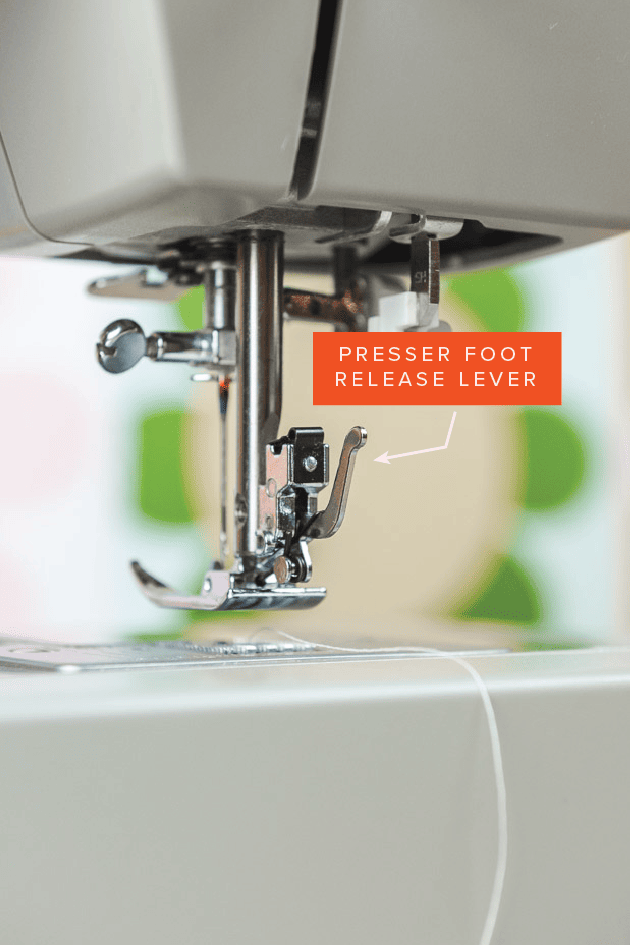
Presser foot release lever
This is a little metal lever right behind/attached to the presser foot. Press on this lever to release the presser foot and change it out.
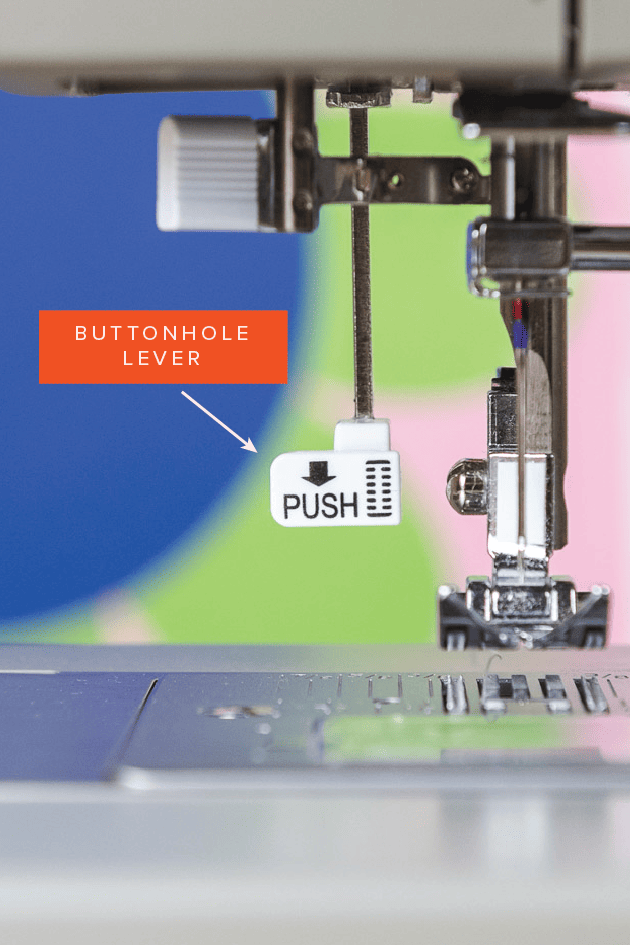
Buttonhole lever
This is the little white lever next to the presser foot. You’ll get to know this lever very well if you plan to make any projects with buttons and buttonholes. See more info on buttons and buttonholes here!
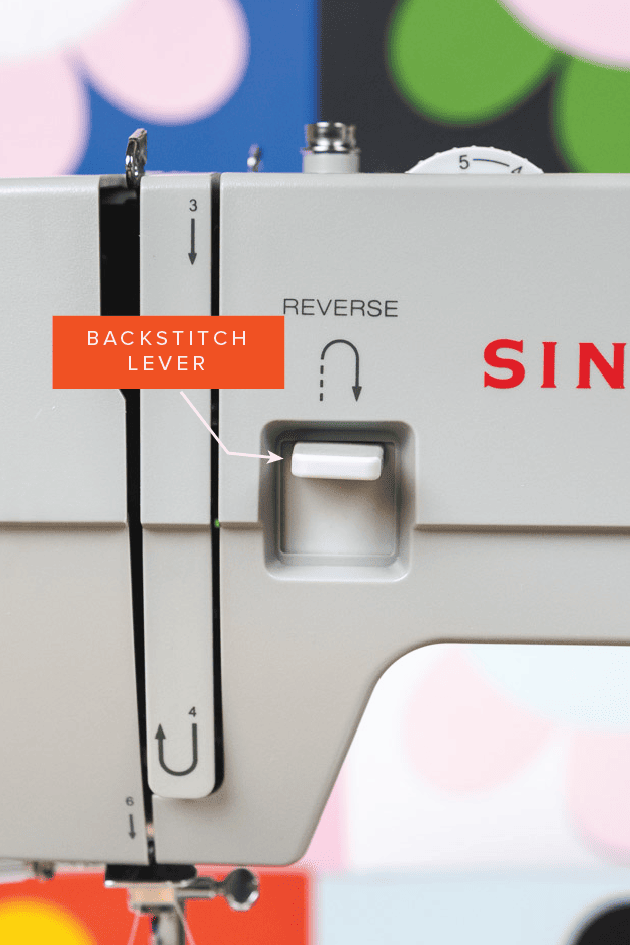
Backstitch lever/button
Press this lever down when you want to sew backwards to reinforce stitches. It’s located front and to the left of the center of the sewing machine.
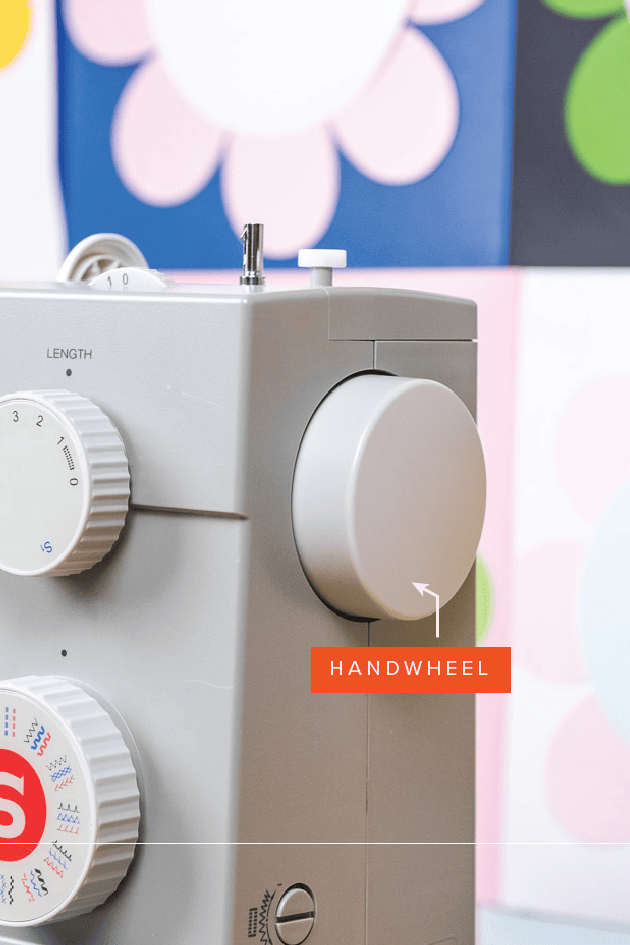
Handwheel
Located on the left side of the sewing machine, the handwheel raises and lowers the needle as you turn it. You’ll use this often!
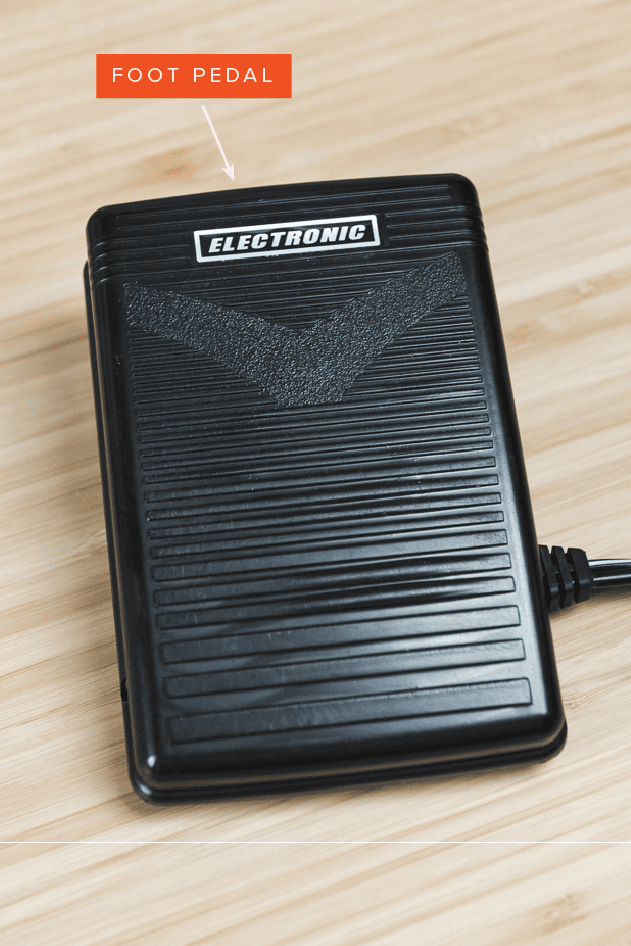
Foot pedal
Don’t forget about the foot pedal! It’s one of the most important parts of a sewing machine. Press down on it with your foot to start sewing once all your settings are in place.
Accessories
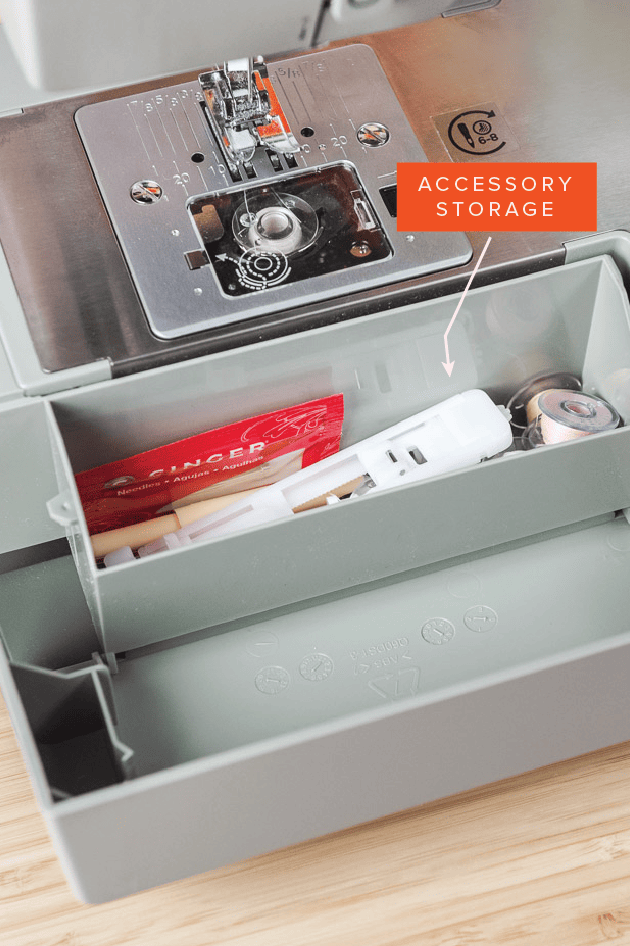
Accessory storage
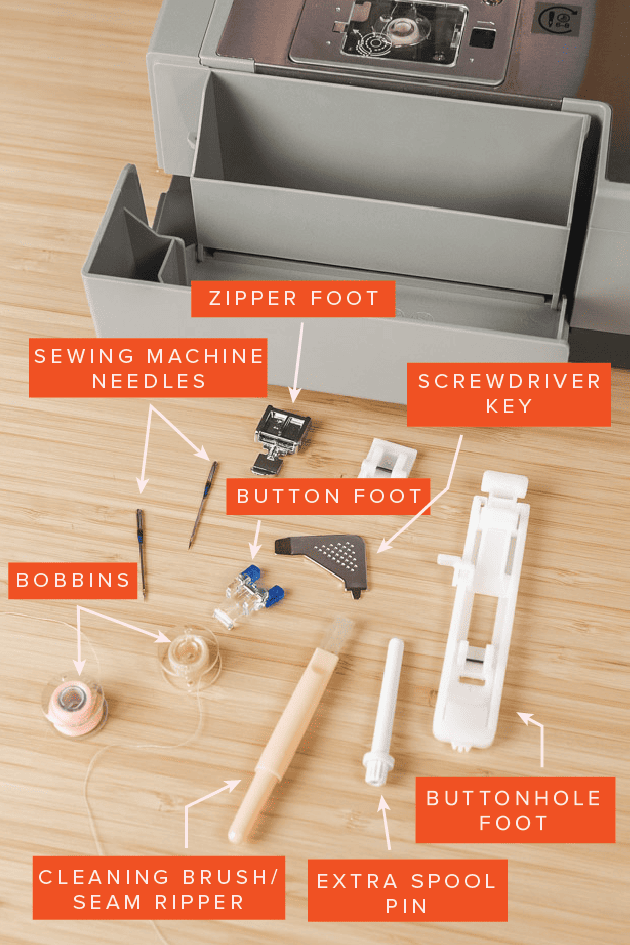
In some machines, there’s also an accessory storage compartment somewhere on the body of the machine for easy access. In it, you’ll find a lot of useful odds and ends for your sewing needs. We’ve listed them below for your convenience!
Essential accessories
Most machines come with a few extra presser feet, like a button foot, buttonhole foot, and a zipper foot. You’ll also find extra needles and bobbins, as well as a second spool pin. (Remember earlier when we talked about the hole it goes in)? Two other useful accessories are a seam ripper/cleaning brush (did you know the cleaning brush has a secretly disguised seam ripper you can pull out of it?!) and screwdriver key. The screwdriver key is a little metal tool used to unscrew the tiny screws on the needle plate to access the things underneath. See more about that here.
Questions?
How did our tour of the parts of a sewing machine go for you? Let us know in the comments! And let us know what else you’d like to learn as part of our sewing basics series. We’re all ears!
More Inspiration
Did you love this post on how to read a pattern? There’s more where that came from! Check out the rest of our Sewing Basics series here. You won’t want to miss this DIY Fanny Pack or these cute DIY pencil cases, either! Also, see more of our past sewing projects: New Team Outfits, Easter outfits, Casetify inspired projects, shaped throw pillows, Mother’s Day apron, quilted shower curtain, quilted face mask, rainbow buttons, reusable lunch sack, and DIY beeswax wraps. Oh, and don’t forget to visit our shop for lots of sewing templates and patterns!



Comments